In detail: ardo t80x do-it-yourself repair from a real master for the site my.housecope.com.
Read the recommendations for repairing the Ardo washing machine from the master!
The manufacturer (translated from Italian home appliances) is Antonio Merloni.
Front loading standard - FL models.
Drying - WD.
- 30% - blockage of the drain path, wear and damage to the pump:
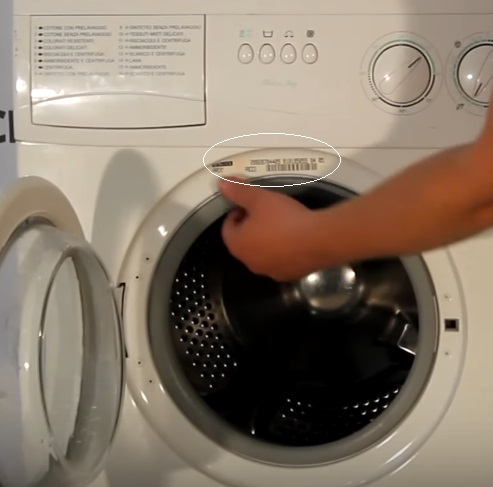
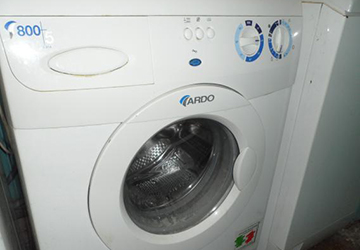
We open the loading door, on the sticker we determine the model of the machine.
Having unscrewed the drain filter at the front at the bottom, we clean it.
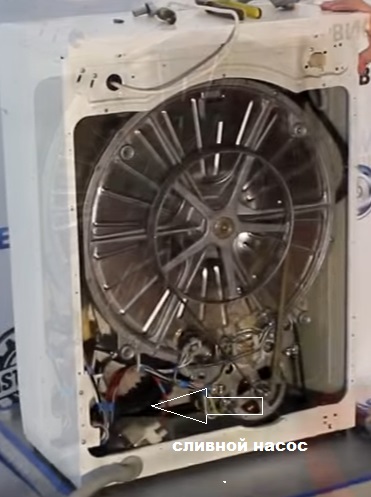
We change the pump, which is located at the bottom right on the back side.
We loosen the clamp on the drain pump branch pipe.
We check the pump, clean it - in case of a malfunction, we change it.
Over time, mechanical wear appears on the shaft. The impeller dangles and does not pump out water well.
- 20% - malfunction of the electronic control board:
MINISEL board: Ardo models FL1000, FL1202, FLS81S, A800XEL, AE810, AE800X, SE810, FLS81S, AED1000X, TL1000EX, TL1010E ANNA610, ANNA 600X, A410, A610, A500, A1000.
We look at the power supply and the level of constant voltages (5 and 12 V) at its outputs. If there are no voltages at the IP output, check the corresponding elements - a power switch, a power filter, a power transformer T1, a rectifier (D11-D14), a U1 microcircuit.
Module DMPU: Models A800, A804, A810, A814, WD800X, S1000X, T80, T800, TL800X, TL804, etc.
Malfunctions in the DMPU module
breakage of resistances R51 (A, B);
stabilizer U3;
Zener diode D24 (short circuit);
open varistor VDR5.
relay K1, K2;
Rsimistor TR2.
Diodes D1-D6, D9-10, D15, D23.
A thing of the past module DMPA:
They are used in typewriters with an asychronous drive motor and a mechanical controller.
Models A1000PL, A1000XCZ, A1000XPL, WD1000PL, TL1000X, etc.
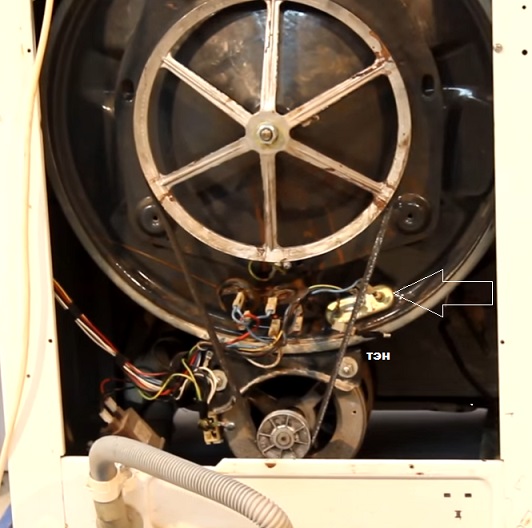
The wear of the heating element increases with “hard” water.
| Video (click to play). |
Overgrowing with scale (scab), it gives off heat poorly and burns out.
You need to pull out the gum and not the heating element. Since pulling out the heating element, you can wedge the gum.?
This is important to avoid further leakage under the seal.
- 10% - wear of brushes of the collector motor, loosening of contacts, breakage of the drive belt
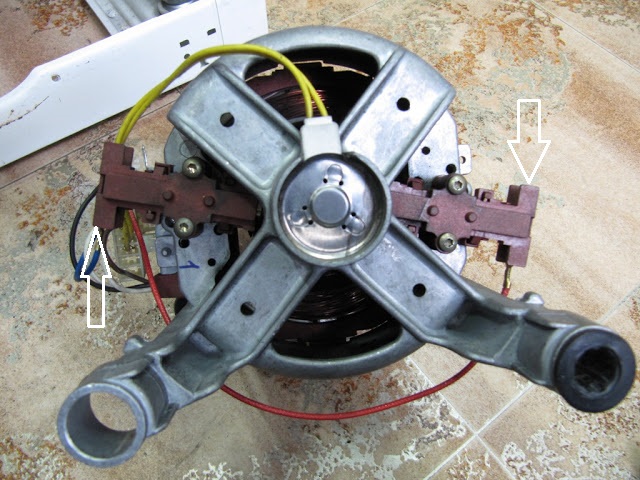
Remove the belt, unscrew the screws and remove the engine. The motor has two brushes, each attached with two screws. We unscrew the screws and remove the brushes.
Inspect the board motor power supply terminal and ground wire.
Very often, the contacts are oxidized from moisture and the machine gives an error because of this.
Each brush is installed in a brush holder. It can be taken apart into two halves. Pay attention to how much the brush protrudes.
This size should be at least 1 cm. The best option is 1.5 cm. After that, we assemble everything and put it back in place.
- 10% - extraneous noise (bearings, shock absorbers, foreign object)
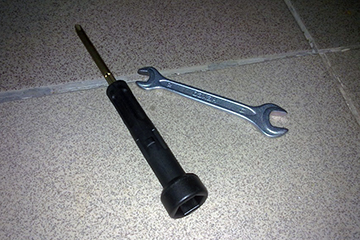
Having jammed the pulley, unscrew the upper shaft clamping nut counterclockwise.
If the oil seal is not filled with a specialized grease and the cross bushing is not lubricated with it during assembly, the oil seal will wear out very quickly, no matter what quality it is, this has been proven in practice.
It is not worth saving and improvising with lithol, grease and other lubricants, get better specialized lubricants that are used to lubricate the oil seals.
Standard sizes of Ardo bearings and seals:
This applies to modern technology - since 2000 (models AE800X, AED1000X, TL1OOOEX).
Thanks to it, you can diagnose (control module DMPU):
Close the hatch (without linen). Set the program selection to 30 ° C until it clicks. The temperature regulator to 0 ° C. Turn on. The drum rotates at 250 rpm. To check the buttons half load, additional rinse and others, press them. The spin speed increases from 250 to the maximum, provided for this model. In the absence of additional functions, press the spin button.
Indicators will blink when a malfunction is detected.
- E00 | E01 - Draining. Clean the drain filter and drain connections.
E02 - Water does not flow in correctly or is drained off. The drain hose may not be positioned correctly.
E03 - Water is not drained from the tank, also the drain time has exceeded 3 minutes.
F2 - Temperature sensor.
F4 - It is issued on the display if there is no water drain. A possible cause is a drain pump.
F5 - The water is drained and instantly poured. The problem is usually in the water supply filter.
F6 | F9 | F12 - Electronic module.
F8 - The water in the tank has exceeded the available level. Suspicion of an aquastop valve.
F13 | F14 - Critical.
Breakdowns are rare, usually associated with improper operation. Italian technology is distinguished by its high manufacturability and versatility.
How to carry out a service test equipped with the MINI-SEL board:
Control panels look different
The steps to enter the check mode are shown in the figures.

- move the program selector knob to the 6 o'clock position
- press the button 4 - ENERGY WASH and, while holding it, press the POWER button.
After that, the CM should go into test mode.
With temperature control knob:
- turn the program selector knob to the 6 o'clock position
- move the temperature selection knob to the 9 o'clock position
- press and hold the ENERGY button (for at least 6 s), at the same time turn on the power supply of the CM with the POWER button.
After that, the CM should go into test mode.
Turning the selection knob, we check the devices:
Knob in position 1 (autotest) - NTC temperature sensor (sensor circuit - for open or short circuit), pressostat, display (if any), door lock and main function buttons on the control panel
2. First, the cold water inlet valve is opened until a signal is issued from the water pressure sensor. The filling of water takes place through the compartment of the dispenser for the PREVIEW.
3. First, the heating element turns on and the water in the tank heats up to 60 ° C. Then the CM drum starts to rotate in a cyclic mode at a speed of 45 rpm (as in a washing mode).
4. The drain pump (pump) turns on. At the same time, the drum starts to rotate as during spinning.
5. Within 10 s, the hot water filling valve is turned on (if this CM model has it). At the same time, the CM drum starts to rotate.
6. The fan and heating element of drying are included (for models with drying)
The test mode is exited by turning off the power with the POWER button.
The Ardo washing machine in the house for a long time, the service life specified by the manufacturer, has expired, but in service. She already broke down three years ago. The renovation turned into a whole epic. I had to almost thoroughly study its nodes and the algorithm of work. I coped with the repair, but it was not easy. Therefore, you can imagine how "I was delighted" when they told me in an insinuating voice: "But the washing machine is not working."
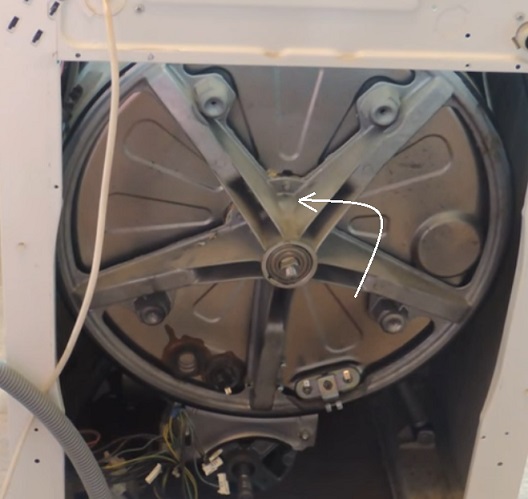
When I removed the side panel, I saw that the belt had come off. But this is not the cause, it is the effect. But the consequence of which was to be sorted out. Flange misalignment is evident. On closer inspection (looked into the inside of the drum), I saw that there was a bias in relation to the washing tank, but not in relation to the washing drum.
In the last renovation, having opened the panel, I saw just such a "picture". The attachment point for the washing drum flange support in the side cover of the washing tub has collapsed.
He took off the cover, dismantled all the elements from it, bought a new one and put it on it. I also purchased a new flange with support for the drive belt pulley.
When disassembling the washing machine, it is imperative that you need a photograph of the connection of the wires coming from various nodes to the elements installed on the side cover of the washing machine tank. Otherwise, when assembling, you will have to call a specialist from the service.
You also need a photo of the bearing (always with a number) to buy a new one if the machine has worked for more than 3 years. The culmination of the renovation came with the start of assembly work. The thing is that it is often possible to remove a worn-out part without a complete disassembly of the equipment being repaired, but it is simply impossible to assemble it.Moreover, as expected, I mean qualitatively. I had to make a complete nodal analysis of the washing machine, and only then assemble it. Everything would be easier and faster if from the very beginning he did not try to philosophize slyly.
This time he behaved correctly. I sorted it out right away. Here is the pulley-supported flange that I replaced last time.
It is still quite well preserved. I decided to leave him.
It is a flange supported on the opposite side.
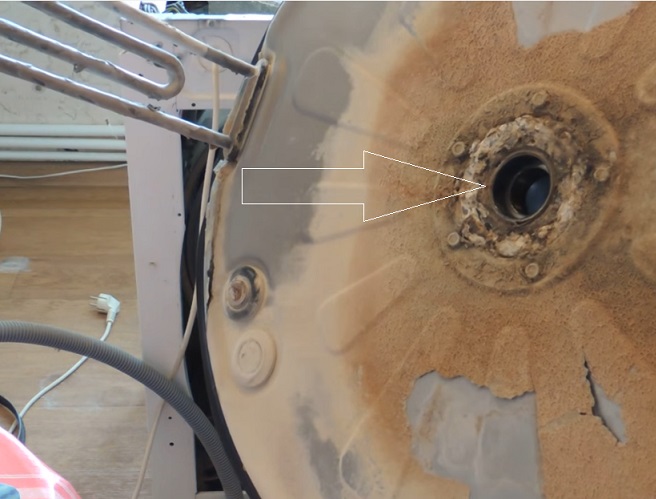
In vain I did not listen to the advice and did not replace it the last time (I was greedy). It turned out to be deformed in the plane of the flange.
And besides, his appearance is not very presentable - metal corrosion. Unambiguously requires replacement. I ran halfway through the city, to all the spare parts stores and workshops, but nowhere did I find a new one. In one place they offered second-hand, but I myself have one, only a little curve. In one of the workshops, my attention was drawn to the center of the flange, more precisely, to the screw. If you unscrew it, then the support is disconnected from the flange. That is, the unit is repairable.
I made a sketch indicating the dimensions for the further production of a normal drawing and began to look for a turner. But it is always like this, when necessary, then "the brick ran out, then the mortar has dried up." Got it, it won't work quickly.
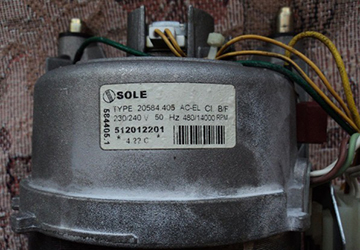
I photographed the nameplate on the back of the washing machine (his information helps a lot to search through the Internet) and set out to find what I needed in the virtual space. It turned out that this may be possible (chances are 50 x 50), but it will take a long time to wait for the result.
Then he picked up a brass hammer (for less deformation of the metal of the part being repaired), laid the flange with its flat side on a flat, smooth and thick metal surface and slowly, with gentle blows, aligned (made it even). I collected everything in the reverse order. There was no skew. The drive belt did not come off during operation. The washing machine has been in operation for the third month. The washerwoman received intelligible instructions on the inadmissibility of pushing things into the drum lumpy and in large quantities. These are the main reasons for the failure of the washing machine. But the drawing still needs to be done and the stainless steel flange should be sharpened, and as thick as possible. Whoever happens to carry out such repairs, start with the instruction manual:
- page 3 - Machine Description
- page 10 - Troubleshooting
This is a great way to speed up the process. Repair of washing machines is being mastered by Babay iz Barnaula.
The user understands about the breakdown of the washing machine based on specific symptoms. Only after studying these symptoms, he can assume a breakdown of a particular unit. Therefore, we will start by listing the most common symptoms.
- The machine has stopped draining water. This can happen for several reasons, the main of which is the clogging of the drain system, which includes: a branch pipe, a drain hose and a pump. In very rare cases, the water does not drain due to a breakdown of the water level sensor.
- The machine does not heat up the water, especially when washing 60-90 0 C. The reason for this malfunction is the breakdown of the heating element, which burns out due to limescale and settling scale. But the development of the resource of the heating element is also possible.
- The drum does not rotate in the machine, it stands still. In Ardo washing machines, the tank rotates due to the drive belt, and if it breaks or falls off the pulley, the machine will stop. The problem is solved by replacing the drive belt.
- Extraneous sounds appeared in the typewriter, similar to knocking or crashing. If such a knock is heard when the machine is turned off, then the reason is clearly in faulty bearings. Another reason for the rumble can be a foreign object in the tank.
- Is there water leaking under the machine? The reason must be looked for in the drain filter or pipes. In the worst case, oil seals and bearings need to be replaced.
- Programs get lost or the machine does not turn on at all, which means that the reason lies in a malfunction of the electronic board.
Before you panic and call the master, take a close look and listen to the "symptoms" that appear, perhaps you yourself can find the cause or even carry out repairs yourself.
In many washing machines, the manufacturer has programmed error codes into the microprocessor, which appear on the display in the event of a malfunction. Here are some examples of codes of common malfunctions. A all codes of any Ardo model can be found in the instructions.
- E00 or E01 - no water drainage due to clogged drain filter.
- E02 - incorrect draining during spinning, the position of the drain hose is violated.
- E03 or F4 - the drain time is exceeded, the drain pump is broken.
- F2 - problems with the temperature sensor, heating element or control board.
- F5 - self-draining, wrong connection of hoses.
- F13 or F14 - malfunction in the control module.
Having found out the cause of the malfunction, we determine - call the master or we will repair it ourselves. In some situations, it really is not worth overpaying, but doing the repair yourself. For example, blockages that have arisen can be removed. Most of the garbage accumulates in the drain filter, so cleaning it belongs to minor repairs and can cost about 600 rubles. Although in fact, there is nothing complicated about it:
- Open a small door at the bottom of the front of the machine or remove the bottom panel.
- Then place a large, absorbent cloth on the floor in the area of the filter.
- Unscrew the valve counterclockwise.
- Pull out the filter.
- Rinse it well with water, remove hair and other debris.
- Screw the filter back on.
The problem is debris can become clogged not only in the filter, but also in the drain hose, nozzles and the drain pump... To get to them you will have to open the car body. And this is classified as repairs of medium complexity, the price for which starts from 1200 rubles, and if a malfunction of a spare part is found during the disassembly of the machine, then you will have to buy a spare part as well.
If a foreign object gets stuck in the tank, such as a bra bone, then you will have to completely disassemble the machine. Such repairs are assessed as difficult and will cost at least 2,000 rubles. And if you are wondering how you can get an item out of a car, then you can read an article on how to remove a bra bone from a typewriter.
You can replace or clean the pump yourself if you have free time and skills in working with simple tools.
In the Ardo washing machine, you can get to the pump from the bottom side, it is either absent, or the plastic strip can be easily removed. The entire algorithm of actions and video instructions are in an article on our website on how to clean the drain pump in a washing machine.
If it is necessary to clean the drain hose, then one of its ends must be pulled out of the sewer pipe, and the other must be disconnected from the pipe coming from the pump. Then the hose itself is cleaned with a flexible cable, at the end of which there is a small brush. After that, the hose must be rinsed under running water, wiped and connected in place.
Quite often, a heating element fails in washing machines. Diagnosing its malfunction is simple: when washing things in water heated to 60 0 C, put your hand to the drum hatch. And if it is cold, it means one thing - the ten is burnt out, you will have to change it. Replacing a heating element refers to repairs of medium complexity, the cost of which will cost up to 2,000 rubles plus the cost of the heating element. But do not rush, because getting to the heating element is not difficult and you can do this through the back cover of the case, for this:
- We disconnect the machine from the network, disconnect it from the water supply and sewerage system, deploy it so that it is convenient to work.
- We unscrew the self-tapping screws around the perimeter of the machine that hold the cover.
- We find contacts and wires coming from the heating element under the tank, remove the terminals and sensors.
- We unscrew the bolt that secures the heating element.
- Gently, with blabbing movements, we pull the ten on ourselves, you can pick up the ten with a screwdriver.
- We clean the heating element holder from debris.
- We take the original heating element for the Ardo typewriter, insert it into the holder for the heating element, so that the sealing gum completely fits into place.
- We tighten the bolt, connect all the terminals.
- We collect the machine.
Pay attention! Regular cleaning of the washing machine from scale will extend the life of the heating element, but you should not rely on advertised water softeners.
Replacing the electronic module is also not difficult and belongs to the middle class. However, this is in the case when there is confidence that the module will have to be completely replaced one hundred percent. But in some situations, the module can be repaired by replacing individual elements on it. This is of particular importance, because the module itself is quite expensive, in some models its price is one third of the price for the entire machine. It is not uncommon for people to refuse such repairs and buy a new automatic machine.
Working with electronics is specific, it is necessary to possess not only the skills of working with tools, but also knowledge in a certain area. Therefore, in such a situation, it is better to contact a specialist who accurately diagnoses the malfunction and can replace the element correctly.
For your information! There were times when some craftsmen independently changed the control module, connecting all terminals and sensors, and as a result, the new module burned out.
The most difficult repair, according to experts, is the replacement of bearings and oil seals in Ardo washing machines. This is because you have to almost completely disassemble the machine and take out the tank, and the bearings themselves are difficult to remove. Special tools, patience and dexterity may be required. In such a situation, it is much wiser to give the car to the craftsmen than to repair it in your apartment, where there is not much room to turn around.
For those who still want to save money or gain experience in repairing washing machines, we suggest watching a detailed video on replacing bearings.
Thus, only after assessing the complexity of the repair and your real abilities, you can begin to eliminate the malfunction yourself. Sometimes it is better to pay a technician than to pay twice later for a failed repair attempt.
If you are interested in self-repair of Ardo washing machines, it means that the machine has broken down and you would like to save money on repairs.
While others convince you to call the technician, we will help you carry out the repair yourself. To make it easier for you to understand everything, we will consider the main breakdowns, fault codes and provide detailed repair instructions.
FIND A MANUAL FOR YOUR WASHING MACHINE ARDO IT IS POSSIBLE AT US ON THE SITE. Is free! The instructions can be downloaded or viewed online.
Service center technicians claim that all faults in ARDO brands are divided into 2 types: typical and rare.
Typical. These are glitches typical for all washers, not only the Ardo brand, but also any others. For example, in every typewriter, such a misfortune can happen: water does not drain, it leaks, the drum is blocked, and so on.
Rare. Such breakdowns are associated with the brand of the machine, and depend on the technologies used in the manufacture of the CM. These include a tank full of water, insufficiently heated water, and others.
Attention! According to experts, in 9 out of 10 cases, Ardo washing machines with normal and vertical loading bother the owners with typical breakdowns that are not related to the peculiarities of production. This proves once again that the ARDO technique is quite reliable.
A breakdown is usually reported by a number of symptoms. By carefully studying them, you can recognize the failure. Therefore, it is better to start with an overview of the most common signs of breakdowns:
- Water does not drain. This can happen for a number of reasons, among which, mainly, a blockage of the drain system, consisting of a branch pipe, a drain hose and a pump (drain pump). It is extremely rare that this problem occurs due to the failure of the thermal sensor.
- The water stopped heating. This is especially noticeable in high-temperature washing modes. You can understand that the water does not heat up by looking at the cold linen and unwashed stains on it. Failure of the heating element (heating element) causes a breakdown. Limescale and scale slowly but surely destroy the part, causing it to burn out. The wasted resource of the part is also not excluded.
- The drum stopped spinning - it was stuck rooted to the spot. The device of Ardo washing machines is such that the drum is driven by a special belt. If the belt comes off the pulley or breaks, the tank will stop spinning. In this case, you need to fix or replace the belt.
- Noise and "left" sounds - knocking, hum, rumbling. If you hear them in operation, then the reason lies in the bearings. An object that has fallen into the tank often makes noise - a button, a coin, etc.
- Water leak. The fault of a dangerous breakdown is a violation in the pump or pipes. In the most severe case, you will need to replace the bearing and oil seals of the Ardo washing machine.
- The program crashed. The machine does not start. All this is typical for a breakdown of the control module.
Don't panic, you can often do without a master. Perhaps, having correctly identified the breakdown and its cause, you can fix the washing machine yourself.
Modern washing machines are complex devices, in the microprocessor of which breakdown codes are programmed. They appear on the display whenever a fault occurs.
In the most frequent cases, the Ardo brand SM displays the following error codes: E00, E01, E02, E03, F2, F4, F5, F13, F14.
Ardo washing machines are sometimes naughty.
Considering that even for a simple filter cleaning the master will have to pay a quite tangible amount - 600 rubles, many owners of such units would like to master the skills of simple repair.
So, the topic of this article is the Ardo washing machine: DIY repair.
A washing machine is a rather complex equipment, therefore, malfunctions in the operation of the unit can be caused by very many reasons. But some of them are much more common than others. Here is a rough list of them:
If this is not done, then after shaking during a long journey, the unit will end up in a warehouse or a shopping center in a very poor condition.
Before the first run, these bolts must be removed, which some buyers forget to do. Of course, in this state of affairs, the unit will not be able to work properly.
All "washers" should be installed in a strictly horizontal position. The correctness of installation is controlled by the building level. If there is a distortion, the drum rotation, especially in the spin mode, is accompanied by excessive vibration and noise.
The scourge of all washing machines, as well as boilers, is scale - a hard, porous coating of calcium and magnesium salts (hardness salts), which is especially actively formed in hot water. The heating element is covered with deposits, as a result of which it first loses its ability to quickly heat water, and then completely fails.
So, for example, overloading the machine with linen or, conversely, starting an almost empty unit leads to undesirable consequences.
Also, do not overfill the distribution container for detergents - powder and other chemicals must be filled in the quantities indicated in the instructions.
Problems often arise due to the fact that the powder left for a long time in the container cakes up, due to which the machine cannot absorb it.
Some models react painfully to switching the wash program before the end of the current one.
And one more abnormal situation - the user started the car, forgetting to close the drum.
Incompatible things - water and electricity - in the washing machine, willy-nilly, have to be combined. No matter how hard manufacturers try to seal electrical contacts, water often manages to short-circuit them. Moisture is especially insidious in the form of an ubiquitous vapor, which easily penetrates into the most inaccessible places and immediately, cooling down, turns into condensation.
Here are some general instructions on how to carry out repairs:
To check the condition of the electrical part, you may need a multimeter and a phase indicator screwdriver.
In addition to the standard tool, sometimes it is necessary to use a magnet on a nylon thread or nylon cord (it helps to remove screws or any metal debris that have fallen into it from the car), as well as a flexible metal ruler 70 cm or more long. The ruler is indispensable if you need to turn the drum to its normal position after it has been put into operation with an open loading door.
A non-professional repairman may need a special tool only to replace bearings - this operation is performed using a special puller.
It should be noted that it is better to entrust such repairs to a specialist, since in the absence of experience, the axle shafts can be damaged.
When starting to assemble the unit after repair, novice repairmen sometimes face a problem: it is difficult to remember which connectors are connected to certain wires.
To avoid such situations, the wires and the fastening diagram of various components must be photographed before the next stage of disassembly.
Well, the theoretical course is over. Now let's see what kind of failures we have to deal with most often.
The solution to the problem must be sought in the following sequence:
The clamps holding the drain hose and the branch pipe from the tank of the machine do not need to be completely removed - it is enough to slightly loosen them. Then the wires are disconnected and the pump itself is unscrewed. After removing the foreign objects, the assembly is assembled in the reverse order.
Drain pump for washing machine
If the pump turns out to be in good order, go to the last link in the chain - the level sensor, also called the pressure switch. It is he who gives the signal to the controller about the need to start the drain pump. To get to this element, it is enough to remove the top cover of the machine by unscrewing the screws and slightly pushing it back. Next, you need to check the condition of the wire connections with the sensor contacts. If there are no complaints about them, the pressure switch should be dismantled and the tube connected to it from below should be inspected for blockages.
Next, you need to blow into the tube - this way the operability of the device is checked. If it is operational, you should hear a click. If no clicks can be heard, it is necessary to purchase and install a new level sensor.
How to eliminate some types of damage to Indesit washing machines, you will learn here.
It does not always make sense to contact a specialist if the washing machine breaks down. Some faults can be rectified by yourself. If you are the owner of a Kandy washing machine, the following article is https://my.housecope.com/wp-content/uploads/ext/740/cancliz/mnogokvartirnyie-doma/santehnika/kandi-stiralnaya-mashina-remont-svoimi-rukami. html will help you figure out how to fix it.
In this situation, it is necessary to act in this way:
- Remove the back panel by unscrewing the fasteners holding it.
- Check with a multimeter the presence of voltage at the contacts of the heating element, the shank of which sticks out of the tank in its lower zone (the machine must work in heating mode).
- If there is no power supply, you need to check the temperature sensor. Measure its resistance at room temperature and after heating with hot water. If it remains constant, the sensor must be replaced.
Heating element (heating element bent) for washing machine ARDO (Ardo)
At the same time, make sure that the contacts of the heating element relay are not jammed (located near the control module).
If power is applied, then the heater has burned out and needs to be replaced. Having disconnected the wires, unscrew the fasteners in the middle of the shank and carefully remove the heater, shaking it in different directions.
Having cleared the installation site from dirt, we fasten a new heating element and connect the wires to it.
- The unit is installed skewed (checked using a building level).
- Too small amount of laundry has been loaded, as a result of which its weight is unevenly distributed in the drum.
- Drum bearings damaged.
To replace these parts, the machine must be completely disassembled and the drum removed from the tank.
In the absence of a puller, the semi-axle can be knocked out of the bearing with careful hammer blows, only you need to hit not on the semi-axle itself (this can damage the thread), but on the substituted plate. The bearing itself can be knocked out of the cover with a blunt chisel and hammer. The blows must be applied evenly so that the bearing does not warp.
New bearings must be lubricated with lithol before pressing. Note once again that in the absence of experience in plumbing work, it is not worth undertaking this almost gem-quality task.
Another frequently observed symptom is the slow flow of water into the machine or its complete absence. To troubleshoot the problem, do the following:
- First you need to open a cold water tap on any of the mixers and make sure that there is sufficient pressure in the pipeline.
- If there is water, inspect the filling hose. It may be twisted or badly bent.
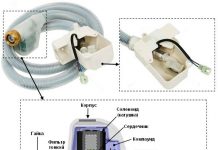
- At the next stage, you need to turn off the water supply to the machine, disconnect the filling hose from it, place its end above the bathtub or some other container and open the tap again. If water hardly drips, the hose is clogged and needs to be cleaned. In some models of washing machines, the hoses are equipped with a safety valve that is automatically blocked in the event of a leak. It is disposable, so a new hose will have to be installed after triggering.
- If the hose is doing its job so far, you need to inspect the mechanical cleaning filter on the back of the unit. It needs to be removed with pliers and cleaned.
- If water does not flow even after that, it is necessary to check the filling valve for operability by removing the top cover from the machine. The valve is attached behind the filter. First of all, inspect the wires and their connections with the valve contacts. If everything is in order here, the valve must be dismantled and the voltage indicated on the body must be applied to its terminals. If at the same time it does not open, the unit is out of order.
If the sensors, valves, heater and other elements are in good condition, but the unit does not work properly, then the control module has failed, which “conducts” this entire system. To fix the electronics or replace it, you must contact the service center.
How to choose the optimal model of a pumping station for a summer residence, we will consider in this material.


