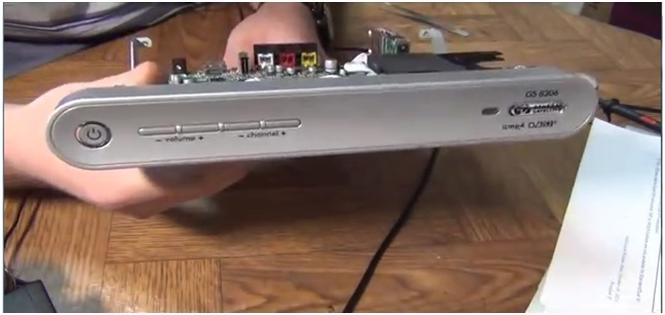
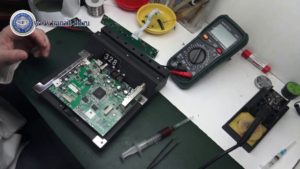
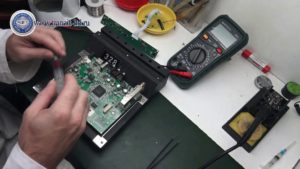
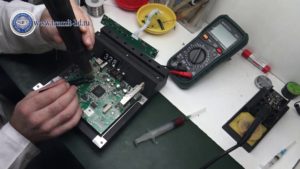
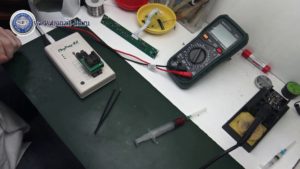
Today we have a GS 8306 receiver under repair.
Here is a 16 megabyte memory dump.
This way you can repair the GS8306 receiver.
You can watch a video instruction with a more detailed guide below.
We will be glad if this manual is useful to you.
Gs 8306 after the update stopped turning on completely. Maybe both LEDs are on on the display and then the receiver hangs. All this suggests that the receiver has lost boot sectors, simply - broken. If, as a result of diagnostics, it is confirmed that the matter is in the flash memory, then we do the procedure for restoring our receiver to working condition.
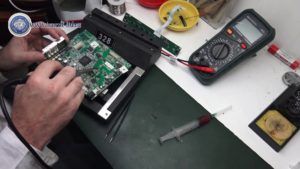
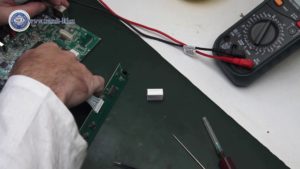
We disassemble the receiver, prepare our main board for repair.
gs 8306 stopped turning on after the update.
If necessary, we clean the main board from dust and other contaminants.
We take the flux, apply it to the contacts of the microcircuit. All contacts must be covered in order to make it easier to remove our microcircuit from the main board.
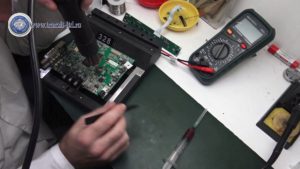
We turn on the soldering station, take a hair dryer and begin to warm up the element that we need to remove. In this repair we are interested in W25Q128BV.
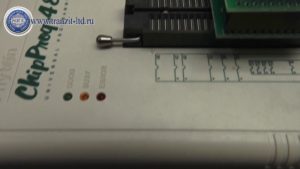
After we removed the microcircuit from the main board, we proceed to programming. For this we need a programmer and a corresponding socket - adapter.
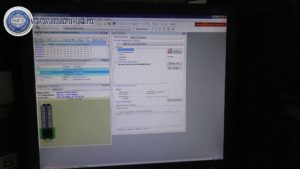
We insert into the programmer, turn on the program. We are looking for the device to recognize our USB flash drive.
If everything is in order and the contact is good, then you can upload a new dump to the microcircuit memory. ChipProg-48 during operation will show in what state it is, if there is an error, the red indicator will be on.
After everything has been requested, we mount the microcircuit on the board. First we apply the flux.
Next, we warm up the board with a hairdryer, wait until the solder turns into a liquid state. If necessary, position the microcircuit on the board.
We do 8306 after an unsuccessful update.
When everything is soldered, we wait until everything cools down. We take the front panel, connect the power supply. Our receiver starts working! We check our receiver in all modes.
If you still have questions, you can watch our video, in which we have shown everything visually! The main thing - remember, if you are not confident in your abilities, then take the broken receiver to the service center!
VIDEO
Good day. Nikolay is writing to you from Togliatti. Faced the same problem that you describe in the article. There is not enough file for the solution with the latest firmware, 1.9.160. I found only version 1.2.001 on the Internet.If it does not bother you, please send it to the mail, thanks in advance. Yes, the article is extremely useful, because the problem is becoming widespread ... Thank you so much for the information.
Best regards BNikolay, Togliatti
I read reviews on the 1.9.160 firmware on your resource ... and well, where to go. Could you throw off the previous version instead. Do not consider it arrogance.
An important part of a set of digital satellite equipment is a remote control (RC). The Tricolor remote control is made of sturdy plastic and equipped with functional receiver control buttons. More than 20 hard-wearing rubber buttons that are subject to repeated pressure over a long service life. But still, in case of unforeseen circumstances, it is recommended to purchase several units, especially if there are children in the house. The low cost of the remote makes this process easy.
The buttons that allow you to tune and operate channels are called master buttons. The receiver power key is also used to turn it off.
The key next to it is called "Time". With a single touch, an icon appears in the upper right corner of the screen, showing not only the hour, but the date and day of the week. Pressing it again hides all data.
Another key in the top row is used to mute the sound while saving the image.
Below are the buttons with numbers that switch TV channels.
"TV Mail" opens a window with mail, communicating the subscriber with the operator. Here you can read all the important information from the service provider: change in tariffs, password for personal account, end date of subscription of paid channels.
In order to go to the "Status" section, you need to use the "#ID" key.
The Signal Input button works only on certain receivers, which manually toggles between HDMI and AV outputs. In its basic configuration, it does not perform any action.
"Aspect Ratio" allows you to change the format of the output image using various functions (conversion, cropping, and others).
"Exit" closes applications, completes any operations, or exits the Tricolor menu.
Below there is a block with arrows, with the help of which it is possible to switch channels, return back or move forward, change the volume level. The "Ok" key confirms the selection.
The Back button returns to the previous operation.
Block of buttons "F": F1 (red), F2 (green), F3 (yellow), F4 (blue). Used to operate the receiver menu.
To call the Cinema Tricolor TV service, the Cinema Hall is used. But this function works only with the connected special package. To display the list of TV programs, press the "TV Guide" button.
Located at the very bottom, the "Record" buttons do not function on all receiver models.
"Menu" will bring up the main menu.
Operation of the TV / Radio button switches the receiver to radio stations or TV channels.
"WWW" brings up your favorite channels on the screen.
To call the help window "Question-Answer", you need to click "Help".
Clear designations on each key will allow you to remember their purpose without making it difficult to use. The style and dimensions of the remote control itself are quite comfortable.
Failure of the remote control can be caused by mechanical impact, the ingress of various liquids or other reasons. In case of water ingress, the device can be opened and dried.
If you pay attention to the board of the disassembled remote control, as well as to the base of the contacts, you will notice a fat layer. It is this accumulated fat that prevents good contact between the graphics coating of the board and the contacts of the rubber base. In order for the remote to respond to actions, it is required to press the buttons hard. It is necessary to lather a sponge and gently peel off the fat. Then rinse with water and dry. Do not wipe the printed circuit board with any alcohol or chemical substance, otherwise the graphite will collapse. If the cleaning procedure does not help, then you need to buy a new one.
New models of receivers provide for the “Input Signal” button in the remote control, which is designed to change the output. By accidentally pressing this button, the Tricolor broadcasting disappears. With this problem, people of the older generation most often turn to technical support. The disadvantage is that you cannot disable or block this button in any way. An excellent solution would be to replace this remote control with an older model remote control that does not have this button. Although the new receiver does not support all the functions of the old remote control, the basic ones still work.
In the event that the receiver does not respond to the remote control, the first step is to check the connection of the receiver to the TV. It happens that the problem lies in the poor quality of the cable connecting the receiver to the TV. Next, you should check the performance of the receiver by using the control buttons on the receiver itself. If the receiver reacts to the actions performed, then it is necessary to replace the battery in the remote control. If the receiver still does not respond after replacing the batteries, you should try replacing the remote control.
On sale there are special remotes for children, programmed to open selective programs. The remote control is set up independently. The brightly colored remote control is perceived by the child as a toy. Due to its simplicity and ease of use, some users are adapting this remote control for retirees. There are also additional remotes for terrestrial digital receivers and universal programmable remotes.
In most cases, the remote controls of the Tricolor TV satellite receivers are interchangeable, differing only in the appearance and location of the buttons.
In this article, we will consider an example of repairing remote controls. The experimental will be the control panel for the Tricolor receivers (DRS-5000,5003,7000).
This technique is universal and suitable for repairing almost all remotes.
Check P.U. very easy. It is enough to turn on the phone camera, or the camera, the laptop camera, point the P.U. at it. and push buttons. If it is working, then the diode of the remote control will flash when the buttons are pressed, otherwise read on :).
Disassembling the remote is simple. At the seam, usually with a knife or a screwdriver, wedge it into two halves.
If after opening you find that the inner surface of the board and the rubber pad with buttons are covered with sticky grease, then it must be removed. This fat accumulates from your hands. Washed off with alcohol, soapy warm water, you can use cotton wool. The board and gasket are wiped dry. With this simple procedure, you will ensure the same good contact of the buttons on the rubber pad with the contact pads on the remote control board.
This is the most common defect in remotes. Symptoms are usually: buttons do not work, keys sticky.
2. Battery contacts. Very often, oxidation occurs in the places where the battery comes into contact with contact. Externally in the form of rust. We clean the contacts with a file or fine sandpaper. Basically everything.
3. Battery contacts on the board. In the place indicated in fig. as (contacts) very often the destruction of the solder occurs. It is easy to determine if you slightly wiggle the battery contacts. The places indicated in fig. (contacts) solder well. It is also advisable to solder the IR diode (diode).
4. Frequent occurrence of failure of quartz at 455 kHz. This is either bad soldering or breakage of the quartz itself. Usually occurs after a fall. Such quartz crystals are massively installed in other consoles, or sold in radio markets.
5. Cracked board. This also happens after falls. Usually hard to see. Cracks in copper tracks can be repaired by soldering, coal is no longer there. In this case, it is better to look towards buying a new remote control.
That's basically it. Best regards, M.A. Taran
First, you need to decide and make sure that the receiver's remote control is broken, and not the controlled device - the satellite receiver's sensor.
How to check the remote control at home?
To do this, you need a modern mobile phone with a digital camera function, or the camera itself or a camcorder.This feature is already present in almost all but the simplest mobile phones of today.
1. We enter the camera mode on the phone,
If the control panel of the tuner is in good working order, you should immediately see on the screen of your mobile phone how the LED in the window flashes when you press any button. To check yourself and that you did everything right, try to look, in the same way, any working remote control for example from an LCD TV. If you see that there are no flashes, then the control panel needs to be repaired. There are malfunctions of control panels, when, on the contrary, there are flashes without pressing a button, this indicates that some kind of button or dirt is sticking on its contacts. How to repair a remote control with such a malfunction, read below. And now we remember about batteries or batteries, how long we use them, we check the integrity. Remote control batteries are used for a long time and may leak over time. The alkaline electrolyte will corrode the power contacts.
How to repair the remote control of the receiver with a similar malfunction?
It is necessary to well clean the rusty plaque with a knife blade to pure metal and rinse the contacts with alcohol. If there are doubts about the performance of the batteries, you can temporarily remove them from the operating panel for testing.
If everything also does not work with the remote control, proceed to the next stage of repairing the remote control with your own hands at home. To do this, you need to disassemble it.
How to disassemble the control panel:
Open the battery cover and remove the batteries. Carefully inspect the back of the console for hidden screws. There are often hidden screws in the battery compartment. The remote control in the photo is completely assembled with screws, but I want to note that the fastening of the upper and lower panels of the remote control is very common - with latches, so you will not find screws on them. To open such a remote control, you need to carefully using a screwdriver so as not to damage your hands and mounting ears.
When you open the remote control, you can hear the characteristic crunch of plastic - no need to panic. This reveals the plastic fastening latches. Even if some of them are broken, the rest are usually enough to use the remote control further.
The disassembled satellite receiver control panel consists of:
The main malfunctions of the consoles:
1. The keys on the remote control do not work.
The main reason why the buttons on the remote control do not work is the contamination of the button contacts.
We use what is always at hand in every kitchen - warm water and any dishwashing liquid such as "Fairy" or similar. If there is no liquid, regular laundry soap will do.
I just wash all parts of the remote control (except for the printed circuit board) under the tap with warm water and detergent. We then rinse with clean water and then dry it all with an electric hairdryer.
Frequent malfunctions of the tuner control panels:
If the remote works from time to time
We check the soldering of the contact springs for the batteries on the board and the soldering points of the emitting LED. We carefully inspect and solder defective solders. The remote control stopped working after being dropped. I want to warn you, sharp blows are dangerous for them, the ceramic quartz on the board is very fragile. To repair the control panel, a complete replacement of the quartz is required. The remote control switches only at close range. It is possible that the batteries need to be replaced or the emitting LED is down. First, we check the batteries with replacement, and if there is no result, we change the emitting LED. The buttons on the remote control do not work. Sometimes cleaning does not help, the rubber eventually loses its electrically conductive properties or the graphite dusting on the spots of the rubber mat is abraded.
How to repair a remote control with these keys?
Using a remote control repair kit.
It contains a small tube of silicone glue and conductive rubber pins. The old patch is carefully cut off with a blade and a new one from the set is glued in its place. The set is enough to repair 3-5 remotes. Another option for making the remote control workable is to use an electrically conductive glue "contactol", which we apply to the degreased patches of the rubber mat. But these ways to restore remotes are expensive and make sense when you need to repair a lot of remotes or the remote is not available on sale.
If the following message appears when inserting a smart card: “Smart card is incorrect Smart card is not inserted “
, then the fastest on the receiver board is the smartcard controller TDA8024 .
We change it and rejoice
Operating voltages on the board:
Message :
If such a garbage happened and the flashing did not help, then the fastest of all is an iron problem:
In my case, the receiving module turned out to be the culprit:
And upon opening it, flooding and corrosion were found:
Plus, after removing the module, the track was damaged:
The module includes: m88ts2022 (DVB-S2 / DVB-S / ABS-S tuner) and M88DS3103 (DVB-S2 / S demodulator)
Accordingly, I had to replace the module from the donor. and throw the track MGTF - ohm.
Only the radio works (as an option), does not reset to factory settings, freezes and turns off, is not flashed via USB, is not updated in any way.
The main and most common malfunction of all receivers is a malfunction in the power supply and voltage conversion circuit. Also, the modulator often fails due to a short circuit in the coaxial cable from the LNB, although the latest models have good protection against short circuits in the cable, when triggered, the voltage supply to the converter simply stops until the short circuit is eliminated.
And so, our receiver does not show any signs of life, the indicators on the front panel display do not light up, and no twitching of the power plug from the outlet and turning on the toggle switch does not help us (at least that was the case with the device, an example of which is given in this article) ... The first thing we do is pull out the plug from the network and remove the top cover, we need to get to the electronic filling of the device. And here it is important to remember one thing, namely, about the warranty seal, which of course we will break if we remove the cover. Therefore, once again make sure that the warranty period has definitely expired, and under warranty no one will repair it for you. If the warranty is still valid, I advise you to take the receiver to a service center and entrust this matter to a specialist.
Receiver inside:
The electrolytic or oxide capacitor at the input often dries up and fails, which is also a malfunction, not everyone can find such a breakdown either, you need to have at least an initial level of a radio amateur. Usually, defective capacitors are swollen, yellowish, or have a small brown speck on the board at the base of the legs. Also, the serviceability of a capacitor can be determined by comparing its nominal and measured capacitance.
The receiver uses direct current, which is rectified from the AC mains using a diode bridge. Problems with the diode bridge also happen. It is very simple to check diodes, the main function of a semiconductor diode is to pass current in one direction, and not in the other. In my case, the transistor of the primary winding of the transformer turned out to be faulty, it is not difficult to find it, it usually has a radiator to remove heat. I determined the malfunction of the transistor by measuring the voltage at its emitter, it was absent there, the primary winding was not powered, respectively, everything else is de-energized. The transistor cost me 28.5 rubles. Replacing it with a soldering iron, I eliminated the malfunction and the receiver is back in working order. I must say such a breakdown is quite a rare occurrence, usually it all ends with a fuse.
A very common malfunction is a firmware crash. The firmware often crashes, this is usually evidenced by the complete hang of the receiver. In this case, "flashing" will help. I will tell you about one more reason for the malfunction, which may arise due to poor-quality installation. Water in the cable. If the outer insulation of the cable is broken, then water from atmospheric precipitation can get inside, it easily enters the receiver like a hose, sometimes flooding all of its insides. The condition of the cable must be monitored throughout the entire service life of the device.
VIDEO flashing satellite receiver GS 8305 after unsuccessful firmware update via satellite. The video describes an example of how to flash a USB stick of a satellite receiver after an unsuccessful software update through the provider. In other words, a forced downgrade (downgrade, to the previous version) of the firmware is carried out.
After flashing the receiver, the Tricolor GS 8306 to version 1.9.160 starts to dull. After each shutdown, you have to update the channel list and even after updating some channels I still don’t show what to do and how it is treated see vidos))) really works.
Repair of HD receiver GS8306 tricolor tv.
Tricolor kills its GS 8306 receivers by rebuilding after an over-the-air update
Typical faults of the GS 8306 receiver
Repair of the TRICOLOR GS8306, GS8307, GS6301 receiver yourself.
Repair of the tricolor GS 8306 receiver.
Receiver tricolor, repair GS 8306 processor replacement NP6 +
DIY repair of the Tricolor TV GS8306 receiver (dismantling the flash drive)
repair of gs 8306, replacement of LEDs.
Receiver GS 8306. Does not work after flashing. Tricolor forces people to change the receiver
Do-it-yourself repair of the Tricolor TV GS8306 receiver (we solder the USB flash drive)
repair gs 8306, replacement of LEDs with comments.
DIY Tricolor TV GS8306 receiver repair (flash firmware)
repair 8306 after unsuccessful update.
Updating the gs-8306 tricolor TV receiver (fixing errors)
DOES NOT INCLUDE, Repair of the tricolor tv receiver.
Features of the receiver Tricolor GS 8306
GS 8306 does not work after upgrade What should I do?
REPAIR OF THE GS B210 RECEIVER DOES NOT START OR DEPEND ON THE BREAKER
Does not turn on, emits a squeak. Receiver GS 8300. PSU repair
A divorce on the repair of receivers from which nerves are torn to shreds!
Repair GS B211 (error 0), or how to fix the breakdown!
Repair Tricolor GS U510 does not turn on
Setting up the GS 8306 receiver Reset to factory settings.
Repair of tricolor receivers with damaged flash memory!
GS 8306 repair after software update
updating gs 8306, checking a new p.o.
Review and repair of the GS 8300 receiver from Tricolor TV
How to Update Firmware Gs 8306
GS C591 repair after service
Repair of the receiver tricolor GS E501
GS 8306 update 1.9.160 No signal and restart.
Repair of the GS 8300 tricolor TV receiver, the power supply burned out.
GS 8306 upgrade to 1.9.160
Repair of the tricolor GS B520 receiver, replacement of the processor.
flashing a satellite receiver GS 8305, or how to flash a satellite receiver GS 8305
Repair of GS B5xx receivers on the example of tuner replacement.
Indication of GS 8306 Tricolor TV on the front panel
Reset to factory settings of the receiver Tricolor GS 8306,8307,8308. Search and configure channels
Our site will help you quickly find an experienced craftsman to order any home appliance repair services. Submit your request and trusted specialists will offer you their services and prices.
If, after an unsuccessful software update from the satellite, your GS 8306 receiver needs to be configured, or if it is out of order, the best way out for residents of Moscow and St. Petersburg is to repair the GS 8306 receiver with the help of performers from the Youdo.com mobile service. They have extensive experience in repairing satellite equipment, appropriate qualifications and will be able to adjust the receiver or fix any malfunction quickly and efficiently, and the prices for YouDo performers' services are much lower than in service centers.
After visual testing using special equipment and troubleshooting, they are eliminated by restoring connections, updating software or replacing failed elements. The GS 8306 receiver may have such malfunctions as:
The receiver does not turn on and there is no LED indication
Indication is present, but the device does not turn on
The receiver does not recognize the smart card
The receiver detects a smart card, but does not open encrypted channels
Distorted or missing image
Missing or distorted sound
No remote control
Very often, many malfunctions can be caused by the receiver's firmware "flipping", which can be caused by a weak signal from the antenna or a malfunction of the power supply.
Before starting the repair of the GS 8306 receiver, it is necessary to test and identify the causes of breakdown or malfunctions. This requires the following tools and equipment:
Satellite dish tuned to receive from the selected satellite
Monitor or TV with HDMI, SCART or RCA output
USB 2.0 flash drive with firmware file
Multimeter
Serviceable receiver GS-8306
Serviceable power supply
Crosshead screwdriver
Work such as setting up, flashing or replacing receiver parts are very complex processes that require special knowledge and equipment, therefore, self-elimination of malfunctions or malfunctions of the receiver can lead to more serious damage to it.
The main feature of early models of satellite TV receivers, for example, the GS 8360, is the absence of a display on the front panel. Because of this, when the Tricolor GS 8306 receiver does not turn on, the causes of the failure can be quite difficult to identify. How to understand what the LED indicators are reporting and tidy up the device? Let's try to figure it out.
If the set-top box does not respond to the power-on command, this does not mean that it is out of order. The reasons can be much simpler:
breakdown of the remote control;
failure of the power supply;
breakage of the plug, power cord, socket, etc.
In a situation where the GS 8306 does not turn on and the power indicator on the panel does not light up, these factors should be checked first.
To check the operation of the remote control, we advise you to take the following measures:
replace the batteries in the device;
try to turn on the set-top box from another, obviously working remote control;
try to turn on the receiver from the power button on the case.
Advice: if the remote control breaks down, you can replace it with a new one from the same dealer where the equipment was originally purchased.
The reason that the GS 8306 receiver does not work may be a failure of its connection to the power supply. Here you should first check:
the integrity of the power supply cable;
serviceability of the outlet to which the device is connected;
tightness of the plug of the power cable to the connector.
It will also be useful to assess the health of the wiring in the house. Perhaps, in the area to which the TV equipment is connected, it has failed due to physical damage or a short circuit.
Unlike modern devices, the power supply unit of the GS 8306 is not built into the case, but is routed to the plug that connects the device to the outlet. Therefore, it is quite simple to check its serviceability:
by external examination;
using special testers;
by replacing the block with a working version.
If, as a result of connecting to another power supply unit, the set-top box began to work, the reason is unambiguously in the breakdown of this device.
Advice! Checking the serviceability of the power supply and the wires suitable for it should be carried out even if the set-top box periodically turns off spontaneously during operation.
Often, device malfunctions occur after a software update. It looks like this: the GS 8306 receiver does not turn on, the LEDs are on and blinking in random order. All this indicates that a failure occurred during the firmware process. Perhaps the receiver was turned off before the update was in place, or there was simply a voltage drop in the power supply network, which resulted in a violation of the procedure. Also, this behavior of the device occurs in cases where the user installed the firmware from unverified sources.
In any case, before starting a major repair, you should try to update the software on the set-top box again.
The easiest flashing option is downloading updates from the satellite. To do this, go to channel 333 and follow the instructions that appear on the screen.
Important! During the download of updates, the STB should never be turned off.
If these steps did not help, you can download the firmware:
from the Internet to a flash card;
from a known working receiver directly to the faulty device.
It is advisable to carry out such operations only under the supervision of a specialist. Without proper experience, there is a chance to completely disable the receiver.
Read: why error 5 may appear on the receiver.
In the case when the Tricolor TV GS 8306 prefix does not turn on, and all simple methods have already been tried, it remains only to open the case and look for a hardware problem. Doing this without proper experience and special tools is not worth it. But if the user has the skills to work with digital equipment and the appropriate tool base, you can give it a try.
Important! After self-repair, the subscriber loses the warranty for the device. All services of the operator's service center, in case of contact, he will have to pay according to the price list.
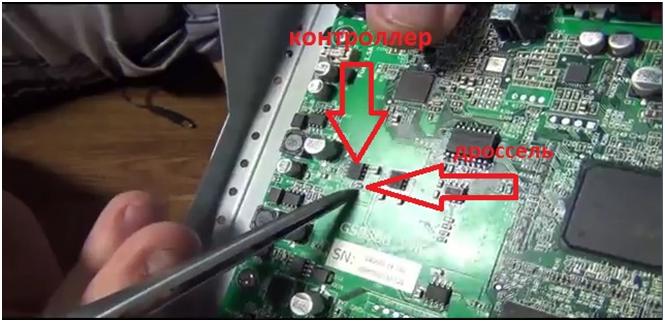
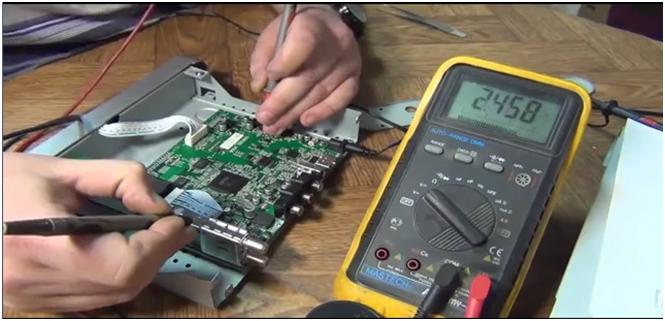
At the beginning of the repair, after removing the cover from the device, it is necessary to check whether its working elements receive adequate power. Even if the power supply unit is working normally, the reason that the Tricolor TV GS 8306 receiver does not turn on may be a lack of voltage on one of its controllers.
To carry out the test, you must use a special tester. The operating voltage of the cell is indicated on the choke for each controller. When checked with a tester, its readings must match the marking. If on one of the elements the tester readings differ from the inscription on the element, the part must be removed from the board and replaced with a new one.
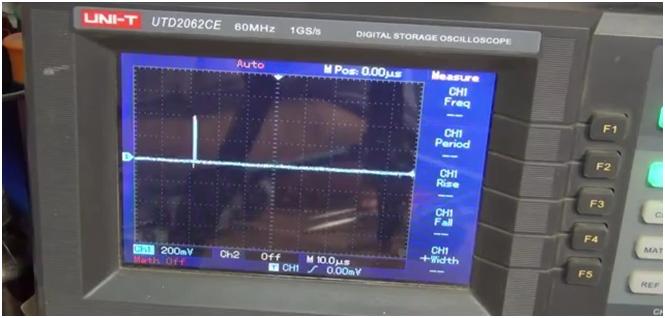
Next, you need to check the processor of the set-top box for operability. This is done as follows:
a memory dump is found on the board;
using the tester, they find out on which leg of the microcircuit the data output is located;
install the oscilloscope probe on this foot;
check the readings of the device.
The oscilloscope must determine if the processor is reading data from the instrument memory. If the result is negative, you can replace the processor or purchase a new receiver.
We advise you to find out which channels are included in the Single package.
Video (click to play).
If all the tested elements work fine, but the GS 8306 does not turn on, the indicator on the panel is on and flashing, the cause of the problem lies in the software. The simplest option in such a situation is to remove the memory chip from the device and load the new firmware onto it through a special adapter. At the end of the download, the memory module is soldered into place. If the user does not have the appropriate skills or does not have access to the firmware, it is worth contacting the operator's service center or one of the dealers.
VIDEO

