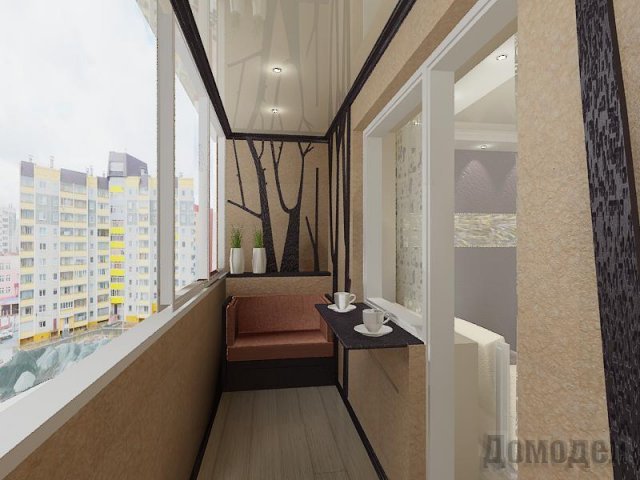
In detail: how to make DIY repairs on the loggia with your own hands from a real master for the site my.housecope.com.
The first step is to carry out preparatory work of the following nature:
- The scope of work is assessed and an expense estimate is drawn up. At the same stage, construction and finishing materials are selected and purchased;
- Old windows, balcony block are dismantled, old finishing material is removed;
- If necessary, the floor is removed from the slab, after which its condition is checked. If there are deep potholes, especially along the edges of the slab, they are cleaned, primed and sealed with cement mortar;
- The walls are leveled to facilitate the installation of finishing materials;
- If it is necessary to strengthen the parapet, then this is done with the help of foam concrete blocks. They are placed on a special glue.
Advice: Do not use aerated concrete blocks for the parapet due to the fact that they strongly absorb moisture, unlike foam blocks.
Next, we will analyze the repair of the loggia with our own hands in stages, dwelling on certain points in more detail.
The loggia must be glazed by choosing a certain type of window system for this purpose. If desired, you can install double-glazed windows that have an energy-saving effect. Choose windows according to your taste:
- Metal-plastic windows... The most practical and affordable type of glazing, characterized by durability and good thermal insulation properties;
- Aluminum windows - less warm structures with a weak degree of noise protection. They are used relatively rarely, in cases where insulation is not planned;
- Wooden windows... A very expensive pleasure. It should be borne in mind that even high-quality wooden windows are susceptible to moisture in the air.
| Video (click to play). |
The procedure for installing glazing on a loggia should be as follows:
- On the parapet, strictly according to the level, a window frame is installed, which is attached on each side with at least two self-tapping screws, anchors or dowels.
- A window sill is installed inside the loggia at the bottom of the window.
- An ebb is attached outside the window.
- Double-glazed windows are installed in their places.
- All gaps between the frame and the structural elements of the loggia are filled with polyurethane foam.
- After the foam has hardened and trimmed, all gaps are closed with decorative overlays.
In the process of repairing a loggia with your own hands, do not forget to lay wires for lighting and power supply. To do this, lead the power cable to the loggia, having previously de-energized it. From the cable, wires are routed in the recesses of the wall or at its corners, going to the lamps, the outlet and the switch. If the walls are flat, then 2 options apply:
- channels for wires are grooved in the wall of the house;
- wires are pulled inside the crate.
Any sconces, pendant and spotlights, LED lighting can be used as light sources.
And in more detail about how cold glazing of a balcony with an aluminum profile is carried out, we told in a separate article.
How to make repairs on the loggia so that when you enter it you feel the comfort, and not the coldness of the street? Of course, you need to insulate it with high quality. All cracks and voids must be sealed, and the structural elements of the loggia are protected from moisture.
It is very desirable to combine the formation of the floor with its insulation. For this, the following flooring options are used:
1. Wooden floor... To do this, a waterproofing film or foil foam is spread on the floor. Wooden logs are laid on top of this layer. They are aligned and fixed to the slab by means of dowels. Between the lags, 5 cm thick foam sheets are inserted, or the same or a thinner layer of extruded polystyrene foam. You can also lay a layer of mineral wool. On top of the insulation, you can lay another layer of foam foam. Grooved boards or OSB board are attached to the logs.
Advice: It is not recommended to use chipboard for flooring, as the material, if moisture gets on it, can gradually deteriorate.
2. Cement strainer... First, the plate is leveled, after which plates of expanded polystyrene or extruded polystyrene foam are laid on it. They are carefully sized. A cement screed with a thickness of at least 4 cm is made on top of the insulation.
3. Warm floor system... It can include one of the following components:
-
Heating mats. They fit in ready-made sections. The advantage of mats is that it is not necessary to prepare a rough surface for their installation. Mats work from electricity, being laid directly in a layer of tile adhesive. Floor tiles are usually laid on top of the mats;
If you decide to make a warm ceiling on the loggia, then you should know that all the cracks above the windows must be closed to prevent condensation from forming on top of the ceiling panels.
Ceiling insulation is performed in one of the following ways:
- A wooden frame is stuffed on the ceiling, between the strips of which insulation is inserted. On both sides of the insulation there should be a layer of vapor barrier such as penofol, although often penofol is used only on top of the insulation;
- Penoplex is nailed to the ceiling plate with dowels. Next comes the vapor barrier layer in the form of penofol again. Below the layer of insulation, on the frame, a suspended ceiling is formed.
The front and side walls are insulated on the loggia. For the wall of a house, such an operation is usually not performed.
Tip: The house wall is not insulated even if the loggia is being repaired with your own hands in a panel house.
For wall insulation, 2 options can be used:
-
Penoplex is attached to the walls with glue or dowels. Then penofol is attached as a vapor barrier. Next, a wooden crate is nailed on the dowels;
It is advisable at the design stage to choose the materials that will be used for the interior decoration of the loggia. After all, they all have different costs and installation features.
The following materials are the most practical for the interior decoration of the loggia:
- PVC panels... They are simple and quick to assemble, easily processed to the desired size. Contrary to prejudice, PVC does not emit harmful components into the surrounding space. Plastic is durable and practical, easy to clean. The panels are fastened with self-tapping screws or clamps to a wooden crate.
Wooden lining or block house... This is the most environmentally friendly cladding, but also the most expensive. Many people sheathe the loggia with wood precisely for its beautiful appearance and naturalness. For fastening the planks, a wooden lathing is required, to which the planks are attached using self-tapping screws, nails or cleats. It is desirable to cover wood with varnish or impregnation containing varnish.
Instead of regular wallpaper, you can use liquid wallpaper. And we will show you how to glue liquid wallpaper. The work is not difficult, but it has its own nuances.
At the final stage of the renovation, you can think about curtains. We recommend paying attention to the Day-Night curtains, which we talked about here.
We figured out how to repair a loggia with our own hands. The final touch remains - heating this small room during the cold season of the year. If the "Warm floor" system was not installed on the loggia, then the following heating devices can be used as a heating system:
- Infrared heater... This is ideal for a loggia, as it warms up quickly, but the air does not dry out on it;
- Electric radiator... The most economical is an oil cooler, and the most energy-intensive is a heater with open spirals;
- Convector... Quite an economical and low-noise option, but it can lower air humidity;
- Fan heater... It is advisable to use an appliance with a ceramic heater that does not dry out the air.
Note: There is also an option to move the heating radiator to the loggia, but it requires a permit, which is not possible for houses with centralized heating.
Here you can see how the repair of the loggia is carried out with your own hands in stages in the video.

The presence of a balcony or loggia allows you to increase the area of the apartment with their competent arrangement.
In order to translate into reality various ideas aimed at achieving the desired result, you will have to carry out repair work.
What should be done and in what order? Consider in this article.
At this stage, you need to do the following:
1) draw up an installation diagram and purchase all materials;
2) dismantle old structures (remove windows, balcony blocks and remove trim);
3) if necessary, you can knock down the old screed or remove the old wooden floor, and check the condition of the balcony slab (if there are potholes on it, from which the reinforcement protrudes, it must be treated with a rust converter, and the potholes must be plastered);
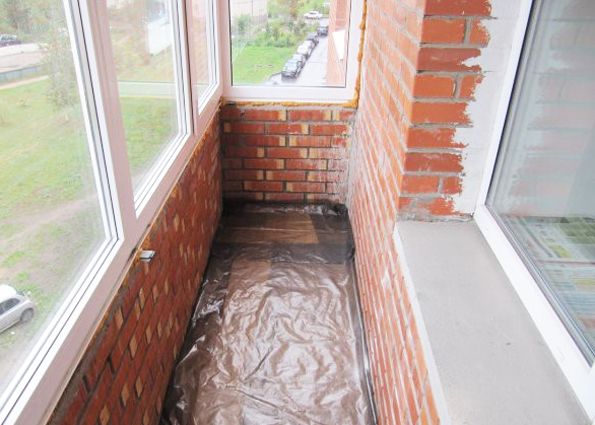
5) to create a reliable fence, you can use blocks of foam concrete, laying them with edges on a special adhesive mixture (the old parapet can be left in its place).
Advice: foam blocks should not be confused with gas blocks, since the latter absorb moisture very strongly and are not suitable for arranging a balcony fence.
It can be accomplished using materials such as:
- metal-plastic profile (optimal in price, durable and perfectly retains heat for a long time);
- aluminum (as a rule, it is installed on loggias that are not intended for insulation);
- wood (the most expensive material, which, in addition to everything, is highly susceptible to moisture).
The sequence of work related to the glazing of balconies or loggias is as follows:
1) on a parapet equipped with foam blocks, using a building level, a window frame is placed strictly vertically and fixed with self-tapping screws or anchor bolts (at least two on each side);
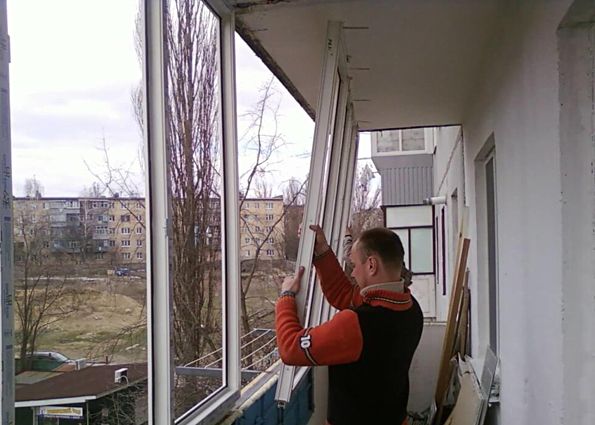
3) and from the outside - low tide;
4) after that, a double-glazed window is installed in each window frame;
5) all cracks formed during glazing must be sealed with polyurethane foam (this will not only help retain heat, but also create reliable protection against various sounds coming from the street);
6) after drying, the protruding parts of the foam are cut off with a clerical knife and these places are covered with special overlays.
To create a comfortable environment on the territory of a balcony or loggia, it is imperative to bring in electrical wires for installing an outlet, a switch and lighting lamps.
To prevent these wires from spoiling the interior, they must be laid in the corners or hidden in special channels made in the walls. Light sources can be a variety of lamps or LED backlighting.
To create comfortable conditions on the territory of the inner space of the loggia, it will be necessary to insulate all surfaces through which the heat from the apartment can escape to the street.
First, the cracks are closed and waterproofing work is performed. After that, they draw up an installation diagram and carry out the purchase of materials.
There are two ways to insulate this surface, each of which depends on the coating material (we are talking about a wooden or concrete field).
For a wooden floor, the sequence of work is as follows:
1) a film of waterproofing material is laid on top of the balcony slab;
3) sheets of insulation are laid in the formed gaps, which can be polystyrene or mineral wool;
4) another layer of waterproofing is laid (it is necessary to protect the insulation from water ingress during wet cleaning of the floor);
5) cover it all with a floorboard or sheets of OSB plates, fixing them to the logs with self-tapping screws;
6) the formed surface is covered with several layers of paint or varnish.
Advice: in no case should chipboard sheets be used as flooring, since this material is very afraid of moisture (swells and collapses).
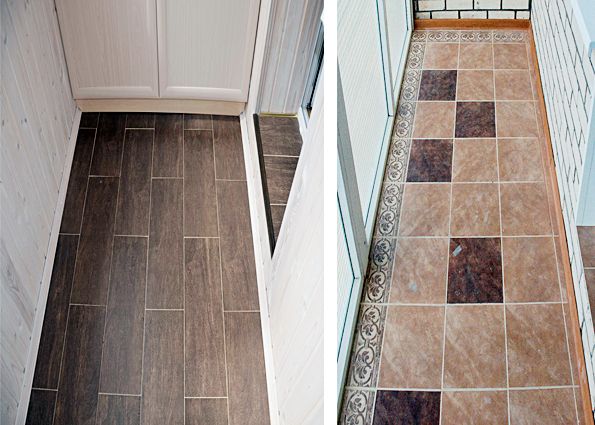
1) first, they equip a rough screed made of cement mortar (with its help they try to smooth out the unevenness of the balcony slab as much as possible);
2) then the sheets of expanded polystyrene are laid close to each other (in the case of gaps or cracks, they are sealed with polyurethane foam);
3) a waterproofing film is spread over them and a reinforcing mesh is laid;
4) then put up beacons and fill in a finishing screed 5–7 mm thick, leveling it with a small rule.
Such a system can work either with a heated coolant or from an electrical network using elements specially designed for this purpose (we are talking about an electric cable, heating mats, or a film covering that emits infrared rays).
If the apartment is not equipped with a water floor heating system, then in this case, the most appropriate would be to use electric heating.
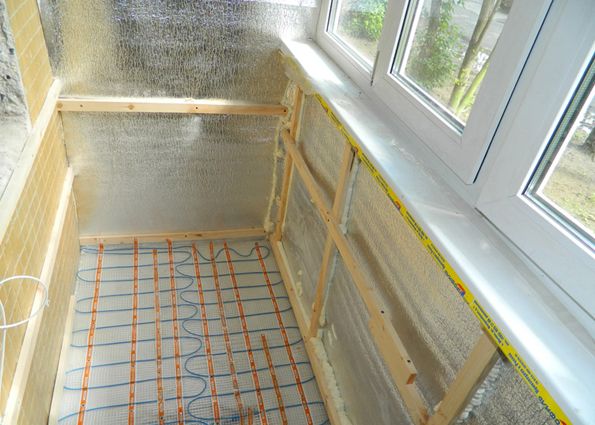
1. An electric cable intended for heating is placed on top of a layer of insulation, after which a finishing screed is poured. When the concrete is dry, floor tiles are glued to it.
The advantages of this method are that the cable connected to the electrical network heats up over time and transfers its heat to the concrete, which, in turn, heats the entire floor area.
2. As for the heating mats, they can be placed in a layer of tile adhesive, on top of which the tiles are laid.
3. To place an infrared-emitting film on the floor, a heat-reflecting material must first be laid on top of the rough screed. The final coating can be tiles, linoleum, etc.
If it is necessary to insulate the ceiling, before starting work, all cracks are closed using polyurethane foam. Otherwise, condensation will accumulate between the insulation layer and the upper ceiling of the balcony, which will eventually lead to the formation of mold.
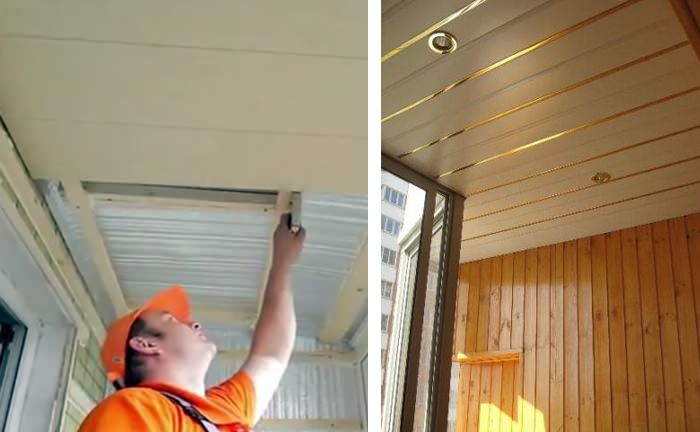
1) build a wooden frame and lay the sheets of insulation in the gaps thus formed, then fix the vapor barrier on top of the insulation and hide it all behind the finishing;
2) fix the penoplex on the upper balcony slab using special dowels (they are also called "umbrellas"), lay a layer of vapor barrier and, having built a wooden frame, close it all with plastic panels.
Only those sides of the loggia that are not adjacent to the apartment should be insulated. Insulation sheets can either be glued with glue and additionally attached with dowels, or placed in the gaps between the previously equipped frame.
Then (in the first and second cases) a layer of vapor barrier is laid. Finally, the installation of the topcoat is carried out, which can be used, for example, plastic panels or other materials.
To carry out work related to the interior decoration of balconies or loggias, you can use various building materials, but the most practical among them are:
- wallpapers of various types, tiles and whitewash (recently they are used very rarely due to the loss of their relevance).
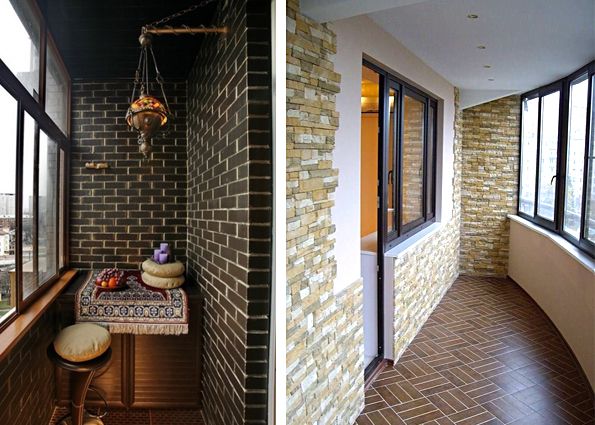
The lining made of wood, although it has a high price, but it has a beautiful appearance and is made of natural material that does not have a negative effect on the human body. It is mounted on a wooden crate with self-tapping screws. Upon completion of the work, the surface equipped in this way should be covered with several layers of varnish, each of them sequentially dried.
PVC panels are durable and harmless material that is very easy to cut, install and wet clean. Installation is carried out in a similar way.
MDF panels are also expensive because of their beauty and strength. Using such a material, you can imitate the surface of marble, granite or expensive wood.Installation is carried out by analogy with clapboard made of wood or PVC panels.
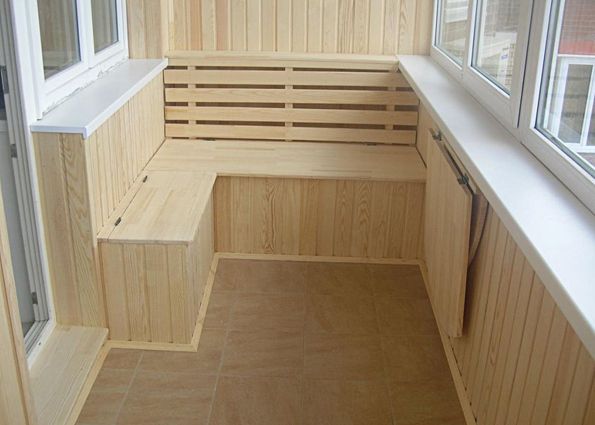
Decorative stone brings its zest to the interior decoration of the loggia. The territory of the balcony, equipped in this way, looks dignified and elegant. This material is harmless to humans and can serve for many years.
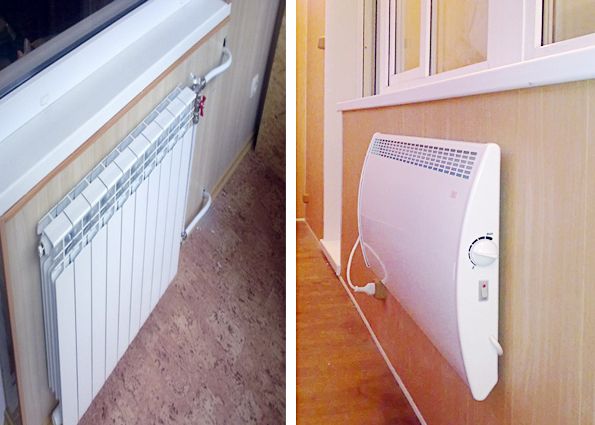
For a longer service life of all building materials involved in the repair, the balcony or loggia must be heated in the cold season.
Applying all the above tips, and consistently translating each of the stages of work into reality, you can repair balconies or loggias of varying complexity, using the most practical building materials.
What does a loggia mean to you? For some, it's just a place to store old things or drying clothes, while others turn it into a cozy relaxation area, gym or greenhouse. Loggia is an integral part of modern comfortable housing, therefore, its transformation should be treated with special responsibility.
Some construction work requires the intervention of professionals, but you can equip a loggia with your own hands. And without excessive efforts, the loggia can be turned into a multifunctional, comfortable and beautiful room that gives a special charm and coziness to the living space.
In this article, we will talk about how to make a loggia repair with your own hands, what basic steps it consists of and what materials will be required for this.
Before repairing the loggia, preparatory work should be carried out - remove the old casing, break off, unscrew and take out everything that was not originally included in the loggia package.
Next, you need to check the existing destruction. For example, if cracks or crevices were found along the edges of the slab, then they need to be repaired. To do this, the surface is initially cleaned of all kinds of debris, stones or chipping parts. Next, the damaged area is treated with a primer, and after it dries, a cement layer is applied. If the destruction is not very large, then one layer will be sufficient. The cement mixture must be glue-based, otherwise the self-made cement-sand mixture may erode and crack over time.
Cement surfaces should also be checked for a variety of voids and then carefully cemented if present.
If the loggia is seriously damaged, then it is better to use the services of construction teams.
Before finishing the loggia, you need to select all the required materials. A variety of materials are used for thermal insulation of the premises - from traditional mineral wool to modern high-quality expanded polystyrene. The parapet is trimmed with siding or decorative panels. Wooden panels must be treated with antiseptics and fire retardants.
To repair a loggia, the price of which depends on many factors, you will need: expanded polystyrene or polystyrene foam with a thickness of 4-6 centimeters, moisture-resistant sheets of drywall and gypsum fiber, foil-clad polyethylene film, foil-clad polyethylene foam, polyethylene foam without toluene, self-tapping screws.
For those who want, first of all, to protect their apartment from external influences, and puts sound insulation into the background, then you can install ordinary wooden frames.Such glazing will, of course, muffle external sounds, but not as efficiently as possible. The advantages of this method of installing glazing are relatively low cost, easy installation and good fresh air permeability.
If you want to achieve maximum comfort on the loggia, then install plastic windows. This method protects as much as possible from wind, noise and other external influences, helps to maintain the temperature, regardless of the season.
The service life of plastic windows is quite long, however, with such glazing, there will be no free air circulation in the apartment.
The first stage in the installation of plastic glazing is the assembly of the window structure - insulating glass units, sashes and a sandwich panel are removed, and the frames are connected one to one and to the expansion elements.
Further, elements for fastening are installed to this structure.
The third stage of glazing installation is the leveling of the window structure. For this, it is best to use self-tapping screws, since they guarantee reliable fastening.
Then, a facing corner is mounted to the window structure on the sides and on top, and an ebb tide is mounted on the bottom.
The next stage is filling the openings between the walls and the window with polyurethane foam.
After all these procedures, double-glazed windows, a sandwich panel, sash and other additional components are installed.
Important: after glazing the loggia, you should carefully check the sealing, as it significantly reduces heat loss, saws and noise.
The next step in arranging the loggia is the installation of lighting. For lighting, you can use any lighting fixtures - mounted on the wall or ceiling, built-in or conventional. It all depends on preferences, fantasies and room design. In addition, sockets and switches can be installed on the loggia. For this, a cable with three conductors of one and a half square cross-section is suitable.
After installing high-quality plastic windows, you need to insulate the walls, ceiling and floor.
The walls are insulated with heat-insulating material, for example, foam or expanded polystyrene, which are attached to the wall, respectively, with wooden slats or dowels with a plastic head. All joints must be carefully treated with polyurethane foam to avoid cold ingress, and the joints between the sheets of insulation are pasted over with tape.
Important: Polyurethane foam should not include toluene, as it can dissolve polystyrene foam.
The next step is to attach a vapor barrier and a reflective layer. For this, foil, polyethylene film or foamed polyethylene is most often used. The vapor barrier is attached end-to-end with tape or polyurethane-based glue.
Ceiling insulation is carried out using the same technology, however, you can also use a suspended ceiling as a heater and hide all the necessary wiring for lighting the loggia under it.
Initially, transverse joists are attached to the ceiling, to which the facing material will be screwed in the future. Styrofoam is placed between the lags. All joints must be filled with polyurethane foam.
Wallpaper is not the best option for finishing the loggia, since there is high humidity and significant temperature changes in this room. The loggia requires a moisture-resistant finishing material - wall panels, moisture-resistant drywall, plastic or wooden lining are ideal.
Before finishing the loggia with panels, the walls must be upholstered with a cork or wooden frame. Then, panels or other finishing material are already being installed by connecting them together.
It should be noted that connecting the panels to the frame is not difficult - the process is simplified by the fact that the tongue of the groove on the outside is slightly shorter than the tongue on the back.
If you want to finish not only the walls, but also the ceiling, then you need to start by installing the lag on the ceiling.
In most cases, it is enough to mount only 3 logs on the ceiling: place one log in the middle, and the other two along long walls.
Decorating the walls with wooden clapboard will add extra coziness, comfort and aesthetic appearance to the entire room.
Do-it-yourself loggia repair - photos of illustrative examples of wall and ceiling cladding.
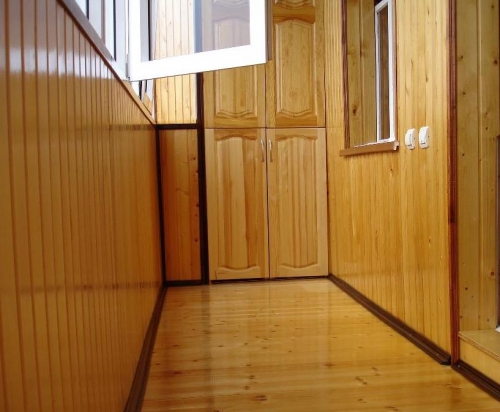
There can be several ways to insulate the floor of the loggia:
Logs are attached to the floor in the longitudinal direction, which will serve as the basis for the future floor. Then they are fixed with the help of polyurethane foam. Insulating material, such as foam or mineral blocks, is placed between the logs. To ensure maximum contact of the insulation with the floor, a plaster mixture is used. If ordinary mineral wool is used as thermal insulation, then it should cover the entire surface with a uniform layer. Next, a tongue-and-groove flooring is mounted on the logs using self-tapping screws.
The thickness of the screed should be 4 centimeters, and a temperature gap of 1 centimeter must be left between the screed and the wall. To do this, before installing the screed around the perimeter, you need to draw a strip 1 centimeter thick of foamed polyethylene. After the screed has hardened, ceramic tiles are attached to it with glue.
- screed with underfloor heating system
Initially, the floor should be leveled with a screed. Next, the heating cable is placed and securely attached to the screed with construction tape. The power of the cable is determined from the conditions of 90-100 watts per square meter of the loggia.
Then a self-leveling mixture with a thickness of 1-1.5 centimeters is poured, completely covering the heat-conducting elements.
After that, ceramic tiles or other finishing material are laid. This method is the most optimal, but it requires more significant material costs.
This stage fully depends on the imagination of the owner of the living space. The only limitation can be financial possibilities. The loggia can be turned into a secluded, cozy place for drinking tea, playing sports, relaxing with friends, or furnish it with a variety of flowers. It is worth noting that the cost of repairing a loggia depends entirely on the chosen finishing material and the style of the loggia.
The main thing is that the design of the loggia fully corresponds to the general idea of the interior of the apartment and can bring only positive emotions to the owners.
Consider the most common ideas for redecorating a loggia.
- greenhouse, flower garden. To do this, you should take care of additional lighting and heating. But these costs are fully compensated by the plants blooming all year round.
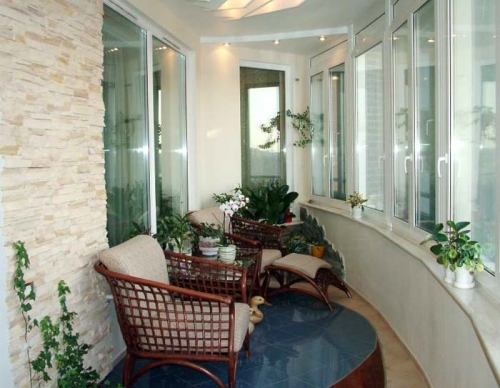
- tea room. To create a cozy interior, it will be enough to put a small wooden table, a couple of armchairs and lay a carpet with a large pile on the floor.
- study. If you have a small apartment, then you can equip a personal office on the loggia - put a computer desk, a chair and additional lighting.
- gym. Equipping the loggia with small exercise machines, you can safely go in for sports without disturbing others.
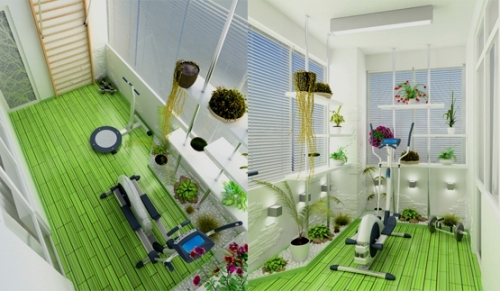
- Very often, to increase the space, the loggia is combined with the room.
If you are renovating the whole apartment, then of course you have to repair the balcony, the advantage of which is that it can be used as an additional room. uniqueness. Balconies or loggias can turn into anything: a flower greenhouse, which will delight with its colors even in frosty winter, a children's room where kids will be happy to play or a work workshop with many shelves and cabinets where dad will place tools and equipment. How to make repairs on the balcony? The answer to this question will follow later in the article.
When you have already decided on the appearance of your balcony or loggia, you can start repair work. To begin with, the balcony room should be freed from the things stored in it.
The balcony should be cleaned of old elements of decoration and interior:
- floor coverings,
- wall coverings,
- partitions.
Depressions or bulges in the floor and walls must be smoothed out. The room can be made more durable with a channel frame, passing it from all sides.
To avoid a collapse, use only relatively light materials, such as foam blocks.
If lining or MDF boards are chosen as materials for finishing a loggia or balcony, you need to level the walls and floors in advance by foaming in the cracks with polyurethane foam. A cement mortar is applied on top. It will protect the foam from decay. The largest crevices are covered with bricks, the smaller ones - with silicone.
Before starting the repair of the balcony, you should clean it from old elements of decoration and interior
Today, the question of how to repair a balcony, if you are a beginner in the construction business, is no longer acute. And all thanks to numerous video tutorials on the Internet, articles with descriptions of work technologies and advice from store specialists who will demonstrate photographs and samples of commercially available raw materials.
Modern manufacturers for finishing a loggia or balcony offer:
- decorative panels,
- wallpaper,
- plastic panels,
- plaster,
- lining;
- ceramic tiles,
- paint.
The most convenient and often chosen are MDF boards, lining and plastic.
Before laying the covering, it is imperative to install thermal insulation, since the balcony is open to winds and precipitation.
The insulation that works best is mineral wool. Remarkable properties and low price, as well as ease of use, distinguish this material from the range of others.
The glazing of the balcony is an integral part of its repair, otherwise all efforts can go to waste.
Glass installation can be done in several ways:
- Cold glazing. This option implies the installation of an aluminum frame, into which single-layer glass is inserted. But you shouldn't expect warmth from such a loggia.
- Frameless way - almost the same as cold, only without the use of frames and vertically standing partitions. Glass in this case is tempered, durable. It is mounted in an aluminum profile using rollers. The glasses are separated from the profiles by rubber seals that do not allow water to pass through.
- Warm glazing. Glazing with a warm method is the installation of double-glazed windows and profiles equipped with thermal protection. This option protects against street noise. The frame with warm glazing is made of aluminum or plastic. It is attached to the parapet with bolts.
Glazing of balconies is not only the best way to provide additional protection for a house from wind, moisture and heat loss, but also an excellent opportunity to expand the useful space of an apartment.
Before renovating the balcony, giving it a certain style, it is necessary to insulate the floors. This is best served by extruded polystyrene foam, which, in addition to the high performance of its main function, has other positive qualities.
Material advantages:
- high density,
- light weight,
- high level of strength,
- durability.
Each board is placed on the floor, pre-leveled and greased with glue. You can put a mounting mesh on the adhesive coating, then fill it with a self-leveling mixture. To make the insulation even better, expanded clay is used. Plates are fixed with plastic dowels.
Also, popular floor coverings for balcony rooms are linoleum, laminate and ceramic tiles.
Do-it-yourself balcony repair will not be difficult if you do not spare time and effort for finishing it.
Lining is one of the most commonly used materials for insulating balcony walls due to its advantages.
The advantages of the lining are obvious:
- natural base,
- long service life,
- low cost,
- attractive appearance.
Before laying the material on the walls of a loggia or balcony, they must be reinforced with a metal profile or wooden slats. Next, heat and waterproofing are installed. For the first, expanded polystyrene is suitable, for the second - roofing material. The lining itself is mounted with nails or clamps.
It is not always possible to decorate the corners beautifully. Unsightly areas will help to hide a decorative corner made of the same material as the base slabs.
Today, one of the most popular ways of covering a balcony is clapboard, because wooden walls are invariably in fashion and look very stylish.
It is not at all difficult to insulate the ceiling yourself. To insulate the ceiling, you can use any non-natural insulation, most often foam is used for this.
The process of working on ceiling insulation looks like this:
- Before insulating the ceiling, it is necessary to make a contour crate on it.
- Styrofoam sheets are glued to the floor slab or inserted into the roof opening.
- Additionally, the insulation should be secured with umbrella dowels.
- The slots are blown out with polyurethane foam.
- The main frame for finishing is attached to the contour crate.
Little trick: find out if the tenants have insulated their balcony floor on top. If they did this, the ceiling of your balcony will not let the cold through, and you no longer need to insulate it.
Insulation of the floor on the balcony is a very important stage in joining this room to the main square meters of the apartment.
The Internet photo gallery is replete with a variety of superbly finished balconies. It is possible for everyone to decorate their own balcony beautifully.
Suitable for this purpose:
- siding;
- metal plates;
- plastic panels.
The best option is siding that does not rust, mold, is durable and durable, and does not require much maintenance. It is advisable to entrust the laying of slabs outside the balcony to professionals.
The best option for finishing a balcony is siding, which does not rust, does not grow moldy, is durable and durable and does not require special maintenance.
A warm balcony can be decorated with any materials. The combined balcony can be decorated in the same style as the main room, and the separate one - for every taste.
| Video (click to play). |

