In detail: do-it-yourself overhaul of a VAZ 21083 engine from a real master for the site my.housecope.com.
In one of the previous articles, we covered in detail the "typical" overhaul of the Oka engine. In that report, we talked about ways to increase engine life, borrowed from our experience with engine tuning, which we use during standard overhauls.
In this article, we would like to talk about the overhaul of an eight-valve engine VAZ 21083 car VAZ 2109... Let us remind you once again that tuning is not always advisable or is necessary for the client - often the budget is limited, and the resource of the serial engine is exhausted - a high-quality overhaul without large investments is required. We offer different options for repairing or tuning the engine, and the client selects the most convenient for himself in terms of engine power or financial costs.
It is likely that in the future we will rarely return to the topic of "typical overhaul", but I would like to say that this article is a sample our work, it describes our principles of repair. Of course, for each specific engine, the list of replaced parts and work performed will differ, but the difference is not that big.
The work in question can be offered to the attention of customers who have in use any front-wheel drive VAZ car with an eight-valve engine. This is the Samar family, "ten", all Kalina and Priory, with 8 valves.
It is important that we provide a written guarantee for an engine after a major overhaul - 6 months, or 20 thousand km of run... This guarantee is a guarantee of great responsibility when assembling the engine and selecting components. We understand perfectly well that a client, especially one who is temporarily without a car, should not be involved in the search and purchase of spare parts for repair, he does not have the experience in choosing spare parts that we have. Therefore, our principle is that we buy spare parts ourselves, since we know where to find a factory oil seal, and not a cooperative one, we know which imported spare parts can be supplied and which cannot (the example with Elring and Reinz oil seals is indicative). We consider this approach to be the most correct.
| Video (click to play). |
Let's take a look at the client machine. This is a VAZ 2109, assembled by RosLada, with a VAZ engine with a working volume of 1.5 liters. Injector with one lambda probe, without catalytic converter and camshaft sensor. Car mileage - 203 thousand kilometers, without engine repairs! The indications for repair are low compression in the 2nd cylinder, and breakage of the timing belt teeth on the track. We accept a car for repair only after washing the body and engine compartment.
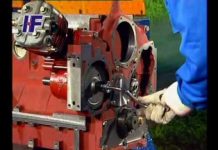
Remove the head assembly with manifolds. The gas joint gasket had long been opened and let through the exhaust gases (blackness is visible at the junction and surrounding details), which gave an increased engine noise.
The gasket under the head is “tired” - we found a breakdown of the gasket to the outside (near the generator), which is why the joint under the head was constantly sweating on the block. The photo below shows the punched edge - we specially raised the edge of the gasket for clarity. Otherwise, the condition of the gasket leaves much to be desired - multiple under-film corrosion of the block under the gasket has noticeably eaten away the plane.
Cylinders are worn out, pistons are loose.
Gasoline engine on the "eight"
The appearance of the VAZ 21083 gasoline engine is directly related to the low quality of domestic rubber products. The fact is that at the very beginning of production, a VAZ 2108 engine, the first domestic power unit, was installed on the Lada Samara family cars,designed specifically for transverse placement under the hood of a front-wheel drive vehicle.
However, the VAZ 2108 engine had an unpleasant feature common to foreign engines with a timing belt drive. When a timing belt breaks, the engine pistons met with the cylinder head valves, and the latter necessarily bent, which led to expensive repairs to the VAZ 2108 engine. On foreign cars, such a breakdown happened extremely rarely due to the high reliability of the timing belts. However, in the first Samaras, the breakage of a low-quality belt was such a frequent occurrence that it was necessary to urgently refine the engine with the help of specialists from German automakers. As a result, a new engine appeared, which became the progenitor of a whole family of power units. Assembling a VAZ 21083 engine is not a difficult task; it can be done without the help of specialists.
Overhaul of a VAZ 21083 engine usually consists of disassembling the unit, troubleshooting parts, boring the crankshaft and cylinders, and assembling the motor. Dismantling the engine is a simple matter, troubleshooting and boring are also simple procedures. But it is necessary to assemble the motor extremely carefully, carefully following the instructions.
Let's start by installing the crankshaft in the cylinder block. Remember: the numbers of cylinders and main bearings are counted from right to left in the direction of the car. That is, 1 cylinder is located near the pump and timing drive, and 4 - near the clutch and gearbox.
The lubrication system of the 21083 engine consists of an oil pump, an oil receiver, a filter and channels. After disassembling the engine, all channels must be flushed with solvent and blown out with compressed air. The oil pump should be installed together with the crankshaft oil seals, and the oil receiver after the installation of the ShPG and the flywheel.
The procedure for installing oil seals and pump.
- Using a thick copper or brass spacer and a hammer, we drive the rear oil seal into the holder to the end.
- With lithol or other grease, glue the gasket to the other side of the holder.
- Lubricate the inner edge of the rear oil seal and the crankshaft flange with engine oil.
- We put the gland assembly with the holder onto the flange, for this we carefully tuck the inner edge of the gland onto the flange using a sharp and soft wooden stick.
Replacing the oil seal in the oil pump
- After that, we slowly move the holder along the flange to the cylinder block itself, grab it with bolts and align it so that its edge completely coincides with the edge of the block. Only after that do we tighten all the bolts completely.
- As well as the rear, we drive the front crankshaft oil seal into the hole of the oil pump.
- Lubricate the inner edge of the oil seal and pump gears with oil. For uniform lubrication, we scroll the gears with our finger.
- We glue the gasket to the oil pump with lithol or any other grease.
- We turn the drive gear so that the protrusions on it coincide with the cuts on the front of the crankshaft.
- We put the oil pump on the shaft, fill the edge of the oil seal on the crankshaft neck with a sharp soft wooden stick.
- Just like the holder, we move the oil pump to the block itself, grab it with bolts, level the edges and tighten the bolts completely.
Back to the table of contents
The connecting rod-piston group (SHPG) must be installed assembled. It is not recommended to press the piston pin into the connecting rod head without special tools. It is better to entrust this procedure to professionals.
To install the ShPG, you need a steel mandrel in the shape of a ring. The height of the ring is 2-3 cm, the diameter of the hole is slightly larger than the diameter of the cylinder. It is necessary to mount the pistons in such a way that the arrow on their bottom (the part adjacent to the valves) is turned towards the oil pump. The connecting rod and piston number must match the cylinder number. Before installation, you need to open the locks of the oil scraper and compression rings at an angle of 120 degrees.
- We turn over the block.
- We wipe the cylinder walls and crankshaft connecting rod journals with a dry cloth.
- Thoroughly lubricate the cylinder walls, piston side surfaces and the inner part of the mandrel with oil.
- We put the mandrel on the cylinder and insert the piston assembly with the connecting rod through it. We push the piston into the cylinder using a round wooden stick (hammer handle).
- We put the liner in the connecting rod cover, lubricate it with oil.
- We lay the block on its side and install the connecting rod cover so that the cylinder number on it and on the connecting rod is on the same side. We grab the cover with nuts.
- In the same way, we mount the rest of the pistons, complete with connecting rods. After that, turn the cylinder block upside down and tighten all 8 nuts securing the connecting rod caps.


