Have you noticed how simple everything is? So, if a hydrocorrector does not want to work in your VAZ 2110, find half an hour and replace it. Agree, the ability to adjust the direction of the light beam at any time without leaving the car seems to be a trifle, but nice.
Many motorists, faced with headlight malfunctions in the VAZ 2110, try to repair the headlight on their own, so to speak, with their own hands, or improve the operation of the headlight by expanding its capabilities.
The price of high-quality illuminators is considerable, however, they last several times longer. You can make repairs or modifications to the optics that are already available if you want to save money.
Correcting the light beam happens quite often, especially when the trunk of the car is heavily loaded, the light strikes directly into the eyes of the drivers of cars moving towards you. If the reflector has gone down, and the adjustment does not work, our instructions will help you repair the VAZ 2110 headlight hydrocorrector, the repair will take very little time.
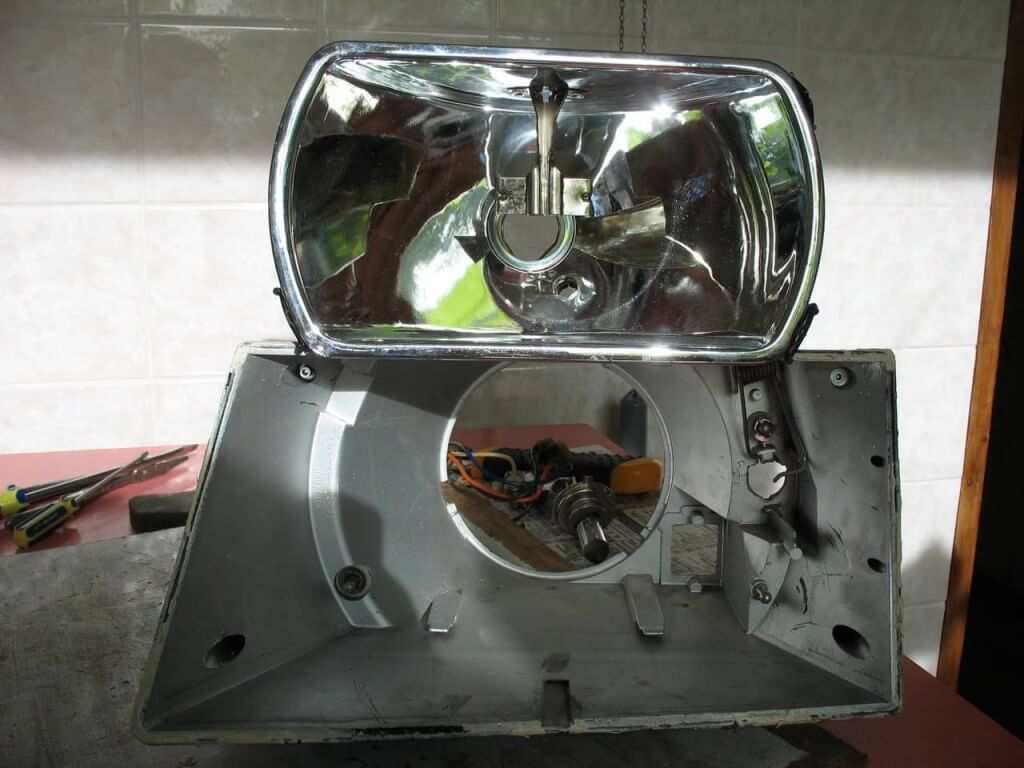
For your information: The ball of the hydrocorrector snaps into the plastic groove, and the metal bobbin into the second groove. It stops the adjustment, preventing it from unscrewing further than itself.
For VAZ 2110, the repair of the headlight hydrocorrector is over. We assemble the headlights in the reverse order to disassembly.
You can snap the ball into the plastic at the end of the "turntable" without removing the glass, through the light bulbs on the back of the illuminator:
Many owners of the VAZ 2110 find that light shaking is observed when the car is moving. Such a breakdown often manifests itself in Kirzhach headlights, and such breakdown rarely occurs in Bosch parts.
Sometimes the entire headlamp needs to be replaced.
VIDEO
We unscrew the bolts securing the headlight (shown in the photo with white arrows), and push the headlight itself back;
Unscrew the bolts securing the headlight
We move the pad about four centimeters to the center of the car so that its hook comes out of the mount with the wing;
Loosen the screws securing the buffer
Press on half of the lining so that the flange comes out of the mount, and take out the lining;
Unscrew the fixing nut of the illuminator from below;
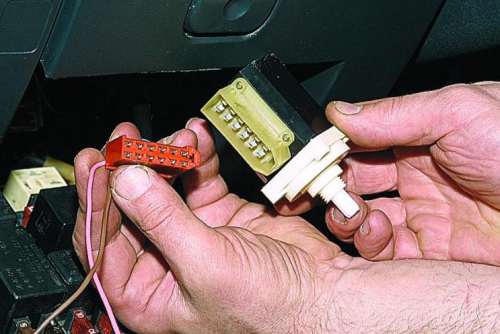
Disconnect the block from the direction indicator lamp, pull the illuminator towards you and take it out;
We unscrew the fastening screws for disassembling the illuminator;
We separate the headlamp from the direction indicator;
Separating the headlamp from the turn signal
On the body of this indicator, we unhook two hooks from the body of the optics part;
We assemble in the reverse order of this and install the headlight assembly.
Congratulations! Do-it-yourself headlight replacement is completed, if anything remains incomprehensible to you, I recommend watching the video on request VAZ 2110 headlights repair.
Car enthusiasts often tune their car headlights to improve their appearance. A well-made tuning gives the car a fashionable look and beauty. If you choose the right accessory, the appearance of dozens changes thoroughly. The most popular among motorists is headlight tuning in the form of toning.
Headlight mask painting;
Glass coloring;
Glass tinting with film.
The process of such tinting is best shown in the video.
Welcome!
Note!
Summary:
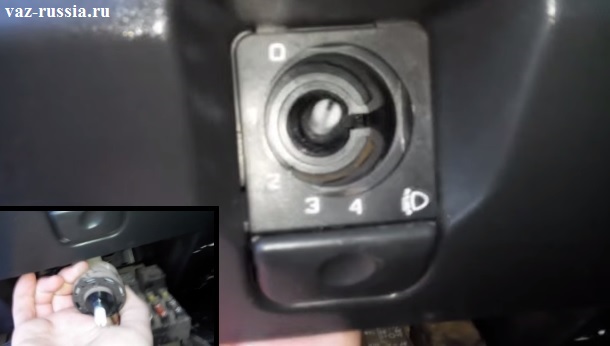
Where is the headlight hydrocorrector located?
When do you need to change the headlight hydrocorrector?
Note!
Another hydro-corrector of headlights must be replaced if the stroke of the slave cylinders has ceased to fit within the norm, namely from 6.5 to 7.5 mm, we will explain to you how to check the stroke of these cylinders a little later.
Note!
And also it still needs to be changed if it has stopped adjusting the headlights, that is, you turn it and the headlights, as they stood in the same position, are still standing, usually after a breakdown of the hydro-corrector, the headlights still sometimes either lift up high, or, on the contrary, go down to the very bottom and are not subject to further adjustment, this indicates that the corrector has become unusable.
Note!
Withdrawal:
Note!
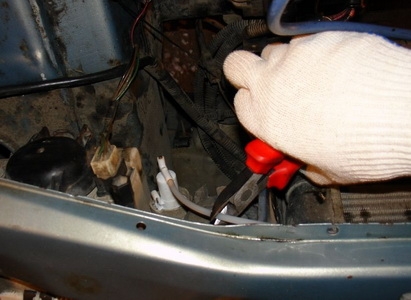
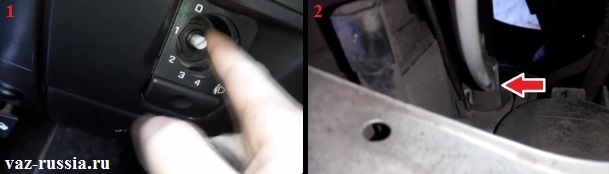
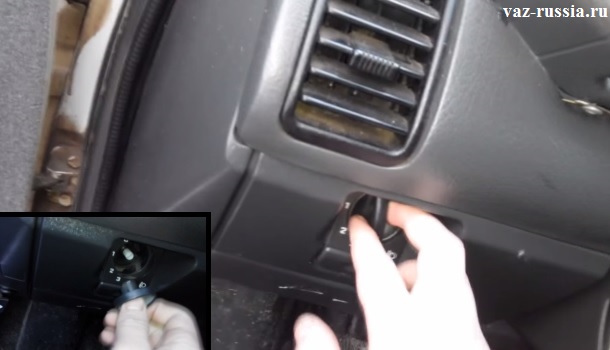
2) Next, get into the car and remove the handle from the headlight range control itself, or rather the handle that adjusts it, it is on the left side under the steering wheel of the car and is removed very simply, to remove it, just grasp it with your hand and gently pull it towards you and when it disengages, it will simply come off.
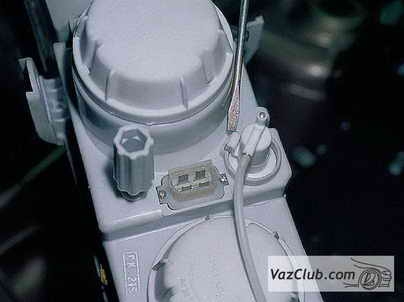
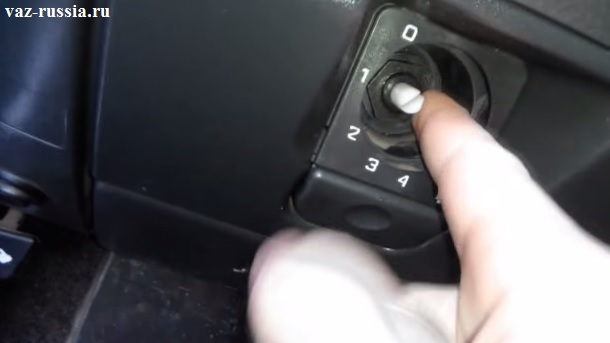
3) After the handle is removed, take a closer look at this hole and you will see that there will be a nut and the rod itself will still stick out, so this nut attaches the main cylinder of the headlight range control to the dashboard, so if you want to remove the headlight range control then using an extension cord with a union head, or with the help of something else, completely unscrew this nut (In the photo, a person points at it with a finger).
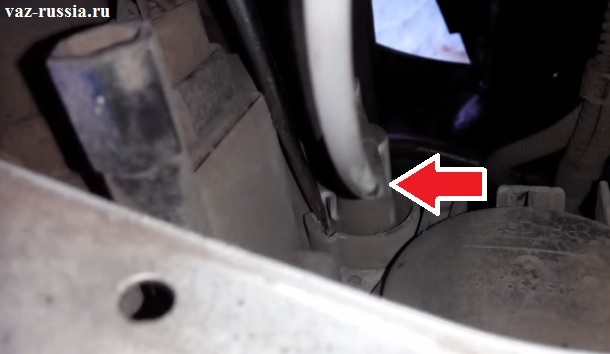
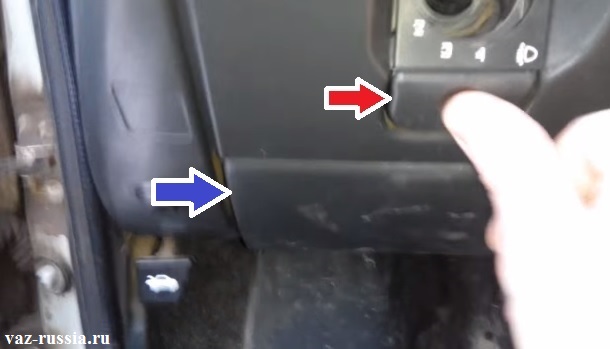
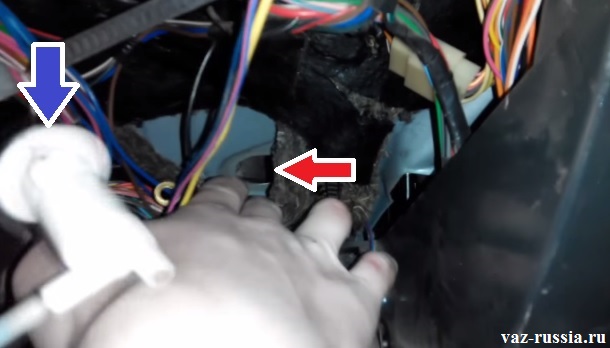
4) When the nuts are unscrewed, press the button that is located under the hydro-corrector itself (It is indicated by a red arrow in the photo), and after pressing this button, the lower panel with fuses, which is indicated by the blue arrow, will fall down and thereby you will provide yourself with full access to the main cylinder of the headlight range control.
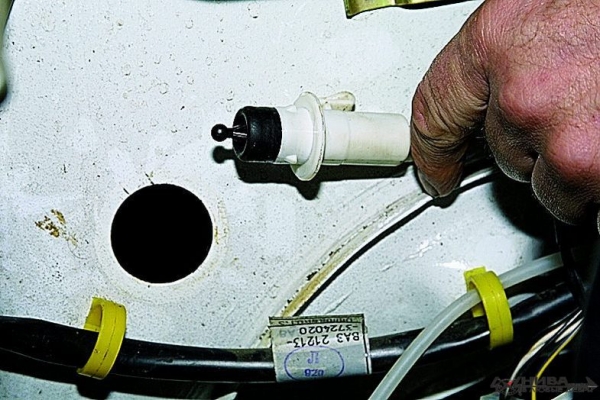
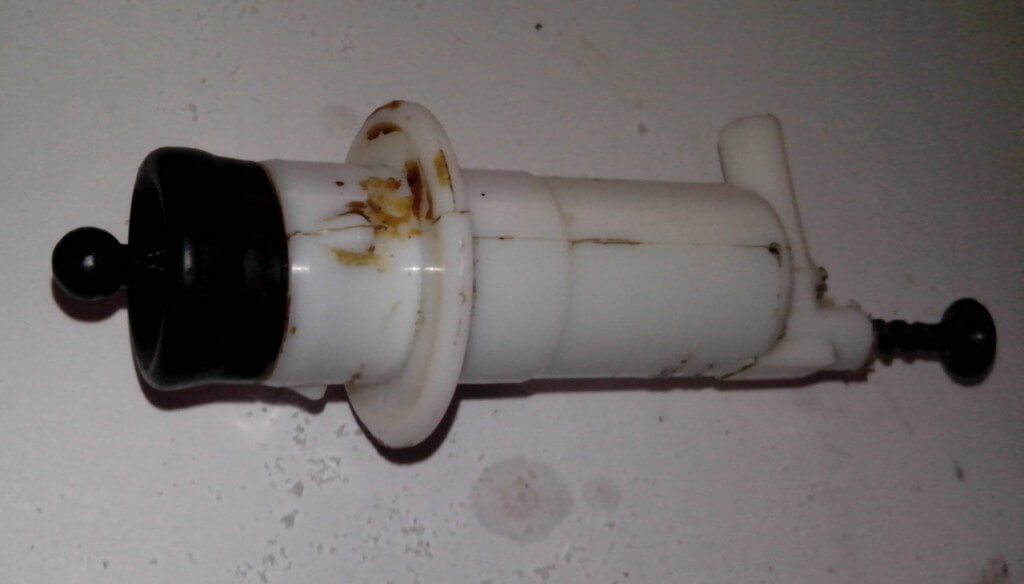
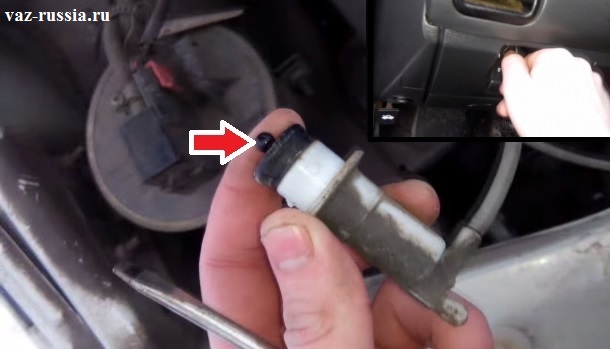
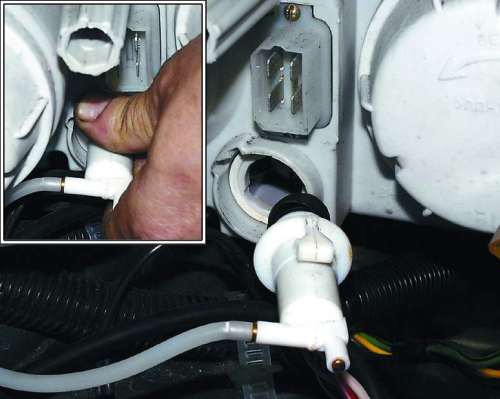
5) Now stick your hand through the hole that appeared as a result of pressing the button which is indicated by the red arrow in the photo above and through this hole find the main cylinder of the headlight range control, and after you find it, carefully remove first its stock, which goes with it as a whole from the hole in the panel, and then remove the master cylinder itself as shown in the small photo just below.
6) After you remove the master cylinder and you will have it in your hands, and at the same time, both executive cylinders that go to each headlight will also be removed, then pull the master cylinder towards you and thereby try to remove it, if it is anywhere if you catch it, for example, in the engine compartment, then get it out of there and eventually pull the master cylinder further and you will take out this corrector.
Note!
Installation:
Note!
Additional video clip:
VIDEO The value and necessity of such a device as a headlight range control has long been beyond doubt. Although on domestic cars the problem of blinding oncoming drivers is not as acute as that of owners of xenon headlights, it does not make it easier for those who are blinded. There is no need to joke with safety, therefore the VAZ 2110 headlight range control in this matter can contribute to its provision.
As you know, checking and adjusting the lighting devices of a passenger car is carried out on an unloaded car. It is this approach to adjusting lighting that subsequently leads to additional problems. When the load of the car changes due to the placement of passengers or cargo in the back seat, the luminous flux changes, the headlights begin to shine higher, blinding oncoming drivers.
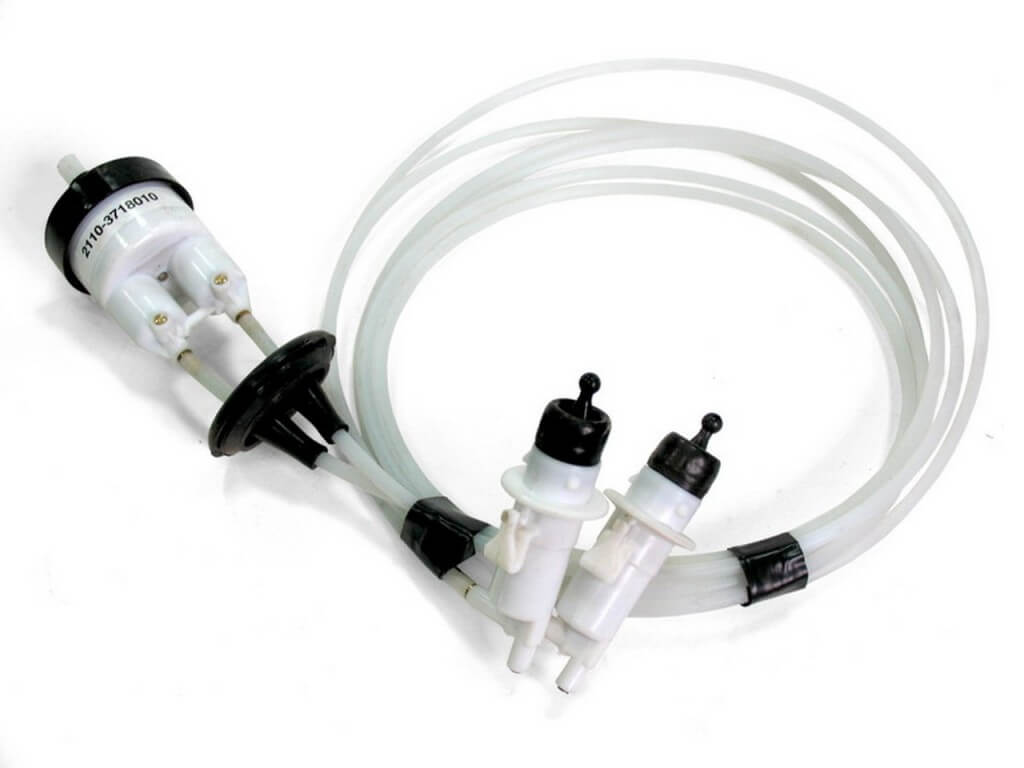
In the design of VAZ cars, a hydrocorrector is used to adjust the angle of inclination of lighting devices. Its work is based on the transfer of power from the control stick to the headlights using fluid. Structurally, a similar corrector is included in its composition:
a switch that allows you to quickly change the angle of inclination for the optical axis;
the main cylinder located on the panel;
a working cylinder associated with the headlight housing;
connecting pipes filled with a special anti-freeze liquid.
The corrector of the described type used on VAZ cars of models 2114, 2112, 2115, 2110, 2109 is non-separable and in case of damage it is completely replaced, along with the cylinders and tubes. The most common causes of failure of such a system are chafing of the tubes and the loss of the liquid filling them.
Video (click to play).
The hydrocorrector used on VAZ models 2114, 2112, 2115, 2110, 2109 is quite simple in design and uses a hydraulic drive to control the position of lighting devices. Due to the loss of liquid filling the connecting pipes, it is possible for such a device to stop working.
VIDEO