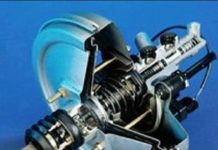
In detail: do-it-yourself gur pump repair from a real master for the site my.housecope.com.
To make it easier for the driver to control the vehicle, in modern cars, a hydraulic booster is installed on the steering column. One of the main elements of this mechanism is a pump that pumps hydraulic fluid through the power steering system. During operation, it is exposed to heavy loads, therefore, it is periodically necessary to repair the power steering pump.
You can change this unit with your own hands. It is even possible to replace a failed bearing. In this case, the power steering pump repair kit will come in handy, which can be bought at any car store.
- you need a key for "12", as well as heads for "14" and "24";
- you will need a snap ring puller;
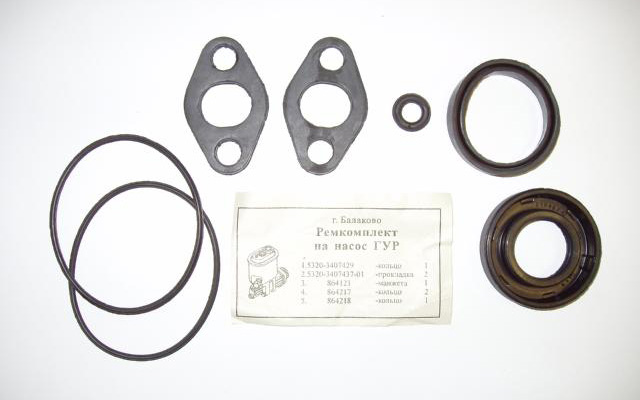
- prepare in advance two copper washers, a gasket for the rear casing, O-rings, in the amount of two pieces and an oil seal, they can be replaced by a repair kit for the power steering pump;
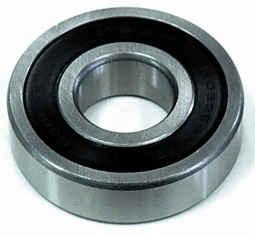
- be sure to have a bearing marked "6202" and an outer diameter of 35 mm;
- to pump oil out of the tank, you need a large syringe and a container;
- clean the workbench and cover it with clean cardboard to disassemble the pump;
- prepare fine sandpaper and a cleaning cloth.
In order to remove the power steering pump and repair it with your own hands, you need to perform the following steps.
- Slightly loosen the axle bolt that secures the pump unit to the bracket using the hole in the pulley. Loosen the tensioner retaining nut completely and remove the belt.
- Using a syringe, pump out the hydraulic fluid from the reservoir. Turn the steering wheel right and left until it stops so that the oil is completely out of the system, do this several times to completely clean the pipelines.
| Video (click to play). |
- Loosen the clamp on the hose that runs from the expansion tank and remove this line.
- Remove the bolt that secures the high pressure hose from the pump to the system.
Remove the axle bolt that secures the pump to the bracket and replace it with a screwdriver or a metal rod of a suitable diameter in order to lock the pulley. Then unscrew the nut that secures the pump pulley.
- Pull the released power steering pump unit up and put it in a specially prepared place. Remove dirt and oil from the unit housing.
- Remove the bearing retaining ring with a puller.
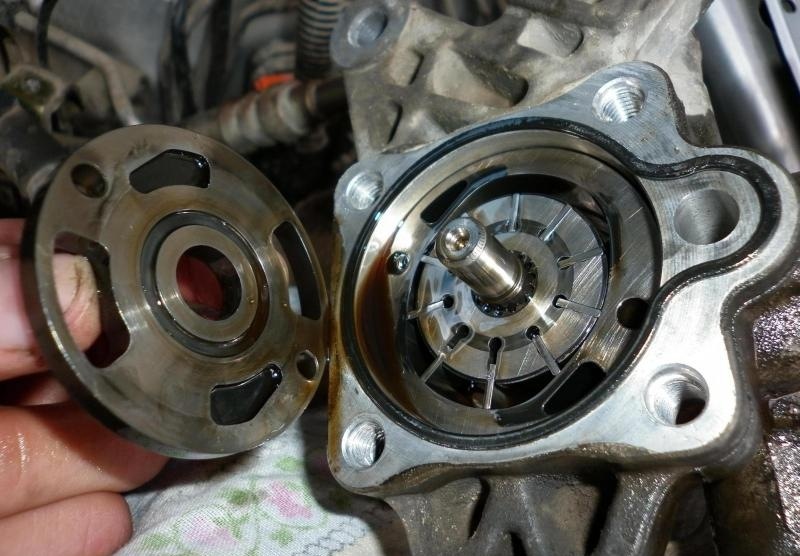
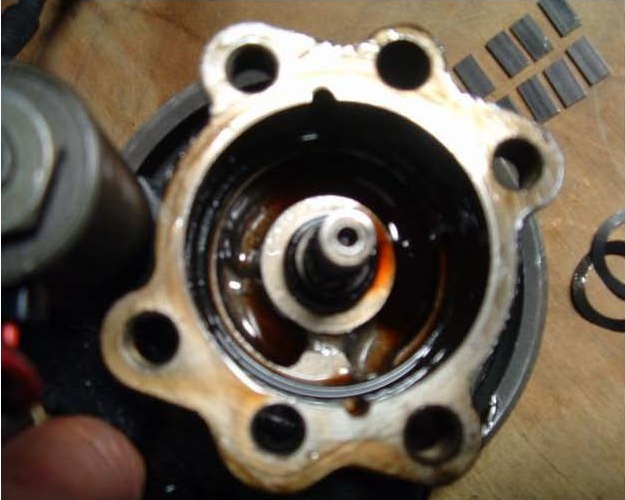
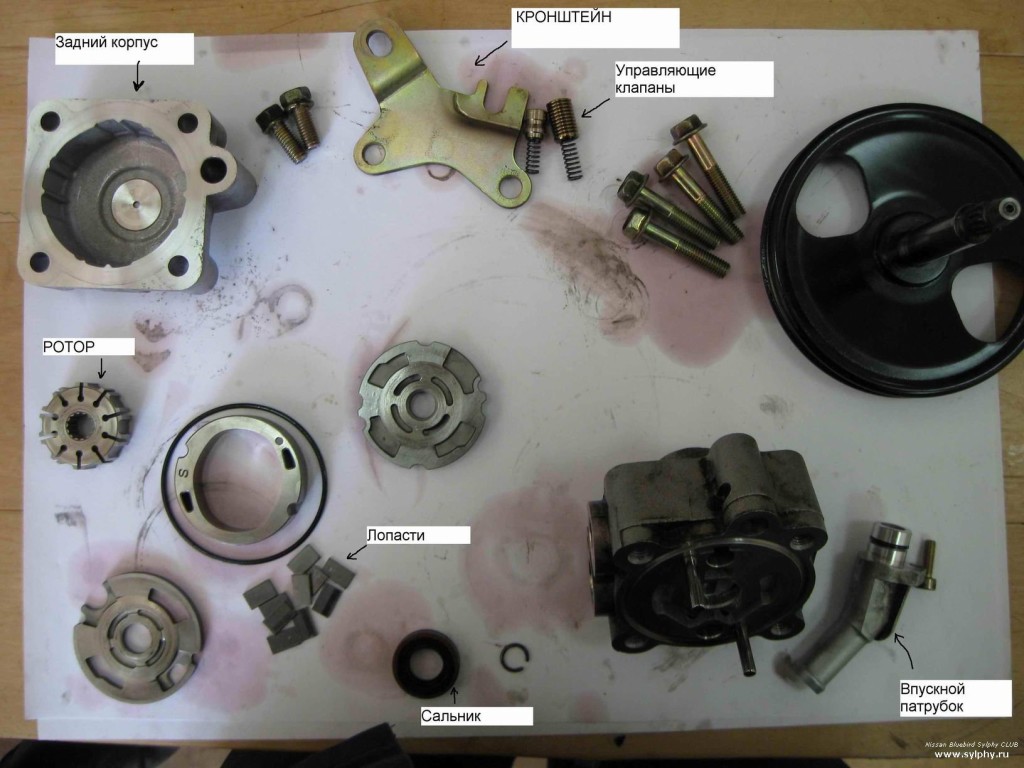
- Remove the rear cover mounting bolts. Gently pry it off with a small screwdriver and remove it, making sure that the rotor blades do not fall out of the housing.
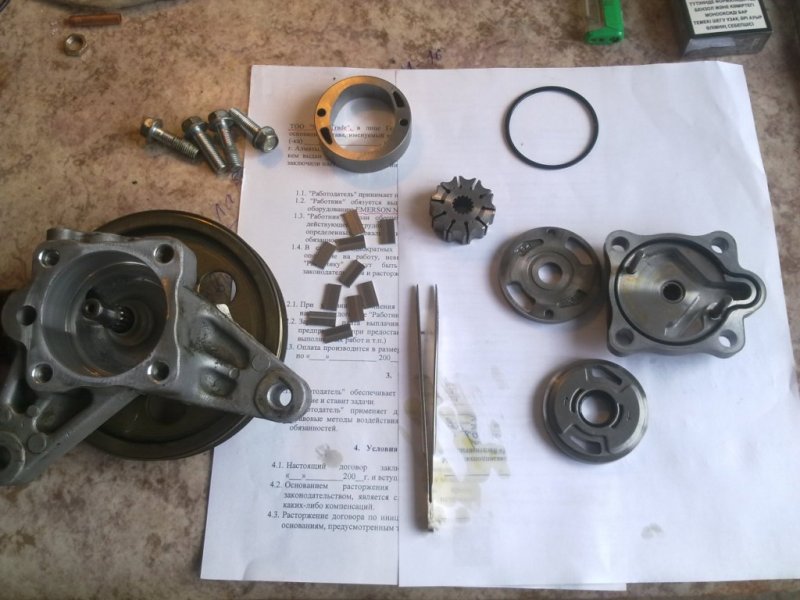
- Take out the blades and put them on pre-prepared numbered pieces of paper so as not to confuse anything during assembly. Attention! Remember the position of the assembled blades. When installed in a housing, the rounded part of these blades must be turned outward.
- Remove the plate and all parts underneath.
- Drive out the shaft by tapping gently with a screwdriver.
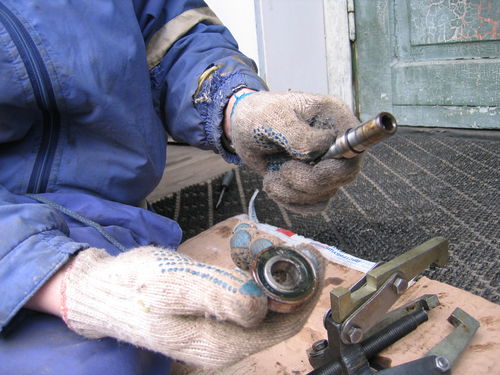
- Press the bearing off the pump shaft.
- Change the unusable bearing for a previously prepared one.
- Check the parts of the pump set for defects and wear. Clean surfaces from dirt and roughness. Experts say - simple cleaning of internal parts reduces gaps and allows you to extend the operation of this unit without replacing any parts.
- Reassemble in reverse order. It is imperative to change the oil seal, O-rings and washers for new ones prepared in advance.
If it is difficult for you to fix the power steering pump with your own hands or there is no time for this, then it is possible to replace the power steering pump with a new one. This will significantly reduce the repair time. Also watch a video on the topic:
A very helpful article! And although I have a Hyundai H1 4 × 4 Starex 4WD, I think that these tips are very, very useful to me. My Gur is stuck (most likely - the bearing). Disassembled. As soon as I find a bearing and a repair kit for it, I will collect it. Wish I saw this article before. I had to suffer with unscrewing the return hose from the fitting. It was only necessary to put a wrench on the lower part of the fitting, and unscrew the upper one.
Thank you for the article!
Very helpful article. I myself am now suffering with gur Ford EXP3 4.6. And howls and tight ... to sort out nodo ... There is already a mess in my head from studying and generally searching for information ....
Many modern cars are equipped with a power steering (GUR). Russian cars were also equipped with such systems, but not in such quantities as we would like. Power steering for VAZ 2110 was installed on rare trim levels, for example, VAZ 21124. In this article, we will show how you can repair the power steering pump yourself.
The power steering pump on cars of the tenth family was installed by the ZF brand (ZFLS 7691 955 339). It is also suitable for VAZ 2170 and 2123, as well as Audi A6, Wolksvagen Passat or Transporter.
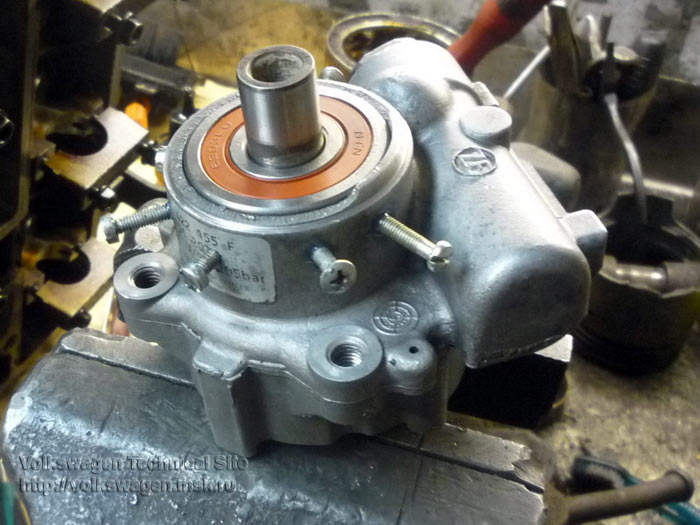
The whole difficulty lies in the fact that this pump model is not collapsible, that is, there are no retaining rings or covers.
Hello everyone! My name is Mikhail, now I'll tell you a story about how I managed to exchange a dvenashka for a 2010 Camry. It all started with the fact that I was wildly annoyed by the breakdowns of the two, like nothing serious broke down, but the little things, damn it, so many things that really started to enrage. Here the idea was born that it was time to change the car to a foreign car. The choice fell on the tayet Camry of the tenths.
but restore the operation of the power steering pump it is still possible.
Another reason power steering pump malfunctions there can be a worn out bearing in a closed housing (450 rubles) or an old oil seal (50 rubles).
When installing the oil seal, you may need to sharpen the shaft a little on a lathe.
There are two ways to fix the new bearing in the pump housing:
Make a groove at the turner on the outside of the bearing. Drill threaded holes in the pump wall. Insert a new bearing and secure it with sharpened bolts, which are then sawn off.
Alternatively, secure the bearing inside the pump using the folded edges of the housing.
We assemble the power steering pump in reverse order. Unlike the Saginaw pumps, the vanes on the ZF pump do not turn over.
To put the flange on the shaft, you need to put the heated flange on the shaft. After a sharp cooling, he will sit tight.
If power steering pump hums after assembly, then do not be alarmed, this is grinding in the parts, after 300-500 km the hum will go away.
Do not forget to change the power steering fluid afterwards. It is worth noting that the device and repair of an electric power steering is much simpler than a power steering.
In order to get rid of constant fines from cameras, many of our readers successfully use Special Nano Film for numbers. Legal and 100% reliable way to protect yourself from fines. Having familiarized ourselves and carefully studying this method, we decided to offer it to you as well.
In order to get rid of constant fines from cameras, many of our readers successfully use Special Nano Film for numbers. Legal and 100% reliable way to protect yourself from fines. Having familiarized ourselves and carefully studying this method, we decided to offer it to you as well.
Auto mechanics in life, lovers of repairing a broken part, try to do the repair with their own hands. It develops skills, saves money, but sometimes it takes a lot of time. Today we will consider whether it is possible to repair the power steering pump with our own hands and, if so, how to do it yourself.
Although the power steering pump is experiencing significant loads, it does not break down so often if it is properly operated. Due to the not particularly complex design of the pump, it is quite possible to repair it yourself.
- Fluid tank.
- Control spool.
- The pressure regulator in the amplifier system.
- Pump.
- Power cylinder.

The pump is driven by a belt. Through the belt, rotation is transmitted from the crankshaft to the pump shaft. During pump operation, the system reaches a maximum pressure of 150 bar (atmospheres) or 15 MPa. The basis for the correct operation of the pump is the clearances set by the factory, which should be in the range from 0.05 to 0.1 mm. If the pump is badly worn, the clearances increase, and the driver feels that the steering wheel has begun to turn harder.
Modern cars are created with maximum comfort for the driver and passengers. So that the driver can easily turn the steering wheel (even with one finger), power steering is installed. It can be electric (EUR) or hydraulic (power steering).
In addition to facilitating the rotation of the steering wheel, the EUR and GUR softens and absorbs shocks on bumps. Also, the power steering keeps the steering wheel straight, even if the tire is burst.

Although installed vane and vane pumps in the power steering structure do not break so often, we will nevertheless consider what are the signs and how to extend the life of the pump.
- Change the liquid on time. Few people change the oil in the hydraulic booster, but it becomes obsolete and loses its properties. Therefore, it is necessary to do this.
- Monitor the fluid level in the power steering reservoir.
- Try not to turn the steering wheel when the internal combustion engine is not working. If the fluid in the power steering system does not move, the pump overheats. The oil does not move if turned many times with the engine stopped.
- When changing the oil, be careful not to get debris.
Subject to the rules of operation, the power steering serves for a long time. Check oil level periodically. When adding fluid, add only the same grade.

- If there are difficulties with turning the steering wheel at idle and at low speeds. At high revs, there are no problems with turning the steering wheel.
- If you find a fluid leak from the power steering system.
- If extraneous sounds become audible during rotation of the steering wheel.
- If a whistling or humming sound is heard from a bearing. If the bearing is removed, then there will be a backlash during the rolling of the pulley.
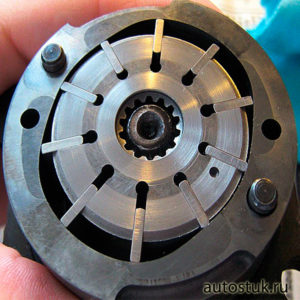
Before you start disassembling the device, you need to check if there is an air lock in the system that interferes with the movement of liquid. It is because of the air lock that most often malfunctions occur in hydraulic systems. That is, the first thing we do is pump the power steering. If after this the reasons have not disappeared, then we proceed to dismantle the hydrach, disassemble it and repair the system parts.

- We do a complete cleaning of dirt. When doing this, make sure that no dirt gets into the hoses.
- Remove the drive belt.
- Drain the oil as much as possible.
- Now you need to put a mark on the power steering shaft relative to the elastic coupling (for this you have to crawl under the car). Unscrew the steering wheel shaft using the hexagon.
- We dismantle the steering rods. To do this, you need to raise the left side of the car with a jack and remove the wheel. Usually, to remove the rods, you need to use a special puller. But, in this case, you can do it without a puller.
- We take a 15 socket wrench and loosen the power steering bolts to the side member. This is done from the side of the wing arch. Unscrew 2 bolts completely, leave one in place.
- Now, what remains in the hoses must be drained. To do this, we substitute a cut empty canister or other container.
- When the liquid has flowed out of the hose, you need to plug them with rags.
- Now you need to unscrew the remaining one bolt. We unscrew it with one hand, and hold the hydrach device with the other.
- Carefully, slowly take out the pump.
First, we inspect if the case is broken, if there is metal corrosion. In the process of disassembly, usually, the cause of the breakdown is found out. Next, we disassemble the pump into its component parts.

- The circlip holds the bearing. This ring must be removed with a puller.
- Remove the rear cover securing bolts. The cover is removed with a slotted screwdriver. It must be removed carefully so that the blades do not fly out and the pump housing.
- Those who do not remember the location the first time are advised to take blank A4 sheets of paper, number them on them and spread them out. During the disassembly process, the parts are laid out on these sheets in a specific order. You also need to remember that the blades with the rounded part must then be installed outward.
- Now you need to remove the plate and the parts under it.
- After that, we proceed to remove the shaft. It must be carefully knocked out, for this you can use a brass hammer or a rubber hammer, which is used by master tilers.
- The bearing must be pressed out of the removed shaft.
- If the problem was in the bearings, that is, it can wedge, or crumbled, or simply rotates tightly, then we press in a new bearing.
- In addition to the bearing, it is necessary to check all the parts of the device and, if necessary, replace them.
- At this stage, when the failed parts are replaced, it is necessary to assemble the power steering device.
There are very important components, devices and parts in the design of a car, but there are less important ones. It is necessary to monitor especially important nodes often. If signs are found, try to eliminate the cause as soon as possible.
This video shows the device and principle of operation of the power steering pump of the Chevrolet Aveo
How to repair the power steering pump yourself
I will tell you how I repaired the power steering pump. But first, a little background.
The steering wheel on a cold car in summer and winter works flawlessly. But as soon as the car warms up, especially in summer, the steering wheel on the XX becomes very tight, as if the power steering is not there. In winter, this problem does not manifest itself so strongly, but it is still present. If you put it on the gas, the steering wheel immediately turns with ease (though not quite perfect, but still lighter). At the same time, the pump does not knock, does not ring, nor leaks, etc ... (do not take the snotty rail into account) the oil is fresh and perfect (especially, thanks to the state of the rail, it is updated regularly!), The cardan is lubricated and does not wedge!
In general, on the face of the sign of the lack of performance of the power steering pump with hot oil at XX. I didn't suffer for a long time, in the end I decided to deal with this problem, spent a lot of time, rummaged through the Internet, understood the principle of the pump, found a similar description and decided to sort out my "old" pump.
And so, first of all, we remove the pump, it is necessary to drain all the slurry from it (how to remove it and drain the liquid, I think everyone will figure it out), also, on the back cover of the power steering, you need to unscrew four bolts with a 14 head.
After we begin to carefully remove the cover, try not to damage the gasket (this gasket with an internal rubber seal), in the power steering body we leave the outer part of the "working ellipse cylinder" (hereinafter simply the cylinder). There is no need to be scared when the lid moves away from the case, it may seem that it is moving away due to the influence of the spring, during reassembly it will seem to you that it does not fit into place, just continue to carefully and alternately tighten the bolts diagonally, then everything will fall into place ...
Carefully inspect the contents and remember (you can take a photo) what stood where and how (more attention should be paid to the position of the cylinder). You can twist the power steering pulley and gently check with tweezers how the blades move in the grooves of the shaft.
All parts should be pulled out without effort, since they do not have any fixations, but the central axis is fixed rigidly, it cannot be removed.
We inspect the shaft from the back side, parts (power steering body and cover wall) touching them, for scoring or grooves, everything is perfect for me.
Now we take out the entire internal economy on "clean" rags and begin to study it.
We carefully examine the shaft, all its grooves have very sharp edges on all sides. One of the end sides of each groove has a pronounced sharpening inward, which, when the blade moves inside the groove with a constant slope to this side, will greatly complicate its movement (this may be the first component of the poor operation of the power steering). The lateral parts of the grooves of the shaft are also "sharpened", this can be felt if you slide your finger in different directions along the end (outer circumference), as well as along the lateral parts of the shaft in different directions. The rest of the shaft is perfect, does not have any flaws and notches.
The faults were found, now we are starting to eliminate them.
We need a rag, white alcohol, sandpaper with a grit of P1000 / P1500 / P2000, a triangular file, a 12mm drill (or more) and an electric drill. With the shaft, everything is much simpler, you need a P1500 sandpaper and we begin to clean all the edges of the grooves on the shaft (we clean the outer and lateral on both sides) in all possible ways. We work without fanaticism, the main task is to remove only sharp burrs.
For one thing, you can immediately polish both sides of the shaft on a flat surface, it is advisable to use P2000 sandpaper.
Next, you need to check the result of our work, check it visually and by touch, everything is perfectly smooth and does not cling.
The most difficult thing will have to do with the surface of the cylinder, I personally have nothing simpler, I have not figured out how to make a spherical grinder from a skin, a drill and a thick drill (F12). To begin with, we take a P1000 skin and such a drill, which can be crammed into a drill.
Next, you need to tightly wind the skin against the rotation of the drill, in two or three turns, there should be no gaps.
Holding the tightly twisted structure, you need to insert it into the drill (clamp the skin too).
Then, in the most convenient ways for you, we carefully begin to grind the cylinder, you need to grind evenly, press the cylinder tightly and move it relative to the axis of rotation (at maximum speed). As the skin is eaten, we change it, as a result we reach the smallest skin P2000.
The desired result is obtained,
now everything must be thoroughly wiped with a path with white alcohol. The shaft itself with blades can be rinsed in it.
After we start the assembly, everything is put in the reverse order of removal.
It's no secret that power steering is often installed on cars. They are both electrical and hydraulic. The hydraulic device has a special pump that pumps fluid, which helps the driver turn the steering wheel. Naturally, this mechanism is faulty and can often become unusable. On a hydraulic booster, an electric pump often becomes unusable.
- If you notice that the steering wheel began to spin with difficulty on your car, then this is the first reason for the pump to break down.
- Accompanied by this, the steering wheel can only turn tightly on the spot, and when driving, everything is fine, as in a car without a hydraulic booster.
- It often happens that in the warm season, the steering wheel still turns on a cold one without effort, but as soon as the car warms up, it starts spinning tighter, as if the pump were turned off. And in the cold season this is not so manifested, because the heat is not enough for this.
Of course, every driver strives to ensure that all units work correctly on his car, ensuring comfortable and safe driving. The power steering pump is no exception. Power steering pump repair is most often done by hand, because at a car service station they take money for this service, and you can do everything for free with your own hands.
- First of all, in order to repair the power steering pump of a car with your own hands, it must be removed from the car. On each car, it is attached in its own way, in order to remove it, you will need to read a book on the operation of the car, or find a removal scheme on the Internet.
- So, having removed the pump, you need to start disassembling it. This must be done in order to find out the cause of the breakdown. It may turn out that it will be necessary to replace the power steering pump, because the faulty one cannot be repaired, or the repair will be more expensive than a new one.
- After the hydraulic power steering pump has been removed, all the fluid must be drained from it. This process will not take long or inconvenience. To do this, it is better to prepare the container so that the liquid does not spread across the garage floor or in the yard. It is not recommended to refill the old fluid, because it has already exhausted its resource.
- Having drained all the liquid from the pump, you should proceed to disassemble the pump itself. There are 4 bolts on the back that secure the cover. So you need to unscrew it in order to gain access to the entire mechanism.
- Having unscrewed the bolts, you can start removing this cover. This must be done carefully so as not to damage the gasket. This is very important, because not all stores and even cities can find this gasket.
In fact, this is the whole process of disassembling the pump. Having completed it, we proceed to inspect all parts to determine a breakdown. The main thing is to remember how all the details were installed, for this you can take photographs.
The main attention should be paid to the position of the cylinder. All parts except for the axis in the center can be removed without effort, because they are not attached in any way.
It is important to inspect everything visually, not a single detail should be overlooked.
- First of all, you should remove the shaft and inspect its inner part for defects.
- After examining him, you need to look at the part to which he touches during work. If everything is in order, then proceed to inspect the following details.
- The next part is the cylinder, it must be inspected from both sides. Particular attention should be paid to the diagonal of the working part of the cylinder, if there are oil traces on it, then you will have to grind the part. If your part has such damage, then you need to put it aside and continue to inspect all parts.
- After that, you need to inspect the shaft for burrs that can interfere with the movement of the blades. This can be done visually or by touching the surfaces of the blades and phases. If your shaft has such faults, then you need to eliminate them.
All these faults can be eliminated by grinding. In order to remove burrs on the shaft, you need to use special sandpaper. There are three ways to use it.
- The first method is to sand the edges with one side of the sandpaper.
- The second way is to fold the paper in two layers. This will help clean two sides at once.
- The third way is to use a small file and use it to press the paper to the surface.
In fact, all these methods are convenient in their own way, and everyone will choose their own way. Having cleaned the shaft, you also need to clean the blades so that they can easily walk through these phases.Then you need to start grinding the cylinder. This must also be done with sandpaper. Some people use an electric drill for this. In this case, you need to find the largest drill by diameter and wrap it with paper in several layers. The paper should fit snugly around the drill without any gaps so as not to leave defects on the cylinder body.
It should be noted that the paper must be wrapped around the drill body against the rotation of the drill. Then insert the drill and clamp it together with sandpaper.
After that, we proceed to sanding the surface. This must be done with caution, periodically checking the working part of the cylinder.
After polishing all the parts, you can start assembling. To put everything together correctly, you should be guided by photographs that were taken during analysis or from memory. Before installing the cover, turn the pump pulley to ensure that it is working properly. After everything has been checked, and you are sure that the pump is fully functional, you can replace the cover and put the pump in place. It should be noted that the liquid has been drained from the pump, therefore it must be topped up.
It often happens that the hydraulic power steering pump becomes unusable, and many try to make it with their own hands. Fortunately, many people manage to repair the power steering pump of a car with their own hands. This happens in almost all cases, except that the pump must be replaced with a new one.
repair, information for maintenance, car news, reviews, diagnostics, forum
Those who have already encountered car breakdowns know for sure that it will be a little costly to make repairs in service centers. Much easier than ever, the most important thing is to do it yourself. With a little knowledge and effort to this process. The inherent content of the material will allow you to get acquainted with an independent repair of the power steering pump. You can also carry out diagnostics to identify malfunctions in the operation of the pump itself.
The most difficult dismantling is to release the pump from disconnecting the supply hoses with pipes and draining the hydraulic fluid. Initially, we loosen the belt or uncouple the gear drive, then unscrew it from the attachment to the engine block. We flush the housing from the accumulation of dirt.
Next, we disassemble the pump body itself, very carefully remembering this moment how everything is attached (or otherwise there will be a problem during assembly), then we thoroughly clean all the components from the inside from dirt.
4. Uneven surface of the inner part of the cylinder (stator).
We examine the rotor, paying attention to the grooves: their edges should be smooth and sharp, without chips and notches.
Next, we look at the inner working surface of the stator, it often happens that its wear is the cause of problems with the power steering pump.
All that we may need in the upcoming work is this!
- alcohol (best of all White Spirit, aka solvent gasoline or a can of WD40 liquid);
- sandpaper (from P2000 to P1000);
- cloth or soft paint brush;
- small file or file;
- electric drill;

Rotor cleaning is reduced to the elimination of irregularities and burrs of the grooves, as well as to grinding the rotor surface.
Gloved work is best as the edges of the rotor are very sharp; try to keep the movement smooth and even for a smoother finish.
There is no consensus on how to grind the inner surface of the stator; if you have enough patience and time, you can try manual leveling.
The algorithm is as follows:
First, we make a rough cleaning with a file, then smooth it with coarse sandpaper and finish it with a sandpaper.
It is easier to adapt an electric drill using a drill and sandpaper. You will get a kind of mini-grinder by screwing sandpaper onto a drill with a diameter of at least 12 mm (against the movement of the drill rotation). When grinding with a self-made unit, you must try to evenly distribute the load over the entire surface, unnecessarily not zealous and not forgetting to change the skin from coarse to the finest.

After finishing with grinding, we will bring the power steering pump to its original working condition. Carrying out the assembly process in the reverse order, it will be useful to first check whether the shaft rotates easily inside the pump itself.
The final touch will be to install the cover in place, with the preliminary installation of a new gasket. During the assembly process, the cover is easily tightened with four bolts. It is best to pull them crosswise, thereby achieving an even, accurate fit of the cover plane to the stator.
Now the pump is now again in a new state. Nevertheless, it will take a long time before you will have to repeat this procedure again!
Watch a video lesson of self-repair of the power steering pump.
Watch a video lesson how the power steering system works.
Date of publication: April 26, 2016.
Power steering (or abbreviated power steering) is a steering element designed to reduce the force of human influence on turning the steering wheel. Thanks to this device, the life of motorists has become much easier over the past few decades. In addition to the fact that the power steering allows you to make a minimum of effort to turn the steering wheel, it also improves the maneuverability of the vehicle, as a result of which the driver feels more comfortable.
Like any other part of the car, the hydraulic booster can fail. You can fix it both in a car service and on your own. Unlike the installation of electrics and such auxiliary elements as parking sensors or alarms, power steering requires a lot of experience in such repair work. Therefore, if you are not confident in your abilities, it is better to turn to specialists, but if your skills allow you to do such work, then you can safely proceed with the repair. First of all, you need to make sure that the problem lies precisely with the power steering.
There are several signs, based on which we can conclude that it is time to do the power steering:
- If you notice that the power steering wheel is spinning tightly. Moreover, this happens at idle, and with an increase in speed, the problem disappears.
- When, when turning the steering shaft, you hear an unpleasant whistling sound (most likely, the power steering belt whistles).
- The bearings began to whistle.
Power steering failure is most often associated with problems in the hydraulics, or rather, with the working fluid. Based on this, the following could have happened:
- Liquid began to flow out of the hydraulic booster, as a result of which its level in the tank and pipeline dropped.
- The liquid was not changed for a long time or a poor-quality composition was used.
- Foreign matter has entered the system.
- The liquid does not circulate in the system, as a result of which the hydraulic unit overheats.
If we talk about mechanical damage, then the most common problem is a torn power steering belt or pump malfunction. You can fix these breakdowns yourself.
In order to tighten the power steering belt you will need:
Before tightening the power steering belt, the car must be driven into a pit and the parking brake must be applied. After that, determine where the power steering is installed. If your vehicle has a transverse engine, remove the front wheel from the side of the pulleys and belts. Raise the car on a jack and fix it. Then follow these steps:
- Remove the protective apron from the motor.To do this, using a screwdriver, remove all plastic clips, and then use a socket wrench to remove the existing fixing bolts.
- Using a flashlight, find where the power steering is attached, more precisely, its adjusting bolt.
- Using a spanner wrench, slowly turn the adjusting bolt and turn it until the belt is taut.
- Perform a voltage test. To do this, grasp the belt itself (between the pulleys) with your fingers, pull it back and release it sharply. If the belt makes a short and dull sound, it means that you did everything correctly and the tension is optimal. If you hear a long and high-pitched "squeak" - this indicates excessive tension. In this situation, the belt must be loosened.
If you tighten the power steering belt too much, you risk damaging the bearings. It is better to adhere to the optimal tension force, about 5-7 kilograms. You can check the tension force during operation, for this you need to press on the belt in the middle with a force equal to 3-4 kilograms. If its length is small, and the pulleys are located close to each other, then it should push through by 3-5 millimeters. In the case when the distance is 40-50 centimeters, it should be pushed by 1.5-2 centimeters.
The next problem of power steering is pumping equipment.
You can try to sort out this element, but quite often it becomes easier to buy a repair kit for the power steering pump, the cost of which ranges from 4,000 to 50,000 rubles, depending on the make and model of your car.
Whether you are using a new pump or looking to repair an old one, this element has yet to be reached. To do this, you will need:
- keys for 12, 13, 14 and 24;
- circlip remover;
- 2 copper washers, back shroud gasket, 2 o-rings and gland. All this can be replaced with a ready-made recomplement;
- bearing;
- a container and a syringe that will be needed to pump fluid from the power steering;
- sandpaper and rags.
It will also not be superfluous to prepare a working workbench so that you can safely disassemble the pump on it. It is better to immediately spread cardboard or polyethylene for this. Next, let's get to work, for this:
- Lower the axle bolt slightly that holds the pump unit to the bracket. To do this, use a special hole in the pulley.
- Unscrew the lock nut completely and remove the power steering belt.
- Pump out the hydraulic fluid with a syringe. In order for the oil to drain completely, it is necessary to turn the steering wheel in one direction and the other until it stops several times.
- Find the clamp that is located on the hose coming from the expansion tank and loosen it. The pipeline can then be removed.
- Unscrew the securing bolt that holds the high pressure hose (it will go from the pump to the system).
- Remove the axle bolt that secures the pump to the bracket and insert a screwdriver or any other metal rod of suitable diameter in its place. This will block the pulley.
- Unscrew the nut holding the pump pulley.
- Pull the pump set out and place it on a workbench. Use rags to remove dirt and oil.
- Using a puller, remove the bearing retaining ring.
- Remove the screws holding the rear cover. It can then be carefully removed using a small screwdriver.
- Remove the rotor blades and carefully place them in the correct order.
Healthy! Be sure to remember the position of the blades while they are still assembled. Then prepare the numbered sheets of paper.
- Remove the plate, as well as all the parts that are under it.
- Tap the shaft out gently with a screwdriver.
- Press the bearing off the pump shaft.
- Replace the bearing with a new one.
- Check the rest of the pump unit. You may notice some kind of imperfection or signs of wear.
- Clean all surfaces from dirt and get rid of roughness with sandpaper.
Healthy! Even a routine cleaning of all elements of the pump unit allows you to extend the operation of the mechanism without the need to replace any elements.
- Reassemble the system in reverse order. In this case, do not forget to change the oil seal and O-rings.
If you just change the power steering pump to a new one, then the work will be much less, but in order to save money, you can try to extend the "life" of the old pump unit.
If you want to purchase a new pump, it is better to give preference to vane (vane) models. They are most popular today due to their long service life and excellent performance.
Also, the reason for the breakdown of the power steering can be associated with the ingress of air into the system. To remove air bubbles in this case, it is necessary to use specialized equipment, which not every car owner can boast of. Therefore, in this case, it will be cheaper to contact a car service.
| Video (click to play). |
We have considered possible damage to the power steering, which you can fix yourself. If you have not performed such work before, be sure to read the recommendations of the manufacturer of your car and follow the instructions. In order to facilitate the assembly of the power steering, it is better to prepare a drawing of the power steering, on which all its elements will be marked. Laying out each detail on a separate numbered piece of paper, you will not get confused. Remember, the power steering system is directly responsible for the handling of the car, and, accordingly, for the lives of passengers.

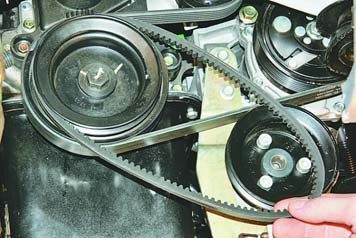
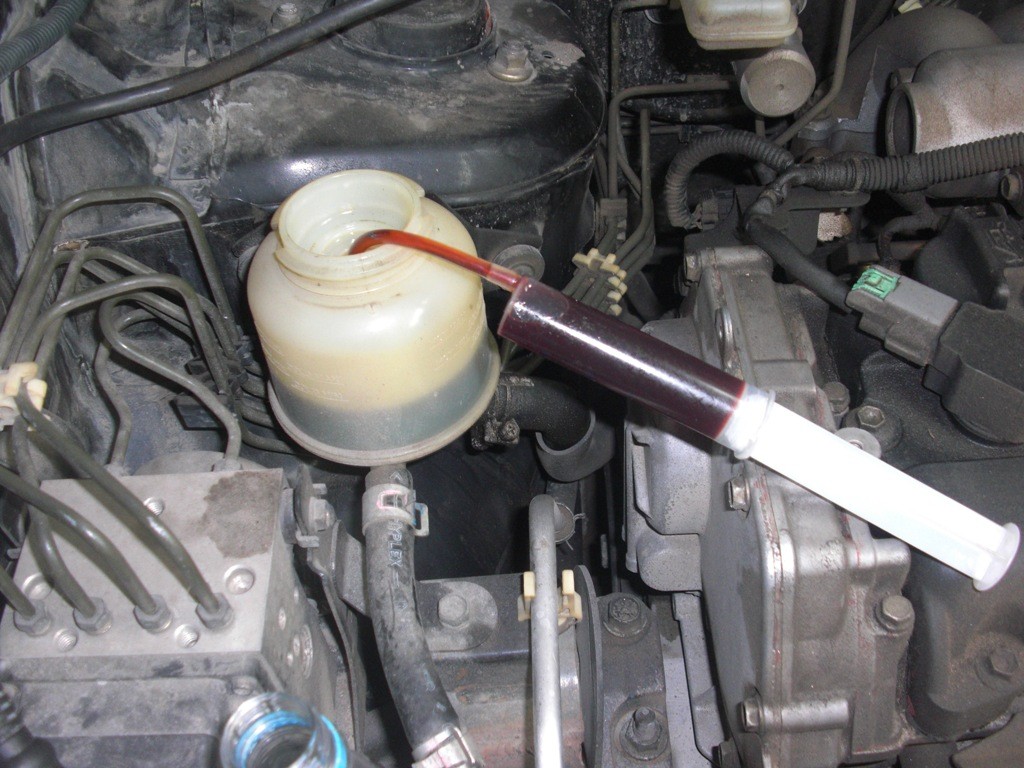
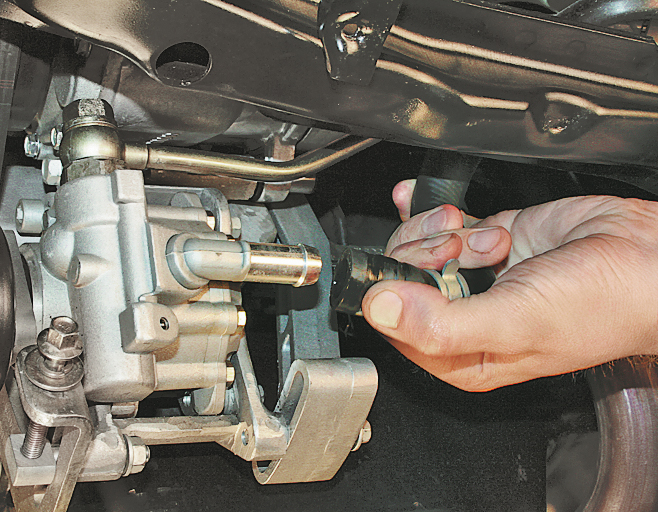
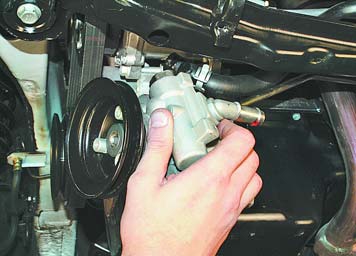 Remove the axle bolt that secures the pump to the bracket and replace it with a screwdriver or a metal rod of a suitable diameter in order to lock the pulley. Then unscrew the nut that secures the pump pulley.