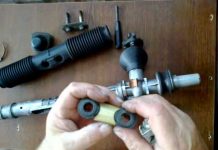
Unfortunately I didn't take a photo. I take a picture of how I will collect.
The procedure is actually not that difficult, but it takes patience.
Remove the expansion tank (pull it up), disconnect the tube. Disconnect the alternator wiring harness from the body mount. Remove the expansion tank mount.
Now you need to remove the alternator / air conditioner belt.
Next, we throw off the belt (here you can check the condition of the compressor bearing by turning the pulley by hand).
Disconnect, if not yet disconnected, the negative terminal of the battery.
We disconnect the excitation winding terminal, unscrew the power plus from the generator, the black wire - the ground (here a small short key is desirable - the bolt is inconveniently located).
We remove the wiring harness from the mount, remove it so as not to interfere.
The generator is mounted on three bolts, two at the front and one at the back at the bottom.
All now, having found the position in which it will pass, we take it out towards the washer reservoir.
We unscrew the four pins on the sides, unscrew all the screws on the back of the generator and the nut on the plus. Gently pull off the back cover with a light hammer - it will first jump off the stator winding, then with a little effort, the rear bearing is removed from the housing and remains on the rotor. (do not lose the plastic washer on the positive terminal.)
Now you can pry out the stator from the front cover and carefully remove it from the mesh with the brushes. To remove the diode bridge, we solder it with a powerful soldering iron from the stator. It only hangs on wires.
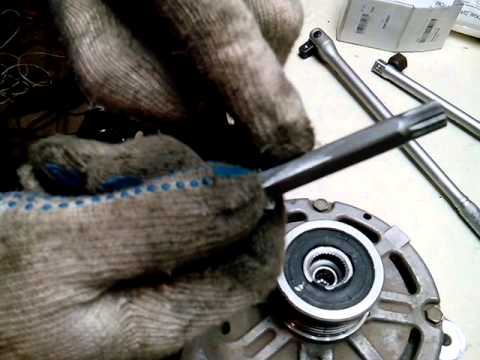
Now the most difficult thing is to unscrew the pulley. Here you need a good vise and a 24-bit head and a pipe for extra effort.
We tighten the pulley through two pieces of wood in a vice (the cuttings from old ski poles fit me). We pull the vise with the pipe. I don’t know how to describe the effort, but it’s very big. Probably better by trial and error - if you do not make it, it will simply turn. The pulley is very strong and not wrinkled in the least. We are trying to unscrew the nut (also with a pipe). It didn’t work - we drag it out and try again. It is advisable to periodically spray VDshkoy on the pulley nut, knock with a hammer and dance with a tambourine.
We put the generator with the ears of the front cover on two bricks and knock the rotor down through the piece of wood (we catch it so as not to break it).
Now you can change the front bearing (it is behind the cover and can be easily removed from the housing if not distorted).
I have not been able to knock the rear bearing off the shaft yet :(. Here you will probably have to get a puller.
I don’t know how to collect it yet, but I think in reverse order))).
And do not repeat my mistakes - be careful with the diode bridge - when I hammered the pins into place in it - I broke one diode :(.
In order to tighten the alternator belt on the Nissan Note, you need to: raise the car on a jack, remove the wheel, unscrew and remove the fender liner (it is held on 3 self-tapping screws from the bottom and 3 clips).Now we find the tension roller and loosen the fastening nut. Behind the tensioner roller there is a bolt (turnkey 13), and it needs to be tightened to tension the belt.
There are 2 ways to get to the tensioner pulley bolt. It is necessary to remove the radiator grill, which rests on clips from above, 2 latches at the edges of the headlights, and many latches at the bottom of the grille (they snap off by pressing the middle down and pulling the grille towards you). Next, you still need to remove 2 pistons from the plastic frame at the headlight, now you can get to the bolt.
The second method is easier, but not more convenient. From the side of the removed wheel arch liner, we put our hand behind the roller, feel and put the key on the bolt, and slowly twist it.
Check the adjustment by pressing your finger on the belt from below, the deflection of the old belt is 4.8-5.3 mm, the new one is 4.2-4.5 mm. If it is impossible to determine by eye, you can use the steelyard. After tensioning the belt, we tighten the tensioner roller nut and assemble everything in the reverse order.
VIDEO
How to replace the alternator pulley on Nissan is shown in the video and described in this manual:
We completely remove the generator from the car
We clean it from dirt
Now we need two keys. The first key - SP-Line M10 - will be inserted into the internal spline (spline on the shaft). Insert a special key for generators into the external slot. The key you need can be picked up at a car dealership. You can see what keys are needed in the video for replacing the generator pulley on a Nissan with your own hands.
The inner slot is twisted clockwise, the outer slot counterclockwise. The effort must be very great, so the repair is not quick.
It is strictly forbidden to use gas wrenches and vices during repairs. They will still not help remove the pulley, but they can damage it.
First of all, we will describe the problem itself: the charging lamp came on while the engine was running! Before swallowing validol and frantically figuring out the cost of the new "gene" in our minds, we get out of the car and cold-bloodedly open the hood, making sure that the drive belt is in place and not torn or weakened, all the wires are in place, open the trunk and, looking into its bowels, fetch out a mount, a wheel wrench or whatever you have there and, looking under the hood again, lightly knock on the generator case with your metal object. We look at the dashboard and, lo and behold, the charging is off! If so, then by 90% it can be argued that the generator brushes are to blame, which are stuck due to complete wear. Now that the diagnosis is clear, you can drive into the garage and start repairing.
Let's remove the “armor” from the bottom of the car for more convenient access to the generator from below. In addition, I personally also removed the radiator, since in the Example it is not difficult and does not take too much time, we drain the antifreeze through the lower radiator pipe, there is no need to drain from the engine block - just plug the pipes. Now there is much more space under the hood for removing the generator.
Now we turn off the wires and remove the generator tensioner.
Put the removed unit on your desktop with the pulley down and remove the back plastic cover with the logo of the famous “Magnetti - Marelli”.
Under the cover we see the brush assembly itself, the end of the rotor is closed with a plastic cover on a vertical slide. Gently pry it off with a screwdriver.
Having visually made sure that the suspicions about the brushes were not unfounded, we turn away everything unnecessary.
We remove the brush assembly from the generator. Gently prying the covers of the guides (also installed in the slide), remove them.
and we are convinced once again that the brushes are ordered to live long. Then we have two options: Option one - we buy a new brush assembly and assemble everything in reverse order. But if there is no replacement at hand and there is nowhere to buy it in our village (just my case), but go as they say "NADA". we choose the second option and, remembering the precepts of Dr. Frankenstein, we revive the deceased.
To do this, we go to the nearest general store and buy a brush assembly for the VAZ generator. And we decisively cut off the new brushes together with the copper "pigtails" - conductors, there is no need to be greedy when cutting, it is better to remove the excess later.
We take out the remnants of the "native" brushes from the old assembly and re-perform the cutting ritual with them, as a result we will have new brushes with "pigtails" in our hands and the same remnants of conductors from the old ones with terminals at the ends. With the help of a soldering iron and our own eloquence, we bring them together, not forgetting to adjust the required length of the "braids" and the brushes themselves in place (if necessary, we bring them to the size of the guides with an emery cloth or a bar, carefully - the graphite is soft).
We clean the internals of the generator from graphite dust. We carefully sink the new brushes using a sharp (not metal - so as not to crush) object, and install the assembly in place. Further assembly is carried out in the sequence already known to us. We return the “gene” to its place and enjoy life.
Today I changed my belt, unfortunately I didn't take a photo, I'm sorry, but I can explain in pictures! Smile The way they showed it in the service, I never figured out how to crawl, so I decided to just remove the bumper. Smile Filmed [. ]
Withdrawal. 1. Drain the coolant. Do not open the cover on a hot motor. 2. Remove the air duct (intake). 3. Remove the reservoir as follows. - disconnect the hoses from the tank. - disengage the latch (A) in the direction indicated by the black [. ]
Good day ... I wanted to share one trouble that happened to my Tiida ... Having traveled around the winter without breakdowns and complaints, the following happened: As I understood, Tiida's main radiator and the radiator of the air conditioner are located close to each other. [. ]
And since it is already clear from the name, my right hub in front did not just buzz, but howl like a hellish howl. Naturally, everything started harmlessly with a slight hum at 50-60 km, and after with [. ]
There is nothing complicated at all - it's even easier than changing the timing belt for an 8kl vase. The key is 13 + the head is 13. The bolt that holds the tension roller itself is loosened (maybe this is not necessary), then it looses [. ]
Good evening. I replaced the upper and lower engine mountings. I took the original. The replacement took about 10 minutes in general. In general, nothing complicated. It felt much more pleasant, the “trembling” of the gas pedal and steering wheel on [. ]
STARGEN + offers you generator diagnostics and repair Nissan tiida in an hour!
Our technicians perform free diagnostics of all parts on special equipment, so even hidden defects that are not visible during manual and visual diagnostics are revealed. Further, the unit is disassembled and the cause of the malfunction is determined. We inform you about the parts that need to be replaced during the repair of the generator Nissan tiida as well as the cost of repairs. After, if it is advisable to repair the generator, we carry out further work.
Diagnostics of the repaired unit is carried out on a stand that simulates operation on a car in full load mode.
We repair generators for both passenger cars and trucks and special equipment.
We always have spare parts and components for the repair of generators in stock Nissan tiida ... If it is not practical to make repairs, we will offer you a new or remanufactured generator. Possibly a ready-made generator with a 6 month warranty. on Nissan Tiida available.
You can contact our specialists right now by phone:
or drive up to the address: Balashikha, Soviet 42
the nearest metro stations from us: Shchelkovskaya, Pervomaiskaya, Perovo, Novogireevo, Novokosino. the nearest service areas: North-Eastern Administrative District, Entuziastov Highway, Gorkovskoe Highway, Shchelkovskoe Highway, Nosovikhinskoe Highway, Zheleznodorozhny, Reutov, Shchelkovo, Nikolsko-Arkhangelsky, Saltykovka, Kuchino, Staraya Kupavna, Losino-Petrovsky, Elektrougli, Noginsk.
Raccoon
Group: Users
Raccoon
Group: Users
Raccoon
Group: Users
Raccoon
Group: Users
Raccoon-nosed
Group: Users
Post has been edited gavrilov3 – 19.7.2017, 20:16
Raccoon
Group: Users
Raccoon-nosed
Group: Users
Post has been edited gavrilov3 – 19.7.2017, 20:16
Barbados raccoon
Group: Users
Replaced the brushes today.
In general, nothing complicated, the savings are really decent.
White-nosed coati
Group: Users
The other day I changed the brushes. Mileage 180,000 km.
In general, I want to summarize: With a mileage of about 200 thousand, a simple replacement of brushes will help to avoid an expensive replacement of the generator, but this is not for long - the collector of my generator was quite worn out (about 2 mm), and how long it will last is unknown.
To the topic "Nissan generator repair" read the same:
Reasons for removing and disassembling the generator :
Strong noise effect when the generator is running. The bearings are worn out and are noisy.
The need to replace the overrunning alternator clutch.
To carry out the work you will need:
Ratchet and head set.
A set of spanners (in some places they are more convenient)
Jack and balonnik
Desirable: WD 40
And so, on their own or by instruction ( How to remove a generator from a Nissan Teana ) you obtained a generator from the engine compartment.
Now we will disassemble it.
We unscrew the through (side) bolts. They hold 2 halves. (Photo 1)
We unscrew and remove the nuts from the back cover (photo 2)
All back cover removed. There you can drive (if desired) a new bearing. Since it costs a penny, I did it. The old one was cut with a grinder. Now I think I need to buy some kind of puller, as it often comes in handy.
Scored with a suitable head size.
At this stage, you have already disassembled the entire generator. But if you did all this in order to get to the overrunning alternator clutch, read on. Actually, we did all this, yes, in order to fix the rotor when removing the clutch.
Assessment of a car owner named Artyom: Price-quality ...
Category: Vehicle device
Original name: Zamijeniti alternator pojas Nissan Tiida
Description: The dimensions are as follows, length - 3222, width - 1100, height - 1460 mm. The wheelbase is 2743 mm. The ground clearance is 173 mm. The car is equipped with a hybrid power unit. The 4-cylinder engine is equipped with a system that provides the output power of the motor. There are 4 valves per cylinder. Diameter of one
Below you can see the technical properties of replacing the Nissan Tiida alternator belt. Express your worldview about cars in the comments.
Release date: 13.09.2014
Laughter in the subject: In the zoo, all animals behave decently, except for monkeys. One feels that it is already five minutes before the people.
The Nissan Tiida gasoline generator is a repairable unit. In case of any breakdown, it is more expedient to repair it at a service station with a guarantee, rather than purchase a contract or a new expensive unit.
The main failures of electrical equipment Nissan Tiida are:
breakdown of the winding;
failure of the relay-regulator;
failure of the diode bridge;
wear of current-collecting brushes;
breakdown and beating of the rotor;
natural wear of bearings.
Some of the symptoms that the car owner associates with a faulty alternator are indications of other problems. For example, with poor contact or problems with the contact group of the ignition lock. A blinking battery icon does not always mean that the generator itself is faulty - the matter may be in a failed relay.
The restoration of electrical equipment at a specialized service station involves the following procedures:
initial inspection and visual diagnostics of the generator;
dismantling;
diagnostics at the load stand;
disassembly of the generator and replacement of failed parts;
assembly;
repeated diagnostics;
installation on the car.
Turning to the DDCAR car service for the repair of the Nissan Tiida generator, you can be sure that you will receive quality services, original spare parts and prompt repair. The equipment of our workshop allows us to identify any malfunctions of the generator and eliminate them. The prices for our services can be called the most affordable in Moscow. To make an appointment for repairs, call 8 (495) 120-75-03 or use the feedback form. We provide all clients with a 6-month warranty for work.
STARGEN + offers you generator diagnostics and repair Nissan tiida in an hour!
Our technicians perform free diagnostics of all parts on special equipment, so even hidden defects that are not visible during manual and visual diagnostics are revealed. Further, the unit is disassembled and the cause of the malfunction is determined. We inform you about the parts that need to be replaced during the repair of the generator Nissan tiida as well as the cost of repairs. After, if it is advisable to repair the generator, we carry out further work.
Diagnostics of the repaired unit is carried out on a stand that simulates operation on a car in full load mode.
We repair generators for both passenger cars and trucks and special equipment.
We always have spare parts and components for the repair of generators in stock Nissan tiida ... If it is not practical to make repairs, we will offer you a new or remanufactured generator. Possibly a ready-made generator with a 6 month warranty. on Nissan Tiida available.
You can contact our specialists right now by phone:
or drive up to the address: Balashikha, Soviet 42
the nearest metro stations from us: Shchelkovskaya, Pervomaiskaya, Perovo, Novogireevo, Novokosino. the nearest service areas: North-Eastern Administrative District, Entuziastov Highway, Gorkovskoe Highway, Shchelkovskoe Highway, Nosovikhinskoe Highway, Zheleznodorozhny, Reutov, Shchelkovo, Nikolsko-Arkhangelsky, Saltykovka, Kuchino, Staraya Kupavna, Losino-Petrovsky, Elektrougli, Noginsk.
0: 210, tired of a terrible squeak in the morning while the car is warming up.
Headings, batteries like pull up belt generator on Nissan tiida.
Flash 39 Experienced 05′.5AT 4WD Japan With us since: Messages: 544 Added: Sat Apr 24, 2010 9:40 pm Post subject: Re: Substitution alternator belt Anton-24kk wrote: Picked up now, Pitwork came, written by Made in Indonesia.
The answer to the request for the request in the topic of replacing the alternator belt nissan tiida run across, we are waiting for you.
I took off the bumper - I think it's not worth explaining how to shoot, it was described here and there in the forum;
Nissan Tiida received an adaptation package for the Russian market.
I have after installation belt has grown up a little, squeals a little, you need pull up , but there is no lift, when you think about removing the bumper again, you feel reluctant to go!
VIDEO
At low temperatures and dampness, extraneous sounds appear. The stator / rotor of the generator and on the Izh planet 5. Izh how to check the armature. How to change the timing belt on a volvo s60 with your own. Izh planet 5 with magneto how to check the anchor installation of the generator on the ilh planet 3. Rollers belt new, not unique. How to check the motorcycle anchor speed test viper r1 Java 638. Generator wiring Izh planet 5. How to replace the belt with your own hands? Changing the timing strap on the Daewoo Nexia 16 valve. How to independently replace the alternator belt on the Peugeot 308 and other models? Suspicion.
VIDEO
Pull up generator belt .
Belt weakened, put a new one through the bottom and screwed it back.
I decided to replace the roller tensioner bearings, there were 2 of them, not 1, as they say on other forums.
When trying to unscrew the pressure roller nut, all its faces were enchanted (I don't know how they screw it up so much.).
Two fasteners have to be unscrewed: the nut of the tensioner roller (not automatic and the tensioning bolt, which actually needs a cunning reversible sprocket with a ratchet.
Then they came for Catholics, and I said nothing because I was a Protestant.
Scr Newbie 06′.5CVT Japan With us since: Messages: 20 Location: Rostov Added: Sun Apr 25, 2010 10:26 am Post subject: Here is this belt I have / img _ Blue blood, variator, 06 edition _Griha_ Newbie 05 ′ Nissan Note With us since: Messages: 15 Added.
Mobilis 49 GASIROVK MAIN 4MT Luxury With us since: Messages: 2600 Location: Rostov-Papa Added: Sat May 08, 2010 9:10 pm Post subject: Re: Replacement alternator belt Anton-24kk wrote: Today changed belt Added to the FAQ.
The difference in speed between 100 and 180 km / h is felt only by the cars flashing in the right lane, and (O horror!) By the angry-contented faces of the traffic cops, periodically waving striped sticks.
The following parts were purchased to replace the tensioner belt:
2 bearings Koyo 63012RSCM = 600 rubles.
Tired of a terrible squeak in the morning while the car is warming up. I decided to replace the roller tensioner bearings, there were 2 of them, not 1, as they say on other forums. Carried out the correct belt tension (found in the manual). Now when starting the car - silence!
you need two such bearings
a bushing is pressed into the bearing bore, pressed out with a head
then pressed out the bearing
these are the bearings there, the grease leaked out, there are noticeable jamming after scrolling
found it in the operation book. Adjust the tension of the accessory drive belt. To do this, press your finger on the strand of the belt between the crankshaft pulleys and the air conditioning compressor. When pressed with a force of 98N (10 kg), the deflection H of the old belt should be 4.8-5.3 mm, and the new belt should be 4.2-4.5 mm.
And we measure the distance (as indicated in the text). The belt was pulled by a plate connected to the steelyard through a bent electrode (for convenience)
Not all novice drivers know how to change the oil in an internal combustion engine themselves. Therefore, this article is for “dummies”. After the purchase
Show control panel
Recently tried to change the belt,
It is not clear in the video what key was used to crawl to the locknut.
extra crap. The generator does not need to be turned! the roller has loosened and pull everything out.
tell me, how much should the tensioner be tightened?
tension screw 10 or 13, like the roller nut?
if possible, pack also the process of tensioning the belt itself
unfortunately I will not show you. sold a typewriter. I didn't want to, but I had to. real estate is more important))
Hey
By the way, you really don't need to change the video! Let's take off the roller, carefully remove the anthers of the bearings, rinse it, put in Litol 24 and ride happily ever after.
For those who do this operation for the first time, the sequence is not clear. And so I will explain: 1. loosen the nut of the roller itself from the end. 2. And only then! we loosen the tensioner bolt (under the generator) otherwise people break the edges of the tensioner bolt.
Video (click to play).
Today I tore off the bolt, now I don’t know where to find it (((

