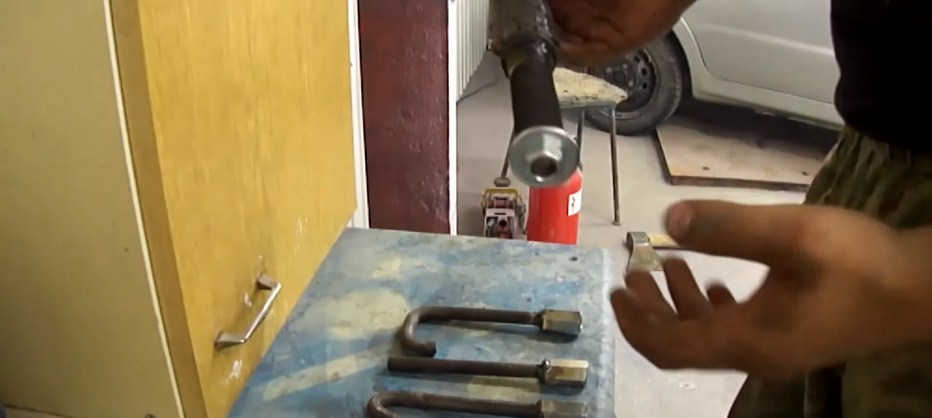
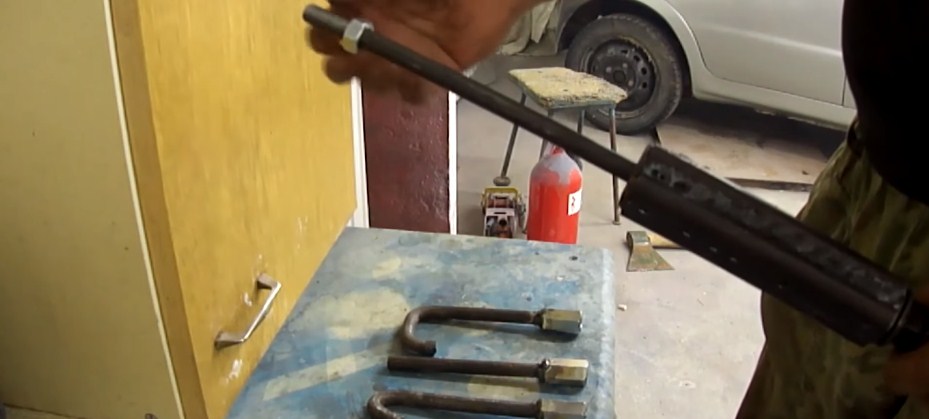
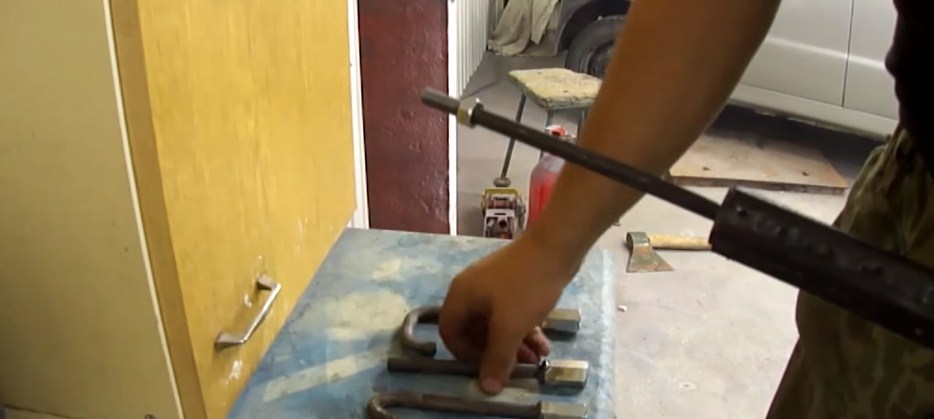
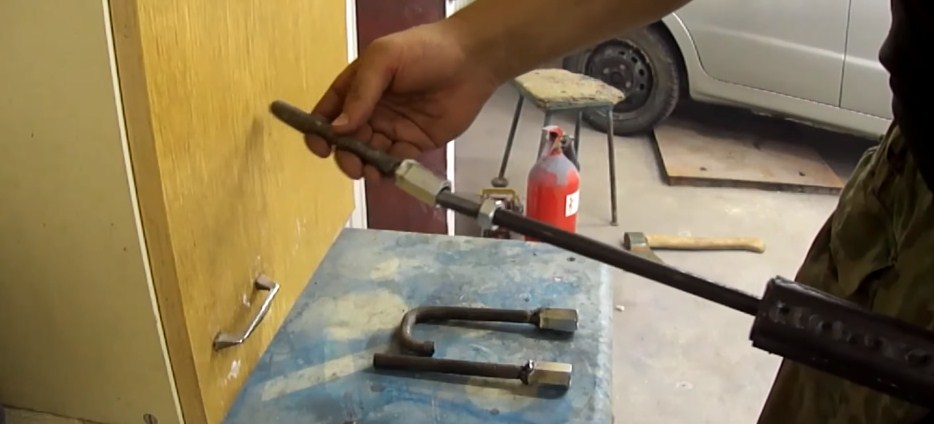
In detail: a reverse hammer for do-it-yourself body repair drawings from a real master for the site my.housecope.com.
The reverse hammer is a tool for car body repair and can be made by hand.
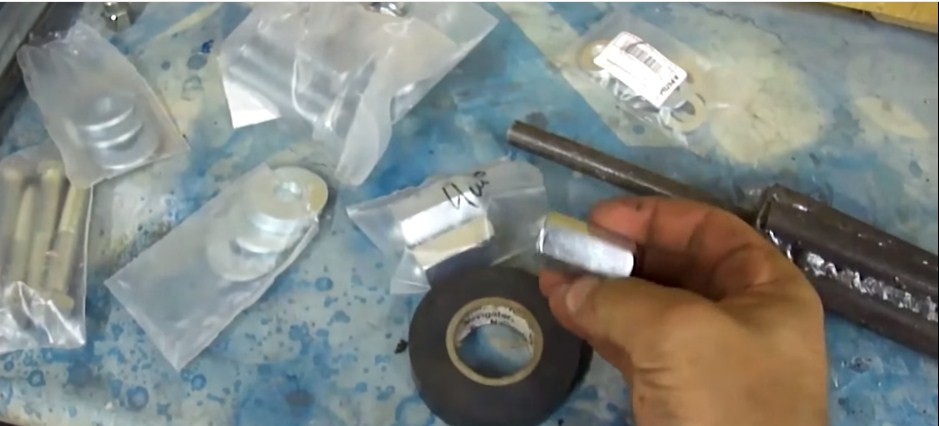
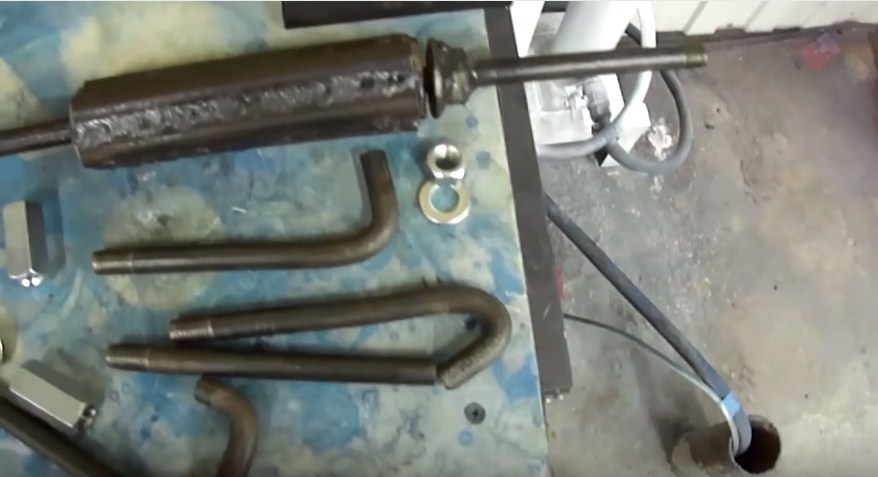
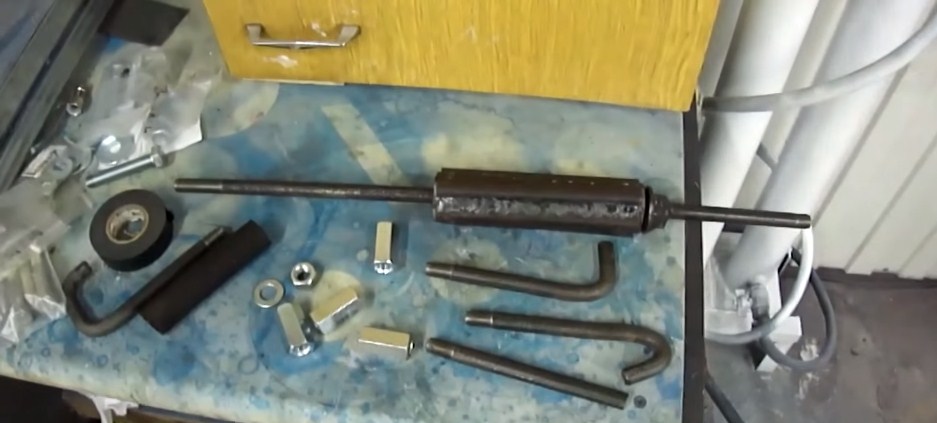
The product consists of several parts: a handle with a length of about 50 centimeters, two lock nuts with washers, weights and several hooks (other attachments, depending on the intended use).
The principle of operation is that a weight fixed on a metal bar strikes the lock nuts with each subsequent movement, thus exerting an effect on the fixed hook, which pulls out dents or bends of the deformed metal.
A high-quality reverse hammer can be made in a garage without the use of serious equipment and with minimal material costs. The manufacturing process, with all the necessary elements, takes about 1 hour.
Basic tools and materials for making a reverse hammer:
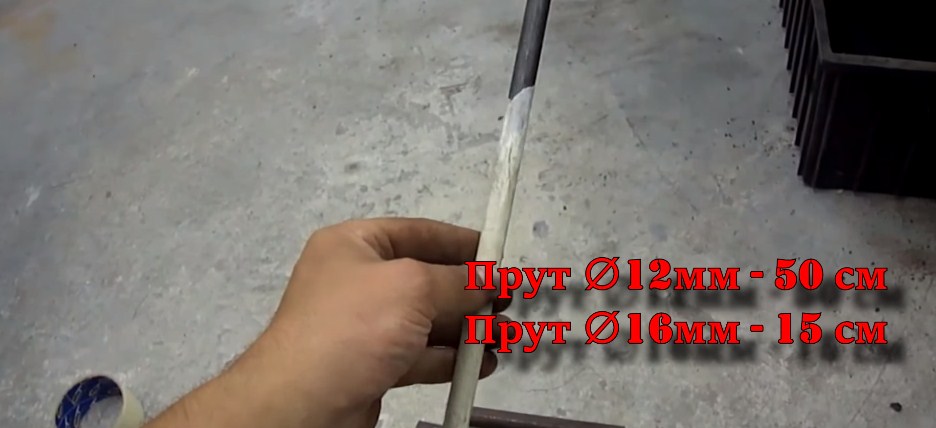
- Steel bar 12 mm, length about 50 cm;
- Electrical tape, adhesive tape;
- Steel bar 16 mm;
- Two large steel washers with nuts;
- Threading tool;
- Electric welding;
- Vise for fixing.
The reverse hammer manufacturing process begins with the preparation of the material. A metal rod 12 mm thick and 50 centimeters long will be used as a handle.
1. Making a movable "weight"
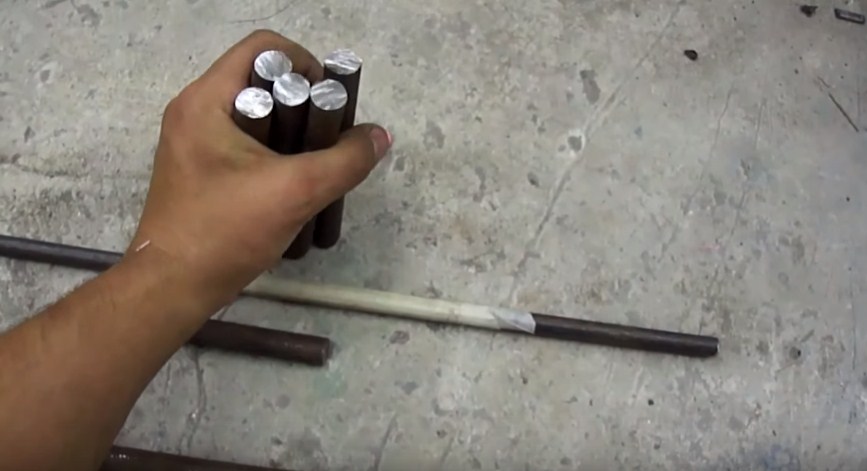
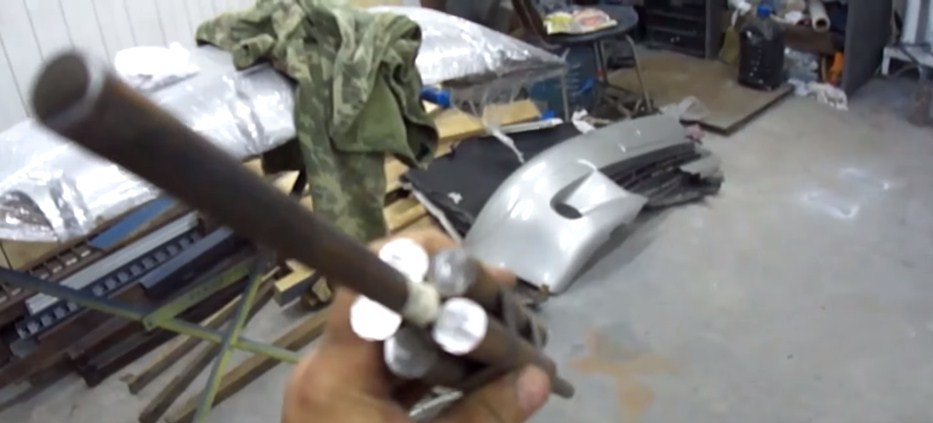
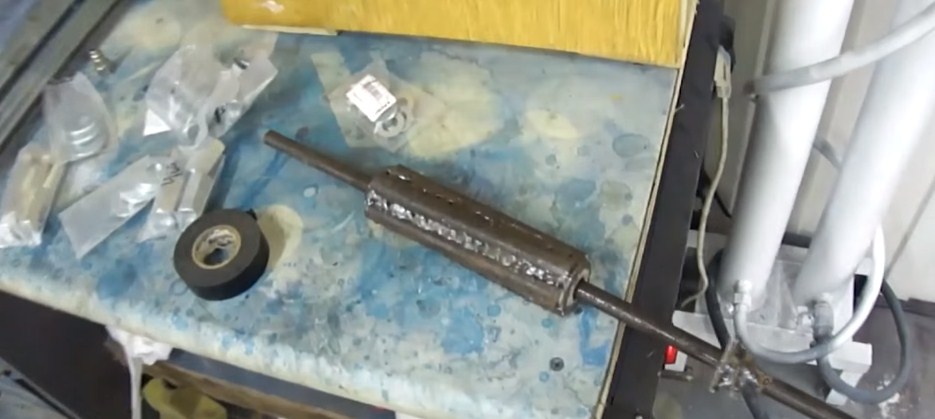
The counter hammer weight is made from a rod with a diameter of 16 mm. The rod is cut into 5 even parts, the length of which is 12-16 centimeters. The rods are fixed on the main handle with electrical tape, and then they are welded together with a longitudinal welding seam. It is important to consider that there is no weld slag on the surface of the handle.
| Video (click to play). |
2. Threading the top of the hammer handle
The thread is cut for a long nut by about 2-3 centimeters along the bar. This procedure should be carried out taking into account all angles, as it depends on how strong the reverse hammer for straightening will turn out.
3. Making bent hooks for a reverse hammer
These hooks are needed to align parts in different planes. The production of elements is carried out on an individual basis, depending on the needs of the user. The bending procedure is carried out using a sledgehammer and a stop.
4. Threading metal hooks
On ready-made hooks for a reverse hammer, threads are also cut to connect the two elements necessary for the operation of this tool with a long nut. The cutting should take place at an even angle so that the two connected parts are without distortions, otherwise the hook may break off the thread during the working process.
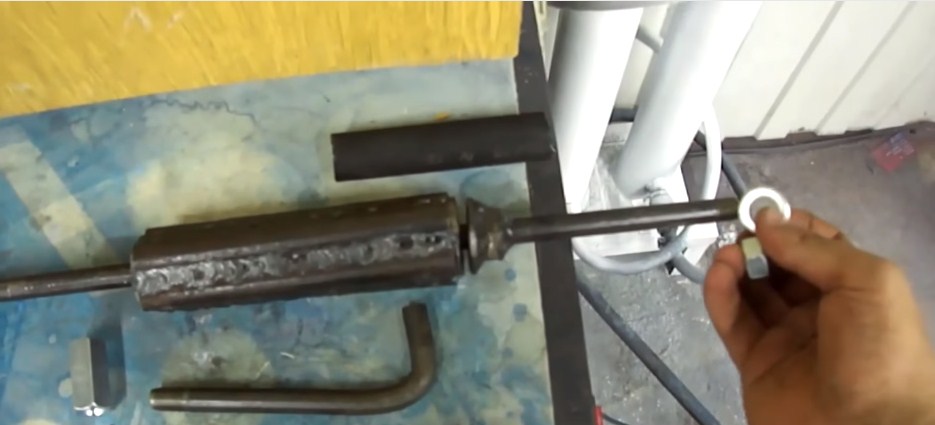
5. Installing the lock washers on the handle
To get a good quality all-round hammer, you need to make reliable lock washers. These elements take most of the load during impacts, so they must be installed taking into account all angles. At the end of the handle, a thread is cut into which a nut and washer are then screwed on. Before installing the washer, a rubber handle made of electrical tape or rubber hoses is mounted.
6. Checking the functionality of the reverse hammer assembly
The manufactured reverse hammer should work without jamming or any difficulty. All mechanisms move smoothly.
The threads on the hooks and lock nut must be lubricated in order to preserve the knot mechanism.
Video: how to make a reverse hammer with your own hands?
Many motorists restore the car body with their own hands. When performing this work, in order to eliminate defects, it is necessary to use special tools, including a reverse hammer. This device can be purchased, however, if body repair is performed infrequently, it will be much more profitable to design the tool yourself.

The body repair hammer is a tool designed to remove dents from the surface of a car. As a rule, these defects cannot be straightened with ordinary tools, therefore, a reverse hammer is often used to straighten dents on sills, arches and vehicle struts. The instrument in the classic version is a pin 50 centimeters long. The diameter of the steel bar is two centimeters. It contains two elements: a rubber grommet on one side, and a metal washer on the other. It holds the hammer in a stable position and protects the tool body from vibrations resulting from impacts.
The tool is used for straightening small damage.
The device for straightening defects is equipped with additional clamps and metal hooks, with the help of which, during straightening, they grip the staples welded to the car body.

The use of a reverse hammer largely depends on the location and complexity of the defect. There are several types of tools:
- Pneumatic tool.
- Spotter.
- Vacuum hammers.
- With adhesive pads.
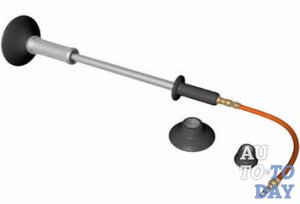
For point straightening of dents on the surface of the body of a new car, it is recommended to use vacuum hammers.... The scheme of its operation is as follows: with the help of a suction cup, the tool is attached to the restored area, then, the handle is pulled "towards itself", and as a result, due to air compression, the dent is leveled. The principle of operation of this type of device allows you to eliminate defects without damaging the paintwork of the car body.

The use of a pneumatic tool is essential to repair serious damage. The hammer is connected to a powerful compressor, resulting in increased mechanical impact on the damaged area. The device is attached to the car body using special hooks. Before using the device, if necessary, remove the paintwork from the damaged area.
Spotter - a welding machine with which an additional element is welded to the car body. It can be an iron bar or a special hook. Next, they cling to the protruding part with a return hammer, and align the damaged area.
Before welding the part, the area to be restored is thoroughly washed, the paintwork is removed from it and degreased.

Tool with glue pads is attached without the use of a welding machine. Reliable fixing is ensured by a special adhesive, after the defect is eliminated, the lining is cut off, and the damaged paintwork is restored.
The purpose of using a hammer is to level out dents. However, with its help, some parts are dismantled. So, to remove the internal bearings, a tool is used that has a special stud in its design.
The finished tool is not cheap, therefore, in order to save money, many motorists carry out the construction of the device with their own hands. For self-creation you will need:
- A metal steel bar (or pipe) 50 cm long and 2 cm thick.
- Rubber or ebonite handle.
- Stainless steel hook with a thickness of 4-5 mm.
- Welding machine.
- Two steel washers with a diameter of 2.5-3 cm.
- A kettlebell with a thickness of 6 cm and a length of 16-17 cm.

To make a reverse hammer you will need:
- Clean and degrease the bar, use a grinder to polish the surface of the part.
- A hook is attached to one of the ends.In order not to waste time when creating threads for removable nozzles, the part is welded.
- A small washer is put on the pin, which must be welded near the base of the hook. It is used so that the weight does not come into contact with the work surface.
- A hole with a diameter of 2.1 cm is made in the weight. Thanks to this, the part will move freely along the rod during operation. When making a tool, take into account that the shape of the part should be without protrusions and corners. Round steel sheets are welded to both ends of the element, thanks to which the palm will not jump off the weight when straightening the body.
- A weight is inserted from the free end. If the part moves slowly, then the diameter of the hole is increased by another half a centimeter.
- At the end of the work, a handle is put on, but before that, another washer is mounted to prevent the handle and weights from touching when using a hammer.
To straighten dents on the body of a car, different tools are used, including a reverse hammer. In many cases, it is more expedient to make it independently. Having spent 30-40 minutes of his time, the motorist gets a tool that is simple in design but effective in straightening the car body.
What is a Reverse Hammer for Auto Body Repair? Structure, operating principle. How to make a homemade tool.
When carrying out body repairs, one of the most requested tools is the reverse hammer. This device is designed to level out small dents on sills, pillars, arches, precisely in those places where there is no access from the inside of the cabin. This is one of the basic tools for straightening and every car body craftsman should be able to work with it.

On the one hand, a hook is attached or welded to the rod, with which you can make a hook on the fastening loops welded to the body. On the other hand, a washer is welded, which prevents the weight from flying off, and serves as a bump stop, striking against which the force is transmitted to the rod and then the metal surface is leveled under this pressure. If you buy a factory reversible hammer, it usually comes with several interchangeable hooks for grabbing staples of various shapes. There are modifications of these hammers with two and three sleeves, which allows you to control the impact force when leveling dents.
Another variation on the market is the vacuum reverse hammer for body repair. Large areas of dents are repaired with such devices, and the previous design is suitable for minor damage. Here, suction cups are used as a hook, which removes the issue of preliminary removal of the old paint and varnish layer from the part.

- Scrubbing the damaged area down to metal, usually using a sander and sandpaper.
- With the help of a spotter, brackets are welded to the body, in various places of damage, so that it can be gradually pulled out, restoring the shape of the body part.
- The staples are hooked with the hook of the return hammer.
- With gentle, not strong movements of the kettlebell, we begin to slowly level the surface, making blows. The main thing here is not to overtighten, so as not to clog the bulge back later. With such gradual procedures, we pull out the entire area of the damaged part.
- We remove the staples by cutting or twisting.
- We clean and degrease the part and you can start applying the putty.
One of the main disadvantages of using the classic reverse hammer is the need to remove the old paintwork, even if it was not badly damaged. In addition, as mentioned above, this method is only suitable for small dents.
Video example of flattening a dent with a reverse hammer.

To get started, you need:
- metal rod 50 cm long and about 20 mm in diameter.
- washer, or handle, which will serve as a bump stop.
- welding machine and protective devices: goggles, mask, overalls.
- steel hook.
- weight.
- steel washers, 2 - 3 pcs. with a diameter of 2.5 - 3 mm.
The technique for assembling a reverse hammer from these components is as follows:
- We grind and clean the metal rod from rust and burrs.
- We weld a threaded fastener to the hook, and on the stubble, on one side, we also grind the thread to make a removable connection. As an analogue, you can fix the hook permanently by welding.
- We make a hole inside the weight 1 mm larger than the diameter of the rod, so that it can move freely along it. Next, we put it on the rod.
- We weld a handle with a washer, against which the weight will hit, transferring the thrust to the rod itself.
At this stage, the independent development of a reverse hammer for car body repair is completed. Also, if desired, you can make a vacuum version of the tool. But here, instead of hooks and welded brackets, a suction cup will be used, which is attached to a wide indentation and slowly pulled out.
Please write in the comments with a reverse hammer which manufacturer do you use and are you satisfied with the quality of the work he does? Thanks in advance for your reply, it will help newbies a lot.
- Device and use of a reverse hammer, DIY tool making
- What is a Reverse Hammer for Body Repair
- Purpose and types of reverse hammers
- How to use the reverse hammer
- We are engaged in self-production of a reverse hammer

In the process of working with a car body, the most difficult and critical part is straightening, that is, leveling the surface of the body. To accomplish this task, even specialists need to have professional equipment at hand, which includes the reverse hammer.

In addition to this, many reversing hammers also have hooks with which the device can grip the staples welded to the body and thus hold onto it securely during straightening.
Often, a reverse hammer is used to repair small dents in metal parts of an automobile body that either cannot be accessed directly or must be leveled from the back. With the help of the return hammer, it is very convenient to work with car sills, wheel arches and struts.
There is a classification of reverse hammers for body repair, which includes:
• With weights (two and three are used).
• Reverse hammers powered by a pneumatic mechanism.
The entire process of straightening dents on a car body using a reverse hammer should be performed in the following order:
1. Rinse the entire work surface with water to remove all contamination, and be sure to treat the entire surface with a degreasing agent.
2. Remove any paintwork from the work surface if necessary. For this, it is more practical to use a grinder.
3. Weld round repair washers to the dent.
4. Attach a special hook to the opposite end of the hammer, which should come with the tool.
5. Hook the hook onto the washer.
6. While holding the tool with one hand on the handle, grasp the weight with the other hand and point it towards the handle. In this case, your movement should be as sharp as possible.
Due to the fact that the return hammer is tightly adhered to the body surface, with each movement of the kettlebell, the back dent is evened out. At the same time, the harder you hit with a kettlebell, the faster the process of straightening the car body will go.
Be very careful when working with a reverse hammer. In no case do not rush and after each blow evaluate how the dent has changed. This will help you avoid the formation of new dents on the edge of the existing defect. But if you work slowly and follow all the instructions correctly, you can eliminate a small dent in just a few minutes.
Often it is impossible to do without a reverse hammer in car body repairs, although each time it is necessary to soberly assess the situation, and if the area of work is too large, resort to using other tools. As for the reverse hammer, fortunately, such a tool for bodywork can be made with your own hands.
Reverse hammers today can be bought at any car dealership. It is worth noting that they can be sold both as a separate unit and as part of a set of tools specifically designed for body repair. But since there are no complex mechanisms in the reverse hammer, it can also be made at home.
• Pin made of strong steel, 50 cm long and 2 cm in diameter.
• A handle or attachment that can be slipped over a steel pin. The handle must be made of ebonite or rubber.
• Welding machine and protective devices for it (gloves, mask).
• Steel hook no more than 0.5 mm thick.
• A 16 cm kettlebell, about 6 cm thick.
• Steel washers in the amount of 2 pieces (diameter 2.5-3 mm is suitable).
All other work on the manufacture of a reverse hammer for do-it-yourself body repairs is recommended to be carried out in the following sequence:
1. If necessary, we clean the metal pin from rust by grinding and process a perfectly flat surface with any degreasing agent.
2. A hook must be attached to one end of the pin.If the hook has a thread on one side, it can also be made on the pin by creating a detachable connection. Otherwise, welding will have to be used to secure the hook.
3. It is imperative to place a washer at the base of the hook, which will prevent the weight from moving to the working surface and accidentally damaging it.
4. To put a weight on a metal pin, it is necessary to make a hole in it, the diameter of which should be 1 millimeter larger than the diameter of the pin. Thanks to this, the weight will be able to move freely, and you will be able to give it any possible acceleration.
5. The weight is put on a pin, and steel sheets are attached on top of it, which will allow you to grip it as securely as possible to strike the body. On top of it, you should also put on and weld another washer so that the weight does not hit the handle.
6. Proceed to fix the handle. Please note that it should sit on the pin as securely as possible, so if possible, it should be welded to the base of the pin.
This completes the manufacturing process of the reverse hammer. As you can see, if you prepare materials and tools in advance, all work will take no more than 40 minutes. You can even make a reverse hammer with a vacuum suction cup with your own hands, which will greatly simplify the implementation of repair work on the body. To do this, instead of the hook with which the tool is attached to the working surface, it is necessary to use special suction cups, which can provide the same reliability of fastening.
Every driver who at least once has been repairing his car himself knows what a reverse hammer is. For those who hear this name for the first time, we will tell you in detail about this tool in this article.
The most important part in car body repair is leveling its surface. To straighten the body, you need to have all the necessary tools. This includes the reverse hammer.
Reverse hammer for body repair - metal pin measuring 50 cm in length and 2 cm in diameter. There are two elements on it: a rubber bushing and a metal washer. The washer holds the sleeve and prevents shock vibrations from being transferred to the hammer body.
Some reverse hammers may have hooks. With the help of them, the hammer grips the brackets welded to the body, holding on to it during the leveling of the car surface.


Reverse hammer with a suction cup is needed to grip the metal surface of the body. Thanks to him, you do not need to dismantle parts of the car that require repair. The vacuum hammer is powered by compressed air, which is generated by the compressor.
Some complex dents on the car body are straightened using one-sided spot welding. Such a device is called a spotter. The device instantly welds metal fasteners to the body on the damaged area and pulls out the deformed surface with a reverse hammer.
It is fixed on a surface that requires straightening, and the hammer itself moves in the right direction in the form of a washer, which at the fixation point applies force and pulls out deformation.
A mechanical reverse hammer is a small hand-held device for straightening a car, which consists of a bar and loosely mounted weights of the same or different mass.
On one side of the hammer there is a hook, on the other there is a lock washer, which prevents the weights from falling off the rod, thereby transferring the impact force to the surface requiring alignment.
The inner and outer bearings can be removed using a special reverse hammer. This tool is used to perform work that requires efforts from the inside.
There are also cv joint removers with a reverse hammer, which are designed to remove constant velocity joints from car drives. At the end of the puller there is a tubular nut, which must be screwed onto the CV joint thread and pulled out of the drive with a reverse hammer.
To do the straightening of the car body, you need to choose the right reverse hammer.
When choosing a reverse hammer, you need to pay attention to:
- maximum effort;
- weight;
- structural strength;
- life time;
- model.
When buying a reverse hammer, it is not at all necessary to pay attention to its color. The operation of this tool does not depend on this.
One of the best models of the reverse vacuum hammer is considered Ligota ATG-6258 with a striker weight of 1.36 kg, powered by a compressor. Suitable for flattening flat surfaces. Sold in a set with three suction cups with a diameter of 50, 120, 150 mm.
Pros:
Ligota ATG-6258 kit advantages:
- a light weight;
- three sizes of suction cups;
- powered by a compressor;
- long service life;
- robust construction.
Minuses:
The disadvantages of the Ligota ATG-6258 reverse hammer include:
Model JTC 2503 a reverse hammer for point straightening is the best.
XModel characteristics:
- length - 43.5 cm;
- width - 12.5 cm;
- height - 6 cm;
- weight - 2 kg;
- used to draw a washer welded to the body.
- compactness of dimensions;
- robust construction;
- long service life;
- used in auto repair.
- only used with a welding machine.
SOROKIN 6.121 reverse action mechanical hammer is one of the best.
Specifications:
- weight - 9.8 kg;
- there are nozzles for a mechanical reverse hammer;
- Sold in a set of eleven pieces.
Pros:
The advantages of the SOROKIN 6.121 hammer include:
- wear resistance;
- strength of tools;
- the components of the set during transportation will not be lost due to the case;
- long service life.
Judging by the reviews, there are no downsides to the SOROKIN 6.121 mechanical reverse hammer.

Specifications:
With the help of the MASTAK 100-31005C set, the repair of the running gear of cars is carried out.
- reverse hammer weighing 2.5 kg;
- three-armed bearing pullers ranging in size from 15 to 80 mm;
- a ring that adjusts the divergence of the bearing puller legs.
The whole set is assembled in a convenient plastic case.
- compact size and weight;
- high wear resistance;
- strength of tools;
- long service life;
- ease of use.
- the complexity of work in hard-to-reach places of the chassis.
Before you start repairing and straightening a car with your own hands, you need to acquire all the necessary tools. If you have neither the time nor the desire, you can simply drive your favorite car to a service station.
This device will be useful to everyone who is independently engaged in body repair - using a reverse hammer with a replaceable nozzle, you can easily and quickly remove small dents in those parts of the car body to which direct access is difficult (for example, arches, pillars or thresholds). And you can make such an irreplaceable tool in the garage from scrap materials.
As a basis for this homemade product, an old steering rod will be used, which has already "rewound" its service life. If necessary, we clean the surface of the part from rust and dirt using sandpaper or a grinding wheel.
Additionally, you will need to use a part of the steering tip and a steel plate with dimensions of 70x30 mm, which can be cut from the fortieth corner. Notches should be made on the front side of the plate for better adhesion with the adhesive.
We put a piece of scrap on the steering rod axis, to the upper part of which it is necessary to weld a "plug" so that the part is not removable. Part of the steering tip and the steel plate cut from the corner must be welded together perpendicular to each other.
For a detailed process of making a reverse hammer and its application in practice, see the video on our website.
Body repair is a complex operation that requires certain knowledge, special tools and devices. One such device is the reverse hammer. This is a simple tool that is easy to make with your own hands. For this, there are many photos and videos on the Internet. You can also download a drawing of the simplest version of the device.
This tool is a device that allows you to apply a certain amount of force to a restricted area of metal. A device is used to level out small areas of a deformed vehicle that have suffered from minor accidents.
Some areas of the car body can be leveled with a conventional rubber mallet by applying blows from the back. However, most surfaces do not have this access. In such cases, a reverse hammer is necessary. Its tip is fixed in the place of deformation, and a pulling jerk force is transmitted to the surface with the help of a weight, which is located at the other end of the device.
Before making a reverse hammer, it is necessary to describe the varieties of this tool. You will need this to make a drawing of the device you need, and then make it.
Despite its simplicity, this device has acquired several versions over time. Each option is applied in individual cases, which depend on the type of damage and the skill of the specialist. In general terms, the design of this device is the same, as is its principle of operation. The only differences are in the way the tool is attached to the body.
The most common reverse hammer is a metal rod with a hook at one end and a weight with a stop at the other. The hook engages with a washer welded to the place of deformation. By applying impact forces to the load, the deformation is stretched to the desired moment.
The second, equally simple version of the reverse hammer differs from the previous one in that instead of a hook, there is a regular thread at the end. To level the surface with such a device, it is necessary to make a hole in the center of the deformation, insert the threaded end there, and fasten the washer and nut on the back side.
The most complex type of this device has a vacuum device at the end, which is fixed to the surface of the deformed part using rarefied air. The suction cup can be operated either from the compressor or by the conventional method. This type of device allows the straightener to correct minor damage to the body, and at the same time preserve the paintwork of the area if it is not damaged.
Making a reverse hammer at home with your own hands is quite simple. It does not take much time, and does not require special materials and tools. For a more visual understanding, you can watch the video on the Internet. A primitive drawing will also not be superfluous.
To make this tool with your own hands, you will need the following:
- metal pin about 50 cm and 20 mm in diameter;
- a load that has an inner hole;
- threading tool (optional);
- welding machine;
- Bulgarian.
If it is decided to make a reverse hammer with a hook type of attachment, then a hook is made at the end of the pin. You can do it with a vice or pliers. Or, weld a ready-made hook from another device with a welding machine.
If the tool is made with a threaded grip, the end of the pin is tapped with a suitable tool.A lot of threads should not be cut as the body metal is quite thin.
After making the tip, a weight is put on the pin, which is limited on the back of the tool. This can be done by welding, or a threaded stop can be used. The second method is more preferable, since it will allow the use of weights of different weight, depending on the required force at the end of the return hammer.
Again, in order to clearly understand how this happens, the easiest way is to watch the video. If this is not possible, then the procedure for working with this device is approximately as follows:
- the tip is fixed on the deformed part of the body;
- by impacts of the load on itself, the part is aligned to the desired position;
- if the effort is not enough, then the load is changed to a heavier one.
When pulling out a relatively large section of metal, you can weld several washers on the same line and thread a pin through them. To do this correctly, it is advisable to watch a video on this topic. This pin is then hooked with a hook that is welded to the fixture and pulled along with the metal, aligning it to the desired state. Be careful when using this method, as welding a large number of washers can over-pull the metal and ruin the body part.
Correction of defects in a car body is not complete without the use of special tools. In particular, a vacuum hammer or modifications are required. The types are different, some models are made by hand. What it is, and how to make a do-it-yourself body repair tool is described in this article.

[contents h2]
Not all body parts on a car can be repaired from the outside. To straighten dents on thresholds, racks and arches, a reverse hammer for a spotter - a welding machine is useful. It is a device designed in the form of a pistol with a retractable electrode and a shock blank. Automation operates without the participation of the hands of the master, who only controls the keys of the device.
A conventional manual straightening hammer consists of a steel bar with a hook on one side and a steel washer on the other. The principle of operation is simple:
- The handle and weight - a steel washer - are the moving parts of the hammer.
- The place for straightening and repair is initially prepared for the procedure. The hook at the end of the hammer is firmly set in place of the defect on the auxiliary washers.
- By sharply moving the weight to the handle of the hammer and making strong blows, the dent is straightened.
Using hammer models, they not only correct dents, but also use them as a puller. For example, if you have to separate the lapped parts - the return hammer for bearings is indispensable.
Any body work requires detailed consideration, otherwise the use of a hammer will do a "disservice", creating new dents. They use the tool on their own only when they have the appropriate skill.
The locksmith industry offers several tool options. For instance:
- Reverse hammer with pneumatics. The mechanism increases the impact force, which makes the result satisfactory without long work.
- Spotter. As described above, this is a welding machine necessary to cauterize the metal and relieve stress from it. A reverse hammer with it makes the job complete.
- A complete set of 2-3 weights. A large number of weights, contributes to the accuracy and power of the impact. Dignity in fast straightening. A homemade reverse straightening hammer is created according to this principle and is being improved.
- Vacuum. The hammer, the most gentle car paintwork - it does not need to be removed from damaged areas. It is a reverse hammer with a suction cup. Corrects dents with strong air compression.

Accordingly, the model and cost.It is easy to assume that the latter option is the most weighty in price.
A simple kettlebell model is available for self-assembly. It is quite possible to make a more modern reverse hammer for body repair with your own hands if you purchase components. Consider one of the options that will require the following materials:
- Steel bar. With a cross section of at least 2 cm. If you do not take this into account, then a thin rod will not last long - enough for one straightening.
- Rubber handle. It is specially machined from a single piece or using a nozzle from something.
- Steel hook. At its end, a thread is cut to screw it into the pin. It is needed not only for pulling the surface by the staples, but also as a reverse hammer for removing the nozzles - it is convenient for them to pick up obsolete parts to be replaced.
- Welding machine. An inverter is suitable for household needs.
- Steel washers - 2 pieces. Diameter - 3 cm.
- Weight. Use an ordinary headstock from store scales, without corners and protrusions. Otherwise, it is inconvenient to use it. Section up to 6 cm and length up to 15 cm.
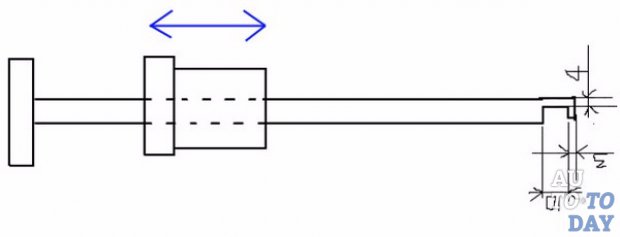
To make it more convenient to assemble a handicraft model, it is better to have a drawing of a reverse hammer in your hands with standard dimensions applied. This will surely increase the build speed. It is made as follows:
- They bring the rod into proper condition - soak it in an anti-corrosion solution, grind it and degrease it. It is important that the pin for the homemade reverse hammer remains level - either it is chosen according to this, or straightened at the initial stage.
- One of the washers is welded onto the end of the rod, so that when struck, the weight does not fly off the rod and does not touch the surface of the car body. They immediately equip the reverse hammer with their own hands with a grip - weld or screw a hook to the end of the rod.
- The weight is drilled through on a lathe so that the stroke along the steel pin becomes unimpeded. Check this right away by putting on the weighting compound from the other end. If he walks tightly, then the diameter of the inner hole is increased.
- After putting on the weights, a second washer is fixed at the other end to prevent the heavy headstock from breaking the handle.
- It remains to put on the rubber attachment and the reverse hammer for the spotter is ready. The handicraft model is tested in action on an old, unnecessary piece of iron and the flaws are eliminated, otherwise additional defects will appear on the car body.

To make a reverse hammer with a vacuum suction cup, you will need the same components, only a plunger is used instead of a hook - a new one, there will be no sense from the old. First, the attachment is "sucked" to the gland and then work begins. The advantage is that you don't have to weld additional brackets to the body, and then remove them, thereby spoiling the already ugly surface.
The model, which is a reverse electric hammer, is a version of the straightening tool equipped with a motor. Efforts to straighten the dents are practically not required - the power of the engine allows you to stretch and strike the gland with a greater amplitude than a person does.
It is not enough to make a reverse hammer with your own hands - it is important to know the methods of working with it in order to get a decent result, or at least not do the worst. There are several options for straightening the body, depending on the problem:
Typically, a reverse hammer is used to remove dents. It starts in a spiral - from the edges to the center. If we do the opposite, then only the center will be displaced, and the sides will remain concave, which makes the defect even more complex and rigid, not amenable to straightening in the usual way. Therefore, the work requires skill.
When the body profile is restored, the work cannot be considered finished - the view does not dispose. Further, direct forging takes place with the same tool, but with a smoothing nozzle in the form of a blade and a counter support.To carry out the work, you will need a reverse hammer with a set of nozzles - this way the work will go in the best way and even minor defects will be eliminated.
Dents do not do without the opposite effect - bumps appear on the area of the car. Their elimination is possible. For this, thermal action is used through welding to relieve the stress of the metal in the middle, thereby making the defect ready to be smoothed. Work is carried out from the edge of a red-hot swell to its center - it is groped by hand, there it is most springy. When the contours of the body are marked, the place of straightening is spilled with cold water, which will further contribute to the retraction of the metal.
The second way to fix bumps. It consists in the cold straightening of the metal to the contours with the help of a support and a shovel-shaped nozzle, which is put on a reverse hammer for body repair. And then the finished place is warmed up to smooth out the contours of the installation. Then the defect is spilled with cold water. However, this method has a significant drawback - if the metal is thin, then the temperature drop will lead to rupture and cracks.

This is the standard procedure described above. Let's consider in more detail: the defect site is thoroughly cleaned of paint and varnish material over a larger area than necessary and the places are carefully sanded. Auxiliary rings are welded to the dent, to which the reverse hammer clings for straightening. They are then beaten off. Further, by striking the load on the limiter on the handle, they achieve the transfer of force along the rod to the dent, and thus, the tool will gradually pull out the defect.
The pull-back hammer is needed for the vertical surfaces of the car - it is not suitable for the roof and bottom, an ordinary mallet or a standard iron tool can handle it.
It is better to pull out small dents with a special tool, since a hammer with a reverse impact can lead to large defects. Outwardly, the device resembles a short drill, where an electrode is inserted instead of a drill. As a result of the work, metal deposition is obtained in the center of the indentation, which are then pulled out by pressing the back button of the device. Nuance - you cannot burn through the metal, so welding takes no more than 0.3 seconds, with point movements. With the skill to make a reverse hammer for a spotter with your own hands, it is possible, but not without difficulties, using a welding machine and a drill body with a retractable mechanism for this.
The complexity of the work lies in the scheme - the drawing of the reverse hammer for the spotter is not the most important part of it... The main element of such a tool is the electrical filling, which includes a transformer, stabilizer, thyristor and capacitor.... If these words say something to a home-grown master, then he can safely get to work - the diagram is attached.
After the principle of operation of the reverse hammer has been mastered in practice and the surface of the body has come to a suitable state, it is brought to its logical conclusion. Such a procedure is considered to be the processing of damage with files, after the elimination of a large problem. It will not cope with the work with small grinding, therefore they select rough ones, but there is a nuance in the work - they deform the surface with them in the absence of skills.
After straightening, it is not possible to apply a primer or paintwork immediately - defects will become visible in all their glory. Final restoration of the body is required. It consists in grinding the processed body with six or heptagonal discs that do not leave steps and small defects on the surface. The specialist consultant of the corresponding store will help you to choose the correct grit size or the number of revolutions of the machine.
In conclusion, it is important to say that making a reverse hammer for your own needs and thereby restoring your own car is not difficult.
| Video (click to play). |
It is important to collect the available information and isolate the nuances from it - then the work as a tool will not become a burden, and the result will exceed expectations.

