In detail: punch makita hr2450 do-it-yourself repair from a real master for the site my.housecope.com.
Hammer drills are percussion drilling devices designed for drilling and chiselling holes in extra strong materials.
The hammer drill implements two ideas: the working tool rotates and simultaneously moves in the longitudinal direction, creating a shock impulse.
Rock drills always work under extreme conditions.
The duration of the hammer drill depends not only on the correct operating conditions, but also on the reliability of the parts included in the product.
But no matter how hard you try, over time, punches start to fail.
To properly repair a punch, you need to familiarize yourself with its device.
Do-it-yourself repair of the Makita 2470 and 2450 perforator can be done by a person who has the skills of a locksmith and knows the basics of electrical engineering.
Remember! Observe safety regulations and unplug the punch from the mains when disassembling.
Hammer drills Makita 2450 and 2470 are assembled in almost the same scheme and from the same parts. Repairing them is no different.
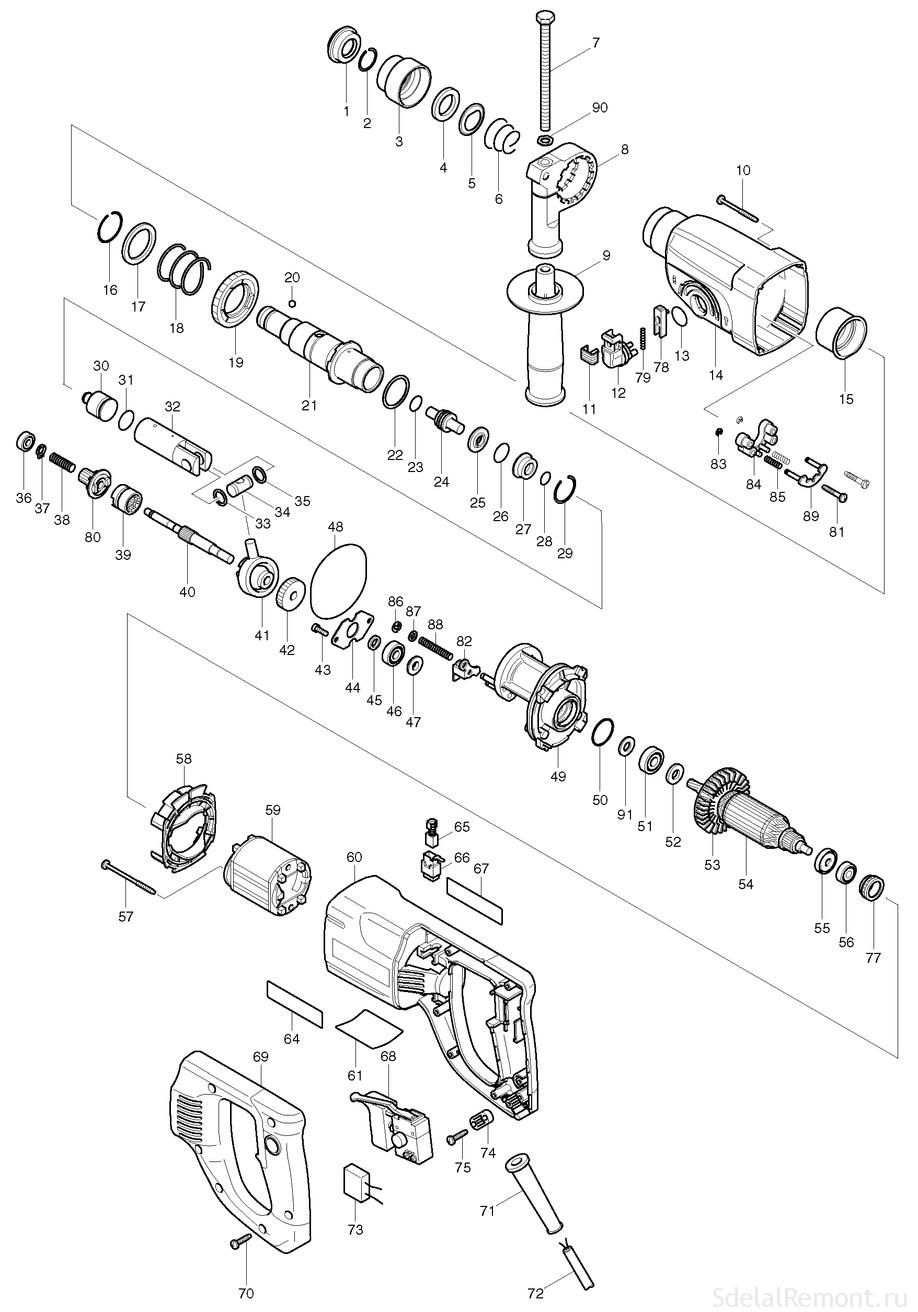
For the convenience of repair, below is an assembly diagram and a catalog of parts for Makita perforators.
The scheme of the Makita 2450 and 2470 puncher consists of a mechanical and an electrical part.
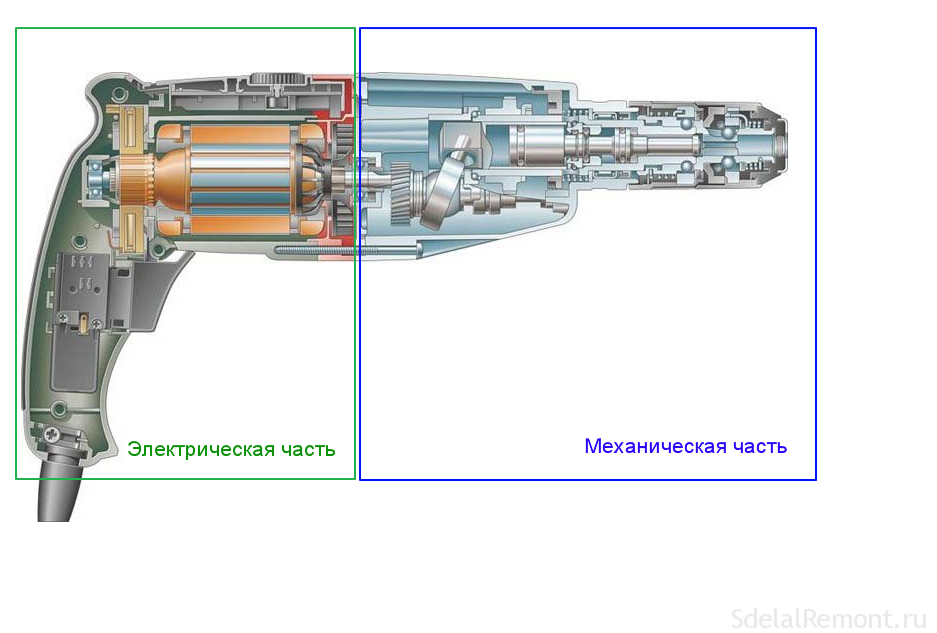
The mechanical part provides the transmission of torque to the drill bit, while simultaneously creating a translational movement that creates a shock.
The mechanical part consists of a rotation drive and an impact mechanism.
The electrical circuit of the Makita perforator provides the conversion of electrical energy into kinetic energy through the rotation of the rotor. The electrical part includes an electric motor, a power button with a speed controller, a reverse switch, and connecting wires.
| Video (click to play). |
Rotary hammer malfunctions are divided into electrical and mechanical.
In this article, we will consider all the malfunctions of the electrical part of the Makita 2470 and 2450 rock drills and how to fix them:
Electrical malfunctions of Makita 2450 and Makita 2470 perforators
Electrical faults are manifested in the fact that when the rotary hammer is connected to the mains voltage, the tool does not turn on.
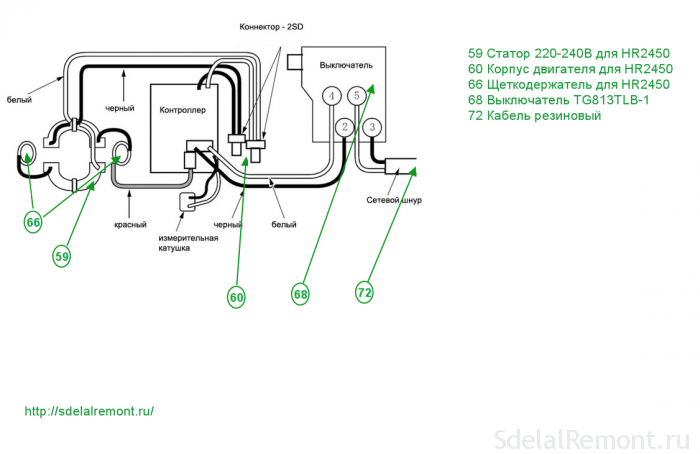
The scheme for connecting the Makita puncher to the network is simple.
The electrical diagram of the Makita 2450 perforator is a serial connection of the electric motor, start button and wires. The scheme of the Makita 2470 hammer drill is similar.
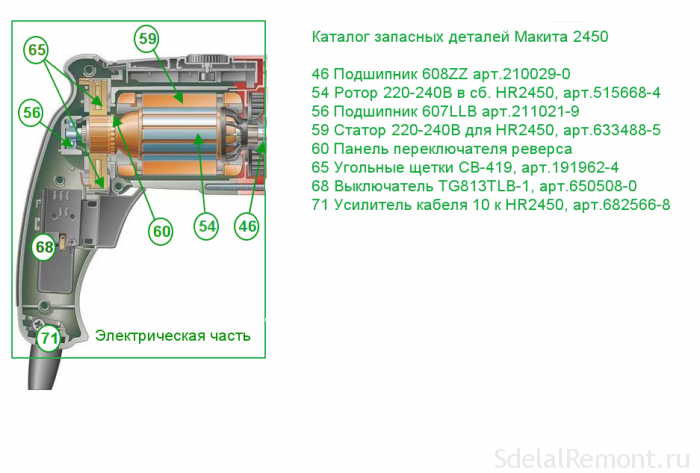
Through the connecting cord, pos. 72, the supply voltage of 220 V is supplied through the switch, pos. 68, and the electric brushes through the brush holder, pos. 66, to the lamellas of the rotor of the electric motor, pos. 54, and through the contacts of the reverse switch, pos. 60, to the stator winding, pos. 59.
The most common malfunction is the lack of contacts in the connections.
Determination of the integrity of the electrical part of the Makita perforator. In order to repair the Makita 2450 or Makita 2470 hammer drill with your own hands, you need to arm yourself with devices and tools. Any tester, screwdriver set, wrenches, hammer, wooden guide will do. It is good to have a screwdriver with a built-in phase indicator.
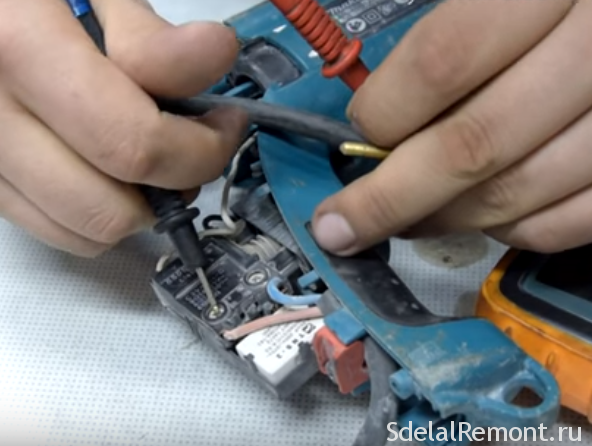
You need to take a tester, connect to the ends of the punch plug and press the punch switch. If the tester shows any resistance, then the power circuit of the puncher is intact.
If the tester shows infinity, then the continuity of the circuit is broken and you need to remove the back cover to check the connecting cable and electric brushes of the hammer drill.
The back cover (usually black) of the punch is easy to remove, you just need to unscrew three screws with a screwdriver or screwdriver.
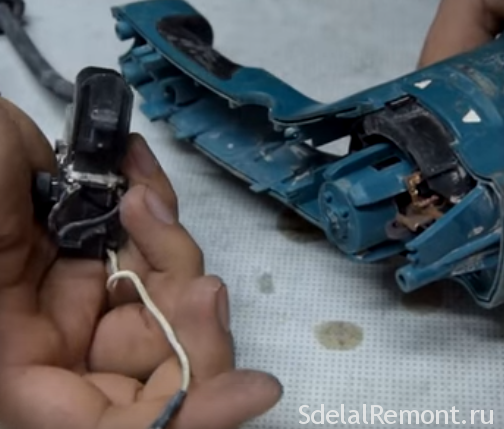
Remove the cover and use a screwdriver to disconnect the ends of the wires from the electric brushes.
Using a tester or a home-made device, popularly called "arkashka", determine the integrity of the lead wires and the correct operation of the switch.
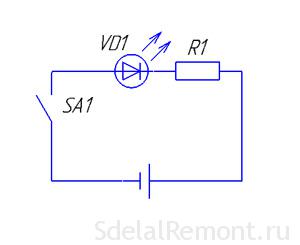
A few words about a simple control device called "arkashka". The device consists of an LED or a light bulb from a flashlight, a penlight battery and two pieces of wire. The entire electrical circuit of the control device is a series-connected parts. Connect the battery to one end of the LED or light bulb, and connect the wires to the free ends of the LED and battery. You will have a universal device for checking the continuity of electrical circuits.
Typical malfunctions of the Makita 2450 and 2470 perforator
Frequent faults in the electrical part of the Makita 2450 and Makita 2470 rotary hammer:
- break of the supply cable at the point of entry into the perforator;
- failure of the button of the TG813TLB-1 switch, art. 650508-0, pos. 68 .;
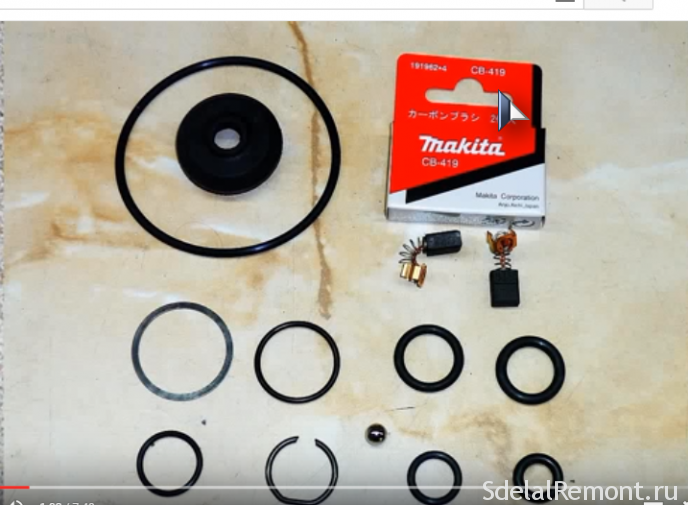
- wear of electric carbon brushes SV-419, art.191962-4, pos.65;
- wear of the reverse switch contacts;
- wear of the rotor bearings: bearing 609LLU, art.210060-6, item 51; bearing 607LLU, item 211021-9, item 56;
- short circuit of the rotor 220-240 V, art.515668-8, pos. 54;
- failure of the stator winding 220-240 V for HR2450, item 633488-5, item 59.
The TG813TLB-1 switch, art.650508-0 is used as a start button; pos. 68.
Replacement of brushes is carried out when they are completely abraded or poor contact. This malfunction is detected by strong heating of the points of the places where the electric brushes are installed.
Failure to turn on the hammer drill may be caused by abrasion of the contacts on the reverse switch.
Eliminating such a malfunction is very simple.
To repair the reverse switch, the rear cover must be disconnected. Disconnect the wires carefully from the button. Inspect the switch carefully.
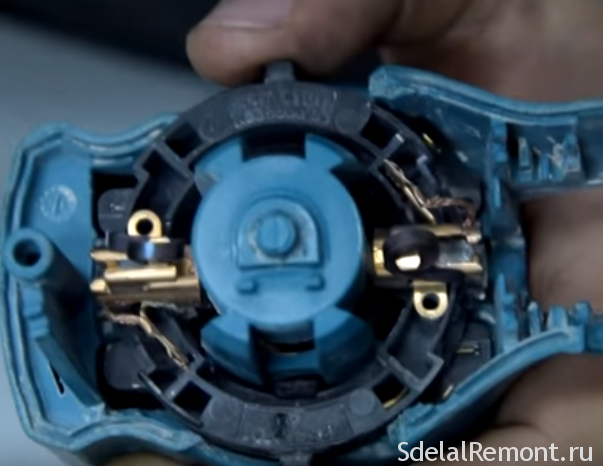
Further disassembly consists in removing the brush holder, having previously released the brushes themselves.
After removing the brush holder, you will reach the contacts of the reverse switch.
Determine its condition, replace contacts if necessary.
Another common electrical fault is poor contact between the stator and the lower contacts of the reversing switch.
To remove the stator, the gearbox housing (black) must be disconnected from the stator housing (green).
Remember! In the mechanical part of the rotor, the bearing is pressed by a special ring. When disassembling, do not lose it.
The stator is located in the green housing. Looking into the middle, you will see two self-tapping screws 4 × 60, ref. 266334-3, item 57, securing the stator to the body. Unscrew them, remove the plastic stator protection for HR2450, art.419201-3, pos.58., Free the stator.
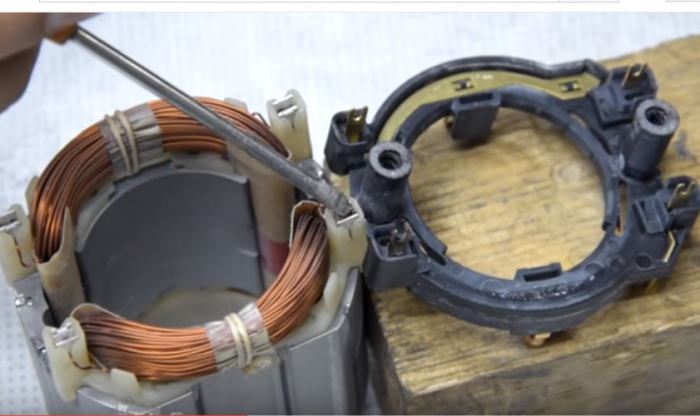
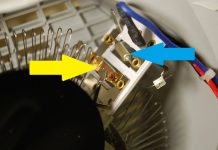
When you take out the stator, you will see the contacts on the stator and the reversing switch panel.
Clean the contacts thoroughly with sandpaper, treat with solvent or alcohol.
Before assembly, bend the contacts so that they fit snugly into each other. Lubricate the contacts with a thin layer of petroleum jelly.
The electrical part of the hammer drill is assembled in the reverse order.
Even very reliable Makita rotary hammers break down over time.
Any breakage is eliminated, you just need to have straight arms and perseverance.
In addition to electrical malfunctions, rotary hammers are also susceptible to mechanical damage.
Operation of rock drills with hard materials in dusty environments will shorten the service life and require user intervention to perform preventive maintenance.
Any tool repair begins with determining the nature of the malfunction and disassembling.
The Makita 2450 and 2470 hammer drill can be repaired by a user who has basic locksmith skills and is familiar with electrical safety requirements.
This article discusses the mechanical part of the Makita rotary hammer, the main malfunctions and how to fix them.
Dismantling the mechanical part of the Makita 2470 rotary hammer
To get to the mechanical part of the hammer drill, you need to remove or disassemble the cartridge.
Dismantling the quick-release chuck
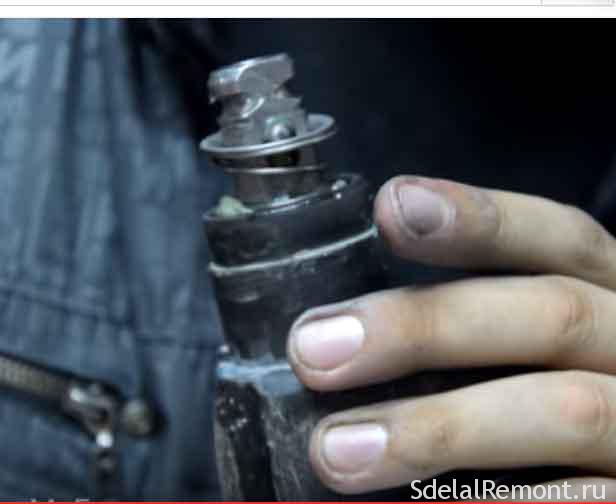
Place the punch on the rear case cover on a tabletop covered with a clean cloth or paper. Using tweezers or a screwdriver, remove the rubber tip 35, item 1.
Carefully loosen the annular spring, pos. 2, the coupling cover, pos. 3, and the steel ring, pos. 4. You will reach a steel ball with a diameter of 7 mm pos. 20.
Now you can remove the housing of the mechanical part
It is black.
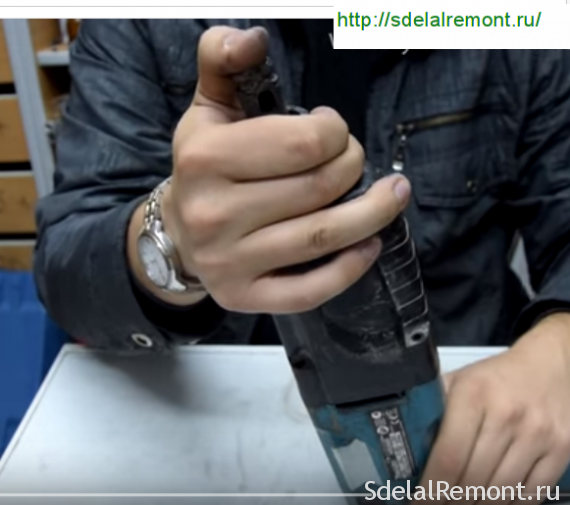
Using a screwdriver, unscrew the four screws at the end of the case.
Holding the black case with your right hand, press your thumb on the end of the shaft from which the cartridge was disassembled. The plastic housing can be easily removed.
Next, you need to remove the gearbox shaft.
To disconnect the mechanical part from the electrical one, you must first remove the electric brushes.
Remember! In the lower part of the housing, the rotor is held by electric brushes, which must be removed.
After checking that the electric brushes are disconnected from the rotor lamellas, use a screwdriver to pry the metal housing of the hammer drill at the border of the green plastic housing.
Now we turn to disconnecting the rotor from the mechanical part of the perforated
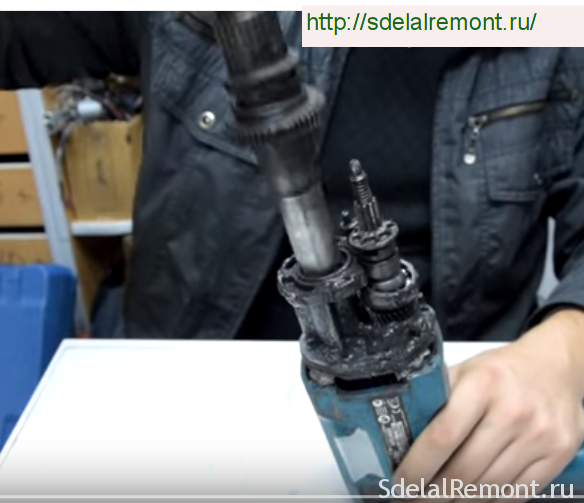
If you take the rotor housing in one hand and the mechanical housing in the other and pull in different directions, swinging, you will separate these two units.
You will get such a unit in the old grease.
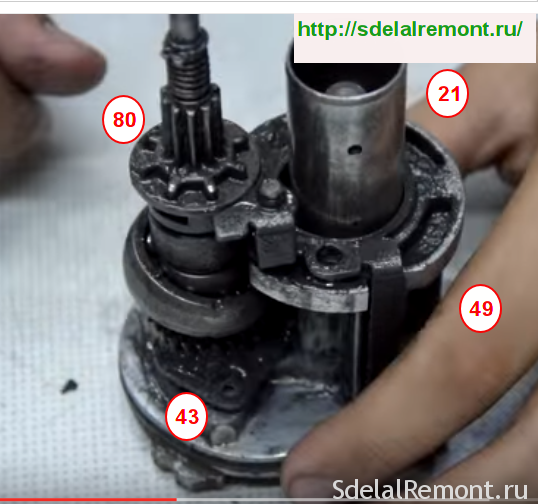
Then unscrew with a hexagon two bolts M4 × 12, pos. 43., art. 266273-7 with an internal hex head.
Pull out the shaft with the intermediate spur gear 10 pos. 80, art. 226399-7.
from the inner case, pos. 49, art. 153687-8. Remove old grease from parts.
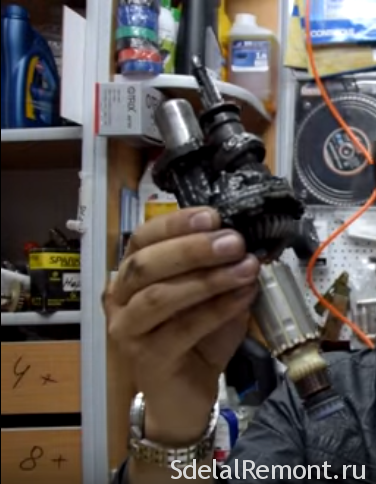
You will get such a mountain of clean details.
Now carefully look through the details, discard the rubber rings immediately after picking up new ones.
Replace the defective parts with new ones.
Frequent mechanical failures of Makit punchers include:
- destruction of the quick-release chuck;
- failure of bearings;
- breakage of the striking mechanism;
- drill barrel wear;
- wear of striker and striker rubber bands;
- breakage of gears.
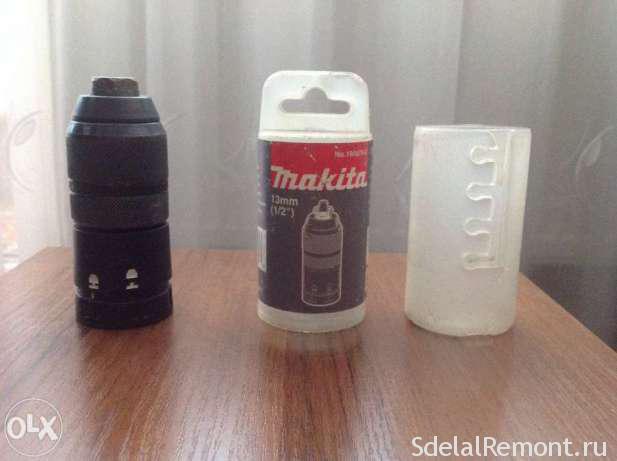
The hammer drill chuck is repaired to replace the boot and rubber ring, as well as the conical spring and the steel ball, which secures the working tool (drill). This is indicated by what is a working tool? namely, the drill does not hold well in the chuck.
The main reason is the wear of the steel ball 7.0, item 20, art. 216022-2. The wear of the ball occurs from contamination of the bore of the cartridge due to the ingress of dust and dirt.
The general view and device of the Makit perforator cartridge is shown in the photo below.
Do-it-yourself repair of the makita 2450 perforator cartridge is easy. The cartridge must be disassembled, freed from old grease, discarded rubber parts, replaced defective.
More complex malfunctions require knowledge of the mechanical part of the Makita 2450 perforator.
Having determined the nature of the malfunction of the Makita perforator, proceed to disassemble the mechanical part, called the gearbox.
Disassemble the mechanical part according to the attached video.
Free it from old grease.
Carefully inspect all parts, their integrity, level of wear. All rubber products require replacement during any disassembly.
Consider repairing the barrel of a rock drill. Let's analyze the mechanism completely.
Video of disassembly, lubrication and assembly of the Makita perforator

