In detail: do-it-yourself Kaiser stove repair from a real master for the site my.housecope.com.
This article discusses ways to check and possible repair gas stove Kaiser XL 500 with gas control, when after automatic electrical ignition and the occurrence of a flame, it the flame goes out when the handle is released... The article is provided with illustrative photographs, which are supplemented with text explanations. The general provisions and conclusions of this article can be used when repairing similar gas stoves with gas control from other manufacturers.
Appearance gas stove Kaiser XL 500 shown in the photo on the left. A distinctive feature of this gas stove is gas control function, which provides gas and fire safety. The release of this feature is based on the use of thermocoupleconnected to electromagnet (valve)that supplies gas to the burner nozzle. When the thermocouple is heated from the temperature of the gas flame, a current arises in the coil of the electromagnet, the electromagnetic force of attraction ensuring the retention of the core (valve) with the minimum required clearance between the end of the valve armature and the end of the electromagnet core, thereby providing gas supply to the burner nozzle. When the temperature on the thermocouple drops to a certain minimum value, for example, when the flame has gone out, the valve returns to its previous position due to the force of the compression spring, cutting off the gas supply to the gas burner nozzle.
Before checking the operability of the gas control function of the gas stove, it is necessary to disconnect the gas stove from the electricity and turn off the gas valve on the gas supply pipeline.
| Video (click to play). |
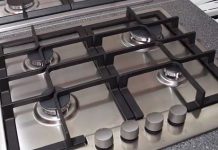
The photo on the left shows a gas burner showing a spark plug (white electrical insulation) and a thermocouple (with reddish-brown rubber insulation, probably made of fluoroelastomer). To remove the top stainless cover from the gas stove, it is necessary to unscrew two screws from all gas burners, then unscrew the screws from the right and left ends of this stainless cover.
After removing the top stainless gas stove cover, you will see the view shown in the photo on the left. Here we see the gas part and the electrical part of the gas stove. It is necessary to pay attention to the gas burner in which the flame goes out after electric auto-ignition and releasing the handle.
At this gas burner, the flame goes out after auto-ignition and releasing the handle, we see an electric ignition plug and a thermocouple. Checking the performance of a thermocouple is reduced to heating it, for example, using a conventional lighter and simultaneous measurement voltage at the ends of the wires coming from the thermocouple.
To do this, carefully pull out the thermocouple connector (it is installed by pulling) from the electromagnet socket by pulling on the connector, but in no case by its electrical wires. In the photo on the left you can see the wires and the connector from the thermocouple connected to them and to the left the brass socket of the electromagnet screwed into the gas valve. When an electronic voltmeter was connected to the wires of the connector from the thermocouple and the thermocouple was heated for about 5-7 seconds, an EMF of about 8-12 millivolts was observed. This indicates the working capacity of the gas control thermocouple. If the voltage is not observed during measurement or it is significantly less than the mentioned values, the thermocouple must be replaced. After making sure that the thermocouple is in good working order, proceed to the next step, and, using a 5/16 ”socket wrench with an extension and a“ ratchet ”, carefully unscrew the electromagnet from the gas valve thread.
Having pulled out the electromagnet, we attach the thermocouple connector to it, as shown in the photo on the left. It is necessary to check the operation of the electromagnet. To do this, we heat, as before, the thermocouple and at the same time apply a small force to the core of the electromagnet, compressing the spring.When the thermocouple is heated and the electromagnet spring is compressed to the end, the electromagnetic force of attraction must be greater than the force of the compressed spring. When the thermocouple cools down, the electromagnet should turn off, and its valve should return to its original position due to the force of the compression spring. If the electromagnet does not work properly, it must be replaced.
We found out that the thermocouple works, the electromagnet also works. After conducting further analysis, it was possible to determine the reason why, after automatic electric ignition and the occurrence of a gas stove flame, this is the flame goes out when the handle is released... It turned out that the handle did not sink deeply enough, and thus the stem from this handle did not compress the spring enough - there was a too large gap between the end of the valve armature and the end of the electromagnet core. The elimination of this malfunction required the removal of the plastic handle. To remove the handle of the gas stove, pull it towards you. After that, it was necessary to install an additional steel washer about 1.0 mm thick (the third in addition to the two standard washers) on the stem, and then return the handle of the gas stove to its previous position. The use of an additional washer made it possible to reduce the gap between the end of the valve armature and the end of the electromagnet core when the handle was pressed all the way. The assembly of the gas stove must be carried out in the reverse order.
For the sake of modern technology, electronic components are often used in electric stoves, as this allows users to more easily control the functions of the stove.
The most common breakdowns of KAISER electric stoves:
1. Complete shutdown of one or more heating elements (burners, heating elements).
This is mainly due to the long-term operation of this heating element at the maximum power, non-observance of the diameter of the dishes, as well as natural wear and tear ...
2. Instability of the heating elements (shutdown when heating, spontaneous switching on, error symbols on the display, etc.)
- If the electric stove or hob has touch control, then such malfunctions most often occur as a result of failure of the components of the electronic control unit of the electric stove.
- If the electric stove has mechanical control, then such problems are most often associated with the failure of the electric stove's power switches.
More information about the device of the electric stove, as well as its main components, can be found by going to the section: kaiser electric stove diagram.
In certain cases pemont should be carried out only by qualified craftsmen with experience in repairing electric stoves of foreign manufacturers, unskilled intervention in the hob system can lead to its complete failure, and at least to an increase in the cost of repairs.
You can also familiarize yourself with and, if you wish, order the repair of built-in ones:
What to do if required repair the KAISER electric stove?
Call us at 8 (495) 968-24-25, and a specialist will competently advise, name the approximate cost of repairs, and, if you agree to repairs, will send an engineer to you at a convenient time for you.
Draw your attention to! You can apply for repairs both urgently and on any day convenient for you.
Various devices can be used for cooking, but due to their frequent use and intensive work, they are especially prone to breakdown.Repair of electric stoves can be done with your own hands at home, without taking out bulky equipment to a service center.
Despite the external complexity, this device has a very simple design. All working elements are installed in a special heat-resistant cabinet made of alloy steel.
The principle of operation of the electric stove is based on heating the heating element by means of an electric current flowing through it. The device is equipped with heating elements that are necessary for cooking. They are ceramic, tubular, halogen, solid.
- Ceramic burners are presented in the form of a tube, so they can be used for any electric stoves and it is very easy to repair them yourself. The spiral fits into the hole in the plate and is secured with the help of special parts. Now more and more glass ceramics are used, which are more affordable and durable, in addition, it is amenable to washing;
- Halogen burners are considered economical, they work due to halogen lamps with reflectors. These lighting devices are installed in different parts of the hob and provide fast heating and low consumption of electrical energy;
- In old domestic tiles (Dream, ZVI and others), cast-iron spiral heating elements were often installed. They heated up slowly, but after turning off they gave off heat for a very long time. Separately, it should be noted their durability and resistance to moisture and high temperatures;
- The tubular spiral is made of a hollow tube. When heated, it not only gives off heat, but also promotes the circulation of warm air inside itself, which makes it possible to increase the efficiency of the device. This type of burner is the most difficult to repair yourself.
To power the stove, a power wire is used, which is connected to all burners. In addition, they also connect to regulators and thermostats, which act as a safety system for the appliance. After switching on, the wire begins to transmit energy to the heating element, which is necessary for cooking. You need to control the heating level and the hotplate using the appropriate knob. Many household stoves Ardo (Ardo), Indesit (Indesit), Electrolux (Electrolux), Zanussi (Zanussi) and others, in addition to these devices, also have built-in timers and alarms. They help control cooking times.
Unlike gas stoves, electric stoves are considered fairly safe in everyday use. Their repair and maintenance can be easily done by yourself, and in terms of durability they are much better than gas models. In particular, this is because they can be cleaned at home, and not wait for the arrival of a specialist.
Typical malfunctions:
- A burning smell appears during operation. If you are worried about the smell of burnt food, then repair is not needed, you need to clean the cooking surface. If it stinks of plastic or rubber, then you need to urgently call an electrician;
- The hotplate does not heat up. This could be due to a lack of voltage, a coil or control handle problem. Repair of the burner or its wire will be required;
- Heating temperature not adjustable. It will definitely require repair of the mode switch;
- The hotplate does not heat up. A common problem with tabletop and stationary cookers is that their spirals crack. They can collapse as a result of an impact or from a sharp temperature drop (for example, the spiral is heated up, and cold water accidentally gets on it). This is the reason for the lack of heating of the burner or uneven heating of food. Self-repair of the spiral is very easy to carry out without the help of a master - more often than not, it just needs to be replaced;
- Poor oven performance. Most likely, the problem also lies in the breakage of the spiral.
It should be noted right away that the branded service will not undertake to carry out warranty repairs after outside interference. Therefore, if you do not have such experience, then it is better to immediately contact specialized workshops.
Before starting to repair the device, you need to disassemble the case and get to the main elements. Depending on the design, on the panel or on the back wall of the Ariston (Ariston), Beko (Veko), Bosch (Bosch) electric stove and others, threaded connections may be located. They must be carefully unscrewed and removed. The table is attached with four screws, if removed, the panels can be lifted and removed to the side.
You will see the wires that go to the burner - these are the power cables and switches. They must be removed, because otherwise, further disassembly will be impossible. Burner removal scheme looks like this:
- First, the grounding clamping nut is unscrewed;
- It comes off neatly;
- There may be a ring or bracket under the ground, which serves to press the part as tightly as possible to the base;
- The burner can be installed either on the thread or simply inserted into the hole. Depending on its design, you need to lubricate the threaded element with oil and unscrew the part from the case, or simply pry it off with a flat screwdriver and take it out.
After that, you will have access to the internal connections of the device. It should be noted that the main elements of the hob are located directly below it, below (on the bottom, under it, on the back wall) there are spare parts for the oven.
Consider how to clean ceramic hobs from Hansa (Hansa), Gorenje (Combustion), AEG and others. It is imperative to disconnect the device from the mains, otherwise you may get an electric shock. With a damp cloth, you need to wet the dirt on the surface of the burner and wait a few minutes, then gently clean off the build-up with a sponge or soft brush. Under no circumstances should a metal brush be used, otherwise the integrity of the spiral and powder coating may be damaged.
Step-by-step instructions on how to replace or repair a switch for household electric stoves:
- It is necessary to turn off the power and turn the knob of the switch from the off position to the minimum heat. In the process, a lye should be heard, which indicates the operation of the thermostat;
- If there is no click, then the regulator is faulty. For an additional check of the thermostat, you need to leave it in the middle position and turn on the power - the protection should turn on and off every half a minute;
Photo - electric stove switches repair
- Before removing the handles, be sure to read the "User's Guide", some models of plates are non-collapsible (Hephaestus, Kaiser);
- The first to remove are the handles, which are used to adjust the outside. Then, using screwdrivers, the front panel is unscrewed;
- Under it is a bar that presses the switches. It also needs to be unscrewed and the broken part removed.
What to do if the spiral is cracked:
- Unplug the electric stove from the network. In most cases, repairing the coil is impractical, so it will need to be replaced;
- Remove the top hob;
- Under it there is either a hole for ceramic heating elements, or a recess for solid cast iron or halogen ones;
- You need to very carefully pry on the part and remove it. Disconnect the contacts from the switch and the power wire beforehand;
- Install the replacement coil in a similar way.
Video: replacing burners on an electric stove
Today, the popularity of household appliances powered by electricity is constantly growing, but minor breakdowns sometimes occur during operation. The electric stove is present in every modern kitchen - it is the heart of this space.When a kitchen assistant fails, many home craftsmen are interested in whether it is possible to repair an electric stove with their own hands?
Firstly, a home craftsman who decides to repair an electric stove on his own must at least understand electrical appliances, know the elementary fundamentals of electrical engineering and safety rules when carrying out this type of work. Secondly, you need to be sure that you can perform such a complex repair, and most importantly, find and eliminate the root cause of the breakdown. Third, it is necessary to prepare special tool.
When dismantling electric stoves, you will need screwdrivers for various purposes: for a cross or slot, with different thicknesses, the so-called tip specialists. You will definitely need keys - open-end and capscrews, pliers, wire cutters. For internal work in the body of the product, a soldering iron, side cutters, an insulating tape and, of course, a special device for measuring voltage and resistance are useful.
The photo shows only an approximate set of the necessary tools - during work, the assortment of the tools used tends to significantly expand.
The electric stove looks very impressive - it is a complex household appliance, but its design is quite simple, and all the main working elements are in a special heat-resistant housingwhich is made of stainless steel.
The principle of operation is similar to all electrical household appliances: the current, passing through heating elements (TEN), heats them to a predetermined temperature. The stove has several burners on the hob, and their number varies: at least two, and the standard is 4. For example, the budget Mechta 15M electric stove has only two burners and a small oven, and the product of Belarusian engineers Hephaestus has a standard set of burners and a voluminous oven.
Burner structure quite varied. Classics are burners on an enameled hob with heating elements inside, modern ones are solid ceramic surfaces with heaters of various types built into them. Let's consider the main types of burners.
- Old domestic options are equipped with products cast iron, they slowly heat up and also cool down, creating a steam effect in the kitchen, but they are resistant to moisture and high temperatures.
- Tubular spirals - they are made from a hollow tube, when heated, such devices not only give off heat, but also promote the circulation of warm air inside their case, which significantly increases their efficiency. These products are very difficult to repair yourself.
- Hotplates ceramic they are very simple in design, they are easy to repair at home - the nichrome spiral is placed in special cells in a circle and fixed. In modern models, glass-ceramic solid plates are increasingly used - they are more durable and easy to clean.
- Halogen devices - these are special burners with a similar emitter, which are installed in different places on the hob. A stove with such burners provides quick heating, in a second, and low energy consumption, so they are the most economical, but only professional craftsmen can repair them.
All models of modern stoves to transfer current to the burners use power wire special section, in addition, they are connected to regulators and thermostats, ensuring their protection against overheating.
In different models, the heating level is controlled in different ways: by manually changing the cooking mode or special timers and alarms that control.
During the operation of electric stoves, users may encounter such typical malfunctions.
- Sometimes when the product is turned on, burning smell - it is necessary to turn off the stove and inspect the burners, on which the remains of burnt food could remain, which can be easily removed. When there is a smell of burnt plastic or rubber, then you need to call the master.
- The heating element does not heat up - here is the fault of the burner or the connecting wires, but first you need to check the controls, maybe the contact has gone away.
- Impossible adjust the optimal temperature heating the hotplate - it is necessary to repair the switch.
- The hotplate does not heat up - if you have a spiral inside, then it often ruptures from overheating or moisture ingress. In this case, it is very easy to repair the electric stove - replace the spiral, that's the whole repair.
- The oven is not working well - it is necessary to ring the heating elements, in 100% it is their fault, replacement is required, since they are not being repaired.
Attention! If the electric stove was connected independently, then not a single service will do repairs for free - you have lost the right to warranty service.
The process of finding equipment failure does not depend on the model of the product and the type of hob or the burners installed on it.


Our task is to find a malfunction and localize the resulting problem. After following all the recommendations, you will find the reason for the failure of the equipment, and we will tell you how to fix it a little later.
Models of slabs are different not only in external shape, but also in size, design - it is impossible to describe a disassembly algorithm that will fit all products. Common factor for all is the presence of a thermal insulation layer - here you need to work with him very carefully. Users should be aware that the asbestos dust of the gaskets under the burners in older models is very harmful to health - keep this fact in mind when disassembling archaic stoves.
initially the hob is dismantled - it is fastened with screws, if you unscrew them, then it can be easily removed. Under it are the burners, supplying wires to them and mechanical temperature regulators, which are located on the front panel.
All this must be dismantled in order to get to the lower part, where the heating elements of the oven are located.
At a modern electric hob with a hob made of glass ceramics disassembling the case for repair will be different - in order to get inside, you just need to remove the top panel.
Important! Repair of glass-ceramic hobs is carried out only by specialists of the service center - amateurs with superficial knowledge and lack of experience should not touch such complex equipment.
Below are the common breakdowns of electric cookers. Some of them can be fixed by yourself, others require professional diagnostics and repair.
If you have a stove with burners, then in order to change them, you need to act according to this method.
- We unscrew the nut and remove the grounding.
- There may be a ring or bracket under it that presses the part to the base.
- The burner is fastened with a threaded connection or simply inserted into a special hole.In the first case, we lubricate the thread with oil and carefully try to unscrew it from the case, in the second case, we pry it with a screwdriver and take it out.
- If the model is of the old model, then it is better to immediately replace the burned-out burners with modern and economical models that are suitable in size.
- If the burners are in good working order, then the reason for the failure lies in control unit - a large current flows through the mechanical regulators, and carbon deposits can form on delicate contacts, which are cleaned with fine sandpaper.
Here's a step-by-step guide on how to repair or replace a switch on an electric cooker.
- If there are no clicks when turning the regulator, this indicates that it is defective.
- There is an original check of its condition: we put the regulator in the middle position, apply voltage to the stove, the automatic protection should work - turn on and off after 30 seconds.
- Before removing the handles, you must study the instructions - on some models they do not understand (Gefest, Kaiser).
- First, the control knobs are removed from the outside, then we unscrew the front panel.
- A bar is installed under it, which must be removed in order to get to the broken regulator.
If the click is inaudible when the relay is turned on, then it is necessary to check for the presence of a signal - if it is absent, the reason lies in the microprocessor itself or in the cascade at the output. To repair an electronic unit, you need to have a schematic diagram and understand the complexities of radio engineering... If there is no knowledge and skills, then it is better to turn to specialists - otherwise you will have to buy a new electric stove.
Modern electric stoves on heating elements quite often use a cascade-type burner heating thermostat.
Sometimes there is a breakdown of such a regulator, for which an identical replacement can be found. Experienced masters advise to install triac type such a device, you just need to take it with a margin of power and current strength. In some models, it is installed on the same board along with a heatsink. When the burner of the stove is operating at maximum, and the heating control cannot be changed, this indicates that it was the regulator that failed for an unknown reason - it urgently needs to be replaced.
Each user should understand that modern household appliances are crammed with electronics, each model has its own, different from others, nuance of manufacturing and control - mechanical or electronic. Outside interference without special knowledge and skills can negatively affect the delicate filling of electric stoves.
If you have a simple stove with burners on an enameled hob, then you can repair it on your own by watching the video:

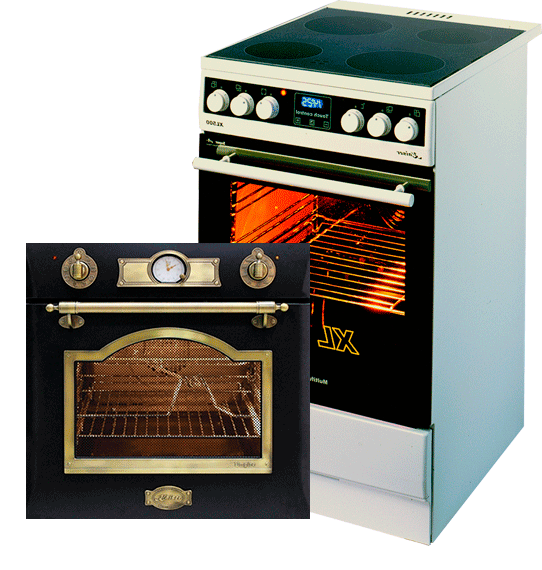
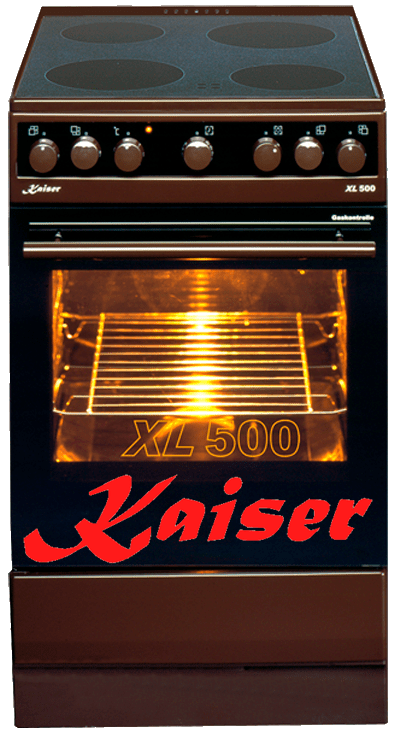
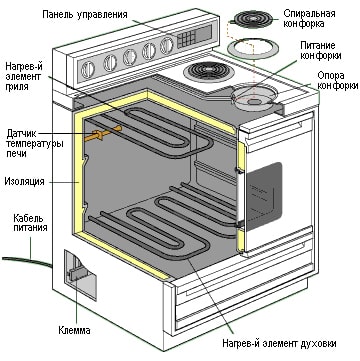
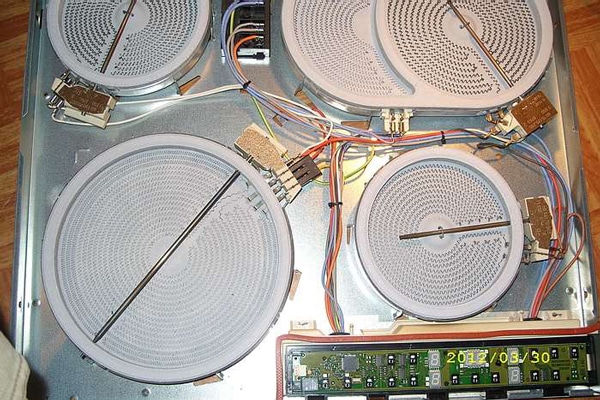
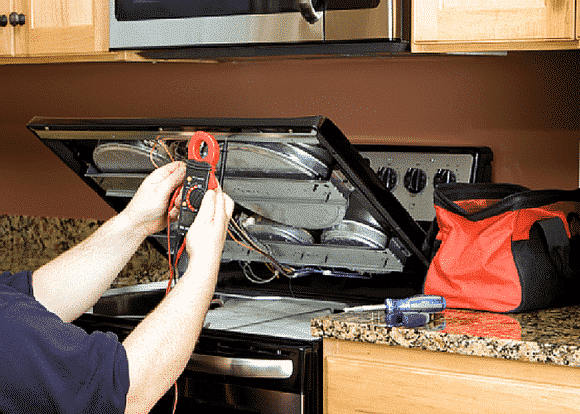
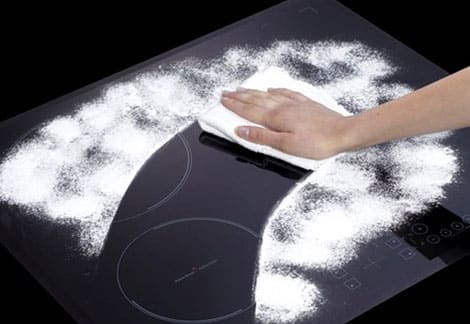
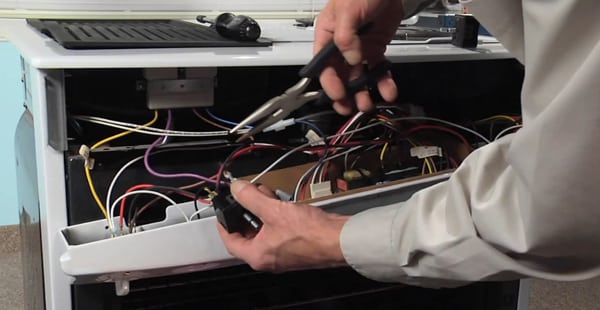 Photo - electric stove switches repair


