In detail: do-it-yourself curling iron from a real master for the site my.housecope.com.
How to repair a curling iron with your own hands, see my master class with step by step photos.
Periodically, I do minor repairs to home electronics and household electrical appliances. Once I was approached with such a problem - because of a weak clamp, the client was unable to manipulate the hair.
Curling irons, as you know, have firmly taken a confident position in the household of almost all representatives of the fair sex, and those who do not have a curling iron mean its modern modification - an iron.
After basically very simple manipulations, the downforce was restored.
In the above work, a ceramic curling iron by Maestro was repaired, although the principle of repair is almost the same everywhere and can be applied to any other curling iron of a similar design. This repair required only a Phillips screwdriver and sturdy fingers.
The total time to repair the curling iron with your own hands (with photographing the process) took no more than half an hour.
The first step is to remove the retractable stand. As you can see in the photo, for this it is enough to bend the bracket and remove it from the groove on one side, and then on the other.
The main thing here is not to overdo it, so as not to unbend the bracket more than necessary with unnecessary effort and then not bend it back.
The next step is to remove the clamping part of the curling iron, which is fixed with two bolts.
There is a spring under it, so it is better to first grab the curling iron with one hand, and then unscrew the mounting bolts.
Before us is a disassembled curling iron. As you can see in the photo, a spring is attached to the body of the curling iron, which creates the necessary downforce for the curling iron to directly manipulate the hairstyle.
| Video (click to play). |
And precisely because of its weakening, this curling iron was sent for repair.
Now we perform a very simple manipulation, namely, we unclench the spring. In this case, the effort of the finger was enough for execution, but if the spring had not unclenched as needed, then it would have to be removed from the body and dealt with separately.
In fact, this is the culmination of such a repair, which took about a minute in time, all other manipulations were only preparatory.
Finally, we proceed to the assembly of the curling iron, which will require the use of fingers to set the clamp in place and hold it until it is bolted in place. Then we fix it with bolts and put the retractable bracket-stand in place.
Job done - downforce restored.
So you should never rush to throw away any thing because of a minor defect, since almost always most minor faults can be eliminated simply or very simply.
Hair curlers have taken a confident position in the modern world. Almost every housewife has no idea how to do without her, because this device helps to create a wide variety of hairstyles.
What to do if your irreplaceable assistant stops working at the wrong time? Of course, the first thing that comes to mind is to go get a new one, or you can make a simple repair with your own hands, and we will tell you how to do this in this material. To begin with, we will tell you what this device consists of.
The curling iron consists of a heating element, a heating control board, a temperature sensor and a network cable.
If your curling iron does not turn on, first of all check the network cable for damage, if it turns on, the light indication is on, but the device does not heat up, then most likely the heating element has burned out.
Next, we will tell you how to replace it with your own hands.
First of all, we take a Phillips screwdriver, unscrew the 6 screws that are located on the handle of your curling iron, remove the upper part of the case.
There are 2 more screws under the housing cover, they fix the heating part.
The next step is to remove the upper part of the handle body. There is a heating control board, leads from the heating plate are soldered to it.
Now we carry out the following steps, you need to disassemble the housing of the heating part, in which the heating element is located, in order to replace it later. Take a hex screwdriver and unscrew 2 screws from the heating part and remove the non-working plate.


Using a soldering iron, we solder the contacts of the heating plate from the heating control board, and change it to a new one.
Now we start assembling the curling iron back, then plug it in. The replacement of the heating element was successful, the hairon professional is fully functional again, which means that the work has been completed successfully. As practice shows in repair, almost any device can be repaired and in many cases it is very simple. So do not rush to purchase a new device. We showed you how to make a simple repair of a hair curler with your own hands, you can do such a repair yourself at home.
Before proceeding with the study of information on how to disassemble a hair curler, you need to think carefully. Can you then assemble it so that there are no "extra" parts left? Despite the fact that the device seems to be extremely simple, inept actions can render it completely unusable. To repair the styler, you need to have a screwdriver and side cutters available, as well as a tester and a soldering iron. Moreover - to be able to use all this.
The basis of the device is a round case with a heating element inside and a triangular flexible support leg. A power cord with a plug is connected to the handle. A metal clamp is hinged.
Unfortunately, the simple design of the styler does not guarantee its reliability and trouble-free operation. Even not cheap models of the most popular brands fail.
If you repair your hair curler with your own hands, you can save money and time that you would spend on a visit to the master. The main thing is to properly disassemble the device and determine the cause of the malfunction.
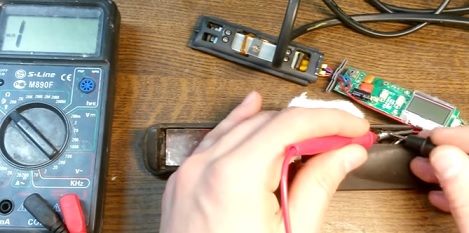
It doesn't take too long to repair your hair curler. To fix the styler, you will need two screwdrivers (a Phillips and a flathead screwdriver to remove the plugs), a piece of electrical wire, a multimeter, and insulating or adhesive tape.
If the moving contact is oxidized, the parts must be disconnected. Then, carefully sand both elements with very fine emery paper.
Just in case, check the cord with a multimeter. So you will find out if there are breaks or pinches. If such damage is found, be sure to replace the wire.
When the tongs begin to compress the hair worse, you need to straighten the spring. To do this, you need to remove the pull-out stand and carefully unscrew the fasteners.
Sometimes it is enough to pry the spring with a flat screwdriver or your finger - and it easily slides into place. But it also happens that you have to remove it from the case and return it to the desired position separately from the device.
After carrying out the specified manipulations, put the clamp in place, fix it tightly with the bolts and install the lower pull-out bracket-stand.
As you can see, the device of this electrical appliance is so simple that it is not at all difficult to repair it at home. However, before proceeding with the repair, you need to learn how to properly disassemble the curling iron.
All forceps are in two halves. You need to disassemble them in the following order:
- Use a flat screwdriver to gently pry off the caps on both sides.
- Unscrew the bolt holding the two halves of the curling iron.
- Examine the condition of the wiring for kinks, spring force, and contacts.
After establishing the exact cause of the malfunction, you can proceed directly to the repair of the device. Don't forget to grab the tools mentioned above right away.
There are many reasons for the breakage of the curling iron. However, there are a few of the most common ones. Let's consider the most common malfunctions.
It is recommended to watch a video on how to troubleshoot a curling iron. An illustrative example will help you navigate faster.
Have you performed all the manipulations and the device still does not work? Then it is better to contact the master. The repair may require special skills or tools.
The purpose of the swivel is to rotate the styler. If used improperly, the wire can twist heavily. As a result, a break occurs at the point of its attachment to the body.
You can fix the cord by insulating the exposed part. However, such repairs will be short-lived. He often threatens to be electrocuted in the future.
You need to properly repair the swivel as follows:
Disassemble the tongs.
- Strip the ends of the bare wires with a knife.
- Prepare the conductors.
- Solder the center conductor and wrap several layers of electrical tape around it. Then do the same with the second.
- Tie the ends together and secure them with copper wire.
- Remove the wire after a while.
- Assemble the device.
If you did everything correctly, the styler will function as before. If suddenly it did not work out - it's okay. Take the curling iron to the workshop for an experienced technician to take care of it.
If your styler suddenly stops working, immediately check for a damaged wire. Does the curling iron turn on normally (the indicator light comes on), but does not heat up? Apparently, the heating element is to blame, which most likely burned out.
Here's what to do to replace a damaged part:
- First, use a Phillips screwdriver to unscrew the 6 screws located on the handle of the curling iron. Remove the housing cover.
- Now you should stumble upon a couple more screws that firmly hold the very same heating element.
- Remove the upper part of the handle. Under it, you will see the heating control board. Leads from the heater plate are connected to it.
- Disassemble the body of the part of the device where the burnt part is located. Use a hex screwdriver to unscrew 2 screws from the non-working plate. Then it should be carefully removed.
- Take a soldering iron and use it to disconnect the pins of the heating plate from the board that controls the temperature. Replace the burnt part with a new one.
Build your styler step by step and plug it in. If you succeed in replacing the heating element successfully, the device will fully restore its functionality.
Knowing how to disassemble your curling iron and repair it yourself will extend the life of the device. And this is definitely a positive point. However, in order to avoid repairs or at least minimize them, you should initially try to choose a high-quality styler.
Today the market for beauty devices is replete with a huge number of models that are able to give curls a wide variety of shapes. Small and large curls, Hollywood curls, corrugation - this is not a complete list of styling.
There are also such curling irons on sale that they themselves carry out the capture and winding of the strand. Technological progress does not stand still. Manufacturers do their best to improve the convenience and modernization of the styler functionality.
When choosing a device, first of all, you need to pay attention to the brand. This is the most important criterion.The more serious and well-known the company is, the longer the purchased curling iron will last and the better the curling will be.
Stylers of the listed manufacturers can be seen, probably, in any home appliance store. They cannot be classified as cheap. And yet they are in high demand.
In addition to these brands, there are professional curling irons that are sold only at specialized points. If you believe the reviews, the best among them are:
Of course, the latter are more expensive. True, they compensate for the costs with their endurance and long service life.

