In detail: do-it-yourself step-by-step repair of a loggia from a real master for the site my.housecope.com.
The first step is to carry out preparatory work of the following nature:
- The scope of work is assessed and an expense estimate is drawn up. At the same stage, construction and finishing materials are selected and purchased;
- Old windows, balcony block are dismantled, old finishing material is removed;
- If necessary, the floor is removed from the slab, after which its condition is checked. If there are deep potholes, especially along the edges of the slab, they are cleaned, primed and sealed with cement mortar;
- The walls are leveled to facilitate the installation of finishing materials;
- If it is necessary to strengthen the parapet, then this is done with the help of foam concrete blocks. They are placed on a special glue.
Advice: Aerated concrete blocks should not be used for the parapet due to the fact that they strongly absorb moisture, unlike foam blocks.
Next, we will analyze the repair of the loggia with our own hands in stages, dwelling on certain points in more detail.
The loggia must be glazed by choosing a certain type of window system for this purpose. If desired, you can install double-glazed windows that have an energy-saving effect. Choose windows according to your taste:
- Metal-plastic windows... The most practical and affordable type of glazing, characterized by durability and good thermal insulation properties;
- Aluminum windows - less warm structures with a weak degree of noise protection. They are used relatively rarely, in cases where insulation is not planned;
- Wooden windows... A very expensive pleasure. It should be borne in mind that even high-quality wooden windows are susceptible to moisture in the air.
| Video (click to play). |
The procedure for installing glazing on a loggia should be as follows:
- A window frame is installed on the parapet, strictly according to the level, which is attached on each side with at least two self-tapping screws, anchors or dowels.
- A window sill is installed inside the loggia at the bottom of the window.
- An ebb is attached outside the window.
- Double-glazed windows are installed in their places.
- All gaps between the frame and the structural elements of the loggia are filled with polyurethane foam.
- After the foam has hardened and trimmed, all gaps are closed with decorative overlays.
In the process of repairing a loggia with your own hands, do not forget to lay wires for lighting and power supply. To do this, lead the power cable to the loggia, having previously de-energized it. From the cable, wires are routed in the recesses of the wall or at its corners, going to the lamps, the outlet and the switch. If the walls are flat, then 2 options apply:
- channels for wires are grooved in the wall of the house;
- wires are pulled inside the crate.
Any sconces, pendant and spotlights, LED lighting can be used as light sources.
And in more detail about how cold glazing of a balcony with an aluminum profile is carried out, we told in a separate article.
How to make repairs on the loggia so that when you enter it you feel the comfort, and not the coldness of the street? Of course, you need to insulate it with high quality. All cracks and voids must be sealed, and the structural elements of the loggia are protected from moisture.
It is very desirable to combine the formation of the floor with its insulation. For this, the following flooring options are used:
1. Wooden floor... To do this, a waterproofing film or foil foam is spread on the floor. Wooden logs are laid on top of this layer. They are aligned and fixed to the slab by means of dowels. Between the lags, 5 cm thick foam sheets are inserted, or the same or a thinner layer of extruded polystyrene foam. You can also lay a layer of mineral wool. On top of the insulation, you can lay another layer of foam foam. Grooved boards or OSB board are attached to the logs.
Advice: It is not recommended to use chipboard for flooring, as the material, if moisture gets on it, can gradually deteriorate.
2. Cement strainer... First, the plate is leveled, after which plates of expanded polystyrene or extruded polystyrene foam are laid on it. They are carefully sized. A cement screed with a thickness of at least 4 cm is made on top of the insulation.
3. Warm floor system... It can include one of the following components:
-
Heating mats. They fit in ready-made sections. The advantage of mats is that it is not necessary to prepare a rough surface for their installation. Mats work from electricity, being laid directly in a layer of tile adhesive. Floor tiles are usually laid on top of the mats;
If you decide to make a warm ceiling on the loggia, then you should know that all the cracks above the windows must be closed to prevent condensation from forming on top of the ceiling panels.
Ceiling insulation is performed in one of the following ways:
- A wooden frame is stuffed on the ceiling, between the strips of which insulation is inserted. On both sides of the insulation there should be a layer of vapor barrier such as penofol, although often penofol is used only on top of the insulation;
- Penoplex is nailed to the ceiling plate with dowels. Next comes the vapor barrier layer in the form of penofol again. Below the layer of insulation, on the frame, a suspended ceiling is formed.
The front and side walls are insulated on the loggia. For the wall of a house, such an operation is usually not performed.
Tip: The house wall is not insulated even if the loggia is being repaired with your own hands in a panel house.
For wall insulation, 2 options can be used:
-
Penoplex is attached to the walls with glue or dowels. Then penofol is attached as a vapor barrier. Next, a wooden crate is nailed on the dowels;
It is advisable at the design stage to choose the materials that will be used for the interior decoration of the loggia.After all, they all have different costs and installation features.
The following materials are the most practical for the interior decoration of the loggia:
- PVC panels... They are simple and quick to assemble, easily processed to the desired size. Contrary to prejudice, PVC does not emit harmful components into the surrounding space. Plastic is durable and practical, easy to clean. The panels are fastened with self-tapping screws or clamps to a wooden crate.
Wooden lining or block house... This is the most environmentally friendly cladding, but also the most expensive. Many people sheathe the loggia with wood precisely for its beautiful appearance and naturalness. For fastening the planks, a wooden lathing is required, to which the planks are attached using self-tapping screws, nails or cleats. It is desirable to cover wood with varnish or impregnation containing varnish.
Instead of regular wallpaper, you can use liquid wallpaper. And we will show you how to glue liquid wallpaper. The work is not difficult, but it has its own nuances.
At the final stage of the renovation, you can think about curtains. We recommend paying attention to the Day-Night curtains, which we talked about here.
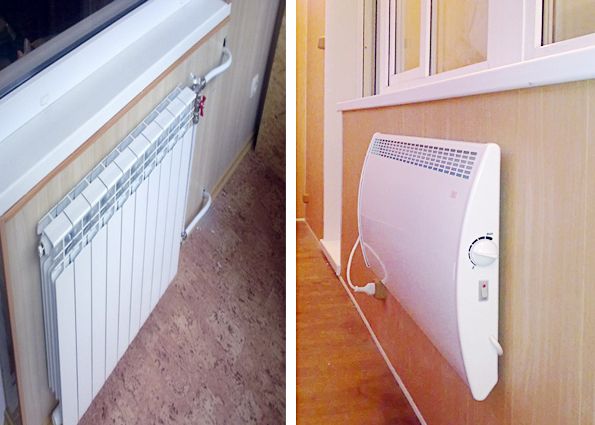
We figured out how to repair a loggia with our own hands. The final touch remains - heating this small room during the cold season of the year. If the "Warm floor" system was not installed on the loggia, then the following heating devices can be used as a heating system:
- Infrared heater... This is ideal for a loggia, as it warms up quickly, but the air does not dry out on it;
- Electric radiator... The most economical is an oil cooler, and the most energy-intensive is a heater with open spirals;
- Convector... Quite an economical and low-noise option, but it can lower air humidity;
- Fan heater... It is advisable to use an appliance with a ceramic heater that does not dry out the air.
Note: There is also an option to move the heating radiator to the loggia, but it requires a permit, which is not possible for houses with centralized heating.
Here you can see how the repair of the loggia is carried out with your own hands in stages in the video.
Today, loggias from storage of unnecessary things are increasingly turning into full-fledged living rooms. For such a transformation, sometimes it is enough just to make a step-by-step repair of the loggia with your own hands.
It is the strict observance of all stages of work that is the main condition for the successful repair of the loggia, during which the utility room can become part of the living space of the apartment. Consider step by step all the stages of the work, following which you can repair your balcony yourself.
In order to make quality repairs to your balcony, you should pay special attention to the preparatory stage.First of all, it is necessary to draw up a project, which will reflect the entire scope of the upcoming work. Next, you should free the balcony from unnecessary things and remnants of the previous finish: clean the walls and ceiling from paint and plaster, floors - from the old floor covering.

- thermal insulation;
- soundproofing;
- protection from street dust;
- protection from precipitation.
Since the glazing of the loggia plays a very important role, when installing windows, high-quality modern systems should be preferred. It is better if these are plastic or aluminum windows with multi-chamber double-glazed windows.
Before installing windows, it is imperative to inspect the parapet to see if it can withstand the load of the window blocks. If there are any doubts on this score, then it would be best to make additional reinforcement.
The next step after glazing will be the insulation of the walls, floor and ceiling of the loggia. This can be done using any of the most suitable insulation.

This coefficient shows how effective one or another insulation is - its minimum thickness depends on it, which is necessary to protect the balcony from external factors and freezing temperatures. Therefore, insulation should be carried out in accordance with building codes (SNiP) for your region.
The most commonly used for repair work on the balcony are polystyrene, penoplex, penofol, mineral wool and slabs.
At the same time, denser types of materials are recommended for floors, while roll insulation (mineral wool, penofol, etc.) is also suitable for ceilings.
Before proceeding with the installation of the thermal insulation material, all cracks and gaps in the joints of the balcony structures should be carefully repaired. If we neglect this, in the future, the cracks will become ways for dampness and cold air to enter the room. To seal cracks, depending on their size, you can use plaster or putty solutions, as well as polyurethane foam.
Then all surfaces should be treated with a water-repellent mastic. Waterproofing will avoid the appearance of dampness under the insulation and the development of mold and mildew. Further, on all internal surfaces, a frame should be mounted for attaching future finishing elements. You can do without a frame on the floors if you plan to pour a cement screed over the insulation.
It is also possible not to mount the frame on the ceiling if the ceiling plate is sheathed with thick sheets of insulation and putty. To create a frame, you can use wooden bars or a metal profile for gypsum board.

The insulation is fastened using construction adhesives or dowels. The most practical is the option of fastening with plastic dowels, fungi. For more information on how to insulate a balcony, see this video:
The gaps between the insulation and the frame bars should be carefully putty to avoid heat loss.

As you can see, having made a step-by-step repair of the balcony with your own hands, you can get a good living room instead of a utility room for storing rubbish.
In this article we will consider two types of finishes: clapboard and plastic. The photographs show you step by step the entire repair process from the beginning to the final stage.
To begin with, you should replace the double-glazed windows on the loggias. The installation of windows should be carried out by professionals. It is better not to do this work on your own, during operation it will be difficult to correct mistakes made during installation.
New glass unit Rehau 60 Blitz design. Each door of the two-chamber design opens. This will make it easier to keep the windows clean, since there is a road next to the house and dust accumulates on the surface quickly enough.
Glazing estimate. The total expense for the installation of windows was 18,220 rubles.
Tools:
- Construction knife and pencil;
- Concrete drill;
- BOSH bit;
- Yardstick;
- Jigsaw blades;
- A set of drills for wood;
- Stainless steel joiner's square;
- Building level;
- A miter box with a saw for cutting at an angle.
Power tools that are needed for work.
Lumber:
- Bars: 11x19x2200 (knotless spliced), 20x20x2000 (dry planed, category 1), 40x40x2000 (planed, category AB);
- Euro lining 12x95x2700 (category B);
- Furniture panel 18x400x800 (grade BB);
- Plinth 12x40x2200 (1st grade);
- Corner 27x27x2500 (external);
- Stapik 10x10x500 (category 1).
- Anchor bolts 8x80;
- Polypropylene dowels 12x70;
- Door hinges;
- Furniture hinges;
- Self-tapping screws for wood and drywall;
- Mounting corners;
- Door knob.
You will also need:
- Protective glasses;
- Polyurethane foam;
- Penoplex;
- Insulation material covered with a reflective film (porlex or penofol);
- Double-sided mounting tape (foam-based);
- Mineral wool;
- Metallized tape;
- Plywood.
- We assemble the structure from wooden blocks 40x40 and fasten it with anchors to the base;
- In order for the frame to be stable, we mount the transverse bars and fasten them to self-tapping screws;
- For reliable thermal insulation, we lay mineral wool with a thickness of 75 mm;
- The next layer is penofol (5 mm thick). This material improves thermal insulation, creates a thermos effect;
- The final step in floor insulation is the laying of 18 mm plywood (by bars). This action eliminates the squeak during operation.
The process of laying mineral wool between battens.
Mineral wool is laid over the entire floor area of the loggia.
Penofol covers not only the floor, it is also used for walls.
- Between the battens of the lathing, we lay plates of foam, for fixing we use a special glue, which is produced for this material;
- Fill the joints between the foam boards and the lathing material with polyurethane foam;
- Next, we mount the penofol layer.
Stacked foam boards.
Penofol installation instructions:
- We glue double-sided tape on the lathing bars;
- Next, we lay the heat insulator;
- From above we fix the slats with self-tapping screws (for the ventilation gap). It is necessary to make holes in the slats in advance, otherwise cracks will form in the material;
- Connection with metallized tape.
A wardrobe built into the wall of the lining.
Linoleum is used as a floor covering. The wooden skirting board is fixed around the perimeter of the base.
The cabinet doors are made of furniture board.
In addition to clapboard cladding, there are also other options for decorating the loggia, for example, finishing with PVC panels.
Advantages of PVC panels:
- Low weight;
- Easy to take care of the material during operation;
- PVC panels are fireproof;
- Long service life;
- Large selection of shades;
- There is no need to level the surface of the walls before installing the panels.

The presence of a balcony or loggia allows you to increase the area of the apartment with their competent arrangement.
In order to translate into reality various ideas aimed at achieving the desired result, you will have to carry out repair work.
What should be done and in what order? Consider in this article.
At this stage, you need to do the following:
1) draw up an installation diagram and purchase all materials;
2) dismantle old structures (remove windows, balcony blocks and remove trim);
3) if necessary, you can knock down the old screed or remove the old wooden floor, and check the condition of the balcony slab (if there are potholes on it, from which the reinforcement protrudes, it must be treated with a rust converter, and the potholes must be plastered);
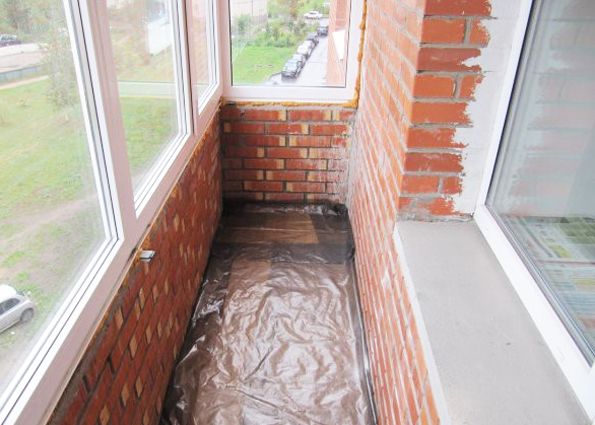
5) to create a reliable fence, you can use blocks of foam concrete, laying them with edges on a special adhesive mixture (the old parapet can be left in its place).
Advice: foam blocks should not be confused with gas blocks, since the latter absorb moisture very strongly and are not suitable for arranging a balcony fence.
It can be accomplished using materials such as:
- metal-plastic profile (optimal in price, durable and perfectly retains heat for a long time);
- aluminum (as a rule, it is installed on loggias that are not intended for insulation);
- wood (the most expensive material, which, in addition to everything, is highly susceptible to moisture).
The sequence of work related to the glazing of balconies or loggias is as follows:
1) on a parapet equipped with foam blocks, using a building level, a window frame is placed strictly vertically and fixed with self-tapping screws or anchor bolts (at least two on each side);
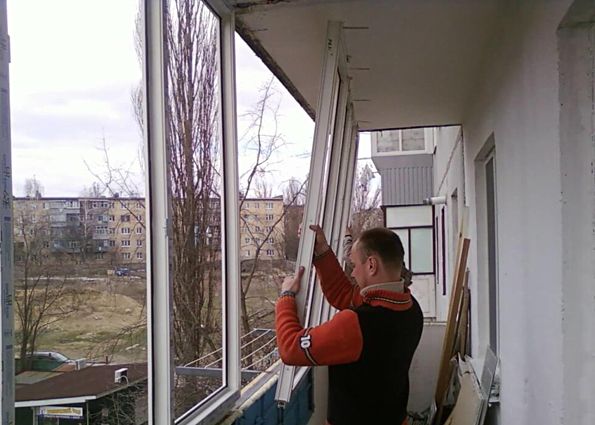
3) and from the outside - low tide;
4) after that, a double-glazed window is installed in each window frame;
5) all cracks formed during glazing must be sealed with polyurethane foam (this will not only help retain heat, but also create reliable protection against various sounds coming from the street);
6) after drying, the protruding parts of the foam are cut off with a clerical knife and these places are covered with special overlays.
To create a comfortable environment on the territory of a balcony or loggia, it is imperative to bring in electrical wires for installing an outlet, a switch and lighting lamps.
To prevent these wires from spoiling the interior, they must be laid in the corners or hidden in special channels made in the walls. Light sources can be a variety of lamps or LED backlighting.
To create comfortable conditions on the territory of the inner space of the loggia, it will be necessary to insulate all surfaces through which the heat from the apartment can escape to the street.
First, the cracks are closed and waterproofing work is performed. After that, they draw up an installation diagram and carry out the purchase of materials.
There are two ways to insulate this surface, each of which depends on the coating material (we are talking about a wooden or concrete field).
For a wooden floor, the sequence of work is as follows:
1) a film of waterproofing material is laid on top of the balcony slab;
3) sheets of insulation are laid in the formed gaps, which can be polystyrene or mineral wool;
4) another layer of waterproofing is laid (it is necessary to protect the insulation from water ingress during wet cleaning of the floor);
5) cover it all with a floorboard or sheets of OSB plates, fixing them to the logs with self-tapping screws;
6) the formed surface is covered with several layers of paint or varnish.
Advice: in no case should chipboard sheets be used as flooring, since this material is very afraid of moisture (swells and collapses).
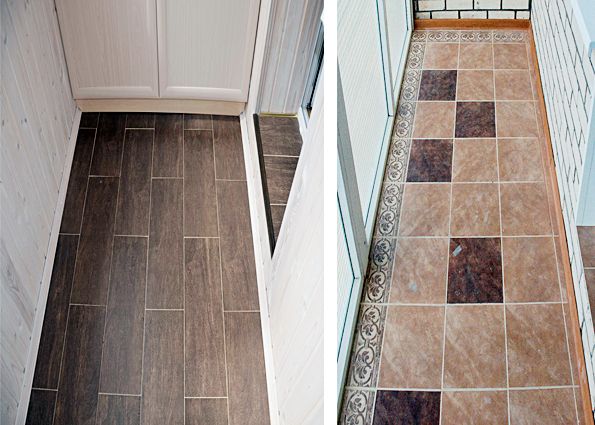
1) first, they equip a rough screed made of cement mortar (with its help they try to smooth out the unevenness of the balcony slab as much as possible);
2) then the sheets of expanded polystyrene are laid close to each other (in the case of gaps or cracks, they are sealed with polyurethane foam);
3) a waterproofing film is spread over them and a reinforcing mesh is laid;
4) then put up beacons and fill in a finishing screed 5–7 mm thick, leveling it with a small rule.
Such a system can work either with a heated coolant or from an electrical network using elements specially designed for this purpose (we are talking about an electric cable, heating mats, or a film covering that emits infrared rays).
If the apartment is not equipped with a water floor heating system, then in this case, the most appropriate would be to use electric heating.
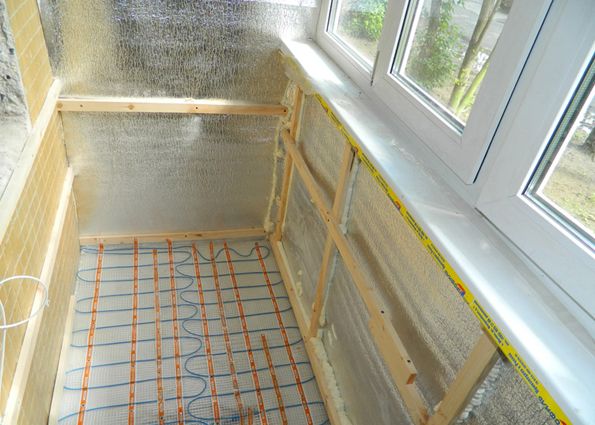
1. An electric cable intended for heating is placed on top of a layer of insulation, after which a finishing screed is poured. When the concrete is dry, floor tiles are glued to it.
The advantages of this method are that the cable connected to the electrical network heats up over time and transfers its heat to the concrete, which, in turn, heats the entire floor area.
2. As for the heating mats, they can be placed in a layer of tile adhesive, on top of which the tiles are laid.
3. To place an infrared-emitting film on the floor, a heat-reflecting material must first be laid on top of the rough screed. The final coating can be tiles, linoleum, etc.
If it is necessary to insulate the ceiling, before starting work, all cracks are closed using polyurethane foam. Otherwise, condensation will accumulate between the insulation layer and the upper ceiling of the balcony, which will eventually lead to the formation of mold.
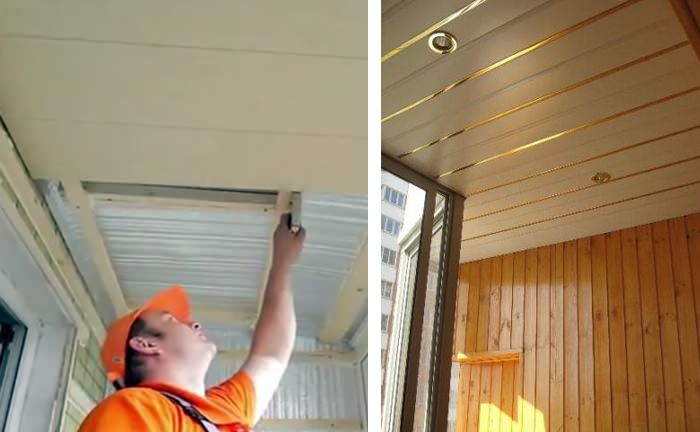
1) build a wooden frame and lay the sheets of insulation in the gaps thus formed, then fix the vapor barrier on top of the insulation and hide it all behind the finishing;
2) fix the penoplex on the upper balcony slab using special dowels (they are also called "umbrellas"), lay a layer of vapor barrier and, having built a wooden frame, close it all with plastic panels.
Only those sides of the loggia that are not adjacent to the apartment should be insulated. Insulation sheets can either be glued with glue and additionally attached with dowels, or placed in the gaps between the previously equipped frame.
Then (in the first and second cases) a layer of vapor barrier is laid. Finally, the installation of the topcoat is carried out, which can be used, for example, plastic panels or other materials.
To carry out work related to the interior decoration of balconies or loggias, you can use various building materials, but the most practical among them are:
- wallpapers of various types, tiles and whitewash (recently they are used very rarely due to the loss of their relevance).
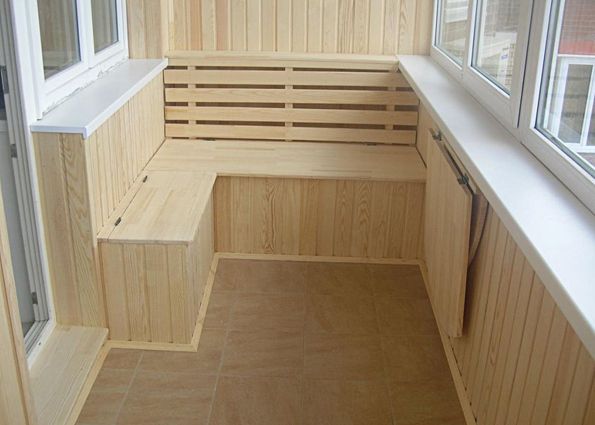
The lining made of wood, although it has a high price, but it has a beautiful appearance and is made of natural material that does not have a negative effect on the human body. It is mounted on a wooden crate with self-tapping screws. Upon completion of the work, the surface equipped in this way should be covered with several layers of varnish, each of them sequentially dried.
PVC panels are durable and harmless material that is very easy to cut, install and wet clean. Installation is carried out in a similar way.
MDF panels are also expensive because of their beauty and strength. Using such a material, you can imitate the surface of marble, granite or expensive wood. Installation is carried out by analogy with clapboard made of wood or PVC panels.
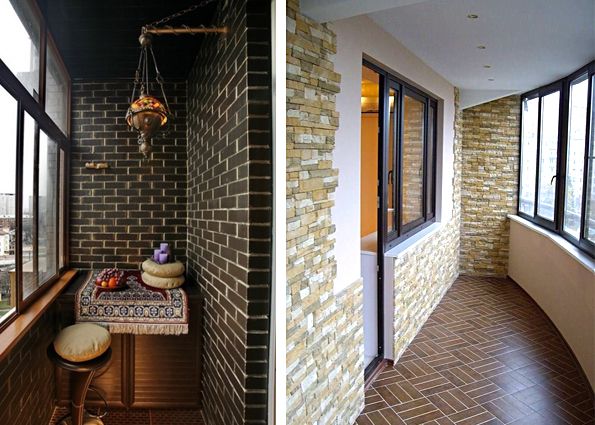
Decorative stone brings its zest to the interior decoration of the loggia. The territory of the balcony, equipped in this way, looks dignified and elegant. This material is harmless to humans and can serve for many years.
For a longer service life of all building materials involved in the repair, the balcony or loggia must be heated in the cold season.
Applying all the above tips, and consistently translating each of the stages of work into reality, you can repair balconies or loggias of varying complexity, using the most practical building materials.
For some, a loggia is a closet for storing old and unnecessary things, tires and bicycles, and for someone another full-fledged room, the most comfortable corner in the house, a winter garden or even an area for sports. Turning a cluttered balcony into a well-groomed and functional room on your own is not so difficult, you just need to competently plan the repair of the loggia with your own hands and get down to business.
Making repairs to a loggia in a new building is one thing, but more often we have to deal with an already cluttered balcony, which must be disassembled to its original state.
Using the balcony for other purposes
First of all, clean the room of all unnecessary, do not feel sorry for old things that have been idle for years and even decades. Then remove the shelves, cladding and anything that was not included in the original balcony configuration.
If you notice cracks, voids, and collapses on the concrete slabs, they will need to be cleaned, primed and cemented with an adhesive-based mixture. Check all cement joints carefully for deterioration and, if problems are found, cement them.
You should start repairing the loggia with your own hands in stages. Start by purchasing supplies and necessary tools. For thermal insulation, choose mineral wool or modern expanded polystyrene - it depends on your budget.
For finishing the loggia, it is customary to use siding, lining or decorative panels, but you can come up with your own original version. You will also need moisture-resistant drywall, polyurethane foam and a construction gun, self-tapping screws, etc.
For budget repairs, glazing with wooden frames is suitable, but if you want to make a full-fledged room with soundproofing from a loggia, then you will need glazing with plastic windows. This option is the most preferable, it will protect the room from wind, noise, drafts and other external factors.
The video shows how to repair the loggia step by step with your own hands and, in particular, how to install plastic windows on the balcony.
The next step will be the installation of the lighting of the loggia. Here you can choose any lighting fixtures you like. Both ceiling and wall lamps look good on the balcony.At the same stage, the installation of sockets and switches is carried out.
In the photo, the repair of the loggia at the stage of installing the lighting. See how the professionals handle it.
Balcony insulation is divided into several stages, let's consider each of them separately.
The walls of the loggia are insulated using various heat-insulating materials. It can be penoplex, cotton wool and other more modern options. The insulating layer is attached to the wall with dowels or slats. The joints are sealed with polyurethane foam.
A vapor barrier and reflective layer must be made on top of the thermal insulation layer. Here you can use foil or foamed polyethylene.
Ceiling insulation is not much different from wall insulation, but here you can choose suspended ceilings as insulation. One of the advantages of this solution is that such a ceiling will easily cover all the wiring for lighting.
There are several ways to insulate the floor in the loggia. One of the most common options is wooden logs, between which an insulating layer is placed. A grooved board is laid on top of the thermal insulation, which is screwed to the logs with self-tapping screws.
A screed is another common, but more expensive option. Today, on the loggia, more and more often the underfloor heating system is stopped under the screed. This simultaneously solves the problem of floor insulation and heating of the entire balcony. Tile or other building material of your choice is laid on top of the screed.
The walls of the loggia are best sheathed with plasterboard, clapboard or plastic panels. In any case, the material must be moisture resistant and preferably washable.
Before cladding the walls, the insulation is closed with cork or wooden flooring, and then the upper decorative layer is already mounted. In the photo you can see what a do-it-yourself loggia repair looks like in the process.
DIY loggia repair
It all depends on your preferences. With sufficient financial investments, another room can be made from a loggia of a good footage. But even a small loggia, with a competent approach, can make your dream come true. Think about what you are missing in your apartment and feel free to start repairing the loggia with your own hands!
| Video (click to play). |
And you can get acquainted with our ideas for repairing a loggia in the photo gallery. Here are just a few options for decorating a balcony:


