In detail: DIY repair of a 4-stroke scooter from a real master for the site my.housecope.com.
In order for the engine of a four-stroke scooter to work perfectly, only three things are needed: spark, fuel and compression. When troubleshooting, you should adhere to the following rule - everything is checked gradually, from the most basic faults to the repair of the main parts of the moped.
The first thing to check is the presence of fuel in the tank and in the system. Then we check for a spark. The engine will not start if the quality of the mixture is disturbed, or if the carburetor is clogged.
If the ignition key is not turned, a fuse is blown, or the battery is discharged, the engine will show no signs of life. Therefore, before proceeding with a global repair, you should check these reasons.
The starter motor cranks, but the engine will not start.
Possible reasons - the spark plug is broken, the carburetor is clogged, the fuel does not enter the system.
The engine runs erratically or a loss of power is felt.
This may indicate that the carburetor is clogged, the oil or air filter is clogged, the head valves are misaligned, the variator or piston group is worn out.
There was a specific knock in the engine during operation.
This could be a sign that the bearings are out of order and need to be replaced. It may also be associated with the need to adjust the valve clearance.
- We remove the engine from the scooter. We install the scooter as stable as possible. We remove the trunk. Disconnect all wires from the engine and the throttle cable from the carburetor. Remove the gas hose and vacuum filter. Disconnect the rear shock absorber. After the engine has been separated from the frame, unscrew the nut on the mounting axle and remove the axle. After removing the engine, it is advisable to wash it.
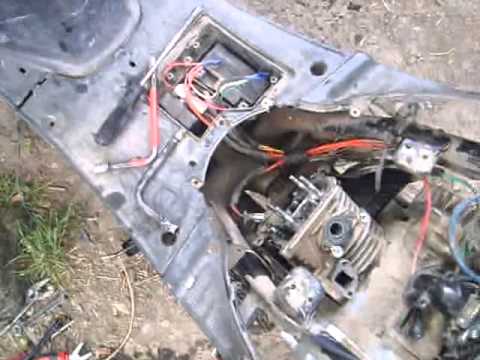
- Removing the cylinder head. It is necessary to do to clean the chamber from carbon deposits. In order to remove the head, you must first disconnect all the "extra" parts. Then the chain tensioner bolt and locking bolts are unscrewed. Then we turn the flywheel until the T designation matches the one on the engine body. We unscrew the bolts on which the cylinder is attached and remove the chain, and then the cylinder head itself.
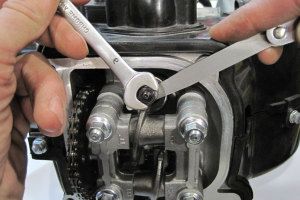
- Valve clearances must be adjusted if a metallic knock appears. The principle of operation is as follows: the cover of the valve mechanism is removed. The mark on the flywheel is related to the mark on the engine housing. We measure the clearance between the adjusting screw and the valve stem. When increasing or decreasing the gap, we adjust by rotating the screw.
| Video (click to play). |
As practice shows, it is better to entrust the engine overhaul to professionals, since there are many nuances that an ordinary driver does not pay attention to, but which in the future can create even greater problems and then more expensive repairs will be required.
A video on repairing a 4-stroke scooter will introduce you to the main aspects of repair.
Crime: the brake light does not light up, the brake lever limit switch does not work.
Analytics: the lever of one of the brakes has not been pressed or there is a malfunction in the brake light circuit.
Procedure: replace the bulb, adjust the brake lever free play or replace the brake lever limit switch.
Crime: fuse blown.
Procedure: check and, if necessary, replace the fuse for the main circuit and the starter circuit.
Crime: the junction of the terminal with the wire is covered with a loose coating of oxides.
Analytics: the battery gives insufficient voltage, which can happen due to a malfunction in the circuit or if the battery terminals are oxidized.
Action: check the circuit, recharge the battery if necessary. Clean the terminals from oxides.
A temporary measure is to start the engine with a kick starter.
Crime: you turned on the ignition, pressed the brake lever and the starter button, and the starter relay still does not click.
Analytics: the electric starter circuit is faulty.
Actions: clean the contacts on the relay and starter, "ring" the relay, wiring, starter windings.
Crime: when you press the kick-starter lever, it scrolls, but the engine crankshaft does not rotate; the leg does not feel resistance to the stroke of the kick-starter lever.
Analytics: Kick starter or ratchet gear teeth are broken. Action: replace defective parts.
Crime: the electric starter turns the crankshaft, but the engine does not start.
Analytics: the carburetor is "dry" (unscrew the drain screw of the float chamber - see). Variants of reasons: the filter of the gas valve is clogged, the gas valve is faulty, the fuel line is clogged, the vacuum hose for the control of the gas valve has jumped off or is leaking.
Actions: clean the fuel tap filter, blow through the fuel line, make sure that the automatic gas tap is in good working order.
Crime: fuel is supplied to the carburetor, but does not enter the pop-up chamber.
Analytics: float fuel valve stuck.
Procedure: remove the float chamber cover and clean the valve seat. If it does not help, replace the valve.
Crime: you unscrew the candle, and it is "wet" - covered with a layer of unburned benzo mixture.
Analytics: excessively rich combustible mixture, which happens due to too high fuel level in the float chamber or due to clogged air filter.
Actions: disassemble the carburetor, check the fuel level, clean the air filter.
Side effects: The engine starts immediately if a little gasoline is poured into the air filter.
Analytics: the automatic starting enrichment does not work.
Actions: check the serviceability of the starting enrichment (there are several ways - they are described in detail in the repair manuals)
Crime: a spark does not occur on the spark plug unscrewed from its socket (in a position where the metal part of the spark plug reliably contacts the "mass" of the scooter).
Analytics: the spark plug is faulty: the insulator is broken or the electrodes are covered with a thick layer of carbon.
Procedure: Clean the spark plug with emery paper or replace. If the spark still does not appear, diagnose other elements of the ignition system.
Crime: the spark on the spark plug is formed, but weak or "running".
Analytics: the spark plug has a broken insulator.
Action: replace the spark plug.
2. THE ENGINE STARTS WITH LABOR, RUNNING UNSTABLE
Crime: the engine does not "spin", there are pops in the carburetor.
Analytics: excessively lean fuel mixture, a possible reason - air is sucked in through a loose intake manifold or damaged crankshaft oil seals. Water in the float chamber.
Procedure: replace the gasket under the branch pipe and evenly tighten the bolts of its fastening. Replace the crankshaft oil seals. Get rid of the water in the float chamber (by unscrewing the drain screw of the float chamber), blow out the jets and channels of the carburetor, replace the gasoline in the tank.
Crime: a spark on an unscrewed spark plug (in a position where its metal part reliably contacts the "mass" of the scooter) is formed, but the surfaces of the insulator and electrodes are dry.
Analytics: the automatic starting enrichment does not work (if the engine is cold). Normal combustible mixture does not form. The idle air jet is clogged.
Actions: check the serviceability of the starting concentrator (see item 1). Purge the carburetor jet and channels.
Crime: there are water droplets on the insulator and electrodes of a twisted spark plug. Analytics: water penetrated into gasoline.
Action: get rid of water in the float chamber.
Crime: a spark on an unscrewed spark plug (in a position where its metal part reliably contacts the "mass" of the scooter) is formed, but the surfaces of the insulator and electrodes are covered with black oily soot (photo 5).
Analytics: the brand of the spark plug does not correspond to the thermal mode of the engine operation - its glow rate is higher than that set for the given engine (the spark plug is "cold"). The temperature in the working area of the plug is insufficient for self-cleaning of the electrodes.
Action: replace the spark plug with a "hotter" one (with a lower glow number).
Crime: the engine starts normally, but soon there are interruptions in its work and it stalls.
Analytics: the vent hole in the fuel tank cap is clogged or the hoses responsible for communicating the contents of the gas tank to the atmosphere are clogged.
Procedure: Clean the fuel tank cap vent or hoses.
Crime: when you press the kickstarter lever, there is no resistance to compression of gases in the cylinder.
Analytics: the piston, cylinder, piston rings are extremely worn out.
Actions: check the compression - using a compression gauge or by measuring the parts (after dismantling the cylinder). Upon confirmation of the diagnosis, the engine requires repair with replacement of worn parts.
Crime: the sound of escaping gases is heard, oily traces are formed on the head and cylinder.
Analytics: the gasket under the cylinder head is damaged or the fastening of the head to the cylinder is loose.
Actions: replace the gasket and tighten the nuts securing the head to the cylinder with the required torque (effort) in the sequence recommended by the repair manual.
3) EXTRAORDINARY SOUNDS IN THE ENGINE
Analytics, version 1: increased wear of parts of the cylinder-piston group.
Action: the engine requires repair with replacement of worn parts.
Version 2: the thermal clearance in the valve drive is broken (for 4-stroke engines).
Action: adjust the valves.
Version 3: Loose chain in the valve drive (4-stroke engines).
Action: adjust the chain tension.
Version 4: grooves in the variator pulley have developed, along which the rollers move, as well as the rollers themselves.
Actions: replace the worn pulley, rollers (possibly other variator parts).
4. ENGINE STOPS AT SHARP OPENING OF THE THROTTLE
Circumstance 1: The engine has just started.
Analytics: the engine is not warm enough.
Action: continue warming up the engine at idle speed.
Circumstance 2: The engine is well warmed up.
Analytics version 1: carburetor not adjusted.
Actions: adjust idling speed, if necessary - the main dosing system (see item 5).
Version 2: the variator does not work properly.
Actions: see item 10.
5. THE ENGINE STARTS NORMALLY BUT IT DOESN'T SPIN
Crime: thick smoke in the exhaust, excessive fuel consumption, black plaque on the spark plug electrodes.
Analytics: The main dosing system prepares an overly rich mixture.
Actions: adjust the quality of the mixture - lower the carburetor throttle adjusting needle one notch (groove) down. It may be necessary to install a smaller bore main jet.
Crime: the engine overheats, detonation is heard during acceleration, white bloom on the electrodes and spark plug insulator. After turning off the ignition, the engine continues to run for a few seconds (detonates).
Analytics: The carburetor's main metering system is preparing an overly lean mixture.
Actions: adjust the quality of the mixture - raise the carburetor throttle adjusting needle one step up.It may be necessary to install a large bore main fuel jet.
Crime: the engine runs unusually quietly (although it is easy to start), low-smoke exhaust, the engine “does not pull” during acceleration.
Analytics: muffler, channels and cylinder windows clogged with carbon deposits (in two-stroke engines).
Action: clean carbon deposits if possible. If the muffler is completely clogged (no air flow), replace the muffler.
6. AFTER A LONG DRIVE, THE ENGINE LOSES POWER
Circumstance 1: an air-cooled engine.
Crime: no air movement is felt from under the cylinder casing, and a sheet of paper does not "stick" to the air intake mesh (on the right side of the engine) (if a test is carried out with paper).
Analytics: the fan impeller blades are broken, another assumption is that the shrouds of the cooling system are loose or split in places.
Procedure: Replace the impeller and damaged covers.
Circumstance 2: Liquid-cooled engine.
Crime: coolant leaks, its level in the tank has dropped.
Analytics: faulty components of the system: pump, thermostat, radiator.
Action: replace faulty components.
7. ENGINE DOES NOT ACCELERATE THE SCOOTER TO 50 KM / H
Inspection data: speedometer calibrated, no power or rev limiter installed.
Analytics version 1: The scooter is not designed for this speed.
Actions: all actions are meaningless.
Version 2: the carburetor is incorrectly adjusted, the muffler is clogged, or the parts of the cylinder-piston group are worn out.
Actions: see item 2 or change the scooter.
Version 3: the variator is not working properly.
Actions: see p. 9, 10.
8. WHILE THE ENGINE IS RUNNING THE SCOOTER DOES NOT START FROM THE PLACE.
Crime: the variator is faulty.
Analytics: the driven pulley spring is broken, the V-belt is torn (to make sure of this, remove the variator cover - breakdowns are perceived at a visual level).
Action: replace defective parts.
Crime: faulty centrifugal clutch.
Analytics: the springs of the shoes are broken, the linings of the shoes are excessively worn out (found out during a visual inspection after removing the variator cover) (photo 9). Action: replace defective parts.
9. SCOOTER RIDES IN SPECTS
Crime: jerks are felt when driving.
Analytics: the variator belt slips (due to wear, damage or oiling) or the surfaces of the pulleys are excessively worn out.
Action: replace defective parts (photo 10).
10. SCOOTER SPEEDS SLOWLY, RIDES SLOWLY
Analytics: during the recent tuning, the weight of the centrifugal regulator weights or the spring of the driven pulley are incorrectly matched. The springs of the centrifugal clutch shoes are broken or have lost their rigidity, the linings of the centrifugal clutch shoes are worn or oiled.
Actions: carry out the tuning more thoroughly, preferably with the participation of specialists.
Let's get down to the basics of technical inspection
Although four-stroke scooters are more resourceful than two-stroke scooters, they, like any equipment, need timely maintenance (MOT) at the company's service stations. This will not only ensure long, trouble-free operation, but is a condition for the seller to comply with the warranty obligations. However, after the expiration of the warranty period or at the request of the owner, he can carry out all the work on his own. The main work on the maintenance of the mechanisms and systems of the scooter engine includes: changing the oil and cleaning (replacing) the oil filter, cleaning the air filter, replacing the fuel filter, cleaning and adjusting the carburetor, cleaning carbon deposits from the parts of the cylinder - piston group and adjusting the valves of the gas distribution mechanism (timing ) and their drive.
Maintenance is carried out at intervals determined by the service book (after the first 300-500 km, and then every 2000 km), or as needed (for example, when operating in dusty conditions or when extraneous sounds, jamming or leaks appear). For the full execution of work, tools and devices are needed, as well as experience in working with them.
- engine systems;
- tires and drum brakes;
- storage battery;
- free running of the throttle cable;
- steering column bearings;
- front disc brake;
The engine oil level should be checked before each ride using the dipstick on the right side of the crankcase. If necessary, the oil should be topped up with the same grade that was added to the engine. Simple, but extremely necessary operations - oil change and filter cleaning, they are carried out at every scheduled maintenance.
- dipstick and oil filler neck;
- oil filter plug;
To change the oil, warm up the engine, unscrew the filler and drain plugs. When the oil flows out, screw the drain plug and unscrew the oil filter cover and clean it or, if damaged, replace it with a new one. Then pour the required amount of oil through a funnel into the hole (usually its amount is indicated on the body), controlling the level. After starting the engine for 1-2 minutes, check the oil level (it should be at the upper mark of the dipstick), and top up if necessary.
The carburetor is adjusted when the idle speed deviates from the norm (the engine “roars” or stalls), or to adjust the composition of the mixture (by changing the position of the metering needle). In this case, it is not necessary to remove the carburetor from the engine; it is sufficient to separate the luggage compartment and the seat. Removing the carburetor is required to clean the carburetor and check (adjust) the fuel level in the float chamber.
Adjusting grooves on the carburetor needle.
Air filter maintenance consists of cleaning the filter element and housing. The foam (polyurethane foam) filter element allows multiple cleaning, it is washed in pure gasoline and impregnated with a special oil for air filters. Excess oil must be removed by squeezing the foam rubber (but not twisting it).
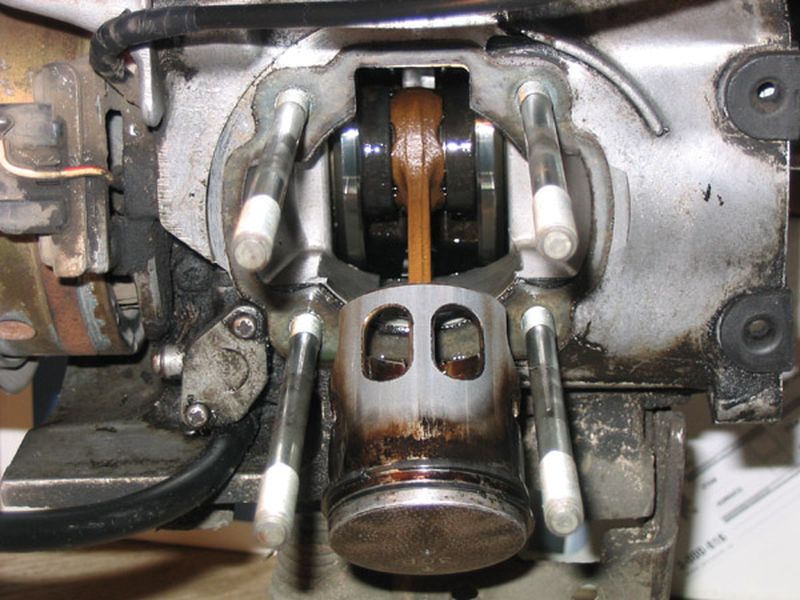
After several seasons, it may be necessary to clean up carbon deposits from parts of the cylinder-piston group. To carry out these works, you need to remove the cylinder head from the engine and soften the deposits using acetone (moistened with rags) or special cleaners. A scraper made of wood, plastic or thin sheet metal is suitable for removing carbon deposits.
The work on adjusting the valves and the timing drive requires experience and is quite laborious. Of the special devices, a set of probes is required, which must be inserted into the gap between the pusher and the camshaft cam, having previously turned the crankshaft to such a position when both valves are closed (end of the compression stroke). The normal clearance should be 0.08-0.1 mm for intake valves and 0.1-0.12 mm for exhaust valves. Measurements are carried out on a cold engine. In addition, it is necessary to periodically adjust the tension of the timing chain.
Maintenance of scooter electrical equipment actually comes down to inspection, cleaning and timely replacement of the spark plug, and replacement of burnt out lamps. At each maintenance, it is necessary to check the condition of the spark plug, and after a run of 4-8 thousand km (depending on operating conditions) or once a year, it is recommended to replace it. A new candle should be installed of the same type, and if it is not there, then another manufacturer, but with the same glow number. During operation, the candle is periodically cleaned of carbon deposits and the gap between the electrodes is adjusted (its value is indicated on the package).
To clean the surface of the battery from traces of electrolyte, it is wiped with a cloth moistened with soda solution, then washed off with water and wiped with a dry cloth.Maintenance of the electric starter is reduced to cleaning the terminals from oxides and tightening the terminals in case of malfunctions.
Maintenance of the transmission includes: cleaning the inside of the casing of the variator and changing the oil in the rear wheel gearbox (for this, transmission oil is used). Frequency - during the first maintenance, and then annually, if not necessary (for example, when water gets in). The oil level can often not be checked unless there are signs of oil leakage. The filler hole is aligned with the control hole, so new oil should be added until its level in the gearbox is equal to the lower edge of the hole.
An important operation is the maintenance of the scooter's brakes. It includes: cleaning and replacing pads, or brake fluid, adjusting the free play of the rear brake lever, lubricating its cable.
Rear brake lever free play adjustment
Adjusting the free play of the throttle cable
The hydraulic hose must be free of scuffs and cuts, and there must be no fluid leakage at its joints. There is a special peephole to control the fluid level in the reservoir of the master brake cylinder. Topping up, if necessary, should be liquid of exactly the same type that was poured earlier according to the instructions in the instructions. It is recommended to replace the brake fluid every two years. If the front brake lever fails, the system must be pumped to remove air.
The condition of the pads can be assessed without disassembling the brake. The minimum thickness of the friction layer is determined visually if the pad has a special wear indicator. It is made in the form of a groove that does not reach the steel base of the shoe by the amount of wear limit. If the pad does not have a wear indicator, measure the thickness of the friction layer - it should not be less than 1-1.5 mm. After replacing the pads, before leaving, be sure to press the brake lever several times so that the pads select excessive clearances (self-align).
Servicing a drum brake is reduced to the supply of shoes by rotating the nut on the threaded cable end. If the efficiency of the brakes decreases, which occurs due to contamination (oiling) of the surfaces of the pads and the drum, you should remove the wheel and clean the surfaces with sandpaper or a file, and, if necessary, replace the pads. The axle of the expander cam is also lubricated with engine oil. After cleaning (replacing) the pads, the brakes do not immediately acquire normal efficiency; some mileage is required to grind the pads to the drum.
The tire pressure should be checked regularly; it should be 1.8-2.0 atm. This will ensure the safety of your travels and the maximum service life. The maximum residual tread height of scooter tires (according to traffic rules) is 0.8 mm.
In steering, the steering column bearings require attention: seizing of bearings in any position of the steering wheel, as well as their backlash, is not allowed. Their condition is checked (with the front wheel suspended) by swinging the lower parts of the movable tubes of the fork or the tube of the link suspension with your hands. The adjustment requires two large keys and the removal of the front trim panel.
The scooters are equipped with sealed front wheel bearings, designed to operate without maintenance throughout the entire bearing life. In such bearings, it is necessary to ensure that the backlash does not exceed the permissible values (about 2 mm around the rim). If necessary, they should be replaced with new ones.
Article taken
I started 4 such a scooter from the accumulator, the revolutions will blow out normally, I throw off the clem from the accumulator, the speed drops to a minimum, although I give gas to the full, I put the clem on the accumulator, the turnover will blow out normally what is the reason
Most likely, the ignition (rotor stator) is not working properly, it is also worth checking the operation of the voltage regulator relay
In order for an internal combustion engine to work, it needs three components: fuel, spark, compression. The main slogan of the motorcycle mechanic is “there are no miracles”. It must always be remembered that if, when troubleshooting and scooter repair it turns out that there is a spark, there is compression, fuel comes in, but the engine does not start, this usually means only that some of these components are actually missing.
Too lazy to give the scooter for repair and pay money for it. Familiar situation. Then it's time to take on the repair with your own hands.
The basic principle of troubleshooting and repairing a scooter is to exclude system elements step by step, trying to identify the cause of a malfunction in one of them. Search and repair must be carried out strictly sequentially, from the very beginning of the chain to the very end. That is, for example, in the absence of a spark, you should not immediately change the switch. First you need to make sure that we have a "live" generator, then test the wiring. Etc.
An important note: if you have a device in front of you, which, according to the owner, “used to work like a clock”, it makes sense to ask if old gasoline is poured into the tank. A couple or three months of storage is quite enough for gasoline to lose its octane number to such an extent that it has lost the ability to ignite.
It is important to remember that before making the final diagnosis and starting the repair of the scooter, you need to make sure that a working candle is installed on it, as well as the carburetor is functioning normally.
In addition, you need to know that the correct operation of the engine (even at idle) is closely tied to the correct operation of the variator, clutch, as well as the camshaft and valve group. In other words, with normally functioning power supply, ignition and CPG systems, the problem may be, for example, in the transmission, since the crankshaft torque is directly transmitted to the variator.
When carrying out diagnostics and repairs, it must be remembered that under some circumstances that led to the need scooter repair, it is necessary to check not a single element, but the entire system. For example, if the carburetor is clogged, provided that the air filter is intact and impregnated, it is necessary to check if there is any dirt in the gas tank and fuel filter. If the scooter has been driving for a long time without an air filter, or with an untreated filter, then everything must be checked: the CPG, the crankshaft and the main bearings.
Below are some of the problems that you may encounter and the basic steps to take to fix them. The links indicate the places where you can find information on this item.
In terms of the complexity and abundance of systems, this carburetor will compete with the most sophisticated automobile ones (only those with electronic control are more difficult). Hence the advice: if your experience with the motorcycle power system is limited to two or three successful repairs of K-65 devices, do not risk it - contact a specialist. And the second: work on a table covered with a sheet of clean white paper under the light of a bright lamp - this way it is easier to see the details and more difficult to lose them. And to consider the holes of the jets is daunting: they are so small that the smallest speck of dust will clog them. Some channels are comparable in size to them. The outside of the carburetor must be clean before disassembly. Hands are the same as those of a surgeon before an operation. For work, you need screwdrivers with unworn working surfaces. Most of the screws here are not only tight, but they are also secured with thread sealant, so a screwdriver with a bad sting will only break their splines. Stock up on tweezers to make it easier to "catch" the little things. Well, scared? If not, let's get started.
It is possible to remove the carburetor through the hatch under the seat, but it will be easier if you first dismantle the entire trunk.
You can get to it through a hatch in the trunk, under the saddle. But it is easier to do this if you unscrew the five bolts and dismantle the entire trunk together with the saddle, loosening the clamps.Loosen the one on the engine side more so that the bead on the rubber tube can come out of the deep groove in the carburetor outlet. Usually, when the engine is not running, the gas tap with a pneumatic drive is securely closed, but it is better to play it safe - fix the end of the hose removed from the carburetor above the gas tank. Then disconnect the throttle cable and the connector of the wires A going to the carburetor trigger. Clean any dust from the carburetor with a soft brush, wash your hands and start disassembling.
Unscrew the three bolts and remove the float chamber cover. The axis of the floats holds the bolt. Unscrew it and take out the float block with the locking needle. The needle of this carburetor has a rubber conical part, and a spring-loaded rod rests against the float tongue. This design makes the assembly sealed, very durable and resistant to abrasion.
Back view : 1 - starting device; 2 - channel leading to the cavity under the spool membrane; 3 - air channel of the starting device; 4 - air jet of the main dosing system; 5 - accelerator pump sprayer; 6 - channel in which the idle air jet is located; 7 - accelerating pump.
Possible malfunctions. The bead on the side walls of the floats should be parallel to the plane of the upper carburetor connector. If this is not the case, bend the metal tab into the correct position. Check it with the carburetor on its side - the tongue should only touch the needle shaft, not sink it.
Front view : 1 - channel for the outlet of the fuel-air mixture from the starting device; 2 - a tube through which excess gasoline is drained in case of a malfunction of the float mechanism; 3 - channel through which vacuum from the intake manifold is supplied to the idle system shutdown mechanism.
Main dosing system
Its jet is located in the center of the float chamber. Through it, the fuel enters the emulsion tube, in which it mixes with air and forms an emulsion. Air enters through a jet located at the inlet of the carburetor. The emulsion is dosed with a needle, which is fixed in the spool. A spool provides a constant vacuum in the spray area. There is a hole near the dosing needle through which the vacuum is transmitted into the cavity above the membrane, while the spring is compressed, and the spool is raised to the desired height.
Right view : 1 - accelerator pump drive lever; 2 - sector of the throttle valve drive; 3 - screw for adjusting the amount of fuel-air mixture at idle speed.
To deplete or enrich the combustible mixture, unscrew the screws securing the diaphragm cover and remove the spool with the diaphragm. Be very careful - the cover is made of fragile plastic. Remove the needle cover and the needle from it.
The range of adjustments is small - there are only three grooves on the needle, with the factory setting the stopper is in the middle. When the engine is running, vibrations in the air in the intake tract cause the valve to vibrate. To prevent the stopper from breaking the needle groove, a rubber ring is installed under it. If you damage or lose it, then not only shorten the service life of the unit, but also deplete the mixture - the needle will go lower without this part.
Left view : 1 - screw for adjusting the quality at idle; 2 - fuel intake fitting; 3 - fitting through which you can sleep fuel from the float chamber; 4 - screw-plug of the float chamber.
When you put the diaphragm in place, make sure that the protrusion on it fits into the cavity in the body.
Possible malfunctions. There can be two of them. First, the fuel jet is clogged. Blow it out. Second, the spool diaphragm is damaged. In this case, replacing the diaphragm with a spool is indispensable.
Details in the float chamber : 1 - fuel tube of the starting device; 2 - block of floats; 3 - locking bolt; 4 - a needle with a rubber tip and a spring-loaded stem; 5 - axis; 6 - tongue; 7 - main fuel jet. eight - . and its emulsion tube; 9 - idle fuel jet.
Idle speed (XX) is regulated, as in most carburetors, with two screws: the quality and quantity of the mixture. The quality screw is located under the throttle shaft on the left side of the carburetor, and the quantity screw is located at the axle sector stop. At the factory, the quality adjustment is carried out as follows: the screw is tightened all the way, and then unscrewed by 2.5 turns. The XX system fuel nozzle is located next to the main fuel system jet and it and the emulsion tube form a single unit. The air jet is pressed into a tube-like lug to the right of the main fuel system air jet. The emulsion is fed to three holes under the throttle valve. Why three? As the damper opens, its cut moves from one to the other, and they alternately find themselves in the zone of the highest air flow velocity, which means, in the zone of the highest vacuum. This improves the performance of the carburetor at the beginning of the throttle opening and eliminates "dips".
When installing the spool, make sure that the protrusion on the diaphragm is in the cavity of the body (highlighted in red). The arrow indicates the hole through which additional air enters the idle system to turn it off.
When the throttle valve is suddenly opened, the vacuum near the sprayer decreases, it is not enough to suck in a sufficient amount of gasoline - and the engine "fails". The purpose of the accelerator pump, as its name implies, is to help the engine accelerate the scooter during this carburettor "confusion".
The carburetor on a scooter is an important part of the engine's power system and is responsible for supplying fuel to the engine's cylinders. But due to the wear of the parts, over time, your carburetor may need to be repaired.
In this article, we will tell you how to repair the carburetor of a scooter with a 2-stroke and 4-stroke engine with a volume of 50 and 150 cubic meters, and also explain how to install and adjust a new carburetor on a scooter.
The content of the article:
- Removing and cleaning the carburetor,
- Installing the carburetor,
- Adjustment (tuning) of the carburetor,
- Repair video,
- Our production,
In order to remove the carburetor from the scooter, the first step is to remove all plastic that interferes with access to the carburetor (usually you have to remove the seat and plastic under the seat). Then we disconnect the fuel and oil hoses (there are oil hoses only on a 2-stroke scooter), the contacts of the starting enricher. After that, we unscrew the bolts securing the carburetor to the engine.
Now, after the carburetor has been removed, it is necessary to clean its outer surface from dirt and dust. Can be washed in gasoline and wiped off with a dry cloth.
The next step is to partially disassemble the carburetor, namely: unscrew the bolts securing the float chamber cover (2 bolts), then carefully remove the float so as not to bend the plate. We wash the float chamber cover itself very carefully from the inside. Now you can start cleaning the inside of the scooter carburetor itself.
2 easy ways to clean your carburetor:
1) We wash it in gasoline, then we purge with a compressor with a nozzle in the form of a pointed tip (this will effectively purge all channels).
2) We buy a can with a liquid for cleaning the carburetor. Thoroughly clean all channels and nozzles of the carburetor. Balonchik also replaces the compressor, since the liquid is supplied from it under high pressure, which makes it possible to effectively clean the small channels.
When cleaning, special attention must be paid to all channels and jets (unscrew the jets during cleaning).We also remove the starting concentrator and clean its channels. It is not necessary to dry the inside of the carburetor. Now we can put on the float and assemble the carburetor in the reverse order.
We install the carburetor on the scooter in the following sequence:
- 1) We fix the carburetor in the place of attachment with the engine, put on the air pipe and secure it with a clamp.
- 2) We put on the drain hose on the fitting (the lower part of the float chamber)
- 3) Install the throttle cable in a special bracket. We check that the protrusion on the cable fastening screw coincides with the groove on the bracket. We fix the cable with nuts
- 4) We put on the gasoline hose and secure it with a spring clamp.
- 5) Connect the contacts of the starting enrichment.
As you can see, the connection diagram for the carburetor on a scooter is not that complicated. Next, you need to adjust the carburetor.
Adjusting the carburetor on a scooter consists of several steps, which include: adjusting the idle speed, adjusting the mixture quality and adjusting the fuel level in the float chamber.
The carburetor setting of a 2t and 4t scooter has no fundamental differences, except that on some carburetor models there may be no screw for adjusting the quality of the mixture and therefore the quality of the mixture has to be adjusted only by adjusting the needle and float in the carburetor of the scooter
It is necessary to adjust the idle speed on the scooter engine warmed up for 12-15 minutes. The adjustment is carried out using an idle screw, which is installed on each scooter and which allows the engine to run at idle speed stable. When the screw is tightened clockwise, the revolutions increase, when unscrewed, it decreases. We warm up the scooter and achieve stable engine idling by adjusting the screw.
2-stroke scooter carburetor (Honda Dio)
4-stroke scooter carburetor
1 - idling screw, 2 - mixture quality screw
1 - screw of mixture quality, 2 - fuel intake fitting, 3 - fitting for draining fuel from the float chamber, 4 - screw-plug of the float chamber.
The quality of the mixture is very important when adjusting the carburetor, because with a lean mixture, the engine can overheat and lose power, and with a rich mixture, carbon deposits form in the combustion chamber.
We adjust the quality of the mixture using the adjusting screw. The mixture is enriched when we turn the screw clockwise and lean when turned counterclockwise.
The adjustment scheme looks like this:
- We warm up the scooter for 10 minutes, turn off the engine,
- We tighten the screw all the way clockwise,
- Unscrew 1.5 turns back counterclockwise
- We start the engine and turn the propeller back another 1/3 turn. Let the engine run for 2 minutes.
- If the revolutions increase, then unscrew the screw another 1/4 turn counterclockwise. We also let the engine run for 2 minutes.
- We repeat the previous step until the rpm starts to drop (do not forget to let the engine run for 2 minutes before each change)
- If the revolutions began to fall, then turn the screw clockwise by 1/4 turn.
Thus, stable operation of the engine is achieved at any permissible speed. Ideally, the engine should work well in the unscrewed position of the screw for adjusting the mixture quality by 1.5 - 2 turns. However, due to wear of engine parts, this range may change. If the carburetor of your scooter does not have a screw for adjusting the quality of the mixture, then the adjustment should be carried out only by adjusting the position of the carburetor needle. Raise the needle - the mixture is enriched, lower the needle - the mixture is leaner.
By the soot on the candle, you can find out about the incorrect adjustment of the quality of the mixture. If the carbon deposits on the candle are black and there is a lot of it, the mixture is too rich. If the carbon is almost white, the mixture is too white.
The fuel level in the float chamber can be checked with a transparent tube on the bottom of the carburetor. In order for this to be possible, it is necessary to unscrew the cream screw, lift the tube towards the top of the carburetor. Now we check the fuel level with the scooter engine running. It should be located just below the protruding skirt where the float chamber cover is attached to the carburetor.
If the level is low or, as is often the case, too high, then it is necessary to remove the cover and adjust the moment of triggering of the locking game by bending the needle holder (small tendril) in a very small range.
It is worth remembering that if the carburetor malfunctions or its internal elements are dirty, adjusting the carburetor may only temporarily solve the problem.
That's the whole principle of tuning the carburetor on a Chinese and Japanese (Honda, Suzuki, Yamaha, etc.) scooter. Now you can independently repair and adjust the carburetor on a 2t and 4t scooter engine with a volume of 50 and 150 cubic meters.
| Video (click to play). |

