In detail: do-it-yourself auto antenna repair from a real master for the site my.housecope.com.
Sooner or later, all things fail. Sometimes through the fault of the owner, and sometimes through the fault of the manufacturer's plant. But one way or another, in our time of permanent crises, sometimes there is simply no way to spend money on a new thing, especially since DIY repair is not so difficult. And in this article I will talk about a special case of repairing the Optim CB-2001 antenna.
In principle, I have already described this technology in an article about a fake Lemm AT-2001 Turbo, and if you haven’t read this article yet, I recommend reading it. After reading these two articles, you will know in detail how to repair a car communication antenna with your own hands.
This antenna, Optim CB-2001, was sent to me by Alexey from Novorossiysk with a request to repair and return it to the air. What I actually did.
The antenna was disassembled, a separate case, a separate top cover, there was no cone into which the pin was inserted, and the upper bronze bushing was torn from its rightful place and dangled on the upper terminal of the hot coil.
Apparently, this knot loosened and the bolt simply "gnawed" through the fiberglass insulator, falling off it.
And the first thing we need to do is secure it in place. For this we use a regular cyanoacrylate-based superglue.
We put the top sleeve in place, glue it with superglue and let it dry.
Obviously this will be extremely fragile, so the next step is to reinforce the hot coil with epoxy. However, before filling the antenna coil with epoxy, I strongly recommend that you clean all surfaces of the antenna and thoroughly solder the coil. I described how to do this in the article about preparing antennas for operation.
| Video (click to play). |
We get EDP glue in a hardware store, this, in fact, is the very same epoxy.
We take out the bottles from the box.
Pour one and a half parts of epoxy resin and one and a half parts of hardener into a suitable container. One part corresponds to the volume of liquid between the marks on the surface and the label of the vials.
As a vessel for mixing epoxy components, I chose an ordinary plastic cup. The volume of resin in the photo is taken with a margin, you can take less.
After adding the hardener, mix the epoxy resin thoroughly for 5 minutes.
Before pouring the epoxy into the coil, the joints should be lightly sealed to prevent the resin from leaking out of the coil. To do this, I simply applied a little flux gel for soldering to the joints. Also for these purposes you can use the well-known LITOL-24.
We put the coil vertically, clamp it in a vice, the outer case.
In order to securely fix the upper sleeve on the insulator, pour a little ready-made epoxy into the sleeve, being careful not to get into the threads. Do not fill the entire internal volume, since after the resin has hardened, you will not be able to screw the upper cone with the pin into the antenna.
After this procedure, carefully fill the inner volume of the coil with epoxy resin. Take your time and let's get air out.
You need to fill it up to about this volume.
The final stage, we cover everything with a top cover, which will center the coil and leave it all for 24, or even better for 48 hours until the epoxy resin has completely solidified.
After that, of course, the hot coil becomes non-separable, but protected from any surprises and you can no longer worry about the safety of the antenna.
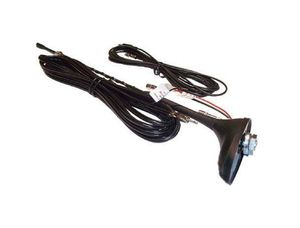
Car antennas today are diverging in purpose.In combat conditions they catch communications, in peaceful conditions - broadcast channels, navigation information. The car antenna is a quarter-wave vibrator supplemented with matching devices. Signal line, the body of the car will serve as the ground. Due to these two components, signal reception becomes possible. Due to the simplicity of the design, they make a car antenna with their own hands. First, determine the purpose of the device, the wavelength range, the type of modulation. Three main components of the design.
We mentioned the types of car antennas, we will give an excessive classification:
- Purpose:
- Reception of broadcasting.
- Reception of TV broadcasting.
- Reception of satellite information of navigation systems.
- Connected car antennas.
- Method of installing antennas on cars:
- Magnetic.
- On a suction cup.
- Mortise.
- Threaded connection.
- On a clamp.
- Embedded.
Wiring diagram for the car antenna under the rear wing
- By location:
- Outdoor car antennas.
- Salon (internal).
- Amplification type:
- Active.
- Passive.
Surely an experienced car enthusiast will be able to add a couple of signs, we restrict ourselves to the specified classification. FM antennas fit inside the passenger compartment. Amateurs make accessories with their own hands, using lengths of cable with a characteristic impedance of 50 ohms. The braid is electrically combined with the car body (mass). Beware of catching lightning while driving through the field. The thunderstorm chooses the point closest to the sky.
The size of the car antenna depends on the range. Messengers (radio frequency 27 MHz) of large size. Powerful varieties reach a length of 2 meters (put on trucks), according to science, they should be made 50 cm higher. To match the differences between the actual size, a quarter-wavelength "extension" coil at the base. For use, the installation of a car antenna for communication is carried out vertically. Due to the type of polarization. The communication antenna can be tilted by means of a lamb, a lever, so as not to break, driving through the forest, overcoming the spans of a low bridge. Most of the drivers of large trucks use the communication antennas. It is allowed to equip jeeps, civil cars, at times the view will turn out to be unsightly.
Note. Factory antennas are tuned to the wavelength. The mustache is shortened, equipped at the end with a protective cap. The operation is carried out according to the instructions. The manual includes a chart of recommended sizes. Violation causes a drop in reception sensitivity.
The digital car antenna for TV reception looks like a police flasher, made in a different color scheme. The device is devoid of unnecessary bells and whistles, accepts a frequency of hundreds of MHz. The first multiplex in Moscow was chosen by 559 MHz. The digital car antenna on a magnet is located at the top (roof), the wire runs over the door without modifications. Horizontal polarization signal, the task of the device is to receive an arbitrary azimuth.
Broadcast antennas rarely boast a large size, since the wavelength is higher, the dimensions are larger. Small height pins, like decorating portable radios. Beware of accidentally buying a car radio antenna designed by the manufacturers to decorate your TV receiver. Fearing to be mistaken, read the technical specifications in the store:
- Radio is designated FM, AM (frequencies 70 - 108 MHz).
- Television - DVB - T (frequencies below 900 MHz).
- Navigation - GPS (about 400 MHz).
- Radio communication - CB (27 MHz).
Sometimes dealers forget to indicate the capabilities of an antenna. The range is 400 - 530 MHz, it is mentioned, "the option of receiving GPS signals is available." One can only guess what the copy can do, the first Moscow multiplex passes by. Frequencies above 400 MHz are used by portable radios, departmental communications of the Ministry of Internal Affairs.
It remains to pay attention to the connector.It coincides with the vast majority of devices for which it is intended, it will not be out of place to verify the compatibility issue. They say that an external car antenna catches better, the question concerns mainly city reception. Rushing along the track, the windows of a typical passenger car will not create serious obstacles to the passage of electromagnetic radiation. Intra-salon car antennas are easier to install. Accessories are lower than the outer ones, hence the inferior quality.
The store will provide all sorts of hybrid models, including options a la All-in-One. You can switch the reception from city to road. Differs in sensitivity, interference suppression features. Out-of-town reception range is increased, amounting to 80 km. They sell peculiar tandems. A pair of similar pins is laid out, one of which catches TV broadcasting, the other - radio, communication. The use of the charms of the set requires the purchase of appropriate receiving equipment.
The only difficulty: the body of the car is constantly moving. Traditional terrestrial domestic antennas in this case will form reception dead zones. There will be long periods of time when maneuvering when there is no reception. Refers to horizontal polarization, not vertical polarization! In the latter case, the antenna does not care about the azimuth of the signal arrival. The mast is upright! This was discussed by ordinary loop biquad antennas, quarter-wave vertical dipoles. Let's see what else is useful to nature.
Zeroing the braid by means of mass
How to make a car antenna with your own hands so that:
- did not cause complaints from the traffic police for unnecessary revision of the body;
- got up in the salon;
- ensured reliable reception of radio frequencies;
- had a high efficiency (since you need to work on transmission).
The quarter-wave vibrator suits the named case poorly. Difficult to manufacture, has a relatively large size (see above), difficult to attach, interferes with driving. Here is the notion of the drivers of VAZ 2106 cars (an experienced radio amateur will remake the concept, abstracting from the brand of the car).
A frame structure is used, which is laid under the car's rear window seal. Slightly narrowed upward, slightly different sizes than required by a frequency of 27 MHz, in the center is a capacitor, which tunes the car antenna into resonance on the desired channel. Please note that there are two receiving frequencies:
The upper resonance falls on the lower range of radio broadcasting. The car antenna circuit is simple:
- It is necessary to lay out the perimeter of the rear window with a trapezoid with a MGTF 0.5 wire:
- The upper edge is 56.5 + 56.5 cm.
- The lower edge is 66.5 + 66.5 cm.
- The sides are 22.5 + 22.5 and 45 cm.
Coiled section reduces overall antenna length
- The pluses are, where we will add the wires of the matching capacitor, remove the signal with the cable RK - 50.
- In the middle of the glass, two wires go vertically to the center, where a trimmer capacitor is attached exactly along the axis (5 - 25 pF). Each one is 45 cm long. Therefore, you will have to twist it in a zigzag, put it under the insulating tube.
- We solder the cable from the side where the wire is cut in the middle. There should be no gap on the opposite side.
The car antenna is connected through the connector used by the communication equipment. The length of the cable is short, or rather, you should take a smaller one. Since the antenna is passive, the signal will be strongly attenuated in the path to the receiver. If you put really connected equipment at the rear window, it is worth doing so.
See advantage. It is unlikely that our antenna for a car with your own hands will differ in too long a range, show miracles of reception, but it is competitive with some factory models mounted on the roof, they have a height greater than a passenger car. Plus in the forest, the city will not hurt. In addition, there is no need to wind the matching device.This is not easy, in addition to accurately maintaining the number, the pitch of the turns, it will be necessary to find the required wire thickness. The structure will have to be sealed; the event will require the purchase of a number of additional materials.
Will understand the meaning once holding a walkie-talkie with his hands. The antenna is covered with a dense sealant, the devices will allow broadcasting, at best, for a couple of kilometers. If the terrain is not rugged. In our case, ease of installation, ease of construction, and accessibility for the average user are achieved.
A capacitor is required: the circuit is shortened. According to the author of the idea, the coefficient is 0.3. The middle stubs are used to electrically lengthen the frame to the desired size, the capacitor extinguishes the reactance to match the RK-50 cable and will allow the system to be tuned into resonance. The author claims that the antenna is broadband. In most cases, it is possible to perform installation on the rear window of any car without major design changes. The setting is based on the minimum standing wave ratio.
In some cases, buying an antenna for a car and installing it will be more expensive, more difficult and provide a lower quality of reception. There is nothing difficult in the above design, and every motorist can try the accessory in his spare time. A two-meter mast will not fit a passenger car, more appropriate on a tank! Which, as you know, are not afraid of dirt.
We decided to install an in-car active antenna with attachment to the windshield on the car. Antenna of this type is characterized by ease of installation, does not require maintenance, does not wear out and does not create aerodynamic drag. Other advantages of such an antenna include the fact that it does not attract the attention of car thieves, since it is not easy to remove it from the car.
True, with all the positive qualities, it should be noted that its sensitivity changes depending on the orientation of the car relative to the radio station transmitter.
According to the installation method, such an antenna is disposable. On its body and poles ("whiskers") there is a sticky film, which secures the antenna elements to the windshield. Once these elements have been removed, it will no longer be possible to reattach them to the glass.
In addition to the antenna itself, the kit includes detailed installation instructions, as well as materials, fixtures and templates to facilitate installation and reduce labor and time.
There are two options for installing the housing and antenna "mustache" on the windshield. In the first case, the antenna body is installed in the middle, in the upper part of the glass (behind the rear-view mirror), and both antenna poles are glued on both sides of the mirror along the upper edge of the glass. In the second case, the antenna body is installed in the upper right corner of the windshield, and the "mustache" is glued along the upper and side edges of the glass.
The book describes the second option for installing the antenna.
SEQUENCING
Thoroughly clean the inner surface of the windshield from dirt ...
... and degrease it with a napkin soaked in a cleaning agent, and then wipe it with a dry napkin.
Now the glass surface is prepared for gluing the housing mounting plate and antenna poles.
To glue the plate, use the included thick paper template. The template has slots that allow the plate to be inserted into it in only one position.
We insert the pin and the plate latches into the slot of the template.
Remove the protective sticker from the smooth side of the plate and press the plate together with the template to the glass so that the two corners of the template touch the corresponding sides of the glass edge.
We remove the template from the plate.
In order for the antenna "mustache" to be glued to the glass equidistantly to its edges, the antenna installation kit includes a set of distance templates (pieces of white adhesive tape).
We glue the templates on the glass perpendicular to its edges.
Antenna pole is a piece of wire, on one side of which a contact tab is soldered. The wire and the contact tab are located on a transparent plastic tape with an adhesive layer. The adhesive layer is covered with a white protective film, which must be removed before gluing the "mustache". After removing the film, we put the contact eyelet on the pin of the housing mounting plate.
Gently glue the "mustache" to the glass along the edges of the spacers (for clarity, the protective film has not been removed).
After sticking the antenna "mustache", smooth them out with a special spatula included in the kit.
The right sun visor must be removed to route the antenna wires.
Pulling the roof lining towards us, we pass the grounding cable through the hole in the upholstery and pull it out.
Remove the front roof pillar lining.
We stretch the wires behind the roof upholstery and remove them from under the upholstery.
We install the antenna housing on the mounting plate.
When installing, the pin of the fastening plate, on which the antenna "mustache" contact ears are put, must go into the hole in the antenna body. When the case is properly connected to the plate, the characteristic clicks of the plastic latches should be heard.
To fix the antenna body on the mounting plate, screw in the screw.
The tightening torque should not be high, otherwise cracks may appear in the plastic parts.
We pass the antenna cable into the gap between the windshield frame and the instrument panel trim.
We stretch the cable into the glove box and pass it over the plastic bracket of the instrument panel.
After completing the cable laying, we ensure that there are no loops and sagging along its entire length. Make sure that the cable does not touch sharp edges of the body and is not overstretched.
Reinstall the front roof pillar lining.
Trying not to damage the conductors of the ground loop, we make a hole in the loop with an awl and, separating the conductors, we increase the diameter of the hole so much ...
... so that a self-tapping screw can pass through it.
We insert the self-tapping screw into the visor bracket and put the grounding cable on the self-tapping screw rod. Lubricate the contact part of the loop and the self-tapping screw with anti-corrosion grease, which is included in the antenna installation kit. We remove the excess length of the train under the roof upholstery.
Install the sun visor in place and tighten the screws.
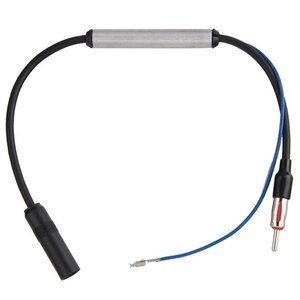
We connect the antenna cable to the radio. The power supply wire of the antenna amplifier (red) is connected to the radio tape recorder wire to supply power to the automatic retractable antenna drive. In this case, power will be supplied to the amplifier only when the radio is turned on.
The range of devices in stores is very large. By purpose, this technique is divided into the following types:
- Active antennas for a car radio, when the signal is received together with a built-in amplifier. They are considered to be very powerful. Great for long distance signal pickup.
- Passive models. They work without amplifiers. They are considered simpler, it is much easier to make them yourself. Such devices are just recommended to be installed if car radios are used only in the vicinity of the city.
Antennas are also classified according to the method of installation. Distinguish between internal and external antennas:
- Internal. They are installed in car interiors.This installation method is suitable for active models.
- External. They are located outside the car bodies. This installation is more suitable for passive devices. At the same time, the low power of the equipment is somehow compensated.
To make an antenna for a car radio with your own hands, you need to take into account the principles of the signal catcher, determine the length of the device, its location, the degree of complexity of the entire structure.
That is why, to replace obsolete oversized devices, they use independently made external antennas for car radios. To hear stable radio signals in the popular range, it is enough to use pin devices with a length of 10 to 20 cm.
In addition to significant cost savings, there are a number of other advantages to using this technique. The following advantages are distinguished:
- The self-made design can be tailored to completely different car models.
- There will be no problem with the installation height for receiving radio signals.
- Installing a homemade device is much easier than factory counterparts.
- It is possible to improve the quality of signal reception with the correct installation of the installation, as opposed to using commercial antennas.
It is worth noting that it is possible to start independent design if you have the skills to work with electrical engineering, otherwise it is better to use the services of professionals or use store counterparts.
You can make with your own hands both inactive and active (with an amplifier) devices. The production technology consists of several stages:
- preparation of the necessary tools;
- direct assembly;
- attachments to the machine body;
- connections.


