
In detail: do-it-yourself bumper repair bmw e39 from a real master for the site my.housecope.com.
Repair of both the body and the units is especially relevant for old cars. In this article, the most common types of body repair are considered using the example of BMW models in the E34 and E39 bodies.
BMW E39 and even more so E34 have long been removed from the assembly line. Therefore, problems with body parts can arise not only due to road accidents, but also due to aging. And although these cars are considered very reliable, their bodies are still corroded.
BMW E39 and E34 are models of the premium segment of the E class or 5 series according to the manufacturer's classification. However, it is common knowledge that German premium cars are losing value very quickly in the secondary market, so now such cars are comparable in price to new budget models. Consequently, they are purchased by poor people, and they carry out repairs during operation either with their own hands or in simple unofficial workshops.
As for corrosion, the most susceptible body parts of the BMW E34 and E39 are sills, lower edges of doors, fenders.
However, there are many cars involved in road accidents on the secondary market. If the body repair was done incorrectly, corrosion may also form in other places. Bumpers are the most frequently damaged in road accidents.
This article discusses the most common and frequently performed body repairs for BMW E34 and E39 generations, such as replacing or refurbishing bumpers and sills. The easiest way is to replace these parts. Moreover, there are many body elements and other spare parts for the cars in question, both branded and non-original, new and used, on the market.
| Video (click to play). |
In order to make high-quality body repairs, you will need, first of all, a well-lit room. Moreover, you should use both basic and portable lighting devices.
As for the tools, in the case of a one-time repair, their list is determined by the type of work. However, it is advisable to purchase universal equipment in case it is used to restore various damage to the body in the future.
For example, the body repair of BMW E34, E39 thresholds is considered.
- First you need to raise the car or one of its sides. In this case, you should first check the integrity of the bottom, since the rear jack is susceptible to corrosion damage. Then the wheels are dismantled.
- After that, you need to disassemble the lower part of the cabin from the repair side. Dismantle carpets, seats, lower sidewalls. It is especially problematic to remove the floor covering, since it is represented as a single piece, therefore, to dismantle it, you will have to remove all the seats. However, you can cut off a small piece of carpet and glue it in after renovation.
- Finally, the threshold and arch are removed. After that, it will be seen how damaged the body is under these parts, as well as themselves. And on the basis of this, a decision is made to repair or replace.
BMW E34 and E39 are equipped with plastic bumpers, which are repaired according to the rules common to such parts. This will require:
- soldering iron;
- chopped wire or mesh;
- putty;
- abrasive tools (sandpaper of various grain sizes or a sander);
- paints and varnishes.
First of all, you need to dismantle the bumper from the car and remove unnecessary elements from it (aluminum amplifier, headlight washer nozzles). Body repair of this type begins with heating wire fragments or mesh with a soldering iron. It is gradually recessed into the bumper crack from the rear side. In this way, the crack is connected and strengthened, and then it is soldered.From the outside, perform the same operations, only more carefully.
After that, putty is applied and the surface is sanded with 100 grit sandpaper or with a grinding machine with a nozzle of similar abrasiveness. Further, these operations are repeated in order to shape and fill the grooves in the soldering points with putty. Then the surface is covered with a fine-grained putty and low abrasive sandpaper is used for grinding.
Finally, the damaged section of the bumper is painted.
Before starting work, you should inspect it well: if at the same time, scratches were found in other places, the part should be repainted completely.
In addition, in the case of staining a fragment, it can be difficult to achieve the same shades of the new and old paintwork due to the fading of the latter.

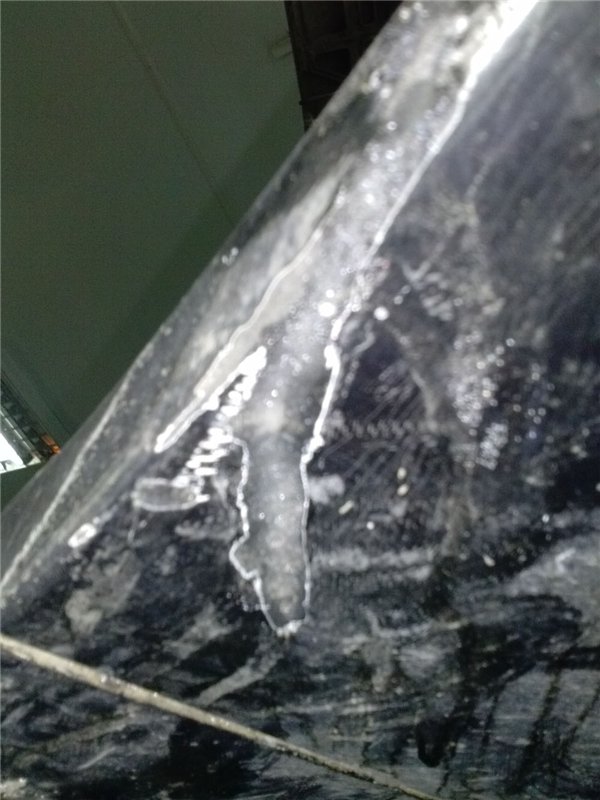
Cracked bumper repair - Photo report.
This topic is for those who want to fix the bumper with their own hands. Cheap and reliable.
A piece is broken off, and a bunch of cracks.
We remove from the car, twist the excess (In my case, the washer nozzle and the aluminum bumper amplifier)
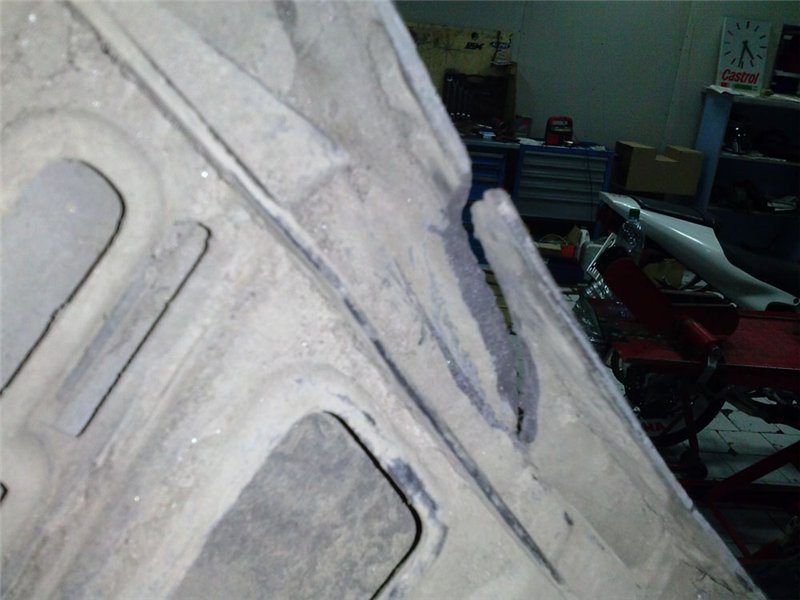
If possible, we climb into the inner side of the bumper. (A small piece is already sealed in the photo).
You will need a wire from an electrical cable 1-1.5 squares. We bend in such a way as to strengthen the cracked part.
Next, you need either a powerful soldering iron or a soldering iron that heats up from a gas burner in 15 minutes.
We warm up and insert the wire into the bumper. We cut a new one.
The same procedure. We also go along the crack and solder the burst parts of the plastic.
Outside, we reinforce the missing piece of plastic with a mesh. And we also solder cracks, only more subtle than from the inside.
Next, apply a putty with fiberglass on 2 sides (main layer)
We grind with a large foot 100 (you can use a grinder if you have one)
We apply again, already shaping and glossing over the grooves in the soldering points.
Then we apply a fine-grained putty and putty already with a small foot.
And so we repeat until the surface is flat.
I didn’t turn around a lot, I just leveled it with a 500tk little leg, since I tinted the bumper with ordinary black paint. And for an ideal bumper you need to grind various scratches in many places. And then paint the whole thing entirely.
All this was done in 1 evening.
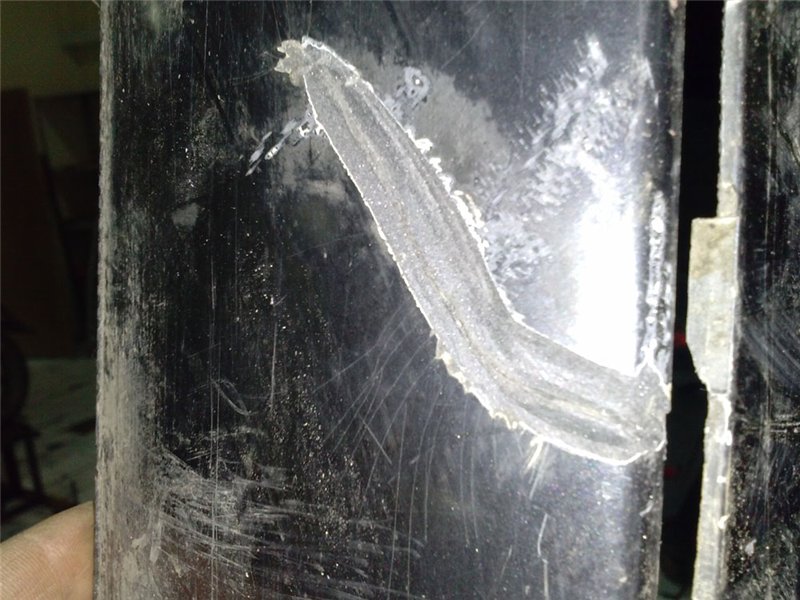
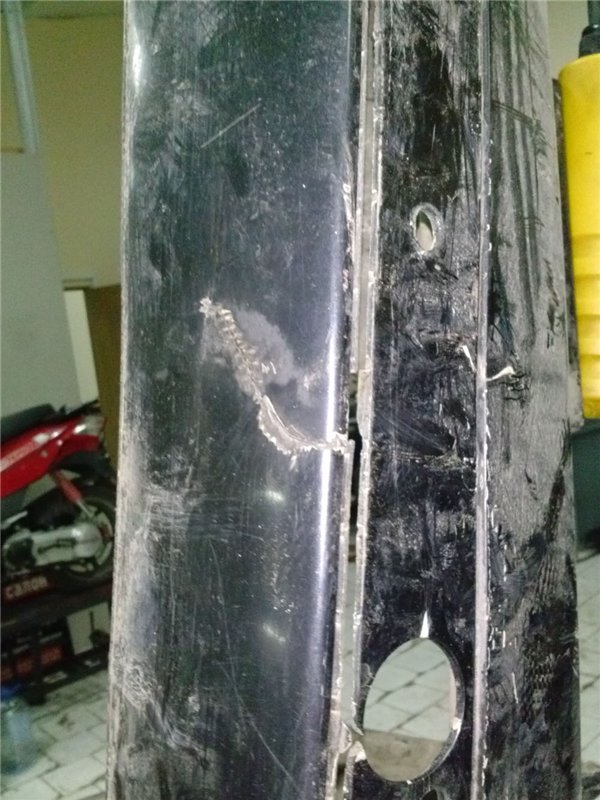
In the end, this is what happened:
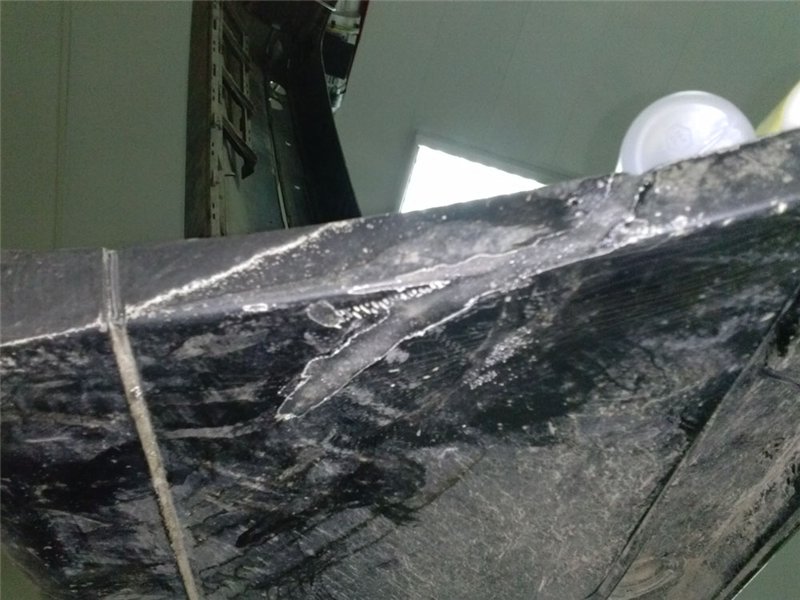
Also a couple of pictures of the rear bumper. Only here I soldered the wire from the outside.
I tried to solder both with a 100vt soldering iron and a burner. The structure of the BMW e34 plastic is broken and a high-quality seam does not work, maybe there are some features. and what type of plastic is used? What is the melting point?
I tried to solder both with a 100vt soldering iron and a burner. The structure of the BMW e34 plastic is broken and a high-quality seam does not work, maybe there are some features. and what type of plastic is used? What is the melting point?
Soldered with solder?
Recently I soldered myself a bit off corner of the bumper, there was no fragment of 2 × 6 cm.Everything is ok, and strong.
I tried to solder both with a 100vt soldering iron and a burner. The structure of the BMW e34 plastic is broken and a high-quality seam does not work, maybe there are some features. and what type of plastic is used? What is the melting point?
Is it about the usual, or m-tec and others like them? I heard that the plastic there is different and is not soldered, but the usual one also soldered it, everything is ok.
The usual one is soldered with a bang with an ordinary soldering iron
The usual one is soldered with a bang with an ordinary soldering iron
+ 1. Everything worked out too, I soldered the lower "lip". As a reinforcing mesh I took a mesh from the air filter of the TAZIK
I tried to solder M-tech, did not know that they were with stock from different types of plastic.
Thanks for the clarification. And yet, where to find out the type of plastic used on the m-tech and on the drain, otherwise there are no markings.
I tried to solder M-tech, did not know that they were with stock from different types of plastic.
Thanks for the clarification. And yet, where to find out the type of plastic used on the m-tech and on the drain, otherwise there are no markings.
Yes, m-tech, schnitzer, and so on are lightweight - the tuning ones are made of different plastic, at the moment I forgot its name, and I do not remember it in any way.
I don’t know how to distinguish it visually.
In my opinion, many repairers will not be able to tell the difference until they start soldering.
the author of the plus sign for the work done!
I agree for the work + M-tech is not soldered there some kind of porous structure and plastic with crumb. When heated, a pungent odor is released, the structure of the plastic is disturbed. it becomes soft and putty is poorly taken to it. So if you have M-tech, it's better not to solder it, but try to glue it together. I was missing a corner on the right side. somewhere a piece of 8-8cm molded a new one from fiberglass and polyester. Polyester does not hold small caps. I used super glue Gel for ABS PP and other plastic very effectively and I am satisfied with the result. Maybe someone will come in handy.
everything will fall apart or the mesh will rot and the plastic bumper will start to rust))))
As an option for sale, normal, but not for yourself.
A soldering iron will also not work well.
bumpers are boiled with hot air and plastic, homogeneous in composition, for bmw it is ABS plastic
if it stinks and is not sung, it’s like ANS or AVN — a lot with the letter H — this is a flight, but you can overpower it with air.
Putty only on plastic, and the green glass fiber will fly off all at once
Still a prize for undertakings.
M-those I tried to solder with a hot air gun, I made rods from it, I did not master it. Which confirms the above post. In the place of soldering, the structure of the plastic of the m-tech bumper was broken as a result of heating, the crack was never sealed. among other things, the place of soldering became somehow oily, in short, the putty with fiberglass did not hold well, the oily layer had to be cleaned, it turned out to be quite deep, depending on the area and duration of heating, then everything is correct the putty for plastic is more elastic, less brittle, with good adhesion to plastic.
So, I do not recommend taking those with severe damage for restoration. Especially with cracks along the top edge and where the moldings are. M-those are better off trying to glue.
The drain can be soldered. rods can be cut from the same bumper, or from the same type of plastic.
everything will fall apart or the mesh will rot and the plastic bumper will start to rust))))
As an option for sale, normal, but not for yourself.
A soldering iron will also not work well.
bumpers are boiled with hot air and plastic, homogeneous in composition, for bmw it is ABS plastic
if it stinks and is not sung, it’s like ANS or AVN — a lot with the letter H — this is a flight, but you can overpower it with air.
Putty only on plastic, and the green glass fiber will fly off all at once
Still a prize for undertakings.
Can you sell bumpers?
Since when will an aluminum mesh covered with a layer of putty rot?
Justify why, the mesh will rot, why the putty will fall off, why the soldering iron does not work well when the heated plastic is literally mixed with the soldering iron in the place of the crack.
I did something similar with mine, in the outer part I heated a wire and fused it into the bumper. staples turned out, the whole thing was fixed, with molten plastic, it holds well, the same shape has not lost. And on the outer part of the bumper I soldered a thin layer of thin plastic with a neat layer, polished it .. it turned out exactly, it remains to paint, there is a photo but of poor quality. did not get dirty. 
black square.
I have been repairing bumpers for more than one year, and for the same years I have been picking out nets from bumpers)))
You used the putty not for its composition, this putty was made for not for plastic. At the slightest impact, it will move away from the plastic or give a crack at the joints in which the water will do its job.
Of course, I understand that you wereted and spent a lot of time on it, but the technology for repairing bumpers is not at all the same
Yes, you do not need to solder anything with a soldering iron, the plastic leads to warming with a hairdryer from the temperature. This is the stone age. There is a wonderful adhesive composition with reinforcing powder. It holds much better than brazed ones. It breaks next to the repair site but not along the glue line. If you try, you can even do without putty, the main thing is to strictly follow the technology.
I even made a video specially)
For the video, please do not kick hard - as best I could))))
Well done. There are a number of questions, what are the components, that is, what is the name of the adhesive composition. what types of plastic is suitable. Does the glue rise immediately after adding the reinforcing compound or what?
Read carefully, I wrote about m-tech above. If it is severely damaged, it is better not to take it. Do not try to solder to spoil the structure of the plastic, heating with a hairdryer is also not an option. there was not enough corner pasted out of polyester with glass mat. Jumpers tried to glue the gel with super-glue, it didn't last long. I watched the video above and tried this miracle adhesive composition. This is either the Pover layer or the German Hosh. I sealed the jumpers, let's see how long it will last. But large volumes are not an option - it turns out to be expensive. And the composition of the glue is similar to ordinary super-glue, and the granules are on finely crushed plexiglass, and after drying, something similar to plexiglass turns out. So for repairing m-tech, I advise you to try to glue it (it makes sense if the damage is minor.polyester will help if the surface area is large and pre-treated.
Yes, you do not need to solder anything with a soldering iron, the plastic leads to warming with a hairdryer from the temperature. This is the stone age. There is a wonderful adhesive composition with reinforcing powder. It holds much better than brazed ones. It breaks next to the repair site but not along the glue line. If you try, you can even do without putty, the main thing is to strictly follow the technology.
I even made a video specially)
very well, what kind of glue is this?
It was enough for me to repair the front M-bumper, the rear M-tech. A killer thing.
I also use it. How much work did you do on the repair? His consumption, if used correctly, is not very large. Already that only they have not pasted over. Another half of the composition remained.
] 
After the last blow in the ass, the bumper burst along almost the entire length (in the place where the central pad is inserted) and everything stuck together. Awesome thing, only darling it hurts.
Can you please tell me what can be done with the gap (the crack has stretched) on the bumper cover?
Thank you for the information
BMW E39 bumper repair is done in case of minor damage to the bumper. Repairing the BMW E39 bumper in the absence of large pieces, more than 10 cm, is almost impossible to do, only if you do not find a "donor" from which you can cut the same piece. This is especially true for damaged areas of the bumper where there are bends and transitions.
After repairing the front or rear bumper of BMW E39, we will paint the bumper and install it on the car. Sometimes, the cost of repairing a BMW E39 bumper can be more expensive than buying a new non-original bumper. If we have in stock a used original bumper with less damage, then we can take your bumper into credit, repair ours and install it on the car. Bumpers that go without painting will most likely have to be painted. the place of repair will be noticeable.
The cost of repairing a bumper for BMW E39:
Bumper repair terms:
- repair of small chips and polishing takes from 1 to 3 hours;
- repairing cracks and a split bumper can take up to 6-8 hours + time for painting and installation
When to repair a BMW E39 bumper:
- the bumper comes only in the original, and its cost and time are enormous;
- there are minor damages on the bumper and the car needs to be prepared for sale;
- the cost of repairing a bumper is lower than buying a new one.
BMW E39 Bumper Repair Warranty - 6 months
In this article, we will figure out how to remove the front and rear bumpers on a BMW 5 Series E39 body. Let's take a step-by-step look at the whole process and introduce you to its main features. But first things first, and we'll start with the front bumper.
The front bumper of the BMW 5 E39 is able to withstand the impact of a vehicle moving at a speed of up to 4 km / h. It is hardly worth checking, of course, but still situations in life are different, so just take note of this. The shock is absorbed by an internal aluminum beam and two hydraulic shock absorbers.By the way, shock absorbers, at the cost of their deformation, can absorb impact at speeds up to 15 km / h, and the engine beams will remain intact.
This is how the front bumper looks schematically:
- Cladding
- Opening grille
- Covering grill
- Visor
- Lining
- Visor
- Lining
- Lattice
- Sealant
- Lid
- Visor
- Stop bar
- Beam
- Buffer
- Bolt
Step 1. Simply unscrew the three outer wheel visor bolts on the left and right and remove the side visors from the bumper.
Step 2. Now detach from above and remove the decorative grill.
Step 3. Go directly to the removal of the bumper, after unscrewing the bolts of the Torx T50 bumper to the shock absorbers on the left and right. Now we remove the bumper.
Step 4. Disconnect the fog lamp plug connection and / or disconnect the headlight cleaning hoses. At the same time, it is important to pinch the hoses with clamps so that the liquid does not flow out.
Step 1. To facilitate the work, we complete the bumper assembly.
Step 2. Next, you need a partner, because only with his help you can install the bumper horizontally. Attach the fog lamp plugs and / or connect the hoses for the headlight wipers.
Step 3. Now insert the bumper into the side rails and click on it.
Step 4. Align the bumper parallel to the body and fasten it with screws. In this case, the distance between the bumper and the body should be A = 5 ± 1 mm.
Step 5. Adjust the height of the bumper by turning the plastic inserts (5) in the shock absorbers.
Step 6. Place the decorative lattice, insert the rivets and press them in.
Step 7. Finally, attach the front wheel visor. Everything, the bumper is in place!
The rear bumper is also capable of withstanding a 4 km / h impact. As in the front, the internal fiberglass beam and two hydraulic shock absorbers take the blow. Rear bumper diagram:
- Cladding
- Rear stop bar
- Central visor
- Side stop bar
- Visor
- Thermal insulation
- Rivet
- Holder
- Towing hook cover
- Lid
- Clamp
- Amplifier
- Self-tapping screw
- screw
- Sliding element
- Towing hook
- Beam
- Bolt
- Sealing
- Shock absorber
Step 1. As in the case of the front bumper, we start the process with the visors, that is, we unscrew the bolts securing the left and right rear wheel visors. To do this, remove the clamp by first knocking out the pins in the center of the clamps using an elbow socket wrench. If the pins have a cover, first remove the pins with a screwdriver, and only then remove the clamp. After that, remove the wheel visors from the side of the shock absorbers.
Step 2. Open the trunk, remove the rear lining.
Step 3. Unscrew the three bumper mounting nuts with a 13 mm wrench on the left and right.
Step 4. For a car with remote parking control, cut off the band clamp, disconnect the plug connection and release the cable. Pull the bumper back a little and remove the cable grommet and cable.
Step 5. Here you will need an assistant again - with his help we take out the bumper.
Step 1. Putting the bumper into one knot.
Step 2. Put a plastic cap on the shock absorber (if necessary).
Step 3. Insert the bumper (again with the help of the assistant) into the side guides and move it slightly backward, install the front element on the side and move it all the way forward. In this case, the front guide must engage with the bumper.
Step 4. For a car with remote parking control, insert the cable grommet and cable. Connect the plug connection and secure the cable with a tape clamp, as before removing.
Step 5. Raise the bumper a little, set it parallel and fix it. The distance between bumper and body must be 5 ± 1 mm.
Step 6. The height of the bumper is adjusted with the shock absorber removed by turning the plastic insert with an internal hexagon.
Step 7. Install the rear lining in the trunk.
Step 8. Install the rear wheel shields, fix the clamps and insert the safety pins all the way.
We repair the bumper BMW E39 with painting:
- we use professional Italian equipment MaxMeyer
- fall into color
- the price of repairing a BMW E39 bumper in yuzao is one of the lowest with the same quality
- higher level than that of official dealers
- 15 years of experience (we are at the same address all the time)
- guarantee
- discounts (where can we go without them)
The main material from which the bumper of almost any foreign car is made is plastic. Unlike metal parts of a car, such bumpers do not corrode, but they suffer more in collisions with obstacles and require no less thorough repair. The main damage to the bumper of any foreign-made car:
1) cracks - these are tears in plastic and paintwork
2) gaps - violations of the integrity of the bumper structures as a result of strong stretching
3) dents - various changes in the geometry of the bumper that can occur as a result of heating or mechanical stress
4) scratches - represent significant damage (namely, longitudinal grooves) on the surface of the plastic or paintwork
5) breaks - are through destruction of plastic resulting from mechanical stress
AMC specialists make a reliable and fairly quick repair of the BMW E39 bumper in the South-West Administrative District, local and comprehensive restoration, as well as high-quality painting. The degree of damage is determined by diagnostics using the latest equipment.
Models for which we produce the above services:
Have you got oil in antifreeze in BMW? Most likely the matter is in the heat exchanger gaskets or the corrosion itself.
In this video, I will show you how to prepare a support for rework for a collapsible one. And also how to make the necessary ones.
Complete replacement of the suspension for BMW E39.
Continuation of work after the automatic transmission bulkhead follows.
repair button BC bmw e39 with his hands repair button BC bmw e39 with his hands.
Do-it-yourself repair (restoration) of the rear cover of the BMW E39 Touring is not very simple, but accessible to everyone.
How to restore a car after an accident. Replacing the TV, headlights, part of the Langeron, hood, front left.
Something about BMW that may be useful or interesting to you! BMW, BMW repair, BMW tuning, BMW test drive, repair.
AS THE PRACTICE HAS SHOWED YOU DO NOT NEED TO FILL THE VISCOMUFT FULLY 2-3 SYRINGES IS ENOUGH! To help my kana.
Do-it-yourself video about the repair (restoration) of the front brake caliper on a BMW e36.
Bmw body repair. (Full car painting). I painted the car with my own staff.
HBO for Auto - high quality and safe from the "Eurogas ™" company
Repair of the ABS block bmw e65, e46, e39, e38. Soldering the contacts of the FII unit Iyts Once I stopped by to repair a BMW e65 with a possible malfunction.
BMW 3 do it yourself seat repair. Master class in pictures, for those who want, but do not know how to renovate.
car painting - car polishing - car primer - car putty - car overcooking - car preparation - bodywork.
I finally finished it. Block 8eo614111ab. Before you climb yourself, make sure that the problem is exactly in the block. Quite.
Repair and restoration of a BMW (BMW e34 525), bought for 60,000 rubles from the "Trash" state to the "Sweetie" state.
I am showing you the cheapest way to repair the gear shift knob on a bmw e34 (suitable for all old.
Do-it-yourself repair of BMW E39, E38, E53, E34, E32, E31 stove valves. This video shows how to make a rubber replacement.
Do not open the plug when the engine is hot. There is a risk of burns! Open the plug only at temperature.
For the first time in my life I took apart the steering rack. Washed, changed gum and oil seals.
Steering rack repair for BMW E39. Steering rack repair for BMW E39 in St. Petersburg. Our company provided
DIY BMW starter removal, replacement and repair. Replacing the solenoid relay and starter bendix video.
================================================= Many drivers.
Even the battery could not be removed! 🙂
An epoxy sleeve that holds the leash on the ball allows you to extend the life of the yard mechanism for a while.
Repairing speakers on my little bummer.
repair of the door opening handle on BMW E39.
Do-it-yourself repair, write to whom to help, I will help you in any way vk Serafim Kokosov.
The repair was carried out using a soldering iron and double-sided tape, nothing was drilled, it takes 20 minutes.

my rear wiper refused. I will disassemble everything, re-solder the wires and, of course, shoot a video. Follow the channel news.
Ilya means that the curtain itself has been skewed, which is attached under the ceiling trim. You just need to open all the connections and everything will become clear, since the design there is not complicated. Good luck Ilya in the repair and be sure to sign off as you will. Well, subscribe to the channel of course. Thank you.

but you will not tell me how this lid is kept inside in the car itself there is a bolt for adjustment or something else when I put the rubber I did not close it successfully and one edge has lifted now there is even a gap between this glass and the trunk lid
+ Ilja Naljotov
If, nevertheless, the lid opens after that, then it's not a question at all. On the cover itself there are adjustment bolts that fix it to the curtains. They are hidden under a plastic panel. Remove it and unscrew the bolts 10 mm. Something like this. Thank you.

ok, I'll keep in mind. thank you
I bought a cover for disassembly whole now I will prepare it with acids and I want to rubberize it. should, according to the idea, repel water. and I had trouble with Akum watched the video went and checked it with a tester yes Akum zdoh temporarily put 75 from 2 cars and all the rules. useful lesson. Thank you so keep waiting for more reviews
+ sasha gorlinsky
Thank you Sasha for your feedback. As for the lid, the ends are still sealed with any seal (I did not show it in the video), so that the water between the glass and the metal gets less.
And there will be many more vidos, the box is full of ideas.
I had the same problem I did as in the video. 2 years I drive all the rules) but I don't slam it on the glass with an autoclicker
+ sasha gorlinsky
I do not have a push on the upper half of the tailgate, I slam well and also nothing falls out. But I think in the future all the same rust will come out, tk. there is such a place that there is water and is in contact with the very edge of the lid. From that and corrosion and nothing can be done about it. Thank you.

Once you slam and all your work will fall off. There was no option to brew.
You can, or maybe you should have tried, although there is very thin metal. Plus, glued glass, which in an amicable way needs to be dismantled in this case too. As for me, replacing an item with a used one in excellent condition is the real solution to the issue. Thank you.
can anyone struggled with these gaps, share your experience (bumper made of abs plastic)?
Well, you need to stir up something with the mountings. how to regulate. On the other hand, what to want from ABC-plastic. what kind of money.
And what kind of door sills? Somehow not very ((((
can anyone struggled with these gaps, share your experience (bumper made of abs plastic)
You take off the wheel, you take off the wheel arch liner, you see the mount on which the bumper hangs. You release the nut and set it in the position you want. Accordingly, the bumper-body gap will be adjusted vertically.
I suspect that there will not be enough fastening travel.
You take off the wheel, you take off the wheel arch liner, you see the mount on which the bumper hangs. You release the nut and set it in the position you want. Accordingly, the bumper-body gap will be adjusted vertically.
I know about this mount, but it kind of adjusts to the inside of the body or to the outside, but I need to go to the left (if you look at the photo).
And what kind of door sills? Somehow not very ((((
this is from the schnitzer body kit.
I know about this mount, but it kind of adjusts to the inside of the body or to the outside, but I need to go to the left (if you look at the photo).
It was in E-34 there was an outward / inward adjustment. And in E39 this mount can be adjusted up / down (you also need to do this - you have no gap). But moving the bumper back will not work. You can remove the bumper mount - there is something like a shock damper - it shrinks when hit by the bumper.So this mount can be squeezed a little, i.e. make it shorter. Accordingly, the bumper assembly will move back. In general, looking at the photo, if you move your bumper down (make the required gap of about 7-8 mm), then you will not have to move it back either - the arch line will coincide with the bumper line.
Post has been editedINKO: 25 February 2014 - 03:50
It was in E-34 there was an outward / inward adjustment. And in E39 this mount can be adjusted up / down (you also need to do this - you have no gap). But moving the bumper back will not work. You can remove the bumper mount - there is something like a shock damper - it shrinks when hit by the bumper. So this mount can be squeezed a little, i.e. make it shorter. Accordingly, the bumper assembly will move back. In general, looking at the photo, if you move your bumper down (make the required gap of about 7-8 mm), then you will not have to move it back either - the arch line will coincide with the bumper line.
Do-it-yourself repair (restoration) of the rear cover of the BMW E39 Touring is not a very simple procedure, but an accessible procedure for every motorist.
So how to get rid of the corrosion on the back cover of the BMW E39 Touring with your own hands?
Watch my next video about this.
Happy viewing!
Once you slam and all your work will fall off. There was no option to brew.
I had the same problem I did as in the video. 2 years I drive all the rules) but I do not slam it on the glass with an autoclicker
I bought a cover for disassembly whole now I will prepare it with acids and I want to rubberize it. should, according to the idea, repel water. and I had trouble with Akum watched the video went and checked it with a tester yes Akum zdoh temporarily put 75 from 2 cars and all the rules. useful lesson. Thank you so keep waiting for more reviews
ok, I'll keep in mind. thank you
but you will not tell me how this lid is kept inside in the car itself there is a bolt for adjustment or something else when I put the rubber I did not close it successfully and one edge has lifted now there is even a gap between this glass and the trunk lid
yes, I saw these bolts, but they are completely in revenge
Most of the drivers would hardly be able to refuse the presence of a dashboard in a modern car now. This rather complex device is a combination of numerous devices that facilitate driving, providing control over the operation of various units and, as a result, traffic safety.
Owners of BMW e39 probably once faced such a problem as damage (fading or complete disappearance) of pixels on the on-board computer display. The reason for this phenomenon lies in the oxidation of the contacts between the board and the cable connecting it to the dashboard display. This problem is solved by the usual replacement of the loop. We would like to draw your attention to the fact that some drivers choose the option of buying a used onboard computer, but in this case, remember that dead pixels may appear on any screen of this car information system sooner or later. Next, we will try to describe in detail the main process of repairing the BMW e39 dashboard.
There are two types of loops suitable for our task: "Chinese" and "Hungarian". What is the difference? Hungarian ones are glued, but Chinese ones should be soldered, in addition, as practice shows, the latter are thinner and better adhere to the screen. So basically, car owners use the Chinese version of the train.
The first thing to do is, of course, remove the dashboard. We will not dwell on the sequence of dismantling, here are some photos regarding this moment:


Our next step will be to make four holes exactly in those places that will be indicated in the photo below. What you want can be achieved using a drill or a soldering iron, depending on what is available and what is more convenient to use.
An important point! Some people, in order to quickly get to the place where the cable is attached, decide to remove the arrows, which is definitely not necessary to do.There is a great risk of malfunctions with them after assembling the dashboard at the end of the repair. There is no point in repairing if, through the fault of the person who is repairing, new faults appear.


We unscrew 8 small bolts that hold the top layer of the dashboard (where the km markings are located), in the photo these places are circled in red.
Now it's the turn of the fourteen latches, their location is not so difficult to locate if you take a good look: the first 12 are located around each of the wire entries, the remaining two pieces can be found at the bottom of the dashboard. The latches must be gently pressed or pry off with a screwdriver.


The next step will be to unscrew the remaining bolts (it is completely optional to get them out). To remove the display, you will have to use a screwdriver again, prying the guides on the left and right of the screen, and in no case touch the contacts.


Feel free to tear off the cable from the dashboard and clean the contacts. You can get rid of the remnants of the old train in various ways, in the photographs this is done using a card.
One of the most crucial moments of the renovation. We put on the soldering iron a T-shaped special nozzle with a rubber end. We solder the cable first to the display, then to the dashboard itself. It is not necessary to solder each separate section for a long time, because there is a possibility of damage to the new loop due to overheating.


The last step will be to check the functionality and assemble the repaired device. We would like to note that few car owners independently carry out such repair work, preferring to contact specialists qualified in this matter, due to the high probability of damaging the dashboard during disassembly or assembly. The repaired unit can be seen in the photo below:
| Video (click to play). |


