In detail: do-it-yourself xenon ignition block repair from a real master for the site my.housecope.com.
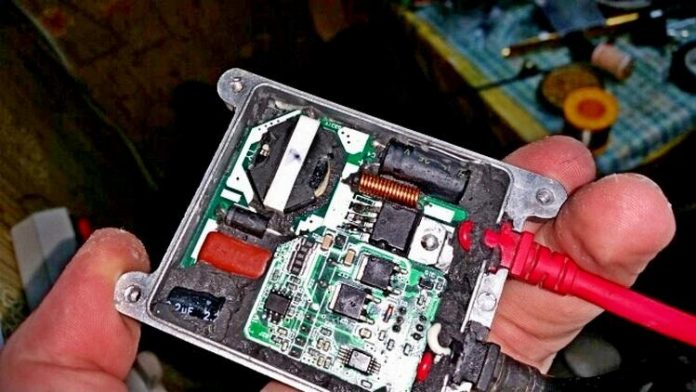
The sho-me block burned out, opened it - I see a burnt resistor at the transformer. I looked in the net - a common problem, but no solution is written. I took up a soldering iron and a tester.
Disclaimer:
In the unit when the lamp is factory, a voltage is generated across the multiplier of about 25-35KV. Can kill. When turning on the unit without a cover, put it away on non-conductive surfaces, away from flammable things and living people. Switch on only with the lamp connected. Do not stick the claws into the working unit, let the unit just turned off lie down a little. (a minute somewhere). Do not touch the board unnecessarily, and especially the high-voltage part.
In order:
I flew both blocks that were on the car, the first block flew from the fact that the Chinese, crankshaft them in a hollow, forgot to solder the contacts of the power connector to the board, by the way, the inspection of the block showed the disgusting quality of soldering, the contacts of a number of parts fell out of solder, soldering points were with holes, shells. Therefore, first, we pick out the sealant from the back of the board near the power connector, evaluate and solder the contacts, after which we start the block (by connecting a lamp to it. ) and, perhaps, rejoice. You can safely poke power into the pins of the connector - the unit is protected from incorrect “inverted” switching on (plus and minus can be confused - it will not light up). If it doesn't start, read on.
1. We open the covers, pick off the sealant.
2. We see a burnt resistor, not far from 4 transistors, in the TO220F - MDF4N60 package - mosfets Vds = 600V, Il = 4.6A Vgs = 30V, P = 35W. We call a tester for a breakdown of the 3rd transistor (or better - everything). If there is a breakdown, we rejoice and run after a new field worker, ideally 4N60, I found such an FQPF 4N60 with IL = 2.5A, which is 2 times less, but soldered - it works. (For MDF 4N60 in Datashit (product passport), the current has a footnote, they say the current strength depends on the cooling, you can see the transistors are the same, they just measure differently at different factories). If the transistors are not 4n60, it is better to change everything, otherwise the light may flicker.
| Video (click to play). |
3. We call the burned resistor, most likely it survived, if not, we change it. I don’t remember the denomination, in the net I heard the figure 2.2K. judging by the size - 5 watts.
3.1. An extremely desirable, if not required, item. We remove the sealant from the soldering side, solder EVERYTHING. soldering points in a new way with an inactive flux, which we wash off, or if the flux can not be washed off, we do not wash it off. I use a pink indicator flux-gel TT, which becomes transparent when soldering, which can not be washed off. Only if you solder them - do not leave pink spots of the gel, warm it up.
4. Getting started. Shines - we rejoice. If not, alas, I don’t know.
5. If you find a dead transistor, but there is no replacement, but you want to know if this is the only problem - you solder the transistor and start it. The lamp should turn on and off, and the spark gap will also break through on the board (pink crap, soldered into the slot on the board). Just do not hold it for a long time, you saw it and knocked it out.
6. Everything was soldered, the transistor was replaced, checked - it works, great. Fill the board with paraffin. You can't use silicone sealants, because you rip it open first, and secondly, acetoxy, which decomposes into acetic acid, and other type of sealants (such as neutral ones) emit chemistry that destroys contacts. The board filled in this way will process a maximum of a year, alas (checked on myself). I read that in the USSR it was poured with paraffin, I tried it - it works great and insulates from water, I highly recommend it. One drawback - when the module is working, it slightly flows out of the power connector, but this is garbage, it does not affect the speed, before plugging in the chip, you will need to clean the contacts and that's it.
Repair cost = transistor price = 45 rubles.


P.S.
Do not put xenon in the high beam and do not drive around the city like that - there is little use for it, but it is blinding with a bang.


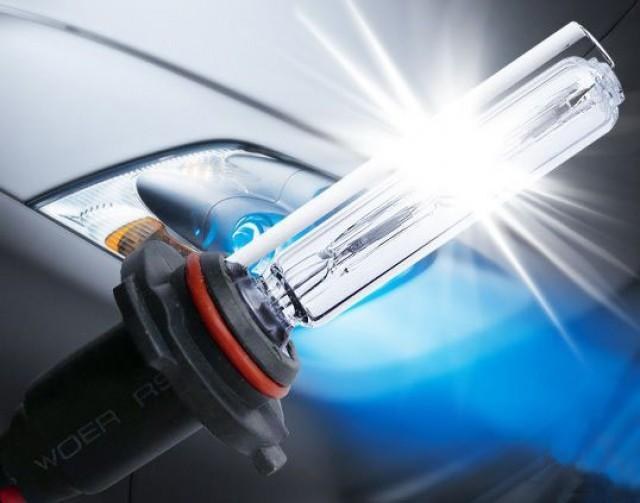
There are several reasons for the breakdown of xenon ignition, here they are:
1) There is no tightness in the unit itself, dust or water can get inside. This can be determined by opening the device. There is a malfunction in the blinking of the headlight. Or it doesn't light up at all.
2) Rust, due to which the adhesions of some elements of the block may come off. The parts themselves may fall out of the solder due to rust.
3) Problems with transistors.
4) "Punching" the windings of the multiplier or transformer.
5) There is no control signal from the controller.
Such operations as repairing the xenon ignition unit with your own hands cannot be classified as everyday, but they do happen. The option of replacing the block with a new one is not always good for the reason that it is expensive. Sometimes minor repairs cost mere pennies.
Let's first analyze the problems that can arise with bi-xenon in a car. The problem may be not only in the ignition unit, but in the lamp itself. More precisely, in a coil. Here is a tester to help.

The next probable malfunction is the ingress of water into the unit.

Finally, there is a defect in the multiplier. Green microcircuit - pulse generator (by analogy with a computer - OS). In the photo it is designated by number 1. Number 2 is the multiplier. It is in it that most often there is no contact with the lamp.

If the previous electrical circuit is in good order, then the multiplier must be changed entirely, or look for faulty diodes, solder it, install new ones.
Now we will consider the most common case of repairing a xenon ignition unit with our own hands. The repair algorithm is as follows.
Corrosion of joints and soldering points.
Water ingress into the housing of the xenon ignition unit.
- Rinse the unit with alcohol and allow to dry. In case of water ingress or corrosion, the device may work. Do not touch the board with your fingers, the voltage value can be very high.

Calculate with a tester, solder, install a new one.
- Another possible defect is a blown resistor. We also change. Almost one hundred percent chance that after that the lamps will work. It is only necessary to pour paraffin on the circuit board before reassembling.
Such repairs will cost several tens of rubles.
Well, in pursuit. We already treat the products of China with due respect, the country has learned to do something. But in the case of repairing the xenon ignition unit, we do not recommend purchasing products from the Middle Kingdom, this is not the case. Finally, to clarify: if the knowledge in electrical engineering is completely zero, it is better not to go into the block with your own hands. Let the special work.
Repaired a Chinese ignition unit. SHO-ME has its own specifics. I changed the transistor to FQPF 4N60, the parameters are not the same, but pulled. Special thanks to the Chinese comrades - the soldering is disgusting. The parts may be intact, and the problem lies precisely in the places of poor-quality soldering.
As a rule, the unit burns due to our negligence. I burned out because there was moisture inside. All 4 IRF840 teristors are covered with a pelvis. So prevention is the best method.
The issue of good roadway lighting is relevant for any driver, especially if trips are mainly made outside the city. In order not to get into an accident, you need to be confident in the reliability of the headlights, regardless of their type. However, many believe that the standard optics does not provide sufficient illumination and therefore install a xenon ignition unit with appropriate lamps (if the device is not included in the factory configuration). How does such a system work, and what are the benefits?
Xenon lighting implies the use of not only the appropriate lamp, but also the ignition unit (BR), which ensures the normal operation of the entire system.Its purpose is to generate a current of a certain strength so that the gas in the flask begins to burn and subsequently shines with a constant power. The standard electrical equipment of the car cannot produce the required voltage, which predetermined the use of the unit. It also automatically adjusts the level of light flow depending on the level of illumination of the road.
All devices are a step-up transformer enclosed in a housing. Their task is to convert pulses from the on-board network into a voltage of up to 25 thousand volts. Powerful start makes xenon glow. In the future, the unit delivers 85 V, which is necessary so that the gas does not go out. Factory-installed products are characterized by high operational stability, reliability and long service life. All of them have a special marking - OEM codes. They are needed in order to check the compatibility of the car, headlights and the ignition unit itself. The supply voltage of the unit is 12 V for cars, and 24 or 36 V for trucks or SUVs.
Universal (adaptive) ignition units are used to independently change the optics. Available in two versions:
- DC. Constant current device. It is distinguished by the absence of a stabilization unit and a relatively low cost. However, the lamps working with it flicker: the combustion is not very stable.
- AC. AC device. Provides a high-quality glow of the lamps. The use of a stabilizing block guarantees an even voltage - there is no flicker. The downside is the higher cost.
There are no OEM codes on the universal ignition units. All products are connected to a standard 12 V car on-board network, have a power of 35 W and output a voltage of 23 thousand volts.
If everything is clear with the factory devices: it is necessary that its code matches the characteristics of your car model. And how to buy a universal BR and what should you look at first of all?
First, make sure that the supply voltage of the unit matches the on-board network of your car. Manufacturers produce blocks designed for 12, 24 and even 36 volts. Other parameters (average data):
- power: 35-75 W;
- starting and operating current: 5.8 and 3.1 A;
- ignition voltage: 23 thousand volts;
- arc stabilization time: up to 20 seconds;
- working temperature: from minus 30 to plus 105 degrees.
Editions, incl. and on the Internet, regularly publish ratings of companies producing xenon kits. Among the most frequently included in the "tops" are several manufacturers:
- MTF. Differs in high quality products - the percentage of rejects does not exceed 1%. Most popular kits: MTF-Light Slim Line, MTF-Light Slim Line MSP with noise suppressor. Of the minuses, one can note the original connectors (not suitable for blocks from other companies) and the high (5500 - 5900 rubles) cost.
- Optima. The ARX304 units manufactured by the company belong to the 5th generation of devices. The average price for a set is 3300 rubles. (maximum for trucks - 4800 rubles). It is advisable to change lamps every year and a half.
- SHO-Me. The most widespread set in the Russian Federation. There is a standard design and slim. It is recommended to replace lamps after 12 months. The average cost is 2800 rubles.
- APP Digital Ultra Slim. Japanese manufacturer specializing in the production of lighting devices for cars. It has an extended operating temperature range suitable for Russian conditions: from minus 40 to plus 125 degrees. Average price 4000 rubles.
- Interpowre. High quality and reliable unit. Lamps last up to 2 years. The cost of the set is 2500 rubles.
- Xenotex. This is a product in the creation of which 3 countries participated at once: Japan, China and South Korea. The set is characterized by an affordable price - an average of 2300 rubles.
In most cases, especially if a standard xenon unit is used, the reason lies in the failure of the lamps (they gradually change color and fade away). They can be restored using special equipment - an automatic corrector, or simply buy new ones. What signs indicate that the device of the xenon ignition unit is out of order? They can be:
- The glow of the lamps is interrupted. The reason lies in the deterioration of the car wiring or the power supply circuit of the ignition unit.
- Constant flashing of lamps (can be weak or bright, interfering with seeing the road). This indicates a poor contact of the unit with the "mass" of the car, or a wiring malfunction.Ballast can also corrode.
- Headlights fogging. It can occur in cold weather or frost. Here the whole thing is in the absence of cold air inside the headlight housing, which is heated by the engine. To remove the temperature difference, thin long tubes can be put on the intake channels, which are led out behind the front bumper.
- When the unit is turned on, the motor may stall or slow down. You can solve the problem by installing a relay between the lamps and the unit.
If the lamps are in order, but the light still does not correspond to the parameters declared by the manufacturer, the problem may lie in the ignition unit itself. The most typical reasons for its failure:
- Ingress of dirt or moisture, which is caused by poor tightness of the ignition unit. As a result, the lamps start blinking or there will be no ignition at all.
- Malfunction (breakdown) of the unit transistor or its transformer.
- Corrosion. The junction points of the electronic components of the ignition unit are oxidized. The poor-quality assembly at the factory and constant humidity are “to blame” for this.
It should be noted right away that a full check is possible only with an oscilloscope and a tester. In a garage, you need to inspect the block body for cracks. If you smell a burning smell, then the device will have to be replaced. You can also remove the cover and look at the transistor, other electronic components: their blackening indicates the need to purchase a new device.
First, make sure that the corresponding fuse is intact, then disconnect the negative terminal from the battery and the ignition unit itself. Remove the cover from it. If there are traces of moisture or rust, wash the electronic board with alcohol. If you see that some components are loose, you will have to remove the sealant from the back and solder the problem leads. Further verification is possible if you have experience with electronic components and a tester. In this case, check the transistors and resistors. After soldering the parts, fill the board with molten paraffin.
In conclusion, we can say that xenon lamps guarantee better illumination compared to conventional halogen lamps. However, if you decide to install the system on your car, you should give preference to the factory kit, which works better and lasts longer. And the second point: a complete repair of the xenon ignition unit with your own hands is possible only with special equipment and experience. Otherwise, buying new equipment is inevitable.
Currently, the driver should know about the xenon ignition unit, do-it-yourself repairs and features. Without such knowledge, serious problems can arise in the form of a breakdown. And you can't move without light, especially at night. We'll have to call specialists and spend extra money. To prevent all this, it is necessary to carry out regular technical inspection and maintenance. Experts note that the cost of a block varies greatly. Not every driver can afford to buy a new one. In this regard, it is required to obtain at least some knowledge about the device and repair methods.
Xenon ignition unit, do-it-yourself repairs are carried out without any problems if the driver has experience and a special tool. Of course, you can contact the service, where everything will be done efficiently and quickly. But there are times when a breakdown occurs far from civilization, urgent action is required and continued movement. If you do not understand anything about the device of a car, then you can just stay overnight in an open field until dawn.
Experts note that before starting testing the unit, it is necessary to unscrew the old lamp and install another. Perhaps it just burned out, and there is nothing to worry about. You should also check the wires for an open circuit. If all these actions did not help, then a thorough examination and testing is required.
Let's look at the main reasons for the breakdown:
- The tightness of the block is broken. Because of this, a lot of dust, dirt and water gets inside. All this negatively affects the elements of the ignition unit, a banal burnout is possible;
- A lot of corrosion occurs. As a result, the soldered elements simply come off, are lost in the interior of the case. Cleaning will not solve the problem in any way; re-soldering is required;
- The transistor partially or completely fails;
- A large number of breakdowns occur on the windings of the multiplier and transformer;
- The control signal is missing or interrupted.
All these breakdowns can manifest themselves in different ways:
- The headlights can just flash;
- Do not light up at all;
- There is a burning smell, which is not very pleasant.
If the controller fails, it cannot be repaired. You just have to change it to a new one, which is not very cheap. All other issues can be solved without investing serious money.
First, you need to exclude simple reasons:
- Check all wires for breaks and leaks. Most often, the ignition unit stops working due to a pinched wire;
- Rinse the unit gently with clean alcohol. This is necessary in order to get rid of rust and possible condensation. If all this does not help, then you can disconnect the sealant from the back of the board and solder the contacts;
- Open the housing block and inspect it carefully. All work should be carried out in compliance with safety measures to prevent injury.
Check the lamp connection unit. If it does not work, then wait a while until everything cools down and continue to inspect.
Next, you need to completely disassemble the unit, disconnect the sealant and all the covers. Take a tester and check all transistors for performance. If the problem is found, then good. You just need to remove the old transistor and install a new one. It should be noted that the check is carried out without the block itself. It is required to remove each element.
If the transistors are operational, then you need to go to the resistor. The first symptom of a malfunction is an unpleasant smell of burning. The resistor needs to be urgently replaced with a new one. If this is not done, the vehicle will not go anywhere. Be sure to go through it again, thoroughly rinse the case from the flux residues. All this is done with a brush.
In the final part of the work, check the operation of the unit, turn on the xenon headlights. If everything works, then the problem has been found and fixed. Unplug the device and let it cool down. Pour in special paraffin. It is not recommended to use a silicone base for this purpose. The fact is that it quickly solidifies and turns into a solid base. In addition, silicone contains substances that, when heated, emit harmful vapors.
After eliminating all the problems, you can move around by car without any problems and safely. The main thing is not to delay the repair, so as not to get into a traffic accident and not get serious injuries.
So we examined why the xenon ignition unit breaks down: do-it-yourself repairs are carried out without any problems. The main thing is to have a little experience in this area and a tool. If you do not want to do anything, then it is better to contact a specialized service.


Xenon ignition block wiring diagram
The ignition unit is a part of the xenon system that ignites the xenon gas in the lamp cavity.
The ignition unit is a part of the xenon system that ignites the xenon gas in the lamp cavity. This process is carried out through the supply of a powerful pulse, after which the arc in the lamp is activated and, accordingly, the gas in the lamp starts to "shine". The starting voltage value is 250,000 V, further combustion is maintained at only 85 V. Without the ignition unit, there would not be such a bright white glow in the lamp. Also, this device performs the function of strict control over voltage surges and interruptions, which will protect against short circuits. And some cars of the latest generations are equipped with a very convenient AFS option, when xenon ignition units can change the position of the headlights relative to the road, and this protects against unwanted glare and significantly improves visibility even in bad weather conditions.
They are installed by car manufacturers, so the quality is guaranteed and meets all the requirements of lighting equipment, respectively, the price for such models will be high, and the selection is very difficult. All mechanisms of the standard type have a sturdy body, excellent sealing, long operating time with minimal energy consumption, but at the same time, their selection for a car is expensive and problematic.
Universal ignition block SHO-ME
This type of block does not have to be of excellent quality, but it all depends on the manufacturer. For example, the Chinese inexpensive universal SHO-ME work very well, and have established themselves as a good alternative to the regular ones. Another representative of the popular MIXLINE lighting devices has a lot of advantages: safety (since low starting currents are used), reliable electrical insulation, smooth ignition, works perfectly in various climatic conditions. The cost of the ignition unit of this brand is about 850 rubles.
Now it is easy to find comprehensive information about the top models of xenon ignition units. For example, the editors of one online store conducted their own test and identified the leader, this is MTF-Light Slim Line, it is not counterfeit, it has the highest quality, but the price is slightly higher than that of similar other models.
Universal ignition units do not need to be matched to every car, they are compatible with any universal lamps.
All xenon ignition units are of high quality. Often the use of universal blocks leads to flickering, their service life is much shorter than that of the original counterparts. But there are also significant advantages: universal models do not need to be selected for each car, they are compatible with any universal lamps (except for the original), besides, their price is so low (unlike standard ones) that in case of a malfunction it can be replaced with a new one.
To connect the xenon ignition unit, follow the following rules. First, choose the same one (preferably) instead of the old, failed unit. Secondly, the installation should be carried out in a regular place, checking the reliability of fastening and fixing of the wires. Thirdly, the installation must be carried out as far as possible from the heating elements. Fourthly, make sure that water, dirt, dust does not get into the mechanism as much as possible. Usually, Chinese manufacturers' xenon ignition units get very hot. It will be useful to read the reviews before buying. If the lighting mechanism burns out, you will have to buy a new one.
DIY xenon ignition block repair
If a situation arises when the xenon ignition unit does not work, then you should first figure out what the reason is.
Theoretically, malfunctions can occur during corrosion, lack of sealing (moisture, dust, dirt has entered), the transistor has broken, the winding on the transformer has broken through, there is no signal from the controller.
Often, a simple cleaning of the ignition unit from dirt and moisture will restore its functionality.
It is recommended to remove dirt from the electronic part of the device. Sometimes this works if the cause of the problem was only the presence of moisture or dust. Check the contacts, they may need to be soldered. After these simple manipulations, restart the device.
We continue diagnostics. How to check the xenon ignition unit multimeter? Take a multimeter and check all the transistors, if a breakdown is detected, the transistor needs to be replaced. After all the steps, you need to fill the board with paraffin. Start starting the entire mechanism. It is not possible to check the xenon ignition unit without the lamp itself.
We hope that these manipulations will lead to success, and the lamps will illuminate the space around with bright light.
Not in all cases of failure of xenon lighting in a car, it is possible to have it repaired in a car workshop.
On an emergency basis, when failures occurred on the way, or far from civilization, it is tedious to be able to independently repair such systems.
To do this, you need to know how xenon headlights are arranged at least in general terms, as well as what materials and devices will be needed to repair equipment.
An ignition block or automobile ballast is called a trigger device powered by high voltage to create a spark for lighting discharge lamps and lanterns in the exterior lighting of a vehicle.
Without this device, no xenon lamp will last long, or rather, it will fail almost immediately, or will not ignite at all.
Each light source relies on one ballast, whose principle of operation is as follows:
- To ignite the gas mixture (xenon) in the flask, a spark is needed to create an electric arc inside the flask.
- In the car, the voltage supply to the lights is directly 12 V, and 30 KV (sometimes even 50 KV, depending on the type of lamp) will be required to ignite the gas-discharge lamp.
- The voltage for burning the lamp needs much less - already 25,30,55, 80 V (again, it all depends on the type of the lamp itself).
- Conclusion - high-voltage current is only needed for the spark supplied to the electric current converter.
- The ignition unit also serves as such a current converter. By accepting high voltage in the form of a short discharge, the ballast uses a spark to convert in the arc bulb.
- A gas is ignited from an electric arc and gives a glow of a certain intensity (range of a light beam), color, brightness.
The ballast kit includes the following:
- Directly a box of the unit itself with an internal microcircuit and other details.
- Wire, block and connector for high voltage power supply.
- Lamp wires and contacts.
- Unit power connector
Externally, the unit looks like a compact box installed next to the headlight connections, or on the lamp itself, depending on which model of the kit.
Now many people use Slim ballasts - a new generation of devices that are smaller in size than the palm of your hand. Large-sized structures are used less often, although they belong to typical standard blocks.
The body of the structure is rubberized with a special material, which, like a sealant, insulates the unit from moisture and other interference.
On the one hand, the unit is connected through special connectors to the electrics of the on-board general power supply system.
On the other hand, two wires supply high voltage directly to the xenon lamp (two contacts per lamp).
To understand, for example, why the lamps do not light up, it is enough to check how firmly the contacts "sit".
Often a problem can be their weakening as a result of long-term use of frequent shaking of the car when driving on uneven roads.
The internal structure of the block consists of the following parts:
- microcircuit with transistors;
- capacitors;
- part of the ballast receiving high voltage;
- part of the ballast that receives the "rectified" current to the winding;
- spark gap ("spark");
- transformer ("ignitor") or coil;
- power switches on transistors (bipolar or field);
- rectifier diodes.
Here are the main reasons that can often occur in case of malfunctions of the xenon ignition unit in a car:
- Frozen or bursting insulation on the system wiring can cause a short circuit when moisture, lint, or dust gets on the bare sections of the wires.
- Corrosion or soldering in electrical wiring caused by oxidation of some components. Such elements move away from the place of the solder and can fly out of them.
This happens due to poor-quality assembly of ballast structures, or due to the constant ingress of moisture, dust inside, under the body.
A burned-out transformer, transistors, resistor, or the broken integrity of the unit sealant - in almost all cases, this is the main reason for the failure of the ignition unit.
How to put xenon on a motorcycle is explained in the article: xenon on a motorcycle.
Which is better and more reliable - xenon or LEDs, read here.
First, they carry out diagnostics, and not replace the ignition unit, if the driver suspects something amiss in it.
The process of correctly identifying a breakdown includes the following:
- If the block is burnt out, then the characteristic smell of burnt parts will certainly come from it.
- If you have a universal oscilloscope, you can check the signal at the input and output. The absence of a signal indicates a failure of the part.
- Transistors (there may be 4 of them) are checked with a special measuring device - a multimeter.
- You can also check the resistors - when they are in order, their power is at least 5 watts.
In order to diagnose and repair the ignition unit, you must always have on hand:
- rubberized gloves;
- tester;
- soldering iron with consumables;
- screwdriver.
Methods for repairing the ignition unit, offered by specialists of auto repair shops:
- Degrease, "wash" the entire microcircuit with acetone, alcohol. This will help to rid the board of adhered rust, its smudges, if moisture gets on it.
- In the case when the "flushing" did not help, remove the sealant with which the inner parts of the side are poured, and re-solder the contacts that have become unusable.
- If the transistors are out of order, then you will need to buy new (field-effect) ones and solder in place of the old options.
Old elements are soldered from the microcircuit. They can be seen with the naked eye - the transistors are slightly swollen, smudges of liquids, and its dried remains are visible.
Then try to connect to the lamp and check the unit's serviceability - it should give a spark to the lamp.
In some cases, you will have to check the resistance in such parts of the microcircuit where the transistor is located, and more than one. Therefore, the protective cover will have to be removed so that all parts of the internal ballast device are visible.
Transistors are soldered from old microcircuits (on the reverse side) and new ones are soldered.
When soldering transistors or other contacts on the microcircuit did not help, the unit still does not function, then you will have to buy a new copy of it.
It is best to find exactly the same unit, or a universal one, but in any case, the connectors of the wires included in the kit must be suitable for the "receiver" of the lamps.
To replace, you need the following tools and parts:
- screwdriver;
- rubberized gloves;
- serviceable (new) ignition block;
- serviceable (possibly new) xenon lamps that fit the unit.
After purchasing a new block and, if necessary, putting it in place of the previous one, you need to follow a certain algorithm of actions:
- First, disconnect the positive terminals on the car battery.
- Then you need to open the fuse box to check the health of the element that is responsible for supplying the external optics of the car. If it is noticed that it is out of order (burned out), it should be replaced.
- Then you need to check all the electrics that lead the current to the headlights (respectively, and to the ballast in the presence of xenon in the lighting). All wires and contacts had to be complete, tightly connected.
The adapters in the headlights are also checked here, if the system was installed by hand (not standard, not factory).
When buying a ballast for xeno lighting of a car, an instruction is included in the kit, in which a clear diagram of the correct connection is drawn.
You can focus on it in order to avoid mistakes when installing a new ignition unit.
You need to understand that the unit is powered by electricity, it has a voltage multiplier that can be hidden inside the case.
For this reason, there are risks of electric shocks. Even a tester to check if a part is not connected to the vehicle's power source requires precautions.
Before turning on the ballast, you should take into account the safety tips:
It is not difficult to repair the xenon ignition block if everything is well understood from the very beginning.
Before deciding to repair the unit, you must first carry out its full diagnostics, determine all the reasons for the failure with special instrumentation.
You can use the standard connection instructions to be guided by it. It will assist with both troubleshooting and installing a repaired (or new) xenon lamp ignition unit.
How to put xenon in reverse is shown in the article: xenon in reverse.
How to check the xenon ignition unit at home, see the page.
Learn about xenon in Moscow from this information.
The ignition unit is a high-voltage device that is the starting device for xenon and bi-xenon lamps. Since gas-filled lamps contain xenon gas, they need a high voltage - about 23,000 - 25,000 V. This voltage is needed only at the start, then the ballast maintains stable operation (xenon combustion inside the bulb) throughout the entire operation of the lamp.
For those who want to save material resources, step-by-step instructions for installing ballast:
- To begin with, it is worth choosing a suitable place where the ignition unit will be reliably protected from moisture, dirt and strong heating.
- It is best to place the device near the light bulbs so that the wires are not taut.
- The place of the ignition unit must be level.
- We securely fix the ballast, it should not fidget on the surface. This can be done with bolts or clamps.
- Then we connect the devices to xenon / bi-xenon lamps.
- We do the same with the second ignition block.
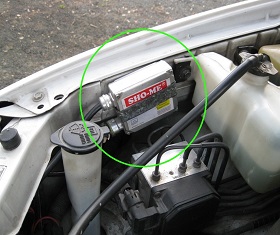
In cars with on-board computers, some difficulties may arise. If the lamp does not light up properly or does not function, it is worth installing a voltage relay. Thus, the load on the wiring will be stabilized during the ignition of the headlights.
As you yourself have seen, installing the ignition unit yourself is possible. But is it really possible to repair the device with your own hands?
You will need these skills at the most inopportune moment. The xenon system may be unusable on the road when the workshop is far away. Decisions need to be made urgently. But, before proceeding with the repair of the unit, it is worthwhile to understand what types of breakdowns can affect its malfunction.
Before you start repairing ballast yourself, you should learn how to determine the breakdown yourself. You must be sure to correctly diagnose the problem.
Remember! That 100% correct it can only be done by a professional, but you can still try to determine it yourself.
- The appearance of a burning smell. When you open the hood, you can determine the place where the smell comes from, if it is from the ignition unit, then the xenon system in it is broken. If you have the opportunity, you can purchase oscilloscope. It will help to determine exactly what exactly influenced the breakdown of the unit: a controller, a resistor or a transformer.
- If, with correct diagnosis, it was revealed that the reason is in the controller, then repair is impossible. In this case, you should get a new part for your xenon.
- If there is a breakdown in the transformer or resistor, then it is possible to repair the ballast yourself.
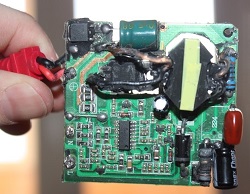
- The first thing to try is to rinse the ballast housing with alcohol. This manipulation is appropriate in case of moisture ingress or rust formation. After that, the block should work. If the cause is not eliminated, then follow next.
- Disconnect the sealant from the back of the unit, if there are disconnected boards, then try to solder them. Perhaps the reason is in them.
It is worth checking the device only in the assembled state, after it is connected to the lamp. The surface where the ballast is located must not conduct current, remove all flammable objects that are near the high-voltage unit. The voltage of the multiplier is about 35 V and should never be touched with bare or wet hands.
- Open all covers and remove the sealant.
- Test all 4 transistors with a tester. If you find a breakdown. Then you need to replace the field worker. It is best to use 4N60. It will need to be soldered instead of the one that does not work. If no breakdown is detected, then move on.
- For greater accuracy, solder the sealant in places where the flux is inactive. Wash off excess flux, it is not needed. You can use a pink indicator liquid, it does not require rinsing. So that no pink spots remain afterwards, warm up the gel well before use.
- After eliminating all possible malfunctions, connect the ignition unit. If the xenon headlights shine like new, then everything is done correctly and your device will work for a long period of time.
- If, nevertheless, the headlights do not turn on, then the cause may be in the transistor. If you find a damaged transistor, then re-solder it. In this state, turn on the unit. If it works, then turn off and connect the ignition unit according to all the rules.
- After the proven procedures with the ignition unit, the device board should be carefully filled with paraffin. Give preference to it because other sealants are difficult to remove. In addition, they can emit harmful substances that have a negative effect on contacts.

| Video (click to play). |
So, you have learned how to independently determine the cause of the failure of the ignition unit. And we ourselves were convinced that the repair of the device is possible. Moreover, if the reason is in the transistor, then it will take you a little money for repairs. Agree, this is cheaper than spending a large sum on a new high-voltage device.

