In detail: do-it-yourself repair of the Makita 9069 grinder; change the anchor from a real master for the site my.housecope.com.
If, when turning on the grinder, circular sparking is observed, this is evidence that the anchor lamellas have burnt out and an urgent replacement is required. You will learn how to repair a tool with your own hands from our step-by-step master class using the example of a Makita 9069 angle grinder.
Replacing an anchor in an angle grinder is straightforward. It is not necessary to give the instrument to the workshop, you can do it yourself.
For work we need:
- flat screwdriver;
- hex keys;
- new anchor for angle grinder Makita 9069;
- rags for cleaning the disc from dust and grease.
Using a flat screwdriver, unscrew the cover of the brush unit, remove the washer of the brush unit to remove the tool cover (the covers are on both sides of the angle grinder) and remove the brushes.
Unscrew the 4 screws securing the gearbox to the housing.
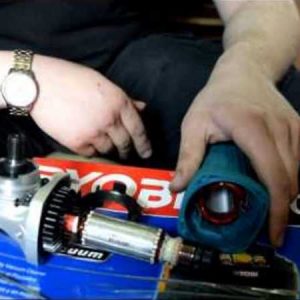
We remove the gearbox along with the armature and dust ring. We put the body and the ring aside - no work is done with them.
Using a hexagonal L-shaped wrench, unscrew the 4 bolts of the gearbox cover and remove it.
The small gear on the anchor is secured with a retaining ring (black ring). Remove the retaining ring with a puller.
Carefully remove the gasket.
Unscrew the front and rear anchor fixing bolts.
We remove the armature with a bearing and a small gear.
Remove the gear and bearing.
Remove the anchor fixing disk and wipe it from dust and grease with a rag.
Take a new anchor and place a commit disk on it.
We install and install the bearing.
Install the small gear and fix it with a retaining ring.
We insert the anchor into the gearbox housing.
| Video (click to play). |
We combine the holes in the gearbox and on the anchor fixing disk and tighten the front and rear anchor fixing bolts.
We put in place the gasket and install the gear cover.
We tighten the gearbox cover bolts.
Wipe the dust from the LBM case with a rag.
Installing the dust ring.
We insert the gearbox with an anchor into the LBM case.
We fix the gearbox with 4 screws.
We install the brushes and fix them with lids.
If, when turning on the grinder, circular sparking is observed, this is evidence that the anchor lamellas have burnt out and an urgent replacement is required. You will learn how to repair a tool with your own hands from our step-by-step master class using the example of a Makita 9069 angle grinder.
Replacing an anchor in an angle grinder is straightforward. It is not necessary to give the instrument to the workshop, you can do it yourself.
For work we need:
- flat screwdriver;
- hex keys;
- new anchor for angle grinder Makita 9069;
- rags for cleaning the disc from dust and grease.
Use a flat screwdriver to unscrew the cover of the brush unit, remove the washer of the brush unit to remove the cover of the tool (the covers are on both sides of the angle grinder) and remove the brushes.
Unscrew the 4 screws securing the gearbox to the housing.
We remove the gearbox along with the armature and dust ring. We put the body and the ring aside - no work is done with them.
Using a hexagonal L-shaped wrench, unscrew the 4 bolts of the gearbox cover and remove it.
The small gear on the anchor is fixed with a retaining ring (black ring). Remove the retaining ring with a puller.
Carefully remove the gasket.
Unscrew the front and rear anchor fixing bolts.
We remove the armature with a bearing and a small gear.
Remove the gear and bearing.
Remove the anchor fixing disk and wipe it from dust and grease with a rag.
Take a new anchor and place a commit disk on it.
We install and install the bearing.
Install the small gear and fix it with a retaining ring.
We insert the anchor into the gearbox housing.
We combine the holes in the gearbox and on the anchor fixing disk and tighten the front and rear anchor fixing bolts.
We put in place the gasket and install the gear cover.
We tighten the gearbox cover bolts.
Wipe the dust from the LBM case with a rag.
Installing the dust ring.
We insert the gearbox with the anchor into the angle grinder body.
We fix the gearbox with 4 screws.
We install the brushes and fix them with lids.
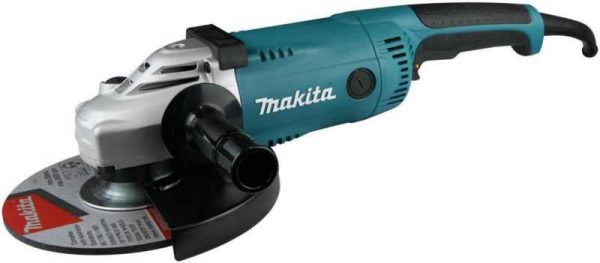
Most of the tools used on the farm are not insured against breakage. The grinders, which almost every master has, fail over time. Different models of angle grinders may have a similar type of malfunction. But each brand has its own characteristics in design and components. The renowned Makita brand is valued for its high quality - durability. However, devices of this brand also tend to break.
Repairs can be done at home. Spare parts for the machine can be easily purchased. Before repairing the device, you must familiarize yourself with the attached diagram.
Types of angle grinders of the Makita brand and their features
Based on the diameter of the working wheel, the brand's grinding devices are divided into classes:
- Lightweight - have a circle with a diameter of 115–125 mm. They are distinguished by easy handling.
- Medium - the diameter of the circle is 150–180 mm. There are professional models and household ones, distinguished by motor power.
- Heavy - disc diameter 230 mm. This class is represented by models for professional purposes when working with concrete, brick, etc. They are characterized by the latest protective systems.
Amateur devices vary in power and price. Professional equipment is designed for long-term heavy loads and has an increased power reserve. Models with power above 1000 W are equipped with a comfortable rear handle, which is covered with special pads to protect against vibration.
As for the design of the grinders of this brand, it is characterized by the presence of such additions:
- labyrinth device, which serves to protect from dirt and dust;
- armored coating of motor windings;
- special system for soft start and overload protection (Super-Joint-System).
Malfunctions when working with Makita angle grinders can be divided into two types:
- electrical (breakdown of the rotor, stator or defects in the control circuit);
- mechanical (breakage of the bearing on the gear wheel).
First you need to inspect the device. The mechanism of operation of the grinder consists in supplying torque from the rotor by means of a gear to the spindle of the working body (circle, cutting stone).
Sources of damage can be increased loads, untimely replacement of brushes, lubricants. Thanks to the presence of a quick-detachable protective casing, Makita models are repaired in a short period of time.
There are components in the control circuit that you can repair yourself. The weak point is the brushes. Therefore, their verification is necessary first of all. And also you should check the continuity of the power supply circuits from the plug to the terminals of the switch.
If the malfunction lies in the breakdown of the switch, then it must be replaced. If the supply wire is damaged and cut, the damaged parts are removed or the entire wire is replaced.
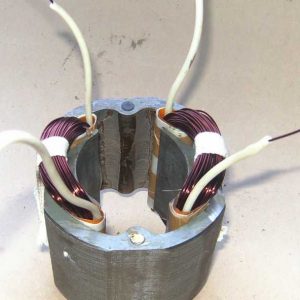
Failure of the stator can be the cause of the breakdown of the angle grinder. This can be understood by the large number of sparks in the collector area and the smell of combustion. The rotor is connected to the gearbox. Therefore, when removing it, it is required to disconnect it from the gearbox. Rotor repair is a complex technology. It will be more practical to replace it with a new part.
The new rotor is placed in the housing already fitted with bearings. And the drive gear is also put on.Then you should check the bearing fit and tighten the nut.
Then the rotor with the gearbox is placed in the stator. In this case, the bearing should be covered with a boot and rotate easily.
If the gearbox is damaged, play in the spindle shaft appears. The gearbox starts to wedge and the gear slips. Gearbox repair is usually associated with damaged gear teeth. For each Makit model, driven gears are attached either to the shaft or pressed onto the spindle. In addition to the driven gear, the gearbox consists of a housing and a driving gear. To repair the angle grinder, you need to replace the gears, and you should replace them in pairs. You will need a puller to remove the driven gear. You can also use a press. It is not recommended to use a hammer due to the fragility of the housing shell.
- it is necessary to start assembly by checking the parts for integrity and cleanliness;
- assembly begins with sliding the bearing onto the spindle;
- a driven gear is installed after the bearing;
- the spindle is placed in the gearbox housing using a rubber ring;
- when assembling the gearbox, the bolts are lubricated with sealant;
- when placing the lubricant in the gearbox housing, the volume of its space is taken into account (the volume of the lubricant is 1/3 of the volume of the space);
- at the end of the assembly, the torsion of the gearbox is checked and the bolts for fastening are screwed;
- carbon brushes are replaced after 7 thousand hours of operation or wear up to 8 mm in length.
Makita grinders are very often undergoing a repair procedure due to the high number of counterfeit devices. A frequent problem is the breakdown of the gearbox, namely, its gears.
In addition to the popular Makita brand, other grinding devices of the brands Bosch, Sparky, Stern are known. All of them are reliable and easy to use. But cases of breakdowns are not excluded.
Bosch grinders often require bearing replacement. The mechanism of the machine is based on the torsion of the spindle shaft, which is pressed into the driven gear. And it also rests on a needle bearing. If a bearing breaks down, it is very difficult to get its cage. Moreover, the drive gear is fixed to the rotor shaft with a left-hand thread. As a result, it is fixed with a nut. The gear, which is driven, is pressed onto the spindle shaft.
Reducers of Sparki grinders are characterized by a gear pair placed in a housing. The driven gear is fixed with a press or keyed connection. The key is a small diameter ball. The drive gear is also attached to the rotor shaft with a key or a right-handed nut. The grinders of this model are also distinguished by easy extraction of the brushes without removing the handle.
When disassembling Stern grinders, the gearbox can be left out of the housing. During repairs, pay attention to the key of the small gear, which does not hold well. The lubricant must be changed in a timely manner.
You can and should try to fix any tool. The grinders do not differ much in their mechanism. The diagram is always included with the purchase of the device. Therefore, any craftsman who has the necessary tools and devices can carry out the repair of working units with his own hands.
The grinder's anchor is most exposed to thermal, mechanical and electromagnetic loads. Therefore, it is a common cause of tool failure, and as a result, it often needs repair. How to check the anchor for performance and fix the element with your own hands - in our article.
The grinder's motor armature is a conductive winding and a magnetic circuit, into which the rotation shaft is pressed. It has a pinion at one end and a manifold with lamellas at the other. The magnetic core consists of grooves and soft plates coated with varnish to isolate from each other.
In the grooves, according to a special scheme, two conductors of the armature winding are laid. Each conductor is half a turn, the ends of which are connected in pairs on lamellas.The beginning of the first turn and the end of the last one are in the same groove, so they are closed on one lamella.
Types of armature malfunctions:
If the armature is faulty, the motor overheats, the winding insulation melts, the turns are short-circuited. The contacts connecting the armature winding with the collector plates are unsoldered. The power supply is cut off and the motor stops running.
- visually;
- multimeter;
- light bulb;
- special devices.
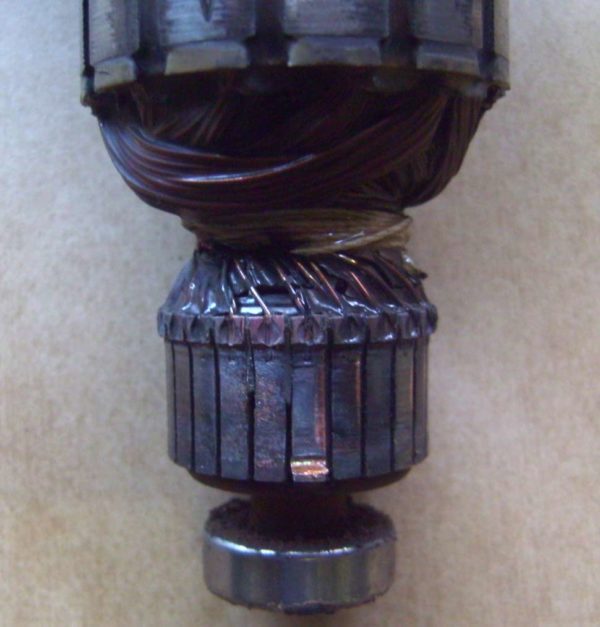
Before taking the device for diagnostics, inspect the anchor. It may be damaged. If the wiring melts, the burnt-on insulating varnish will leave black marks or a peculiar smell. Bent and crumpled turns or conductive particles such as solder residue can be seen. These particles cause short circuits between the turns. The lamellas have folded edges, called cockerels, to connect to the winding.
Due to the violation of these contacts, the lamellas burn out.
Other damage to the manifold: Raised, worn, or burnt fins. Graphite from the brushes can accumulate between the lamellas, which also indicates a short circuit.
Bent manifold plates
- Put a resistance of 200 ohms. Connect the test leads of the device to two adjacent lamellas. If the resistance is the same between all adjacent plates, then the winding is in good order. If the resistance is less than 1 ohm and very close to zero, there is a short circuit between the turns. If the resistance is two or more times higher than average, then there is a break in the winding turns. Sometimes, when there is a break, the resistance is so great that the device goes off scale. On an analog multimeter, the arrow will go all the way to the right. And on digital it will not show anything.
Diagnostics of the armature winding with a multimeter

