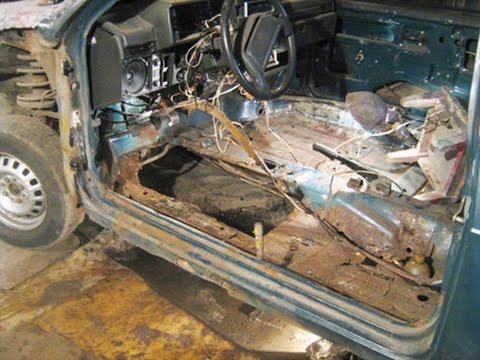
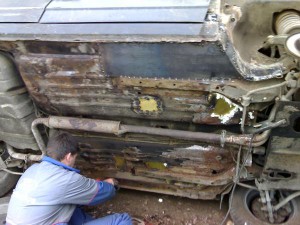
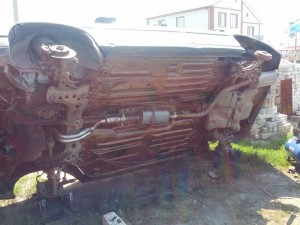
The center of perforating corrosion, or simply a hole in the bottom of the car, is a payment for the comfort in the cabin. Its primary source is not anti-icing reagents acting outside, but moisture accumulating under the “cake” of heat, noise and waterproofing. Therefore, during its liquidation, work is carried out mainly from the inside.
If you follow all safety rules for welding, you must completely dismantle the interior, including the skin. This is always very time consuming. Therefore, the question of how to close up the bottom of a car without welding is very relevant. Moreover, most of the alternative methods give not the worst, but rather the best result.
There are two ways to seal holes in the underside of a car without hot work.
Holes in the bottom are usually found outside, when inspecting a car in a pit or lift. Signs of through corrosion are local swelling, which, when trying to pick them open, crumble into dust.
If you find such troubles, you need to open and remove the cake of heat, noise and waterproofing on the floor in the cabin in the entire area where the sheet of iron that forms the floor is welded to the power elements of the body - thresholds, a tunnel and others. Then you will see the whole picture of damage and will be able to take preventive measures in those places where corrosion has not yet become through.
Before the process of sealing gaps itself, you need to take measures to slow down the corrosion process (stopping is an unattainable ideal, which is worth striving for). To do this, all the rags of iron are removed, and the edges that have residual strength are processed with sandpaper and a metal brush until a shine appears. The abraded surface is treated with rust converters. For example, the composition "Tsinkar". Works are carried out inside and outside.
After the end of the work, the surface of the unprotected metal is covered with bituminous mastics, putty (acrylic, epoxy), paint or cannon fat.
The work makes sense if the total surface of the through holes does not exceed 15% of the floor area.
If the center of perforating corrosion has a diameter of no more than 1 centimeter, it can simply be covered with a two-component polymer composition. Good results are obtained with Poxipol glue or a set for cold welding, similar to plasticine.
The small hole makes it possible to apply the so-called cathodic electrochemical protection. Find an aluminum bar, make a rivet out of it and seal the hole with it. Corrosion will stop within a radius of 20 cm from it. True, the rivet will gradually collapse on its own. But this can take five years.
In this case, you will have to take care of how to restore mechanical strength. If the hole is in a flat area, then there is no point in fiddling with epoxy and fiberglass.
A truly durable composite material is obtained only with absolutely strict adherence to the technology - mixing proportions, drying regime and much more. Use ready-made material of this kind, for example, textolite. With a thickness of 3 mm, it is not inferior in strength to sheet iron. The plate can only be installed with epoxy adhesive, but it is better to use a combined joint using rivets. The latter should be made of aluminum, then they will play the role of cathodic protection.
Long holes at the joints with the load-bearing elements are repaired by patches made of sheet iron or aluminum. They need to be bent in the shape of the joint so that the width of the contact zone with the still living material is at least 2 cm. They are installed on aluminum rivets, the use of an epoxy composition will be useful. Especially if sheet metal is used. After all, you cannot know for sure its composition and in which direction the electrochemical corrosion will go - whether it will destroy the patch or the body. The polymer resin will act as an inhibitor.
The final sealing of cracks and holes is carried out using, for example, the Novol Plus 710 kit. In addition to the epoxy filler and hardener, it includes a piece of glass cloth.
You can also fill in holes in the bottom with soldering. However, ordinary household soldering irons are unsuitable for heating metal with a thickness of 0.5 mm or more. Most likely, the construction hairdryer is not an assistant to you in this. It is necessary to use a portable gas burner, for example, Super-Ego R355, which fits with a small - volume from 400 to 700 ml - cylinder for tourist stoves.
Soldering requires solder and flux. Low-melting solder is used, with a predominant content of tin or lead. The flux can be replaced with electrolytic acid.The connection turns out to be strong, it is able to withstand high vibration loads.
Now you have an idea of how to close up the bottom of a car without welding. If you are careful and persistent in cleaning the surfaces, their subsequent processing and protection, then the installed patch can outlast the car itself.
VIDEO
I propose a way to restore the bottom of a car without overcooking and in normal garage conditions. I do not pretend to be the author of the idea, although the idea was born myself 🙂 If we compare the costs of capital welding, then this method is incomparably cheaper. It is certainly not perfect and is unlikely to suit those whose body has already rotted into "dust". And so - think for yourself, decide for yourself - to have or not to have.
For this we need:Materials: Equipment: Details:
And so, let's get started.
Due to the presence of a "grinder" I cleaned the "live" part of the floor to metal. The only jamb - after a couple of passes through the uncleaned mastic, the petal circle clogged and no longer cleaned it, but polished the rust, it had to be replaced.
Galvanizing installation.
Installing the front side member
As a result, we got something like this:
the protruding parts of the bolts can be cut off.
I hope that this manual and idea will be useful to someone.
The body of the car undergoes corrosion over the years, especially quickly it begins to rust if you do not take care of it, do not make an anti-corrosion coating. How soon the body parts begin to rust, also largely depends on the quality of the iron, factory processing, over time, the car needs repairs to the bottom, sills, side members, wheel arches, and so on.
Rusted sills and a rotten bottom are a fairly common problem on a VAZ-2110 car, and since such work in a car service is quite expensive, many car owners try to repair the car with their own hands. You can patch holes on the body and bring the car back to its normal form by various methods, there are non-welding methods, but basically all car owners try to make repairs using welding.
With any body repair, first of all, it is necessary to make an external examination of the iron, to identify and note for yourself which areas are in a deplorable state, need repair or replacement. The state of the bottom metal is determined in different ways:
using a hammer and a core drill - if you think that there is rust in a certain area, you need to lightly hit the metal, check if there is rotten iron under the anti-corrosion coating;
try to raise the car on a jack on each side - if the stubborn platforms are rotten, it will be noticeable when you try to jack up the car;
push in different places on the floor of the car - weak, rotten iron will bend under your feet;
try to move the front seats back and forth in the cabin - problematic seat movements also often indicate the poor condition of the metal.
Any repair of thresholds and bottom by a non-welding method is not professional, and the craftsmen are considered only a temporary measure in order to restore the condition of the body in an amicable way, one cannot do without a welding machine. When repairing the bottom without welding, patches and new body elements are not welded, but installed on rivets or self-tapping screws (bolts), preparation and all other work is done in the same way as in traditional body repair using a welding machine.
Before proceeding with the restoration of the body in the traditional way (using welding), you need to prepare everything you need, from the tools you will need:
welding machine;
Bulgarian;
electric drill with drills;
screwdrivers;
hammer.
To remove old noise insulation, you may need a chisel, you can quickly and efficiently remove the "noise" using a perforator. To clean metal, sandpaper of various grain sizes is needed; to increase productivity, it is recommended to use a sanding machine. You cannot do without materials when repairing the bottom, here a lot depends on the volume of restoration work. Most often you have to use:
patches (pieces of new iron) or ready-made spare parts such as floor spars, panels, sill amplifiers, etc .;
priming;
rust converter;
anti-corrosion and noise-insulating materials (you can use Movil, Tektil, bitumen mastic, Dinitrol, Prim Antishum, etc.).
Since the brake, fuel pipes under the bottom often corrode thoroughly, stick and do not turn away, in many cases they also need to be replaced.
Before setting new salaries on the bottom or weld on body elements, you need to make preparations, partially disassemble the car:
remove the seats;
remove carpet;
dismantle the old soundproofing;
move aside the electrical wiring in those places where repairs will be carried out.
Before replacing individual elements, installing patches, the entire metal surface is freed from the old noise insulation, thoroughly washed and wiped off, cleaned with a grinder, a stripper or sandpaper. Then the metal should be degreased and treated with a rust converter, only after that you can start working directly with iron.
Most often, when replacing individual parts of the bottom or installing patches, welding is used; a semiautomatic welding machine is best suited for such repairs. If a complete individual part is changed, for example a cross member, rivets can be drilled here and the element can be dismantled without welding.
When the bottom and the sills change at the same time, the latter are removed from the car first, and when replacing the sills, it is important to control the geometry of the body. When replacing floor panels, the bottom parts are always mounted from below, then welded or riveted. When there are many holes and foci of corrosion in the floor of the body, it is better to replace the bottom completely, all the more since it is relatively inexpensive when assembled for a Top Ten.
After carrying out work on restoring the bottom of the body, it is necessary to treat the surface with anti-corrosion compounds, it is best to first prime the iron, and then apply anti-corrosion. Before applying a protective layer, the metal must be thoroughly washed and dried, the best option is to degrease it with white spirit, acetone, solvent or a special chemical composition after washing. Also, do not forget about the processing of welds, they are lubricated with mastic.
In case of significant damage, the bottom often changes entirely, replacement in this case is more profitable than repairing:
the purchase of one large integral part as a result is cheaper than purchasing all the spare parts separately;
the amount of work in general for replacing the bottom is less than repairing it;
no need to waste time on thorough cleaning of metal from rust, removal of old sound insulation;
completely replacing the bottom can be quite simple, without welding, by drilling out the rivets, and then installing new fasteners.
If you are going to use an automatic welding machine, it is imperative to dismantle the fuel tank when replacing the floor of the body, non-observance of safety precautions can lead to a fire or even an explosion.And although the work of replacing a one-piece body element at first glance seems quite simple, there are some nuances here - on the new factory floor there are no studs, a bracket for a parking brake cable, and other fasteners that will need to be rearranged from the old floor.
When preparing iron for patches, it is necessary to take into account its thickness - too thin metal will be fragile, and a thick sheet is poorly welded and harder to process.
Although electric welding is cheaper to use, it is better to weld metal with a semi-automatic - it is easier to use it, and the weld is smoother and more accurate.
When cutting out pieces of metal and installing patches, the part to be installed must fit exactly in size.
When replacing the bottom, the weld seam cannot be continuous, since it has high rigidity, and insufficient elasticity negatively affects the strength of the body.
And if you undertake to repair the body with your own hands, you should be patient, carefully, without haste, perform all the necessary operations, sparing no time and effort in processing the metal, cleaning it from rust. Poor preparation and poor anti-corrosion treatment lead to the rapid appearance of corrosion, which negatively affects the service life of body elements.
VIDEO
When repairing a car, it is often necessary to perform welding. If you have some welding skills, you can perform this type of repair work yourself. Welding work may be required when repairing the body, underbody, engine and other elements of the car. In each case, there are certain features of the work.
With the help of a carbon dioxide semiautomatic device capable of welding with wire, you can patch up any holes, weld on new parts, and straighten out dents.
Welding work on the body can be performed using a carbon dioxide semiautomatic device that is welded with wire. With this device, you can weld metal sheets with a thickness of 0.8 to 6 mm. This will eliminate various gaps and dents on the body, weld on some new parts (for example, sills, fenders).
The supply of carbon dioxide to the weld allows a greater volume of metal particles to be retained so that the metal melts rather than burns out. This effect is achieved due to the fact that carbon dioxide displaces oxygen.
The mechanism of the welding semiautomatic carbon dioxide.
If argon is supplied to the welding site, it is possible to weld aluminum, stainless steel and other non-ferrous metals and alloys. In this case, it is necessary that the filler wire used is made of the same metal that is being welded.
The metal must first be prepared for welding. The area on the body and the parts to be welded must be thoroughly cleaned. Paint, rust and any contamination are removed from them.
The seam can be continuous or discontinuous. This is determined by the design features of the do-it-yourself car welding place. An interrupted seam is used on thin metal if there is a large gap between the parts to be welded. Such a gap prevents the metal from being pierced; if the parts are butt-welded, then a continuous seam is made.
To prevent the metal from overheating, it is necessary to reduce the transfer of heat to it. This can be achieved by applying intermittent current. Depending on the thickness of the parts to be welded and the size of the gaps between them, the optimal ratio of welding duration and breaks is selected. The break is necessary for cooling the weld pool to avoid burn-through.
It is recommended to adhere to the following order of welding a car with your own hands:
High pressure cylinder connection diagram.
Checking the network for load capacity. Before you start welding, you need to make sure that the wiring is able to withstand the stress that the welding machine will create. Only after a successful check can you proceed to the preparatory work.
Install the welding wire. To do this, you need to remove the nozzle from the semiautomatic burner and unscrew its copper tip with a wrench. After that, the pressure roller is removed by the wire and the required current polarity is set. If a simple wire is to be used, then the plus must be installed on the torch and the minus on the clamp. When using flux, the polarity is reversed.
The wire must be inserted into the feed channel 10-20 cm. After that, the pressure roller must be brought in. The wire must fall into the groove of the drive roller.
The semiautomatic device is connected to the network. Press a special button on the torch handle. After that, the gas flow will start, and then the wire and current flow. After that, a copper tip and a nozzle are put on.
Welding a car body with your own hands means welding all parts except the front one. This is because the load on the front is minimal. This does not apply to those cars, the front suspension of which is under heavy stress. The floor is usually welded on both sides, but before doing this it is very important to treat the welds with a special primer. The fenders and hood are usually not welded, but the seams of the uprights, rear and sump must be carefully finished.
An example of "threading" a wire into a welding machine.
If damage to the integrity of the bottom elements is found, then repair work on the bottom is necessary. This work requires making even seams and adhering to a certain temperature regime. This avoids harmful effects on the bottom material and maintains the required seam structure.
It is very important to choose the right material for making patches on the bottom. You can not use too thin metal, and too thick. In the first case, the patch will be unreliable, and in the second, the metal will be difficult to process. The optimum thickness is 1.5-2 mm. To maintain the technological characteristics of the material used, you will need to adhere to the optimal operating mode during metal cutting.
Carbon dioxide welding mode table.
It is recommended to work with two people, since it is almost impossible to control the uniform distribution of the metal layer on the bottom alone. At the end of the welding work, it is necessary to grind the edges of the patch and coat it with a special primer or epoxy resin. This will protect and seal the joint.
The bottom can be deformed over time. Dents increase the likelihood of corrosion. You can eliminate them by tapping the bottom with a mallet. This work must be done evenly. Start it from the middle of the dent.
Many materials used in bottom welding are highly flammable. Therefore, it is not recommended to weld it if you do not have at least basic welding skills. In this case, it is recommended to consult a professional.
In some cases, it may be necessary to weld some parts of the machine's engine. The parts of the engine that can be repaired by welding are:
cylinder blocks and their heads;
intake valves and their guide bushings;
intake and exhaust manifolds;
oil and water pumps;
bushings and valve seats;
caps and covers of the ignition timing adjustment chambers;
bushings and valve seats;
pistons and piston pins;
pipelines.
These are the main engine components that can be repaired with a welding machine. But welding can be applied to other parts as well.
VIDEO
The car muffler can also be repaired by welding.
If the muffler is rotten or a hole appears in it, then the following steps will need to be taken:
You need to cut a piece of metal to a certain size. Apply it to the damaged area.
The edges that will be processed must be cleaned with emery.
The patch should be applied to the thickest parts of the muffler, so that it will not be possible to burn it during welding.
For work, you need to use electrodes with a diameter of 2 mm. The current of the device is adjusted for them.
The battery leads must be disconnected before starting work.
When performing a welding seam, you need to lead the electrode from a section of greater thickness to a thinner one, that is, from a patch to a section of the muffler.
The finished seam must be beaten off with a hammer to remove slags and carefully inspected. There should be no pores in it. If they are, then you will have to boil them. 1 more suture is applied from above.
VIDEO
Video (click to play).
Thus, it is quite easy to weld a car yourself. Welding work allows you to repair various parts of the car. When doing welding with your own hands, you can save significant money.

