In detail: DIY home renovation of the floor of the house from a real master for the site my.housecope.com.
Having bought an apartment in an old house or inherited it, the new owners immediately think about its overhaul so that the design and interior fit their preferences. And if almost everyone knows what to do with the walls and ceiling, then not everyone knows how to repair the floor in their home. The floor can be concrete or parquet, with laid tiles or laminate, with linoleum or other coatings that make the apartment cozy and beautiful. And in order for the home to be not only beautiful, but also safe, the repair of the floors in the house must be carried out with special care. At the same time, repairing floors is an excellent reason to insulate them!
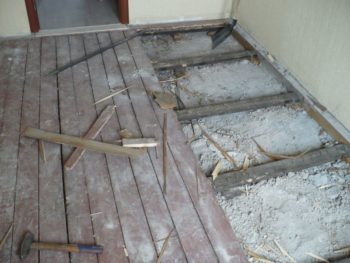
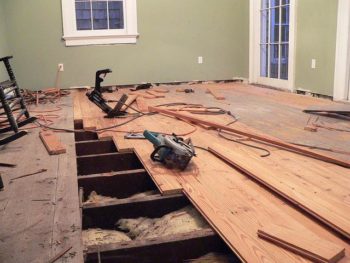
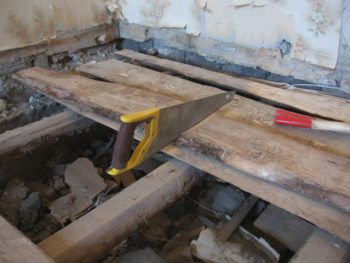
First of all, the repair of the floor must begin with the dismantling of the old coating. Linoleum, parquet or other type of flooring must be ripped off and the floorboards inspected. As a rule, if the house is old, then they require a complete replacement, so they should also be dismantled.
After all the work on dismantling the obsolete building materials and cleaning the space from debris, you can start building a new floor.
If the foundation has become unusable due to dampness from the basement, it must be plastered and restored to its normal form before construction work begins on laying the floor. The main materials that allow you to repair the floor in a wooden house:
- dry timber, dimensions 200x200 mm;
- thermal insulation material, sheet or roll;
- floor board;
- antiseptic impregnation for wood;
- various fasteners, including self-tapping screws and foam.
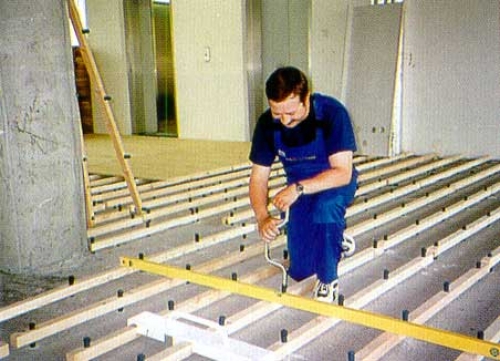
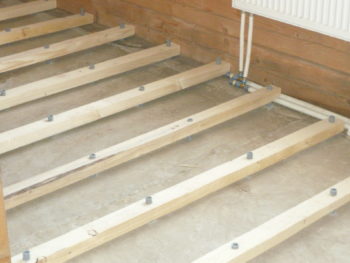
Having decided on the location of the boards in the room, you can proceed to the installation of a wooden beam impregnated with an antiseptic, which will be the basis of the new floor. The step of laying the lags depends on the thickness of the floorboards: if the board is 40 mm thick, then the floors must be installed in increments of no more than 850 mm. When using thicker boards, the step can be increased to 1 meter and, accordingly, reduced if the board thickness is less than 35 mm.
| Video (click to play). |
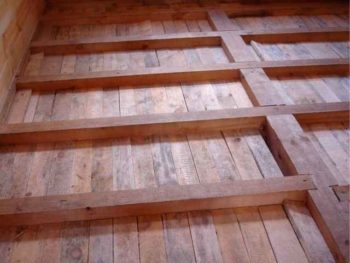
Lags are set strictly by level. In places where it is necessary to raise the beam, plywood soaked in hot drying oil should be used - it works perfectly for compression and will not allow shrinkage over time. These gaskets must be screwed to the lags, in order to avoid their falling out and subsequent subsidence of the floor. In no case should wedges and spacers be used instead of gaskets - they can eventually decrease in size and fall out of the seats, which will lead to floor subsidence and squeak. If the floor is being repaired in a private house or in an apartment on the ground floor, and a basement is provided under the room, then this must be taken into account before installing the lag. In this case, insulating material will need to be laid between the lags. After fixing all the elements of the subfloor, you can start laying the insulation.
Insulation must be chosen based on the climatic conditions in which the house or apartment is located. If the apartment is on the ground floor or the floor is being renovated in your own house, you should take this issue very seriously. The comfortable stay of households in the home during the cold season will depend on the quality of the insulation. To choose the material that is ideal for specific living conditions, you need to consult with specialists in hardware stores and purchase the appropriate insulation. It can be expanded polystyrene, mineral wool, ecowool, penoizol, etc.
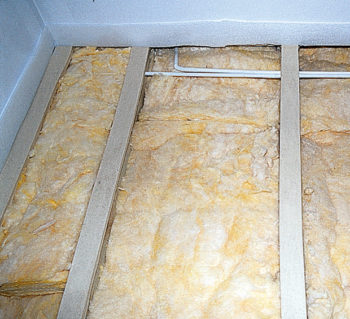
Roll or sheet material is laid between the logs.In this case, it is important not to leave gaps and voids in order to exclude the passage of cold air from the basement. If logs with a height of 200 mm are chosen, you can use a sheet of stone wool insulation, if the height of the base is less, you should consider the option with rolled thermal insulation laid in one or more layers. The main thing to be guided by when installing the thermal insulation of the floor is that the top board does not touch this material, there should be a small air gap between them. Also, in case of constant dampness in the basement, which sooner or later will penetrate through the concrete slabs, waterproofing should be laid on the floor before installing the insulation. This is a necessary measure, since all heat-insulating materials tolerate high humidity extremely negatively, they can accumulate moisture in themselves, increasing the risk of wood rotting and collapsing at the same time. This, of course, does not apply to expanded polystyrene and some other synthetic insulation, but in most cases, waterproofing is needed.
After carefully laying the insulation, you can start installing the wooden floor. To date, the lining has proven itself excellent. Thanks to special spikes and grooves, the installation of a wooden floor will be very easy and quick, moreover, there is a ventilation groove in the lower part of the board so that the wood "breathes".
The board is fixed to the logs with self-tapping screws, while it is necessary to control the absence of gaps between the joints. A properly installed floor should not have even the smallest gaps. It is recommended to tighten the self-tapping screws in such a way that after installation they are not visible, and their heads do not spoil the appearance of the floor.
Having secured the last board, you can proceed to the next operation, depending on the preferences of the owners of the house.
So, if the homeowners prefer a parquet board or laminate, in this case, waterproof plywood, 10-15 mm thick, is fixed on the floor, screwing it securely to the boards. It should be noted that small gaps must be maintained between the sheets in order to exclude friction of the ends against each other and creaking. Next, a laminate or parquet is laid on the plywood. The laminate has an ideal smooth surface and does not need further processing, and in the case of laying a floorboard or parquet, several more repair operations must be performed.
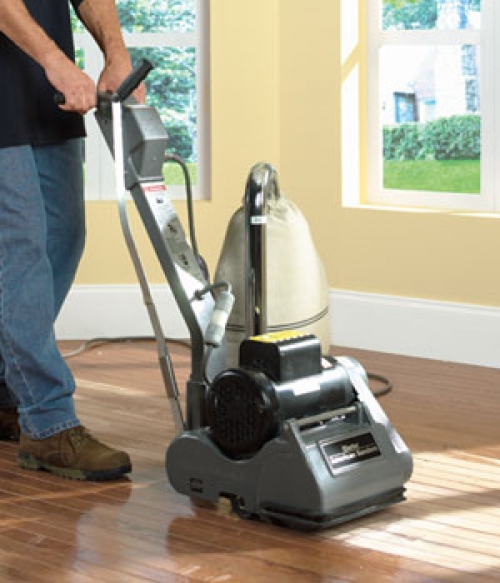
To remove possible differences in the height of the boards or parquet and ideally level the floor, a special scraper is used, which allows you to remove the top layer of wood, cleaning off possible dirt and unevenness that arose during the installation of the floor. If the planks have deep scratches or dents, sand them roughly with coarse grit sandpaper and then use finer grit paper to achieve a perfect floor surface.
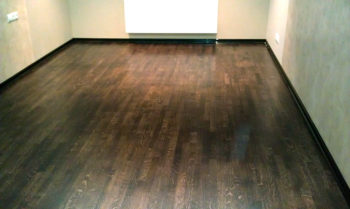
After scraping the floor and removing debris and dust, you can cover the wood with a special varnish, which will not only give a mirror-like shine to the surface, but also protect the floor from dirt and minor damage.
Of course, everyone knows that a wooden floor is the ideal surface of a home for a person's comfortable stay in it. But it is not always possible to see a tree on the floor. Modern architects and builders, erecting new residential boxes, give little thought to the question of the aesthetics of the interior and the health of future owners. That is why in panel houses the floor is, for the most part, concrete, with linoleum or vinyl tiles. And when apartment owners plan to renovate their living space, they also think about renovating the floor.
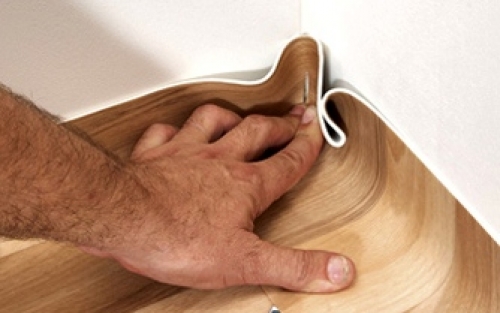
Worn linoleum or peeling tiles must be removed, and the concrete floor must be cleaned of old glue. Further, floor repair in a panel house can follow several scenarios.
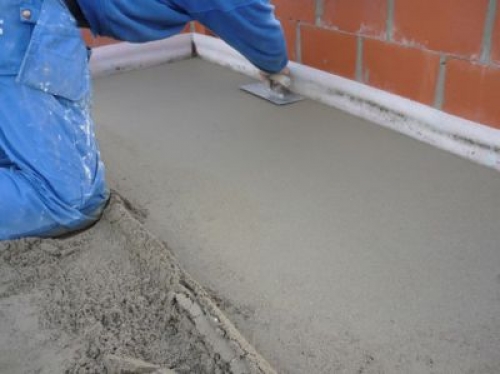
If the height of the floor level drops made you think about leveling the floors, then you should think about the floor screed. This method of leveling can be dry, semi-dry or wet. it all depends on the material used.With a dry floor screed, expanded clay is used, which is covered with gypsum fiber boards. The main advantage is the timing of the execution, the lightness of the structure and the parallel insulation of the floor.
With a semi-dry screed, the solution is mixed in such a way that it contains very little water. Such a screed dries faster than wet, and the process of its implementation is less laborious.
Sand and cement, sometimes with the addition of plasticizers, are the basis for wet screeds. For floor insulation, expanded clay is added to the mixture. This method is one of the most established, but it will not work in cases where it is impossible to create additional loads on the floor slabs, and such a screed dries up to 30 days.
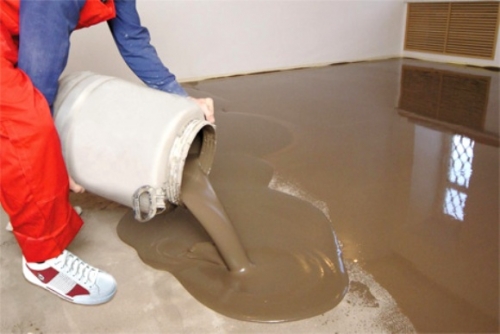
Self-leveling floors are considered a novelty in the field of flooring. Polymer mixtures are quite easy to prepare, and the installation of self-leveling floors requires much less effort than any of the floor screeds.
It is important to properly prepare the base floor, prime it, observe the mixing technology of the mixture and all the necessary parameters for humidity and temperature in the room. Polymer mixtures are also called self-leveling. Such a solution is simply poured onto the floor, focusing in some cases on the beacons, and distributed over the floor. So you can quickly level the floor, which is then covered with linoleum, tiles and anything else. And you can use only polymers and after the starting coating, pour in the finishing one. Self-leveling floors allow you to radically change the interior of your home. After all, you can make not only single-color floors, but also patterned floors - the so-called 3D floors.
By itself, such a floor is already a work of art, but from the point of view of practicality, it is generally irreplaceable. One drawback: such floors will be expensive. But, as an option, they can be poured in a small area - in the kitchen, bathroom and even on the balcony.
One of the most economical and simple floor coverings is linoleum. Indeed, what could be easier than laying linoleum? On a clean washed floor, glue or mastic is applied and linoleum is laid. The principle of laying linoleum is similar to wallpapering walls, only the working process takes place in a different plane. It is necessary to monitor the density of adhesion of linoleum and prevent air bubbles, otherwise a hole from an inadvertently moved chair or table will break through in that place.
One of the easiest to install and remove and the cheapest way to renovate old flooring is with vinyl tiles. The variety of its designs allows you to create a very beautiful finish with a minimum of effort. But tiles, like linoleum, laminate, and parquet should be laid on a perfectly flat surface.
The tile looks very impressive in the hallway or in the kitchen, among other things, it is easily cleaned of various contaminants.
The tile is laid on the concrete floor, free from dust and grease stains, using an adhesive solution. Before laying the tiles, in order to maintain symmetry, it is best to preliminary mark the area and determine its center. In this case, the drawing on the floor will fit into the interior without disturbing the harmony of the apartment ensemble. After the glue has hardened, the joints are grinded with special solutions, which can completely merge with the color of the tile or, conversely, sharply contrast with it.
There is still not enough money for the overhaul of the floor in the old house, inherited, and the repair is required today? You can extend the life of a worn floor, and at the same time strengthen your nerves, since creaking floorboards or dangling tiles can irritate even a person with an iron hold.
The resulting gaps between the boards in the floor can be sealed with a special wood filler, and thoroughly cleaned after it dries. Large gaps must be sealed with wooden slats, pre-lubricated with PVA glue, and then carefully hammer them in with a hammer.A broken or decayed floorboard should be sawed out and replaced with a new one that fits the size of the opening. It should be remembered that both ends of the board must necessarily lie on the logs and be fixed on them.
If for some reason the tile has come off, it must be carefully removed so that it does not burst. Otherwise, you will have to improvise with the remnants of tiles from past repairs or look for similar tiles in hardware stores. After removing the tiles from the floor, you should carefully remove some of the cured mortar so as not to damage the remaining tiles. Next, the resulting depression is filled with glue and the tiles are laid, pressing and removing the excess solution squeezed out through the gaps. After the mortar has set, you can grout the joints and in a day the floor will look like new.
Parquet floors can be easily restored by yourself. As a rule, especially damaged elements are replaced with new ones, and planks with scratches and small irregularities are treated with wood putties. But before repairing cracks, it is imperative to clean the areas to be repaired from varnish so that the repair mixture adheres well. After the filler has dried, the repaired parquet areas can be sanded and varnished.
To strengthen old wood floors and prevent them from squeaking, you need to:
- use a punch to drill holes in them;
- insert long screws;
- hammer them in with a hammer;
- tighten with a screwdriver.
You will learn the whole process in detail if you watch the video.
Of course, renovating the floor in an old house is a painstaking job that requires some building skills. But for a home craftsman who is familiar with carpentry and locksmith's tools, this work will not seem difficult and the repair of even the most difficult sections will be excellent!
A wooden floor is the best option for building a country bath. They arrange it based on economic, aesthetic and environmental considerations. However, organic material is gradually losing the height of technical priorities from uneven loads, moisture drops, fluctuations in the temperature background. To extend the service life of the structure, the owner needs to regularly repair the wooden floor with his own hands in a cosmetic volume. For neglected, badly damaged, partially decaying floors, global restoration measures will be required. Let's look at how to identify the causes, how to prevent emerging problems, and how to fix small and significant defects.
The list of reasons for the need for restoration includes not only the well-known sensitivity of wood to fluctuations in temperature and moisture. Periodically shrinking and swelling, the material loosens the fasteners. There are foci of decay if no antiseptic treatment was carried out during the construction period or if the antifungal protection was not resumed after the prescribed 2 years.
It often happens that after long-term use, the floor boards begin to stagger and sag threateningly when moving along them, or even grumpily creak, meeting the feet of the owners. Often, cracks or chips appear on the floorboards and between them, favoring the settling of bacteria and rot spores. Any of these signals notifies the owner of the need for repair work, a significant part of which he can perform on his own.
Before repairing, you need to examine and assess the condition of the floors, then, based on the audit carried out, draw conclusions about the amount of work to be done:
- If the surface is just damaged and movement on the floor does not cause concern, you will need to tighten or change the fasteners, trim and seal small gaps with putty;
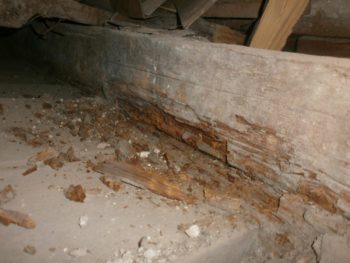
- If the floorboards respond to hammer blows with a dull sound, you will have to remove and replace the rotted floor parts.It is possible that these will be not only boards or their fragments, but also logs and embedded beams. It all depends on the area affected by rot or damage by the bark beetle. It is recommended to disassemble and reposition the floor in such situations, which is much cheaper than the loss of a completely rotten structure;
Note. The presence of deterioration and the development of rot will also help determine the rust of the nail hammered into the board and the "blue" of the wood.
- If the boards creak, it means that the wooden elements of the structure are not sufficiently cohesive in the area where the floorboards are joined to each other or in the area of joining with the joists. Those who cannot eliminate the cause of the squeak from the subfloor or from the surface will have to disassemble the floor, repair or improve the lag system;
- If there is a disgusting smell of rot in the bathhouse, the finishing, rough coating, logs, beams, and often the mortgage crowns must be changed immediately. It is better to hire a team of carpenters for work, if you want to remove the lower part of the log house in parts, lifting the entire floor with a jack, then change the embedded beams for new lumber;
Advice. You can cut the decayed sections of the log yourself and build up the timber on both sides with boards.
- If the floor sags, serious restoration work is coming with the obligatory analysis of the structure and the replacement of rotten elements. If the reason for the sagging is the deformation of lags or beams that are not damaged by rot and bark beetle, supports are installed under them.
- a special metal device with an unscrewing adjustment system;
- steel pipe with cement poured into its cavity,
- foam concrete blocks;
- wooden beams;
- brick posts.
Any of these options requires pouring a small local foundation 0.5 × 0.5 m and the presence of a roofing felt gasket between each other and the wooden element. The lack of height of the support post is covered by the lining of the board scraps. The direction of the upper row of masonry supports should be perpendicular to the direction of the log.
Another reason for the sagging of the floorboards is the insufficient frequency of installation of the lags. This means that we need to dismantle the floor and modernize it by installing an additional beam.
Visually, it can be difficult to determine whether cosmetic or major repairs of wooden floors are currently required. It is necessary to check the condition both from the inside and outside of the building, and from the side of the underground.
Attention. Be sure to carefully inspect the ends of the log. Wood that is not protected in this place very quickly becomes infected with rot from the embedded timber and transfers the "infection" to the rest of the wooden elements.
For examination in the twilight of the underground, do not forget to stock up on a flashlight and an assistant who will move across the floor during the period of the diagnosis. You will also need an awl, which will need to periodically try to pierce the mortgage beam or logs. We make "injections" even in those places that do not optically raise doubts about suitability. If the awl rod has passed freely into the wood, we study the size of the damaged area by the same method, cut it out and replace it by substituting a jack for insurance under the “cut off” section of the structure.
An owner who is inexperienced in the field of wooden construction should not be involved in replacing crowns and embedded beams with his own hands. However, information about the probable causes will help him control the work of the brigade. But to perform simple work, it is not necessary to part with personal savings. What and how can you repair yourself?
Examine the "vociferous" area of the floor. We found out that unsweetened tunes are heard due to loose fasteners, then we will screw, hammer in and supplement the fastening with galvanized self-tapping screws designed for working with wood.
We deal with more complex "squeaky" problems with other methods:
- A common cause of a squeak is a tongue of the tongue that is loose in the groove. To eliminate it, we will disassemble the floor, first carefully dismantle the plinth, then remove the edge board, and then all the rest to the area of the squeak.We use a spatula, a lever and shims from the trims of the lath. We knock out the nails from the dismantled boards and plinth with a hammer or the butt of an ax, hitting from the side of the tip of the fastener, after which we pull it out with a nail puller. We check the lags, make, if necessary, a complete or partial replacement of the damaged components and put them back. Fasten with self-tapping screws, departing from the "old" fixation point 3 cm.
Advice. It is more reasonable to remove the grooved floor in blocks, especially if they were attached through 4 boards. The block will be easier to disassemble without damaging the locking system. So that there is no difficulty in assembling the boards in the reverse order, we number the floorboards and the baseboard.
- The creak of a floorboard that does not fit tightly to the log is eliminated by lining a wedge, a piece of roofing material or cardboard, inserted under the board from the side of the subfloor. It may be sufficient to simply screw in two additional screws while inside the room. We drill holes for screws in the creaking board at an angle both to the floor and to each other. We putty the heads recessed by about 0.5 cm, grind the repair area after hardening of the putty.
- The easiest method to get rid of the squeak is to fill the problematic gap between the floorboards with graphite powder or talcum powder.
Close up large cracks with wedges. For their manufacture we use trimming of slats or boards. We will process the wedge-shaped side with wood glue and drive it into the longitudinal hole. Let's wait until the glue hardens and cut off the excess protruding above the floor surface with a plane.
The gap can be filled with a rope or twine coated with glue. After waiting a day, the place of repair must be putty with a homemade compound made of linoleum softened in acetone, which did not have a substrate.
Small cracks can be repaired:
- putty for wood;
- polyurethane foam;
- a mixture of fine sifted sawdust and carpentry or casein glue, taken in equal proportions;
- newspaper softened in hot water, mixed with paste and wood glue;
Recipe. The mass from old newspapers, crushed into pieces, filled with boiling water, should be infused for a day. Then you need to boil the liquid paste, cool it and add wood glue. This solution must be introduced into a strongly squeezed newspaper mass and stirred until you get a homemade putty with a consistency resembling a window putty.
Cracks and small gaps are covered after scraping the floor. By the way, during this period, there is a sufficient amount of sawdust used for embedding. Crack repair is completed with puttying.
A board without locking joints or part of it can be removed without a complete disassembly of the floor, because it is not in a "rigid bundle" with the adjacent elements. To replace the entire floorboard, the skirting board will still need to be removed; for partial repairs, it will be necessary to accurately find out the location of the logs and underground communications.
Completely remove the board as follows:
- we pick up the floorboard with a crowbar from the edge and, placing a wooden block under the crowbar-lever, carefully raise it;
- put wooden scraps under the raised board to fix the gap, and saw off an unnecessary piece;
- in the same way, we move to the opposite edge of the floorboard.
Those who intend to re-lay the floor, turning it down with a slightly worn side, must act according to the described algorithm, but there is no need to saw off the pieces from the boards.
Important. Do not forget to treat the wood with antiseptic impregnations before re-laying the wooden floor.
To replace a piece of board, you will only need to cut out the damaged area. When cutting, engineering networks and logs should not be damaged. If the cutting line is expected to cross them, the size of the part to be repaired must be increased. The area to be replaced must rest on at least two logs, the line where the patch and the old board join should be located above the log.
We make a new part using the cut-out template segment, put it in place and attach it to the logs.The fasteners can be supplemented by driving nails into adjacent boards at an angle of 45º.
So, the renovation of old wooden floors can be considered complete, now is the time to take care of aesthetics and prevention. Sand again, cover the restored floor with a decorative and protective layer of varnish or paint. Outside, along the perimeter between the plinth and the foundation beam, we will install an apron made of a strip of sheet lead 20 cm wide. It will prevent the penetration of atmospheric moisture and subsequent damage to the foundation crown.
That's all for today, all questions and reviews - in the comments! Thank you.
No matter how well the house is built, over time, it will be necessary to carry out current or major repairs. Overlap and floor often suffer from damage of various kinds. Therefore, the owners of houses made from natural materials should know how the floor is replaced in a wooden house.
It is possible to decide whether repairs are needed or not by external signs, among them the most obvious:
- Floorboards squeak under load.
- The floor flexes under the weight of the furniture.
- Differences in floor level are visible, water flows in one direction.
- Cracks and gaps between the floorboards.
- The wood is rotten and crumbles, even with a slight impact on it.
Before repairing floors in a stalinka or other wooden building, you need to check their condition. Diagnostics will help determine the scope of work. You need to examine:
- Boards. Partial replacement may be necessary if rotten areas are found.
- Lags - they can also be damaged.
- Beams for the "work" of beetles and other pests.
- It will not be superfluous to examine the subfloor, if it is seriously damaged, then it will have to be replaced.
Note! Do not flatter yourself if it seems that the finished floor is in perfect condition, checking the lags and the subfloor are required. After all, the problem sometimes lurks in the depths, and if it is not detected in time, the consequences will be unpleasant. It is better to repair the floor in a wooden house sooner rather than later.
The check is carried out according to several parameters:
- Sound, so beams, beams and floorboards follow. To do this, tap on a wooden surface with a hammer. A dull sound means that the wood is rotten.
- The appearance of the nails. From them it will be possible to see where the floorboard is rotten. In damaged areas, fasteners are rusty due to the effects of putrefactive processes.
- Checking lags consists in probing with an awl. They need to walk the entire length of the log. Ideally, the awl should not easily be driven into the wood, if so, then the supports are rotten and a lot of work will have to be done. Rot is most likely to form at the ends of the beams.
You can determine the degree of necessary repairs as follows:
- If an external examination showed that there are cracks, paint peeled off in places and other minor imperfections, then a partial repair is carried out.
- If there is a creak, then you need to replace individual lags.
- If a too cold floor is found, complete disassembly and insulation is necessary, since during the construction process they saved this.
Any damage to the floor can be repaired, only the costs, duration and complexity of the repair depend on the defects found.
Such work is needed if the detected defects are not critical. Do not forget about checking all floor levels if there are no defects in them, which rarely happens, because the floors are not 5 or 10 years old.
Redecoration consists of sealing cracks and cracks. This is done in several ways:
- Repair using putties.
- Sealing with glue and sawdust mixtures.
- Clogging of cracks with slats.
Any of these options will not take a lot of resources and time. After completing the work, the floor is again as good as new and will serve for many more years.
Often, repairs to an old wooden floor in a private house are carried out when it is impossible not to notice wear and tear. In most cases, floorboards need to be replaced.In the most difficult situations, there are also lags and a rough floor. Such measures will be needed by the owners of houses whose floors are more than 40 years old, wood is not metal, it has its own resource. And given the fact that previously such attention was not paid to wood processing and its isolation from negative factors, overhaul is the only measure.
"Stalinkas" are residential buildings that were built during the Soviet era, until the beginning of the 60s of the last century. Such structures have characteristic features:
- High ceilings.
- Large windows and spacious rooms inside.
- Wooden floors between floors.
- Wooden floors.
Many owners who live in such houses are interested in how to replace the wooden floor in the stalinka. There are many options, but you still can't do without lags and a rough floor.
Reconstruction measures for wood flooring in stalinka or other types of houses are similar.
- Dismantle the old floor.
- Install new lags.
- Equip the sub-floor.
- Warming.
- Install a clean floor.
- Hand saw or chainsaw.
- Hammer.
- Nail puller.
On the floorboard in old houses there is an additional coating - linoleum, carpet and others. They are removed along with the baseboards. With the latter, you need to act carefully, it may turn out to be reused.
- Note! Particular difficulties arise just in "stalinkas", in Soviet times it was difficult to find suitable fasteners, so a sheet of hardboard was nailed with 5 cm nails, when removing them from the board, problems arise.
To dismantle the boards, you need to find a gap. With the help of a crowbar or a nail puller, or better both, pry the board and rip it off. You need to pry it along the entire length so as not to damage it if it is intact. Then you should pull out the nails. So remove both the finishing and the rough floor, if any.
After that, you should not delude yourself to inspect the state of the lag, most likely, it is catastrophic. They can be damaged by the bark beetle or completely rotted.
If the situation is not so critical, then the logs must also be carefully dismantled by unscrewing them from the beams and support pillars. In cases where a wooden house rests on embedded beams, the process of replacing the floor is accompanied by jacking up the house. This is necessary to replace the beams at the anchor points.
Before installing, clarify whether it is necessary to drain the basement and grout the foundation. If dampness is detected in the subfield, drainage is necessary, which will increase the time required to repair the floor. If there are places with a damaged foundation, you need to add it and wait until it dries.
Check the condition of the support posts. For laying new lags, the elements must be serviceable. It happens that in the old structures of wooden houses there are no posts at all, they are installed before mounting the supports. Steps when installing a lag:
- Marking on the support beams of the sections for fastening the beams. If there are columns, then their markings.
- Determine the angles of the posts in the longitudinal and transverse planes.
- Treatment of lags with an antiseptic will extend the service life several times.
- Further, the posts are waterproofed.
- Lags are laid on them and fixed. In this case, it is necessary to reach a horizontal level, if in some places there are protrusions, process the supports with a plane.
- To fasten the lags to the support beams, self-tapping screws of the required length are used, for the support posts - dowels.
The permissible deviation of the level of the lags is within 1 mm per 1 meter.
Rough or bottom floorboards are needed so that there is where to mount the insulation. For it you need a rough board with a thickness of at least 2 cm, preferably 4. They must be dried and treated with an antiseptic. Installation of boards is carried out across the logs with fastening to the beams. Wooden boards can be nailed or screwed on with self-tapping screws.
Although the floor is rough, there should be no gaps in it; they are blown out with polyurethane foam, if they are found. After the foam dries, cut off the excess.
The wooden floor needs insulation.To do this, use a variety of materials, it is important to lay a layer of waterproofing and a vapor barrier when arranging any of them. The first is laid on the subfloor before laying the insulation, the second - on top of it. Insulation options:
- Budget solutions: sawdust or expanded clay.
- Mineral wool.
- Ecowool.
- Izolon.
- Expanded polystyrene.
Regardless of the type of insulation chosen, it is necessary to ensure tightness, it is most important for isolon and expanded polystyrene, since these materials are sheet and dense, not self-filling.
The upper or final wooden floor is mounted on top of the insulation, on the logs. The moisture content of wooden boards should not be more than 12%, thickness from 4 cm. It is more convenient to work with grooved ones, such have a groove-comb system. This eliminates the formation of through cracks when the wood dries up.
You need to start flooring from the corner of the room farthest from the door. The first board is laid with a comb against the wall, and a nail is driven into it. Moreover, the distance from the wall to the first board should be at least 1 cm. This ventilation gap is required. On the other hand, screw in a self-tapping screw or drive a nail at an angle of 45 degrees into the groove. Screw the rest of the boards to the logs on one side - into the groove.
In the event that the length of the boards is less than the length of the room, they are mounted at random - about 1 meter. This is necessary so that the joints of the ends do not coincide.
Before installation, floorboards must be treated with an antiseptic, which will exclude the development of mold, fungi and other damage characteristic of wood on the surface and inside the material.
Upon completion of the work, the flooring is sanded and varnished. If it is not planned to install another coating on it. In situations where additional flooring is planned, sheets of plywood or chipboard should be mounted on top, and linoleum, laminate or parquet should be installed on them.
Difficulties even in a large-scale repair of a wooden floor should not arise. The technology for replacing the subfloor, lags and finished floor is similar for a private house or for an apartment. The key requirement for a new floor to last a long time is the use of dry wood materials and treatment with an antiseptic.

