In detail: do-it-yourself repair of a washing machine door from a real master for the site my.housecope.com.
For safety reasons, washing machines use an electronic lock that locks the door during washing. Thus, it cannot be opened until the wash and rinse is complete. After completion of the wash cycle and the corresponding sound signal, the door opens automatically. If the lock breaks, the washing process becomes impossible.
To carry out diagnostics and repairs, we recommend contacting qualified specialists at the "RemonTechnik" service center.
The three most common problems with a sunroof lock are possible:
After completing the wash cycle, the lock does not open. In this case, to open the door, you will have to disassemble the washing machine;
The door does not lock even after a characteristic click, as a result, washing does not start. Thus, the control panel does not receive an informative signal to close the hatch;
It is most dangerous when the door is not locked and the washing process begins, as water may spill out. Also, the main components of the washing machine are damaged as a result of depressurization.
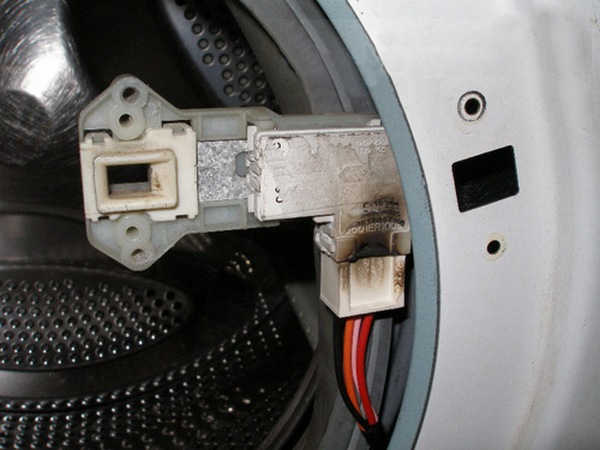
After a visual inspection, you can determine the malfunction of the blocker, but first it must be removed.
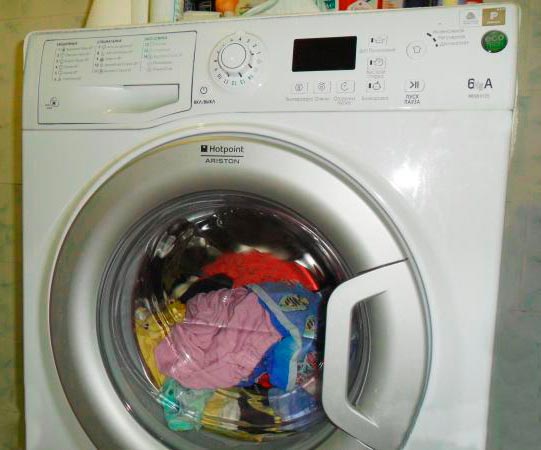
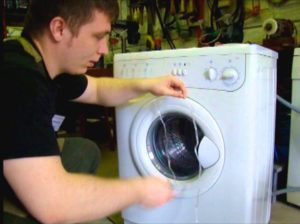
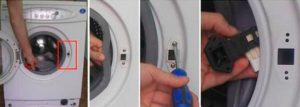
In front-loading washing machines, the lock is located to the right of the door. Dismantling the lock includes the following steps:
Drain the water and disconnect the unit from the network;
Remove the steel wire ring that presses the rubber gasket placed between the hatch and the drum to the machine body;
Move aside the rubber cuff in the area of the blocker so that you can get to it;
Unscrew the fastening bolts on the front panel (hold the lock with your hand so that it does not fall through);
Pull out the terminal that supplies power to the lock.
Video (click to play).
The process of installing the lock is carried out in the reverse order.
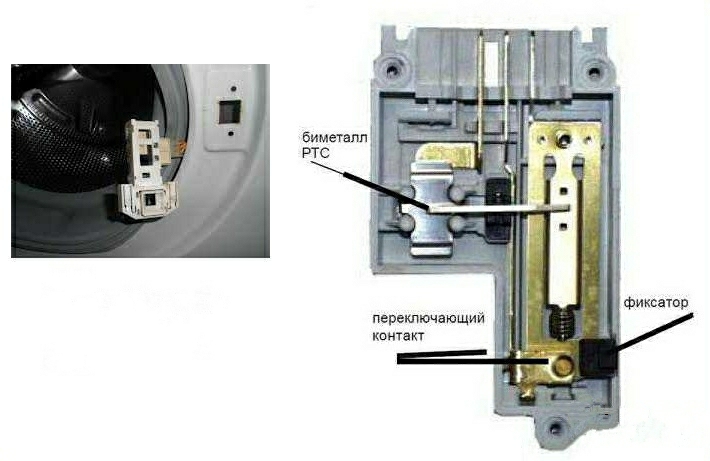
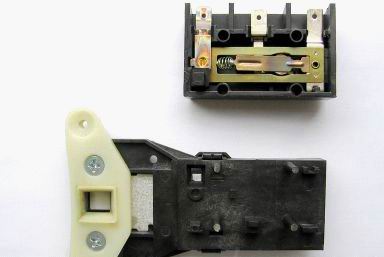
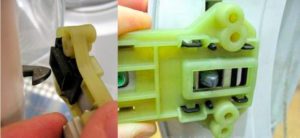
The body of the lock is made of plastic; there is a large hole at the end of the lock, which is intended for the hatch hook. The blocker housing contains:
A plate (usually made of metal) designed to engage the hook;
Pin and contacts transmitting a signal to the control module;
Thermistor;
Bimetallic plate, bends when heated.
When the door is closed, the hatch hook, falling into the holes of the lock, mechanically acts on the metal plate, setting it in a certain position. After the receipt of a special signal from the control panel to the lock thermistor, the bimetallic plate is deformed, which presses on the pin.
The pin enters the hole of the plate, blocking its movement. At the same time, the contacts are closed, which send a signal to close the hatch to the control module. The loading door can be opened only after the current supply to the thermistor has been cut off and the bimetallic plate has cooled down. Therefore, you cannot open it immediately after the end of the wash, but you must wait for a while.
After disassembling the lock of the washing machine, usually, you can visually easily determine the cause of the breakdown. If the cause of the breakdown is not clear, you need to check the following:
Resistance thermistor. In the cooled state, it is equal to 900 ohms.
Contact voltage after closing the door;
It is necessary to simulate the door closing procedure by applying voltage to the thermistor, to trace the operation of the bimetallic plate;
Check if the pin fits into the hole.
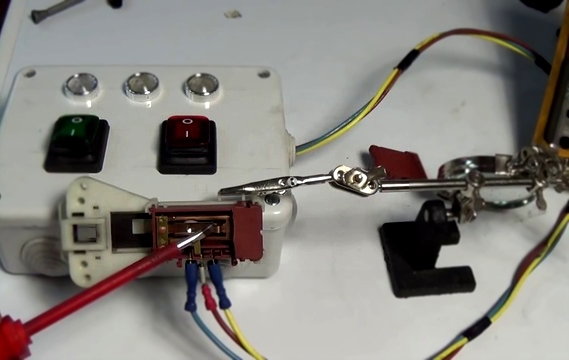
To diagnose the operation of the loading door lock, a multimeter is required.
If you doubt your own abilities, contact our service center, our masters will quickly fix the problem and your machine will be back in service.
The video will help you clearly understand the process of repairing and replacing the lock:
VIDEO
During operation, the washing machine can get malfunctions in which washing is impossible. If the washing program has ended, the blocking time (5 minutes) has passed, and the door does not open, and of course there is no water in the drum, then the problem is in the door.
Faults can be different :
the door glass may be broken;
defective or jammed latch;
the loop on the support breaks;
the problem is in the sunroof locking device.
In this case, repairing the washing machine door with your own hands is not difficult. It takes patience, time and the right preparation.
What will be required before proceeding with the repair?
Understand what kind of device it is and how it is made.
Know some of the nuances that the craftsmen use when repairing equipment.
Required tool (depending on breakdown).
Materials and spare parts.
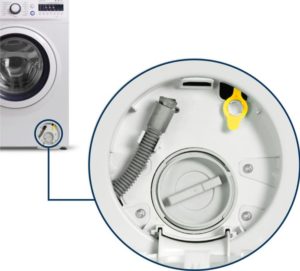
If the door of the car does not open, you can use the emergency opening of the hatch. The instructions for your washing machine indicate the emergency door opening procedure. Most often, manufacturers specifically provided for a solution to this problem and built an emergency cable into the car. It is located under the drain filter cover. The cable is usually bright orange and must be pulled to open the hatch. Not all models are equipped with this device.
If there is no cable, then the lock is disengaged in a different way. The cover is removed from the top of the machine and it tilts back in order to move the drum a little. After that, the retainer is pushed aside by hand.
There is also a popular method, which is often effective when repairing a washing machine door lock device. A nylon thread or fishing line is taken.
The middle of it is pushed with a screwdriver or knife between the door and the hatch in the area of the lock. Then both ends are pulled so that the thread or line gets inside the machine. After that, the latch is pulled back and a click is heard. The door is open.
To replace the old UBL with a new one, you need :
remove the cuff on the right;
unscrew the screws that hold the device;
pull out UBL;
insert a new one.
The latch is easy to fix. There are two options: if the latch can be removed, then it is removed. If not, then you will have to work with the entire door.
Next, you need to grind off the notch with a file or file.
Graphite grease is applied. It is imperative that the excess is removed to avoid damage to the laundry during washing.
The door is installed in place.
VIDEO If the glass is damaged, you will need to purchase epoxy or polyester resin. Removable glass in the door is rare. Otherwise, repairing the hatch of a washing machine is a little more difficult.
Polyethylene is glued in front with tape. It is important that there are no gaps.
The hole, which requires repair, is closed with a reinforcing tape used for plastering work.
Next, the resin is prepared from the required proportion of base and hardener in a separate container.
The prepared resin is poured into the damaged area.
Polymerization takes place during the day and only then can the plastic film be removed.
The smudges are removed with sandpaper.
Nothing complicated, a little effort and the machine will open.
To repair the support you will need:
The broken part is fixed with a vise.
You will need a nail with a diameter of 4 mm, which is cut to the required length.
A hole is drilled through the support with a diameter of 3.8 mm.
The nail heats up to about 180 degrees. At the same time, it is held with pliers. And then it is inserted into the hole that was drilled.
Cooling time 2-3 min.
Next, the door is assembled and installed in its place.
The broken handle is removed, a new one is inserted and everything is assembled in the reverse order.
VIDEO VIDEO
What to do if the door of the washing machine breaks down? Do not rush to call the workshop, we will tell you how to fix the problem yourself. In the article, you will learn how to disassemble and repair the door without leaving your home.
Before proceeding with the repair, study the structure of the door, the features of its fastening. What problems happen:
Glass breaks.
The latch does not work or, on the contrary, sticks.
The support on the hinge breaks.
The sunroof locking device (UBL) does not work.
If the damage is mechanical, you can repair it yourself. But it happens that a failure occurs in the control unit - then the door is also not blocked. It is better to entrust the diagnostics and repair of the unit to a professional.
Prepare the necessary tools and materials right away:
Phillips and slotted screwdrivers.
replacement parts (lock, tongue, spare glass).
Can't open the door after washing? The UBL lock may have broken. Since it is powered by electronics, check to see if the lights in the apartment have been turned off. In this case, the door will remain locked.
The principle of operation of the UBL is simple: the control module supplies electric current to the lock plates. As they heat up, they bend and press on the latch that snaps the hatch into place.
How do you know if the device is broken? On such grounds:
After turning off the machine, the hatch does not open.
When you start washing, an error code appears on the screen.
You have loaded laundry, but the lock will not engage.
To make sure that the problem is in the device and not the control board, you need to diagnose with a multimeter.
Apply the test leads of the tester to the contacts "neutral" and "phase of the lock".
Measure the indicators.
Everything works if the screen shows three numbers.
Then attach the test leads to the neutral and common contacts.
Zeros or ones on the screen indicate a breakdown.
To open the door when blocking, you can use the method suggested by our users. Take a thin string, thread it between the SMA body and the hatch. Pinching the ends on both sides, pull the tape towards you. After opening, you can start repairing.
How to fix it yourself:
Pull back the cuff.
Remove the clamp using a screwdriver. If it's plastic, detach the latch.
Remove the bolts that hold the device in place.
Insert the cuff inward and remove the lock.
Disconnect the wiring.
Install the new part in reverse order.
Over time, the latch lever deforms, irregularities appear on it, which interfere with normal closing. To replace, you need to know how to remove the door:
Remove the clamp and rubber sleeve. If you do not want to completely remove it, bend it and tuck it inward.
On the side you will see the door fasteners.
Remove the two screws.
Lift the hatch up and out of the seat.
To return the latch to a flat surface, you need a file - grind off the notches and irregularities. Lubricate parts with graphite grease for best performance. Lock the door in place.
Sagging hinges, loose fasteners can be the reason for a loose drum closing. When installing the hatch in place, you need to adjust its position so that the latch normally fits into the hole.
It is good if the glass in your SMA model can be replaced, but such luck is rare. Otherwise, you will have to fill up the cracks.
From the outside, you need to attach the plastic wrap with tape. It is important that there are no gaps.
Apply reinforcement tape to the damaged part.
Prepare the epoxy solution in a separate container.
Fill the gap with the solution.
Remove the tape after 24 hours. Remove streaks with sandpaper.
How to prepare the resin? In order for the agent to have good adhesion and resistance to temperature extremes, a hardener is added to the composition. You can prepare a solution based on EDP glue:
Take 6 parts resin and 4 parts hardener.
Mix in a separate container until smooth.
If it's too thick, heat it up a little in a water bath.
Read the instructions carefully before dilution: an error in the proportions will affect the quality of the resin.
In some cases, a special sealant can be used, although it will not last as long.
To do this, you need to remove the door, disassemble the handle and repair the support.
Remove the sunroof. Place it on a flat surface.
Unscrew the fasteners around the perimeter.
Remove the top and glass.
Now you can remove and replace the handle in case of breakage.
Remove the support for repair, drill a hole with a diameter of 3.8 mm in it.
Saw the nail to the desired length. Heat it up and thread it through the hole.
Wait for it to cool down for 2-3 minutes.
To avoid breakage of the handle or other elements, you do not need to jerk it hard when opening. Also close the door carefully, do not slam the door. Otherwise, the elements will quickly wear out and break.
Now you know how to do it yourself. Observe the rules of operation and read the instructions before switching on. Then the technique will serve for many years.
VIDEO Any home craftsman who has a desire to do everything on his own can repair the door of the washing machine. There is no need for haste in this work. You need to prepare for it.
Before starting work, you need to:
To study the device and features of the manufacture of the door.
Get acquainted with the basic techniques that specialists use when performing repairs.
Prepare the tool for the job.
Purchase the necessary auxiliary materials and original spare parts.
If necessary, prepare tooling for making elements with your own hands.
Washing machine door design
After determining the algorithm of actions, it is necessary to decide what and how will have to be done in order for the door of the washing machine to start functioning again.
As practice shows, the following damage can be detected at the door of the washing machine:
Glass is broken as a result of careless opening.
The latch is damaged. It sometimes gets stuck after closing the door.
Breakage of the plastic support on the hinge.
These breakdowns are detected on close inspection ... All that remains is to choose the right tool and make repairs.
The main tool for any household appliance repair is a screwdriver. With its help, the detachable knots and fragments of the product are turned off and twisted. Here you should clarify the type of bits used. Imported washing machines, in addition to the usual cross, often use stars of different sizes or curly profiles. You need to have them on hand. You may also need bit extenders.
The use of magnetized extension cords will help hold the screws in deep holes.
Other types of tools are being specified from the videos on repair. You need to have them in your arsenal in order to produce quality work.
The latches most often have notches on the lever that goes into the hole. They interfere with normal work. The breakdown elimination procedure is simple:
The door from the machine is unscrewed and placed on the table.
With the help of a needle file or a file with a fine notch, the notch is grinded.
Before installing in place, you need to apply graphite grease, and then wipe off the excess so that the graphite does not stain the items intended for washing.
The door is returned to its place and fixed with screws.
VIDEO Some washing machine doors you can remove the latch ... If the design allows removal, then it is better to remove and fix it when turning in a vice.
Damaged glass is more difficult to repair. This will require the use of polyester or epoxy resin.After removing the door, consider the ability to remove the glass ... Most often it is not removed. Therefore, they repair it like this:
A plastic wrap is glued to the front surface. You may need to use scotch tape. Slots are not allowed.
A reinforcing tape is laid on the existing hole that requires sealing (it is used for plastering).
Resin is prepared in a separate container according to the instructions. The base and the hardener are mixed in the required proportions.
After the resin is prepared, it is poured into the desired place.
Typically, polymerization occurs within 24 hours. After this time, the plastic film is removed.
Smudges are removed with sandpaper.
VIDEO This is how easy it is to repair glass on the door of a washing machine.
To repair the support, perform the following operations:
The support is removed.
The broken part is connected and fixed in a vice.
To eliminate the breakage, use a nail with a diameter of 4 mm. It is cut down to the desired length.
A through hole with a diameter of 3.8 mm is drilled in the combined broken support.
The nail is held in place with pliers, heated to a temperature of about 180 ° C, and then inserted into the drilled hole.
After cooling down for two to three minutes, you can assemble the door and put it in place.
VIDEO With a little effort, you can repair any product with your own hands, including the door of the washing machine.
The door is a part of the washing machine through which the laundry is loaded into the drum of the appliance. It would seem that it is arranged extremely simply, and there is nothing special to break there. In fact, service center specialists often encounter a door malfunction. Most often, the problem is not in the factory marriage, but in the improper operation of the device. It even happens that the handle comes off completely. In fact, it is secured quite firmly and, if you handle the washing machine correctly, nothing like this should happen. If you pull the door with excessive force (and this is far from uncommon), then the plastic structure may not withstand. In the article, we will consider the most typical breakdowns and repairs of the washing machine door.
Latch problems prevent the hatch from closing properly. This often happens due to the fact that notches appear on the lever. You can eliminate this nuisance in this way:
Remove the washer door.
File off any notches on the lever with a file.
Apply a little graphite grease to the lever, but don't overdo it to avoid staining your clothes during the wash.
Replace the door and secure the screws.
back to content ↑
The most common cause of leaks, if you believe the commercials, is insidious scale that accumulates in incredible quantities in the washer. In fact, the reason for this unpleasant phenomenon is the deformation of the machine's cuff. It is impossible to repair it, only a replacement is needed.
Repair is simple, you can do it yourself. The algorithm is as follows:
Remove the cover, control panel and trim strip.
Loosen the screw and remove the spring securing the front of the cuff.
Pull the cuff towards you, then disconnect the wires.
Remove the spring holding the collar to the reservoir. To do this, you must first remove the counterweights.
After replacing the worn cuff with a working one, reassemble in the reverse order to that shown.
If the algorithm seems complicated and incomprehensible to you, contact the service center, do not tempt fate.
Important! The reasons for leaks and poor closing of the door of the washing machine can be the wear of the elastic band. We have prepared a separate article for you, which describes step by step how to replace the cuff in the machine.
The reason for such a breakdown is a gross physical impact on the open hatch of the washing machine. Plastic does not withstand this and naturally breaks. Remove the washer hatch by unscrewing the corresponding screws, install new hinges. After that, in the reverse order, assemble the hatch.
Important! Facing a problem with an unpleasant odor from your washing machine? Be sure to check out our review for the best ways to combat odor and dirt.
To replace a damaged glass with a whole one:
Disassemble the hatch according to the algorithm specified in the previous paragraph.
Remove the screws that hold the hatch halves together.
Pry up the glass so as not to injure your fingers. You can use a small screwdriver for this.
Replace the cracked glass with a new one and assemble the hatch in the reverse order.
Damaged glass can be tried and repaired. The procedure is as follows:
Dismantle the door.
Using scotch tape, stick the film to the front of the glass. Do not leave gaps.
Apply reinforcement tape to the glass defect.
Dilute epoxy by mixing base with hardener.
Fill the defect with resin. As a rule, it is necessary to wait 24 hours for complete polymerization.
Remove the plastic wrap.
A fairly simple and very effective repair of the washing machine hatch.
They are quite fragile and can be broken quite easily. It is impractical to repair the handle, it is better to replace it. First, remove the door, take out the glass. A standard plastic handle kit includes:
Here's what to do:
To begin with, install the spring in such a way as to hook it onto the hatch body.
Then install the metal tab, aligning the holes in the housing and the springs.
Insert the pin into the spring and body holes, holding the resulting structure at the bottom.
Now attach the plastic handle and press it into the post.
Check handle tension. If there is no tension, then the installation was made incorrectly.
If testing was successful, carry out the assembly, all according to the same principle “in reverse order”.
back to content ↑
VIDEO
VIDEO
VIDEO
VIDEO
VIDEO
VIDEO
VIDEO
Thus, you have learned the simplest diagnostic techniques associated with repairing a washing machine door. Uncomplicated repairs can be done on your own, without resorting to expensive services of masters.
Posted by admin in Repair of equipment 11.06.2018 0 74 Views
Any home craftsman who has a desire to do everything on his own can repair the door of the washing machine. There is no need for haste in this work. You need to prepare for it.
Before starting work, you need to:
To study the device and features of the manufacture of the door.
Get acquainted with the basic techniques that specialists use when performing repairs.
Prepare the tool for the job.
Purchase the necessary auxiliary materials and original spare parts.
If necessary, prepare tooling for making elements with your own hands.
Washing machine door design
After determining the algorithm of actions, it is necessary to decide what and how will have to be done in order for the door of the washing machine to start functioning again.
As practice shows, the following damage can be detected at the door of the washing machine:
Glass is broken as a result of careless opening.
The latch is damaged. It sometimes gets stuck after closing the door.
Breakage of the plastic support on the hinge.
These breakdowns are detected on close inspection ... All that remains is to choose the right tool and make repairs.
The main tool for any household appliance repair is a screwdriver. With its help, the detachable knots and fragments of the product are turned off and twisted. Here you should clarify the type of bits used. Imported washing machines, in addition to the usual cross, often use stars of different sizes or curly profiles. You need to have them on hand. You may also need bit extenders.
The use of magnetized extension cords will help hold the screws in deep holes.
Other types of tools are being specified from the videos on repair. You need to have them in your arsenal in order to produce quality work.
The latches most often have notches on the lever that goes into the hole.They interfere with normal work. The breakdown elimination procedure is simple:
The door from the machine is unscrewed and placed on the table.
With the help of a needle file or a file with a fine notch, the notch is grinded.
Before installing in place, you need to apply graphite grease, and then wipe off the excess so that the graphite does not stain the items intended for washing.
The door is returned to its place and fixed with screws.
VIDEO Some washing machine doors you can remove the latch ... If the design allows removal, then it is better to remove and fix it when turning in a vice.
Damaged glass is more difficult to repair. This will require the use of polyester or epoxy resin. After removing the door, consider the ability to remove the glass ... Most often it is not removed. Therefore, they repair it like this:
A plastic wrap is glued to the front surface. You may need to use scotch tape. Slots are not allowed.
A reinforcing tape is laid on the existing hole that requires sealing (it is used for plastering).
Resin is prepared in a separate container according to the instructions. The base and the hardener are mixed in the required proportions.
After the resin is prepared, it is poured into the desired place.
Typically, polymerization occurs within 24 hours. After this time, the plastic film is removed.
Smudges are removed with sandpaper.
VIDEO This is how easy it is to repair glass on the door of a washing machine.
To repair the support, perform the following operations:
The support is removed.
The broken part is connected and fixed in a vice.
To eliminate the breakage, use a nail with a diameter of 4 mm. It is cut down to the desired length.
A through hole with a diameter of 3.8 mm is drilled in the combined broken support.
The nail is held in place with pliers, heated to a temperature of about 180 ° C, and then inserted into the drilled hole.
After cooling down for two to three minutes, you can assemble the door and put it in place.
VIDEO With a little effort, you can repair any product with your own hands, including the door of the washing machine.
Rating of washing machines for quality and reliability. Top ten free-standing models, their features and important technical parameters. Advantages and disadvantages, price level.
Before proceeding with the replacement, you need to disconnect the machine from the electricity. Then you need to remove the door itself. It is fixed to the body with two bots. They can be twisted with a screwdriver or an asterisk (different models have different ways). After that, we put the removed hatch on a hard, even surface so that the bolts connecting it are on top. We will have to unscrew these bolts. Then, using a slotted screwdriver or a knife, you need to pry off the part of the door located at the top and remove it.
Now we turn over the door of the washing machine and detach the outer part from the one inside. After that, remove the glass part and set it aside. And put the inside back on a firm, flat surface. So we get to the handle that needs to be replaced. Then we recommend taking a photo of its location and fixing methods. The photo will help us not to make a mistake when we assemble the hatch.
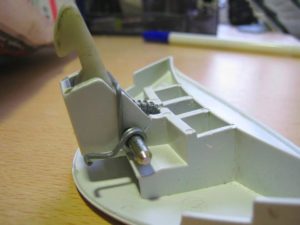
The plastic handle is fixed with a pin. We must carefully remove this pin. To do this, move it to one side and then take it out. When removing the pin, the plastic handle can be removed first. Following the spring and hook. A rather common malfunction is when it breaks off as close as possible to the place where it is fixed with a pin.
We hope you have already purchased a kit to replace the handle of your washing machine. Typically, it is sold or ordered from service centers.
Plastic handles,
Metal pin,
The hook, which, when closed, enters the sunroof locking device,
And the return spring.
After that, we need to stick in the pin. But you need to do this only in one hole. So that you can then insert the handle. To do this, you need to hold the spring and the pin with your free other hand. Then insert the handle and fix it in place by extending the pin. The pin should go through the special holes in the handle and enter the opposite hole on the hatch. During this part of the work, you will need to hold the handle in a certain position. This is to ensure that the end of the pin does not deflect and enter the opposite hole without problems.
When the pin is finally in place, you need to check that the handle is positioned correctly. It should be slightly bent to the side by the action of the spring. If the spring does not push the handle away, then you have placed it incorrectly. You will have to disassemble the handle again and reinstall the retaining hook with spring.
Then we just had to assemble the door of the washing machine hatch and return it to the right place. Make sure all parts are tightly connected and secured with screws.
In order to visually demonstrate the whole process, we attach two video clips to the article:
Video (click to play).
VIDEO
remove the fixing bezel;
The door can be unscrewed and placed on the table for convenience.

 remove the fixing bezel;
 The door can be unscrewed and placed on the table for convenience.


