In detail: do-it-yourself 4 a fe engine repair from a real master for the site my.housecope.com.
The phenomenon and repair of "diesel" noise on old (mileage 250-300 thousand km) 4A-FE engines.
"Diesel" noise occurs most often in the throttle release mode or in the engine braking mode. It is clearly audible from the passenger compartment at a speed of 1500-2500 rpm, as well as when the hood is open when the gas is released. Initially, it may seem that this noise in frequency and sound resembles the sound of unregulated valve clearances, or a dangling camshaft. Because of this, those wishing to eliminate it often begin repairs from the cylinder head (adjusting valve clearances, lowering the yokes, checking whether the gear on the driven camshaft is cocked). Another of the proposed repair options is an oil change.
I tried all these options, but the noise remained unchanged, as a result of which I decided to replace the piston. Even when changing the oil by 290,000, I filled in Hado 10W40 semi-synthetics oil. And he managed to press in 2 repair tubes, but the miracle did not happen. The last of the possible reasons remained - the backlash in the finger-piston pair.
The mileage of my car (Toyota Carina E XL station wagon 95 onwards; English assembly) was 290,200 km at the time of repair (according to the odometer), moreover, I can assume that on a station wagon with kondeem, the 1.6-liter engine was somewhat overloaded by compared to a conventional sedan or hatchback. That is, the time has come!
To replace the piston, you need the following:
- Belief in the best and hope for success.
- Tools and fixtures:
1. Carburetor cleaner (large can) - 1 pc.
2. Silicone sealant (oil resistant) - 1 tube.
3. VD-40 (or other flavored kerosene for loosening the intake pipe bolts).
4. Litol-24 (for tightening the ski mounting bolts)
5. Cotton rags. in unlimited quantities.
6. Several cardboard boxes for folding the fasteners and camshaft yokes (PB).
7. Containers for draining antifreeze and oil (5 liters each).
8. Tray (with dimensions 500x400) (place it under the engine when removing the cylinder head).
9. Engine oil (according to the engine manual) in the required quantity.
10. Antifreeze in the required quantity.
| Video (click to play). |
1. A set of pistons (usually they offer a standard size of 80.93 mm), but just in case (not knowing the past of the car) I also took (with the condition of return) a repair size larger by 0.5 mm. - $ 75 (one set).
2. A set of rings (I also took the original in 2 sizes) - $ 65 (one set).
3. A set of engine gaskets (but one could get by with one gasket under the cylinder head) - $ 55.
4. Gasket exhaust manifold / front pipe - $ 3.
Before disassembling the engine, it is very useful to wash the entire engine compartment in a car wash - no extra dirt is needed!
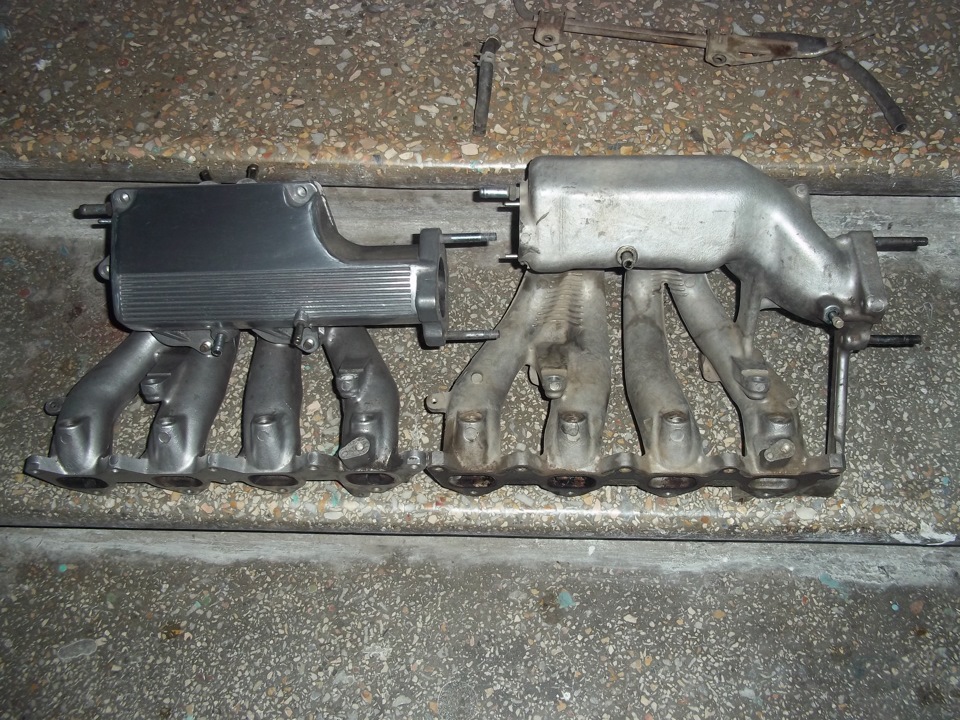
Decided to disassemble to a minimum, since it was very limited in time. Judging by the set of engine gaskets, it was for a regular, not a depleted 4A-FE engine. Therefore, I decided not to remove the intake manifold from the cylinder head (so as not to damage the gasket). And if so, then the exhaust manifold could be left on the cylinder head by undocking it from the intake pipe.
I will briefly describe the sequence of disassembly:
... At this point, in all the instructions, the negative terminal of the battery is being removed, but I deliberately decided not to remove it, so as not to reset the computer memory (for the purity of the experiment). and to listen to the radio during the repair; o)
1. Abundantly flooded VD-40 with rusty bolts of the intake pipe.
2. Drained the oil and antifreeze by unscrewing the bottom plugs and caps on the filler neck.
3. Detached the hoses of the vacuum systems, wires of temperature sensors, fan, throttle position, wires of the cold start system, lambda probe, high-voltage, spark plug wires, wires of LPG injectors and hoses for supplying gas and petrol. In general, anything that fits the intake and exhaust manifolds.
4.Detached the hoses of the cooling systems from the cylinder head (in this case, it is useful to substitute a tray under the engine - oil and antifreeze are always poured out of the detached hoses).
5. Detached the oil cooler hose from the oil pan.
Next came the unscrewing of the engine elements.
1. Unscrew the valve cover.
10. I loosened the tension of the alternator belt (the head is 12 on the bottom of the alternator) and unscrewed the upper long bolt of the alternator fastening. Then he took off the belt itself. It is useful to draw the direction of rotation on the belt with a marker in order to use it again.
11. Unscrew the bottom left intake manifold support bolt (12 head). Right - only from the pit.
Then he climbed into the hole! In the pit:
1. He removed the protective plastic pallet (only the right side and partially unscrewed the left side).
2. He removed the front pipe (the gaskets can be reused, if not confused. I confused - I had to change one).
3. Since access to the pallet was limited due to an incomprehensible aluminum trough connecting the gearbox to the cylinder block, I decided to remove it. I unscrewed 4 bolts, but the trough could not be removed because of the ski.
4. I thought to unscrew the ski under the engine, but could not unscrew the 2 front ski mounting nuts. I think that before me this car was broken and instead of the required studs and nuts there were bolts with self-locking M10 nuts. When I tried to unscrew, the bolts turned, and I decided to leave them in place, unscrewing only the back of the ski. As a result, I unscrewed the main bolt of the front engine mount and 3 rear ski bolts.
5. As soon as I unscrewed the third rear bolt of the ski, it bent back, and the aluminum trough fell out with a twist ... in my face. It hurt ...: o /.
6. Next, I unscrewed the M6 bolts and nuts that secure the engine pan. And he tried to pull it off - and pipes! I had to take all possible flat screwdrivers, knives, probes for tearing off the pallet. As a result, having folded back the front sides of the pallet, I took it off.
7. He removed and carefully put the oil intake in a clean bag.
8. Unscrew the right intake manifold support bolt (12 head).
9. I washed the engine pan with a carbcliner.
10. Scrubbed the contact surfaces of the pallet and the cylinder block with a scraper plate and probes, wiped clean with a rag with a carbcliner.
Oddly enough, it turned out to be quite simple to remove the cylinder head by unscrewing 10 bolts with a 10 star head. The only thing that I did not unscrew in time was the water pump pipe (on which the oil dipstick is attached) and it held the cylinder head.
Also, I did not notice some kind of brown connector of an unknown system, located somewhere above the starter, but it successfully undocked itself when the cylinder head was removed.
Otherwise, the removal of the cylinder head was successful. I pulled it out myself. The weight in it is no more than 25 kg, but you have to be very careful so as not to demolish the protruding ones - the fan sensor and the oxygen sensor. It is advisable to measure the adjusting washers (with an ordinary marker, wiping them first with a rag with a carbcliner) - this is for the case of the washers falling out. I put the removed cylinder head on a clean cardboard - away from sand and dust.
The piston was removed and put in turn. To unscrew the connecting rod nuts, a star head of 14 is required. The unscrewed connecting rod with the piston moves with your fingers upward until it falls out of the cylinder block. In this case, it is very important not to confuse the falling out connecting rod bushings.
I examined the dismantled unit and measured it as far as possible. The pistons were changed before me. Moreover, their diameter in the control zone (25 mm from the top) was exactly the same as on the new pistons. The radial play in the piston-finger connection was not felt by the hand, but this is due to the oil. Axial movement along the finger is free. Judging by the soot on the upper part (up to the rings), some of the pistons were displaced along the axes of the fingers and rubbed against the cylinders with the surface (perpendicular to the axis of the fingers). Having measured the position of the fingers with a barbell relative to the cylindrical part of the piston, I determined that some of the fingers were displaced along the axis by up to 1 mm.
Who did the engine overhaul with your own hands, please respond
probably, too, I'll take off my head I'll look at the state of the cylinders of the ring.and this engine must be removed .. or drive and not touch .. well, in winter I would not want to take such a risk.
I threw off the engine together with the box, assembled on the front beam
my mileage was 250,000 on the speedometer.
at our service station it costs from 15,000 to 20,000 rubles, plus spare parts and plus if boring is needed. so I want to save money on disassembling and assembling the engine. I'm just wondering if changing the rings without boring the oil block will disappear?
on my engine, the oil consumption was not so much because of wear on the rings as because of the fact that the holes in the pistons for the outflow of oil removed from the walls by oil rings were completely coked
I took a 1.5mm drill and cleaned it, I think that decoking in my case would not help.
by the way, the rings were not coked, they walked freely in their grooves
well, I think I have the same. Well, I don't want to pull the engine out under the bore. and if you pull it out, how is it done?
Do you have a book? everything is described in detail there! what is not in the book is in the net on the forums, 4a-fe was not only put on spasio.
on 121 bodies, the engine with the box is removed downward, then the front end on jacks rises and the engine is pulled out from under the car, almost everything can be done alone (if health is normal 
) A friend helped me only to push the engine with a box from under the car and push it back.I took off and disassembled for 3 days,
I waited 7 days for the ordered rings-liners-oil seals-MSK, at this time I was washing everything, lapping the valve, cleaning the clutch for changing the timing of the timing, and so on.
3 days collecting and installing
in the end I spent about 15 tr. for spare parts (taking into account the purchase of new oil and a filter in the box) and two weeks after work and on weekends.
Were you having difficulty assembling the engine? Or is it as simple as in the book? are there any nuances?
it seemed like everything was clear, in any case, the nuances with the 1 nz engine are unlikely to help when repairing the 4a-fe. there is only a general principle.
on 1nz, the timing chain and the VVTI clutch must be correctly placed on the marks.
on 4a there is a belt. I did not delve into the subtleties.
Passed: 41 Age: 41
Passed: 35 Age: 35
Passed: 50 Age: 50
There are 17 birthday people in total.
Most active in the list.
Not a poet or a writer. I am writing it briefly. Bought, at first glance, a car in perfect condition for these years. I took it to the internal combustion engine diagnostics, ripped off 1.3Kre, they said that everything was ideal.
Although I was present and memorized everything. At first glance, everything was really good. All sparks slipped through, compression was normal. Immediately changed the candles.
Of the sensors, only lambda (and who has it not dead =)) Well, too high CO. Having traveled for a short time, I noticed the loss of oil. Judging by the exhaust of oil zhor, a monstrous oil zhor.
Floor level of the dipstick at 200 km. Having traveled about 400 km, after reading the forums, I decided to go over it. Immediately took some consumables, all original.
Cylinder head gasket 11115-16150 x1
STD Rings 13011-16300 x1
MSC (to be sure) 90913-02090 x8 + 90913-02089 x8
Connecting rod bushings STD MARK2 (On the necks of the connecting rods and on old bushings, then I saw the marking "1", but there was a slight backlash, barely perceptible, so I took it right, considering the 170 thousand mileage) 13041-15031-02 x4
Everything turned out to be about 5 thousand. rub. + 1.5 thousand oil with a filter and flushing, as well as coolant for topping up + 3 thousand sick leave, which is now not fully paid = D
First, I freed up the space around the engine, removed the generator, washer, dropped the terminal, since when the genes were removed, the 100A fuse was blown.
Then the cylinder head cover, threw off the belt (did not put any tags), removed the camshafts. It should be noted right away that it is better to try to remove (tidy) the valve lifters together with the washers and put them in STRICT sequence.
I took off my head with them, and when I turned it over, they fell off the nafik and got messed up. The cylinder head must be freed from the manifold, coolant hoses, pump, air, gas filter, and other little things.
Next, a special head is taken for a large square elongated by 10 (12-sided sprocket) and unscrew 10 studs. By the way, with engine it is imperative to drain the coolant, not just from the radiator, namely, like that from the engine.
I took off my head together with the inlet.Having taken off your head, you can look at the pots that are not in the VMT, my honing lines were visible almost everywhere.
After removing the cylinder head, crumbling expansion joints, and pouring the entire internal combustion engine coolant, climbed into the pit. He removed the crankcase protection, drained the oil, removed the bumper so that the oil cooler could be removed (I have a modification with it, including I sinned on it, because in the place where it leaves the filter I snotted. hammered).
He took off and washed the oil cooler with kerosene. By the way, it's better to do everything with kerosene, it is softer both in relation to hands and to all plastics and rubber bands.
It is clearly impossible to remove the pallet without unscrewing the subframe. And Removing the subframe without unscrewing the rear cushion will also fail. The right and left cushions must be screwed down. the internal combustion engine will hang on them.
It is also worth noting that there is a bolt in the stretcher that cannot be pulled out (or it has become so rusty for me), so it was not possible to pull out the stretcher just like that, I had to jack up the internal combustion engine behind the box.
By the way, in the back of the stretcher, a muffler is attached to it - you also need to unscrew it. Now you need to unscrew some kind of aluminum crap that pulls the internal combustion engine and manual transmission. By the way, under it there is a paralonka for absorbing oil from the current oil seal.
We look and draw conclusions. We unscrew the pallet, carefully tear it off with a sharp knife. Next, we twist the oil receiver, throw it into the pan with the kerosene already poured.
There is a lot of rubbish in the pallet, I found a piece of an old MSC there! Then you can pull the connecting rods, evaluate the backlash. With an asterisk 14, unscrew and pull up the connecting rods with pistons. The order is better not to be confused.
I signed everything with a marker on white paper masking tape. We look at the rings. Compression ones in comparison with new ones were ideal.
But the oil scraper not only lay down, but also worn out, as well as the oil drainage channels were clogged, completely. He threw off the rings, broke one for cleaning, threw it there, in kerosene.
All carbon deposits were cleaned off with a soft brass brush (drill attachment). It is best to clean the ring seats with an old broken ring. Thoroughly.
Rings need to be thrown carefully so as not to break, it is better to start with the oil scraper. First, the "holder" (xs as it is called) of the rings is installed, the lock is slammed, then the rings themselves.
They have no top and bottom. Then the second compression, the most difficult one. The photo shows how to put it on correctly. It has a top and a bottom, a letter towards the top. Then the first compression (upper).
The locks on the rings should look in different directions 2 compression 180 degrees. and 2 oil scraper 180 degrees. and to each other 90grad. Without a special device, it is not so easy to compress the rings and install the piston in place.
Therefore, I took to drive this device, as well as a torque wrench. We put new inserts, pour oil on them. By the way, many do not do this, I chamfered the compression rings with a diamond file so that the pots would not be lifted up for sure.
Tightened the nuts with a force of 60 Nm. You need to put one piston at a time and scroll. If you need to apply a very large effort or does not turn at all - draw conclusions.
For me, it turned quite easily, only when all the pistons were aligned in a row, it turned a little more difficult, just a little.
The cylinder head was also torn off from carbon deposits with a brass brush, as well as the outlet and inlet (I removed it), as well as the surface from the old gasket both on the head and on the cylinder block. The valves are dried out very simply using a tube (in my case, a candle wrench) and a heavy hammer.
Springs are also better not to be confused, at least inlet and outlet. I took off the old MSCs from my head (they turned out to be completely intact, but chilled), blew and flushed the entire cylinder head, ripped it off from soot. So does every valve.
It is not recommended to confuse them either. Further, using the lapping paste, the drills and the hoses from the pump are very easy and quick to grind the valves. I checked them dry, turning them upside down and pouring kerosene.
It is worth noting here that when rubbing the valve, it is better to slightly drip oil on them so as not to scratch the guide. I had a tiny bit of valve play in the guide, but I clogged.
MSCs are best worn with the head that unscrewed the cylinder head.Well, the head is ready, clean, dry, kerosene does not flow. The inlet can also be cleaned, DZ, etc.
I decided not to change the intake manifold gasket. We fasten everything that was removed from the head. We put a gasket on her head, insert the pins, the graduation pins are longer.
The hairpins are wrapped alternately in a checkerboard pattern from the center to the edges, with increasing force m. Ultimately 110Hm. Now you can collect everything from below, I put the pallet on the sealant.
Subframe, oil cooler, muffler. Here again, it should be noted that there is no need to unscrew the muffler from the exhaust manifold.
Although it is mounted on 3 studs, they are burnt and rusted there. I broke one, I still drive a homemade one, nowhere are there any.
So the head stands still. The first piston in VMT (along the crankshaft pulley). Water the camshaft areas abundantly. We put my confused expansion joints.
We put the camshafts (we connect with installation marks on the teeth, the timing marks look down), we pull from the center to the edges (like 15 - 20Hm).
After that, he twisted them in all sorts of different ways, checked the gaps between the washers and the camshafts with a special ruler, it seems that none of them presses on the valves, which means it will not burn out, they will only knock.
Also, at this point, a distributor is installed according to a previously set label (marker). We turn the camshafts so that the timing marks on the teeth converge.
At the same time, through the hole on the sprocket of the exhaust camshaft, we see a mark on the bearing (top). We loosen the timing roller, put on the belt.
We crank the crankshaft a couple of times. We expose the first piston along the pulley at TDC. We look at the mark in the hole of the camshaft sprocket. Coincided. We tighten the video. Water the camshafts abundantly with oil. !
Do not pour gently into the spark plug well and onto the belt. We put on the lid. I followed her for a sealant. We collect everything, all the hoses, wires, generator, washer, etc.
Everything seems to be ready. Fill in the oil. I poured rinsing immediately. Fill in coolant. It was necessary to start immediately with glasses, suddenly the marks are not correct - the nafik of the valve will bend. Pulled out the EFI fuse, twisted it with the starter. Seems to be OK.
I pushed back the fuse, the key, - to my surprise, it started up with a half turn. But so gourmet! I thought the collector did not tighten. Then smoke poured out from under the hood.
Well, I thought I just didn’t hold out. It turned out that the smoke was from oil and coolant on the manifold, then it burned out. And the noise is the valve, plus a week of silence in the garage, that's why it seemed loud.
In general, I worked for 15 minutes. I muffled, drained the flush, changed the filter. Filled in new oil. I started it. I gave it to work, the revolutions swam a little, even tried to stall once.
Work noticeably became louder. I drove out of the garage, rolled, refueled the 95th (now only pour it, if possible).
Now I'm driving it, it's already 700 km. They say you need to hold the tachometer needle 2-3 thousand, but it's very difficult = D
Now the engine has clearly become more frisky, gaining momentum at a stroke, sometimes I do not even notice. When even 5 thousand.
Oil does not eat at all, as it was poured at the same level, and the color is transparent, barely noticeable on the dipstick. The coolant is also on the metsa, there are no smudges on the engine.
Tired of writing
On the engine, I think it remains to sharpen the expansion joint washers, clean the injectors, and the ramp, change the gas filter, and the lambda. And there will be an internal combustion engine in its.
Used tool FORCE 4821. Best ins
Skelet Oct 14, 2010 9:21 am
In the FAQ section, I wrote on oil scraper. And take my word for it, even if the caps do not have a really bad oil consumption from them like yours, well, you will save a couple of glasses of oil for 10 thousand. try the compression first. With such a flow rate, we can almost definitely say that the oil scraper rings are buried.
And what is better, to change the engine or capitalize it - this is IMHO a theme for Holy WAR
Grog 78 Thu Oct 14, 2010 3:36 pm
Skelet Thu Oct 14, 2010 5:11 pm
Well I do not know. I think that in order not to climb 2 times, it's easier for the engine to capitalize right away and change the valve stem seals in comfortable conditions. I changed myself - rather, out of nothing to do, along the way with the timing :)
And if the oil scraper rings are stuck, then the compression will be overestimated "not dry".
Well, decarbonization IMHO what a dead poultice, tk.the ring is essentially a spring, and the spring, being in a compressed state, after some time loses its rigidity, respectively, and does not fully fulfill its functions.
VAL Thu Oct 14, 2010 5:32 pm
Skelet Thu Oct 14, 2010 5:36 pm
Shumakhov Thu Oct 28, 2010 7:31 pm
Shumakhov Thu Oct 28, 2010 7:36 pm
Skelet Thu Oct 28, 2010 9:04 pm
Do not regard uneven compression as a guide to action :)
Of the difficulties? Think about how you will assemble the head and how to insert the piston with rings and install the pulleys .. Whether or not the engine needs to be capitalized without opening it is impossible to find out. The same compression will not give a direct assessment of the condition of the walls of the combustion chamber.
Yes, and your indicators only speak of wear on the oil scraper rings, small valve overlap or a fully open throttle valve, and the difference between the cylinders can be the bleeding of air from the same compressor.
IMHO if you do not eat 3-4 liters in the summer, then it makes no sense to go there and bother. Unless there is a lot of money and nothing to do :)
Denis Wed Sep 13, 2011 11:26 am
In general, a year after the creation of the topic, I made a capital account light. 
As I started driving, I noticed that all the breaks were gone, and other sounds were not clear. The engine runs smoothly and quietly.
When cleaning the pistons, it was clear that all the channels that go to the oil scraper rings were completely clogged (they had to be drilled corny), the grooves were in the same shit. Before that, I did decarbonization, I thought it would help. But dick - there are no miracles with oil scraper rings. They are either mobile or laid down.
Now the catalyst is being actively cleaned, it is a little podvannya some kind of incomprehensible garbage. Glushak must clean himself like this and spit out the soot.
For information - before the repair, the engine ate about 1 liter of oil. 800 - 1200 km, depending on how you turn the speed.
gelost » 23.01.2010, 15:04:46
normal vegetable engine Korollovsky. ... my repair kit
interested in some services. only the work costs at least 10k. in general I think a little expensive, therefore the question of the International Federation of Journalists who recently capitalized (or friends) and how much, as well as where. ... Is it possible to find cheaper 10k and make the rules. ... the principle of timing is not critical.
pysy. I was interested in samurai and a couple of garage services (on ilinka). tweet for work ask stsuki ((
Dr.Z » 23.01.2010, 15:09:18
gelost » 23.01.2010, 15:17:28
I eat butter (((.
... and the contract is also not a fact that a live buit (for good, you also need to look at his intestines) + troubles with traffic police, that another internal combustion engine. in general, the contract is not an option (well, perhaps in the very last place)
Zavhozzz » 23.01.2010, 15:21:01
Dr.Z » 23.01.2010, 15:39:34
gelost » 23.01.2010, 16:04:40
kanesh will have to. after all, the current probably you have one hand not from jo .. grow
vk » 24.01.2010, 12:47:49
you can't find 10 cheaper, they also make cans for a dozen
I just doubt something that for this they will do everything as it should be. if I did it myself, strictly according to the procedure,
would not agree for less than fifty dollars
p.s. if you are going to do it yourself, then I have a description of the procedure, with all the data for troubleshooting, etc.
Camry » 25.01.2010, 08:56:45
gelost wrote: the usual vegetable korollovsky engine. ... my repair kit
interested in some services. only the work costs at least 10k. in general I think a little expensive, therefore the question of the International Federation of Journalists who recently capitalized (or friends) and how much, as well as where. ... Is it possible to find cheaper 10k and make the rules. ... the principle of timing is not critical.
pysy. I was interested in samurai and a couple of garage services (on ilinka). tweet for work ask stsuki ((
gelost » 25.01.2010, 15:59:21
gelost » 25.01.2010, 16:03:14
vk wrote: you will not find cheaper 10-ki, they also make pots for a dozen
I just doubt something that for this they will do everything as it should be. if I did it myself, strictly according to the procedure,
would not agree for less than fifty dollars
p.s. if you are going to do it yourself, then I have a description of the procedure, with all the data for troubleshooting, etc.
you have a specific description of the cap.rem. this engine. ... with pictures. ... in e-form or just a book.
vk » 25.01.2010, 16:07:19
a short description of disassembly, troubleshooting and assembly. a book without pictures. not for dummies
gelost » 25.01.2010, 16:17:22
vk » 25.01.2010, 16:47:47
Def » 28.01.2010, 16:23:59
gelost » 29.01.2010, 02:18:52
Dr.Z » 29.01.2010, 14:52:51
Camry » 29.01.2010, 17:32:27
Dr.Z » 29.01.2010, 18:55:04
vk » 29.01.2010, 20:03:40
a high-quality otkapitalnoe dviglo will run longer than the average contract. only I'm not sure that we make it somewhere, of high quality.
I know how it should happen and have seen how it happens in reality more than once. two big differences.
AlVlaT » 30.01.2010, 16:05:19
Users browsing this forum: no registered users and 0 guests

In parallel with all the well-known and popular engines of the S series, the small-volume A series was produced and one of the brightest and most popular engines of the series was the 4A engine in various variations. Initially, it was a low-power single-shaft carburetor engine, which was nothing special. As it improved, the 4A received first a 16 valve head, and later a 20 valve head, on evil camshafts, injection, a modified intake system, another piston, some versions were equipped with a mechanical supercharger. Let's take a look at the entire 4A continuous development path.
1. Large fuel consumption, in most cases, the culprit is the lambda probe and the problem is solved by replacing it. If there is soot on the spark plugs, black smoke from the exhaust pipe, vibrations at idle speed, check the MAP sensor.
2. Vibrations and high fuel consumption, most likely it's time for you to wash the injectors.
3. Problems with rpm, freezing, increased rpm. Check the idle valve and clean the throttle valve, watch the throttle position sensor and everything will be fine.
4. Engine 4A does not start, rpm is floating, here the reason is in the engine temperature sensor, check.
5. Float turns. We clean the throttle body, KXX, check the candles, nozzles, crankcase ventilation valve.
6. The engine stalls, see the fuel filter, fuel pump, distributor.
7. High oil consumption. In principle, the plant allows a serious consumption (up to 1 liter per 1000 km), but if the situation is annoying, then replacing the rings and oil caps will save you.
8. Engine knocking. Usually, piston fingers knock, if the mileage is large, and the valves were not regulated, then adjust the valve clearances, this procedure is carried out every 100,000 km.
In addition, crankshaft oil seals are leaking, ignition problems are common, etc. All of the above occurs not so much because of constructive miscalculations, but rather because of the huge mileage and general old age of the 4A engine, in order to avoid all these problems, you must initially, when buying, look for the most lively engine. The resource of a good 4A is at least 300,000 km.
It is not recommended to buy versions of Lean Burn, running on a lean mixture, having a lower power, some moodiness and increased cost of consumables.
It is worth noting that all of the above is also typical for motors based on 4A - 5A and 7A.
Engines of the 4A series were born for tuning, it was on the basis of the 4A-GE that the well-known 4A-GE TRD was created, in an atmospheric version producing 240 hp. and twisting up to 12000 rpm! But for successful tuning, you need to take the 4A-GE as a basis, and not the FE version. Tuning 4A-FE is a dead idea from the beginning and replacing the cylinder head with 4A-GE will not help here. If your hands itch to finalize exactly 4A-FE, then your choice of supercharging, buy a turbo kit, put on a standard piston, blow up to 0.5 bar, get your
When turbocharging 4AGE, you immediately need to lower the compression ratio, by installing pistons from 4AGZE, take camshafts with a phase of 264, a turbo kit of your choice and at 1 bar pressure we get up to 300 hp. To obtain even higher power, as in an evil atmosphere, you need to adjust the cylinder head, put a forged crankshaft and a piston under the degree
7.5, a more productive whale and blow 1.5+ bar, getting its 400+ hp.
Why can't a person find the videos they want on Youtube? The thing is that a person cannot come up with something new and look for it. He was out of fantasy. He has already watched a lot of various channels, and he no longer wants to watch anything (from what he watched earlier), but what to do in this situation?
In order to find a Youtube video that suits your needs, it is imperative to keep searching. The harder your search is, the better your search result will be.
Remember that you only need to find a few channels (interesting), and you can watch them for a whole week or even a month. Therefore, in the absence of imagination and unwillingness to search, you can ask your friends and acquaintances what they are looking at on Youtube. Perhaps they will suggest original vloggers that they like. You, too, may like them, and you will become their subscriber!
Online mp3 cutting is convenient
and a simple service to help you
create a musical ringtone yourself.
YouTube video converter Our online video
the converter allows you to download videos from
YouTube website in webm, mp4, 3gpp, flv, mp3 formats.
These are radio stations to choose from by country, style
and quality. Radio stations all over the world
over 1000 popular radio stations.
Live broadcast from webcams is made
absolutely free in real
time - broadcast online.
Our Online Television is more than 300 popular
TV channels to choose from, by country
and genres. Broadcasting of TV channels is free.
A great opportunity to start a new relationship
with a continuation in real life. Random video
chat (chat roulette), the audience is people from all over the world.
TOYOTA engines 4A-F, 5A-5F, 7A-FE - user manual / instructions for repair, maintenance and operation.
Repair manual for Toyota 4A-F carburetor engines (1.6 l); 5A-F (1.5 L) and 4A-FE (1.6 L) engines, 16 and 20 valve 4A-GE (1.6 L), 5A-FE (1.5 L), 7A -FE (1.8 L) with multipoint fuel injection.
The amount of information in this book allows you to use the manual when repairing other modifications of 4A and 5A engines: 4A-G, 4A-GZE, 4A-GELU, 4A-ELU, 4A-GEU, 4A-FHE and 5A-FHE. The publication contains detailed information on the repair and adjustment of carburetors and elements of the fuel injection system, ignition, starting and charging systems, instructions for using the self-diagnosis system, as well as possible malfunctions and methods for their elimination, the mating dimensions of the main parts and the limits of their permissible wear.
The book is intended for car owners, service station personnel and repair shops.
Russian language
Format: PDF
Size: 23.8 MB
Download this guide from the links below:
Attention!
By downloading this manual, you agree to delete the downloaded file from your computer after reading it. All content of the portal is obtained from free sources on the Internet, or freely distributed. If you are the author of the posted material, please, contact us in order to provide portal users with another alternative for familiarization, or purchase a high-quality "original" directly from the publisher. The portal administration is not responsible for illegal actions and any damage incurred by the copyright holders.
If you are the author / owner of the posted material, please contact us in order to provide users of the resource with another convenient alternative for familiarization, or purchase a high-quality "original" directly from the publisher.
In terms of reliability, popularity and prevalence, A-series motors are not inferior to Toyota S-series power drives. The 4A FE engine was created for cars of classes C and D, that is, numerous modifications and restyled versions of Carina, Corona, Caldina, Corolla and Sprinter. Initially, the internal combustion engine does not have complex units, it can be repaired and serviced by the owner in the garage without visiting a service station.
In the basic version, the manufacturer has laid down 115 liters. with., but for some markets it is recommended to artificially lower the power to 100 liters. With. to reduce vehicle tax and insurance premiums.
The markings on the Toyota engine are fully informative, albeit slightly encrypted. For example, the presence of 4 cylinders is indicated not by a number, but by the Latin F, the first letter A denotes the series of the motor. Thus, 4A-FE stands for:
- 4 - in its series, the motor is developed the fourth in a row;
- A - one letter indicates that it began to leave the factory before 1990;
- F - four-valve engine diagram, drive to one camshaft, transfer of rotation from it to the second camshaft, no forcing;
- E - multipoint injection.
In other words, the peculiarity of these engines is the "narrow" cylinder head and the DOHC gas distribution scheme. Since 1990, the power drives have been modernized to convert them to low-octane gasoline. For this, the LeanBurn power system was used, which allows the fuel mixture to be leaner.
To get acquainted with the capabilities of the 4A FE motor, its technical characteristics are summarized in the table:
Toyota 90913-02090 intake
Toyota 90913-02088 exhaust
bearing cover - 57 Nm (main) and 39 Nm (connecting rod)
cylinder head - three stages 29 Nm, 49 Nm + 90 °
The manufacturer's instruction manual Toyota recommends changing the oil after 15,000 km. In practice, this is done twice as often, or at least after passing 10,000 runs.