In detail: DIY 4216 internal combustion engine repair from a real master for the site my.housecope.com.
Gazelle until 2009. Disassembly and assembly of the UMZ-4216 engine - part 1
We disassemble the engine to assess the technical condition and replace the failed parts of the crank mechanism. Remove the engine from the car (see "Removing and installing the engine", p. 67). To securely fix the engine, we put wooden blocks of suitable dimensions under the brackets of the power unit supports, the oil pan, the clutch housing and disconnect the lifting chain from the eyebrows. Remove the cylinder head assembly with the receiver, inlet pipe and exhaust manifold (see "Removing the cylinder head", p. 56).
Remove the generator and its lower mounting bracket (see "Removing the 3282M.3771 generator", p. 267). Remove the starter (see "Removing and checking the starter", p. 272).
Using the "24" wrench, unscrew the adapter assembly with a tap from the hole in the cylinder block.
Remove the crankshaft position sensor (see "Removing the crankshaft position sensor", p. 83) and the phase sensor (see "Removing the phase sensor", page 83).
Remove the crankshaft pulley (see "Replacing the front crankshaft oil seal", p. 59). We unscrew the oil filter (see "Changing the oil and oil filter", p. 44). Remove the coolant pump (see "Removing the coolant pump", page 112). Remove the fan drive belt tensioner (see "Removing the fan drive belt tensioner", p. 64). Remove the electromagnetic clutch for switching on the fan (see "Removing the electromagnetic clutch for switching on the fan", p. 110).
| Video (click to play). |
Further disassembly of the engine can be performed on a universal disassembly and assembly stand. To do this, it is necessary to remove the bracket of one of the power unit supports and attach the stand plate with bolts screwed into the threaded holes of the cylinder block, which are designed to fasten the power unit support bracket. If there is no stand, unscrew the cylinder head mounting studs from the cylinder block and install the block with the flat side on the workbench. Remove the brackets for the power unit supports (see "Replacing the power unit supports", p. 65). Using the “36” head, we unscrew the bolt securing the crankshaft pulley hub (we hold the shaft from turning with a mounting blade inserted between the teeth of the flywheel crown and the clutch housing).
Press the pulley hub off the toe of the crankshaft (see "Replacing the front crankshaft oil seal", p. 59).
- Like
- I do not like
Good day! something was wrong with my gazelle. compression disappeared, and after a while a knock and blue smoke and pipes appeared. an autopsy showed that the 4th cylinder had burned out and a crack in the second liner. took the block to the glorious city of Novocherkassk for pressurization and sleeve fitting. waiting for the results.
The question is the following, dear members of the forum. What do you recommend when assembling? I would like to collect a high-quality and reliable engine!
- Like
- I do not like
Lord, what's wrong with the internal combustion engine? Did you drive on gas with late ignition? Overheated well? With pistons, you can still understand, but a crack in the liner? I have not encountered it yet.
It was good before - I replaced the insert liners and new pistons, rings. and order. by myself, in a couple of days.
- Like
- I do not like

It was necessary to immediately take the repair pistons to them, so that the liners would fit on them.
- Like
- I do not like
mileage of the internal combustion engine 250,000. Only gasoline Lukoil 92. first gave it for pressure. then we'll see. just the first renovation 100.5. a used block from Nizhny Novgorod costs 12,000. Sleeve 2100, replacing it with 1000. I don't even know, the problems started after I started pouring the suprotek. or just a coincidence
- Like
- I do not like

Suprotek is an abrasive, no wonder.
- Like
- I do not like

- Like
- I do not like
somewhere through 15 thousand began to podtraivat. but on troubleshooting, I realized that I have uniform wear on all pistons. on the other hand, there is more than one seizure on the main and connecting rod liners. the machine then worked at the company before me. and poured there, don't understand what, so I decided to wash the inside with all sorts of expensive washes. but inside it is clean and shining! and the question is still, there was a thread on candles in oil, sinned on the valve oil seals. changed but the problem did not go away. and the gap in the guides is normal
- Like
- I do not like
And often on 4216 liners crack?
- Like
- I do not like
- Like
- I do not like
Well it is necessary to ride on something. So that the sleeves are burst.
- Like
- I do not like
- Like
- I do not like

Looking at the piston is very similar to an overheating motor.
By the way, carbon deposits are not from gas but from gasoline, that's for sure. Gas is another carbon deposit.
- Like
- I do not like
Looking at the piston is very similar to an overheating motor.
By the way, carbon deposits are not from gas but from gasoline, that's for sure. Gas is another carbon deposit.
I agree, it doesn't look like gas. But suprotek evens out the surface due to the finely dispersed abrasive. But why did it crack? Most likely, simultaneously with overheating, a thermal shock. Did the cylinder head drive?
That you scared me. Previously, I changed the sleeve and that's it, I had 15 of them lying around in stock, 4 of them were new, the rest were used, but better than new ones.
in business, is it better to immediately change the sleeves or can you sharpen them? and do they change them in general? they are not pulled out there?
or can you sharpen it?
sharpen, they are poured
and generally they change?
cut out and inject with nitrogen a new
- Like
- I do not like
in the sleeve where the crack was, the compression was the highest. but crimping showed that another (which is intact) flows. In general, it costs 1000 rubles to change the sleeve. and the sleeve itself is 2100 and for some reason they do not give a guarantee. rarely does anyone do such work
Post has been editedChLeNoPoTaM on: 29 December 2016 - 19:15
- Like
- I do not like
and why is there a hole in the oil fence?
- Like
- I do not like
For some reason I thought that the hole in the mesh was not a man-made creation
- Like
- I do not like

For some reason I thought that the hole in the mesh was not a man-made creation
I saw this in two engines. In addition to sabotage, there is no thought. I didn't have this, but the first time I changed the oil, the filter was clogged with bits of sealant. The mesh is intact.
Good day! something was wrong with my gazelle. compression disappeared, and after a while a knock and blue smoke and pipes appeared. an autopsy showed that the 4th cylinder had burned out and a crack in the second liner. took the block to the glorious city of Novocherkassk for pressurization and sleeve fitting. waiting for the results.
The question is the following, dear members of the forum. What do you recommend when assembling? I would like to collect a high-quality and reliable engine!
“High-quality” - naturally, a lot depends on the quality of spare parts. The same liners that are installed instead of the factory ones very often come across as if from a regular pipe. That is, wear in them occurs faster than in the factory ones .. (Although everyone knows that we have spare parts To assemble a reliable engine as you write, the first is the quality of the spare part. In general: pay special attention to the clearance between the piston and the cylinder, the thermal clearance in the rings, the wear of the connecting rod bushings, the weight of the pistons, the wear of the half rings on the CV even if everything is normal with the crankshaft, put new liners (the same size as they were), pay attention to the distribution gear, replace if necessary, check the camshaft bushings, of course, valve bushings, valves, valve seals in the cylinder head. oil intake, because it is broken in the photo. Pay attention to the wear of the ring on the flywheel. On these internal combustion engines, it often "eats". oil seals, gaskets, etc. Attached, too, when installing, check for backlash, grease, etc., and Good luck with the assembly
We remove the engine from the car (see Removing the engine) and clean it from the outside from dirt and oil.
Remove the oil filter and the right power unit support bracket.
We fix the engine on the stand by the studs of the right support bracket.
We take out the oil dipstick.
Remove the fan impeller, accessory drive belts, generator and starter.
Using the "24" wrench, weaken the tightening of the union and turn it with the tap up.
Turn off the oil cooler tap using the "19" key.

Finally, we unscrew the fitting with the valve.
… And remove the oil pressure gauge sensor.
The flare connection of the sensor is sealed with two washers.

We turn off the emergency oil pressure sensor (see Replacing the lubrication system sensors).
Remove the fine fuel filter (see Replacing the fine fuel filter).
Remove the fuel pump (see Removing and disassembling the fuel pump).
We remove the distributor sensor together with the drive and high-voltage wires (see Removing the distributor sensor).
In order not to lose bolts, nuts and washers, after removing the next part ...
... we bait them into place (but only where it will not interfere with further disassembly).

We remove the starter (see. Removing the starter).
Remove the intake manifold and exhaust manifold (see Removing the intake manifold and exhaust manifold).
... and "14" we unscrew the two mounting bolts of the amplifier and remove it.

We turn the engine over with the crankcase up. Remove the clutch release fork (see Removing the pressure and driven clutch discs). Remove the flywheel (see Replacing the rear crankshaft seal).
Using the "14" wrench, unscrew the two bolts of the upper fastening of the clutch housing ...
... and with the same wrench, two middle bolts.
With an open-end wrench "17", unscrew the two bolts of the lower crankcase mounting.
Remove the upper part of the crankcase.
Using the "10" wrench, unscrew the two lower bolts and three bolts of the upper cuff mounting plates and remove the plates.

We turn the engine to its original position and remove the cylinder head (see Removing the cylinder head).
We turn the engine with the front part up. Remove the crankshaft pulley with the bushing (see Replacing the front crankshaft seal).
Remove the coolant pump (see Replacing the coolant pump).
Using the "13" wrench, unscrew the nut ...
... and remove the cover of the pusher box and its gasket.
Remove the second cover (with oil separator) in the same way.

On an engine with a working volume of 2.5 liters ...
... we take out the eight valve pushers and number them (or put them in order).

To prevent cylinder liners from falling out, ...
... we fix them with a device.

We turn the engine over with the pallet up.
Using the "13" wrench, unscrew the 18 pallet fixing nuts.

If some nuts are turned out together with the studs, degrease and lubricate the threads of the studs and the hole in the block with anaerobic sealant before screwing them in.
Shaped washers are installed under the corner nuts for securing the pallet.
We remove the front and rear parts of the gasket from the pallet, ...
... and from the block - the side parts of the pallet gasket.
Using the "13" key, unscrew the three remaining nuts securing the front cover of the cylinder block ...
... and with keys "12" and "14" a bolt with a nut for fastening the cover.
Remove the cover gasket by prying it off with a sharp tool.
Using the "13" wrench, unscrew the two nuts securing the discharge pipe of the oil pump.
Using a 12 key, unscrew the two bolts securing the pump to the crankshaft main bearing cover.

Remove the oil pump.
A gasket is installed between the pipe and the block.
Using the "13" wrench, unscrew the two nuts securing the pipe to the pump.
Remove the pipe and gasket.
Using the "12" wrench, unscrew the bolt securing the oil intake mesh ...

Use a screwdriver to bend the antennae of the locking plates ...
... and with the "10" head unscrew the four bolts connecting the cover to the pump casing.

We take out the bolts.
... and, having marked the relative position of the parts, remove the oil intake, taking care not to damage the gasket.
We take out the pressure reducing valve with a spring from the oil intake.
Remove the cover from the pump housing.
Shims are installed between the body and the cover.

We assemble the pump by lubricating its parts with engine oil and washing the oil intake mesh from deposits with a solvent.
Remove the crankshaft front end oil deflector.
We turn the engine crankshaft so that the holes in the camshaft gear are opposite the heads of the camshaft thrust flange bolts.

To replace the camshaft gear.
... with a key "17" unscrew the bolt securing the camshaft gear ...
... and remove it together with the washers.
With a long head "12" through the hole in the gear, we unscrew the two bolts securing the thrust flange.
We remove the camshaft together with the gear.
With a special puller, we remove the gear from the camshaft and press a new one through the mandrel (for example, with a head of a suitable diameter).
ATTENTION
When removing and installing the gear, do not strike or apply force to the plastic part, as it may be damaged.

In order not to confuse the pushers, we put them in order or put notes with a serial number in them.
Using the "13" wrench, unscrew two nuts ...

The cover is seated on a sealant, so you should first swing it with pliers.
Using the "15" head, turn off the connecting rod cap nuts.
Lightly tapping on the sides of the cover, pull it off the bolts.
ATTENTION
Do not remove the cover by inserting a screwdriver or chisel into the gap between the cover and the connecting rod, as the seating planes will be damaged.
If necessary, knock out the connecting rod bolts through a thin soft metal bit.
Remove the connecting rod cover together with the liner.
We take out the piston with the connecting rod from the cylinder block.

Likewise, we take out the pistons of the remaining cylinders. The sequence of disassembly of the connecting rod-piston group - reverse assembly (see. Assembling the connecting rod-piston group).
Using the "22" head, unscrew the nuts of the main bearing caps.
ATTENTION
Be sure to mark the number of each cover and its position with a punch. When reassembling, all covers should only be installed in their original places.
Tapping lightly on the root covers, ...
… We remove them one by one together with the inserts.
With a puller, we press the gear together with the thrust washer.
When assembling, we install the washer in such a way that the chamfer of the hole is facing in the opposite direction from the gear.
Knock out the pinion key from the groove on the crankshaft.
Remove the thrust washers (liners) limiting the axial movement of the crankshaft.
After grinding the necks of the crankshaft with a hexagon "14" or a bolt with a head "14" and locked nuts, unscrew the plugs.

We thoroughly clean the channels for the passage of oil in the crankshaft from deposits and residues of abrasive (in case the crankshaft has undergone regrinding). We wash the channels of the crankshaft with kerosene, gasoline or diesel fuel and blow it off with compressed air.
We install in place the plugs of the oil channels.
With a beard, we cut out the edges of the plugs.

We carry out further assembly of the crankshaft in the reverse order of disassembly.
The Ulyanovsk Motor Plant began to produce high-power engines since 1997, the carburetor UMP 4215 became the first internal combustion engine with a cylinder diameter of 100 mm, and in 1998 Ulyanovsk residents developed a new 110-horsepower injection engine. sec., corresponding to Euro-2 standards. Gasoline engines UMZ 4216 in experimental batches began to be produced in 2003, and soon they were put into series.

Model 4216 is installed on GAZ vehicles; this power unit is used in commercial Gazelle vehicles. In 2008, the Ulyanovsk engine was improved, and it began to comply with Euro 3 standards, and since 2012 it has been brought to the Euro 4 standard. In 2013, hydraulic expansion joints began to be used on this engine, since 2014, the Ulyanovsk plant began assembling EvoTech motors volume of 2.7 liters, which is installed on commercial vehicles Gazelle Business and Gazelle Next.
The prototype of the engine of the Ulyanovsk Motor Plant is the ZMZ-21 engine - it has essentially the same design:
- aluminum block of cylinders;
- upper arrangement of valves;
- gear drive of the gas distribution mechanism;
- aluminum rods;
- the lower location of the camshaft;
- two valves per cylinder.
Even the oil sump has a similar configuration - it is also steel, stamped, with recesses in the front and rear.

As in the ZMZ-21, on the Ulyanovsk engine, pistons with connecting rods are connected by means of "floating" piston pins - the pistons are seated on a "cold" one, copper (bronze) bushings are pressed into the upper connecting rod bushings.
On all UMP engines with a cylinder diameter of 92 mm, “wet” removable liners are installed in the cylinder block (BC). In a block with a piston diameter of 100 mm (models UMZ 4215, 4213 and 4216), the sleeves are pressed using special equipment, and during repairs it will not be possible to press them out, therefore, if the cylinders are significantly worn out, the BC needs to be replaced.
The 4216 engine consists of the following parts:
-
an aluminum cylinder block into which four cast iron liners are pressed;


The gas distribution mechanism (camshaft) is driven from the crankshaft through a pair of gears. The camshaft cams, through the tappets and rods, raise and lower the rocker arms, which in turn push the intake and exhaust valves. Due to the valves, the cylinders are filled with a fuel-air mixture, and the engine's operating cycle occurs.
On a Gazelle Business car, the UMZ 4216 engine is equipped with an electronic control system, which includes:
- control unit MIKAS;
- ignition module;
- high-voltage wires with lugs;
- sensors - throttle valve, to / shaft and p / shaft, absolute pressure, detonation;
- wiring;
- idle speed regulator;
- fuel injectors.
Motor 4216 - four-stroke, in-line four cylinders, 8-valve. The internal combustion engine is designed to run on AI-92 gasoline; it is allowed to use higher quality fuel, for example, AI-95 gasoline. The technical characteristics of the UMZ-42164 (Euro-4) modification engine are as follows:
- volume - 2890 cm³;
- diameter of standard pistons - 100 mm;
- compression ratio (compression in cylinders) - 9.2;
- piston stroke - 92 mm;
- power - 107 liters. With.;
- the engine cooling system is liquid (antifreeze or antifreeze is poured in).
The block and cylinder head are cast from an aluminum alloy. The engine of the first completeness weighs 177 kg, the power unit itself is included in the complete set of the motor, and attachments are also installed on it:
- starter;
- generator;
- intake manifold (receiver);
- ignition module with wires and lugs;
- drive belts;
- water pump;
- crankshaft pulley;
- basket and clutch disc;
- ECM sensors.
According to the factory standards, the fuel consumption of the Gazelle with the Ulyanovsk ICE is 10 l / 100 km on the highway outside the city, in mixed mode it is 11 l / 100 km. In practice, more gasoline is usually consumed, a lot depends:
- from the congestion of the car;
- speed limit;
- the period of operation (in winter, more fuel is consumed for heating).
The engine of the UMZ 42164-80 modification is equipped with hydraulic compensators; this engine is used in the Sobol Business and Gazelle Business commercial cars. The 42164-80 model differs little from the standard 4216 motor - this engine is equipped with other, special stays, in the upper part of which the compensators themselves are attached.

Crankshaft 4216 consists of four connecting rod and five main connecting rod journals, has diameters:
- root necks - 64 mm;
- connecting rod journals - 58 mm.
All journals are equipped with two steel-babbit liners, the factory tolerance for the crankshaft dimensions is 0.013 mm. During the repair of the Ulyanovsk engine, the main and connecting rod journals are measured with a micrometer - if they are worn more than 0.05 mm, the shaft is subject to mandatory grinding. The diameter of the piston pins is 25 mm, the pins are installed in the bronze bushings of the connecting rods. Over time, both the fingers themselves and the bushings can wear out; in the event of backlash in the connection, the parts must be replaced.
The crankshaft in the cylinder block is mounted on supports with covers, which are tightened with bolts with a certain effort. Each cover has its own place - they should not be confused in places, moreover, picked up from another BC.Also, the covers must be locked to the lock - if they are installed incorrectly, the crankshaft may not turn (it will be clamped), and even if the shaft turns, the engine will quickly fail.
The resource of the 4216 engine, declared by the manufacturer, is 250 thousand km, but often the engines fail ahead of schedule. Frequent ICE problems:
- leaking engine oil;
- increased oil burnout through the piston rings:
- knock of valves, which is sometimes difficult to eliminate;
- overheat;
- failure of various sensors.
Various breakdowns can occur prematurely for different reasons:
- the driver violates the operating conditions - the motor overheats due to overload;
- maintenance standards are not followed;
- the car is operated in difficult road conditions.
Unfortunately, defects are often found in UMP engines, but ZMZ motors are not insured against this either. If the 4216 engine troit (jerks), the cause of the malfunction may be both the engine itself and a breakdown in the ECM. To determine the cause of the defect, it is necessary to diagnose the internal combustion engine.

There are the most controversial reviews about the UMZ 4216 engine - some owners of Gazelles praise UAZ engines and believe that they:
Indeed, the UMZ 4216 engine is very simple, especially since it has significant similarities with the ZMZ-402 internal combustion engine. The design of the power unit is familiar to many drivers, and such an engine can be repaired almost in the field. Some difficulty for car owners is the electronic equipment of the motor - after all, the injector is somewhat more complicated than the carburetor device.
You can also hear extremely negative responses from the owners of Gazelles with UAZ engines:
- the engine is prone to overheating;
- sensors often fail, so the motor starts to triple and does not go;
- the engine consumes oil, it flows wherever possible.
Unfortunately, a lot of scrap comes from the Ulyanovsk plant, and basically those drivers who get a defective internal combustion engine complain about the Ulyanovsk motor. There are several typical factory "blunders" that are quite common on the UMP 4216:
- the intake manifold cracks and begins to suck in air;
- the pump does not provide the required oil pressure;
- the electromagnetic cooling clutch refuses to work, and the motor begins to overheat.
Drivers of such unsuccessful "Gazelles" note that the engine often has to be "refined with a file." It was also noticed that if the motor is completely sorted out with our own hands, breakdowns in it occur much less often, the main thing is to assemble the engine using original parts of good quality.
During the operation of the Gazelle with the UMZ 4216 engine, various breakdowns occur, one of the most common problems is engine overheating. If the cooling system "airs", antifreeze (antifreeze) starts to be thrown out of the expansion tank. As a result of overheating, it often breaks through the block head gasket - changing the PHBTs as a whole is not difficult, and often drivers make such repairs on their own.
But the problem in case of overheating is different - often from the high temperature on the pistons partitions burst, the piston rings "lie". To replace the pistons or rings, it is not necessary to remove the engine, it is enough just to throw off the block head and the oil pan.
UMP 4216 overhaul is necessary in cases when:
- worn or damaged cylinder liners;
- the crankshaft knocks (wears out);
- low oil pressure in the system, and replacing the oil pump does not give positive results.
Often the Ulyanovsk engine is overheated, and drivers take various measures to get rid of this unpleasant and dangerous phenomenon for the internal combustion engine. Many Gazelle owners install a three-row copper radiator instead of the standard aluminum one - copper cools antifreeze more efficiently. Another method to combat overheating is to install an electric cooling fan with a toggle switch located in the driver's cab.At the moment when the sensor arrow on the dashboard begins to show the critical temperature of the coolant, the driver forcibly turns on the fan, and the temperature regime returns to normal.
In the case of purchasing a Gazelle with an unsuccessful engine, car owners seek to get rid of the power unit, replacing it with an internal combustion engine of another model. Many different options can be considered for replacement, but most often the owners of commercial cars install ZMZ-405 engines, this particular engine is chosen for a number of reasons:
- The Zavolzhsky engine is not capricious - it “digests” Russian fuel well, it rarely breaks down;
- relatively imported power units (Cummins, Toyota, Nissan) ZMZ-405 is inexpensive;
- when installing ZMZ, a minimum of rework is required.
Recently, the Cummins turbodiesel has been regularly installed on Gazelle Business cars, but owners of cars with UMP-4216 almost never consider this engine as a replacement:
- Cummins isn't cheap;
- The American engine is very sensitive to the quality of fuel, and if the car is filled with bad diesel fuel, Cummins can quickly fail.

The advantage of the ZMZ-405 (or 406) also lies in the fact that a lot of used engines are sold in the secondary market in normal, working condition, and their price is several times lower than a new internal combustion engine. True, when buying a used unit, there are no serious guarantees - you have to take the seller's word for it. But even if the 405 requires minor repairs (replacement of chains or piston rings), it is still much cheaper to purchase it together with the repair than to purchase an expensive imported engine. Another minus of the imported internal combustion engine is that if it was not serially installed on the Gazelle, it will have to be purchased together with the gearbox or be puzzled by the fit of the Gazel gearbox to the new engine.
A flexible system of discounts is provided for regular customers.
For work on overhaul and installed spare parts a guarantee is given - 6 months no mileage limitation.
In our work we use original spare parts of OJSC GAZ, a full range of spare parts is always available in stock.
The total cost of the overhaul of an engine is made up of the cost of labor and the cost of spare parts. The cost of work is fixed and does not change. The cost of spare parts depends on the condition of your engine itself, after opening, disassembling and troubleshooting the engine, a list of spare parts necessary for overhaul is compiled and the cost of parts is also calculated.
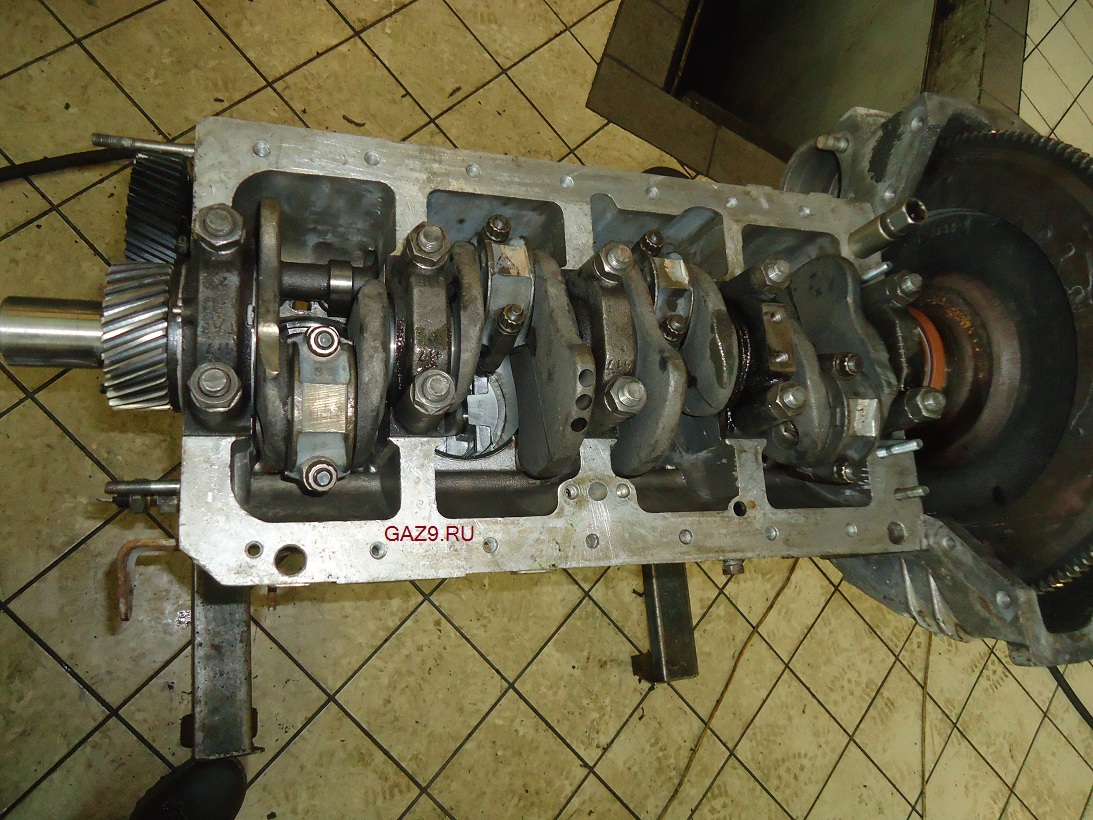

Structurally, the motor is descended from the ancestor of the family - the ZMZ 402 engine. The engine has a lower camshaft, the valves are driven by rods through the rocker arms.
In principle, the unit is quite reliable, repairs are mainly due to factory defects or errors in operation. Widely distributed on the Gazelle Business model.
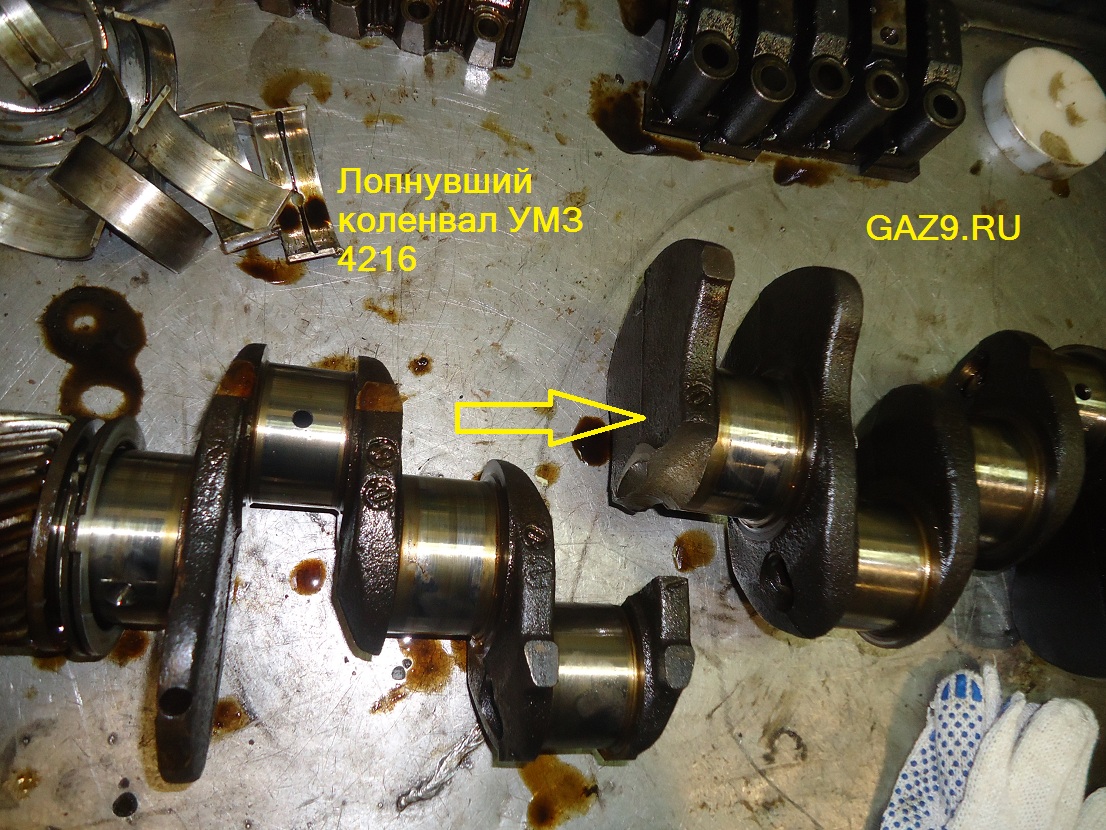
Factory defects include the loss of the valve seat from the cylinder head, with subsequent damage to the piston and cylinder block. The plant knows about this defect and now the valve seats are additionally wedged in the block head.
Defects caused by improper operation: untimely oil change leads to coking of the oil channels and the oil receiver mesh, as a result, a drop in oil pressure and wear of the crankshaft journals.
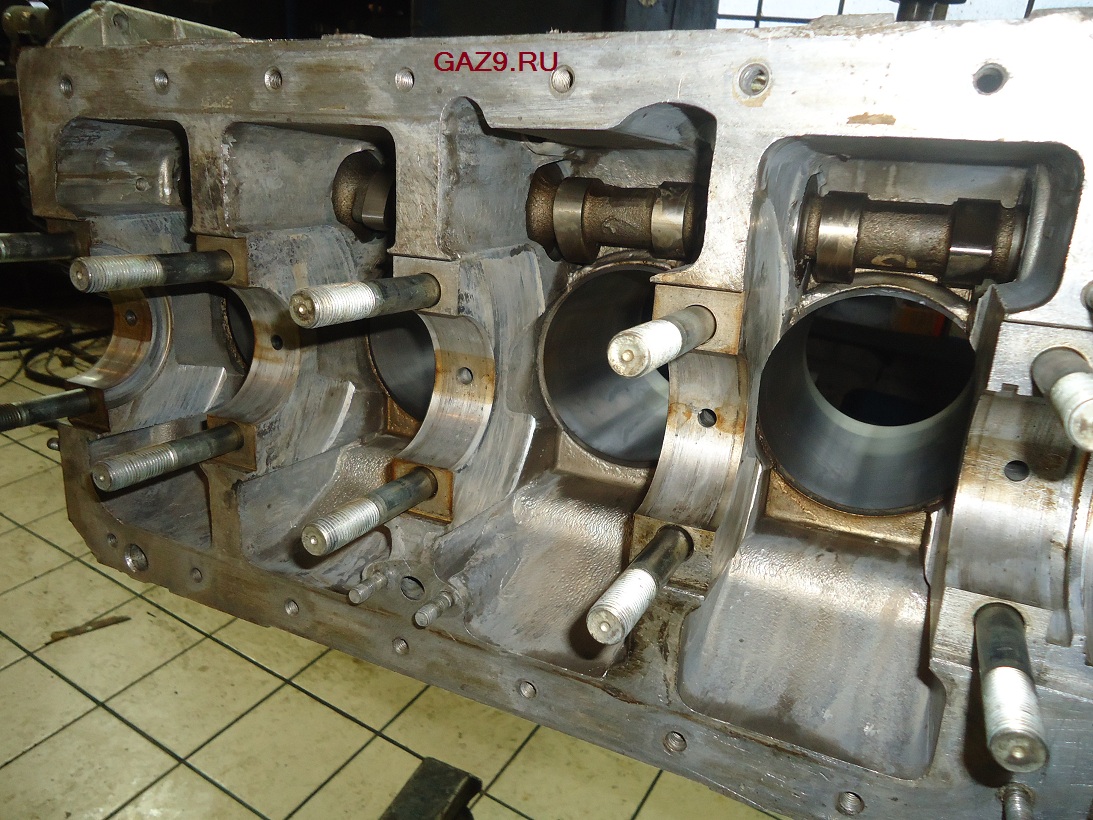
Prolonged driving with thermal disturbances (overheating) leads to seizures on the piston skirt and on the cylinder liner.
We carry out all types of machining: grinding of the block head, boring, cylinder liner, grinding of crankshafts.
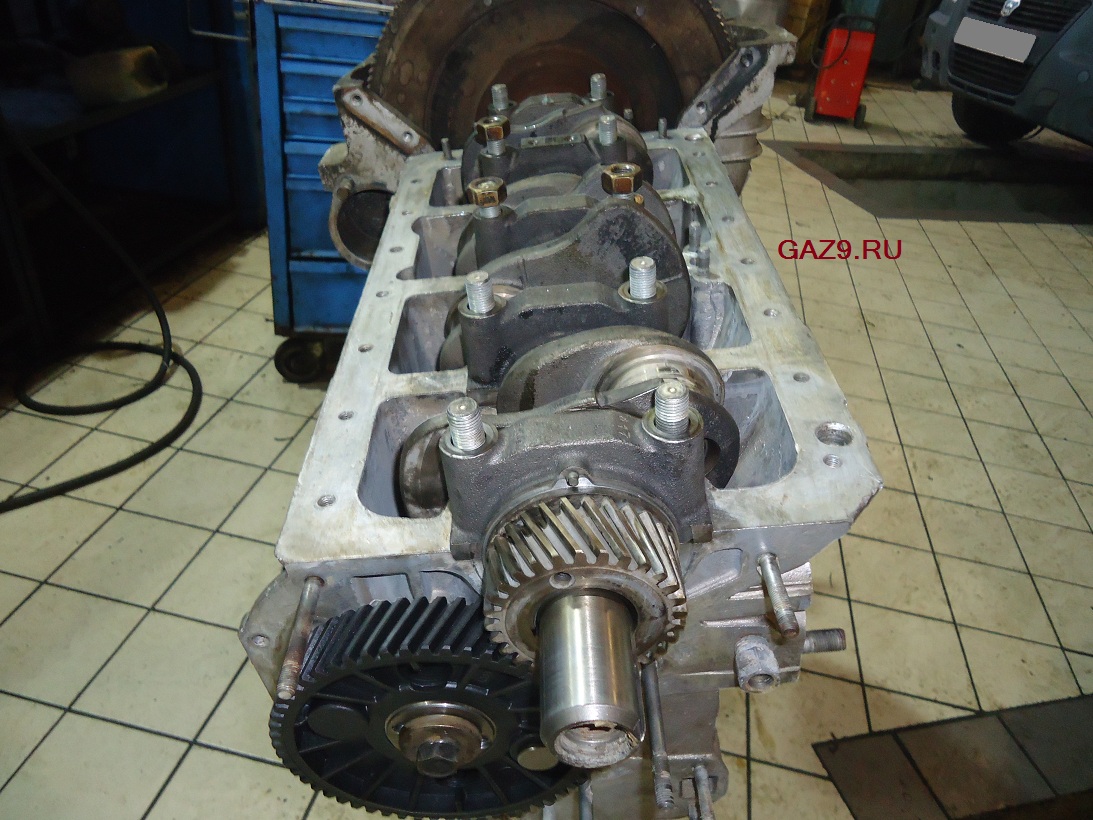

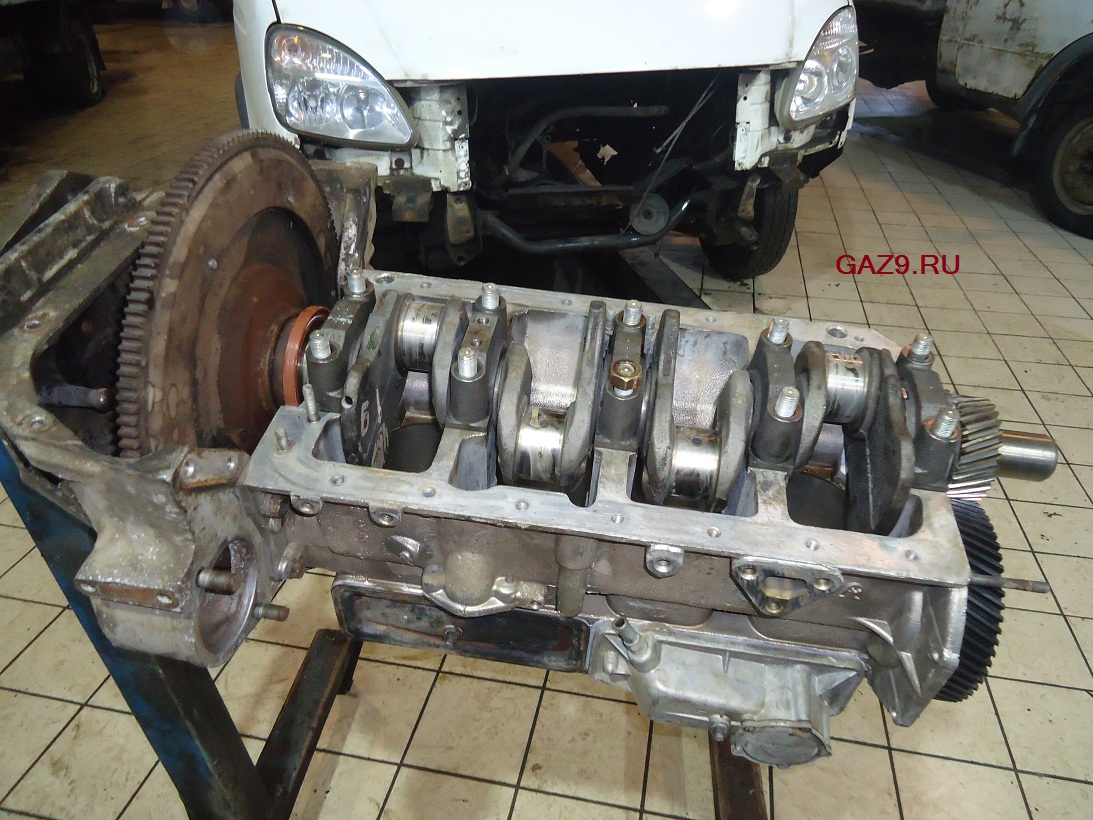

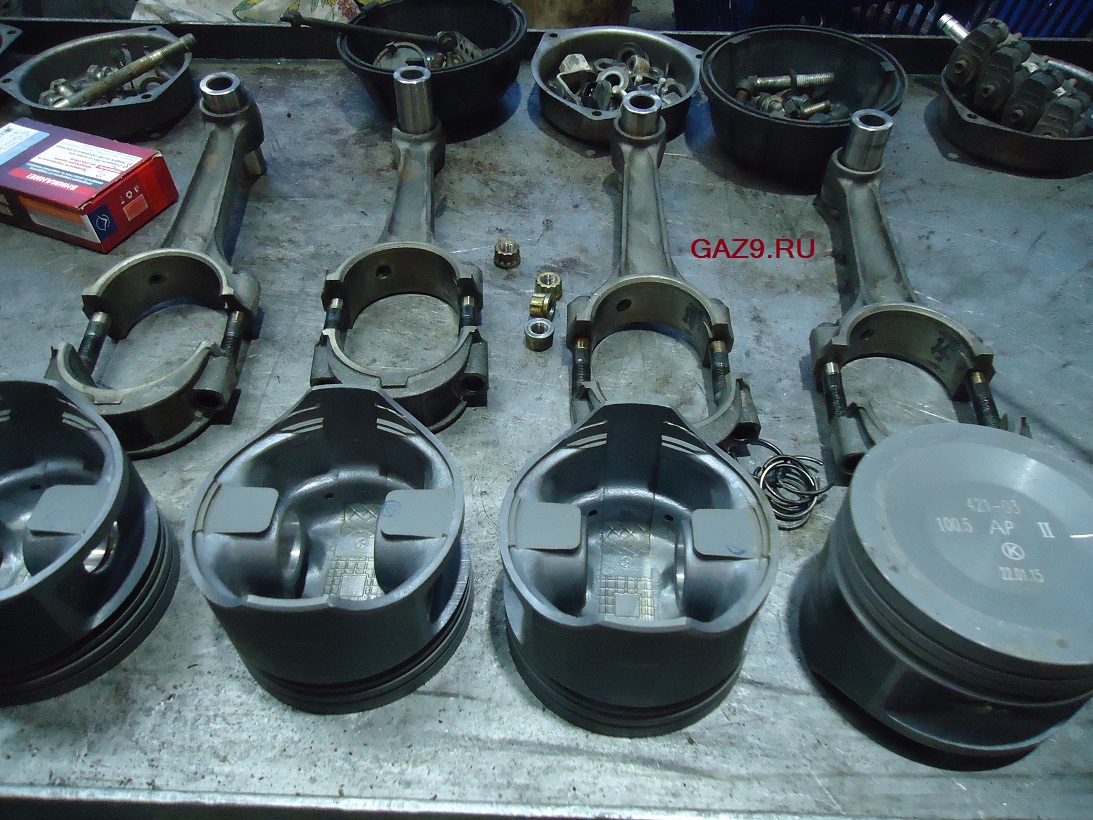
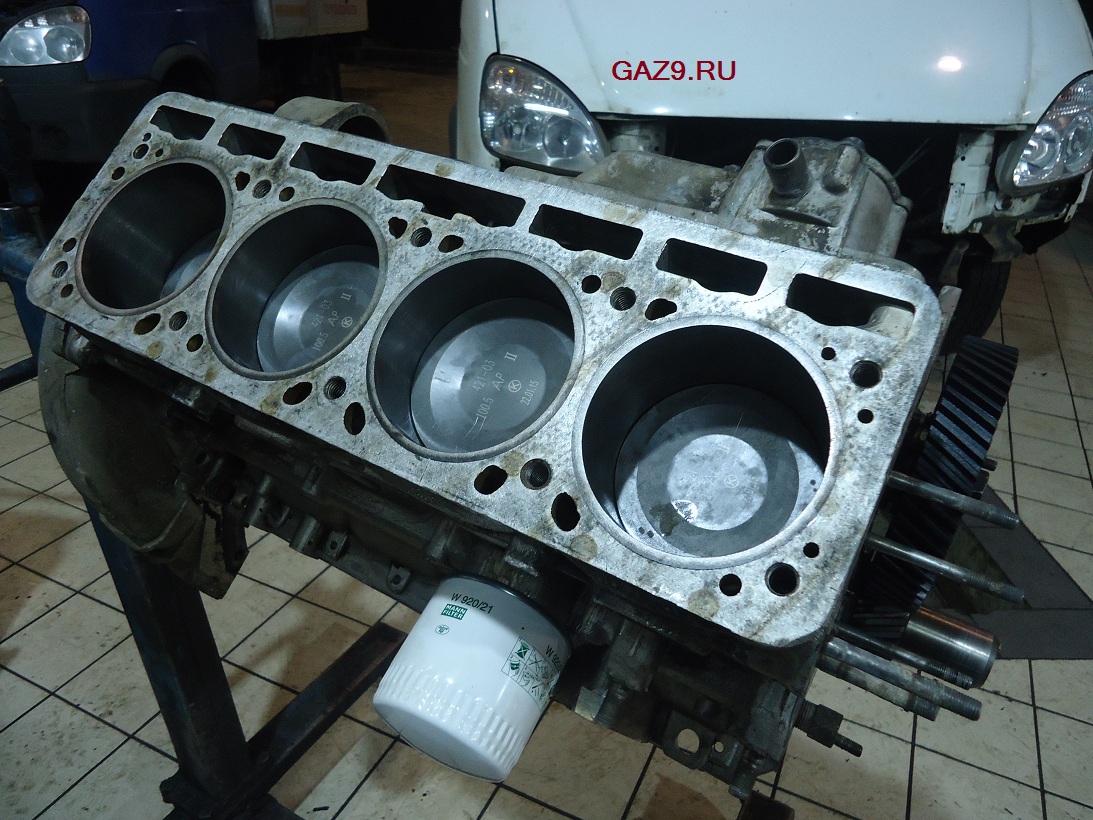

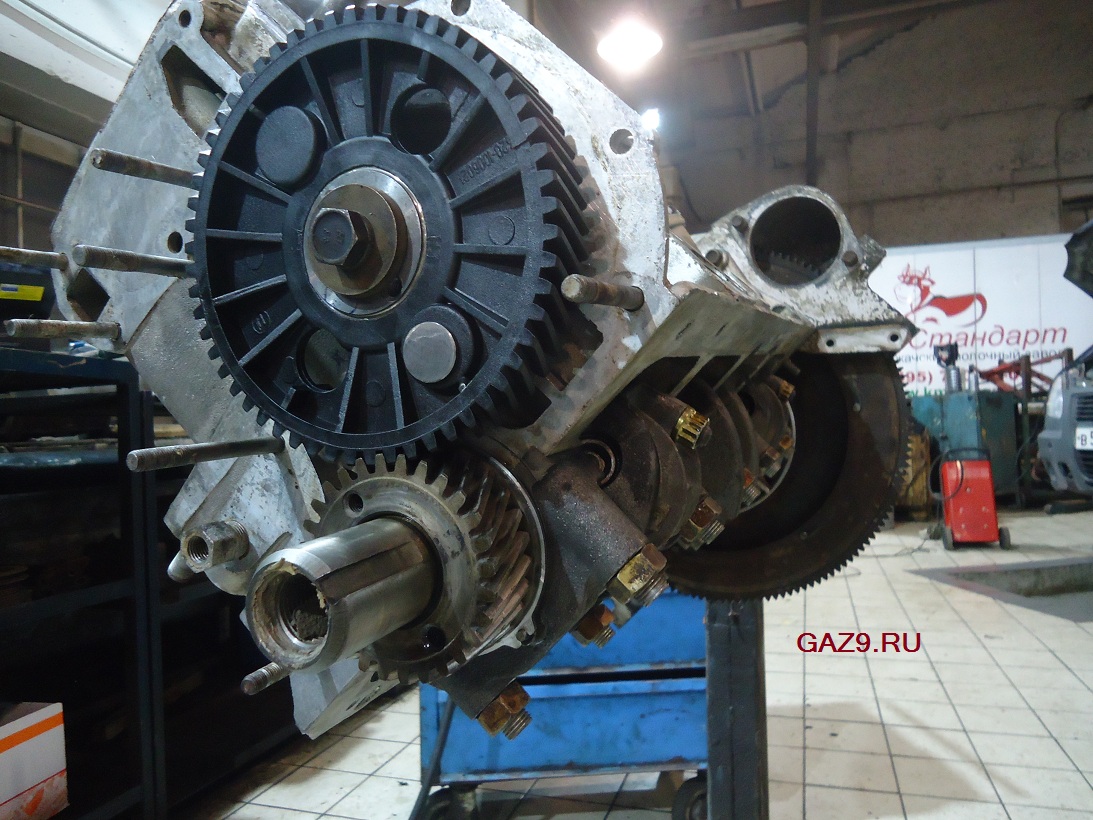

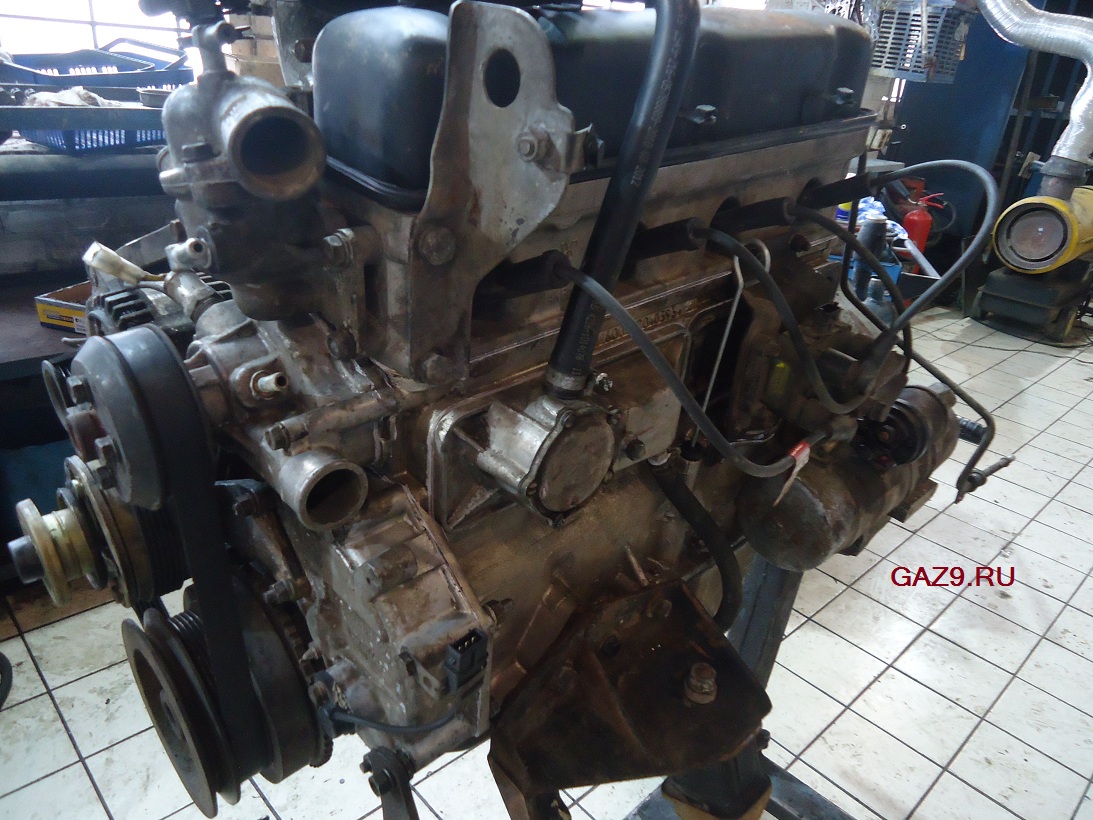
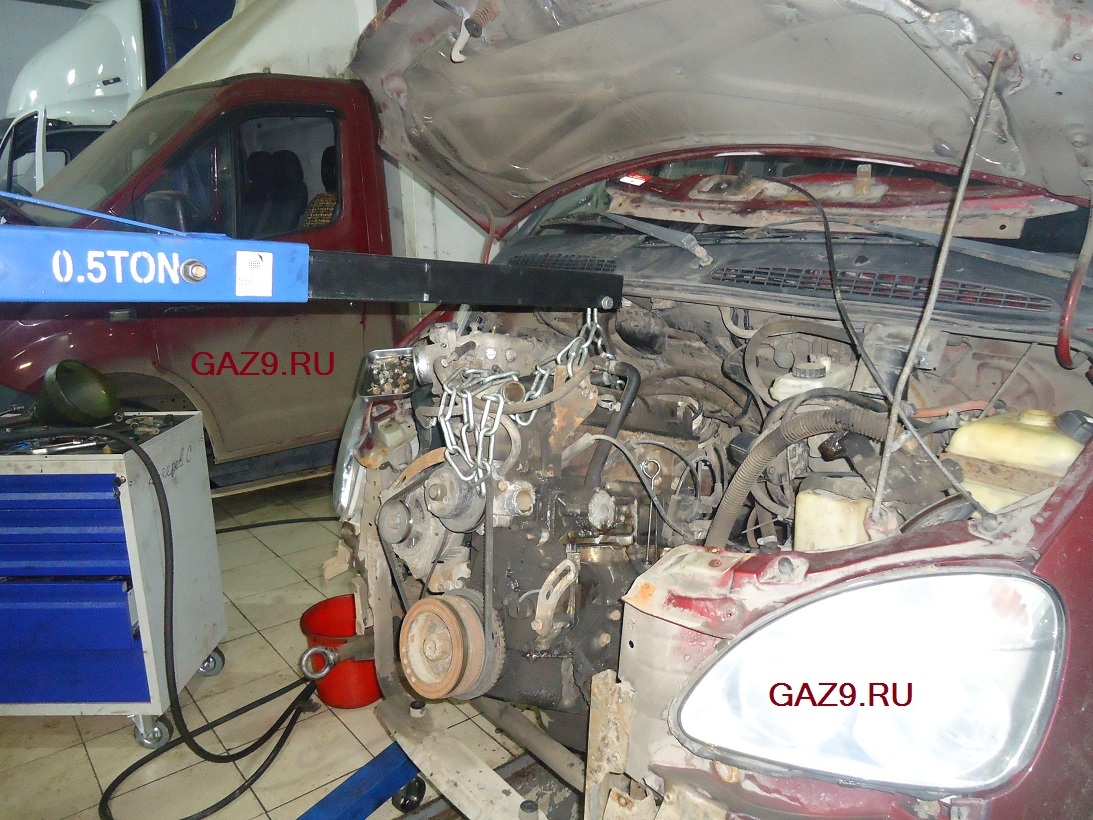

Our recommendations for the operation and extension of the service life of UMZ 4216 motors before overhaul:
- Daily oil level check.
- The use of quality engine oil - our recommendation - Mobil, Motul.
- Compliance with the service interval for mileage - 10.000 km.
- Operation of the motor with current gaskets, oil seals, hoses and connections of the cooling system is inadmissible.
- Temperature control, inadmissibility of overheating.
- Monitoring the coolant level.
- It is necessary to observe the operating modes of the engine in terms of revolutions, do not twist.
- Daily visual inspection of the engine compartment, checking the levels.
Subject to these simple recommendations, the resource of UMZ 4216 engines before overhaul on a / m Gazelle Business, Sable, Gazelle Next in terms of mileage is about 200,000-250,000 km.
If necessary, you can come to us for inspection - it's free.
At the request of our client, to whom we have capitalized the Oka engine for gas fuel, we have taken into operation an engine from an UAZ. The machine is a “loaf” that the owner uses in the Ryazan region. He removed the engine assembled on his own and brought it to our Workshop.
So, the UMZ 4218 engine, with a working volume of 2.89 liters, with a piston diameter of 100 mm. The car is operated only on gas. The reason for the repair is unrecoverable oil leaks, as well as high oil consumption for waste. The design of the motor is bottom-shaft, the valve drive is by rods. The cylinder block is aluminum, with cast iron liners. Progress made its way to this ancient engine - the crankshaft acquired full-fledged oil seals, and later received an injection injection system. But we got a carburetor engine.
We begin to disassemble this miracle of technology. Under the valve cover lies the rocker axle. All this is removed quite easily. The engine flowed with oil from almost everywhere. According to the owner, the pallet pad alone was changed several times.
After removing the clutch housing and flywheel, it was time to remove the cylinder head. It is not difficult to unscrew it, but they took it off for about an hour - she was so attached to the hairpins! It is very difficult to pick up something, everything is made of aluminum. We suffered, but did. The head was already repaired in a well-known company in Moscow - valves, guides, saddles were changed, the plane was milled. The plane is milled by 3.90 mm, the owner also replaced the valve drive rods with shorter ones. All this is for raising the compression ratio for gas fuel.
There are no longer any traces of hone in the cylinders. The head was disassembled, everything was defective - the valve guides are worn out (30 thousand km mileage after repair!), The valves are loose. The saddles sagged slightly due to the gas.
The head has undergone a standard repair procedure. The saddles were replaced. The inlet ones were installed as usual, and on the outlet - steel, made of a special alloy. This option has a greater resource for working on gas fuel. The saddle effect is still there, but not as great as with a cast iron saddle. The guide sleeves are set in bronze, of their own manufacture. The bronze grade has been tested on foreign cars and has a high resource. But, for the valve mechanism to work properly, the valve stems must necessarily be hardened with either chromium or nitriding. In our case, we bought and installed ZMZ “Double Resource” valves, with chrome-plated rods. The valve stem seals were installed by domestic ones - there is no point in taking risks with Chinese products. The plane was milled “as clean”, the head was washed and assembled.
We bore the block to the 1st oversize of 100.5 mm, buy pistons from the factory UMP, piston rings, at the customer's request, we complete from two sets - compression ZMZ (Buzuluk), oil scraper - type-setting Stapri.
The cylinders were plate honed on the Sunnen machine, the crankshaft was in perfect condition and did not require grinding. The camshaft bed is also in excellent condition - no wear and tear.
For several days in the machining shops there were jokes about the street racing loaf, which is prepared in the “K-POWER Workshop”, mercilessly forcing the ancient engine. The jokes, of course, were ignored.
Well, we continue to assemble the engine. No afterburner, of course - just a quality repair. The parts of the oil pump are in good condition, nothing needed to be changed. We update liners and oil seals. The rear oil seal here is from the 2108 engine, and the front oil seal is original.
The camshaft was also left at the factory, the textolite gear was in excellent condition (it was changed 30 thousand km ago, when the engine was being repaired). The camshaft gear is combined with the crankshaft in a simple way - according to the factory label.
The owner of the car asked to replace the front cover with a cover from the UMZ injection engine from the Gazelle - it has a drill for the hairpin of the poly V-belt roller, which the owner was going to install.
Installing the head is not difficult, we use a new Fritex gasket with sealant, put the brackets on the studs as they stood before disassembly and tighten all the nuts.
It turned out to be convenient to adjust the valve clearances with the engine sump removed, observing the position of the camshaft cams. Then we close the valve cover by installing a new gasket.
I had to tinker with the installation of the pallet. The plant offers to assemble a pallet on a gasket consisting of 4 pieces of cork rubber. After examining all this, a verdict was made - THIS will not work - oil leakage is ensured. It should be noted that for one and a half years we have been collecting all pallets only for sealant, without gaskets. This fully justifies itself - the engines are dry. However, this method requires thorough cleaning and degreasing of all surfaces. In this case, our engine was washed with chemistry and there are no traces of oil. But how do you apply a sealant to those monstrous crevices that a finger can crawl into ?! And yet they did. Layer by layer, on both planes. It took two people to work. After installing the pallet and tightening all the hardware, all the cracks were additionally missed and leveled with sealant. Almost two tubes of sealant went to the pallet.
The camshaft plug was also smeared with a special sealant, oil also flowed from it. The gasket for the manifolds was installed from an injection engine, steel. It is completely suitable instead of paronite and is more reliable.
After assembling the engine, the owner took it to the Ryazan region for further installation in the engine compartment of the “loaf”.
| Video (click to play). |
Posted on January 2, 2014
The author of the article, photo-video materials:


