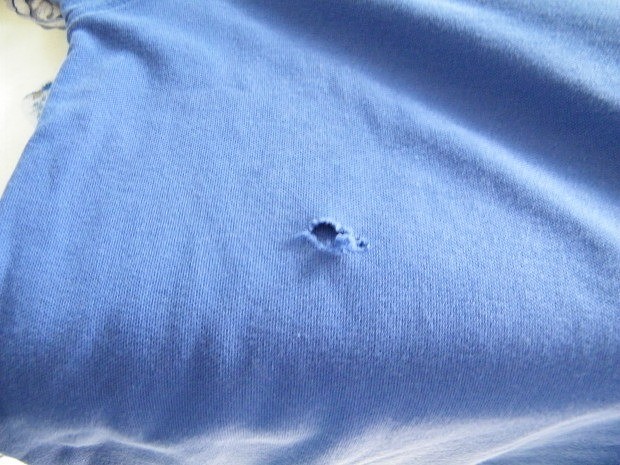
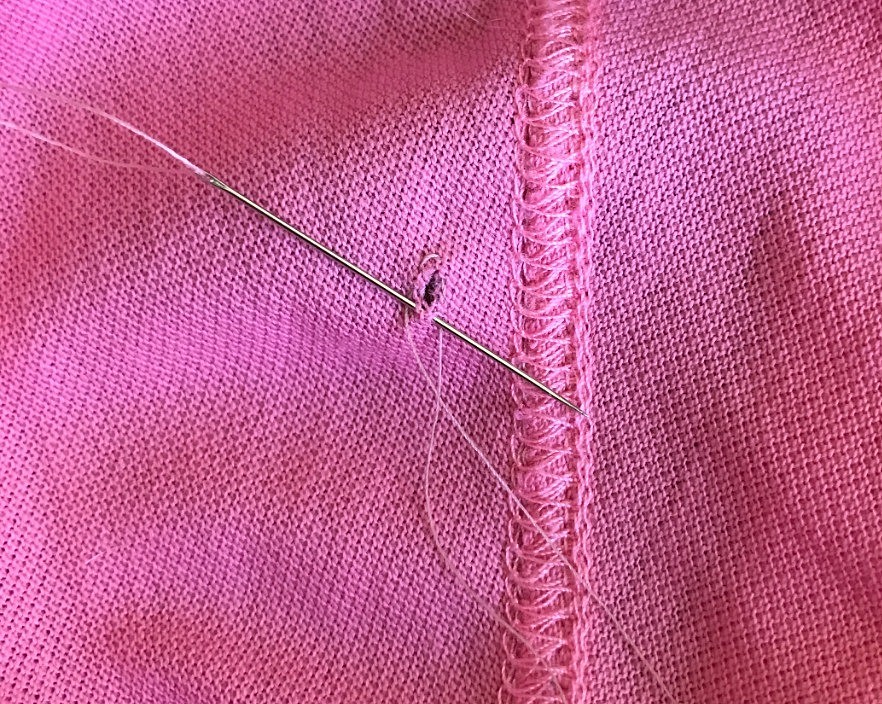
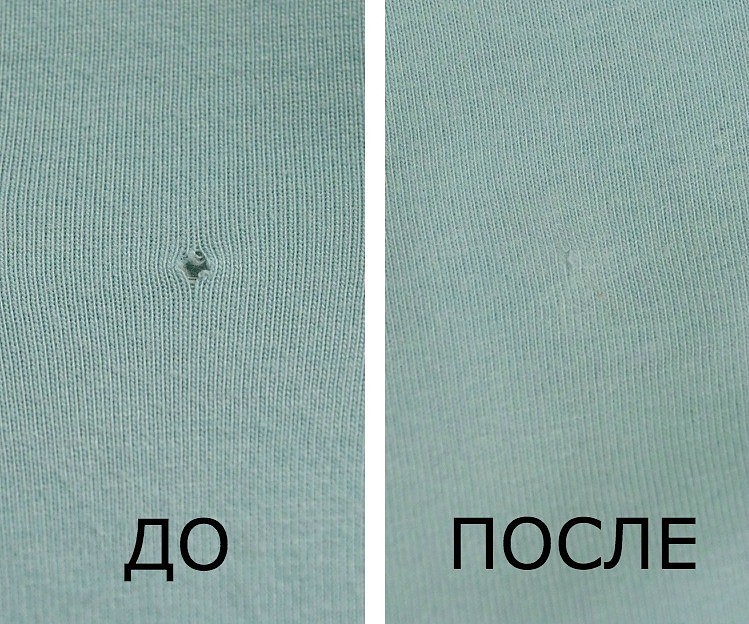
We have already written about how to discreetly sew up a small hole in thin knitwear (master class with video here). The same master class is about how to repair thicker knitwear, for example, knitted sweater, pullover, sweater. In the same way, you can sew a thick knitted sock or any knitted thing.
Sometimes there are cases in which the knitted fabric can be damaged. Whether it is an uninvited guest, a mole ruled in your closet, or caught, tore. If the location of the defect allows, you can make an appliqué, but it is not always appropriate. You will definitely not make an applique on a man's product. There is an easy way to restore a knitted fabric. I will show it on a hosiery sample. You can also use this method on simple patterns.
Of course, there is more than one way to repair jersey, there are several ways. I propose to watch one of them in the video tutorial.
VIDEO
In fact, this method will be useful, provided that the thing is knitted by us (and not bought in a store) and such threads remain. And even if the thing is practically not worn. Otherwise, it is almost impossible to pick up a thread, which makes this MK practically salty.
M-K is for knitters, they don't buy much at a knitwear store.
After the first wash, everything will be the same.
And then, situations are different.
Everyone will decide for himself what is useful to him and what is useless.
MK is just for everyone, because it is on display and accessible to all age categories, nationalities, etc. regardless of the type of creativity and activity.
I read your comments and your profile, everything seems to be correct, but I am surprised by the huge number of grammatical errors. Don't have an editor function?
I also thought about this, that if there are threads, then of course everything is possible, and so it even makes no sense because of this repair to run to look for threads by color.
well, only in a special case, if the thing is very favorite and worn to the holes
I almost imperceptibly restored two thin knitted men's sweaters (mean moth). To my surprise (and joy) in the Leonardo store I discovered a fine wool darning of all kinds of colors. In one case, the color matched perfectly; in the other, two colors had to be combined. True, there were no needles (there are other ways), the canvas is very thin. Without these threads, things could only be thrown away. The threads are thin, so you can twist any thickness. Maybe someone will find my experience useful.
In order for the vile moth not to eat your things anymore, you must always adhere to one rule.
ALL things made of any fabric from any thread and fur, including, should be removed for storage only after washing and dry cleaning, regardless of even if they have put it on once and it is clean. you think so, the mole thinks differently. if there is at least some kind of dirt on things that you cannot see, the moth will devour it along with your things. Personally, I don’t and never have a moth.
Thanks for the advice. I have a mole, unfortunately. And the son tore his sweater the second time.
And the mole even gnaws plastic bags.
A STRANGE moth lives in my house.
It is difficult to get rid of this moth, you need to throw away all the supplies without sparing, rinse everything (cabinets, shelves) and subsequent storage only in glass with lids. My neighbor had this - just horror.
The modern moth will go even into glass with lids. Just don't ask me how. The refrigerator will soon crack, because this is where I store cereals, drying, etc. By the way, once upon a time there was also a material one, only a very strange one - she ate a synthetic kerchief, but did not touch the fur hat. Although, maybe it was she who committed suicide, because we did not see her again.
We have a private house and we store beans in a bottle outside all winter.
more precisely FRUIT MOLE. It is somewhat Larger. And the Bags are gnawed by the Larvae of the Woolly Beetle, which eats the skin not only wool
I was mistaken, not darning, but woolen floss, thread length 20 meters, very convenient.
Shura, please explain how you retrieved the thin sweaters. Very necessary. Or make MK for restoration, pliz.
What are you, Olga, what MK! The usual method of “artistic darning”, when a knitted fabric is imitated with a needle and thread on a mesh previously marked with thin threads. That is, first, the hole is closed with a sparse (according to the number of missed loops) “darning”, and along it there is, as it were, embroidery in accordance with the pattern of the knitted fabric. But I also read about other methods. For example, that you can close small holes with a “fluff” collected from the knitted product itself, gluing this fluff on the glue placed underneath.
I am not at all a master, I apologize in advance if I use terms incorrectly. I climbed into this useful master class with my comments to talk about my successful experience in finding threads suitable for repairing a finished product.
I also want to master the darning method. I will never reach him. This one was shown to us at the courses. And I only saw the darning in magazines. It's good when there are several options for solving a problem!
I can darn with a simple weave, but I have not tried imitation knitting yet. Now, apparently it will be necessary.
Thanks for the explanation. And thanks for the idea with the wool floss.
By the way, nowadays a small roll of thread is attached to factory knitwear, from which this thing is made.
And before talking about the benefits and uselessness, make your MK, start looking at everything in a completely different way.
Thank you very much for MK! I myself am not a knitter, but sometimes I really need to fix my favorite thing, especially when there are threads, I could not think of how to connect these two rows))
And it seems to me very useful. The main thing is shown how to do it! A defect can be made with a pattern from other threads, or even something like pigtails to compose .. Who knits needles will be able to pick up. The main thing is that the author is especially gifted, like me, he showed how this is done.
Why not particularly gifted? I was also taught this once.
Indeed - the main idea, and then fantasy will fly.
And here I dare not agree with such a harsh judgment
Natasha, thank you! Your notes in the notebook left a special impression!)) I have long wanted to implement it in my work, but I don't give a damn about everything))). We must follow the example!)
Yes, I always keep records. Sometimes it is necessary to compare the construction of a pattern or to spy on something else.
Well, after all, you can knit a contrasting square, and more than one, especially if the thing is your favorite. After all, it's no secret that only the most beloved things wear out faster and cling to whatever they hit. And for children's substances - just that.
My son managed to make a hole for the second time on a new sweater. Asking where he hooked - he does not remember.
True, the knitted seam cost, only in one row of loops 10 broke.
Thanks! My husband's vest was just eaten up with moths - I'll try.
Even if with a different thread, everything will work out without a hole.
Great, otherwise the whole piece would have to be bandaged.
I also think - it's still not a hole, but you can pick up yarn and decorate it beautifully. I recommend trying it for the first time on a sample.
It turned out beautifully in the end. I wouldn't bother with holey socks, but if a thing made of expensive yarn is damaged, the method will come in handy for resuscitation. Thanks!
Thank you. It turned out beautifully. The information is necessary and useful.
You did it very well
Wow "practically useless". this is the reaction.
Very useful!
Thanks for MK, I revived my favorite socks for my beloved friend, but what if there are no side ponytails? I sewed on, but I didn't really like it.
There is also a slightly different way - with warp threads and embroidery about it.
Yes, this is how I darn thick socks for my daughter, I once found this method in "Rabotnitsa" - it is very convenient and, if you wish, you can darn the front surface imperceptibly.
Thanks for MK! I think it is very necessary! Of course, for those who knit! And from this it does not become less necessary! In general, I am in favor of repairs, if the thing is good and it's a pity to lose it due to some small defect that can be eliminated!
Of course I agree with you! This I cut so much for clarity, but only a few rows can be torn.
A real skilful housewife will not go to a clothing repair shop for every little thing. Are your trousers or skirt too long, your favorite blouse has sat down, your jeans are frayed, your coat is torn on a nail? No problem. We can handle it perfectly ourselves!
✓ Buttons with four holes on men's clothes are usually sewn so that the stitches are parallel, and on women's clothes - crosswise.
✓ If you are sewing buttons on outerwear, it is better to put a small button on the inside and sew through it - then the fabric at this place will not tear for a long time.
✓ To hem the trousers, you need to open the existing seam and smooth it well with an iron through a damp cloth. Then measure and mark the required hem length on both sides of the leg and draw a line on the wrong side with chalk or a piece of dry soap. 3-4 cm should be set aside from this line, and the rest should be cut off, then folded along the fold line and ironed from the front side through a damp cloth. Next, overlock the cut or overcast by hand and sew the hem, making sure that the line on both legs is at the same distance from the edge.
✓ If a small hole appears on the clothing, it can be repaired using the stitching method without using additional fabric. However, it can only be used if the hole diameter is 3-5 mm. So, the edges should be carefully trimmed so that an elongated hole is obtained, the edges of which are brought together to one point (its shape should resemble an eye, in which the original hole would be in the place of the pupil). The long sides of the new hole should be in the lobular or transverse tissue line, but not in any other direction. Then this "eye" needs to be closed, that is, bring the two long sides of the hole into one line, and then carefully sew the edges with threads to match the fabric with cross stitches.
✓ If the hole is larger than indicated in the previous case, you can apply the plastering method using additional fabric. So, the hole must be carefully cut strictly along the longitudinal and transverse threads so that it takes the correct rectangular shape. Then, from a piece of the same fabric (usually a small piece is always attached to the finished product especially for such cases), cut a slightly smaller rectangle, which should freely enter the hole so that their edges are closely adjacent to each other. In this case, you need to very carefully make sure that the directions of the threads, pattern, pile coincide - in a word, everything that will make the repair the least noticeable. Next, you need to put the flap into the hole, sweep it from the inside with oblique stitches, and then sew from the front side with threads to match with cross-stitches.
✓ It is not always possible to fix holes in clothes with a gizmo. Then you have to think about the patch. Taken creatively, a patch can embellish clothing and update it. To prevent the patch from looking out of place, you can make several of the same appliqués - close the hole with one, and scatter the rest over your clothes. Here is one of the options for such applications - butterflies. By the same principle, you can make any other motive (flowers, sun, etc.). It is necessary to draw the outlines of butterflies on cardboard, cut out a template. Transfer the butterflies to thick cotton fabric, outlining the template with a pencil.Then decorate them to your taste - embroider with multi-colored threads, embroider with beads, sequins, etc. When the appliques are ready, cut them along the contour and iron them in the appropriate places using a double-sided adhesive non-woven fabric.
✓ If you are tired of old jeans, but they are still quite well preserved, you can sew a stylish skirt out of them. To do this, you need to open the inner seams of the legs and the bottom of the crotch seam (to the level of the zipper in the front and back to the same height). Trim the legs to the desired length. Sew the former (ripped) seams neatly by bending them over or overlocking them. Then move the legs together by placing the corners of the crotch seam on top of each other. Sew on top corner. Do this from the front and back. You will have a skirt with a slight wrap and triangular slits.
✓ Has your daughter become short or just tired of her jeans, but wants fashionable breeches? Making them is not at all difficult. However, if you really update a thing, then update it, and not just cut it off. If you know a little crochet, knit simple lace from cotton threads to match the cut jeans and sew along the bottom of the cut legs, along the yoke and to the edges of the pockets. The thing will look new. If you don't know how to knit, just buy ready-made lace or braid.
✓ If your favorite knitted blouse (or pullover) has sat down so that it has become short, and the sleeves have also acquired an incomprehensible length (and not long, and not three-quarters), you can easily and imaginatively correct the situation. Tie up the sleeves with lace to create stylish flared cuffs (for example, crocheting the well-known Pineapple pattern). Also, tie the bottom of the blouse, and also tie the collar and sew it to the neck.
It will be about minor repairs and at the same time decorating summer clothes with your own hands. It can be very annoying if a small hole or an unremovable stain is suddenly found on a favorite thing.
restore the product, hide an obvious defect (close the hole, make it invisible - mask it), but decorate the thing, give it uniqueness and originality.
Of course, you can wear the thing a little more, hoping that the flaw is invisible, that it was "so intended", it looks stylish, as if it were ripped jeans, but ...
In principle, if the hole is very tiny, then laborious work can be dispensed with - it can be repaired in a different way. Attach an adhesive non-woven fabric on the back (such a thin spider web), iron it through gauze - that's it - the fabric in this place will no longer creep. This non-woven fabric is sold in the fabric departments.
There is another way, which is especially good for children's clothing. Why not for adults, you ask? On sale now there are many small-sized decorative stickers for fabrics and ready-made machine appliques with embroidery, as a rule, these are all pictures for babies. Some are glued with an iron, others can be simply sewn on. Perhaps this makes sense, since children often fall, tear and stain their clothes. It makes no sense to buy new things - they will soon grow anyway. Before you have time to look back - that's it, you need to buy one size larger.
But it is much more interesting to embroider something unusual, to make an applique with embroidery - then a piece of clothing from the usual will become exclusive. This will be discussed.
This is what the gray shirt looked like before the renovation. See the flaw in the upper left corner just above the pocket? In fact, there are as many as two holes, one is larger, and the other, located just below and to the left, is very small. Too noticeable - need to make repairs!
It was not possible to completely close the hole in the clothes with embroidery, the hoop is not at home, so it was decided to make the insect's body by means of an applique on an adhesive non-woven linen.
I was inspired by two pictures, at first I really liked the volumetric spider, as in the picture below.I thought that black shouldn't make it (black was needed), it would be too dense, bulging on the soft fabric of the shirt, and if you make it black, it might turn out to be too realistic in the process - everyone will try to brush it off, mistaking it for the present.
These spiders are too naturalistic, and look like termites in color, I'd better leave them alone!
But in the end it was decided to take such a spider stencil as a model for repairing clothes with embroidery. Quite a good example of an arachnid insect. Allows you to combine the embroidery (legs) with the applique (body).
Legs - embroidery - are specially embroidered crookedly so that they look so slightly shaggy and trembling on clothes. The spider's body is an adhesive fabric applique - set on an adhesive non-woven fabric, ironed, and then, just in case, embroidered along the edge so that it surely does not bloom.
Here it is, a terrible representative of the arachnids! At first I wanted to portray a cute little one, but it turned out almost a tarantula! I think that the small repair of clothes with my own hands was a success, the clothes - a summer linen shirt - can still be worn. Until new holes appear ... Although then new spiders may appear! 🙂
Probably, for myself, I would have preferred someone else, but this is a men's shirt, it was a spider that was ordered to repair these clothes by closing a hole, and we know that "der Kunde ist König!" (German proverb, which translates approximately like this: "The client is always the king").
The drawing can be chosen depending on the gender, age and preferences of the owner of the "hole" - a small animal - a turtle, a dog, a hedgehog, a bird, an insect, a technique - a typewriter, an airplane, a sun, an apple with a caterpillar, a stylized flower, a candy wrapped in a wrapper, a house with window - almost anything!
Of course, it is much easier to find or come up with a drawing for a child than for an adult; he can simply put symmetrical patches on a hole in his pants. For a woman or a man, it is already worthwhile to think, to strain your imagination. But, of course, a lot depends on the thing itself and the location of the hole. Sometimes, in order to "close up" a small hole in an inconvenient place (for example, in the lower part of the jacket - the moth pecked at it), you will have to make a long appliqué, start a branch with leaves from the bottom to the very top.
A mischief of cute simple ideas for decorating children's clothes for a girl - embroidery with the addition of appliques on a dress, a sundress or a T-shirt. It takes a sewing machine (straight stitch), a couple of scraps of thin cotton fabric with a small pattern, a little time and the desire to transform a simple thing into an exclusive one.
Several decorative pillows on a sofa with cute dogs in the form of embroidery, fabric applique, or both. Thus, you can not only make a new one, but also decorate or restore the old cushion cover, eliminate minor flaws.
Clothing repair , then in some cases repair with the help of an adhesive spider web will help you.
This method can be used when you or someone close to you, inadvertently touches, say, with the sleeve of your jacket, on a protruding nail and the fabric is, as it were, cut.
There are no holes as such on the clothes, but there is a cut that spoils the appearance of the product. What is the best way to carry out repairs so that - the product is restored and the appearance is not damaged.
The gluey spider web is what will help you in this case!
You don't need to go far for an example. The sleeve on my husband's jacket is in need of a similar repair.
Video (click to play).
To repair such cuts with the glue method, I usually do this (see photo):
I am preparing a rectangular piece of fabric suitable for repairing the product, slightly larger than the size of the incision. So that the patch overlaps the incision. (1,2);
I carefully cut off all protruding threads, give the cut a "decent" look - so that nothing sticks out, the cuts are smooth, beautiful;
I insert the prepared patch under the incision, as shown in photo 3, 4;
The incision for further processing is ready! (5);
Then I cut off a piece of glue web (either tape or wide, which is) slightly longer than the cut (6);
Gently insert the cobweb inside the incision. It turns out such a kind of layered cake: a piece of fabric - a glue spider web - the fabric of the product;
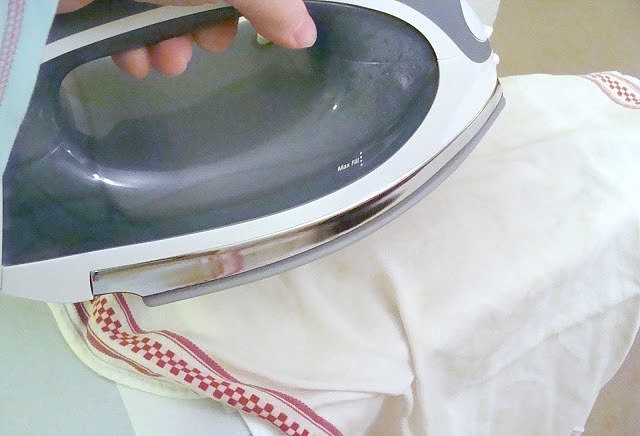
Then, combining the sections, I carefully cover it with an iron (if the properties of the fabric require it) and slowly iron it, stagnating the incision with an iron (8);
I remove the iron - all the cut is not visible, the jacket is saved (9, 10)
IMPORTANT: the difficulty is not to move the edges of the cut, but to do it very carefully. To do this, you need to carefully move the iron, not carrying it over the fabric, but raising and lowering the sole.
As you can see - simple, fast and neat! Try it.
Even though this post is bigger than usual, we believe it will come in handy for all denim lovers looking to extend the life of their jeans without spending extra money on a new pair.
Many people ask me how I managed to wear one pair of jeans for so long. This was my secret until this time.
Each of us, sooner or later, is faced with this; the mere thought of this catches up fear even on the most unassuming in clothes. You probably already realized that we are talking about the wear of your favorite pair of jeans. However, by following the simple rules of this guide, you can extend the life of your clothes and keep them looking good for years to come.
After reading this guide, you will be able to "reanimate" jeans with your own hands. Prepare for the hardest part of this process to be threading the sewing machine's needle. After you succeed, grab the unwanted scraps of fabric and practice on them before hone your newfound knowledge on your favorite clothes.
Before starting work, you need to familiarize yourself with the basics of fabric production and its structure.
Probably most of us already know several options for repairing denim clothes, such as darning, patching or patching, gluing using special fabric glue, and so on. However, let's remember an old Chinese proverb that says: Give a man a fish and you will saturate him for the whole day. Teach a man to fish and you will feed him for life.
So why buy fish when you can learn how to fish?
Learning how to repair jeans with my own hands saved me tons of time and money.
One of the most common complaints about raw denim is that the garment tears quickly at the seam. This is analogous to a hole in a car's tire: You can keep driving for a while until the tire is completely deflated.
The above comparison is undoubtedly only approximate, but, in general, the hole in denim looks like a hole in the tire of an iron horse. You can walk around in torn jeans, but eventually they will rip completely and have to be thrown away.
The optimal solution for both cases looks like this: if you fix the problem right away, there will be much less problems in the future.
You will argue that jeans should last a long time after you decide to shell out the Nth amount of money for them. However, it should be borne in mind that the seams are the most vulnerable point of the product. So it's no surprise that wearing jeans 7 days a week all year round will wear them out faster than you expect. It should be noted that there is a conditional period of 4 weeks before the seam opens due to a small hole that has just appeared on the jeans.
Based on my observation, warp yarns tend to break faster than weft yarns.My guess is that the warp yarn is more vulnerable to lifting and lowering movements when walking than the weft yarn. In other words, the warp yarn has a higher load. Before we start any further discussion, let's take a look at the 3 stages of holes in clothing.
Step 1: The warp yarns are starting to fray or the warp yarns are torn.
Step 2: The warp yarns have finally broken in one place, and the weft threads are starting to fray, or several weft threads have broken.
Stage 3: The warp and weft threads are completely broken.
The easiest way to extend the life of your favorite jeans is to patch up the rubbing fabric before a hole forms.
The basic skills and abilities of sewing I received from the lessons of labor in school in the 8th and 9th grades, where we were taught the basics of cooking and sewing. After reading this manual, you will know exactly as much as I do. With a little practice, you're an expert at home repairing clothes.
My little problem is my sewing machine, which is almost 28 years old. Although, you should not approach the choice of this item too seriously, because the main functions that a sewing machine should perform is to sew in the forward and reverse directions, and nothing more. In case you're wondering, my Montgomery Ward machine has an interesting history of its own.
I will be using Naked & Family X Blue in Green jeans as a test piece. I've been wearing them for the twenty-second month in a row, so they need to be tidied up a bit before they cross the 2-year line. So, get ready with me to breathe life into your long-suffering jeans.
1. Periodically check your jeans for holes (especially seams).
2. Set up the sewing machine.
3. Clean the cleaned areas of the main fabric.
4. Stretch the fabric around the hole to remove wrinkles and unevenness.
5. Sew a zigzag stitch across the frayed area of the fabric.
6. Continue sewing in a zigzag pattern until you have sewn the entire surface of the hole.
7. Enjoy your updated jeans before new holes appear.
The figure shows a hole. Note that the main yarn to break first. If it is not sewn up in time, then the weft yarn will also tear, as a result of which a hole is formed.
Our goal is to "revive" the base yarn.
This can be achieved by making zigzag seams all over the worn area. Move from the top edge to the bottom, from one side to the other, until you have sewn the entire area.
Rice. 2. Make zigzag seams from top to bottom until you reach the end of the hole.
Fig. 3. Sew in a zigzag pattern from one side of the hole to the other.
Fig. 4. Repeat the steps until you have completely sewn up the entire surface of the hole.
ATTENTION! Do not overdo it with the number of seams, otherwise the sewn area will be conspicuous, and it will also be more rough to the touch.
PROCESS.
Fig. 1. Colored thread for Gutermann jeans. 70% polyester, 30% cotton.
Fig. 2. If you have reached this stage, you are halfway there!
Fig. 3. Remember to cut any loose threads around the hole for easy sewing.
Fig. 4. I had to pull the presser foot out of the garment as the denim is too tight around the waistband.
Fig. 5. Make sure the pockets of the jeans are at a safe distance from the site of the intended sewing.
Fig. 6. IMPORTANT - smooth out the hole and straighten the weft fabric around the hole before sewing. Be careful and careful to sew them correctly.
Fig. 7. Move the jeans smoothly and without jerking as you sew up the hole!
Fig. 8. The pocket looks wrinkled and ripped off the leg. But this is not the case.
Fig. 11. Sew up the hole under the back left pocket. It is not easy to deal with multiple layers of jeans. Be careful not to sew back pockets to the rest of the pants.Remember to do zigzag seams.
Fig. 12. Sew up the hole in the left knee. We make zigzag seams, moving from bottom to top. I made 5 of these stitches all over the hole.
Fig. 13. Miraculous disappearance of the hole in the left knee.
Fig. 14. DIY clothing repair.
PHOTOS OF JEANS BEFORE AND AFTER OWN HAND REPAIR.
Fig. 1. The front of the jeans. The hole is located in the lower right corner of the left pocket.
Fig. 2. The hole is 1.5 cm (0.59 inches) long. Holes of this size are sutured quickly and easily.
Fig. 3. The hole is located under the back left pocket.
Fig. 4. Sewing up this hole was more difficult due to the location of the pocket, but I succeeded.
Fig. 5. There are 2 holes in the left knee. The most difficult thing was to position the jeans in such a way that the needle of the sewing machine reached the holes. This fabric turned out to be quite dense.
Fig. 6. Do not allow the holes to grow larger. I should have sewn them up 2 weeks ago, but for the sake of this article, I left them as they are. So the size of the holes is 4.5 cm (1.77 inches).
Fig. 7. Small holes are no problem.
The best way to determine where the hole is starting to form is to look at the wrong side of the jeans. The fluffy bluish areas of the fabric are the base yarn that has started to fray. But don't worry: these frayed areas are just a signal that your jeans are slowly starting to wear out.
Fig. 1. The front of the jeans from the inside out. Pay attention to the lining of the pocket in the picture on the right, it plays an important role in the formation of a hole in this place.
Fig. 2. In addition to sewing up the main holes, I decided to patch up the seams that began to diverge (not shown in the picture). I did this using the zigzag sewing we already know.
Fig. 3. Sewn-through hole under the left pocket.
Fig. 4. And this hole would be worth a couple more stitches.
No article would be complete without a list of the advantages and disadvantages of the work done. But do not be alarmed by the presence of disadvantages, because in fact there are much more advantages!
- Your jeans have a "second wind".
- You save time and money.
- Only you are responsible for your mistakes if something went wrong.
- We'll have to spend a little time in order to learn how to sew.
- If you overdo it with the number of seams, it will be conspicuous.
Tell us your ways to repair denim!
Published by Josh, Oct 24, 2012, Denim Care Magazine: Source.

