In detail: do-it-yourself repair of a KAMAZ energy storage device from a real master for the site my.housecope.com.
The content of the article “Do-it-yourself repair of KamAZ energy storage devices” will start with theory, we will find out what energy storage devices are, what they are made of and how they can be repaired with our own hands. At the end, you will find a practical video on repairing energy storage devices.
Several types of energy storage devices are used on a KAMAZ vehicle. They all have three parts. 1. The lower part is attached to the brake caliper bracket with M16 studs. 2. The middle part is made of aluminum alloy and is connected to the lower part by a two-bolt clamp. 3. The upper part is a steel glass, connected to the middle part by 8 M8 bolts.
Before repairing the KamAZ energy storage device, it is necessary to clean, wash and dry. Before disconnecting the lower part from the middle, it is necessary to supply air to the parking brake chamber with a pressure of at least 5 atm. In order to drown the working rod and prevent the spring from firing, then remove the clamp and remove the rubber diaphragm. Then turn off the air supply and unscrew the plug of the working rod with a wrench No. 36. Re-supply air to the parking brake chamber. Inside the stem there is a restraining bolt with a support bearing, which is secured with a retaining ring.
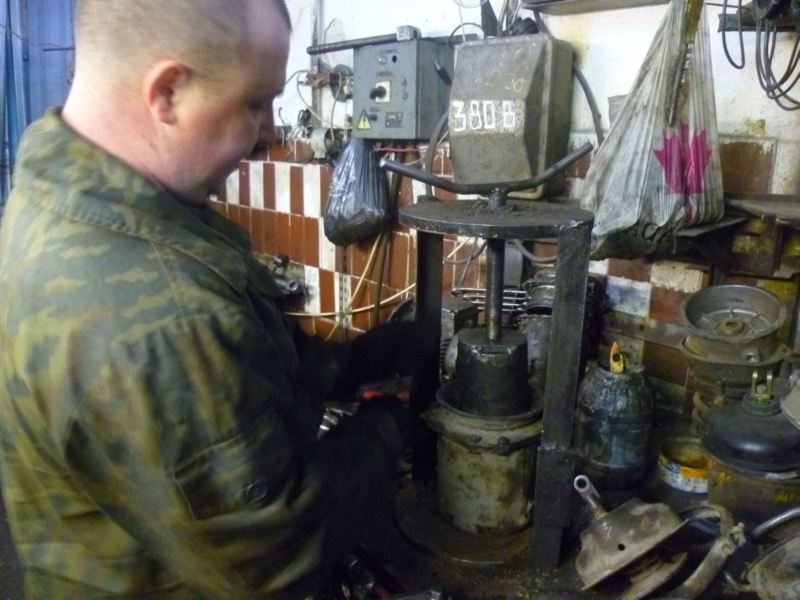
We continue to reanimate KAMAZ further and, having removed the retaining ring with the help of an awl, we release the stem for further disassembly. This is followed by an operation for which either a hydraulic press or a special clamp should be used. Having tightened the stem with a press or a clamp, thereby preventing the parking brake spring from firing in order to avoid injury, unscrew the bolts securing the upper glass from the middle part.
Then, relaxing the clamp (press), release the spring. If, when air is supplied to the parking brake chamber, it is not possible to sink the rod, you have to sacrifice a glass by drilling a couple of holes at a distance of 60 mm from the middle part. Using the same clamp or press, sink the rod to its full depth and insert stop pins into the drilled holes (bolts of at least 8 mm can be used), preventing the piston from returning independently. By removing the retaining ring inside the stem, you can get rid of the stop fingers, also using a press or a clamp. Further, according to the previous scenario, we remove the order book.
Video (click to play).
After cleaning, troubleshooting parts, replacing necessary parts and a repair kit, the assembly is carried out in the reverse order with the implementation of safety measures. After assembly, the operation of the finished energy storage device is checked using a compressor.
For a better assimilation of information, watch a video on repairing energy storage devices with your own hands:
VIDEO You can ask your questions on our Kamaz-forum, where competent and experienced drivers will answer you.
The spring energy accumulator (Fig. 280), after removing the hose and disconnecting from the pneumatic chamber, should be disassembled in the following sequence:
unscrew the pusher 11 (Fig: 281, a) and remove the O-ring 12 from it;
unscrewing screw 19 from cylinder 15 by a few turns (by about 5 mm), unscrew the nuts 9 of the bolts securing the flange 10 to the cylinder 15 and separate them;
remove O-rings 6, 7 and 8 from the flange;
screw the screw 19 until it stops and install the cylinder in the device (Fig. 281, b) so that the stop 21 of the device covers the screw head, and, carefully rotating the handle 22 of the device, compress the spring 5, while the depth of the piston 14 deepening into the cylinder 15 should not exceed 60 mm;
having sunk the package of parts 2, 16 and 18 (Fig. 281, c) outside the rubber ring 1, remove the retaining ring 17 from the screw 19 with a special tool;
release the piston 14 until the spring 5 is completely relaxed by carefully rotating the handle of the device in the opposite direction;
removing the cylinder, piston and spring from the device, remove the remaining parts 2, 16 and 18 in it (Fig. 281, d);
remove guide ring 3 and seal 4 from the piston;
remove the spring 5;
remove the rubber ring 1 from the screw, unscrew the screw 19 from the cylinder and remove the sealing washer 20.
Before assembly, all rubbing parts should be lubricated with a thin layer of CIATIM-221 grease. The assembly should be done in the following sequence:
Disassembly and assembly of the energy storage device ZIL KAMAZ. Repair of energy storage at home
VIDEO VIDEO We sort out the energy storage in the field
VIDEO power accumulator kamaz (little secret to repair)
VIDEO Repair of energy storage type 20 s / o
VIDEO We disassemble the energy storage from Kamaz
VIDEO A little about energy storage
VIDEO Energy storage and brake chambers
VIDEO disassembly of the vapko man l2000 energy storage
VIDEO Repair of EURO energy storage
VIDEO The KamAZ car has a double-circuit pneumatic braking system, which ensures the safety of the vehicle in all driving modes. During braking (by pressing the brake pedal), compressed air is immediately supplied to the brakes of all wheels. The parking brake only locks the wheels of the center and rear axles. The main element of the drive of such a brake is the energy storage. KamAZ has 4 such devices - 1 for each wheel of the rear bogie.
The spring accumulator is mounted on the brake chamber cover and serves to store the energy of the compressed spring.
The main parts of the device are:
cylinder;
piston;
power spring;
pusher;
thrust bearing;
release screw with roller bearing;
bypass tube;
seals.
The battery is bolted to the camera, which provides a strong connection and eliminates backlash during operation. The seal between the cylinder and the brake chamber is ensured by the installation of a rubber sealing ring. In the upper part of the body, a nut for the screw of the brake release system is welded. At the bottom of the cylinder there is a threaded nipple through which the pneumatic line is connected.
A tubular pusher is welded to the metal piston with a rubber O-ring. The power steel spring is located in the piston groove and abuts against the top of the cylinder. The pusher has a thrust bearing, which transmits the force to the brake chamber rod through the diaphragm.
The screw serves for manual release of the brake in the absence of compressed air in the system due to a compressor breakdown or a defect in the receiver. A roller bearing and 2 thrust washers are installed in the lower part of the screw.
The cavity located above the piston is communicated with the atmosphere via a bypass tube through the brake chamber. The chamber under the piston is supplied with air from the parking brake control valve. All power accumulators are simultaneously involved in the analysis of air.
In the parking lot, the car is held by the brake system of the wheels of the rear bogie, which is activated by spring accumulators. The crane with the parking brake control handle is located to the right of the driver's seat. The principle of operation of the power accumulator is simple and is based on the effect of the released energy of the power springs on the drive elements of the brake system.
When the parking brake is applied, compressed air from the lower cavity of the accumulator cylinder is released into the atmosphere. The spring, straightening, moves the piston down. Together with it, the pusher moves, which transfers the force to the diaphragm and the rod of the brake chamber. The latter, through the lever, turns the shaft, the expander fists of which press the brake pads against the drum, thereby stopping the wheels of the rear truck bogie.
If the receiver or the air brake circuit is damaged, the air from the line is released to the atmosphere. The released spring activates the parking brake and locks the wheels. Further movement of the truck is possible after releasing (unlocking) the wheels.
In order to release the truck from the parking brake, it is necessary to remove the control handle from the latch and move it to the lower position. The control compressed air through the pneumatic line through the open valve enters the accelerating valve, which initiates the supply of the working medium from the receiver through the bypass valve to the lower cavity of the energy storage cylinder. The piston moves upward and compresses the spring. The brake rods move to their original position and release the pads. The truck is ready to move.
VIDEO In the event of a lack of air in the system or a breakdown of the engine (compressor) and the need to tow the vehicle, you must manually release the energy storage. To do this, use a socket wrench to unscrew the screws on the cylinders of all batteries. Due to the presence of a thrust bearing, the force will be transmitted to the piston, which, while moving, will compress the power spring. Released from the load, the return spring will move the diaphragm and stem with platter to the top position. The brake pad actuators will return to their original condition and unlock the wheels.
Often on flights, situations arise when it is necessary to repair the KamAZ energy storage device with your own hands in the field. The design of the device allows this to be done. However, it will be much easier to replace the defective energy storage unit with a serviceable one, and to do the repairs in the garage.
To repair a faulty battery, it must be dismantled from its regular place. To do this, you need to remove the air hoses and unscrew the 2 nuts securing the device to the base. Dismantling is carried out using a "balloon" key. In order to disassemble the assembly for fastening the brake chamber rod and the brake shoe drive, it is necessary to unpin and knock out the tapered wedge from the seat.
Before repairing the device, it is necessary to dismantle the bypass line between the cylinder and the brake chamber. Disassembly begins by removing the bottom of the camera. It is attached to the upper body with a clamp. For safe work, the energy storage is installed with the cylinder down and fixed in a locksmith's vice. After dismantling the clamp, by tapping on the camera body, they release it from the seat.
When performing these works, care must be taken, since under the action of the return spring, the cover may "shoot".
The weak point of the brake chamber is the membrane. The defective element must be replaced.
Due to the low corrosion resistance of the cylinder body material, cavities and ulcers are formed on the inner surface. This is facilitated by moisture and dirt entering the glass of the upper part of the energy storage. All this leads to a violation of the tightness of the cavities and, as a consequence, to the failure of the entire device. To eliminate the defect, it is necessary to replace the cylinder glass or try to grind the inner surface. And this leads to a complete disassembly of the cylinder.
To detach the upper part of the battery from the camera cover, it is necessary to unscrew the M8 screws located around the perimeter of the case. The remaining 2 bolts will keep the cover from firing the spring. Use a clamp or press to compress the spring and unscrew the remaining fasteners. Craftsmen who do such repair professionally prefer a lathe.
The cylinder is clamped into the chuck, and the spring is squeezed using the headstock. Having unscrewed the remaining bolts with the rod fully pressed, they begin to slowly remove the latter. All sealing elements are replaced with new ones from the repair kit. The assembly of the cylinder is carried out in the reverse order.The repaired device is checked on the bench by supplying compressed air. The installation of the energy storage device in its regular place is carried out after obtaining positive test results.
The price of the product depends on the modification, manufacturer and region of purchase. The power equipment restored at the enterprise at the KAMAZ type 20/20 in the central regions of Russia can be purchased for 1500-1800 rubles. A new similar model costs from 4 to 6 thousand rubles. The price of more powerful devices such as 30/30 ranges from 10 to 13.5 thousand rubles. Considering that the cost of the repair kit is about 300 rubles, then it makes sense to restore the failed devices.
Disassembly and assembly of the energy storage device ZIL KAMAZ. Repair of energy storage at home
VIDEO We sort out the energy storage in the field
VIDEO VIDEO Repair of energy storage type 20 s / o
VIDEO power accumulator kamaz (little secret to repair)
VIDEO A little about energy storage
VIDEO Energy storage and brake chambers
VIDEO VIDEO energy accumulator zil-kamaz
VIDEO HOW TO DISASSEMBLE THE ENERGY STORAGE TANK.
VIDEO
RF, Republic of Tatarstan,
Naberezhnye Chelny
8(8552)78-02-81
On KAMAZ vehicles you can install energy storage
The lower part is attached to the brake caliper bracket with M16 studs.
The middle part is made of aluminum alloy and is connected to the lower part with a two-bolt clamp.
The upper part is a steel glass, attaches to the middle part with 8 M8 bolts.
Before producing repair of the power accumulator of the KAMAZ vehicle , it needs to be cleaned, washed and dried. Before disconnecting the lower part from the middle, it is necessary to supply air to the parking brake chamber with a pressure of at least 5 atm. In order to drown the working rod and prevent the spring from firing, then remove the clamp and remove the rubber diaphragm. Then turn off the air supply and unscrew the plug of the working rod with a wrench No. 36. Re-supply air to the parking brake chamber. Inside the stem there is a restraining bolt with a support bearing, which is secured with a retaining ring.
We continue to reanimate KAMAZ further and, having removed the retaining ring with the help of an awl, we release the stem for further disassembly. This is followed by an operation for which either a hydraulic press or a special clamp should be used. Having tightened the stem with a press or a clamp, thereby preventing the parking brake spring from firing in order to avoid injury, unscrew the bolts securing the upper glass from the middle part.
Then, relaxing the clamp (press), release the spring. If, when air is supplied to the parking brake chamber, it is not possible to sink the rod, you have to sacrifice a glass by drilling a couple of holes at a distance of 60 mm from the middle part. Using the same clamp or press, sink the rod to its full depth and insert stop pins into the drilled holes (bolts of at least 8 mm can be used), preventing the piston from returning independently. By removing the retaining ring inside the stem, you can get rid of the stop fingers, also using a press or a clamp. Further, according to the previous scenario, we remove the order book.
After cleaning, troubleshooting parts, replacing necessary parts and a repair kit, the assembly is carried out in the reverse order with the implementation of safety measures. After assembly, the operation of the finished energy storage device is checked using a compressor.
Disassembly and assembly of the energy storage device ZIL KAMAZ. Repair of energy storage at home
VIDEO We sort out the energy storage in the field
VIDEO VIDEO Repair of energy storage type 20 s / o
VIDEO power accumulator kamaz (little secret to repair)
VIDEO A little about energy storage
VIDEO energy accumulator zil-kamaz
VIDEO We disassemble the energy storage from Kamaz
VIDEO VIDEO Energy storage and brake chambers
VIDEO Disassembly and assembly of the energy storage device ZIL KAMAZ. Repair of energy storage at home
VIDEO VIDEO Brake chamber with energy storage. Device.REPAIR.
VIDEO We sort out the energy storage in the field
VIDEO power accumulator kamaz (little secret to repair)
VIDEO A little about energy storage
VIDEO Energy storage and brake chambers
VIDEO VIDEO DIY energy storage repair
VIDEO Brake chamber repair Diaphragm replacement GAZ ZIL PAZ KAMAZ MAZ
VIDEO Disassembly and assembly of the energy storage device ZIL KAMAZ. Repair of energy storage at home
VIDEO VIDEO We sort out the energy storage in the field
VIDEO power accumulator kamaz (little secret to repair)
VIDEO Repair of energy storage type 20 s / o
VIDEO Energy storage and brake chambers
VIDEO A little about energy storage
VIDEO We disassemble the energy storage from Kamaz
VIDEO disassembly of the vapko man l2000 energy storage
VIDEO Brake chamber repair Diaphragm replacement GAZ ZIL PAZ KAMAZ MAZ
VIDEO Disassembly and assembly of the energy storage device ZIL KAMAZ. Repair of energy storage at home
VIDEO VIDEO Brake chamber with energy storage. Device. REPAIR.
VIDEO We sort out the energy storage in the field
VIDEO power accumulator kamaz (little secret to repair)
VIDEO A little about energy storage
VIDEO Energy storage and brake chambers
VIDEO VIDEO DIY energy storage repair
VIDEO Brake chamber repair Diaphragm replacement GAZ ZIL PAZ KAMAZ MAZ
VIDEO ENERGY HANDLING KAMAZ
VIDEO VIDEO disassembly of the vapko man l2000 energy storage
VIDEO We disassemble the energy storage from Kamaz
VIDEO energy accumulator zil-kamaz
VIDEO power accumulator kamaz (little secret to repair)
VIDEO Repair of brake chambers or energy accumulators)))
VIDEO Troubleshooting of power supply parts
VIDEO
DIY energy storage repair
VIDEO Brake chamber with energy storage. Device. REPAIR.
VIDEO Disassembly and assembly of the energy storage device ZIL KAMAZ. Repair of energy storage at home
VIDEO VIDEO We sort out the energy storage in the field
VIDEO power accumulator kamaz (little secret to repair)
VIDEO Repair of energy storage type 20 s / o
VIDEO Repair of EURO energy storage
VIDEO We disassemble the energy storage from Kamaz
VIDEO Brake chamber repair Diaphragm replacement GAZ ZIL PAZ KAMAZ MAZ
VIDEO energy accumulator zil-kamaz
VIDEO Energy storage and brake chambers
VIDEO Disassembly and assembly of the energy storage device ZIL KAMAZ. Repair of energy storage at home
VIDEO VIDEO We sort out the energy storage in the field
VIDEO power accumulator kamaz (little secret to repair)
VIDEO Energy storage and brake chambers
VIDEO We disassemble the energy storage from Kamaz
VIDEO Repair of energy storage type 20 s / o
VIDEO Brake chamber repair Diaphragm replacement GAZ ZIL PAZ KAMAZ MAZ
VIDEO Repair of brake chambers or energy accumulators)))
VIDEO disassembly of the vapko man l2000 energy storage
VIDEO Disassembly and assembly of the energy storage device ZIL KAMAZ. Repair of energy storage at home
VIDEO VIDEO We sort out the energy storage in the field
VIDEO A little about energy storage
VIDEO Repair of energy storage type 20 s / o
VIDEO Energy storage and brake chambers
VIDEO power accumulator kamaz (little secret to repair)
VIDEO disassembly of the vapko man l2000 energy storage
VIDEO We disassemble the energy storage from Kamaz
VIDEO energy accumulator zil-kamaz
VIDEO Disassembly and assembly of the energy storage device ZIL KAMAZ. Repair of energy storage at home
VIDEO VIDEO We sort out the energy storage in the field
VIDEO power accumulator kamaz (little secret to repair)
VIDEO We disassemble the energy storage from Kamaz
VIDEO Repair of energy storage type 20 s / o
VIDEO Energy storage and brake chambers
VIDEO Repair of brake chambers or energy accumulators)))
VIDEO Brake chamber repair Diaphragm replacement GAZ ZIL PAZ KAMAZ MAZ
VIDEO disassembly of the vapko man l2000 energy storage
VIDEO Do-it-yourself repair of KamAZ energy storage devices, let's start with theory, find out what energy storage devices are, what they consist of and how they can be repaired with our own hands. At the end, you will find a practical video on repairing energy storage devices.
They all have three parts.
1. The lower part is attached to the brake caliper bracket with M16 studs.
2. The middle part is made of aluminum alloy and is connected to the lower part by a two-bolt clamp.
Disassembly and assembly of the energy storage device ZIL KAMAZ. Repair of energy storage at home
VIDEO VIDEO We sort out the energy storage in the field
VIDEO power accumulator kamaz (little secret to repair)
VIDEO Repair of energy storage type 20 s / o
VIDEO We disassemble the energy storage from Kamaz
VIDEO A little about energy storage
VIDEO Energy storage and brake chambers
VIDEO Repair of EURO energy storage
VIDEO disassembly of the vapko man l2000 energy storage
VIDEO Disassembly and assembly of the energy storage device ZIL KAMAZ. Repair of energy storage at home
VIDEO VIDEO We sort out the energy storage in the field
VIDEO A little about energy storage
VIDEO Repair of energy storage type 20 s / o
VIDEO Energy storage and brake chambers
VIDEO power accumulator kamaz (little secret to repair)
VIDEO disassembly of the vapko man l2000 energy storage
VIDEO We disassemble the energy storage from Kamaz
VIDEO energy accumulator zil-kamaz
VIDEO Disassembly and assembly of the energy storage device ZIL KAMAZ. Repair of energy storage at home
VIDEO VIDEO We sort out the energy storage in the field
VIDEO power accumulator kamaz (little secret to repair)
VIDEO Energy storage and brake chambers
VIDEO We disassemble the energy storage from Kamaz
VIDEO DIY energy storage repair
VIDEO Brake chamber repair Diaphragm replacement GAZ ZIL PAZ KAMAZ MAZ
VIDEO How to remove an energy storage (energach) on a Kamaz car
VIDEO
Installation of brake pads kamaz
VIDEO
Disassembly and assembly of the energy storage device ZIL KAMAZ. Repair of energy storage at home
VIDEO VIDEO We sort out the energy storage in the field
VIDEO power accumulator kamaz (little secret to repair)
VIDEO We disassemble the energy storage from Kamaz
VIDEO Repair of energy storage type 20 s / o
VIDEO Energy storage and brake chambers
VIDEO Repair of brake chambers or energy accumulators)))
VIDEO Brake chamber repair Diaphragm replacement GAZ ZIL PAZ KAMAZ MAZ
VIDEO disassembly of the vapko man l2000 energy storage
Video (click to play).
VIDEO