In detail: do-it-yourself van repair from a real master for the site my.housecope.com.
Transportation of goods is often carried out using special vehicles. Some of the most popular are vans, which can have completely different configurations.
Very often, during the operation of a structure, its main parts are damaged. In this case, it is advisable to repair vans immediately, as this will optimize the further process of transportation.
A van can be called cars that have a closed body type. The main material for the manufacture of such structures can be:
- metal;
- special panels that combine several substances.
Vivid representatives of these structures are trucks that transport food products from warehouses to certain stores. Very often they can be supplemented with special cooling systems.
Vans can have a variety of designs from light vehicles to heavy trucks carrying bulky goods.
Damage to the body of such vehicles can be completely different. Before starting repair work, you should understand the cause of the breakdown.
The remediation process can be divided into several stages:
- Installation of protection systems, both on the sides and behind.
- Installation or replacement of special fasteners for the product. There are several options for such devices, but they should be repaired very carefully so that in the future there is no need for control during transportation.
- If the doorways are damaged, they are completely replaced. Sometimes this can be corrected by installing some individual elements.
- Installation of new panels in place of the damaged ones. In this case, it is imperative to check the condition of the frame for all kinds of cracks, bends, etc. If necessary, the entire structure is strengthened by welding and attaching additional elements, such as metal corners, etc.
| Video (click to play). |
Very often there is a need to maintain a certain temperature inside the structure. To do this, during repair work, you can additionally seal the walls with special materials.
This type of work is rather complicated and cannot be performed at home without the presence of special equipment. The best solution is to entrust the repair of the van to specialists who have certain skills.
We watch the repair of a car van in the video:

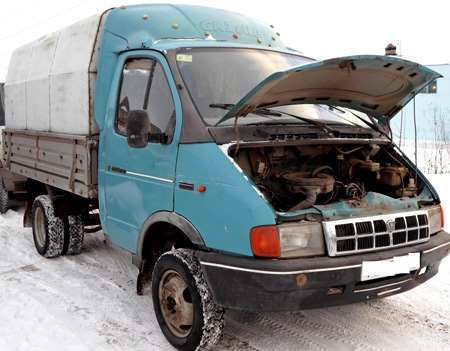
Today, refrigeration equipment on the Gazelle is installed by many owners of these wonderful commercial vehicles. Often, this is due to the desire not only to improve the functionality of the body, but also to significantly increase your income from cargo transportation.
If you have a flatbed car, then, first of all, you should attend to the thermal booth. You can buy ready-made (including used ones), or you can weld the frame yourself. You will need a profile pipe 50x50x2 mm (12 meters) and 50x25x2 mm (24 meters). Optimal dimensions for installation on board: 3.2 x 2.0 x 2.0 meters. The money for the material is about 4,000 rubles. Here's what we end up with:
Next, we collect the insulating "sandwich":
- sheathed outside with suitable sheet material (for example, polymer coated metal)
- inside we lay 5 cm of insulation (foam is suitable, since it is inexpensive, and is sold in the required thickness)
- the surface inside the booth is also sheathed with something that is not subject to corrosion (galvanized or sheet plastic is suitable)
Galvanizing will cost you about 200-250 rubles per square meter, plastic - 300 rubles.per square meter, foam - 180 rubles per square meter Corrugated aluminum can be used on the floor, although this is not the most budget option (about 1800 rubles per square meter of sheet 2 mm thick).
You will have to tinker with the gate in order to weld them smoothly and efficiently (without distortion of the hinges). Operation of a refrigerated Gazelle with "curved" body doors is one torment. Since the dimensions of the structure are quite impressive, it is not easy to bring them to zero in garage conditions. Pay special attention to this, sometimes it takes a whole day to weld and fit the gate.
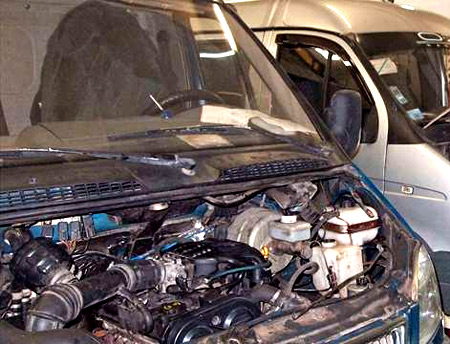
If you decide to install refrigeration equipment in a Gazelle van, then as thermal insulation, you can consider spraying polyurethane foam directly on the inner surface of the van:
A 3 cm thick layer will completely replace 5 cm of polystyrene, PPU is the highest quality insulation.
In the future, cover it with sheets according to the scheme suggested above.
In conclusion of the first point, take a look at a ready-made thermal box for a gazelle, which you can make yourself:
What you will have to deal with:
- compressor
- electronic control unit (refrigeration automation)
- condenser unit (outdoors)
- evaporator unit (in a thermal box)
- pipes and hoses with refrigerant (freon)
- wiring
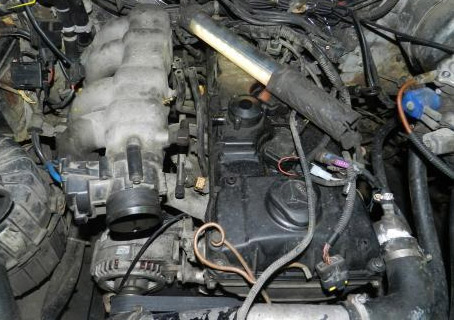
The compressor ensures the pumping of freon throughout the entire refrigeration circuit. It is installed in the engine compartment and is driven by a belt of ancillary units. Brackets and a new (longer) strap may be included with the refrigeration kit you purchased. If not, you will have to make metal staples with your own hands and pick up a longer drive belt in an auto parts store.
It is worth noting that the refrigerator compressor can also operate on a voltage of 220 V. For this, a special cord is usually provided. The mode of operation "from the socket" is used in those moments when the car is at loading / unloading, the Gazelle engine at these moments can be turned off.
The electronic control unit is installed in the driver's cab. It serves for setting and displaying the temperature in the refrigerator box, and also monitors the state of the entire system. When necessary, it turns on the fans on the evaporation and condensation units, controls the operation of the compressor, reports errors.
Wired to compressor, evaporator and condenser.
The condenser is an outdoor unit located on the street, designed to remove heat from the thermal box. Equipped with a fan to increase the amount of outside air passing through it (to remove more heat per unit of time). Usually installed on the front of the cargo area or on the roof. This improves airflow when the vehicle is in motion.
The evaporator is a heat exchanger block, which is located in the cooled volume (in the body of the Gazelle). The air in the thermobox circulates through the evaporator (using the built-in fan) and is cooled. The evaporator unit is also located on the front interior of the body or on the roof. This allows for more convenient loading of the product.
Please note that there are two pipes (or hoses) leaving the refrigerator compressor, one for "discharge", the other for "suction".
The units are connected according to the following scheme:
- from the discharge port of the compressor, the tube goes into the inlet of the condenser
- from the outlet of the condenser, the tube goes to the inlet of the evaporator
- from the outlet of the evaporator, the tube goes to the suction of the compressor, thereby closing the system
The sequence should be described in the installation manual for the refrigeration system you purchased.
It should be said that monoblocks are often found (combined unit of condenser and evaporator). Such a block is simply inserted into a slot in the truck bed. In this case, only the compressor discharge port with the condenser intake pipe and the evaporator outlet pipe with the compressor suction port need to be connected, thereby greatly simplifying the installation of refrigeration equipment.
If you managed to assemble the equipment with your own hands, you have a direct road to where the car air conditioners are refueled. Filling of freon into the refrigeration circuit should be carried out only by an experienced mechanic; without special tools and knowledge, you will not be able to bring the refrigerator into operation.
You can also go to a company that installs refrigerators professionally, but usually their services are more expensive than those who fill air conditioners.
Filling a refrigerator with freon costs from 2000 rubles.
If you are not ready for self-assembly of the refrigerator unit with your own hands, then it is better to entrust it to professionals.
For example, consider the two most popular sets of refrigeration equipment.
(price with assembly 3300 Euro)
The delivery set includes units for evaporation, condensation, compressor and electronic unit. Also included is a compressor for operation from a 220V network. The hydraulic circuit units are connected with flexible hoses.
The units are designed for cooling volumes from 13 to 24 cubic meters. depending on the temperature (from 0 to -20 degrees). All units are made of high-quality steel with a powder coating, the condenser body is made of ABS plastic. The equipment of the Italian company Zanotti is widespread and enjoys well-deserved respect. The only thing that confuses today is the Euro rate. On a well-known classifieds website, we managed to find used kits at prices starting at 60,000 rubles.
(Price with assembly 2400 Euro)
Russian manufacturer of refrigerated trucks.
The principle of operation is the same as that of Zanotti. A significant difference is that it does not work from a 220V network with a standard delivery set.
The cooled volume is from 11 to 16 cubic meters. (a lower value is at minus 20 degrees, a larger value is at 0 degrees). All units are imported, in fact, only Russian housings and assembly. Quite a decent option on a limited budget. We found a used ear kit from 30,000 rubles.
If you decide to order a turnkey installation of refrigeration equipment on a Gazelle, the most correct solution would be to contact an official dealer of the brand of refrigerators you have chosen. This will save you from problems with spare parts and warranty service of equipment, and also implies professional installation of all units.
If you like the installation of equipment with your own hands, approach the issue with all seriousness, try to get the advice of an experienced specialist, or at least study the basic principles of refrigeration technology.
- Like
- I do not like
Hello, there is a Gazelle, 2007 onwards, 330202 (extended, like 4.25). The task: how to assemble the thermobox yourself (for transporting alcohol, water, etc. in winter) or purchase for a price up to 50,000 of the following dimensions - length and width for 330202, but height 220 is the minimum. can anyone sell?
- Like
- I do not like
Put the stove in the booth and make the thermo booth like I'm telling you))
Buy a thick polycarbonate (I think 20 will do) and over an awning to hide this miracle from the eyes of bastards
Polycarbonate material is convenient for smooth or non-smooth bending, by cutting, if necessary, the places of the corresponding ..
There is also a social variant, namely thin plywood and polystyrene between two layers of plywood, on top again with an awning. And a stove or just a copper tube, long along the edges of the body, at your discretion, for the diameter of the hose for the stove, plus a plumbing tap and you will be lucky
I have a factory thermal box, it weighs all 800 kg, probably five polystyrene in a circle.
In frosts I drove roses, 1000 km, not one died. For control, the water bottle was not frozen in more than 15 hour hike. On the floor, a felt mat spread, there are boards covered with one and a half millimeter tin.
Of course, polystyrene is preferable and not dense, but grainy, for which is softer, there is more air and in any frosts, sit down with a booty, you will feel the warmth
- Like
- I do not like

RUSlan174 12 Aug 2013
length and width for 330202, but height 220 is the minimum. can anyone sell?
and how much weight are you going to load there? water in PET bottles in 3 rows in 3 meters and already 1.5 tons!
- Like
- I do not like

gavriloff 12 Aug 2013
Of course, polystyrene is preferable and not dense, but grainy, which is softer, there is more air and in any frosts
Even a schoolboy knows. The denser the better.
Sandwich panels are probably pressed from neuy.
here is the height of 220 minimum. can anyone sell?
for alcohol why so much? you need to heat a lot
- Like
- I do not like

Dima734 12 Aug 2013
for alcohol why so much? you need to heat a lot
most likely a person is looking at the future. now alcohol, then refrigerators
I ran into this myself, went to the tent, they said let's have a booth, and even a thermo, and a load. plastic parts (bumpers, fenders, hoods). I bought a second car, half a year has passed, they say, let's say 4 meters long.
- Like
- I do not like
Dima734 noticed exactly - today alcohol and water, tomorrow IKEA furniture, and the day after tomorrow refrigerators. So just to do something almost from scratch for all occasions. there are no specific drawings or numbers for panels, materials - quantity and volume? although the topic with a stove proposed by OOH is very interesting and it is interesting to learn more about it (tube materials, how to bring, etc.)
Kaverz read the adjacent topics - "Stretcher platform painting" and "Making a stretcher" forma-pokraska / nie-podramnika / there I and many others described the construction of a platform and a frame
Post has been editedLehan: 12 August 2013 - 23:33
- Like
- I do not like
Dima734 13 Aug 2013
Dima734 noticed exactly - today alcohol and water, tomorrow IKEA furniture, and the day after tomorrow refrigerators. So just to do something almost from scratch for all occasions. there are no specific drawings or numbers for panels, materials - quantity and volume? although the topic with a stove proposed by OOH is very interesting and it is interesting to learn more about it (tube materials, how to bring, etc.)
there are no drawings, I already bought it with the booth. Right now I am developing drawings for the awning, I want to lengthen and expand so that 6 Euros stand up
Dima734 noticed exactly - today alcohol and water, tomorrow IKEA furniture, and the day after tomorrow refrigerators. So just to do something almost from scratch for all occasions. there are no specific drawings or numbers for panels, materials - quantity and volume? although the topic with a stove proposed by OOH is very interesting and it is interesting to learn more about it (tube materials, how to bring, etc.)
frankly speaking, with such a question it is cheaper to buy a ready-made one. everything is standard, but if the question has already arisen how, and there is nothing to extricate from the standard, accordingly you will not do it yourself, but for the assembly somewhere it will take you more than buying a ready-made one, then why? and if you just have an awning platform, and you yourself will redo it, then it will also not be a budget option, the documents are not cheap.
at the company buy and deliver, it will be cheaper, faster, and more reliable. count up one welding by yourself, there without interruption in two, so that it does not fall apart and according to technology, work for a week
- Like
- I do not like
Clearly, please advise where is the best place to see the booths? Of course, as close as possible to Krasnodar or with delivery
So, you have decided that you need a new gate for the truck. The best way to solve this problem is to turn to professionals. Among our clients there are companies that will help you with this. For example, Ven-Service company.
But if you want to save money and like to work with your hands, then this article is for you. First, you need to decide on the material from which the gate will be made. The most common and best option is moisture resistant plywood or film faced plywood. This is the same. It only remains to choose the thickness. Film faced plywood is quite heavy, so you need to carefully choose the thickness. If you are making a gate on a Gazelle, then the thickness of 18 mm is quite suitable for you. If you are making a gate for a truck with a larger tonnage, then you can use 21 mm.
There are also options for making gates from a metal profile. In this case, the gate is filled with foam, which can be bought at a hardware store. It can be sheathed with galvanized sheet purchased in the same metal rolling in which the profile was purchased.
Plywood can be left without sheathing, it can be painted or also sheathed with a metal sheet.
Now about the hardware for the gate. First - these are hinges, sometimes called gate awnings. When choosing hinges, important factors are the weight and height of the door. Depending on this, the size and number of loops are selected. Accordingly, the larger the gate, the larger the loop.
Small trucks, such as the Gazelle, have another important nuance that must be taken into account when choosing hinges. This is the thickness of the hinge attachment point to the body. Our task is to make the van door open to the end, i.e. rested against the side wall. Therefore, we can use narrow hinges or wide hinges.
Second Are locks. There are two types of locks for pipes: 22 mm in diameter and 27 mm in diameter. If you have a gate height of 2 - 2.5 meters, then you can put a lock under a 22 mm pipe, if more than 2.5 meters, then you need to put locks along a pipe with a diameter of 27 mm.
In the process of manufacturing the gate, it is necessary to provide for the possibility of replacing consumables and components of the lock. Consumables include plastic bushings in the supports, which wear out over time. You can always purchase bushings for our locks in our store.
Third - this is a seal for the doors of the van. A door seal is necessary to protect the cargo from moisture and dust, it will also help keep the temperature in the van. The best option is a rubber seal without a plastic base. It is mounted at the end, using metal plates and self-tapping screws or rivets. But such a seal is only suitable for doors with a thickness of 29 mm or more. For a rubber seal, you can purchase a silicone grease from us, which will help preserve its properties for many years and protect it from freezing.
If your gate is made of plywood, then a rubber-plastic sealant with a thickness of 18 mm and 21 mm, respectively, will suit you. When installing this seal, you do not need metal plates. You can fix it with special glue or self-tapping screws. It is not recommended to use rivets, as the plastic base breaks under strong compression.
And the final touch - open door lock. Here I think comments are superfluous. Without it, nowhere.
So the necessary hardware for the gate:
Recently, our customers have increasingly begun to ask about the sliding roof on the Gazelle. Ordering a ready-made import version is quite expensive, so we have studied this issue and will tell you how to make a sliding awning yourself.
Useful DIY Tips
Do-it-yourself gazelle booth
How to make a frame for a gazelle video - Center for Journalism Technologies
Do-it-yourself gazelle booth
Do-it-yourself gazelle booth
Do-it-yourself booth for a gazelle
Do-it-yourself booth for a gazelle
Do-it-yourself gazelle booth photo
Do-it-yourself gazelle booth
Do-it-yourself gazelle booth
Insulated frame-booth for Gazelle
How to make a thermobox for a gazelle with your own hands
How to make a thermobox for a gazelle with your own hands
Van on a gazelle with your own hands
From the tent to the thermobox - Body - Gazelist Club
Do-it-yourself gazelle booth
Sale of the GAZ 3302 Elongated Van at low prices from the Factory of special vehicles Favorit service
Do-it-yourself thermo box for a gazelle
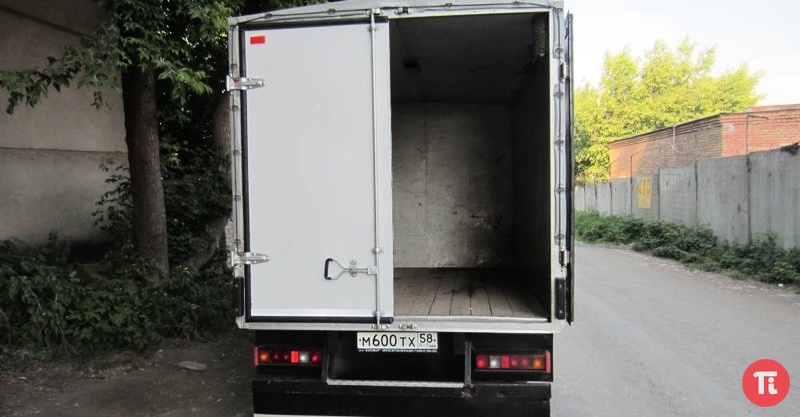
Repair of a van, a Gazelle car booth. Repair of metal doors of a van, Gazelle booth
No matter how famous the manufacturer is, no matter what quality materials are used in production, the fact remains - without regular maintenance and timely repairs, vans serve much less than their owners want.
And if the maintenance of the truck chassis of a van can be performed by almost any automotive workshop, then body repair should be performed by a service center that specializes in the repair of vans.
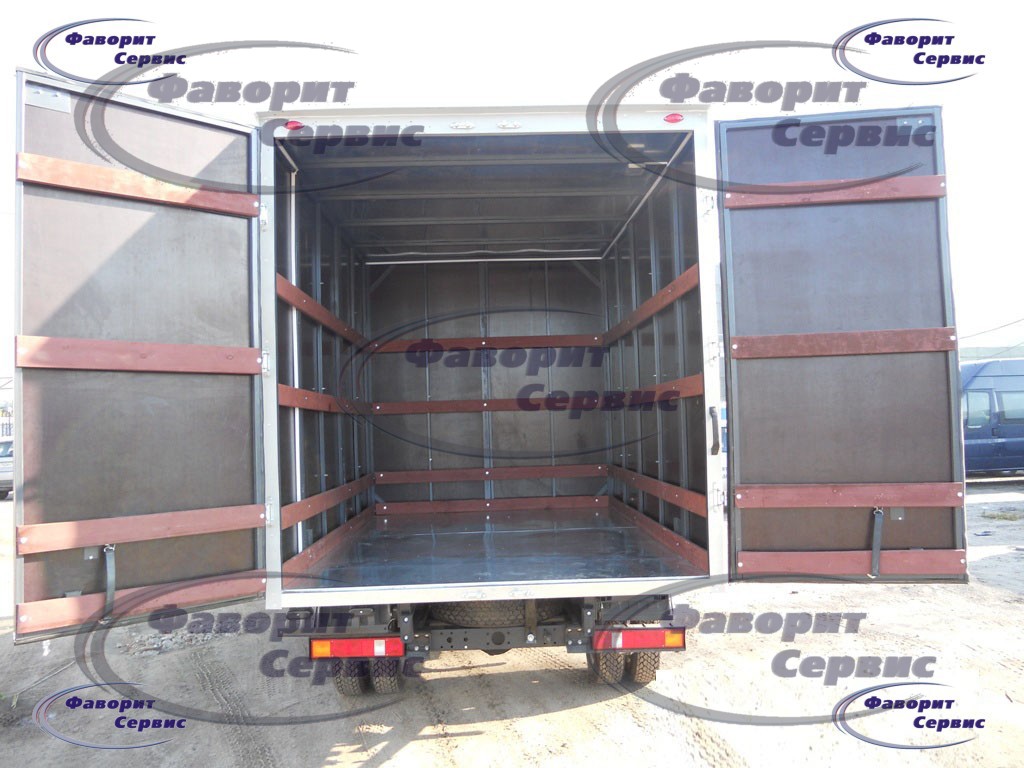
The "Spectrum Motors" company has all the necessary equipment for the production, modernization and repair of vans GAZelle, VIS, Hyundai, JMC and any other brands.All work is carried out by highly qualified professionals using modern materials and quality fittings. For the repair of insulated vans, we use various types of effective insulation, which allows us to improve the thermal insulation of the body by more than 30%.
Sometimes the need to repair the van arises from an accident. Damage to the sides or floor of the van, broken attachment of the body to the chassis, jammed doors - all this is eliminated in our workshops in the shortest possible time. For covering the sides, we use clad galvanized metal sheet, which can be additionally coated with colored enamel. This ensures that even several years after the repair, the van will look and, most importantly, work, just as good as a new one.
The long service life of our vans is also ensured by high-quality fittings that are installed on all our products. The same hardware is also used in the repair of vans. As a result, all moving elements (door leaves, folding and sliding sides, locking mechanisms and latches) work reliably and for a long time, even under heavy loads.
By contacting our service center, you can also get any advice related to the repair, maintenance or operation of your van.
The main purpose of insulated vans is to transport goods that require compliance with a certain temperature regime necessary to ensure the safety of the original quality and presentation of the transported cargo.
No matter how reliable the vans are, without timely and high-quality repairs, they serve much less than their owners want. Repairing the van will help prevent problems and unnecessary material costs associated with poor-quality transportation of goods.
Research and Production Enterprise "MODUL" has all the necessary equipment for the modernization and repair of vans of any brands. All work is carried out by highly qualified professionals using modern materials and quality fittings.
Specialists of SPE "MODUL" have extensive experience in carrying out restoration work and repair of vans and semi-trailers of famous world brands. Restoration of panels is carried out using European technologies and materials similar to the original, which allows us to guarantee high quality repairs.
We offer our clients the following repair services:
- Repair and replacement of composite sandwich panels;
- Steel frame repair;
- Portal repair;
- Replacement of fittings;
- Sealing of seams;
- Repair of floors;
- Replacement of sealing profiles.
General characteristics of composite panels of the "SPE" MODUL "company:
- We make analogues of panels Schmitz, Lamberet, Chereau, KOGEL, KRONE, etc.
- Strength... The panel has equidirectional strength and surpasses other panels in strength characteristics due to the use of fiberglass ;
- Durability... The panel is composite, no molding technology or plywood is used, the panel does not dry out, does not crumble, does not accumulate moisture, the service life is over 10 years;
- Ease... One square meter of our 50 mm thick composite panel weighs about 7 kg, panels from other manufacturers weigh from 10 kg .;
- Isothermal... There is a layer in the panel that reduces the influence of the infrared component (sun) on isothermality, therefore, with equal panel thicknesses, the thermal conductivity of the panel is lower. The heat transfer coefficient of an isothermal van from our panels is 0.40 W / m²K with an average value in the industry of 0.5 W / m²K;
- Price... In a combination of price / quality, the NPP MODUL panel is one of the most efficient panels on the market, our panel on 30-35% cheaper.
We offer our customers the following services:
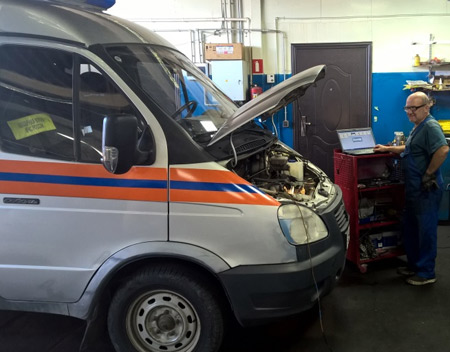
In our rather difficult time, every normal business executive will strive to run his business as economically as possible, trying to minimize his costs.So, the owners of small fleets sometimes make their own replacement of oils and other consumables, washing cars and even repairing vans. But how justifiable is it to take risks with a vehicle as dangerous and unpredictable as a refrigerated truck? Indeed, often not only can depend on its technical condition. Is it possible to carry out these works independently?
Let's look at such a seemingly safe situation using the example of repairing refrigerated vans. On the one hand, this does not in any way affect the technical condition of the vehicle, or rather, the chassis of the car. But in reality, everything is much more complicated. But first things first.
So, what does the owner gain from his point of view, if he does the repair of vans on his own:
Saves money (yourself - cheaper)
Saves time (for yourself - everything always comes first)
Selects the material and components that he likes
Receives an exclusively refurbished functional refrigerator car at the exit
But if you look at it from the other side, then all these pluses in the end turn out to be big and fat minuses.
A modern van is a fairly solid and reliable design, created by specialists through serious calculations. The development takes into account wind loads, chassis carrying capacity, wear resistance of finishing materials, corrosion resistance of all components used. On the basis of this, a body is made that will be able to serve for a long time and will be safe. And if we are talking about refrigerated trucks, then the ability to maintain a given temperature for a long time is also taken into account. And not a single owner of such a car not only does not know the special calculations, but also quite likely has no idea how to make them.
As a result, self-repair of refrigerated trucks leads to a violation of the reliability of the entire structure, to a violation of the conditions for the carriage of perishable goods. After a year of operation, the owner begins to understand that not everything is in order with his car again. As a result, double spending in a short period, again a waste of time, the risk that the repaired refrigerator van will crumble right on the road and other amusing delights. No, of course, if you're lucky, then none of this will happen. But that's - if you're lucky. So is it worth the risk?
Specialized workshops and highly qualified foremen of our company will repair vans of any complexity in the shortest possible time. With vast experience in their creation, we know exactly all the calculations that need to be made. The selected materials and components will last a long time, and all work will be performed with high factory quality.
The specialists of our company have been engaged in professional repair of vans since 2005. In 2012, with an analogy with our main activity, we changed our name to LLC "Vans Repair".
LLC "Repair of vans" offers its services in the field of repairing vans of all types, including semi-trailers, namely:
- high-quality repair of manufactured goods, insulated, sandwich panels of vans of any complexity (repair of a subframe (supporting base of a van), repair of a floor, repair and installation of swing doors, repair of side and front walls, roofs, roof sealing, elimination of leaks in a van, repair of sliding devices and tent racks, repair and replacement of locking fittings and hinges, re-equipment and revision of vans, resizing, production of carcasses, replacement of the semi-trailer hitch base plate, repair of tanks (replacement of outer skin and insulation, welding of cracks in compartments, repair of cranes);
- repair, sale and installation of hydraulic lifting boards;
- repair, sale and installation of refrigeration equipment;
- repair, sale and installation of autonomous air and prestarting heaters.
We have accumulated vast experience in repairing vans of all Nizhny Novgorod manufacturers and most of Russian and foreign manufacturers. We are the leader in the repair of vans in the Nizhny Novgorod region.
Presently we are official dealers of Zepro tail lifts, Planar and EBERSPACHER heaters, automotive refrigeration and heating equipment Eling, FROST. Without stopping at this, we are negotiating the conclusion of dealer contracts with other manufacturers.
Automobile (from ancient Greek αὐτο - itself and Latin mobilis - moving), motor vehicle - a self-propelled trackless vehicle intended for movement on the surface of the Earth.
Camels (lat. Camelus) are a genus of mammals of the suborder callus. These are large animals adapted for life in arid regions of the world - deserts, semi-deserts and steppes.
The ox is a castrated male cattle. It is used as a meat and working animal.
Hydrolift ("hydro" - Greek "water", "lift" - English "lift") (or it is called a tail lift) - a device for lifting heavy loads using hydraulic drives
A truck is a vehicle designed for the transport of goods.
Stagecoach is a means of transportation, intercity public transport. A horse-drawn carriage that transported passengers and mail.
Cabriolet (fr. Cabriolet) - in the original meaning, a light single-axle horse carriage with a folding roof, which was harnessed to one horse. In the modern sense - a passenger car with a reclining top and the number of seats is two or more.
Karavan (French caravane, from Persian or for other purposes and united for mutual assistance and protection in harsh or dangerous terrain, as well as their pack animals: camels, donkeys, mules or horses.
A carriage (from Latin carrus - a cart) is a closed passenger carriage with springs. Initially, the body was suspended on belts, then springs were used for cushioning (from the beginning of the 18th century), and from the beginning of the 19th century they began to use springs.
Kibitka - the word has two meanings:
1. (Arabic) Portable dwelling of nomads: Kalmyks, Kirghiz, a kind of tent covered with felt: serves as a unit of taxation for collecting state and zemstvo-kibitochny tax.
2. A cart or sleigh with a covered top.
A chariot is a large two-wheeled vehicle that uses racing animals as a driving force.
Body - a part of a car or other vehicle designed to accommodate passengers and cargo. The body is attached to the vehicle frame. There are also frameless bodies that simultaneously perform the function of a frame - all other components and assemblies of the car are attached to them.
Coupe (from French coupé) is a type of closed body of a passenger car. It features two doors, one or two rows of seats and a structurally separate trunk, without a liftgate in the rear wall.
Horses (lat. Equus) are the only modern genus of the equidae family of the equid order.
Loshak is a hybrid of a stallion and a donkey. Contrasted with a mule, whose gender of parents is distributed in the opposite direction.
A mule (Latin mulus) is the result of crossing a donkey and a mare. The term "mule" was originally applied to the offspring of any two animals of different species - now called a "hybrid".
Omnibus (from Lat. Omnibus - "for all") - a type of urban public transport, characteristic of the second half of the XIX century. A semi-detached (15–20 seats) horse-drawn carriage, the predecessor of the bus. Gradually it was replaced by a horse-drawn tram and a tram. Nevertheless, for example, in St. Petersburg the omnibus existed until 1914.
The cart is the most common collective name for various vehicles driven by animals, regardless of the design features, the number of wheels, the field of application, etc.
A semitrailer is a type of trailer, which with its front part rests on a tractor.
Trailer - a vehicle not equipped with an engine and intended for movement in a convoy with a power-driven vehicle
The Sicilian cart (called in Italy "carretto Siciliano", and in Sicily - "carrettu Sicilianu" or simply "carretti") is an ornate traditional Sicilian cart, drawn by a horse or donkey.
A tarantass is a four-wheeled horse-drawn carriage on a long road (longitudinal frame), which reduces road shaking on long journeys.
The wheelbarrow is a spring cart with a machine gun pointing backwards.
A trolley is a four-wheeled freight carriage. Horses are usually harnessed to carts, less often buffaloes, mules, oxen.
A tractor is a self-propelled trackless ground transport vehicle designed for towing trailers and semi-trailers.
A van is a type of closed car body designed for the transport of goods, people or other equipment.
Sharaban (fr. Char à bancs) is a type of open carriage. Appeared in France at the beginning of the 19th century.