In detail: do-it-yourself cylinder head repair 2114 from a real master for the site my.housecope.com.
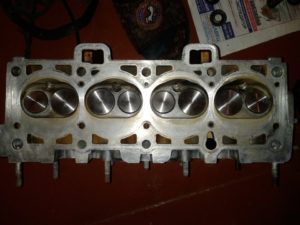
The cylinder head is a cover designed to enclose the cylinder block. It is also indispensable for some other functions that are no less important in the operation of the vehicle's power plant.
During operation of the engine, an air-gas mixture is supplied to the head itself, and exhaust gases are removed thanks to the exhaust manifold.
The cylinder head is a fairly durable working unit, so it does not need to be repaired or completely replaced so often. On cars manufactured in the territory of the Russian Federation, the cylinder head has to be removed due to cylinder leakage or when the gasket is worn out.
And sometimes the cylinder head is removed for rework. Removing this unit on a vehicle with any number of valves is fairly easy, although some skill may be required.
In this regard, if you needed to remove the cylinder head yourself for the first time, then it is best to do this under the control of a person who has previously encountered a similar task.
In order to repair or replace the cylinder head, you will definitely need some tools that are not so often found in a novice car enthusiast. Namely:
A set of keys.
Screwdriver.
Torque wrench.
Socket heads.
Torx.
Disconnect the negative terminals from the storage battery.
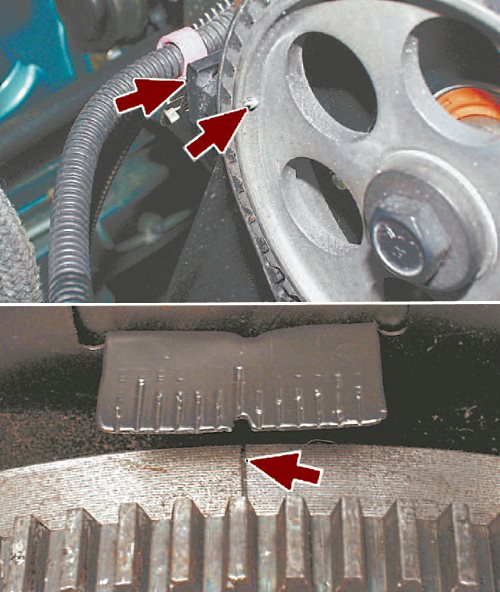
The piston of the first cylinder is set to the top dead center position.
All the coolant is drained off.
The fuel pressure decreases.
The exhaust pipe is disconnected from the manifold.
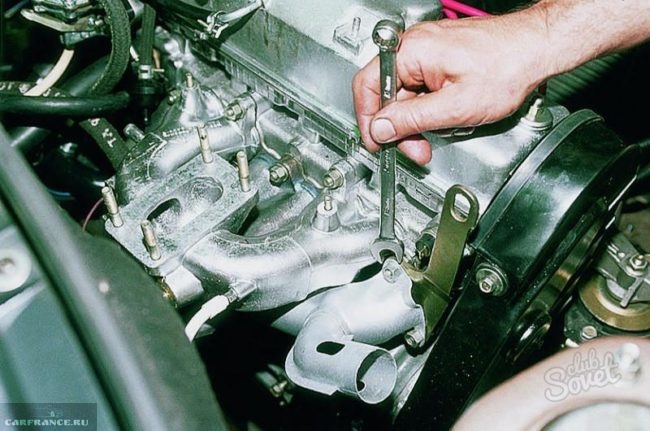
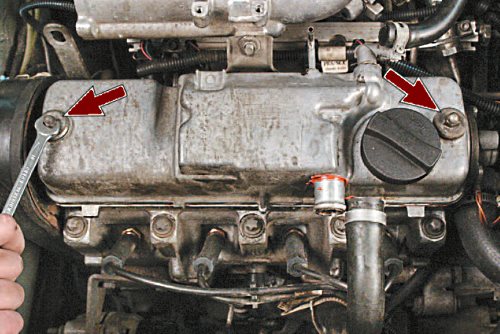
The cylinder head cover is being dismantled.
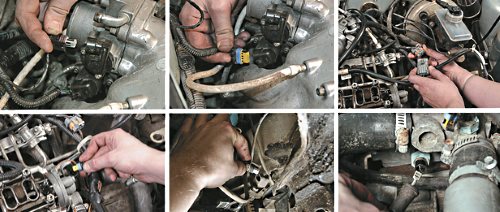
All pipes, electric wires and hoses are removed. But before doing this, you need to remember or note what and where it was originally connected. This is done in order to avoid possible confusion during reinstallation.
There are three bolts on the camshaft belt cover that must be unscrewed and the cover itself removed.
The timing belt is removed and completely retracted.
It is imperative to secure the shafts against possible rotation.
The pulley is attached to the camshaft with bolts that must be unscrewed and then removed.
The nut securing the rear camshaft cover is unscrewed.
Unscrew the remaining screws and completely remove the cover.
Slightly loosen the tension of the ten bolts holding the head.
Then each individual bolt is unscrewed in turn and removed along with the washers.
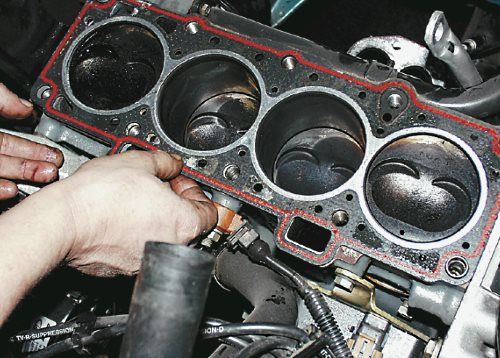
The head is released and removed.
If the head is attached directly to the gasket, insert a screwdriver or any other long tool. Further, this tool must be used as a lever in order to slightly raise the head, and then completely remove it.
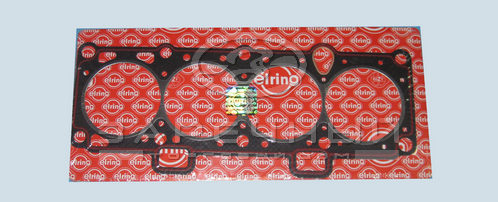
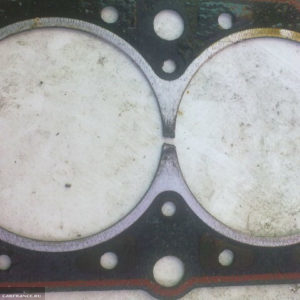
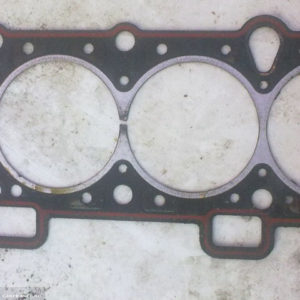
Very carefully, so as not to scratch the surface of the head, it is necessary to remove the remnants of the old gasket. It is best to use a special liquid for this business.
We put a new gasket in place.
We make sure that the shafts are in the top dead center position, and all valves on the first cylinder are completely closed.
We put back the bolts.
Using a torque wrench, start tightening the bolts one by one.
We put in place all the removed equipment.
We adjust the valve drive clearances and tension the camshaft belt.
Video (click to play).
As you can see, repairing the cylinder head on a VAZ-2114, which has 8 valves, is a fairly simple, albeit slightly laborious task, which means that everyone who has at least a little idea about this unit can cope with it.
There is a special offer on our website.You can get a free consultation of our corporate lawyer by simply asking your question in the form below.
The cylinder head should be well cleaned of carbon deposits from the surfaces of the combustion chambers and exhaust valves. Also remove residual oil from the oil passages.
On the necks and supports of the camshaft and in the holes where the valve pushers of the Lada Samara 2 are located, there are no chips or damage.
To be sure, check that the antifreeze does not get into the oil channels, for this it is necessary to plug all the holes in the coolant circulation. With the help of a sediment, at a pressure of 0.5 MPa, pump water into the jacket of the coolant circulation, while within 3 minutes there should be no hint of water leakage from the cooling jacket.
When checking the tightness of the cylinder head using compressed air, it is also necessary to plug all the coolant circulation jackets with special plugs. Pick up a tank, heat the water in it from 60 to 80 degrees and immerse the head in a tank of water. After 5 minutes, blow air into the head with a spray. The air pressure should be between 0.15 and 0.2 MPa. No bubbles should form on the surface of the water for 2 minutes.
Valve seats
I - new saddle
II - saddle after repair
a - intake valve seat
b - exhaust valve seat
Grinding the seats is possible if the chamfers are slightly scratched or damaged.
The procedure for grinding the chamfers of the saddles.
- Before starting milling, insert the stem into the valve sleeve. Different cutters are used for the outlet and outlet valve seats. Route 15 ° chamfer first
- then mill the chamfer 20
- Grind the 45 ° chamfer, observing the diameters of 34 and 30.5 mm. Chamfer grinding is performed with canonical wheels.
Only after the grinding contour has been positioned on the chamfer can the machine be switched on. After finishing grinding, rinse and blow the chamfers with compressed air.
In order to check the gap between the rods and bushings, it is necessary to measure the diameter of the rod and the bore of the bushing.
The clearance for the valve outlet bushings is 0.022 to 0.055 millimeters, for the valve outlet bushings it is 0.029 to 0.062 millimeters. The maximum allowable clearance is 0.3 mm.
Pressing out the guide bushings
If the gap exceeds 0.3 millimeters, it is necessary to replace the VAZ 2113 valve, if the gap is not eliminated, it is necessary to replace the bushing. To replace the bushing, use the shipment to press in and out the bushing.
Press in the guide bushings with the fitted retaining ring until it stops in the cylinder head body.
After the bushing is pressed in, grind the valve seats.
Always install new valve seals. Valve seals are installed using a special shipment.
Inspect the valve, if the stem is not damaged and there are no cracks on the surface of the poppet, then the valve can be reused.
Limits for grinding valve chamfers
I - inlet valve
II - exhaust valve
If the valve has small scratches, the valve can be sanded.
Data for checking the outer spring
Basic data for checking the internal valve spring
To check the deformation of the springs, use the loads
If the pushers are not scratched, they can be reused, otherwise replace the pushers with new ones.
Cylinder head retaining bolt
The length of the bolts should not be more than 13.55 centimeters, if the length exceeds the indicated dimensions, they should be replaced with new ones.
Shims
It is allowed to install adjusting washers on the cylinder head if no wear or scratches are found on them.
The cylinder head is removed for its repair, to replace the head gasket, as well as during engine overhauls.
We prepare the car for work and disconnect the wire terminal from the negative terminal of the battery
Drain the coolant from the engine
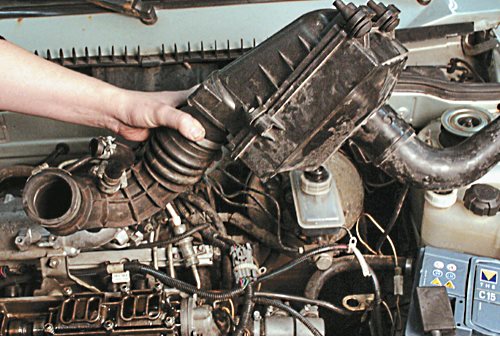
Removing the air filter
Remove the intake manifold and the exhaust manifold from the engine. If necessary, the cylinder head can be removed as an assembly with parts of the power supply system and the exhaust manifold.
Remove the cylinder head cover
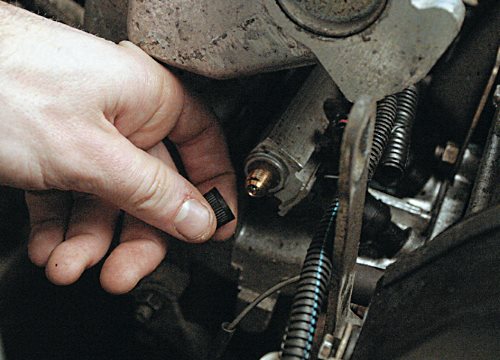
On engines with phased fuel injection, disconnect the wire block from the camshaft position sensor
Disconnect the wiring tips from the coolant temperature sensor For convenience, disconnect the wiring harness block from the knock sensor and move the sensor wiring harness to the side.
Disconnect the tip of the wire from the coolant temperature gauge sensor
Using a 13 mm socket wrench, unscrew the nut securing the "ground" wire to the engine and remove the wire tip from the stud.
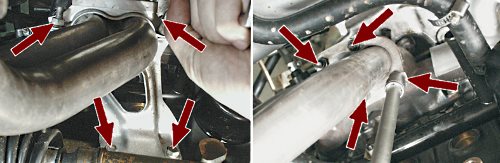
Using a 13 mm socket wrench, unscrew the two nuts securing the branch pipe.
We remove the pipe from the pins of the cylinder head and, without disconnecting the hoses, take it to the side.
Remove the sealing gasket from the studs.
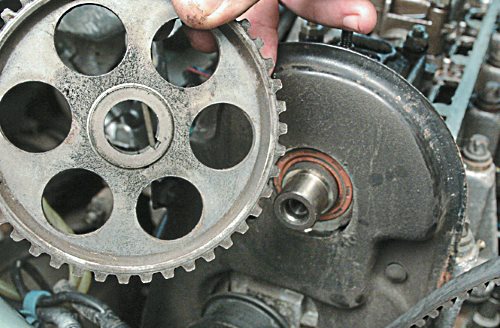
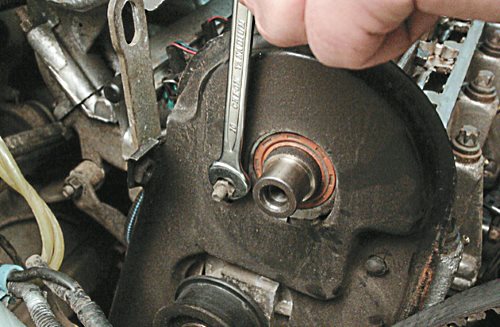
Remove the camshaft pulley
We unscrew the nut and bolt of the upper fastening of the rear cover of the timing belt
We remove the oil level indicator.
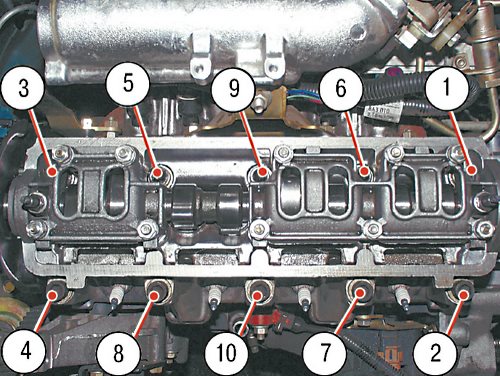
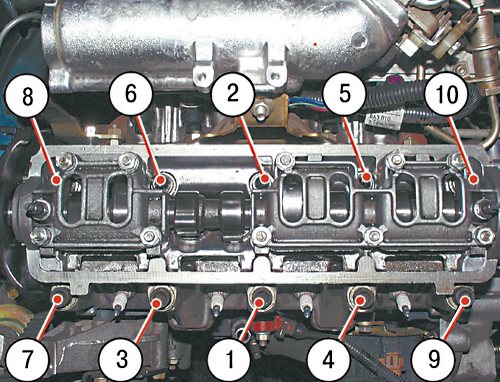
Using a Torx E14 socket wrench with a narrow head, unscrew the ten bolts securing the cylinder head. Some of the cylinder head bolts can only be loosened with a socket wrench with a narrow head. If such a key is not available, remove the camshaft and then remove the cylinder head bolts.
Pulling the rear cover of the timing belt slightly to the side, remove the cylinder head.
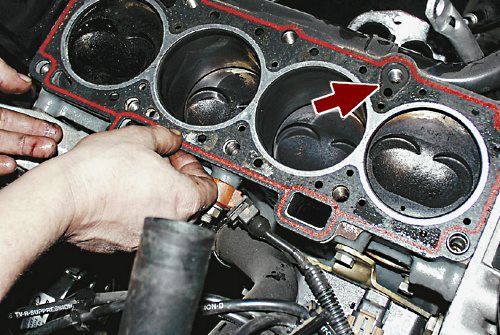
Remove the cylinder head gasket
We take out two guide bushings.
We wash the cylinder head from dirt and deposits with kerosene or diesel fuel.
We remove the remaining oil and coolant from the threaded holes of the cylinder block (for the bolts of the block head).
We clean the resting planes of the head and cylinder block from the remnants of the old gasket, degrease the planes with a solvent. Always use a new gasket when installing the cylinder head. Oil should not come into contact with the surface of the gasket.
We install the guide bushings of the head into the bore of the cylinder block.Tightening sequence of the cylinder head bolts
We put a gasket on the cylinder block, while the guide bushings must go into the corresponding holes in the gasket.
We install the head on the cylinder block. Slightly moving the head from side to side, we ensure that the guide sleeves enter the corresponding holes in the head. Reuse of the cylinder head bolts is only allowed if their length does not exceed 135.5 mm.
We measure the length of the bolts with a caliper or bench ruler. Replace bolts longer than 135.5 mm.
Before tightening, we dip the threaded part of the bolts into engine oil, then let the oil drain, after waiting about half an hour.
We install bolts with washers in the holes of the head.
Using a torque wrench, tighten the head mounting bolts (in the sequence shown in the photo) in four steps: - tighten the bolts to a torque of 20 Nm (2 kgfm);
- tighten the bolts with a torque of 69.4–85.7 N · m (7.1–8.7 kgf · m);
- once again turn the bolts 90 °.
11. Further assembly is carried out in the reverse order.
 Disconnect the negative terminals from the storage battery.
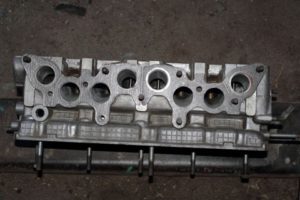 Disconnect the negative terminals from the storage battery.
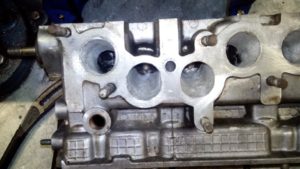 tool. Further, this tool must be used as a lever in order to slightly raise the head, and then completely remove it.
Using a 13 mm socket wrench, unscrew the nut securing the "ground" wire to the engine and remove the wire tip from the stud.