In detail: do-it-yourself repair of the cylinder head of a VAZ 21011 from a real master for the site my.housecope.com.
It's no secret that a well-repaired cylinder head is a guarantee of stable, trouble-free engine operation with maximum power output and normal fuel consumption, therefore repair of the VAZ cylinder head should be done with special attention, since any oversight can lead to damage to almost all parts of the engine and new expensive repairs. This article will describe in detail the repair of the VAZ cylinder head with your own hands, tips are given that are not in the books.
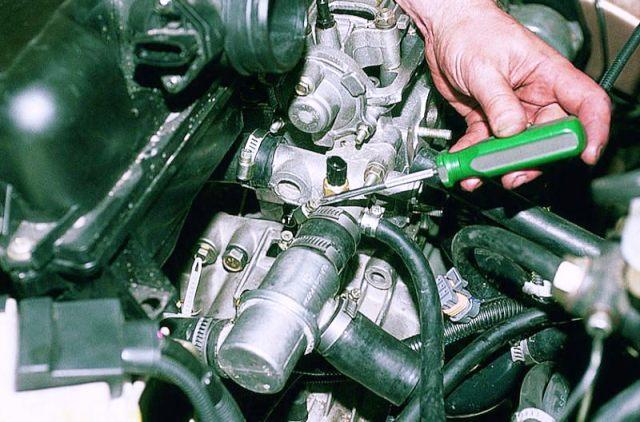
Since any repair begins with the removal of the part being repaired, we will briefly describe it. In order not to forget, and not to be surprised when disassembling, it is necessary to drain the coolant from the engine before starting the repair. To remove the cylinder head, you first need to remove the air filter, carburetor, having previously disconnected all wires and hoses from it.
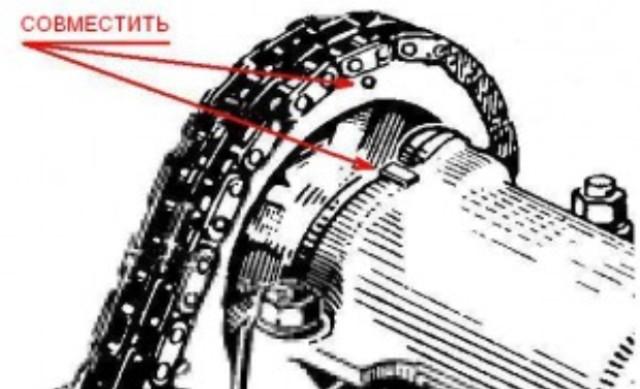
After all this has been done, remove the cylinder head cover, align the marks on the crankshaft pulley with the mark on the camshaft drive cover and the mark on the sprocket or pulley (in the figure below, the asterisk) of the camshaft with the mark on its body.
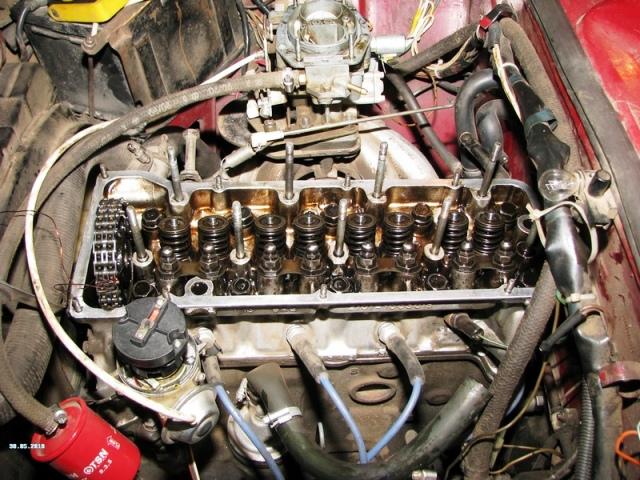
Then you should loosen the chain tensioner, unbend the camshaft sprocket bolt lock washer, unscrew the bolt (preferably with a jerk), carefully remove the sprocket from the camshaft and tie it with wire or something else to the chain. Now you can unscrew the camshaft nuts and remove it together with the housing. The next step is to remove the rockers, for this they must be pulled off the adjusting bolts and removed from the springs. Before removing the rockers, you need to mark with a marker or notches, so that each one sits in its place during assembly, then the running-in with the camshaft journals and the heads of the adjusting bolts will not be disturbed. Now you need to disconnect the wires from the spark plugs, from the coolant temperature sensor, disconnect the hoses from the cylinder head, unscrew the nuts securing the front pipe to the exhaust manifold and remove it. Next, unscrew the bolts with which the head is attached to the block. The cylinder head can now be removed for repair.
After removing the cylinder head, for the convenience of further work, its surface must be washed from all kinds of dirt and carbon deposits.
| Video (click to play). |
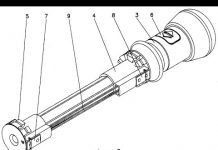
Repair of the VAZ cylinder head begins with drying out the valves. For this, the tool shown in the figure below can be used.
It is advisable to put the valves in their places or mark them so that in case of slight wear you can put everything in place. Now you should carefully inspect the cylinder head for cracks, pits, potholes, corrosion, assess the wear of the seats and guides, the latter usually have to be changed after about 150-200 thousand kilometers. If, as a result of the inspection, no defects were found that could interfere with the repair, then you can continue.
So, if the guide bushings are worn out, then we proceed to replace them, they can be removed using a special device, the drawing of which is shown below.
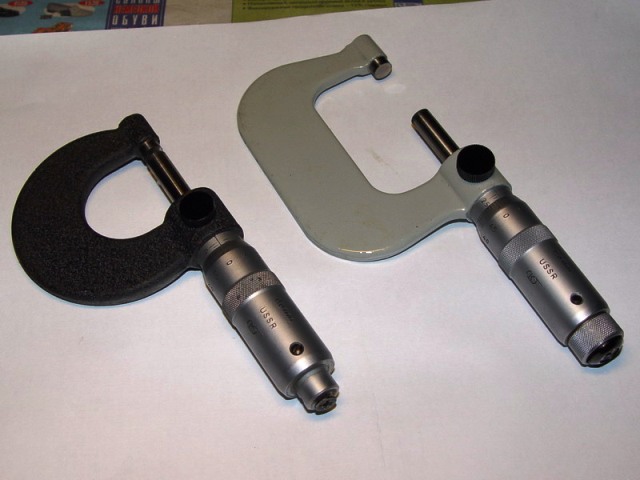
It is advisable, when pressing out the bushings, to immediately measure their outer diameter with a micrometer and write down, so that when buying new ones, go to a car shop with the same measuring tool and pick up a diameter of 0.05-0.07 more than your family. pressing them in, for this we need: an electric stove, a mandrel for pressing the guide bushings,shown in the picture below, hammer, machine oil.
We put the head of the block on some kind of stand along the edges, tuck the tile under the place where we will work, heat it up to 100C, while heating is on, grease the bushings with oil (or even better, put them in the freezer before that), remove from the stands and drive in there new guides. If these requirements are met, the bushings will go "like to their home" and you will not spoil anything. After replacing all eight, it is necessary to let the head cool down and then expand the inner diameter under the valves so that they do not dangle, but move freely, do not jam or jam, otherwise the entire head repair may go down the drain. [Reklama3]
I want to warn against a mistake that many make when working with a sweep: with this tool they work only in one direction with a passage to the end. In no case try to unfold the guide from both sides, this will not lead to anything good!
Now you can start the most painful work, the good performance of which largely determines the tightness of the valve to the seat and the entire cylinder head repair - countersinking. Usually they work with this tool in the following sequence: first, they pass the output cutter (the one on which 60 degrees is written) until the metal layer begins to be removed in a circle, then they take 120 degrees and cut it off until a clear round edge appears ... The last one, the one that is 90 degrees, all that remains is to make a working chamfer, the thickness of which should be 1.5-2 mm, it is advisable to make about 1.5, because when the valves are lapped in, it will increase slightly. A well countersunk saddle should look something like the illustration.
Now it remains to grind the valves so that they fit as tightly as possible to the seats. This is done as follows: go to a car store, buy a special lapping paste (it is quite inexpensive), smear the valve on it, insert it into the head. Further, there are 2 ways of how to rotate it, while pressing it against the saddle: one is "old-fashioned", the other is more modern.
Let's start with the grandfather's. Find a piece of hose of such a diameter that it fits snugly on the valve, squeeze it between your palms and begin to rotate it in one direction or the other. A more modern device for holding the valve is shown in the figure below, it is not difficult to make it.
An external indicator that the valve has rubbed in is the matte surface of the seat and valve at the point of contact, and it should be in a circle, not interrupted. After repair, the tightness of the cylinder head can be checked by pouring a little kerosene or gasoline into the intake and exhaust manifolds. With a well-performed work on the repair of the cylinder head, leaks and dampness from under the valves of the cylinder head are not observed for 5-7 minutes.
Finally, I can only remind you, do not forget to put the valve stem seals. And yet, do not forget to rinse and clean all the parts after repairs immediately before assembling the head, then the motor of your VAZ will last for more than one hundred thousand kilometers.
How to wash the cylinder head from carbon deposits? How to clean carbon deposits from block head valves?
If you are in a hurry, then you should first clean off the carbon deposits as much as possible with some object, the main thing is not to scratch the cylinder head, and then wash off the residues with a carburetor cleaning fluid, while walking with sandpaper similar to a piece of felt, this is sold in car dealerships, it is also similar the one used to clean the pots, usually on one side of the sponge.
And if there is time, then pour the solvent into the not yet disassembled head and leave it for a day, after that it is possible to clean the carbon deposits with the help of an ordinary molar brush, as if the oil is washed off.
author, tell me in what sequence to stretch the head of the block?
the cylinder head bolts are pulled in the sequence shown in the figure
is it possible to make a cylinder head if the rails are loose?
Can. But that will take a lot of shopping bustle. They sometimes contain repair guides for cylinder head valves. Here they can fit perfectly into your block head. Another option is to buy defective guides with a large outer diameter, this also occurs. I will give figures from the practice of repairing such a head from the Ural motorcycle. The diameter of the normal guide is 13.1 mm, I went through a lot of such bushings in the store and found it with a diameter of 13.3 mm. I went in perfect. So be guided by the search for a guide that is larger than the standard one by 0.15-0.2 mm. Do not forget to be sure to heat the head before pressing in the sleeve and grease the guide with oil and put it in the freezer, then it will come in even easier.
what is the pressure in the cylinder of the VAZ 2107?
Normal compression in the cylinders of VAZ cars is 11-12 atmospheres. You can check with a compressometer on a warm engine, with the spark plugs turned out and the throttle valve open (press the gas pedal all the way).
is it possible to change the valves on a VAZ 2106 without removing the block head?
No, this is not possible, because even if you pull the pistons out of the block, the cylinder head valves will still not come out completely and will rest against the cylinder walls. And in general, is it worth it to scoff at yourself, it is easier to remove the head, the more the valves need to be ground after replacement.
Patient VAZ 21011 1977 The engine traveled 213491km. without cap. renovation

Expenses:
Washing the engine at a car wash - UAH 30.00.
Tipping to the car washer - UAH 10.00.
Gasoline Ai92 (25 liters) - 100.00 UAH.
TOTAL TODAY: UAH 140.00
TOTAL: 140.00 UAH
Day three
Rest (16 July 2006, Sunday)
It’s not supposed to work on Sunday. And so we did.
Day four
Washing and Valuation (Monday 17 July 2006)
It was not possible to capture the engine wash, and there is hardly anything interesting in it. Everything went quite simply - a brush, gasoline and diesel fuel. All parts of the engine were very carefully washed to a shine and neatly laid out on the table. The master carefully examined all the spare parts and took out his notebook, in which he began to add up the prices. At that moment I was not there. I was told by phone that spare parts would cost about 1400 hryvnia + work. Considering that there is a maximum of 1,500 hryvnia in your pocket. After a hard day, I managed to get the necessary 300 hryvnia.
Four days without a car is hell. Become a helpless little man - sit at home and watch the 5th channel, as politicians beat each other's muzzles. Everything becomes sluggish and even not drink beer in the evening (because the nearest store is 2 km away).
Day five
Boring and Spare Parts Purchase (Tuesday 18 July 2006)
The cylinder block was bored by 79.7 (from 79.0) and the crankshaft at 0.5 (from 0.25). It was hard to walk around the market with a master who chooses his fingers for an hour. As for me, they are all the same.
Expenses:
Pistons 79.7 Kharkiv Avtramat - 60.00 UAH.
Piston pins - UAH 18.00
Rings 79.7 Prima - UAH 57.00
Intermediate shaft (piglet) plant - 45.00 UAH.
TOTAL TODAY: 180,00 UAH
TOTAL: 320.00 UAH
Day six
Parts Purchase and Assembly (Wednesday 19 July 2006)
Summer, hot, I want to die, but I have to buy spare parts. The girl has already tortured with messages like “Why are you visiting, what happened”, etc. Channel 5 has already learned it. I only go to work by taxi, my legs hurt and the fat accumulated over the winter gradually begins to subside. I don't want anything but to get into the car. It's all the same for whom.
Expenses:
Cylinder block boring 79.7 - 60.00 UAH
Crankshaft bore 0.5 - 60.00 UAH
Intermediate shaft boring (piglet) - UAH 15.00
Piston rings 79.7 Prima - 60.00 UAH.
Crescent - 7.00 UAH
Basic inserts 0.5 - 20.00 UAH
Connecting rod bushings 0.5 - 20.00 UAH
Front crankshaft oil seal - UAH 5.00
Rear crankshaft oil seal - UAH 10.00
Crankshaft bearing - UAH 10.00
Fungus + bushing - UAH 26.00
Chain - 35.00 UAH
Chain gears - UAH 48.00
Shoe 2101 - UAH 10.00
Head gasket 79 - UAH 8.00
Pallet gaskets, valve covers, pants, manifold - UAH 30.00.
Stove pipe (short) - UAH 5.00
Valve guides - UAH 38.00
Valve - 90.00 UAH
Valve oil seals - UAH 15.00
Crankshaft pulley - UAH 25.00
Collector nuts - UAH 4.00
Oil pump - UAH 80.00
Alternator pulley - UAH 25.00
Camshaft with bed - UAH 200.00
Rocker - UAH 125.00
Block tap (for draining the coolant) - 8.00 UAH.
Gearbox guide bush and oil seal - UAH 22.00.
Oil "MAST" 5l 15w40 - 50.00 UAH.
Oil, air, fuel filters - UAH 21.00
Candles - UAH 20.00
Chain damper - 7.00 UAH
Several clamps - 4.00 UAH.
Sealant - UAH 8.00
Thermostat - UAH 37.00
Breather pipe - 12.00 UAH
Antifreeze 10l "FELIX" - 75.00 UAH.
Pump - UAH 75.00
Gasoline pump - UAH 45.00
Fuel pump pulley - UAH 3.00
TOTAL TODAY: UAH 1418.00
TOTAL: UAH 1738.00
Seventh day
Build (20 July 2006, Thursday) 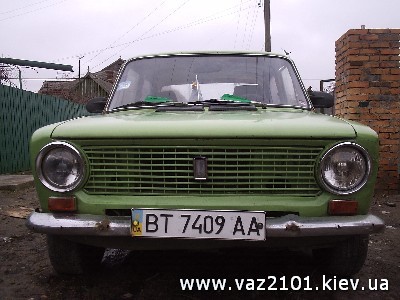
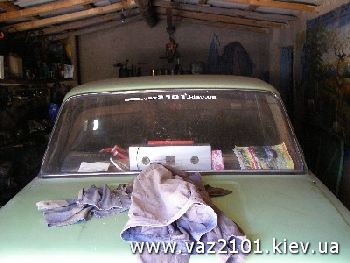
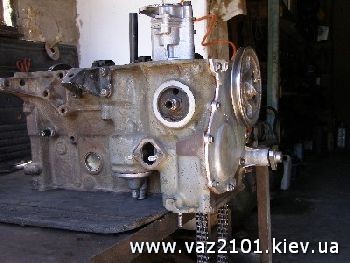
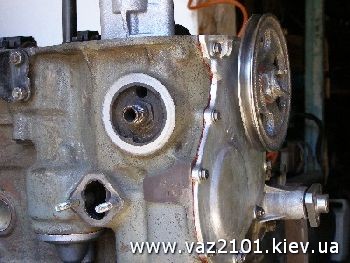
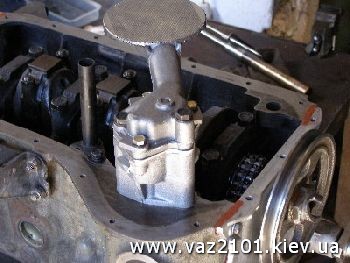
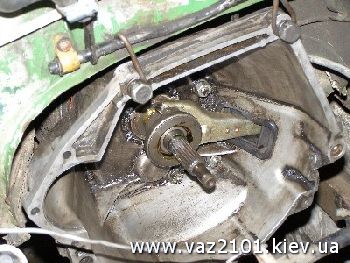
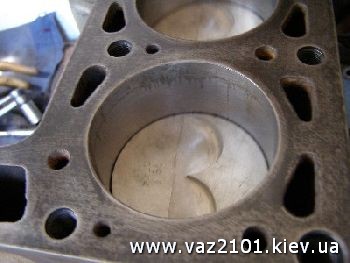
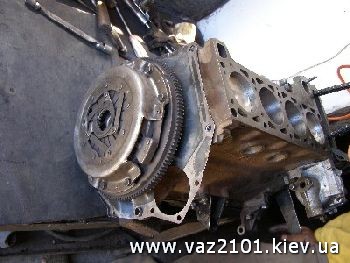
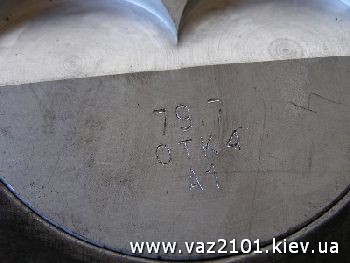
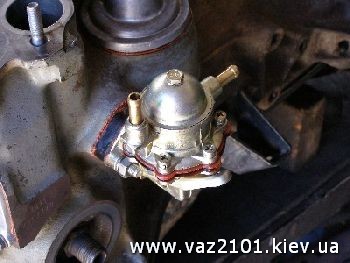
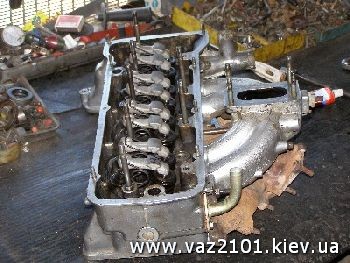
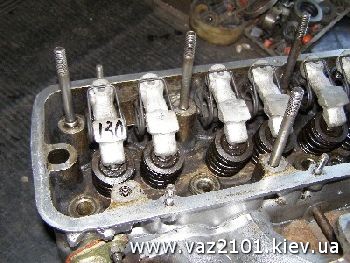
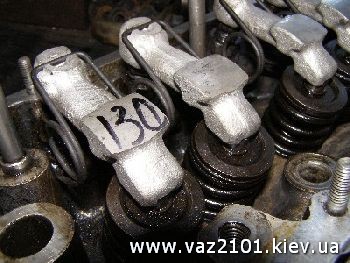
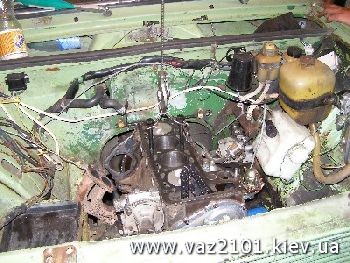
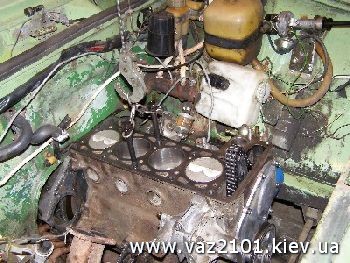
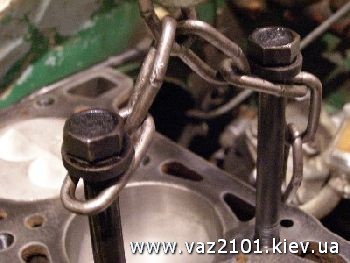
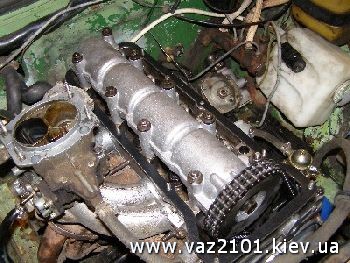
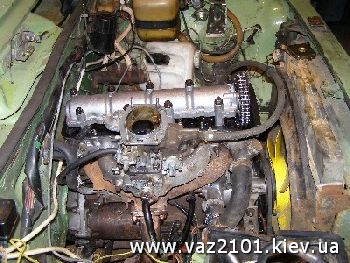
Day eight
Grinding (Friday 21 July 2006)
The most uninteresting day. The engine was polished all day - they started * it at idle and waited for it to warm up. Only he warmed up - they jammed it and waited for it to cool down. All day. Burned 5L. gasoline and only after grinding the water in the cooling system was changed to antifreeze.
Day nine
Grinding and starting (22 July 2006, Subota)
We burned 5 liters of gasoline again. Upon arrival to the master, I paid for the work and went for a beer. After passing 6 km I returned with the words “where did my rrrrrr disappear and why I can't hear the engine”. It seemed that my gasoline rrrrr had been changed to some kind of quiet electric switch. The car itself wanted to go and go. I thought, and decided to drink beer and spend the night with the master.
In the morning I started up with a half turn and drove off. After driving 107 km. I did not notice any problems to the house. Everything is working. True, I had to smoke a little in the middle of the road. the temperature began to slowly rise to the middle of the letter “D” of the word “WATER” of the native instrument panel. It was clearly said not to overheat, but these are already features of the running-in.
Expenses:
The work of the master - 400.00 UAH.
TOTAL TODAY: UAH 400.00
TOTAL: UAH 2138.00
Guidance and advice
up to 100 km - Warm up the engine. Drive no faster than 60 km / h. Do not load the machine or exceed 2500 rpm. Do everything smoothly. Slowly. Monitor the temperature.
from 100 to 500 km - Warm up the engine. Go no faster than 70 km / h. Do not load the machine or exceed 3500 rpm. Monitor the temperature.
500 km - Change the oil for a cheap mineral water. Change candles to Bosh or Philips. Adjust the valves. When changing the oil, do not use any detergent additives.
from 500 to 2000 km - Warm up the engine. Go no faster than 70-80 km / h. Do not put more than 3 people in the car, including the driver. Do not overload. Do not exceed 3500 rpm. Monitor the temperature.
2000 km - Change the oil to semi-synthetics (Mobil, Elf, * Shell) or mineral water (Ravenol, Elf, Esso).
5000 km - Change the oil to semi-synthetics (Mobil, Elf, * Shell) or mineral water (Ravenol, Elf, Esso). Adjust the valves.
Acknowledgments
Thanks to the guys, our Autoclub, especially saik, nik_2101, OlegSH and to all whom I have already forgotten for a huge number of sensible advice and recommendations. OlegSH I would gladly take advantage of your offer to buy spare parts in Kiev, but the master took it with hostility and said that he would choose the spare parts himself, otherwise he would not do anything. *
Post modified: Creativ4eg, 29 October 2016 - 01:40.
The cylinder head is one of the vehicle units that require high-quality maintenance, otherwise repairs simply cannot be avoided. How to repair, bore and modify the cylinder head of a VAZ 2106 with your own hands at home? How to dismantle and install the cylinder head? We will tell you about this with photos and videos in this article.
There may be several reasons for the repair, we will consider them in order:
- The first and most common reason, as a result of which it is necessary to remove the head of the VAZ 2106 cylinder block and repair it, is the wear of the gasket. The sealing gasket wears out over time, holes can appear in it, as a result of which antifreeze can get into the engine fluid, and oil into the coolant.
- The appearance of microcracks in the structure of the cylinder head. In this case, it is necessary not only to remove the head of the VAZ 2106 cylinder block, but to have special equipment that will allow for high-quality repairs.
- Broken guide bushings.Failure of these elements requires urgent replacement of components.
- The need to repair the head seat or replace it.
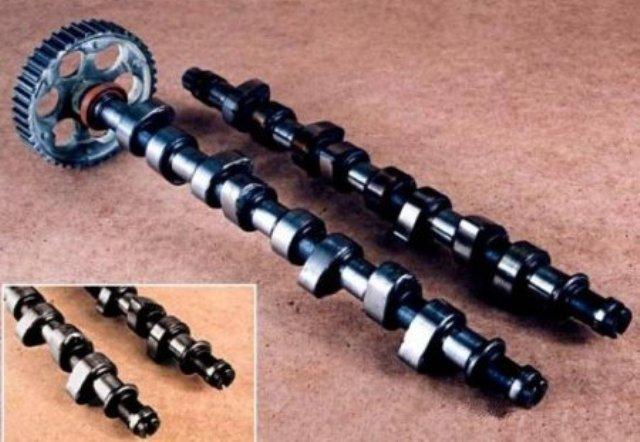
- Replacing the camshaft or the need for its repair and troubleshooting.
In fact, there may be many reasons, but we have given the most common and most common in the case of VAZ 2106 cars. You can find out more about how the repair and dismantling, boring and revision of the cylinder head on the VAZ 2106 take place below.
Sorry, there are currently no polls available.
- Removing the cylinder head is a critical step in our case. Before proceeding with the removal and modification of the cylinder head, it is necessary to drain all antifreeze from the engine, and also remove the air filter along with the carburetor. Before this, in advance, disconnect all pipes and hoses of the system. To carry out the work, you will need a standard set of tools, what every driver should have, including wrenches, screwdrivers, and so on.
- When the carburetor is removed, it is necessary to start dismantling the cylinder head cover, as well as aligning the marks on the crankshaft disc and camshaft. In addition, the marks on the camshaft disc must match the mark on the body. Read more about this in the video and photo.
- The next step in dismantling is to loosen the chain tensioner and dismantle the support washer. You need to abruptly remove the screw and dismantle the cylinder head star. You should also dismantle the VAZ 2106 camshaft along with the body. Next, the rocker is removed, after which all high-voltage cables are disconnected from the spark plugs and the screws that secure the cylinder head itself are unscrewed. Further, the cylinder head is removed for repair, it is pre-cleaned of deposits and carbon deposits.
Installed new plug
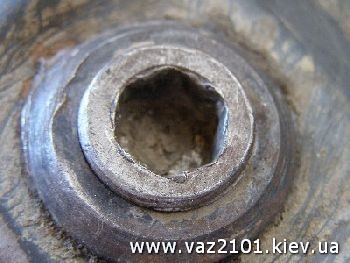
- Replacing the plug, as you will see in the video, can cause some difficulties. Corrosion and deposits can make it difficult to remove. Use a hex wrench, but before doing this, sprinkle the screw liberally with VD-40 fluid. This does not always help, but it may be advisable in your case.
- If in this way it was not possible to unscrew the plug to replace it, then you will have to drill it out. To do this, several holes should be drilled around the plug around the perimeter (drill through without fear, there is a thick wall under this plug, so you will not damage the unit). The main thing in this matter is not to damage the thread.
- The next step is to install the plug. There is nothing difficult in this matter. Before installing the plug, you will need to completely clean the threads from carbon deposits and deposits, for this you can use a sharp object like an awl. Only after the threads have been cleaned can the plug be installed.
- Use pliers and a clamp to remove the bushings. When the elements are removed, measure their outer diameters, in practice it is usually 0.05 mm less than the factory diameters.
- To install failed bushings, you need a hammer with a mandrel and motor fluid, you may need to heat the metal, for which you can use an electric stove.
- After the sleeves are heated (if needed), they are oiled to make them easier to fit.
- When all eight bushings are replaced with new ones, you need to wait a while for the cylinder head to cool down. In this case, the inner diameter of the bushings should be turned so that the valves do not dangle inside, but at the same time they can move freely and do not jam.
- As you can see from the video, replacing the cylinder head saddle can cause some difficulties.
- You need to cut the metal layer in a circle, the detailed diagram is given above.
- After that, the cylinder head must be cut at an angle of 120 degrees until a round edge appears.
- Then it is necessary to make a working chamfer up to 0.2 cm thick. This is done in order for the valve to rub tightly.
You can watch the video about how the cylinder head repair is carried out on the VAZ 2106.
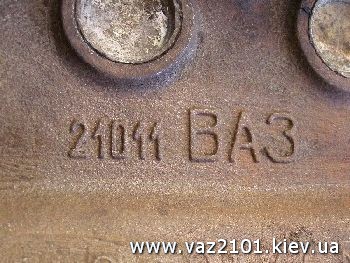
The overhaul of VAZ 2101 to 2107 engines is the same, there is only a difference in the size of the pistons and the size of the crankshaft.For example, the VAZ 2101 engine and the 21011 engine differ only in pistons, on the 01 engine there are 76mm pistons and on 011 79mm, and the rest is the same.
Also, the 2103 engine has 76mm pistons. and 2106 79mm. and everything else is the same. Also, the difference between the engine 2101 and 2103 is only in the crankshaft, the size of the chain, 2101 and 21011, the chain length is 114 links, and in 2103 and 2106 there are 116 links, and in the length of the distributor stem, and everything else is the same.
Therefore, when repairing an engine, you just need to know the engine model.
I will give a complete instruction on how to overhaul the engine with your own hands, at home.
I will repair the 2106 engine, it jammed because the owner of the six was driving without oil pressure.
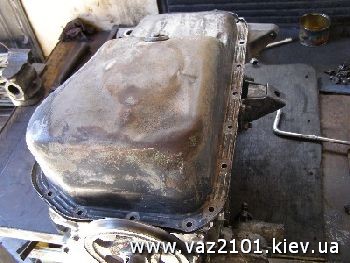
Since the engine is removed, without a head, we can say that half of the work is already done, it remains only to disassemble it, at home it is easier to disassemble it on an old tire, first we begin to remove the pallet.
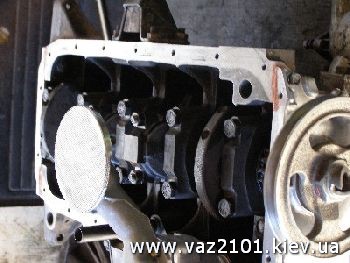
Photo. Engine sump removed.
Pay attention to the photo, 2 and 3 connecting rods are blue and dry, then remove the oil pump, and start unscrewing the connecting rods, but be sure to unscrew the connecting rod, immediately pull it out, put a pillow on it, and bait it, the pillows cannot be changed, each connecting rod has its own pillow ...
Photo. You can see the torn splines in the oil pump drive gear.
As the connecting rod with the piston was removed, it is immediately possible to determine the wear of the piston engine (the piston with the connecting rod is pushed up the engine), looking at this piston, it is clear that gases have escaped through the rings, this is evidenced by carbon deposits on the piston skirt. Also, sliding your finger along the cylinder, a small step is felt at the top dead center, this indicates that there is a development in the cylinder.
I measure the piston, it is 79mm. This means that this engine has never been bored, and there is an opportunity for two more bores. I decide to squander the block for the first repair, these are 79.4mm pistons.
He unscrewed the liner from the jammed connecting rod, and here it is necessary to determine whether to change the connecting rod to a new one or you can leave this one. Not everything is so simple here, of course, if you have extra money, you can immediately buy a new connecting rod and adjust it to the weight of the other connecting rods. But I have been working on engines for a long time and have seen all sorts of breakdowns, the most important thing in the connecting rod, so that the liner does not rotate in the connecting rod bed and the piston pin fits very tightly, and the fact that it turns blue from heating is not scary. So the owner of this six was lucky, the liner in the connecting rod did not turn, I leave these connecting rods, which of course affects the price of spare parts.
Photo. Intermediate shaft sprocket.
After removing the connecting rods, unscrew the intermediate shaft sprocket and remove the chain.
Then unscrew the clutch basket, and the flywheel itself, to make it easier to unscrew the flywheel, put a piece of wood or a large key in the crankshaft so that the crankshaft does not rotate when the flywheel is unscrewed.
Then unwind the crankshaft pillows, but be sure to remember which pillow is in which place, the pillows cannot be swapped. Remove the crankshaft, and unscrew the engine mounting ears, they will interfere with the boring of the block. Usually I do not unscrew the pump, if everything is in order with it, then there is no point in taking it off and wasting time.
Photo. Engine block and crankshaft.
Now we need to make a list of spare parts that will need to be purchased for repairing the engine, but it is very important that the pistons are bought before the block is taken to the boring, the borer bores the engine block under the pistons. And the liners for the crankshaft are bought after boring, when it will be known under what size the boring machine was bored. Since the crankshaft was standard, I predict that, most likely, after boring, the liners will be 0.25, but the borer will say for sure.
It is also very important, be sure to ask that the block was bored out under the mirror, and not under the mesh.
When choosing pistons, I usually put "Kharkov" or "AVTRAMAT".
No matter how I argue that the boring of the block under the mirror is better than under the mesh, this will not seem convincing to many.
Therefore, I will try to explain in such a way that they themselves understand the difference.
When a piston with piston rings rubs against the cylinder wall in the form of a mesh, the mesh is a rough grinding with coarse sandpaper. A cylinder with a mesh turns out like a fine file, of course this file immediately starts to grind down the piston rings and the piston. In turn, the piston rings with the piston, grinding off, smooth the mesh in the cylinder, gradually filling the mirror. As a result, the piston with rings fill the mirror in the cylinder, but they themselves are already half worn out, plus a large output in the cylinder itself. Engines made under the grid do not last long, they start to eat oil very quickly.
Although it seems that the mesh retains the oil on itself, thereby prolonging the life of the piston, but not because the oil holds better on the mesh, this does not prevent the sharp edges of the mesh from eating the piston and piston rings.
Although I met people who proudly said that their engine was bored to the grid, but this until the engine has passed more than 20 thousand, and then questions begin, what to do, the engine starts to eat more and more oil.
It is correct not to spoil the cylinder with a mesh, but to modify the piston, how to modify the piston is described in the next article.
4.Intermediate shaft with liners
5.Shaft and gears of the oil pump
6.Gear wheel drive oil pump (fungus) Niva
8.Support half rings (crescents)
10.Piston rings 79.4 (necessarily German)
12.Rod oil seals (for the German crankshaft)
13.Valve oil seals (German)
14.Chain 116 links (for six)
17.Gasket under the valve cover
18. Crankshaft and main bearings?
A list of spare parts specifically for repairing this engine has been compiled, it remains to take the block and crankshaft to the boring, buy spare parts, and then only assemble the engine.
Any experienced car owner will tell you that a stable cylinder head is a guarantee of the reliable functioning of a car engine. The cylinder head of the VAZ 2107 in good condition reduces fuel consumption and improves the dynamics of the car.
Inexperienced car owners should know that head repair work should be carried out only by highly qualified specialists. Otherwise, an incorrectly adjusted unit can lead to damage to many engine components. Refurbishment work can cost a lot. But experienced motorists with the required skills can replace, repair and pull the cylinder head bolts on their own.
The following symptoms may indicate a malfunction of the cylinder head on the VAZ 2107:
- the engine is troit;
- black smoke coming out of the exhaust pipe;
Many malfunctions are resolved after pulling the bolts, but if this does not help, then a major overhaul of this unit may be necessary, involving the removal of not only the cylinder head, but also other parts of the block. Some parts may need to be replaced such as gaskets, valve stem seals and valve guides.
For work we need the following tools:
| Video (click to play). |
Before starting work on the repair of the cylinder head, it must first be removed and cleaned of dirt.
- The first step is to drain the coolant from the engine.
- We remove the carburetor.
- Having disconnected the pipes and hoses, we remove the air barrier.
Having previously set the marks with a marker, remove the rockers.
This video shows the process of removing the cylinder head.
Now it's time for the valves to dry out. This is done with a special device. If chips, cracks, rust are not visible, we carry out further inspection. We assess the condition of the saddles, the repair of which is recommended every two hundred thousand kilometers.
We inspect the guide bushings, in case of their unsatisfactory condition, they must be replaced.
A special tool is used to extract them. If this is not at hand, then you can do with pliers and a clamp. Having removed the bushings, we measure their diameter. We buy similar ones, the size of which is 0.05-0.07 millimeters larger than the replaceable ones.
The guides are pressed in with a mandrel, an electric stove, a hammer and grease.
- We put the head on a stand along the edges.
- We put an electrical device under the place of work.
- We are waiting for the metal to heat up to about a hundred degrees (so that it expands).
- Now you need to properly lubricate the bushing with grease.
- Having removed from the holders, we drive in new guides.
- When all eight are replaced, we are waiting for the cooling of the cylinder head.
- The valves should not dangle and move freely, there should not be any jamming.
To achieve a tight fit of the valves to the seats, the following must be done. Using a lapping paste, lubricate the valve and insert it into the head. There are several ways to rotate it, here are some of them:
- using a hose tightly fitted to the part;
- using a device very similar to a corkscrew.
The main sign of a good lapping valve will be the specific matte surface of the seat where it contacts the part.
The tightness of the head can be checked by pouring kerosene into the manifolds, you can also use gasoline. If done correctly, then there should be no leaks for the first five to seven minutes.
Attention! All engine parts must be rinsed with a special solution, this will ensure long-term and uninterrupted operation of the power plant for a long time.
When assembling the head, be sure to pay attention to the correct threading of the bolts. It should be carried out strictly according to the scheme. In the event of an incorrect feed, distortions may appear and, as a result, all your previous work will be crossed out. If you have any questions, watch the video.
This video shows the repair of the cylinder head and the replacement of used parts.
One of the advantages of cars produced by domestic factories is the ability of the owner to repair any components and assemblies, up to a complete disassembly of the engine. If the car owner began to master the repair of the cylinder head, then it is necessary to figure out how to replace the valve guides. This procedure, in comparison with other manipulation, is not difficult, but it is essential for ensuring the operability of the motor.
The elements of the block head play an important role in ensuring the stable operation of the motor. Especially carefully it is necessary to monitor the condition of the valves, because it depends on them how efficiently the cylinders will be filled with a combustible mixture and released from the combustion products. This work is entrusted to the valves, which promptly open and close the openings of the channels for the intake of the fuel mixture and exhaust gases.
Each valve has a working part in the form of a disk (poppet), which fits snugly against the seat and stem. It is through the rod that the reciprocating movement is transmitted to the plate, which is necessary for the operation of the mechanism. In order for the valve stem to move strictly along its axis, it is placed in a special bushing.
The valve guides are designed in such a way that the valve does not have the ability to swing to the sides. The lack of clearance between the stem surface and the inner surface of the bushing also helps the valve seal to protect the combustion chamber from engine oil ingress.Even though very tough alloys are used for valves and guides, wear is inevitable. That is why it is periodically necessary to replace the valve sleeves.
The obvious signs of the need for such a repair are:
- getting into the combustion chamber of engine oil (increased oil consumption, blue exhaust smoke);
- characteristic noise from the head;
- replacement of valve guides with new ones;
- replacement of valves after damage (especially when the stem is bent);
- overhaul of the cylinder head.
Any work related to the repair of a car engine requires preparation. This is especially important when it comes to the gas distribution mechanism. In the process of returning the motor to life, it will no longer be possible to do with a simple set of wrenches. The design of individual elements requires special tools.
Replacing the VAZ valve guides on all cars of the classic series is absolutely the same due to the identity of the engine design. To carry out this operation, a special mandrel is required, which can be ordered by a familiar turner or bought in a store. It consists of a handle and a working part. The working part is a rod, the diameter of which is slightly less than the outer diameter of the sleeve, and at the end there is a thinner part that freely fits into the sleeve.
In addition, it is necessary to prepare reamers - special long drills that allow you to bring the inner diameter of the holes to the desired caliber. In the store, you need to purchase a scan for:
- 8,022-8,040 mm (for intake ports);
- 8,029-8,047 mm. (For exhaust ports).
It is over, replacement of the bushings of the engine of any car is possible only when the head is dismantled, the valves and other elements of the GB are removed, and the studs from the cylinders No. 1 and No. 4 in the upper part are unscrewed (they interfere with the pressing of the bushings).
Getting started, the cylinder head is pre-cleaned of grease and dirt. Next, it must be laid on a workbench with good lighting. After that, the following operations should be performed:
- alternately inserting the mandrel into the holes of the old bushings (from the side of the combustion chamber), gently hit the end with a hammer and knock out the bushings;
- We clean the bushing seat with a rag with gasoline or solvents, blow it with compressed air;
- the sleeves must be kept in the freezer for about 2 days in advance to compress them;
- we heat the cylinder head on an electric stove to a temperature of about 100 degrees Celsius (this will expand the landing channels);
- we put on the retaining rings on the bushings, insert the bushings into the holes and carefully hammer through the mandrel until they are fully seated.
Replacing the valve guides ends with reworking the bore holes to the required diameter. This must be done when the head has completely cooled down. If the valve stem does not fit into the bore of the sleeve, it is bored with reamers, which are used in turn from the smallest size with the fitting of the field of each pass.
In order for the replacement of the VAZ valve bushings to be done as expected, it is necessary to determine in advance where the intake and exhaust valves are installed, and also prepare the bushings. It is difficult to confuse them. The intake valve sleeve is shorter in size and has mid-way lubrication grooves on the inside. The exhaust valve sleeves are longer and grooved all the way through.

