In detail: do-it-yourself Matiz generator repair from a real master for the site my.housecope.com.
Daewoo Matiz. REMOVAL AND DISASSEMBLY OF THE GENERATOR
We carry out the work on a viewing ditch or overpass.
Disconnect the terminal of the wire from the negative terminal of the battery.
Remove the alternator drive belt (see "Adjusting the tension and replacing the alternator drive belt", p. 38).
Using a 12 key, unscrew the nut of the other bolt, keeping the bolt from turning with a wrench of the same size.
Disconnect the wire from the oil pressure sensor in the engine lubrication system (see "Replacing the oil pressure sensor", p. 60).
We unsolder three outputs of the stator windings from the outputs of the rectifier unit.
We remove the rectifier unit with a brush holder and a voltage regulator assembly.
We check the length of the brushes. If the length of the brushes is less than 14 mm, replace the brush holder.
To remove the brush holder, we solder the brush holder leads. To remove the voltage regulator, unsolder its terminals. We assemble the generator in reverse order. To facilitate the installation of a rectifier unit with a brush holder and a voltage regulator, we cut a strip from a plastic bottle and roll it up into a tube. Having inserted this tube into the brush holder (the tube holds the brushes in a recessed position), we install the rectifier unit with the brush holder and the tube on the generator, tighten the bolts and screws that secure the brush holder and the unit.
Generator with removed casing: 1 - generator cover; 2 - rectifier unit; 3 - voltage regulator; 4 - electrical connector block; 5 - brush holder; 6 - output "+ B" (contact bolt); 7 - slip rings; 8 - conclusions of the stator winding
| Video (click to play). |
Replacing the generator brushes
Symptoms: the generator does not provide the required battery charge.
Possible reason: the generator brushes are worn out.
Tools: wrench set, socket set, flat blade screwdriver, Phillips screwdriver, chalk (felt-tip pen, marker).
1. Place the vehicle on an inspection pit or overpass.
2. Disconnect the negative terminal from the storage battery.
3. Remove the alternator drive belt.
4. Unscrew the alternator drive belt tension adjusting bolt using a “12” spanner.
5. Unscrew the two adjusting bar fixing bolts using the socket.
6. Remove the adjustment bar.
7. Remove the harness block from the generator.
8. Slide the rubber protective cap.
9. Unscrew the nut securing the lug of the generator output wire using the "10" head.
10. Disconnect the wire lug from the generator lead.
11. Remove the bolt of the lower generator mounting using a wrench (drive end).
12. Unscrew the securing nut of the other bolt using a wrench; keep the bolt from turning with a second wrench.
13. Disconnect the wire from the oil pressure sensor in the engine lubrication system.
14. Mark the location of the dynamic damper on the right front wheel drive shaft using chalk, felt-tip pen or marker.
15. Bend the tabs of the dynamic damper mounting clamp using a screwdriver.
16. Slide the dynamic damper along the shaft towards the wheel.
17. Remove the generator ears from the bracket by moving the generator towards the starter. Lower the generator and remove it from the engine compartment.
18. Release the four plastic clips by prying them off with a screwdriver.
19. Disconnect the generator shroud.
20. Remove the spacer sleeve from the contact bolt.
21. Unscrew the three fixing bolts of the rectifier unit using the “7” socket.
22. Unscrew the three fastening screws of the brush holder and voltage regulator using the head "E-5".
23.Tap off the three leads of the stator windings from the rectifier unit.
24. Remove the rectifier unit together with the voltage regulator.
25. Measure the length of the brushes: it should be at least 14 millimeters.
26. Replace the brush holders if the length of the brushes is not correct.
27. Assemble and install the generator in reverse order.
Continuing an exciting journey through the components and assemblies of our favorite machine, in today's article we will discuss such an important unit as generator Daewoo Matiz... It is this unit that is the main supplier of energy to the systems and units of your car. It is the Daewoo Matiz generator that provides the formation of a spark on the spark plugs, illuminates the road with headlights and turns your favorite disc in the radio tape recorder.
And if it breaks down - the car becomes real estate - well, at least until the generator is replaced or repaired.
As one glorious Englishman once said: “Let's sit on the ground covered with the first spring grass, put a cup of wine in a circle and tell strange stories about kings ...” Well, in terms of generators ...
As mentioned above, the main task performed by generator Daewoo Matiz (and indeed any car generator) is the generation of electricity by converting mechanical energy into electrical energy.
Energy feeds all onboard consumers and recharges the battery. The very scheme of operation of the generator in Matiz is no different in its general principles from any automobile generator - a pulley located at the end of the crankshaft rotates the generator rotor through a belt. The rotor itself is fixed in closed bearings, which are pressed into the generator cover.
The generator does not require any maintenance during operation - it is enough to check the tension of its belt. Removing and installing the generator is not difficult - you can read about it in our article Replacing the Matiz generator.
But the repair of the generator with its disassembly is better for handing over to the hands of an electrician.
To indicate the health of the generator, a special light is provided on the instrument panel, which lights up when the ignition is turned on, and goes out when the engine is running, and the generator rotor rotates. If this lamp blinks or is on constantly, you should urgently look for a malfunction in the generator, its electrical circuits and check the belt tension.
The strength of the current that produces generator Matiz - 65 A, operating voltage - from 13.8 to 14.6 V.
Generators of two types are installed on Daewoo Matiz: Delphi (type "A") and Mando (type "B").
Both types of generators have the same mounting dimensions and specifications.
And only heaven knows what they are guided by when installing a certain type of generator at a factory - most likely the presence of a stock of certain generators. Neither the VIN number nor the vehicle documentation will give you an answer to this question before an external inspection.
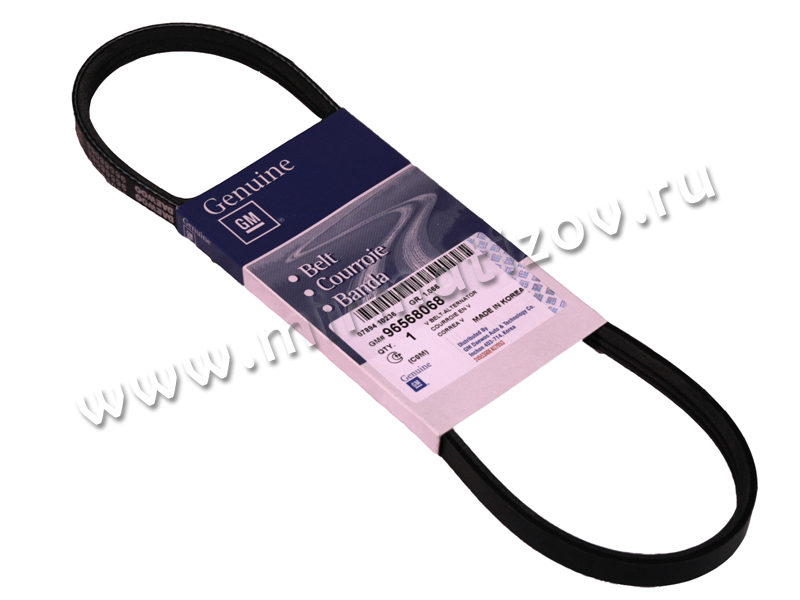
What is the fundamental difference between these types? Firstly, it is the belt and, accordingly, the pulley, with which the generator rotor is set in rotation. The generator type "A" (Delphi) has a poly V-belt, its inner surface consists of three longitudinal wedges. Also, a similar belt is called a rivulet belt. The alternator pulley has, respectively, three slots. The belt number according to the Daewoo Matiz catalog is 96568068.
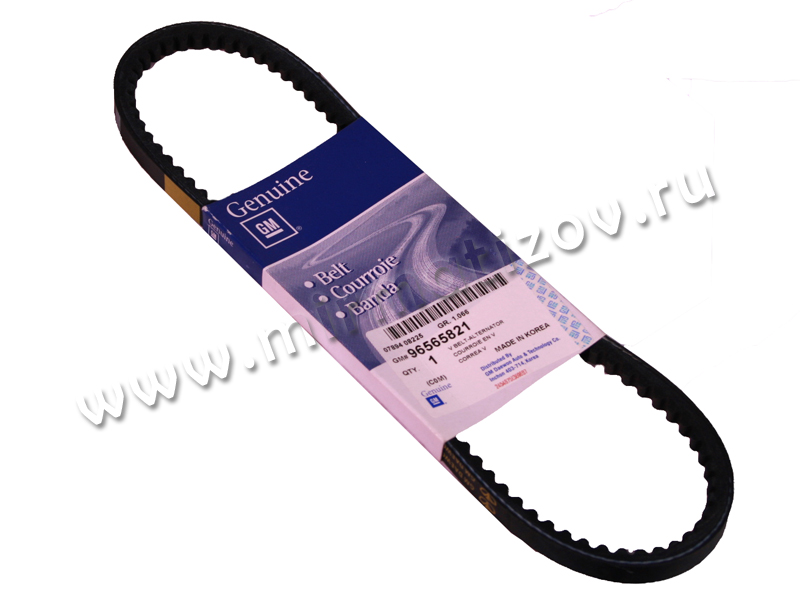
Generator Daewoo Matiz type "B" (Mando) is driven by a V-toothed belt and has a matching pulley with a single groove. The belt has transverse teeth (approximately like on a saw blade) - therefore it is not difficult to distinguish this belt even by touch. The number of this belt according to the Daewoo Matiz catalog is 96565821.
It is very, very simple to distinguish these belts on a car - just run your fingers along the inner surface of the belt. By the absence or presence of transverse teeth, you can find out which belt (and most likely the generator) is installed on your Matiz.
The second fundamental difference in the design of the two types of generator is diode bridge - an element that converts alternating current into direct current.
Often in our work, we note customer requests related to the failure of the diode bridge on the DELPHI type generators (type "A"). This is what this wonderful element looks like:
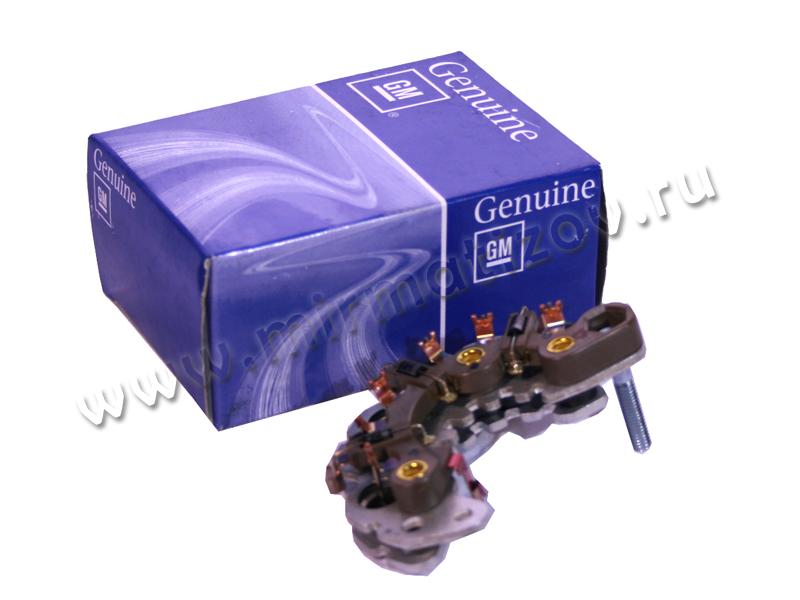
The flow of those wishing to purchase diode bridge generator Matiz is constant, and this is due to the peculiarity of its design, which makes the diode bridge the Achilles heel of Daewoo Matiz equipped with DELPHI-type generators. The body of the diode bridge itself is made of aluminum alloy, and the rivets with which it is riveted are made of brass. Add to this the salty environment of your native roads, the effects of electricity, and remember school physics and chemistry lessons.
The combination of aluminum and brass forms an excellent electrochemical pair, which is why electrochemical corrosion “eats up” the bridge in just 2-3 seasons of operation.
That is why the Matiz diode bridge is, in essence, a consumable.
As usual, there are several ways out of the situation:
1. Periodically change diode bridge (usually gets boring after the second replacement in three years).
2. Drill out the brass rivets and replace them with aluminum ones. Program "Crazy Hands" to help you.
3. Replace the Delphi generator with Mando once and forget about these problems.
And he's good about other faults!
In the sense that there is nothing special to break in the generator, and here are some other malfunctions that can happen to it in a very, very rare case:
- Wear and destruction of the rotor bearings. It usually happens not earlier than 50,000 km. run, and before that it manifests itself in the form of vibrations and a hum, which only a deaf person can miss. It is treated by replacing the bearing or generator assembly.
- Failure of the voltage regulator. Replacement is not difficult.
- Wear of brushes. They also run under 100,000 km, replacement is simple and cheap.
- Broken belt. It has nothing to do with the generator, it is treated with a replacement.
- Theoretically - burnout of the winding (I have never encountered such a case).
The Daewoo Matiz generator is a specific thing, and if fate wanted a Delphi generator to get into your Matiz at the factory, take it with courage. Although it is not at all a fact that there will necessarily be problems with it - many Daewoo Matiz roll back with such a generator 100 thousand kilometers or even more without any problems, but the probability of failure of its diode bridge is much higher than that of Mando - and this is a circumstance can be called almost the only "childhood disease" of our beloved car.
If there are problems with the diode bridge, especially if the car's mileage is 30 thousand or more, the owners usually change Delphi to a new Mando. New bearings, and in general the absence of wear on other elements, more than pay for it and guarantee long-term further operation of the generator.
And we have never come across the fact that Mando was changed to Delphi - this is possible if only on a desert island somewhere in Oceania.
(Yes, we can arrange the delivery of the new Mando there too! – note from the head of the delivery service MM)
Generators of two types were installed on the Matiz, the easiest way to distinguish them is by the drive belt, if the generator drive belt is poly-V, then the generator may soon make itself felt. If the belt is a regular V-belt, then a second type generator is installed, which is rarely complained about.
According to the owner, it began with the battery discharge lamp lighting up, they did not pay due attention to this, they say, this happened before and then passed by itself. But not at this time. The short trip ended with a complete discharge of the battery. As it is not difficult to assume, the generator turned out to be of the first type with a constructive flaw inherent in the factory.
The generator is not particularly conveniently located, it can be removed from the bottom. Before starting work, be sure to disconnect the battery.
First, the right front wheel is removed and the side plastic protection of the engine compartment is unscrewed
Then the nut for fixing the tension of the generator belt is unscrewed from above, the rest of the work is carried out from below.
The two bolts of the lower axis of the generator are unscrewed, the "guitar" of the longitudinal fixation of the engine is unscrewed (in the foreground of the photo)
The positive wire is unscrewed from the generator and the connector is removed (it is more convenient to remove the connector when the generator is released from the fasteners)
Then the bracket for mounting the generator and the engine guitar is unscrewed from the cylinder block. The fastening is on three bolts, the upper one is the most inconvenient, therefore, it is possible to remove the bracket not completely, but to leave it on the upper bolt, slightly loosening it, then it will be possible to take the bracket to the side when removing the generator.
In the photo below, the bracket is completely removed. The generator is removed downward and led out into the right wheel arch.
We proceed to disassemble and check the generator elements.
The plastic cover is removed on 4 diametrically opposite latches, and the diode bridge and voltage regulator with brushes are unscrewed, which requires a key for 7 and E5. The diode bridge is soldered to the stator windings - for dismantling, you need a soldering iron for at least 60 W, and better for 80-100 W.
The source of the problem is already visible in the photo, but for complete confidence, it is required to check all the elements of the generator.
The brushes are in good working order. The stator and rotor windings have normal resistance - they are also serviceable. The diodes are in order, the resistance in all in the right direction is the same in the opposite direction. It remains to check the regulator. We connect it to an adjustable voltage source and measure the voltage on the brushes, for 12 and 13.5 V it is equal to the supplied voltage, at 15 V it sharply decreases to 3 V
The regulator behaves as it should, all the elements of the circuit are in good order, it's all about the brass rivets that connect the minus of the diode bridge to the ground. Brass and aluminum form a galvanic pair, as a result of which a film of oxides forms at the point of contact, which prevents normal electrical contact. The solution to the problem is drilling the protruding parts of the rivets from the negative terminal of the diode bridge, cleaning the oxidized places, applying a thin layer of oil and placing steel washers under the bolts.
The assembly is carried out upside-down. The stator leads are well crimped and soldered to the diode bridge.
After that, the generator is installed in place, the belt tension is adjusted and the car leaves with a working generator that will travel much longer after such a revision.
ZY Theoretically, riveting can be carried out without removing the generator at all, but it will not be possible to carry out a complete check of the elements in the assembled state.

- Members
- 584 posts
- Moscow city
- Members
- 6,266 posts
- City: V.Novgorod
- Members
- 1,156 posts
- City: Makeevka. Don. region Ukraine.
- Members
- 2,860 posts
- City: Orenburg region.
- Name: You can.
- Members
- 584 posts
- Moscow city
- Members
- 2,860 posts
- City: Orenburg region.
- Name: You can.
-
- Members
- 2,847 posts
- Moscow city
- Members
- 215 posts
- City: Kurgan
- Name: Alexander
I drew a drawing, a side view, do not judge strictly. As a result of the formation of oxide salts, the resistance of the charging circuit increases significantly, the voltage in the auto network drops, the relay-regulator increases it, already taking into account additional. resistor - oxide. Next comes the breakdown of the oxide, and the charging current surges (pulse voltage surge until the regulator reduces the armature current - the magnetic field - the voltage at the stator output, which falls on the diodes). And the diodes have less time to turn into beautiful roses. That's the whole disease, which is so rare in other cars.
Post has been edited_Boniface_: 17 May 2009 - 13:43
Post has been editedtoporishev on: 29 September 2012 - 20:04
 Replacing the generator is not an easy task, but, nevertheless, everyone can do it. By following the instructions below, you can do it yourself by replacing the alternator on your car.
First, remove the alternator from the engine. Next, unscrew the nuts securing the generator casing, rear, and the contact nut. Then remove the generator shroud, rear. Remove the screws securing the voltage regulator and brush holder.Remove the brush holder and the same regulator behind the generator. Be sure to check that the brushes move smoothly and smoothly in the brush holder.
Remove the diode block from the generator, before that unscrew the screws. Then mark the front and back parts of the generator to match. Next, remove the pulley from the rotor shaft, while moving the nut for fastening.
The next step is to remove the back cover of the generator, for this you need to unscrew four bolts. Remove the rotor and lock washer from the front cover. Then you check the diode block and the presence of stator windings, for this you need an ohmmeter.
To install the generator, you need to follow all the steps in reverse order.
Sometimes there are situations that it is necessary to remove the generator from the Daewoo Matiz car for its repair or replacement. However, we do not always have access to a viewing pit, flyover or lift. Therefore, now we will learn how to replace the generator without additional tools. In this way, we don't need to lift the car, instead working only in the engine compartment. All actions will be done from the side of the right wheel.
Opening the hood, we find there an expansion tank with coolant. We will need to drain it, so that during further dismantling it does not pour it onto the floor. First, we prepare a small container to collect the coolant. Enough soda bottles.
Remove the connector from the generator and the boot near the right wheel
So, we disconnect the pipe that leads from the expansion tank to the throttle valve. To do this, squeeze the clamp with pliers, pulling it back a little. This will allow us to remove the already named top tube. We move the clamp closer to the engine shield for convenient drainage and drainage of fluid from the branch pipe into a bottle or canister that was previously prepared. Since there is practically no pressure in the pipe, there is no need to be afraid that it will jump out of the container. To more effectively drain the liquid, we start the engine and wait until all the antifreeze is drained.
Now we can remove the expansion tank. We remove the terminals from the battery to avoid a possible short circuit. Now you can remove the second upper branch pipe, as well as raise the power steering tank. This will allow you to slightly move the expansion tank towards you and dismantle the lower branch pipe by sliding the clamping clamp with pliers. Now you can completely remove the tank, which we do. We remove all pipes to the side in order to gain free access to the generator.
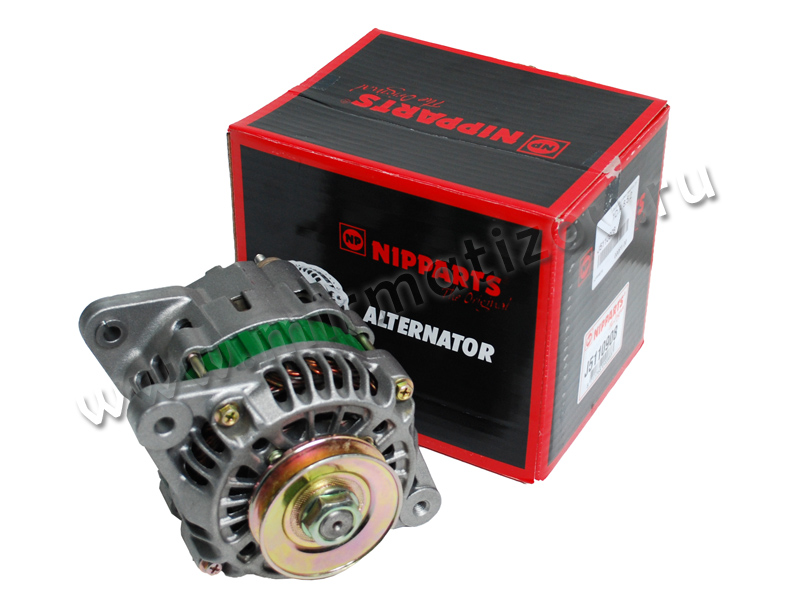
 Non-original generators can also be used when replacing
Next, we disconnect the fuel line from the fuel rail. To do this, press two clamps on both sides of the fuel line. Raise the clamps up until they click and lower them back. So, we have disconnected the fuel line from the rail.
The generator has one electrical connector that goes to the battery charge indicator light. We will need to disconnect it. A wire (plus) is attached to the adjacent nasal outlet, which can be disconnected by unscrewing the nut with a 10 key. We need to unscrew the generator tension bolt and two bolts securing the generator strip.
We remove the top bar and monitor the fuel rail, the tube of which can bend if not properly operated. On the generator itself, there is a bolt and a rail mount. To dismantle them, you need to use a 12 key. Next, remove the boot under the generator, which is held by two nuts for a 10 head and one bolt.
Now we got directly to the generator itself. There is a bolt on one side and a bolt and a nut on the other. To dismantle the generator, we will need to unscrew the bolt from the rear engine mount bracket. Don't worry, it won't skew the engine. Also, you will need to remove the alternator belt.
Now we need to unscrew the two support mounting bolts, which go under the head 12. If they do not unscrew very well, you can use the WD-40.The bolt closer to the center of the engine has a ground wire. Do not forget to connect it back later, when you carry out the assembly.
Having previously removed the support mounting bolt (however, it can not be completely unscrewed, but only slightly loosened to a noticeable backlash), we take out the generator through the hole between the pallet and the right side of the spar. When detaching the rear engine mount, there should be enough space for dismantling the generator.
After we managed to remove the generator, you can start repairing or replacing it. The steps for re-installing the generator are directly opposite to those already performed. Of course, this method of accessing the generator is not as convenient as when working with a lift, but it allows you to quickly repair it, being far from the car service.
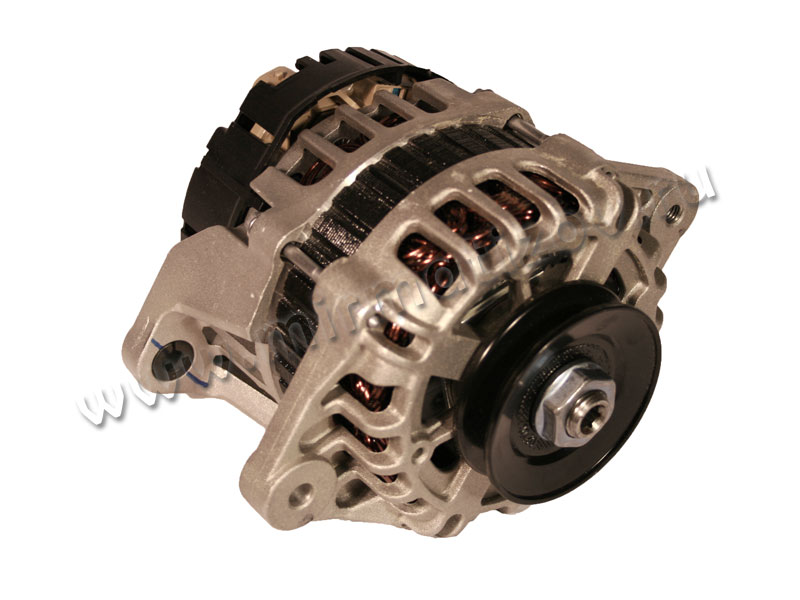
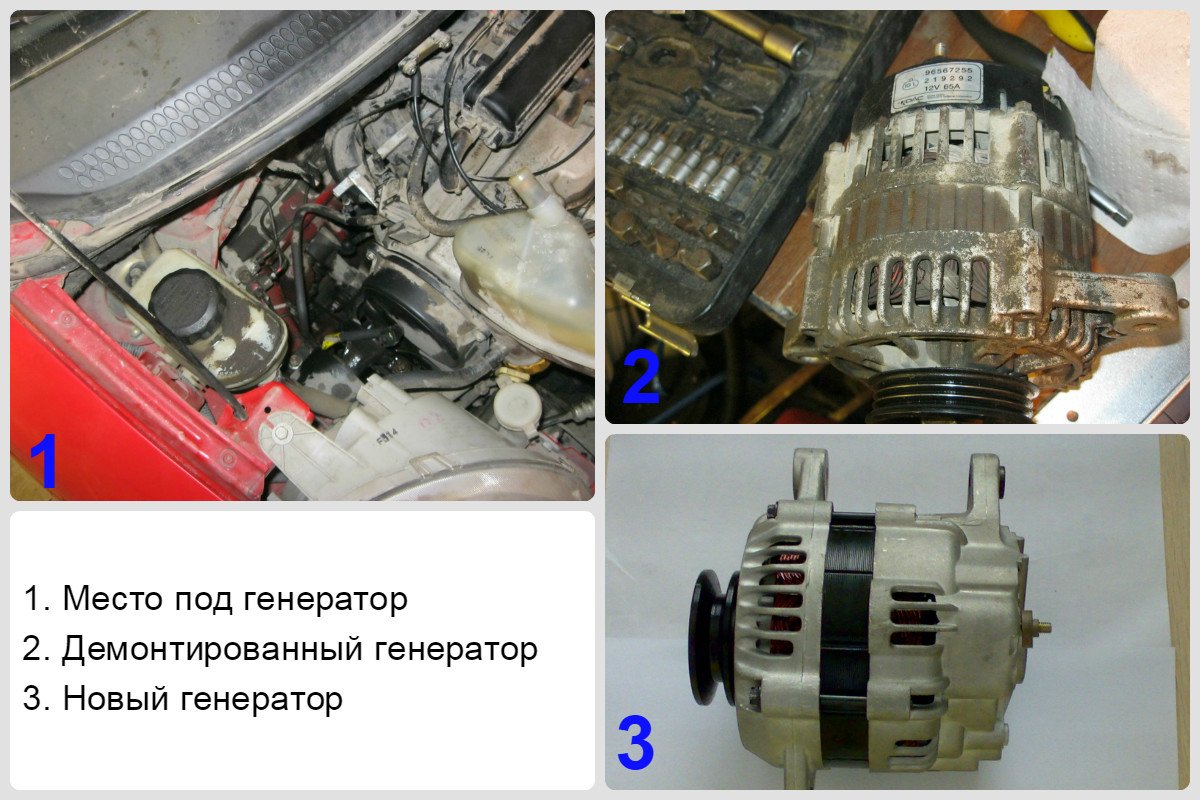 Old and new generators on Daewoo Matiz
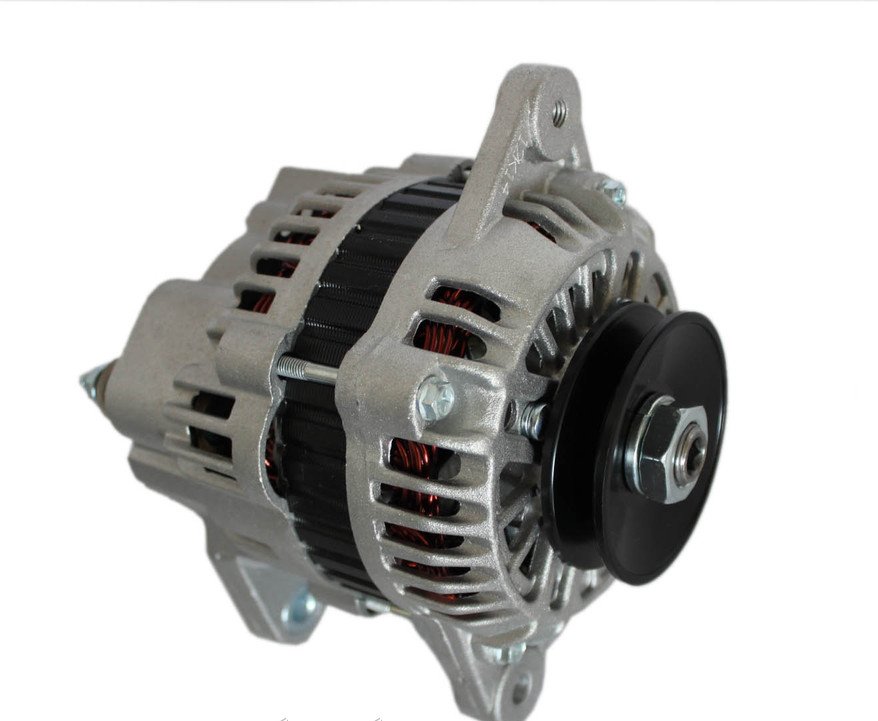
If repair is not possible, then this spare part must be replaced. At the same time, we are talking not only about the standard model, but also about the JA1600 (JA1600IR) generator from HC-PARTS, as well as some others under the numbers 96289030, 96380673, 96566261 and 96567255. In addition, it is possible to use non-original models from EAI under the number 56938 , from JAPANPARTS under the number ALZ460, from LAUBER under the number 11.1600, as well as some others. Their characteristics are almost completely identical to the original generators, which can be easily replaced by them.


poltergaist (September 29, 2012 - 19:46) wrote:
Post has been editedKoff: 29 September 2012 - 19:51
MY NAME IS ALEKSANDR AND I AM A TOOLOHOLIC