It should be said that work should be done only on the removed motor. In this way, the process can be greatly simplified. If it is not possible to remove the engine, then repairs can also be made on the car, having previously freed up space.
In order for the cylinder head to fit snugly to the block itself, it should be tightened correctly.
This completes the work. If it was done correctly, then the motor will run stably, and the antifreeze will no longer get into the combustion chamber .
If the head is not properly tightened, then under-tightening or over-tightening of individual bolts may occur, which will also lead to problems. So, for example, under-tightening will cause antifreeze leakage, and overtightening can lead to cracks in the power unit.
VIDEO
Disassembly and assembly of the cylinder head
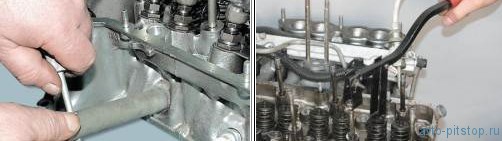
If there is a device for compressing valve springs that is different in design from that shown (for example, a screw, screwed into the hole in the head of the block under the hydraulic support), it may not be necessary to remove the receiver. For convenience, you can remove the intake pipe and exhaust manifold (see "Replacing the inlet pipe and exhaust manifold gasket"), as well as the rest of the attachments removed with the head, however, if repair or replacement of these assemblies is not required, with sufficient skill, repair the head block without removing them.
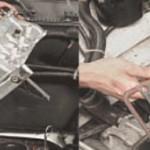
3. Remove all spark plugs.
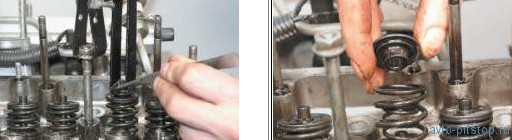
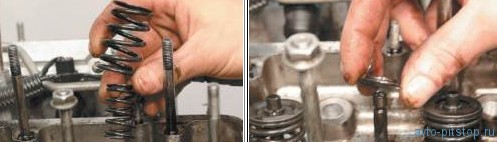
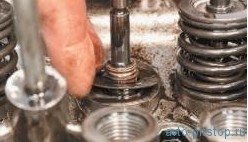
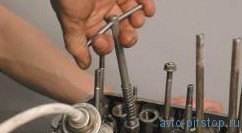
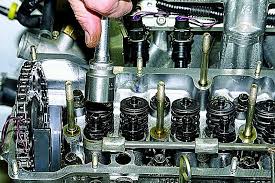
5. Remove the fixture, spring plate, springs, support washer of the inner and outer springs.
Troubleshooting of cylinder head parts
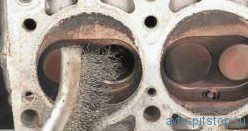
Pre-soak the carbon deposits with kerosene. Mechanical cleaning of carbon deposits is possible.
2. Inspect the head. If there is a suspicion of cracks in the cylinder head (especially when coolant gets into the crankcase or oil gets into the coolant), check the tightness of the block head on a special stand (in repair shops that have the appropriate equipment).
3. Check the condition of the valve seats. The working chamfers of the seats should be free of signs of wear, cavities, corrosion, etc. The valve seats can be replaced by a specialist workshop. Minor damage (small marks, scratches, etc.) can be removed by lapping the valves (see Lapping the valves).
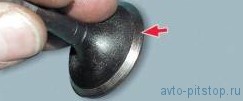
5. Remove carbon deposits from the valves and inspect them. Deformation of the valve stem and cracks on its disc are not allowed. Replace valve if damaged. Check if the working chamfer is too worn or damaged.Grinding of the working chamfer of the valves is allowed (in repair shops with the appropriate equipment). After grinding, the chamfer angle relative to the plane of the plate should be 45 ° 30 '± 5', and the thickness of the cylindrical part of the plate should be at least 0.5 mm. In addition, the bevelled alloy layer should remain at the exhaust valve.
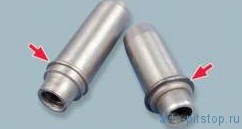
Replacing the valve guides
Unscrew the hairpin by screwing on it two nuts, mutually locking each other. Use a stud driver if possible.
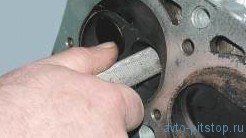
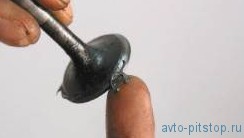
2. Turn the head over and with light hammer blows through the mandrel, press out the sleeve towards the valve drive.
4. After pressing in, unfold the holes in the bushings:
Lapping valves
In the absence of ready-made devices, you can use a device made according to the drawing shown in Fig. 4.9.
3. Slide the pre-sized spring onto the valve stem.
5. Put on the valve stem a valve lapping tool (or with some tension on the rubber tube to connect the valve to the reversing drill).
7. Launch the valve until a matte gray continuous solid colored band with a width of at least 1.5 mm appears on its chamfer, while a matte gray band with a width of at least 1.5 mm should also appear on the valve seat after lapping.
8. After lapping, thoroughly wipe the valve and seat with a clean rag and rinse to remove any residual lapping paste. Check the tightness of the valve, for which install it in the head with springs and crackers. Then put the head on one side and pour kerosene into the channel that is closed by the valve. If kerosene does not leak into the combustion chamber within three minutes, the valve is sealed.
Dmitry is already a regular customer of the workshop K-POWER , for nothing that is in Kazan. In the spring of 2009, he was the first to bet on Oku 52 shaft with modified head and oversized valves 39x34 mm ... The machine then gave out a surprisingly flat shelf of the moment and 47 forces, which for 52 shaft was a kind of revelation that caused heated debate and a wave of natural interest in 52 shaft. You can read more in this report.
Dmitry is an active member of the club "Chevrolet Niva" .
During the summer, Dmitry actively “ventilated” the tuning issue and in every possible way contributed to speeding up the process - in a positive way, of course. In particular, thanks to him, three cars came to Chelny for measurements of the VSH - Dmitry's “snowball” with a tuning camshaft, and two Chevy-Nivas with a completely standard engine. We managed to set up the equipment and measure the VSH of the serial engine, thanks to which we have a “starting point”.
Now let's talk a little about the car we were going to work with. VAZ 21214 engine, volume 1.7 liters, mileage 60 thousand km ... On the 20th thousand, the valve burned out, the “officials” in Kazan repaired the head (valves and valve stem seals were replaced). After the repair, the officials soon required a second replacement of the valve stem seals. NESTE .
Complete machine LC - equipped with air conditioning.
Initially, we wanted to limit ourselves only to the finalization of the block head and chip tuning. The car is completely fresh. It was assumed that everything was in order with the block, and Dmitry did not complain about anything. There were many options on the head. The goals of tuning the Chevrolet Niva are different from the goals that car owners set for themselves when tuning cars. Operation of the Chevy-Niva involves off-road, it is important torque at low and medium revolutions. Engine power per se is not an important tuning target. The Chevy Niva is not a street racing car for racing with traffic lights.
We chose the camshaft for a long time, basically the choice was between 14 shaft and 44 ... In the end, we settled on 14 vale, deciding that we will get the top by finalizing the head, as has happened repeatedly on the lower shafts. Ordered a shaft in Ufa 21213 DynaCAMS -14 (for mechanical bolts).
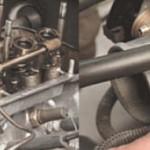
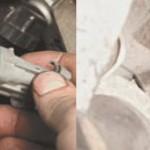
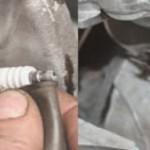
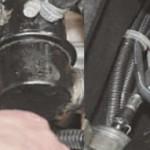
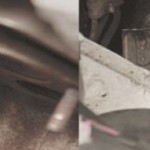
The choice of valves took even more time and nerves. The easiest option is not to change the seats and install the modified serial-size valves. 37x31 mm ... But I wanted to try enlarged valves, especially since we had already installed original 41x34 mm valves on the classics.However, the supplier of these valves temporarily stopped working in the Russian Federation, the opportunity to order them was lost. Many "tuners" follow a simple path - they take cargo valves, shorten the rods, cut chamfers for crackers - and let's go. They will take the money, and then the owner - flour, none of these "tuners" think that the butt and grooves for crackers hardened in the manufacture of HDTV !! And they - with no hesitation, cut all the hardening away and put raw meat on! What's the bottom line ?! Such valves are worth a penny and a zero resource, crackers wear out, the ends are riveted and fall apart, how many cars have already arrived with such valves, here are examples:
Why do “tuners” do this? Due to the difficulties associated with the selection of enlarged valves, it is necessary to observe the length of the rod, the location of the groove for the crackers relative to the end. And not all suitable valves are still suitable for the price, or they can be ordered in the Russian Federation.
The car could now be given the green light.
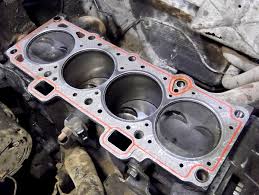
In order for the connection of the head and the cylinder block itself to be sufficiently tight and sealed, a gasket is used. It has three functions:
seals the channel of the cooling system;
prevents oil leakage;
distribution - the cylinder functions normally, as a result of which the mixture of gasoline and air does not flow out.
The seal is used only once and is changed during any motor repair. You can use such types - asbestos, asbestos-free, steel. Each gasket is good in its own way: metal distributes mechanical stress well, asbestos is more elastic and can withstand high temperatures.
You will need such equipment: a key for 10, pliers and a flat screwdriver. Different cars have different design features, engine models and bolting. It is impossible to create the same algorithm for all machines. Consider how exactly to do this with your own hands.
General rules suitable for any car, including the Chevrolet Niva:
when disassembling, mark all attached parts with a marker - so you will not get confused when returning
when buying a gasket, buy exactly the kind that the engine manufacturer advises;
be sure to remove the coating of oil on the bolts of the fasteners;
perform half or one turn while loosening the bolts to relieve pressure;
assembly of the cylinder head is carried out using special bushings;
the bolts are finally tightened with a special wrench very carefully so as not to twist.
After replacing the gasket, carefully observe for signs of leakage to make sure it is a good replacement on the Chevrolet Niva.
We remove the battery wiring and drain the antifreeze.
We release the carburetor from the cables, hoses.
Let's dismantle the controller with voltage wires.
Carefully remove the starter screen and stove tubes from the manifold.
Remove the antifreeze temperature sensor.
We remove the brake booster hose.
We remove the hoses from the cooling system and the stove.
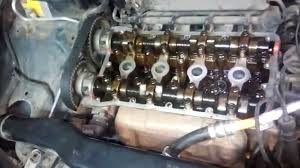
Disconnect the camshaft and valve levers.
We dismantle the chain and fix it.
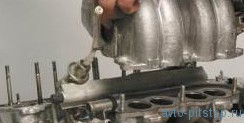
We unscrew the fasteners and remove the cylinder head with a pipe, carburetor and manifold.
According to the owners of the Chevrolet Niva, you need to pay attention to the following subtleties:
you should buy just a metal seal, as it is more durable and of high quality;
if the head fastener is not unscrewed, it must be tapped with a hammer - this way you will damage the surfaces to a minimum and the key will not turn
As you can see, replacing the gasket is not an easy task; you can do it yourself only if you have a good general technical knowledge and skills. Remember, this is still the engine, the main part of the car. Before you do this, study well the engine diagram, the features of your car, do everything slowly, preferably with a fresh mind in the morning, because replacing the gasket is a feasible thing, but requires care, scrupulousness and accuracy.
There is a special offer on our website. You can get a free consultation of our corporate lawyer by simply asking your question in the form below.
VIDEO
Sooner or later, the engine of any car will need care or repair. Especially if the car is operated in difficult and extreme conditions, which is especially important for domestically produced SUVs. Now you will find out how the replacement of the cylinder head gasket is carried out in the Chevrolet Niva and what should be prepared for this.
The need to replace the Chevrolet Niva cylinder head gasket and, accordingly, the need for its tightening torque arises in some cases. It is necessary to change the gasket in the vehicle if it is damaged. This refers to the occurrence of cracks and breakdown in the structure of the cylinder head gasket. In this case, the owner of a Chevrolet Niva will face a breakthrough of gases into the cooling system, as evidenced by the regular bubbling of antifreeze.
In addition, the need to replace the cylinder head gasket for the Chevrolet Niva appears due to the insufficient level of compression in the combustion chambers. Perhaps the gasket has worn out and is no longer able to fully perform the tasks assigned to it. In addition, in the event of a crack in the cylinder head gasket, antifreeze will enter the engine fluid and vice versa.
In these cases, replacing the cylinder head gasket is simply necessary. If you start this case, things can turn out even more sad. Therefore, if at least one of these signs mentioned above is found in your Chevrolet Niva, you need to start replacing the cylinder head gasket as soon as possible.
To carry out these works on replacing the Niva Chevrolet cylinder head gasket and tightening the cylinder head bolts, you should prepare:
Phillips and slotted screwdrivers;
set of open-end wrenches;
torque wrench.
Without the last element, the tightening of the pulleys of the block head will be impossible.
Initially, of course, you need to dismantle the cylinder head cover itself.
Then place a container under the bottom of the car to collect the used refrigerant. Unscrew the drain plug and drain the antifreeze.
Then disconnect the throttle cable from the receiver and assembly.
After that, the camshaft pulley must be dismantled together with the bearing housing.
Next, dismantle the valve lever, and then unscrew the lever supports themselves. Also dismantle the engine fluid supply rail to the hydraulic mounts.
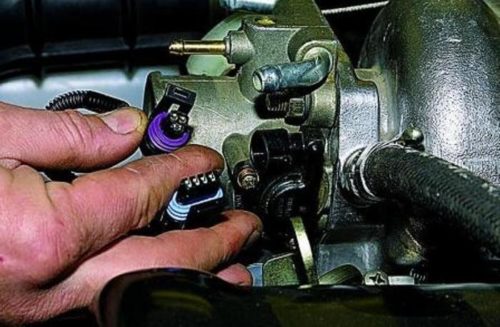
Now you need to disconnect the harness with cables from the TPS. Disconnect the wiring from the idle speed sensor and antifreeze in the same way.
You need to squeeze the plastic retainer and then disconnect the connector with the wires that are for powering the injectors. Here you need to remember to disconnect the harness with the wiring from the knock sensor.
Now, disconnect the high voltage cables from the spark plugs. Also disconnect the cable that powers the motor temperature monitor.
Squeeze slightly and disconnect the front exhaust pipe from the intake manifold. Then the upper screw of the inlet pipe spacer fastening and, slightly loosening the lower screw, the spacer should be taken to the side.
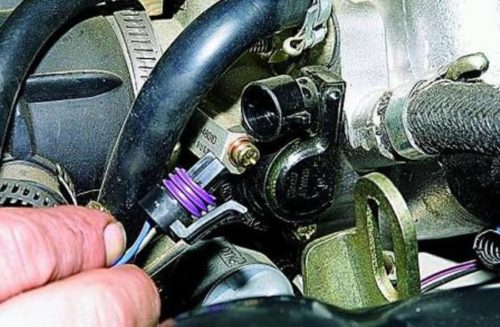
The clamping clamp should be slightly loosened, then the adsorber purge pipe should be disconnected from the throttle assembly.
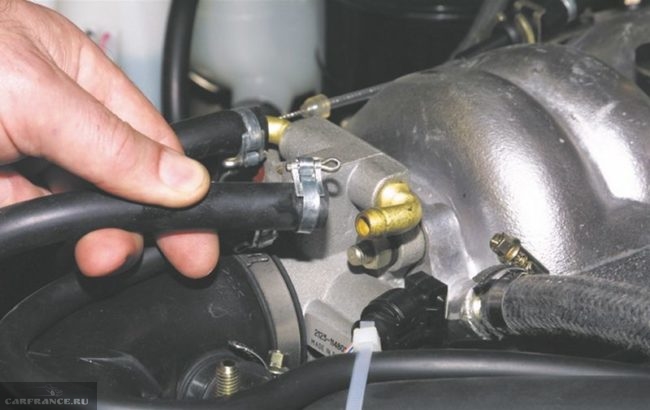
The clamping clamps must be loosened and the pipes of the cooling system must be disconnected from the cylinder head.
Using open-end wrenches, now you need to disconnect the fuel lines. To do this, unscrew the nuts of the fuel hoses designed for draining and supplying gasoline.
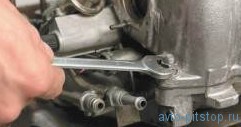
Now, using the wrench, remove the top screw that secures the rear inlet tube strut. The bottom screw should also be loosened slightly. After these steps, the spacer must be removed to the side.
When all of the above steps have been completed, remove the timing chain tensioner.
Then dismantle the brackets with which the power steering device is attached.
Now you can remove the chain with a star of the timing pulley.
After that, using a socket head with an extension, you will need to unscrew the cylinder head fastening screws, and then dismantle it.
The cylinder head gasket can now be removed. Mount a new component in its place, having previously greased it around the perimeter with sealed glue. Actually, this is where the work on replacing the cylinder head gasket in the Chevrolet Niva can be considered complete. All further work on the assembly of the power unit must be performed in the reverse order. But that's not all. To ensure a secure fit of the cylinder head to the block itself, you need to properly tighten the screws and observe the pulling torque.
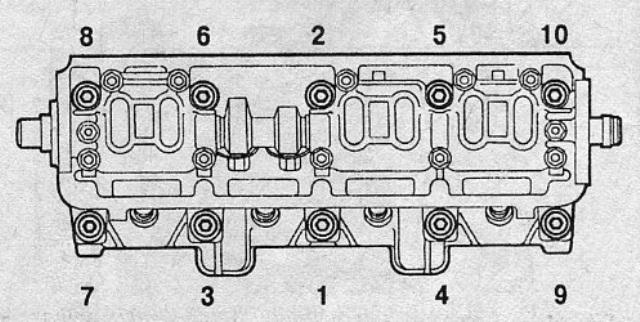
The procedure itself consists of several stages. First of all, using a torque wrench and observing the order shown in the diagram, you need to tighten the screws from the first to the tenth. In this case, the tightening torque of the Niva Chevrolet cylinder head should be 20 Nm.
Further, when all the bolts in turn are tightened, it is necessary to tighten all the cylinder head screws again. The tightening torque should now be 69.4–85.7 Nm. The last, eleventh pulley must be tightened to 31.4–39.1 Nm.
After these steps, the screws marked with numbers from the first to the tenth must be turned 90 degrees, and then, when they are all scrolled, repeat the procedure and again turn them 90 degrees. This completes the screw tightening procedure.
If all the steps were performed correctly, then after replacing the component you will no longer have the problem of engine fluid getting into the antifreeze and vice versa. But keep in mind: everything must be done according to the steps indicated in this manual.
If, for example, you incorrectly tighten the cylinder head bolts, that is, do not reach them or overtighten them, then this can result in more serious problems.
In the event that the screw does not reach, the cylinder head will not fit snugly against the block. This is fraught with engine fluid leakage. If, on the contrary, you have overtightened the pulleys, then this can provoke the formation of cracks in the power unit. If microcracks appear, then you will have to deal with either welding the cylinder head or replacing it. Therefore, before starting such a repair, think carefully - can you do everything right?
See how you can determine that the cylinder head gasket in a Chevrolet Niva car is punctured.
The cylinder head gasket is replaced if it is damaged.
The main signs of damage to the head gasket:
You will need: a torque wrench, a screwdriver, pliers, keys (regular and socket) "for 8", "for 10", "for 13", "for 17", the head "E-Torx".
2. Drain the engine cooling system (see "4.5 Changing the coolant").
4. Disconnect the throttle cable from the throttle assembly and the receiver (see "4.18.2 Replacing the receiver gasket").
5. Remove the bearing housing together with the camshaft from the cylinder head studs (see "4.15 Replacing the hydraulic supports of the valve drive levers").
6. Remove the levers of the valve drive, unscrew all the hydraulic supports of the levers from the holes in the cylinder head (see "4.15 Replacing the hydraulic supports of the valve drive levers") and.
7.. remove the ramp for supplying oil to the hydraulic supports.
8. Disconnect the harness connectors from the TP sensor.
9. . idle speed regulator.
10. . coolant temperature sensor of the engine management system.
11. Disconnect the injector harness connector.
12. Disconnect the knock sensor connector.
13. Move the motor harness to the side.
14. Disconnect the spark plug wires.
15. Slide the protective cap and disconnect the wire from the coolant temperature gauge sensor.
16. Disconnect the front pipe from the exhaust manifold (see "4.25.5 Replacing the front pipe").
17. Remove the upper bolt securing the inlet pipe strut and, having loosened the lower bolt securing the strut, take it to the side.
18. Loosen the clamp and disconnect the adsorber purge hose from the throttle assembly.
19. Loosen the clamps and disconnect the radiator hoses of the cooling system from the pipe of the cylinder head.
21.. side nozzles of the thermostat.
22. Loosen the clamp and disconnect the hose for supplying fluid to the heater radiator from the cylinder head branch pipe.
23. Unscrew the nuts of the fuel pipes and disconnect the fuel supply and drain lines.
24. Remove the upper bolt securing the rear inlet pipe strut, loosen the lower bolt of the strut and take it to the side.
25. Remove the two nuts securing the starter heat shield and.
NOTE
26. take the shield to the side.
28. Disconnect the power steering pump bracket from the engine (see "4.13 Replacing the camshaft chain tensioner shoe") and move it aside together with the pump.
29. Remove the chain from the camshaft sprocket and.
thirty. . place it carefully on the tensioner shoe.
NOTE
31. Remove the ten bolts securing the cylinder head.
NOTE
32. Remove the block head and.
NOTE
33.. the gasket underneath.
34. To determine the cause of the failure of the gasket, carefully examine it. On the edging of the gasket holes, traces of burnout between the combustion chambers of adjacent cylinders will be visible.
35.. between the combustion chamber and the duct of the cooling jacket or.
36.. between the combustion chamber and the channel of the lubrication system.
37. Thoroughly clean the block surface from the remnants of the old gasket.
38. Remove foreign deposits from the channels of the cooling jacket (if any).
NOTE
39. Install a new gasket on the cylinder block, centering it on the two guide bushings.
40.Install the cylinder head, centering it along the two guide bushings, screw in the bolts of its fastening and tighten them in four steps in a certain sequence (Fig.4.8):
WARNINGS
41. Install all removed parts and assemblies in the reverse order of removal.
Video (click to play).
NOTE