In detail: DIY repair of a mixer tap in the bathroom from a real master for the site my.housecope.com.
A mixer is a device that regulates the temperature of the supplied water and its amount. Very often, for some reason, this device begins to malfunction and a leak appears. The principle of repairing a mixer depends on where this leak appeared. Connections in hoses, pipes, crane boxes or elsewhere can leak. One of the most common problems is the leaky gander of the faucet in the bathroom. What to do in this case?
First you need to find the reason why the gander of the mixer in the bathroom is flowing. The most common cause of failure is ordinary wear and tear. Very often in the bathroom, one mixer is installed on the sink and on the bathtub. In this case, the gander is constantly turned from side to side, as a result of which wear occurs. The gaskets begin to break or break, and a leak appears at the junction.
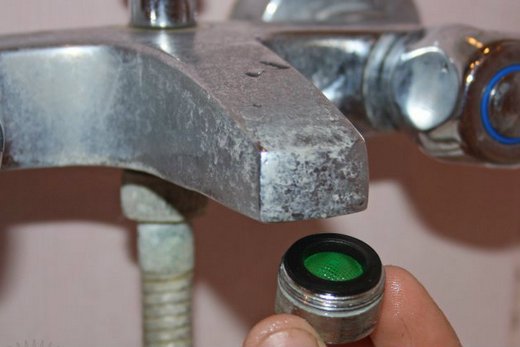
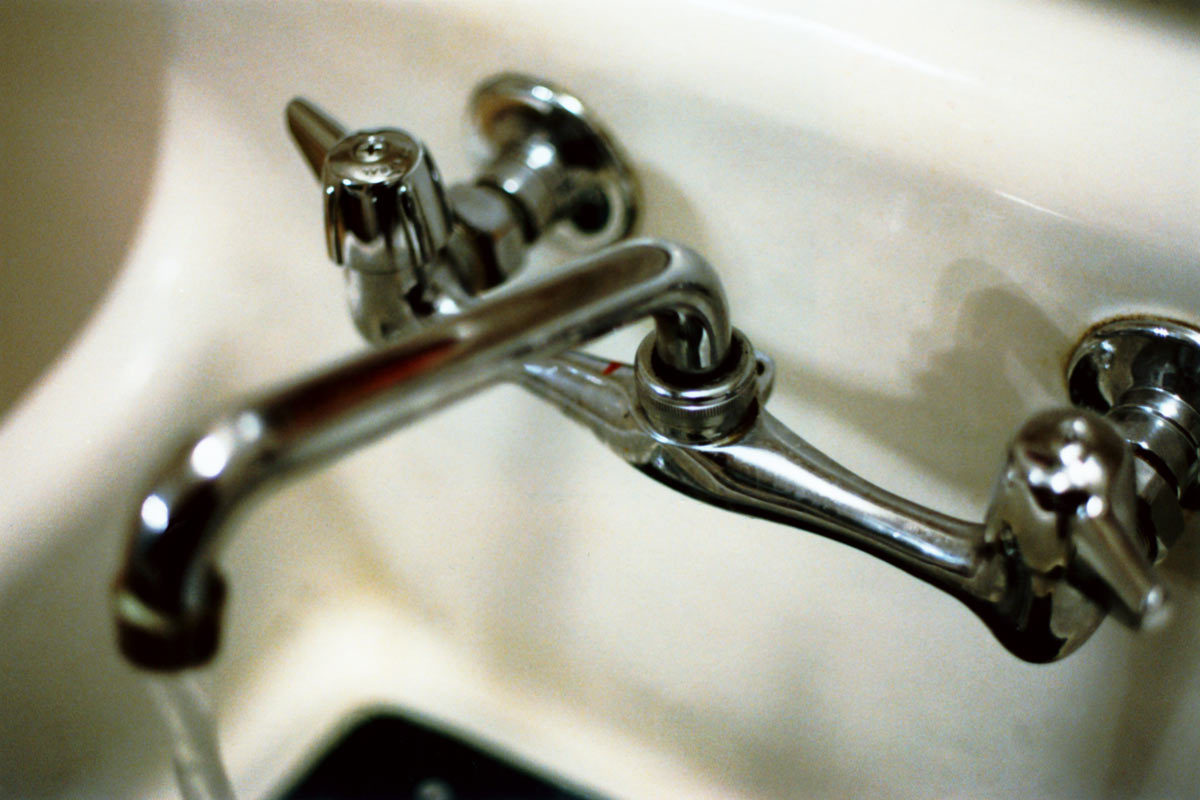
To answer the question of what causes the gander of the mixer to flow in the bathroom, you need to understand what it is. This is a curved mixer tube through which water flows. In fact, this part of the mixer is called the spout, but many are used to the word "gander". The mixer gander can be of different lengths: 10-50 cm. At the end of the gander there is an aerator - a mesh for uniform direction of the water pressure.
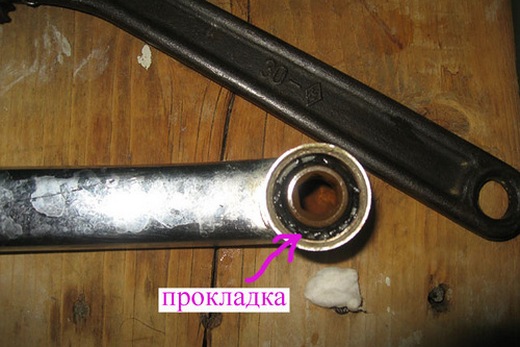
The gander is attached to the mixer with a union nut. A spool is screwed inside the gander, on which O-rings and a retaining ring are put on, holding the nut. If you unscrew the gander of the mixer, you will see only two rubber bands. The third is located under the retaining ring and to change it, you need to unscrew the spool. But, as a rule, this is not required, it is enough just to replace the upper seals.
Sometimes the aerator becomes clogged with small particles of rust, and it must be cleaned, otherwise overpressure arises in the gander, which can also lead to breakdown.
In addition, the rust, clogged in the mesh of the aerator, retains water after the tap is closed, and a familiar phenomenon occurs - it drips into the mixer. Everyone can correct this phenomenon. You just need to carefully unscrew the aerator from the gander and shake out the smallest particles of rust.
| Video (click to play). |
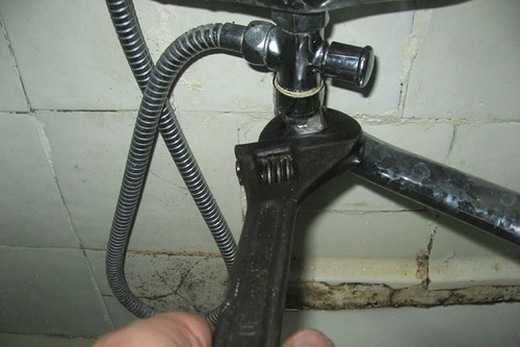
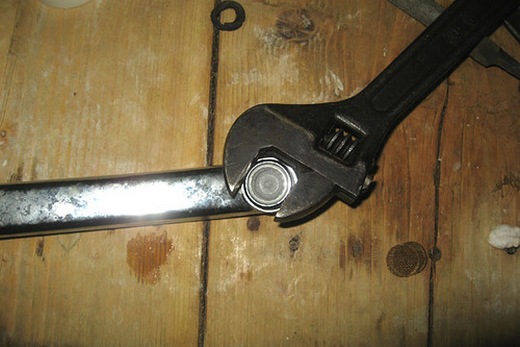
So, we figured out in which cases the gander of the mixer flows in the bathroom, now you can start repairing. Just in case, it is worth shutting off the water supply. After that, you need to unscrew the special union nut of the gander: this is easier to do with an adjustable wrench. Alternatively, you can use an appropriately sized wrench. In order not to damage the coating of the mixer, you can put a rag under the cheeks of the key. Unscrew from right to left.
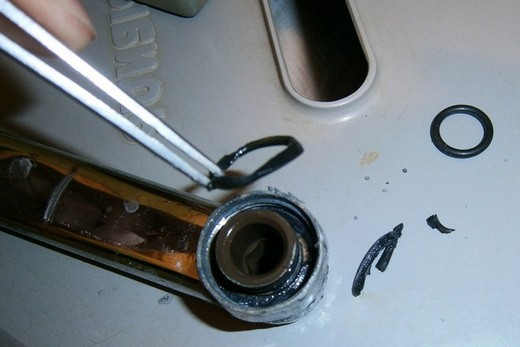
After you have removed the gander, you need to pry the rubber bands with a sharp screwdriver and inspect them for wear. Most likely, you will see that they are pretty spoiled. In this case, we change them to others and fasten the gander in place. If everything is ok, the problem is solved.
If everything is in order with the upper elastic bands, but the leak continues, it is worth replacing the lower one. In this case, we unscrew the spool using a hexagon or, if it is not there, than necessary (with a screwdriver, pliers). Then we change the bottom elastic and screw the spool into place. Then we fasten the gander again.
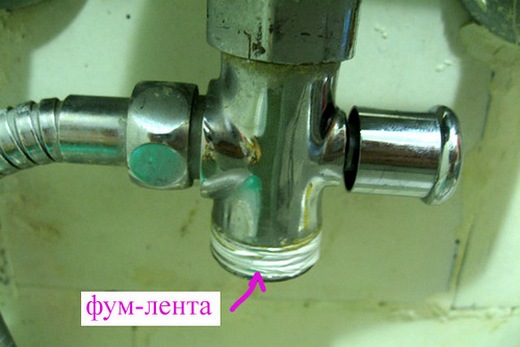
Another short-term way to solve the problem, if the gander of the mixer flows in the bathroom, is to wind the fum tape at the outlet of the mixer, that is, in the place where the union nut is screwed on. We wrap the mixer tube with tape at 5-6 turns and screw the gander into place.
In 99% of cases, replacing the seals or the fum tape will solve the problem. But sometimes you have to change the whole gander entirely. We already know how to do this. Unscrews the old gander and fasten the new one. To make this easier, I recommend moistening the rubber bands with soapy water. When buying a new gander, pay attention to the material of manufacture (the heavier the better), the length of the gander and the diameter of the union nut. If you are afraid of a mistake when buying a gander, it is better to take the old spout with you to the store.
If you constantly have the gander of the mixer in the bathroom, and you are tired of changing the gaskets, then you can solve the problem radically. How? Eliminate the cause of wear and do not turn the neck, but install separate mixers on the sink and on the bathtub. In this case, the connection between the spout and the mixer is eliminated, and the fewer connections the device has, the less likely it is to leak.
This method, of course, is more expensive: you will have to partially redo the piping in the bathroom. But, as practice shows, the installation of a separate mixer for a separate consumer (sink, bathtub) is a very competent and technically correct decision. If such a volume of work scares you, it is better to turn to trusted masters.
Free selection of a qualified plumber in your city!
We figured out what to do if the gander of the mixer flows in the bathroom. But what if a leak appeared in the kitchen, because there the gander of the mixer is on top? In principle, this does not change anything, and the repair scheme remains the same.
Likewise, we unscrew the union nut with an adjustable wrench or wrench and change the O-rings. Or we wind the fum tape in several turns. If these operations did not help, then we find the gander on sale separately and change it.
Dear readers, I hope that this information site will help you with such an everyday problem as - the gander of the mixer flows in the bathroom or on the kitchen sink and you can easily overcome it.
Read also:
Share the article with your friends on social networks!
It often happens that the gander of the mixer flows, that is, the water oozes under the spout mount, from under the nut itself, which just holds it on the tap.
In this article, we will look at how to change the gander in the mixer with your own hands.
In order to determine exactly why the mixer spout is leaking, it (gander), first of all, must be unscrewed and checked in what condition the gaskets and nuts are. To repair the mixer gander, you will need the following:
- Wrench,
- Rags (so as not to scratch the nickel-plated or chrome-plated surface of the nut).
- A ring gasket (preferably made of paronite, since it does not swell when wet inside the tap) with a diameter of ¾ inch,
- Fum tape.
However, first try to manually unscrew the nut. Usually it is not tight. A gas or adjustable wrench will not be appropriate here, since most often the nut that attaches the gander to the body is not wide.
So, let's proceed to the direct replacement of the mixer gander in the bathroom or in the kitchen:
1. Close the main valve of the mixer.
2. While unscrewing the nut, hold the key with one hand and the mixer body with the other, so that it does not turn. By the way, the most difficult thing is to remove the nut on the tap valves, since the handle of the stop valves usually interferes with this.
How to replace a tap? - Look for the answer to this question here: https://my.housecope.com/wp-content/uploads/ext/2602/tap-replacement/
How to repair a bathroom faucet? The instruction is available on our website
3. Remove the handles.
4. Remove the gander. To do this, pull it vertically upwards or downwards if it is a wall-mounted mixer.
5. Having removed the gander, you will see two rubber gaskets that ensure the tightness of the joint and one plastic gasket. If the gaskets are worn out, they should be replaced with new ones. Especially the wear of the gaskets occurs if they were not lubricated with ShRB-4 ointment during installation, it is sold in jars. You can also lubricate with "Gledex" - a special silicone grease.
6. Change the gasket and remember to lubricate it before reinstalling.
7. If you cannot find a gasket of the required diameter, there are 2 options for how to solve this problem:
Then - put back the gaskets, lubricate them and put the gander back in place. And here many have a question, but how to screw the gander to the mixer? It is not difficult to do this: install the spout on the mixer body and tighten the fastening nuts with a wrench.
Insert the spout and tighten the nut. If the mixer still flows from under the gander, then add a few more layers of fum tape.
8. If the rubber gaskets are still in working order, then the reason that the mixer spout is leaking is in the unwinding of the sleeve on which they are put on. To fix this, simply tighten the bushing with the Allen key.
In addition, the gander of the faucet flows in the bathroom or in the kitchen because the foot has been unscrewed, to which the gander nut is attached. In order to get rid of the mixer gander leak in this case, tighten the case with any key.
How to repair a tap valve? Find the recipe on our website!
What are the features of the kitchen faucet device and how to repair it? A detailed description is available at the link: https://my.housecope.com/wp-content/uploads/ext/2602/kitcen-tap/
However, if the reason for the leakage of the mixer spout is not in the gaskets, bushing or footwear, but, for example, in the body of the product itself or in the lower part of the gander tube there are cracks that cause leakage, then you will have to completely change the mixer to a new one.
Note that you can prevent the mixer spout from leaking if you just clean the aerator at the end of the gander (plastic or metal mesh, which is often clogged with various debris). After all, if the aerator becomes clogged, then the pressure rises inside the spout, and the water finds a way out at the base of the gander, that is, in the weakest place where the gaskets have long become unusable.
A mixer breakdown is an unfortunate situation, but far from a catastrophe. Do not rush to buy a new one, because most often we are talking about the natural wear of parts, which is easy to replace. The magazine "Without a plumber" knows what to do if the gander of the mixer flows in the bathroom or in the kitchen, and is ready to share useful information with readers. Here you will find useful tips, step-by-step instructions for dismantling, frequent breakdowns and ways to eliminate them, as well as the secrets of choosing high-quality parts.
The term "gander" has taken root in everyday life, and is used even by professional plumbers more often than the correct name "spout". All variants of breakdowns in this part of the mixer have three forms of manifestation, each of which is worthy of separate consideration.
A common problem that manifests itself in the leakage of water at the point of attachment to the mixer body. The reason that the mixer in the bathroom flows from under the gander is simple and trivial - the sealing gasket at the junction has worn out. Replacing this part is within the power of any home craftsman, and the procedure will be as follows:
- Purchase a new O-ring of the correct size.
- With an adjustable wrench or open-end wrench of a suitable size, unscrew the union nut at the junction of the spout and the body.
- To avoid scratching the coating, place a thick cloth between the key and the nut.
- Rotate the gander to remove it from the body. It will take some effort here.
- To remove a worn gasket, pry it off with a knife or other thin object at hand.
- Install a new gasket in its place by inserting it into the O-ring.
- Lubricate the gasket with a lubricant that will facilitate installation and will prevent the seal from stripping when screwed in. A simple liquid soap will work, but buying a silicone leave-in grease from a plumbing store is a good idea.
- Insert the spout into the body, press firmly and hand-tighten the union nut.
- Wrap the nut with a cloth to keep the cover and tighten it gently.
At this, the repair can be considered completed, and the situation when the gander flows in the mixer in the bathroom remains in the past until the next wear of the seal.
Rubber gaskets are not the best option for repairs. The pads for the gander of the mixer in the bathroom, made of paronite, have proven themselves excellently. This material expands in volume under the influence of moisture, completely filling the space, and guaranteeing the tightness of the connection.
Over time, you may notice that the water pressure gets weaker. This problem is typical of modern aerator-equipped faucets. The spout in them is equipped with a variety of nets that dilute the jet with air, making it more voluminous and reducing water consumption. These nets become clogged with solid particles from the water supply network, and limescale is deposited on them, blocking individual holes. This situation can affect both the gander for the faucet in the kitchen and in the bathroom, and it is solved by simple cleaning:
- Unscrew the aerator. The round shape is unscrewed by hand, so you have to make physical effort, wearing rubber gloves so that your hands do not slip. The task is simplified if there is a cut. Then just use an adjustable wrench or open-end wrench, laying in a cloth to keep the cover safe.
- Remove all nets and rinse them to remove sand and other debris. Table vinegar or citric acid solution, in which the nets should be soaked, will help get rid of scale. You can also restore the throughput manually by cleaning the cells with a needle. Assemble the aerator by installing all parts in reverse order.
- If the aerator has a non-separable design, rinse it from dirt and remove scale by soaking in a weak acid.
- Install the gasket. If you do not change it, then make sure that it becomes the same side as before. During operation, the surface of the seal is deformed, and turning it the other side you will not get a tight connection. Screw the aerator back onto the spout.
Such work can be carried out prophylactically, without waiting for the weakening of the pressure. Prevention is especially important if the water has high hardness.
 Gander-shower mode switch repair
Breakdowns in this area are just as common as a situation where the mixer flows from under the gooseneck. The repair procedure will depend on the type of switch and the nature of the problem, so first decide which mixer you have installed.
You won't find this on modern models, but they continue to be used, since they have a very long service life and high fault tolerance. The problem with the plug switch can be as follows:
- Too much force has to be applied to switch modes. This indicates that the clamping nut is too tight.
- The switch is leaking. This happens when there is uneven wear of the contacting parts - the plug or the mixer body.
Both problems have the same solution. You need to unscrew the connection and lubricate the plug with plumbing silicone grease. It is resistant to drying and will provide good contact with unevenly worn surfaces. Do not overtighten the nut when assembling the switch.
The most common in modern models, in which the button on the gander shuts off the water, directing it into the shower. In this position, the button is fixed by a spring, which is held by the flow of water. When the valve is closed, the spring returns to its original position. Typical problems with this design look like this:
- The switch does not completely shut off the water. As a result, it flows from both the shower and the spout at the same time.The reason lies in the partial or complete wear of the rubber valve that redistributes the water flows. If it is possible to find a valve on sale, then it can be replaced, otherwise it remains only to change the mixer.
- With a weak water pressure, the button returns to its original position. An excessively tight spring provokes such a situation. Unscrew the switch and bite off one turn of the return spring with the pliers. If that's not enough, take out one more turn and the switch will no longer cause complaints.
- The faucet in the bathroom is leaking from the gander at the point where the modes are switched. It is common for the O-ring to wear out. Unscrew the switch to find out the required size of the seal, buy a new one and replace it. The correct diameter can be found in the mixer repair kit for sure.
In this design, turning the lever 1/4 turn offsets the eccentric located inside the plastic or brass barrel. Such a switch does not differ in fault tolerance, manifesting itself in the following breakdowns:
- When you turn the switch, the water does not shut off, continuing to flow from the tap. This problem indicates wear on the gasket or the bolt that fixes it. Repair consists in replacing a worn out part.
- It is impossible to set the switch to the extreme position. Attempts to turn on the shower end up with a spout and shower head. The culprit in this case is a worn-out keg, which will have to be replaced with a new one.
- Leakage in the area of the switch. It is common for the gasket to wear out. To return the mixer to work, it will have to unscrew the switch and replace the seal.
Here, the mode change is made with a full turn of the lever. There is a ceramic cartridge inside the structure, and the tightness is ensured by Teflon or fluoroplastic gaskets. Such mixers are not subject to natural wear and tear, and all breakdowns are explained by violation of the operating rules:
- Poor water quality. If you've opted for a faucet with a ceramic switch, take the trouble to install filters at the entrance to your home or apartment. The central water supply can bring surprises in the form of sand or scale from the pipes that jam the cartridge.
- Illiterate repair. Physical force when trying to unscrew a jammed cartridge will break the ceramic plates or retainers.
In this case, only replacing the cartridge will help. Remove the switch handle and flare nut, take out the cartridge and replace it with a new one.
If the manufacturer has saved on materials, a complete replacement of the spout may be required, as the coating on it is quickly damaged, and the corrosion resistance is poor. In this case, you have to remove the gander from the mixer in the kitchen or bathroom, and replace it entirely.
Soviet-made faucets have a ½ "spout, and now only models with a ¾" thread are available. Consider this point when buying, as it will be impossible to install a gander with a nut of the wrong size on a bathroom faucet.
Replacement will require you to do the following:
- Close the valves on the riser. Theoretically, you can do without this, but it is better to hedge against surprises.
- Wrap the union nut at the base of the spout with a cloth to protect it from damage.
- Unscrew the nut using an open-end wrench or adjustable wrench of a suitable size.
- Turning the gander along the axis, remove it from the body.
- Apply plumbing silicone grease to the o-ring and threads of the new gander. If the kit comes with a rubber seal, it is better to replace it with paronite.
- Place the spout in the body, press firmly and screw on the clamping nut.
- Tighten the nut slightly with a wrench without overtightening.
There is nothing difficult in replacing it, and you will quite cope with the task, even if you have never done it before.
When buying such a simple part, it is enough to pay attention to the main characteristics so that the issue of repair is not relevant for a long time. The future acquisition will be assessed according to the following parameters:
A short video in which the master will tell you in detail about disassembling a flat spout and eliminating a leak:


 Gander-shower mode switch repair


