In detail: do-it-yourself repair of the chassis for a Ford Focus 2 from a real master for the site my.housecope.com.
We check the condition of the undercarriage and transmission on a viewing ditch or overpass every 20 thousand km of run or after strong blows to the car's suspension when driving through deep holes, etc.
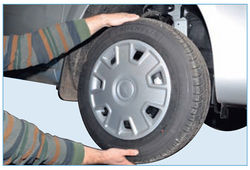
The parts of the chassis (wheels, levers and suspension springs, anti-roll bars, shock absorbers) and transmission (front wheel drive shafts) should not have deformations, cracks or other mechanical damage affecting the shape and strength of the parts. Hanging out the wheels one by one (while the car must be securely fixed on the stand), we check the condition of the bearings of their hubs.
Use only factory-made stands.
The wheel should rotate by hand evenly, without jamming or knocking.
Grasping the wheel in a vertical plane, alternately sharply pull the upper part of the wheel towards ourselves, and the lower part away from ourselves, and vice versa.
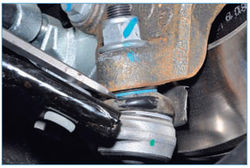
Make sure there is no backlash (knock). If there is any backlash, ask the assistant to press the brake pedal. If at the same time the backlash disappeared, then the hub bearing is faulty, and if the knocking remains, then most likely the suspension parts are worn out. Hub assemblies with worn or damaged bearings must be replaced. To check the serviceability of the ball joints, insert a powerful screwdriver between the suspension arm and the steering knuckle, while protecting the ball joint cover from damage.
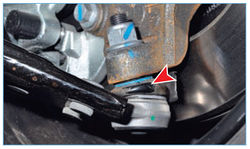
Squeezing the lever with a powerful screwdriver or mounting blade, we follow the movement of the ball joint housing relative to the steering knuckle.
If there is a backlash in the ball joint, we replace it. Similarly, we check the ball joint of the other wheel.
| Video (click to play). |
We check the condition of the protective covers of the ball joints.
We replace ball joints with torn, cracked covers.
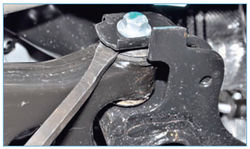
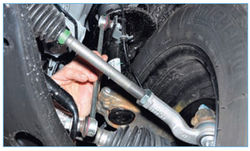
To check the silent blocks of the front suspension arms ...
... insert a mounting paddle or a powerful screwdriver between the lever eyelet and the subframe ...
... and trying to move the lever eyelet relative to the subframe in different directions. If the lever lug moves without significant effort, it means that the silent block of the lever is badly worn or damaged and must be replaced.
Tears, cracks and bulging of the rubber bushing of the silent block are unacceptable. Similarly, we check the silent blocks of the rear suspension levers.
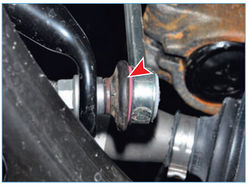
We check the ball joints of the front suspension anti-roll bar struts by moving the struts by hand in different directions.
If there is any play in the ball joints, we replace the stabilizer struts.
We check the condition of the protective covers of the ball joints of the stabilizer struts.
Covers that are cracked, torn or have lost their elasticity must be replaced.
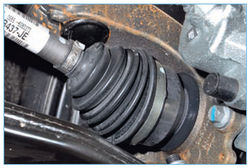
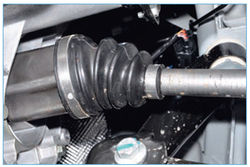
Rotating and turning the front wheels alternately (with the front of the car hanging out) ...
... inspecting the protective covers of the outer ...
… And the internal hinges of the front wheel drives, we check the reliability of their fastening with clamps.
Covers that are cracked, torn or have lost their elasticity must be replaced.
We check the absence of oil leakage from the gearbox through the oil seals of the internal drive hinges. If there is a leak, replace the oil seals.
We check and, if necessary, tighten the fastening elements of the front and rear subframes to the body.
We check the condition of the springs, telescopic struts and shock absorbers of the front and rear suspensions.
We examine one by one ...
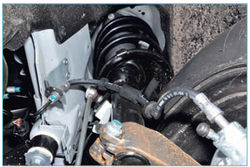
... telescopic front suspension struts ...
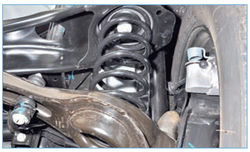
… And rear shock absorbers and springs.
Suspension springs must not be damaged. Tears, cracks and severe deformation of rubber bushings, pads and shock absorbers are unacceptable.Leakage of liquid from shock absorbers is not allowed. Slight fogging at the top of the shock absorber while maintaining performance is not a malfunction.
If the rubber element of the upper support of the telescopic arm settles or breaks, the support must be replaced.
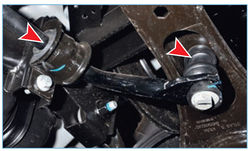
We inspect the struts and cushions of the rear anti-roll bar.
If ruptures, cracks and severe deformation are found on the rubber pads of the rods and stands, they must be replaced.
When the vehicle is moving, a faulty exhaust system can emit sounds and knocks that are mistakenly attributed to defects in the wheel suspension. Therefore, it is advisable to inspect the exhaust system in conjunction with checking the chassis.
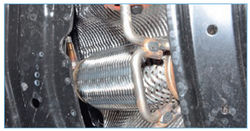
Checking the metal compensator on the collector ...
… The condition of the suspension cushions of the exhaust system, we knock on the exhaust system in different places, swing it and make sure that it does not emit rattling sounds and does not knock on the body and rear suspension parts.
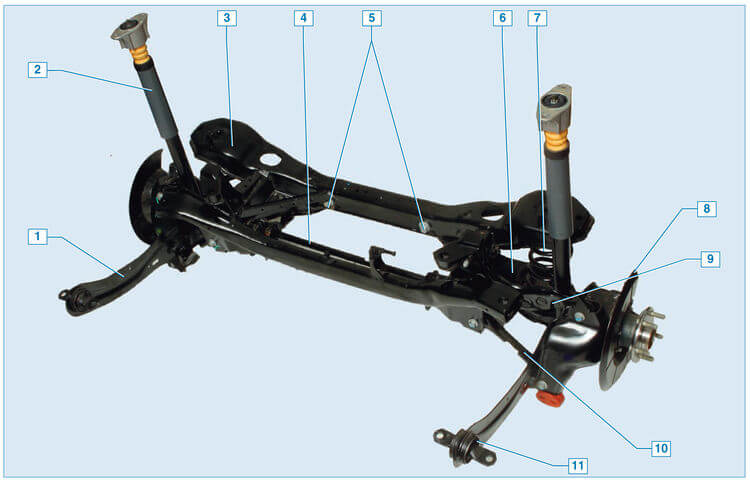
The rear suspension, installed on the second generation Ford Focus, has a multi-link design, due to this, a smooth ride of the car and confident behavior of the car on the road are achieved.
Rear suspension Ford Focus-2 - independent type, with a cross member in the middle, with four levers at each rear wheel (total levers - 8). The undercarriage consists of the following elements:
- crossbars;
- levers - rear lower, upper, front lower, longitudinal;
- springs;
- shock absorbers;
- compression buffers.
All elements, except for the cross beam, are paired, and an anti-roll bar with struts and bushings is also installed on the rear axle.
The Ford Focus-2 was produced in two body modifications - in a pre-styling version (2005-2008) and in a restyled version (2008-2011). After the modernization, there were some changes in the car, but the restyling did not touch the rear suspension - it remained the same.
In the domestic market, the overwhelming majority of Ford Focus-2 are only assembled in Russia, so it is difficult to talk about the quality of spare parts installed on cars assembled in Spain and Germany. But the cars assembled in Vsevolozhsk near St. Petersburg are quite reliable, and the rear suspension lasts a long time during normal operation.
If you do not drive the car at high speed on bad roads, the chassis will require more or less serious repairs on the run of about 100 thousand km, not earlier. As a rule, the trailing arms are the first to fail, the silent blocks wear out in them. The lever can not be completely changed, you can do with repressing the silent blocks, but in order to make such a repair, it is necessary to disassemble almost the entire suspension.
Rear shock absorbers on the "Second Focus" are distinguished by enviable "vitality", on average, the parts are nursed from 90 to 130 thousand km. The price of original spare parts is rather big, each shock absorber costs about 3.5 thousand rubles. But fortunately, on the Focus-2 there are parts of non-original production, moreover, of very decent quality. For example, Monroe or Kayaba shock absorbers can be purchased at a price of 2-2.5 thousand rubles. for 1 piece, and TRW spare parts are even cheaper. Also, these parts are produced by many other companies:
The stabilizer struts are usually the first to fail on many car models, but on the Ford Focus 2, these parts are surprisingly tenacious, sometimes nursing more than 100 thousand km.
Car owners of "Second Focuses" need to know that many spare parts for the car are suitable from Mazda 3, in particular, many of the rear suspension parts are practically the same. True, there is one difference - native Ford spare parts are more reliable than Mazda spare parts, although they are more expensive.
If oil spots appeared in the area of the rear shock absorber rod, and the car began to drive over the bumps with the rear part of the body swaying, the shock absorber is out of order and must be changed. We carry out the work as follows:
- for convenience, remove the rear wheel;
- we put an emphasis under the rear suspension (for example, an old unnecessary wheel rim), and lower the car a little on a jack - it is necessary to make sure that the spring of the suspension compresses a little;
- this is done so that when the shock absorber is removed, the spring does not straighten without load and does not shoot up;
- we unscrew the lower bolt that holds the shock absorber, this will require a knob with a 15-inch head;
- from the body (inside the wheel arch) we unscrew the two bolts securing the shock absorber support to the body, here you need a 10 socket wrench or a head with an extension and a crank;
- dismantle the part to be replaced, install a new shock absorber in place, and assemble.
If there is a knock in the rear suspension area, it is likely that the stabilizer struts are worn out. Changing parts is quite simple, if there are no complications during removal, you can replace the stabilizer rack in half an hour or even faster.
It is convenient to replace it on a pit or on a lift; you do not need to remove the wheel to perform the operation. We carry out the work in the following order:
- unscrew the nut with which the stand is attached to the wishbone, for this you need a 15 spanner spanner. To prevent the stand from turning along the axis when unscrewing the nut, hold it with a hexagon;
- then with the same keys we unscrew the upper nut that holds the rack on the transverse arm;
- having unscrewed the fasteners, we remove the old part, install a new one, this can be considered the work finished.
Everything was simple, but the old counter does not always turn away normally. The thread on the ball pin is clogged with dirt, and when you try to unscrew the nut, the hex wrench turns in the body of the pin. Before starting to untwist the connection, you must:
- clean the threads on the stabilizer post from dirt;
- sprinkle WD40 on it;
- wait 15-20 minutes for the remaining dirt to "eat off".
Only then should you start loosening the nuts. If, nevertheless, the ball pin scrolls in the body, and the nut rotates with it, you will have to use a small grinder - cut off the worn out stabilizer bar.
In this case, the replacement of the L-shaped stabilizer struts is considered, but stabilizer struts of the so-called "direct" type can also be installed on the Ford Focus-2.
These details change even easier, there are practically no complications here.
The front suspension of the Ford Focus 2 is lever-spring, independent, MacPherson type. Consists of a subframe, a steering knuckle with a hub, a lever with a ball joint and silent blocks, a shock absorber strut and an anti-roll bar with a strut.
Most of the front suspension structural elements are designed for about 100 thousand kilometers without repair, except for the hub bearing, which must be changed after 50-60 thousand kilometers. In this case, the hub bearing, the hub itself and the steering knuckle are not disassembled and the entire assembly is changed. Due to the unsatisfactory state of the roads in our country, the mileage of the front suspension is halved. After every 20,000 kilometers or impact when driving through especially deep holes at high speed, the condition of the front suspension should be checked. The problem that most often arises with the front suspension of the Ford Focus 2 is the noise effect (knock) when driving through irregularities.
- The function of the shock absorber is to dampen the vibrations of the spring. If, when you press on one side of the machine, it returns to its original position and there are no repeated vibrations, the shock absorber is working.
- We grab the wheel and swing towards ourselves and away from ourselves. If we feel a backlash, then the shock absorber is faulty. If, after pressing the brake, the play disappears, it is very likely that it is time to change the front hub bearing.
- When visually inspecting the bottom of the shock absorber, there should be no damage and oil drips and the springs should be intact.
It is best to check when the machine is raised.
We swing the wheel to the left - to the right. If play is felt, then the ball joint, steering tip or rod is faulty.
- No external damage to the ball joint covers.
- Move the stabilizer bar up and down by hand or using a pry bar. If we feel a backlash, then the racks need to be changed.
- Visually, there should be no delamination of the rubber.
- We are trying to move the ear of the lever by inserting a screwdriver between it and the assistant. If it moves, then the silent block needs to be changed.
We take a screwdriver, carefully insert it between the lever and the steering knuckle. We move up and down. If there is a backlash or knock, it is necessary to change the ball.
After completing the preliminary diagnostics, it is advisable to go to the service station and make sure that your conclusions are correct. In most cases, the problem will be in the hub bearing or in one part of the arm.

- We jack up the car, unscrew the hub bolt, unscrew and remove the wheel.
- In order not to damage, release the anti-roll bar.
- Disconnect the ABS (anti-lock braking system) sensor terminal.
- We release the tip of the tie rod.
- Remove the brake caliper. Do not disconnect the brake hose. We fix the brake caliper so as not to damage the hose. We shoot down the brake disc.
- We unscrew the ball fastening nut and press it out with a puller or knock a finger out of the lever with a hammer. Please note that in no case should you hit the ball, hit the bottom of the steering knuckle.
- We unscrew the bolt of the terminal connection of the shock absorber and the steering knuckle. Using a chisel and a hammer, unclench the terminal connection and release the shock absorber strut.
- We remove the steering knuckle by pulling out the constant velocity joint of the front wheel drive from the hub.
- The ABS sensor can be pulled out if you are afraid of damage. The bearing is equipped with a red seal. When changing bearings, buy the same. The fact is that the wheel rotation sensor ring is combined with the bearing, and if there is a bearing without this red seal, the ABS will not work.
- Using a puller, we press out the hub together with the bearing and press in a new one.
- We collect everything and go to do wheel alignment.
The second problem that often occurs in Ford Focus 2 is the failure of the elements of the front suspension arm: the rear mount silent block or the ball. The ball joint is quite simple to change, and the silent block is non-removable, and if it fails, then most often, due to the lack of special tools for repair, the entire front suspension arm is replaced.

Links to parts of the Ford Focus 2 suspension overhaul series.
Well, now I found the time to write the next part of the series of articles "Overhaul of the Focus 2 suspension".
The topic of this section will be "Replacing Rear Suspension Arms".
Exposing the camber is a mandatory procedure after replacing the spring-loaded levers.
It is advisable to do the work together.
Let me first make a small but important digression on the topic of the choice of spring arms.
The spring-loaded rear suspension arms on the Ford Focus 2 are of 2 types:
1) curved levers (I have just such, the stabilizer struts on them are in the shape of the letter G) (absolutely no analogues were found)
2) straight levers (the levers themselves are straight, the stabilizer struts are also used straight) (there are analogues from Mayle - it is possible to buy a set of all rear levers at once - I can not say anything about the quality)
ATTENTION ! If you buy the wrong levers, neither a stabilizer nor stabilizer struts will work. (there were people who managed to screw straight levers to replace the old curves with curved stub struts, which were screwed just at crazy angles - there is no question of normal functioning).
IMPORTANT ! Breakup bolts, nuts and washers must be purchased from the same manufacturer (different threads from Ford and Mazda are exactly 100%). It is better to buy new ones so that there are no problems with the camber setting. p / s breakup bolts, etc.from Ford are 2 times more expensive and it is not a fact that it is better.
90% of cases of replacement of levers - stratification of silent blocks. Some want to save money - buy only silent tires and repress them, but this will not lead to anything good, because it will not be possible to press them into the steel levers normally, as a result they will start to fall out - you will try to grab them by welding, which can ruin the silent itself ...
1. Rear spring-loaded suspension arm Ford - 1 548 460 - 3200r * 2pcs (curved levers only the original)
2. Suspension arm rear transverse lower Ford - 1 703 145 - 1346r * 2pcs (finish from focus3, finish from ff2 1061668 is 2 times more expensive - as usual in Ford style)
3. Breakup bolt Mazda - BP4K-28-66ZB - 271r * 2 pcs.
4. Eccentric washer Mazda - BP4K-28-473A - 133r * 2pcs
5. Nut Mazda - 9YB1-01-209 - 170r * 2pcs
In addition to keys and ratchets with heads, it is advisable to buy:
1. Gas burner (about 500r) - I have both bolts of the lower levers completely stuck to the silencers - I had to melt the silencers on the old levers with a burner to pull them out, 1 spray was enough.
2. Ceramic grease - to lubricate the new bolts in order to avoid subsequent problems with souring and sticking (for a long time and for yourself it is better to lubricate), (I think copper will also ride).
3. You must have 2 jacks (2 rolling jacks are generally cool)
4. WD-40, of course, what kind of repair without it.
I will not describe the complete process, because there is a lot of information on the Internet, consider the most important points:
1. Replacement of levers is carried out alternately on 2 sides with jacking up the machine and removing the wheel.
(it is better to jack it higher so that the 2nd jack then crawls under the lever)
2. First, unscrew the stabilizer bar bolt from the stabilizer side, then the spring levers are removed first of all from the wheel side, before pulling out the bolt, you need to jack the lever so that the spring does not fire if you still manage to pull the bolt out. After you have pulled out the bolt from the side of the wheel, you will need a 2nd person: 1 holds the lower part of the lever, the second removes the jack, 1 gently lowers the lever down until the spring is completely relaxed, after which the spring is pulled out and the breakup bolt is unscrewed, the lever is removed completely.

3. The lower wishbones most likely cannot be unscrewed - for this we need a gas burner, with which we diligently melt the silent parts that have become attached to the bolts. (Be careful with the burner - do not melt the wires and hoses, do not ignite anything).
4.! IMPORTANT! The spring has plastic spacers at the top and bottom. The upper gasket may fall off when the spring is removed, the lower gasket remains 100% in the old levers, and naturally these gaskets need to be rearranged into the new levers.
5. Be sure to lubricate all the bolts so that in a couple of years you will not have problems with the collapse of the rear, and indeed with loosening them if necessary.
6. Do not forget to rearrange the rubber bumpers from the old levers (new ones cost about 400r / pc, it makes no sense to buy)
I did not change the crescent upper wishbones. with them, everything is fine with the silencers, apparently due to much lower loads.
The replacement time took about 3 hours (everyone will have it differently depending on how quickly all the bolts can be unscrewed).
Let it not be in the topic of construction, which dominates on this site, but I still did not find a sensible guide for repairing the Focus rear suspension, collecting information in fits and starts on the forums. Hope it comes in handy for someone! Go.
All owners of the second Focuses sooner or later are faced with the repair of the rear suspension. First of all, the idea comes to visit a car service, where a price comparable to the purchase of used Zhiguli will be announced for this procedure. The service is not to blame, the idea belongs to Henry Ford, who offered to sell cheap cars and expensive spare parts for them, but this is not about that now. If the owner of the Focus has everything in order with his hands, a tool and has a piece of land or a garage, then there is an option to save money and repair everything with his own hands.In this article, using my example, I will show you how to do this. It's about Ford Focus 2 pre-styling wagon 2006.
First you need to prepare.
We need the following tool:
- set of heads;
- a pair of sets of open-end wrenches;
- hexagons;
- hammer just in case;
- three-legged puller;
- car jack;
- hydraulic jack;
- ties for springs;
- vdshka or other similar slurry;
- in a bad situation angle grinder or in the common people "grinder" with a disc diameter of 125 mm. This is important because 115 is missing there;
- lithol;
- a device for pressing out oil seals (we will dwell on it in more detail below);
- a bunch of scraps from the boards. You will definitely need to put something. I have a construction site, so there was no problem with that;
- a couple of days of free time (maybe someone will do it faster, but I got that much);
We put the ties on the spring, squeeze it as much as the ties allow. Most likely, it will not be possible to remove it, but this is not necessary.
We lift the main lever on which the wheel is installed
and unscrew the bolt that holds the spring arm.
We take out the spring, move the lever down so as not to interfere.
We unscrew the upper and lower wishbones, and at the same time the shock absorber from the bottom.
Remove the handbrake cable from the hook.
We unscrew the small bolt in the photo below, it is the wires going to the traction control system (ABS) sensor
Disconnect the ABS terminal and unscrew the 2 bolts that hold the wishbone.
We carefully set it aside, trying very hard not to damage anything. We wipe the sweat from our forehead, take a break. Now there is free access to the transverse upper and lower arms, it's time to replace them.
Here it is the silent block of the longitudinal rear arm.
I have it even in normal condition, but since I started replacing it, I need to change it. The trouble is that you have to squeeze it out. do not try to knock it out, it is useless. This is where we need a special device in the form of a metal cylinder. I was made by his familiar turner at a very low cost. I know that turners are in short supply these days, but they are there!
It is a cylinder with a diameter of 58 mm, a height of 70 mm, an inner diameter of 35 mm and a glass depth of 50 mm. We put on the puller and gently press
The glass allows you to evenly press on the entire silent block and it slowly comes out
Here is the result. Extruded silent block
We change the silent block to a new one and press it into place. Try to position it the same way as the old one. I mean the location of the "ears". The photo below shows the final stage. Pay attention to the plates, I put them so that the adaptive glass would stand level.
It remains to unscrew the spring-loaded lever. This was the most difficult action for me, both levers did not want to unscrew and I had to cut them down. It is not very pleasant, especially lying under the car, but what to do. necessary! The lever is attached to the beam with an eccentric bolt and you need to make two neat cuts between the lever and the beam. As a result, we get such an old lever with a sawed-off bolt.
Further, we collect everything in the reverse order. I would recommend that you first assemble everything without tightening it, put a jack under the lever, as in the photo below. This will simulate a wheel on the road and the rubber bands will fall into place.
After that, you can stretch everything thoroughly. In this way, for a couple of days off at the dacha, you can save a decent amount. And have a good time!
Front suspension repair
Ford Focus 2 owners can complain about the malfunctions of their car, which take place in any transport, but no one has the right to say something bad about the quality of both the front and rear suspensions. The developers of the Ford Focus 2 in this category really did their best. However, over time, Focus car owners will one way or another face the question of what to do with the car: send it to a car repair shop for repairs, or try to fix everything on their own. And also the rear suspension.

front suspension ford focus 2
In any case, the restoration of such an important part as the front suspension of a Ford Focus 2, whether it be restyling or repair, is inevitable - everything, sooner or later, becomes unusable and everything has its own term. For the suspension, this terminology is measured in kilometers traveled. Most of the components of the front suspension are capable of taking you about 80-100 thousand km.

Ford front suspension repair scheme
Do not forget about the errors that take place in our realities: we are talking about the quality of domestic roads: we did not want to raise the topic of Russian roads again and again, but, in this case, they directly affect the service life of the entire suspension, shortening the “period »Use for 20-30 thousand km - the value is not so small, is it?
Let's briefly recall the main characteristics of the Ford Focus front suspension: it is a lever-spring, independent MacPherson-type suspension.
"Composition" of the front suspension.

shock absorbers and springs for ford focus
According to its "physiological" structure, the suspension consists of the following undoubtedly important parts, the total number of which hardly reaches one dozen:
the lever, coupled with a ball joint, as well as silent blocks;
shock absorber, and anti-roll bar;
anti-roll bar;
bracket for attaching the stabilizer bar to the subframe;
hubs;
steering knuckle;
stretcher.

Front arm assembly new
front brake pads
As you might have guessed, the parts are connected in a common chain, which creates the very concept of a front suspension. The lever of the front suspension of the Ford Focus 2, for example, in this symbiosis plays the role of an organ that perceives the braking and traction forces while the car is moving.
We are convinced of a malfunction of the front suspension
Perhaps you should start with a shock absorber. Why is it desirable to raise the car either with jacks or with a suspension mechanism. Next, you need to grab the wheel and "shake" it in the direction away from you and towards you. Noticing the free vibrations of the wheel (backlash), we get information about the need to replace the shock absorber. The brake will allow us to finally make sure of the situation. Having pressed on it and noticing the loss of backlash, we conclude that the most likely malfunction of the front hub bearing.
Of course, the initial "sampling" should be a visual inspection of the shock absorber for external damage and oil leaks.


unscrew the shock absorber tip and check the shock absorber
Even earlier, you can make sure that the shock absorber is malfunctioning in the following way: without making any separation of the car from the ground, you only need to press on one side of the car and watch the continuation. In the event that the car returned to its original state with complete or almost complete absence of repetitive vibrations, it is reasonable to conclude that the shock absorber is in general working order and only then proceed to longer checks. This is how our advice is distributed, the best should be read from the end, gradually moving to the beginning.

Checking the anti-roll bar is also not a super difficult task. First, you need to check the covers of the ball posts for any damage, then, either by hand, or with a pry bar or any similar tool, you should try to move the stabilizer bar up and down. Is there any backlash in motion? Bad news for you: the stance is very likely to change.

Replacing the spring and shock absorber
Despite all the seemingly easy methods, the most recommended procedure will still be a trip to the nearest or most convenient service station, where experienced specialists will point out the shortcomings.
Are you convinced?
Fix it yourself
Having dealt with the reasons, let's move on to such a charming action as direct repair of the Ford Focus 2 front suspension.To begin with, consider replacing the front suspension arm, brief information about which we received several wounds.
We start by lifting the car using any means convenient for the car enthusiast: a jack, a lift, and more. We remove the wheel and, then, get rid of the ball joint, for which it is necessary to drill and knock out three rivets securing the support to the lever. If the ultimate goal of the repair was precisely the ball one, then in this situation the support should be replaced with a new one and secured with bolts and self-locking nuts. If you stubbornly want to go further, you will need to unscrew three bolts: one for the front attachment, and the other two for the rear attachment of the lever to the subframe. We got to the lever: we replace it with a new one, repeat the disassembly operation in the opposite direction, from the end, then, put everything together, we go to the auto repair shop to do wheel alignment. This procedure is possible only by experienced specialists.
The second problem that most often occurs with the front suspension of the Ford Focus 2, whose repair schemes are readily available on the Internet (the schemes in these cases represent an ordinary sequence of steps required to be performed in strict observance of the course of action), are the front hub bearings. So, the bearings, whose replacement is recommended to be carried out at the same time, that is, immediately change both the left and right front suspension bearings. Step one: raises the car on a jack, get rid of the wheel, unscrewing the hub bolt along the way. The next step is to get rid of the anti-roll bar. Then we disconnect the anti-lock braking system by disconnecting the corresponding terminals. We unscrew the bolts holding the tip of the tie rod.


unscrew the shock absorber tip and check the shock absorber
We turn to the brake caliper: we unscrew it too, along the way getting rid of the brake disc. After that, go to the ball strut mounting nut by unscrewing it. then, using a specialized puller, remove the "finger" from the lever. Tips on using a hammer to extract a "finger" are only available if you know where and how to hit. Otherwise, contact the auto repair shop exclusively for this operation.
We detach the terminal connection of the shock absorber and the steering knuckle. Next, we will need to free the shock absorber using a chisel and hammer in order to loosen the terminal connection.

we look at the development of the ff drive
Having pulled out the hinges of equal angular velocities of the front-wheel drive from the hubs, we will get rid of the steering knuckle. We got close to our goal and, at the last step, we press out the hub with the bearing, then, having changed to new ones, we press it back in. For this procedure, it is necessary to use only a tool such as a puller. It is advisable, nevertheless, to contact the specialists from the auto repair shop on this matter, the procedure, in comparison with the general replacement of bearings, is inexpensive. After successful pressing, we collect all the parts in the reverse order of parsing and go to do the wheel alignment
In general, we can say that the repair of the front suspension on the Ford Focus 2, or rather two of its most important and often failing parts, has been completed successfully.
Unlike the cheaper models, the second generation Ford Focus rear suspension has a modern, complex design. This is a multi-wishbone system that provides independent suspension of the rear wheels. Thanks to this suspension scheme, the car received a soft comfortable ride, good lateral and longitudinal stability. But, as you know, the more parts in the system, the more difficult it is to repair. How the rear suspension of the Ford Focus is arranged and what is the algorithm for replacing the rear silent blocks of the rear levers, how to choose the right ones instead of the original, we will figure it out today.
The fact that the silent block is called a rubber-metal bushing for damping vibrations and reducing the load on the suspension elements does not need to be explained to anyone.
The fact that they have their own ultimate strength is also understandable. Replacing the silent blocks of the rear suspension is sometimes necessary after 80-100 thousand mileage, and signs of malfunction are:
- knocking and creaking in the area of the rear axle;
- instability of the car during a sharp change of lane and in turns;
- moving the car to the side when braking;
- uneven wear of the rear wheel rubber;
- disturbed camber-convergence angles of the rear wheels.
If you do not notice the strong wear of the silent blocks on time, then in addition to repairs, you can spend a lot of money on replacing suspension parts and on new rubber. And safety on the way will also be at risk.
Rear suspension repair sometimes does not involve replacing the silent blocks, but a complete replacement of the levers. Firstly, it is easier, and secondly, there will be a guarantee that the suspension geometry is preserved.
New silent blocks are installed.
But there is a danger of running into counterfeit, more and more counterfeit levers made of steel of disgusting quality appear on the market. However, if the levers are in good condition, and only the silent blocks are out of order, we will change them. The replacement work costs on average about 4-4.5 thousand rubles, depending on the service, so we will save money and replace the silent blocks with our own hands.
There are many types of silent blocks on the market, but Lemforder elements remain one of the most popular for a long time. Here are their part numbers:
- Lemforder 31938 01 , this is the silent block of the rear wishbones, to replace them you need four, the inner diameter of the sleeve is 12.2 mm, the outer diameter of the cage is 32.2 mm;
- Lemforder 31940 01 - Silent block of the curved rear arm with an internal sleeve of 12.2 mm, the diameter of the cage is 36.2;
- Febi 34249 , sold as a set on both sides with mounting bolts, installed in front of the rear trailing arm;
- ten bolts Febi 29451 with thread M12x1.75, head with a diameter of 24 mm, a wrench for 15;
- two adjusting bolts for setting the camber Mazda BP4K-28-66ZB ;
- two Mazda shims BP4K-28-473A ;
- Hanse HR 402 183 - lower rear wishbone, outer bushing, inner sleeve with a diameter of 12.3 mm, outer cage 36.3 mm;
- inner bushing, lower wishbone, Hanse HR 402 182 , the diameters are the same;
- two anti-roll bar bushings Lemforder 34054 01 .
All parts looks something like this
Before changing the silent blocks of the rear levers on the Focus, you need to make sure that all the necessary tools and devices are at hand. First of all, you will need either pullers with grips for pressing out silent blocks, or a press. It is not always possible to knock out the bushings with a sledgehammer, even with spacers of the required diameter. But spacers are still necessary. Here are their drawings and dimensions. This is a spacer for pressing out the silent blocks of the spring-loaded rear arm:
And with this spacer, the bent wishbone bushings are pressed out:
And these are the dimensions of the spacer for removing the silent blocks of the direct transverse arm:
In addition, we will need a standard tool, a set of heads, an aerosol penetrating lubricant and a tie for dismantling the spring, as well as a standard jack and an adjustable stand (hydraulic jack).
We install the car on an inspection pit or overpass, install chocks under the front wheels and rip off the rear wheel nuts. We jack up the rear of the car and remove the wheel.
-
We thoroughly clean all suspension elements from dirt, process the threaded connections with penetrating grease, wait a few minutes for the grease to soak.
Getting ready for repressing.


The rest of the silent blocks are changed according to the same method on the completely removed levers. The assembly is carried out in the reverse order. Soft and quiet suspension for all and vivid travel impressions!
| Video (click to play). |

