In detail: do-it-yourself pole refrigerator repair from a real master for the site my.housecope.com.
The Pole-10 refrigerator is made in the form of a floor-standing metal cabinet, the outer surface of which is covered with enamel. The inner cabinet of the refrigerator compartment and the door panel are made of plastic and are separated from the metal cabinet and the door body by a layer of thermal insulation.
Rice. one Appearance and structure of the Pole-10 refrigerator
In the upper part of the inner cabinet there is a low-temperature compartment (evaporator) designed for freezing and storing food and preparing food ice.
There is a tray under the low-temperature compartment to ensure the optimal temperature in the low-temperature compartment and in the refrigerator compartment and to collect and drain the defrost water during defrosting of the evaporator. On the right side (on the side wall of the inner cabinet) there is an instrument block, which includes a cover with a cartridge and an electric incandescent lamp and a casing in which a thermostat, a semi-automatic defrosting control device for the low-temperature compartment and a switch are located, the controls of which are located on the casing of the block. The lamp turns on automatically when you open the refrigerator door.
The refrigerator is produced with a right-hand opening of the door, but the design of the refrigerator provides for the possibility of re-hanging the door for left-hand opening. If necessary, the refrigerator door can be re-hung by symmetrically rearranging the door handle, upper hinge of the opening limiter and plugs.
Rice. 2 Electric circuit of the Pole-10 refrigerator:
The re-weighing of the evaporator door is carried out in the following order: open the evaporator door; using a screwdriver, recessed the rear panel latch and open the door; release the axle from the lower engagement by grabbing it with pliers and lifting it slightly upward; pull out the axle, and then the front panel; turning the door over by an angle of 180 °, it is assembled and installed in the reverse order.
| Video (click to play). |
The refrigerator is equipped with a door opening angle limiter. The design provides for opening the refrigerator door at an angle of 90 or 120 °. Refrigerators are produced with an opening angle of 120 °. To change the opening angle of the door, it is necessary to rearrange the fastening screw of the door opening angle limiter located on the underside of the door body into the second threaded hole.
We recommend defrosting the evaporator once a week. To do this, for the duration of thawing, transfer the products from the low-temperature compartment to the upper shelf of the refrigerating chamber, having previously wrapped them in several layers of thick paper. Then press the button of the semi-automatic defrosting device and close the refrigerator door. The water formed during the melting of the snow cover is discharged through the drainage system to the evaporator pan, which is located under the refrigerator.
The tightness of the door body and cabinet is ensured by magnetic sealing rubber. The refrigerator is insulated with polyurethane foam. The evaporator door with frame is made of polystyrene. The hermetic compression refrigeration unit is charged with R12 refrigerant and HF 12-16 mineral oil.
The door body is filled with polyurethane foam under pressure. The use of this thermal insulation material made it possible to reduce the thickness of the door to 33 mm and to increase the capacity of the door panel for placing products.
There are seven rails on the door panel for securing three shelves. They can be installed at different heights. Each shelf has a wire fence.The shelves are firmly installed in the rails and can be easily removed for repositioning. At the bottom of the panel, there is a hinged barrier made in the form of a wire mesh basket. It pivots at a small angle in the sleeves and can be easily removed for flushing. A slight deviation towards itself makes it possible to increase the area of the intake of products from the barrier container. For hygiene, a polystyrene pad is installed on the shelf.
The door panel is attached to its body with screws. It has egg trays limited by a barrier. The barrier is installed in the holes in the door panel, in which the polyethylene sleeves are located. On the door panel there are two containers that are closed by doors. The doors are tightly pressed against the panel using torsion bars, which act as springs, and so that there is no hard impact on the panel when the door is closed, they are fitted with a shock absorber. The frame of the refrigeration unit is mounted on two brackets. Two guide plates for pallet installation are spot-welded to the bottom of the refrigerator cabinet. A polystyrene drip tray is used to collect defrost water from the evaporator. There are four threaded holes in the bottom of the case on the stiffeners for installing adjusting bolts and two supports. In the lower part of the body there are two spot-welded brackets for door re-hanging. An axle is installed on the bracket, fixed with a nut, two washers and a gasket, which prevents the nut from self-loosening and makes it possible to adjust the door height.
Three brackets are welded to the rear wall of the refrigerator body for fixing the condenser of the refrigeration unit. A sealing sleeve is installed in the hole on the rear wall of the housing. The tray for draining water from the evaporator is attached to the refrigerator compartment with a rivet and a wedge and connected to the tray with a Elbow and a tube with a tip. When the refrigerator is defrosting, water enters the tray, then through the drain pipe into the pan located under the refrigerator.
The temperature regime is maintained by a thermostat type T-110-3located in the housing of the instrument cluster. The device for semi-automatic defrosting control is also located here. TO-11... Lighting of the refrigerating chamber is provided by an RN 220-15 electric lamp. At the bottom of the refrigeration unit there is a start-up relay of the type RTK-X(M).
- Unscrew the screws with washers.
- Remove the barrier, plate (table) and base.
- Unscrew the screws and remove the profile.
- Unscrew the screws, remove the upper hinge, and then the entire door, holding its stopper.
- The upper hinge has four holes for securing it when the door is re-hung to the other side. The screws of the upper hinge are screwed into a threaded strip installed inside the cabinet, which is held against displacement by a rivet (polyethylene) and a wedge (polystyrene).
- The door body has two square holes (10x10 mm) for the installation of polyethylene bearings. When re-hanging the door, the bearings are rearranged to the other side. Two holes in the lower part of the body are closed with threaded strips, which are spot welded to the door body. A limiter is attached to this bar with a screw in a free state, which sets the required door opening limit. In the upper part of the door body, four holes are drilled on the sides for fixing the handle, which is fixed with four screws, and two spacers (polyethylene).
- Remove the pallet connected to the lid using the slots in the pallet and latches on the lid.
- Remove the thermostat knob.
- Unscrew the screw, remove the evaporator door with frame.
- Unscrew the two screws, remove the bellows tube gasket and the bellows tube holder for the thermostat and defrosting device.
- To remove the outer flange, unscrew the screws and remove the outer sheet steel flange.
- Remove the inner flange to free the evaporator.
- To completely release the refrigeration unit, unscrew the bolts, washers, remove the spring clip, relay, cover and disconnect the wires from the relay.
- Disconnect the quick-release terminals from the electrical equipment of the instrument cluster.
- Unscrew the screw on the back of the housing.
- Remove the polyethylene cable tie.
- Unscrew the screw on the bottom of the refrigerator body.
- Remove the cable tie and electrical wiring.
The article was prepared based on the materials of the book "Refrigerators from A to Z" S. L. Koryakin-Chernyak
All the best, write
Despite the fact that modern refrigerators are quite reliable and capable of serving for several decades, they also periodically fail. It is worth solving problems with household appliances right away. Some problems can be dealt with on their own, while others require specialist intervention.
Typical problems that you can deal with on your own include:
- the appearance of extraneous sounds and rattling;
- insufficient or strong cooling of food;
But the serious problems that require the intervention of professionals include:
- current piercing through the casing;
- turning off the device immediately after turning it on;
- the formation of a snow cap on the back wall;
- stopping the operation of the motor - compressor;
- lack of cooling.
Most often, no matter how trite it may seem, the rattling of the unit is caused by an incorrectly adjusted suspension of the compressor casing. To solve the problem, it is enough to lower the suspension bolts with springs to the required level.
Also, equipment rattling can be caused by contact of the product body with pipelines. This is solved by detecting problem areas and moving the tubes. Relays can also cause jitter. To fix the problem, it is worth making sure that it is located correctly and according to the special labels.
If the refrigeration equipment begins to freeze strongly or weakly, you will need to check several indicators at once:
Sometimes consumers are faced with the problem that refrigeration equipment is electrocuted. This can happen both during his work and in a calm state.
Attention: using a device that shocks is dangerous to life. Unplug it immediately and either fix the problem yourself or call the wizard.
To fix the problem yourself, you will need a special device - a megohmmeter, with which the insulation resistance of the refrigerator wiring is measured. The workflow will look like this:
- Disconnect the unit from the mains and check the wires for visible defects.
- If you haven't noticed any flaws on the wires, you will need one more device - "Ground". Its wire is connected to the body of the refrigerator, and the second wire - "Line", to the wire of the refrigerator. The “Line” wire is alternately connected to the thermostat, relay and compressor wires, and excessive resistance will be displayed on the screen.
- After the location of the malfunction is calculated, the damaged wire will need to be replaced with a new one or carefully insulated.
The refrigerator can start to work continuously if the room temperature rises constantly or the thermostat knob is incorrectly set. Under these conditions, the equipment will operate at full capacity. If the thermostat is set correctly, and the unit operates at full power without interruption, it means that it simply failed and must be replaced. Also, a problem in the constant operation of the compressor motor may be a refrigerant leak. This can only be determined using a special device. It is impossible to repair the equipment on your own without the skill and necessary consumables. It is worth contacting the workshop here.
The thermal relay is often triggered for various reasons:
- increased voltage in the electric motor circuit;
- the relay is loose;
- relay contacts oxidized;
- there are faults in the starting relay;
- the compressor is seized.
Important: most often the thermal relay often trips due to an increased voltage in the motor circuit. If the problem is not eliminated in time, its winding will burn out.
You can try to fix the breakdown by checking the voltage in the electric motor network. If stable, check the relay. For this, the motor is connected directly without a relay. If, after the performed manipulations, the equipment starts to work properly, you will need to replace the relay.
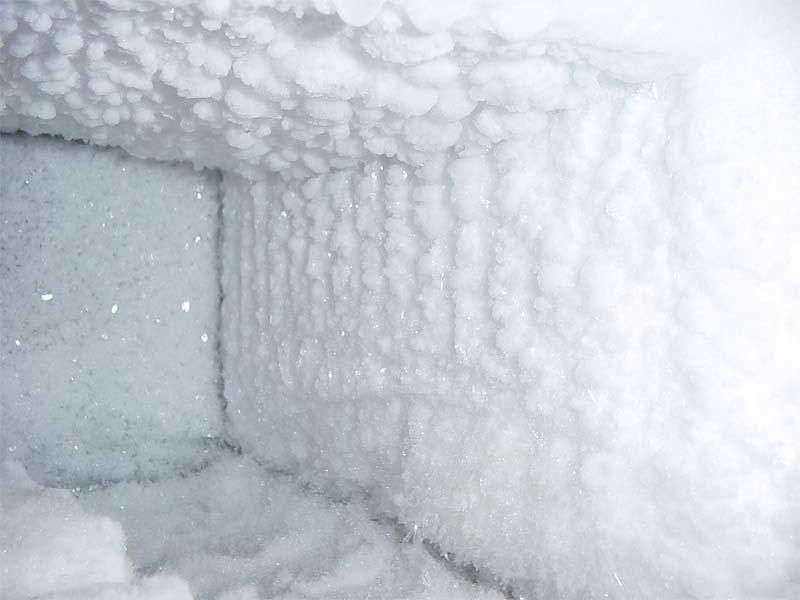
Sometimes in two-compartment refrigerators, excess moisture appears on the walls in the form of drops of water or a snow coat. This can happen due to long open doors, or if the seal has lost its elasticity. It can also be provoked by the fact that hot food is placed in the unit. Correcting this situation begins with checking all the settings in the cooling system.
Quite often, in modern models, a fur coat on the walls appears when the internal lighting is turned off. It is impossible to see if the backlight is on after the door is closed. To check if the light is on or not, place a thin object between the equipment wall and the seal and close the door. Through the resulting gap, you can determine whether the light is on or not. If it does not light up, then repair the lighting system or replace the button - the switch that comes out of the wall towards the door.
If, after connecting the unit to the network, it does not make any sounds, then the refrigerator does not work completely. This is most often due to the lack of current in the power supply network or to the failure of the refrigerator cord. If there is current, simply replace the cord or plug.
If the refrigeration equipment works, but with a short cycle, this can provoke:
- high pressure;
- the presence of air in the system;
- excess freon;
- relay actuation;
- dirty fan;
- failure of the fan.
For troubleshooting, you need to check if the fan is connected correctly. If there is a small amount of air in the system or there is an excess of freon, they will need to be vented through the valve. Remember to check the condenser for dust contamination. Frequent activation of the low pressure switch leads to clogging of the filter or damage to the expansion valve. In this case, you just need to clean the filter or replace it with a new one, check the relay settings.
Moisture can collect on the bottom of the refrigerator due to the tube misalignment or clogging. You can cope with a breakdown quite quickly if you clean the pipe that leads water to a special receiver using a long and flexible wire. The wire is inserted into the tube and moves along the hole to the bottom of the unit. After a few minutes of the working process, all the debris will go into the water receiver.
Caution: To completely clean the tube, it is best to douche it several times.
An unpleasant smell appears in the refrigerator from improper use. To do this, it is not recommended to place products with a pungent odor in it without special containers, wipe the walls of the device in time and monitor its cleanliness.
If, however, an unpleasant odor still appears in the device, you must quickly get rid of it. Since this will have a bad effect on all the products that are stored in it. This process can take several hours of your free time:
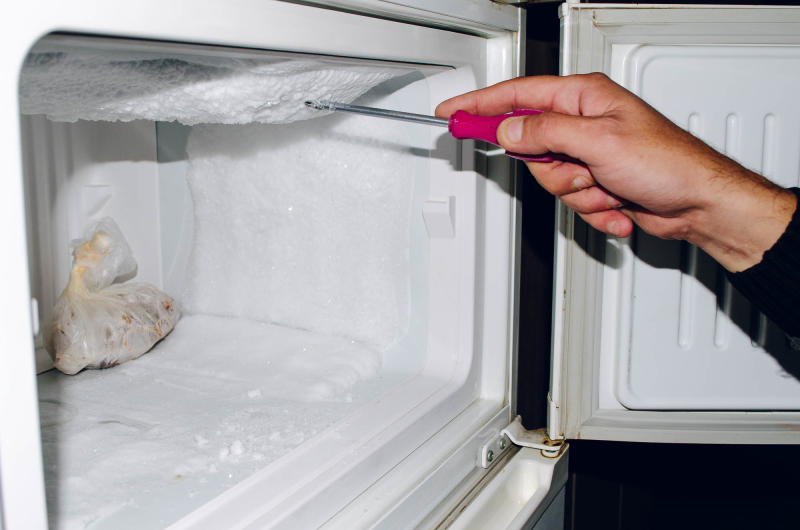
- Disconnect the unit from the network and leave it for a while. If ice has formed on the walls, it is not recommended to remove it by force. Since we can cause mechanical damage to equipment.
- After the equipment is completely defrosted, we wipe its walls with special means. Powder abrasive mixtures should not be chosen. Better opt for helium pastes.
- Wipe the refrigerator dry with a clean cloth, ventilate it for 5-10 hours.
- We plug the unit into an outlet and continue to operate it.
In some models of refrigerators, light bulbs in the backlight often burn out. Replacing them should not be difficult. It is enough just to unscrew the bolt holding the plafond, remove it and unscrew the burned out light bulb. In its place, a new lamp is screwed in, the power of which should not exceed 15 W., and fix the shade in place.
Before proceeding with the repair of refrigeration equipment, it is necessary to diagnose it in order to understand whether it is possible to cope with the breakdown on its own or it is worth resorting to the help of specialists.
- To diagnose equipment at home, you will need to prepare a universal tester and a screwdriver. Diagnostics begins with determining the quality of the voltage in the network. If it is 220 W, then everything is normal. If the voltage is less than this indicator, this can become the main reason for the failure of the household appliance.
- Next, we carefully examine the cord and plug of the unit for integrity. It should not have defects, it should not heat up during operation.
- Next, we inspect the terminals on the compressor. It is better to do this with the equipment disconnected from the network.
- We inspect the compressor, which is located at the lower rear of the refrigerator. It must be free of defects and damage. After visual inspection, we check the winding. Disconnect flexible wires before inspection. It is necessary to check the winding circuit for continuity using a tester.
- After that, you can proceed to diagnostics of small parts - the temperature sensor. To do this, use a screwdriver to remove and disconnect the wiring. Each wire is tested for functionality with a tester.
All malfunctions of refrigeration equipment are divided into two parts:
- The inner chamber is not cooled during normal engine start. Most often, the breakdown lies in the main components of the equipment.
- The unit does not turn on or turns on for a short time and then turns off. Here, the problems are associated with a malfunction of the electrical circuit of the household appliance.
In the first case, only highly qualified craftsmen should be engaged in repairs, since diagnostics and repairs can only be carried out with the help of special equipment and long-term skills.
But if the electrical mechanism of the unit is out of order, then you can solve the problem on your own - after carrying out diagnostics, identifying the causes of the breakdown and replacing the failed part.
In conclusion, I would like to note that every unit, even from a world-famous manufacturer, may stop working at some time. To repair a refrigerator, you need to figure out what the matter is, purchase the necessary part and stock up on free time. If you do not have special experience in the repair of household equipment, it is better to contact the masters of their craft, who will solve all problems quickly and efficiently.
DIY installation of screw piles: performing installation calculations, installation rules. Design features and advantages of screw piles.
Description of the principle of operation and the device of the pumping station, characteristics of the main types of breakdowns, do-it-yourself repair. Replacing a failed membrane. System installation and operation manual.
Ceramic crane-axle box: what is it, design, do-it-yourself repair
Not every consumer knows that the repair of any home appliances, including the refrigerator, can be done independently without contacting a service center. Even a novice master can deal with simple breakdowns. Today we will try to figure out how to replace the refrigerator thermostat with our own hands. And also let's talk about what kind of device it is and what are its characteristics and purpose?
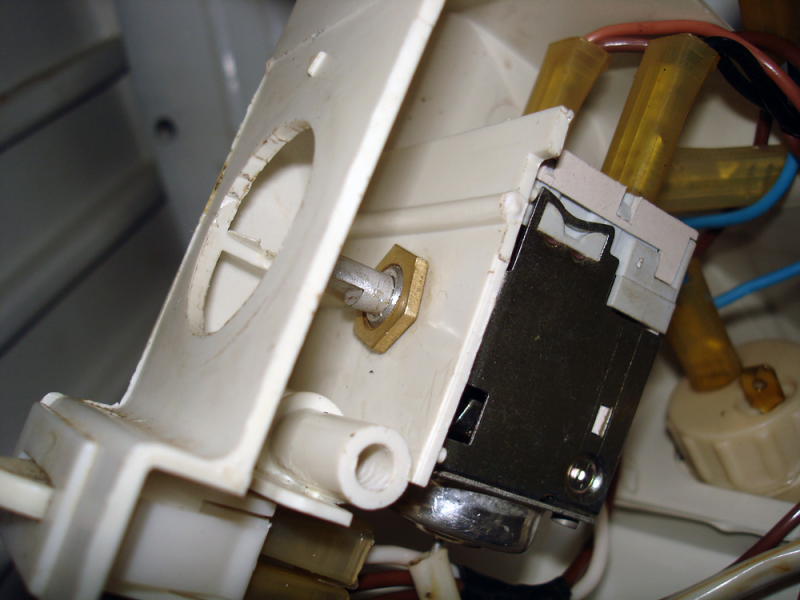
First, let's figure out what it actually is.A thermostat is a device that monitors the t˚C in your refrigerator and gives signals to the compressor, causing it to turn on and off depending on the degree of cooling in the compartment. It works very simply. The thermostat is a relay. On one side of it there is a special hermetically sealed tube filled with freon. On the other hand, the contacts of the electrical circuit, with their help, the compressor is controlled.
See also - How to adjust the thermostat (thermostat) in the refrigerator
Everything works very simply. The end of the capillary tube is attached to the evaporator. Since it is filled with a refrigerant, for example, freon, then with an increase in t˚C inside the refrigerating chamber, the pressure in it increases. This closes the corresponding relay contacts and turns on the compressor. After a while, t˚C in the refrigerator compartment decreases, the pressure in the bellows tube drops and the contacts open. The compressor turns off.
Another important component of the thermostat is the spring, which compresses and expands its contacts. It depends on her how and when they will work. For example, in order to open the contacts at a low pressure in the system (low t˚C), less effort is needed, for a large one - more. The tension of the spring is adjusted using the thermostat switch knob. This is how the temperature regime changes in the Atlant refrigerator and other models with mechanical control.
Some models of refrigerators are equipped with an electronic thermostat. It consists of a temperature sensor and a control module. In modern models, several sensors can be installed for each cooling zone. If your refrigerator has an electronic temperature control mode, it may require specialized knowledge to repair it.
See also - 5 models of refrigerators that we do not advise you to buy
Well, we have disassembled the device and characteristics of the device, we move on to the next question. In order to repair the thermostat with your own hands, you first need to find it.
This is not difficult to do. The thermostat is always associated with a knob or button for setting the temperature regime in the chamber. Depending on the refrigerator model, the thermostat can be installed:
- inside the refrigerating chamber;
- outside the refrigerator.
This arrangement is typical for earlier models of Atlant refrigerators and others. If you open the refrigerator, you can see a small plastic box placed on one of the panels. This is the thermostat. To get to it, you just need to remove the temperature selector knob and unscrew the protective case.
Modern refrigeration units are arranged a little differently. In them, the device we need is located outside the refrigerator chamber. It is usually located at the top of the refrigerator, above the door. But it may be in another place.
In any case, the principle is the same - the temperature controller is located in the same place as the switch knob. To get to it, you need to remove all protective parts.
See also - Why does a refrigerator need a voltage regulator
Do we really need a temperature controller? Maybe the cause of the breakdown is completely different? Most often, the signs of a breakdown of a thermostat are obvious: (See also: Why the refrigerator does not freeze - what to do?)
- the refrigerator works without stopping and does not turn off on its own;
- the unit begins to freeze strongly in the refrigerator compartment, where, in normal mode, there should be, albeit a low, but still positive temperature;
- the refrigerator shuts down spontaneously and no longer makes any sounds.
Each of these faults can be caused by the temperature controller. In order not to spend money on calling a specialist, we will try to fix the breakdown with our own hands.
- disconnect the refrigerator from the power supply;
- remove all food from it and defrost it well;
- move the thermostat knob to the “Max” position or turn on the freeze, if any;
- place a thermometer on the middle shelf of the refrigerator compartment (not in the freezer), it is best if it also has a negative measurement scale;
- turn on the refrigeration unit (empty, no food);
- wait 2 hours, then quickly remove the thermometer and evaluate its reading.
On the "thermometer" you should see at least 6-7˚С. If this is not the case, repairs are imminent. And if the thermostat in your refrigerator is electronic, then it is unlikely that it will be possible to carry out repairs with your own hands.
- broken thermostat;
- the motor start relay has burned out;
- the engine of the refrigeration unit burned out.
The last two reasons are, of course, very serious. But we are now interested in the first one. To make sure that you need to replace the thermal relay, you need to check it:
- disconnect the refrigerator from the network;
- find the location of the thermostat and remove the protective covers;
- inspect the device carefully.
Most often, the temperature controller has three to four colored wires. One of them is usually yellow with a longitudinal green stripe. This is grounding. We won't need it, so set it aside to avoid accidentally snagging it. All wires that fit the body of the thermal relay, short-circuit each other directly. If, after turning on the refrigerator, you hear a steady hum of the engine, it means that the temperature regulator is out of order and you will have to replace it with a new one.
By the way, the wires suitable for the thermostat have the following purpose:
- orange, red or black - connects the thermostat to the motor;
- brown - zero, the wire leading to the outlet;
- white, yellow or green - leads to a light indicating that the refrigerator is on;
- striped yellow-green - ground.
If you find such a nuisance, several factors may be the reason. So first you need to do all the steps described in the first paragraph. If the thermometer readings were + 6 ° C or less, quickly turn the thermostat adjustment knob until the refrigerator is turned off.
If the refrigerator turns off, everything is in order. Not? It will be replaced. In the event that the refrigerator is turned off, we leave it to work without food for at least 5-6 hours. After that, we begin to mark the time intervals between turning the compressor on and off. For a properly operating refrigeration unit, this period should be approximately 40 minutes. If you did it less, "add" some coldness, that is, turn the switch a little to the right, clockwise.
If everything went well, you can load the groceries. Not? The temperature controller will still have to be replaced.
- remove the cover of the upper hinge and unscrew the bolts under it;
- remove the refrigerator compartment door;
- further, remove the plug in the refrigerator roof and unscrew one screw (most often it has a built-in hexagon);
- we unscrew the screws holding the roof (located at the back) and remove it;
- remove the temperature control knob;
- take out the temperature regulator by unscrewing 2 self-tapping screws that secure the bracket;
- change the node to a new one and perform all actions in the reverse order.
- get to the detail;
- disconnect the capillary tube from the evaporator body;
- carefully pull it out of the case;
- disconnect the relay itself;
- carefully insert the new bellows tube and secure it to the evaporator;
- connect all the necessary wires and attach the relay in place.
If this is your first time doing this kind of work, take pictures of your every step with your phone or camera. The photos will help a lot when assembling, if you forget what and where was connected.

