VIDEO Repair of inflatable mattresses.
To repair a mattress, depending on the nature of the damage, you will need the same set of materials and tools as for repairing boats.
The procedure is exactly the same. The only difference is that the mattress is smaller, so the work will be less labor intensive.
Simplest welding for PVC
Many products made of thick or monolithic PVC - boots and their tops, some boat parts - are easier and safer to weld in field conditions without using glue at all. Sometimes it is necessary to use such welding also for repairing relatively thin materials, when the glue either ran out or, as often happens, remained at home in a drawer. By the way, for the first time such a welding method was used during socialism, when the RZ-85 kayak made in the GDR appeared in the USSR (everyone called it "Erzeshka" at that time), whose shell was made of reinforced polyvinyl chloride. Then there were no adhesives (except for the BF series, which "did not take" PVC), the majority could not get the scarce solvents, so our kulibins came up with the idea of making the "skin" of German and Polish kayaks with an ordinary table knife out of poverty. The primitive welding method is good for small cuts and especially for pinholes or perforated scuffs where moisture only oozes out at the pressure caused by immersion in water.
For welding, you will need the cheapest stainless steel table knife you can buy on any market.
Table knife for welding PVC fabrics.
It should be blunt, with a straight blade 2–2.5 cm wide and a rounded end.The knife should be made of sufficiently mild steel as it may need to be bent somewhat for ease of use. Scissors and pieces of the material of the product that are going to be repaired are also needed to cut out patches. And, of course, a source of open fire, which can be a primus stove, a gas burner or, even worse, a fire. On a fire, it is difficult to accurately control the temperature of the blade. Ideally, it should be in the range between 150 and 180 ° C, at a higher knife temperature, PVC burns, and below the specified temperature it melts, but does not “smear”.
It is better to heat the knife on a gas burner.
The essence of welding is as follows: a heated flat and thin knife blade is briefly placed between the patch and the base material. This is done by quickly swiping a knife along both surfaces and, what is important, pressing the edge of the patch from under which the blade has already come out. That is why, for convenience, it is useful to bend the knife blade so that its end over a length of approximately 45–70 mm is at an angle of 10–30 ° to the rest of the blade, depending on the area prepared for welding.
Bonding PVC patch
The hot knife melts the PVC at the puncture site and on the patch.
If the patch is large, then the knife must be moved keeping its blade perpendicular to the long axis of the patch. Small patches (with a ruble coin or less) on a boat or tops of boots are welded with a short touch of a knife - as if they are taking a hot cutlet from a frying pan, only moving the hand on the contrary, towards themselves.
The most important thing in welding is to control the temperature of the tool and to fully touch the molten surfaces to each other. For control, you can use a piece of wood, the easiest way is a match.
Temperature control by charring the match.
Run the end of the match along the edge of the heated knife. If a match breaks out, the instrument is overheated; if it does not leave a trace, it is subcooled. On a normally heated blade, the match will leave a clearly visible trace of a deep brown color.
After practicing on pieces of different materials, you can start repairing your equipment. The advantages of a welded joint are its relative simplicity, low cost, high strength and complete tightness. It is almost impossible to make such a connection permeable to water, while leaks cannot be ruled out in a sloppy "sticky" patch on the glue. Water, as they say, will find a hole!
In life, anything can happen - then rats appear in the most unexpected places, and bars of reinforcement sticking out of the water are no longer a rarity on our reservoirs.
In life, anything can happen - then rats appear in the most unexpected places, and bars of reinforcement sticking out of the water are no longer a rarity on our reservoirs.
During the operation of inflatable boats made of PVC fabric, the shell can receive various damages - punctures, cuts, scratches, tears of the polymer layer, etc. These damages should be repaired promptly. If the damage is small, you can repair yourself using the repair kit supplied with the boat, which is designed for minor repairs in the field.
In order to effectively deal with cuts, punctures and other damage to the inflatable elements of the boat, you will need:
1. The repair kit that you received with the boat upon purchase.
REPAIR OF PUNCTURES, SCORE AND CUTTING IN AN INFLATABLE PVC BOAT
Places of minor damage are found during a visual inspection of the boat, places with a broken tightness - by the appearance of air bubbles coming out of the compartment, lowered into water or smeared with soapy water in the intended place.
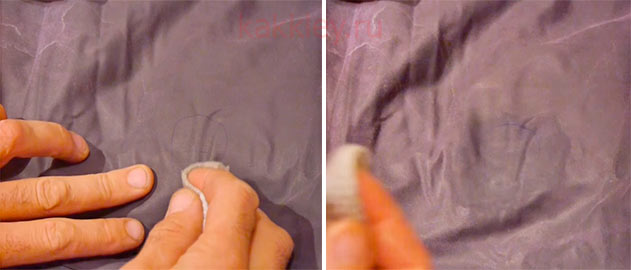
Preparation for repair. Thoroughly clean and dry the inside of the repair area and compartment if water gets into it. The place of damage and the area around it must be washed and degreased with acetone, but do not apply great efforts, since acetone gradually erases the PVC coating. In no case should you clean the material with sandpaper or otherwise violate the integrity of the polymer layer of the fabric.
Gently spread the affected area on a flat surface (you can put a board or a boat floor under the cut). From a piece of cloth supplied with the repair kit, cut out a round or oval patch overlapping the damage by 3-5 cm. Mark the position of the patch on the repaired area with a pen or pencil and degrease the patch with acetone.
Bonding methods 1. Apply a layer of glue included in the repair kit to the damaged area and the patch with a brush, and after 1-2 minutes press the glued surfaces tightly to each other. This bonding method is short-lived and is suitable for field repairs, but it is best to change such a patch as soon as possible.
2. Evenly, in a thin layer, apply the glue to both glued surfaces and let the glue dry (if the glue thickens during storage, it can be slightly diluted with acetone). After 10-15 minutes, repeat the same procedure and let the glue dry again. After 5-10 minutes after applying the second layer (touch the glue - it should dry out, but stick slightly to your finger), the patch is applied to the marked area of damage and rolled with a hard roller, squeezing out air bubbles from under the patch and smoothing out the folds
Instead of a roller, you can use any other suitable rounded object: knife handle, meat grinder handle, etc.
3. The optimal repair method is as follows: dry the second layer of glue until it loses stickiness, apply a patch and to activate the glue, heat the repair site with any household hairdryer to a temperature of 60-80 degrees Celsius (the surface should be warm to the touch, but not hot). Then roll on the patch with force. Or, first warm up the patch and the place of damage with a hairdryer, and then apply and carefully roll the patch
To avoid damage to the material, IT IS STRICTLY FORBIDDEN use open sources of fire for heating!
Inflate the boat until it takes shape, but do not apply excessive pressure and leave for 24-48 hours. It is during this time that the adhesive bond gains full strength. If it is not possible to inflate the boat, it can be folded neatly, without bending the material at the gluing point, and left to dry.
The boat can be used after repair work no earlier than 24 hours later. On large cuts and punctures, it is advisable to put two patches - an internal and an external one. The order of repair work remains the same, only first a patch is put on the damage from the inside of the cylinder, and then from the outside. It is not necessary to wait until the inner patch is fully bonded.
Before putting a patch on damage that is complex along the contour, it is recommended to first sew the torn surfaces with threads. Further, all gluing operations are performed in the same order as described above.
Repair adhesive and heat resistance. Now polyurethane adhesives have appeared on the free market, which are quite suitable for repairing small and medium damage to PVC material. In addition to the Uranus glue, which is included in the repair kit of our boats, and the above-mentioned Desmakol glue, you can use UR-600 glue, as well as Vitur glue produced by the company of the same name from Vladimir.
ATTENTION: never use adhesives such as "Moment", "Superglue" or other types of adhesives not recommended by the manufacturer when repairing PVC boats. They can be used only in case of emergency, not forgetting that such glue will crack, not ensuring tightness at the place of repair.Remember that this glue is almost impossible to remove from the surface of the boat, and it will not adhere to the glue we recommend when repairing PVC boats. This, in turn, will lead to the complication and rise in the cost of the subsequent repair of the boat.
REPLACING A DEFECTIVE VALVE ON A PVC BOAT
Most valve failures are due to mechanical stress. Your boat is blown off after fishing. Friends help you to collect payolas. And accidentally someone steps on the valve, under which there is a stone on the other side. Crackling, in such a situation, probably, hardly anyone will hear.
In order to replace the valve, you need a special key. We do not recommend “picking out” the valve with improvised means, otherwise it can be damaged and then, in order to remove it, you will need three times more effort and time.
If you do not have a “proprietary” key, then you can make it yourself. To do this, you need a metal or hard plastic tube with a diameter of 13 to 20 mm and a jigsaw, which will need to cut out the "teeth" to contact the inner surface of the valve. A small cylindrical hole can be made from above, where the "knob" is subsequently placed.
So you're done! The boat's cylinders must be deflated. Feel through the material and firmly squeeze the counterpart of the valve, the so-called "glass", in your hand. Using a wrench, unscrew the valve body from the "glass". There are times when, as a result of long-term operation, the valve "sours" and does not twist out of the "glass". In this case, you can use a car spray "liquid key".
Before inserting a new valve, it is useful to inspect the faulty one. Sometimes it is enough to simply blow it out and rinse it in soapy water, and lubricate the "stuck" valve spring with a small amount of grease. If your old valve cannot be reanimated, then replace it with a new one.
Holding the counterpart of the valve ("glass") by hand, screw in the new valve using a wrench. Do not overdo it! The new valve must be screwed on tightly enough, but not tightly! Firstly, it may have to be unscrewed someday, and secondly, excessive tightening force can easily lead to valve or key breakage. Inflate the cylinder and use a soapy solution to check the tightness of the connection. If air is poisoning from under the valve, then “squeeze” it with a key.
When operating a PVC boat, situations may arise when, due to damage to the hull, repair work is required using special technologies.
Correctly carried out and high-quality repair allows you to operate the boat for a long period without loss of performance.
During the operation of PVC boats, malfunctions may occur, which can be divided into several groups:
Bottom damage.
Damaged balloons.
Transom damage.
Spoiler malfunctions.
Damage to fittings and equipment.
Other damage.
Bottom damage can occur when the bottom is not tight at the joints of PVC parts.
Etching can form in areas of the boat's hull:
point suture:
butt joint in the keel area in the area from 10 to 50 cm;
in the area from 50 to 100 cm;
in case of loss of tightness of the boat hull along the entire perimeter;
when tearing off the elements of the boat (decor, T-shaped);
when the bottom bulkheads are torn off along the connection line;
when peeling off special protective layers;
in case of damage to the body due to external influences (rupture, puncture, cut, burn-through) of the bottom tissue;
when etching valves.
In case of damage to the cylinders as a result of a violation of the tightness of the cylinder bodies at the joints of the material:
in case of leakage at the joints of the compartments;
when etching valves;
with a through-breakdown (cut, puncture, rupture, burn-through).
Damage to the transom is possible during extreme operation of the boat due to unforeseen circumstances:
changes in the angle of inclination;
transom offsets;
detachment of the transom from special holders;
separation of the transom from the cylinders;
damage to the transom surface.
Interceptor malfunctions can occur during operation:
by displacing the spoiler;
changes in the angle of inclination;
in case of damage to the fastening of the duplicate diagonal.
If the hardware is damaged, malfunctions may occur:
damage to seat anchorage elements;
violation of the protection of cylinders.
Other damage.
To repair a boat made of PVC fabric, the following materials are required:
PVC fabric patches;
special glue;
repair kit.
Tools required for the repair of the PVC boat hull, depending on the place of work:
rags;
solvent;
brushes;
thermal heater;
hard roller;
scissors, knife.
The glue used must have properties that ensure a strong bond of the material:
heat resistance;
resistance to mechanical stress;
elasticity and flexibility.
For repair work, adhesives are used:
Uranus;
Desnokol (together with Desmodur additive);
RK-2;
Master glue;
UR-Mono;
Super-NN (with hardener "Izur-021").
To give the adhesive composition a more liquid consistency, a special solvent is used - MEK (methylene ketol), which gives the composition elasticity and high adhesive properties.
To replace or clean the valve, a tool is required, which must be included in the repair kit.
When going out into the countryside or fishing, you must always take special materials with you: PVC fabric, special glue, a repair kit and a tool for carrying out repair work.
PVC material, glue, repair kit must be of the same type, suitable for repair work.
VIDEO If damage is found to the PVC boat hull, it is necessary to inspect and, if necessary, prepare for repairs in the field.
To carry out the repair, it is necessary to carry out the following operations:
Bleed air from the boat hull.
Wash the damaged area well and dry.
Degrease the boat hull at the bonding area and the patch cloth using thinner, acetone or gasoline.
Make a patch template and try it on to the place of damage on the boat hull. If the damage is small in size, the patch is placed on one side, and if it has a large area, then on 2 sides.
A patch is cut to the size of the template from PVC fabric, degreased, dried.
Using a brush, glue is applied to the hull of the boat and to the patch and kept for 10-15 minutes. for setting.
Secondary, the gluing sites are processed with glue, held for 5 minutes. and applied to each other, rolled with a hard roller to remove air bubbles.
The boat is slightly inflated with air and left for 2-3 hours. to dry the glue.
VIDEO When repairing damage with a large area, it is first necessary to sew up the fabric with threads, and then glue it with patches on both sides.
VIDEO In case of malfunction of the valves installed on the boat, it is necessary to inspect them with a functional check. To do this, using a special key, the valves are unscrewed, cleaned of dirt and washed in gasoline.
They are lubricated with oil and assembled in the reverse order. They are checked for leaks, if the operability is not restored, then they are replaced with new ones.
It must also be remembered that after the end of the fishing season, when laying the PVC boat for storage, it must be thoroughly washed to remove the smell of fish, which attracts rodents that can damage the hull.
Boat repair, pvc boat repair, rubber boat repair, inflatable boat repair, boat repair video, Kiev boat repair, pvc boat seam repair, do-it-yourself boat repair, Dnipropetrovsk boat repair, Kharkiv boat repair, kremenchug boat repair, bark boat repair, repair do-it-yourself boats video, hummingbird boat repair, pvc boat repair video.
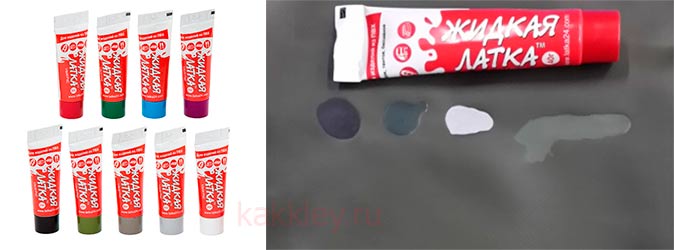
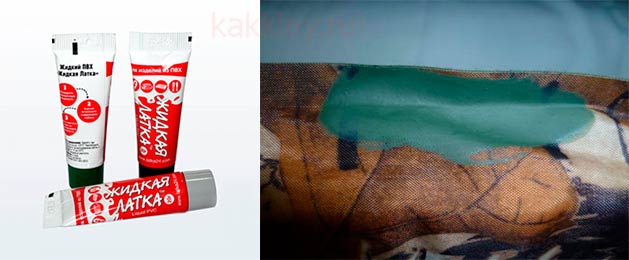
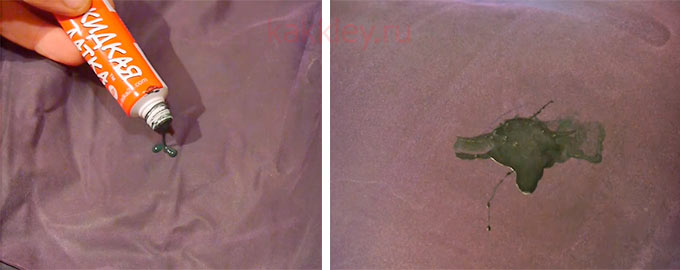
We simulate the damaged bow seam of an inflatable boat and repair it with the Liquid Patch
Where to buy Liquid Patch?
Subscribe to our channel: <>
Video PVC boat repair: Do-it-yourself repair of an inflatable boat seam of the Liquid Patch channel - repair of any PVC products
Many people who like to fish or relax in nature purchase PVC boats. They are much cheaper than motorized hard metal counterparts and do not require a parking space. A PVC boat is an excellent economical option for those who have fishing and recreation on ponds as an integral part of their leisure time.
However, one of the most significant disadvantages of PVC boats is their high susceptibility to damage. This is understandable, because the material cannot be compared in strength to metal. Often, the life of a boat depends on the knowledge and skills of its owner in the field of repair. It is not for nothing that when buying a boat, it immediately has a repair kit.
Puncture of an inflatable boat. It may happen that the hook will pierce the side, or you, through your negligence, pierce the boat with a sharp object. There are situations when a PVC boat is burned with cigarette butts.
Cuts and lacerations. Very often in domestic reservoirs you can find various metal fittings and rods sticking out from the bottom. Most often, beginners stumble upon boat cuts, who have not yet managed to identify all the dangerous places for themselves.
Failure of the boat valve. The valve usually breaks due to mechanical stress on it. You can simply step on the valve.
If a misfortune has happened to your boat, then do not despair ahead of time. PVC is a material that can be repaired very well. Often a PVC boat can be repaired in the field and then continue fishing or rest.
Of course, in many cases, hastily made repairs are not very high quality and require rework after returning to land. But nevertheless, it allows you to continue your journey.
In order to repair the boat yourself, you will need the following tools:
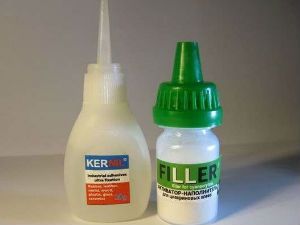
Repair kit (adhesive and patches)
Scissors
Metal plate or roller
Hair dryer. It is better to use a construction hairdryer, but in extreme cases, a household one is also suitable.
Pencil
Solvent
Brush
Water, soap and rags (rags).
Of course, this is all about removing cuts on land. If you have to repair the unit in the field, then you will be able to use only a lighter and a repair kit.
The repair kit is a set of materials with which you can independently repair the boat in the field.
Considering that PVC fabric is a more than unpretentious material, an inflatable boat can be repaired even in the most difficult conditions.
The standard repair kit includes a set of PVC fabric washers (usually with a diameter of 40 and 80 millimeters in an amount of 6 units) and a tube with a special adhesive for PVC. I must say that absolutely all PVC boats are equipped with repair kits, so you don't have to choose it yourself. If you run out of fabric or glue, it’s best not to throw out the tube, but leave a piece of fabric as a sample.
Unfortunately, most often the glue in the repair kit ends or becomes unusable. If you cannot find exactly the same as the previous one, then we advise you to use some recommendations.
First, the adhesive must create a strong waterproof seam.
Secondly, it is obliged to withstand the static and dynamic loads to which the boat will be subjected.
Finally, it must be thermally stable.If you do not want your patch to come unstuck during storage of the boat in winter and not “float” in summer, be sure to take into account the thermal resistance parameter.
The adhesive must have sufficient elasticity.
This video presents the choice of glue for repairing an inflatable boat from a practical point of view: several patches of various types of glue were glued to a piece of pvc in accordance with all gluing rules, and left to dry. Then they were tested by the sun. Which glue for a pvc boat is better - find out from the video.
VIDEO
Which PVC boat pump is most suitable for your boat. Let's try to figure it out together.
To get started, unpack the repair kit and cut out a small piece of fabric - preferably oval or round. You can trim rectangular workpieces with scissors or, if repairs are being made in the field, with a knife. It is important that the length of the workpiece is at least a couple of centimeters greater than the diameter of the cut or pierce.
It is important that the gluing is done on a flat surface without creases. Level the area of the material to be repaired by placing a boat floor or a board under it.
Do not glue the material onto a dirty surface. Use acetone or solvent to clean and degrease it. If neither one nor the other is at hand, use alcohol. Do not under any circumstances clean the surface with sandpaper - this will only harm you.
Place the cut patch over the repair and trace around it with a pencil.
Take a brush and apply the glue evenly on both surfaces. Wait a little while it dries out.
Repeat the previous operation in 10-15 minutes.
Begin gluing 5 minutes after reapplying the glue. In general, the drying time of the glue depends on the humidity, the ambient temperature and the storage time of the glue itself, so it is better not to wait for the exact time, but to guide the state of the glue - it should stick a little.
To activate the adhesive, heat the repair area with a hair dryer or lighter. It's important not to overdo it - you should heat the glue, not set it on fire.
Squeeze out any air bubbles and roll the bonding area with a hard roller. In the field, a knife handle will do for this.
The glued area should dry out for at least a day.
The procedure for repairing large ragged cuts and holes differs from the previous repair method only in that it is necessary to glue the linings also from the inside.
First, you need to cut two oval or round patches of the same size.
Then prepare the repair site, straighten and degrease it.
Sketch out.
In the same way as in the method described above, glue two patches.
For maximum reliability, you can stick two pads on the surface at once. The first should be smaller than the second in diameter.
The repair kit is designed to repair cuts that are no longer than 15 centimeters.
Repair of cuts differs in that the gluing procedure is preceded by stitching of torn surfaces using heavy-duty threads. The rest of the operations are carried out in the same way. The gluing of the slots is carried out using two pads on the outer and inner surfaces of the boat.
How can one person independently launch an equipped boat with a motor?
You won't be able to replace the valve just like that - you need a special key for this. To remove the old valve, it is strictly not recommended to use improvised means and methods, because you can further aggravate the situation.
If you have a factory key, there will be no problems with removing the valve. Otherwise, you can try to make it yourself. Find a small diameter tube of about 1.5-2 centimeters made of hard plastic or metal, as well as a jigsaw - you will need it to cut the teeth (to get contact with the inner surface of the valve).To place the "crank", make a small cylindrical hole from above. Be sure to deflate the boat's cylinders.
You will need to find the mating part of the valve ("glass") and unscrew the valve body from it. It is possible that, as a result of long-term operation, the valve will not twist. Then a special spray will come in handy.
Inspect the broken valve after removing it. You may be limited to lubricating the spring with grease and flushing the old valve, and you will not have to change it.
If the valve cannot be repaired, install a new product.
Using a wrench, screw in the new tap valve, while holding its counterpart. The main thing is not to overdo it with effort. Do not pinch the new valve too much - this can break the key or the valve itself.
Check the tightness of the connection with a soapy solution. If air still flows through, gently squeeze the valve.
Video (click to play).
If you repair the PVC boat on time, then it will serve you for a long time. The main thing is to follow the step-by-step instructions and take your time, because poor-quality repairs are sometimes very difficult to redo.
As in the second method, apply two layers of glue to the surfaces to be glued. Allow the glue to dry completely. Then either put the patch in the place of damage and warm it up with a construction hairdryer (the surface should not be overheated, it should be warm, but not hot), or first warm up the place of damage, then the patch and after that, press the patch tightly to the place of damage. In both cases, it is necessary to carefully and strongly roll the surfaces to be glued with a roller. This method gives the most reliable repair result.


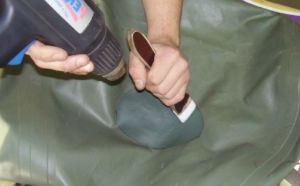 As in the second method, apply two layers of glue to the surfaces to be glued. Allow the glue to dry completely. Then either put the patch in the place of damage and warm it up with a construction hairdryer (the surface should not be overheated, it should be warm, but not hot), or first warm up the place of damage, then the patch and after that, press the patch tightly to the place of damage. In both cases, it is necessary to carefully and strongly roll the surfaces to be glued with a roller. This method gives the most reliable repair result.