All household wastewater from numerous plumbing fixtures in the apartment is discharged through sewer pipes. Their installation is undertaken by developers, but homeowners have to deal with the repair and replacement of utilities.Sometimes in a new building, a sewage system is required to be laid from scratch. The installation work can be entrusted to plumbers, but if you have free time and a desire to save money, then the sewage system in the apartment is assembled with your own hands. The main thing is to know how to lay pipes and connect plumbing.
Before piping and plumbing installation, it is necessary to plan the sewer system. The scheme includes the following elements:
If the connection of new points is not planned, then it is possible not to change the existing sewerage wiring. This will make it easier to calculate the required material. The length of all pipes is measured on site, if they pass through the wall, then the size of each section will be required.
The diameter of the sewer pipes is not chosen arbitrarily, there are recommendations for their size:
To connect some devices, a 32 mm pipe is sometimes used.
The slope also does not have to be chosen independently, pipes with a diameter of up to 50 mm are located at an angle of 3º, and 110 mm - 2º. This means that on an area of 1 meter, the slope changes by 3 and 2 cm, respectively. The correct location of the line ensures the movement of water in a gravity system.
The sewage system in the apartment is mounted from plastic, it is more difficult to work with cast-iron pipes. Three types of polymer pipes are used: polyvinyl chloride, propylene and polyethylene. These products are similar in appearance and properties:
To connect pipes, special elements are required: bends, tees, transitions from metal, cuffs. It is better to purchase all the necessary material from one manufacturer, this guarantees the accuracy of the coincidence of all diameters. Sealing the joints will require silicone grease, which is also bought in advance. So, for work we will need:
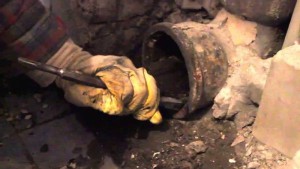
Replacing the sewer starts from the riser. This is the most difficult section, drains from neighboring apartments pass through it, therefore, while replacing the pipe, neighbors should be asked not to use the sewage system for a while. Dismantling is as follows:
After finishing the installation of the riser, proceed to the wiring.
All plumbing fixtures are disconnected from pipes that need to be dismantled. After removing the old system, the location of the new highway is marked. When installing the pipeline, straight sections, bends and turns that provoke blockages are preferable, there should be a minimum amount. Correct installation of the sewage system with a small number of connections and a consistent angle of inclination ensures self-cleaning of the system. With each flush, the stream carries away the remainder of the previous stream.
You can organize the marking of the slope of the pipes using a line on the wall or a cord fixed at the highest and lowest point of the sewer system. According to this marking, the places of fasteners installation are determined, for pipes Ø 50 mm, the clamps are installed every 50 cm.To relieve stress in the pipes, it is necessary to combine two types of fasteners:
Before installing the pipes, you need to chamfer them and clean the edges so that there are no burrs. The inside of the pipe and fitting must be clean and dry. When making the connection, the end of the pipe is inserted into the socket until it is tight. To enhance the tightness, silicone grease is applied to the rubber ring. The sockets should be located downstream of the water flow. During the operation of the sewage system, thermal deformation of the plastic occurs. So that the seam does not lose its tightness when the material expands, a gap of 1 cm is left. This is done as follows: the pipe is inserted into the socket until it stops, then a 10 mm mark is made and the part is pushed back to this mark.
In order not to have to redo the finished system, it is worth making a trial installation without sealed connections. Once you have verified that the installation is correct and that all parts are present, you can proceed with the final assembly.
After installation, it is necessary to check the tightness of the assembled system at all sections of the wiring around the apartment and at the junction with the riser. The reliability of joining the new riser with the neighbor's pipe is checked after the water is drained in the upper apartment. To check, water is drawn into the bathroom, and then the cork is removed, both taps in the kitchen are opened, the water in the toilet is drained. It is not difficult to assess the reliability of the joints - they must all be dry.
This video shows how the apartment cast-iron sewer wiring in the stalinka is replaced with a plastic one:
VIDEO
Sewer pipes and fittings
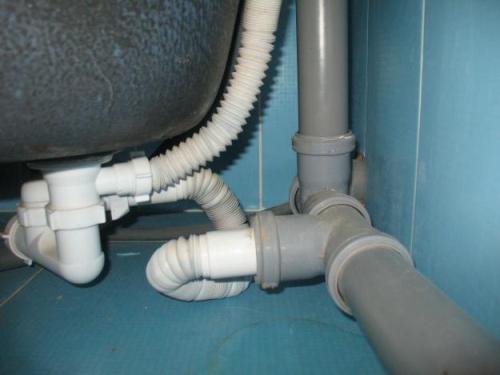
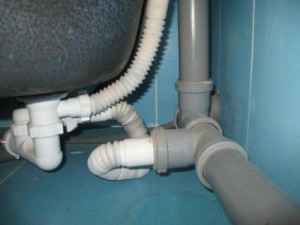
Installation of plastic sewer pipes in the bathroom
Replacing the riser
Pipe slope
Cast iron-plastic connection
Entering a plastic pipe into a tee of a cast iron riser
Replacing cast iron with plastic
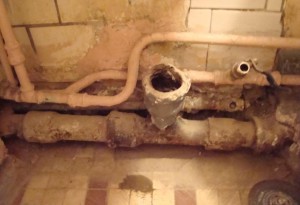
An example of a rotted cast iron sewer
When planning the repair of a sewer pipe without dismantling, you should familiarize yourself with the device of the entire system designed to remove sewage. In this case, the owner will not make mistakes during the repair work and will avoid additional financial expenses if technological errors arise. First of all, you need to familiarize yourself with the rules for installing the system. To avoid the unpleasant consequences associated with the appearance of blockages, the presence of a slope along the entire length of the sewer pipe will help. For each meter of a riser with a diameter of 50 mm, a slope of 3 cm is set. Before starting work, it is necessary to determine the type of repair, prepare materials and tools, make a list of the necessary expenses for carrying out repair work.
Sewerage device diagram.
An experienced owner knows that a sewer riser in an apartment requires constant attention and systematic maintenance. Malfunctions in the system can be eliminated with your own hands if the smell of sewage in the room is associated with malfunctions in the piping inside the apartment. What causes a network emergency?
Damage to the pipes of the inter-house wiring leads to the appearance of an unpleasant odor in the apartment. In this case, the repair of the sewer pipes is carried out by the maintenance office. A leak in a bathroom results from the formation of a crack or fistula in a specific section of the pipe. Inspection shows that hidden sewage leaks appear most often on plastic pipes installed in the bathroom. The master needs to determine in advance the tightness of the connection of the sink, sink and other sanitary equipment. Violations that have arisen in the operation of the ventilation system of the sewage system lead to the appearance of pressure, and the absence of a water plug contributes to the penetration of fetid odors into the room.
Diagram of a sewer riser device.
What are the reasons for the urgent need to repair the sewer riser?
Inspection shows that it is necessary to carry out work without dismantling the equipment in the following cases:
if leaks have formed at the junction of the pipes;
if there are cracks in the riser body.
The first step in the job is to determine the cause of the leak in the cast iron pipe. If a defect occurs at the entrance to the riser, it may be necessary to create a seal. It should be borne in mind that the defect at the pipe joint must be eliminated in a short time. To carry out work without dismantling the equipment, you should purchase tools and materials:
chisel;
hammer;
sealant;
cement;
container for mixing the solution;
water;
lead cones;
liquid glass;
medical bandage;
paint.
Performing the elimination of smudges at the junction of pipes, it is necessary to perform the following operations:
remove old cement;
remove the remnants of the packing from the slots;
prepare a fresh layer of sealant;
eliminate the defect with a cement solution.
Sewerage repair tools.
To create a high-quality connection, a mixture of asbestos, cement and water is prepared.
During the removal of smudges, the joints are cleaned, and then the lead cones are driven into the gap. Unfortunately, a home craftsman may not have a sealant available.
This means that he must use ordinary cement to eliminate defects. At this stage of work, the old coating should be removed from the pipe surface.
A working solution is prepared. The bandage is moistened and laid in a dense layer at the joint. After 2 hours, the coating is fixed by applying a layer of paint on top.
Repair of a sewer pipe without dismantling, if it is made of plastic, is carried out in several stages. First of all, the location of the leak is determined.To eliminate an emergency, the necessary tools and materials are prepared:
rubber seal;
silicone sealant;
clamp;
liquid soap or technical petroleum jelly;
bandage;
marker;
napkins.
Before starting work, wipe the pipe joints dry using napkins or toilet paper. Silicone sealant is applied to the cleaned surface, and then the pipe is fixed. The drain should not be used for 6 hours. At the junction of the pipes, to eliminate leaks, the fitting or coupling is replaced.
The scheme of fastening a metal clamp.
If the leak in the plastic sewer pipe is small, you can use the cold welding method.
For work you will need materials such as:
sandpaper;
plastic patch;
cold welding solution;
latex gloves;
harness.
They clean the surface to be repaired with sandpaper, degrease, remove dust and dirt particles. A plastic patch is prepared, and then they begin to knead the working mass with their hands, receiving a composition for cold welding. A solution is applied to the surfaces to be glued, the junction is fixed with a clamp or a tourniquet. Do not forget to stand the hardened mixture for an hour, and then subject it to various types of processing.
The plastic sewer pipe is ready to perform its functions in a day. You can glue the risers made of plastic using a mixture applied to the bandage material. Acquire the necessary materials for work:
hairdryer for drying;
plastic bandage;
epoxy adhesive;
a piece of fiberglass;
putty knife;
clamp.
Clean the area for work and dry it with a hair dryer. The next step is to prepare the fiberglass bandage. Glue it with epoxy glue to the worn section of the pipe. Determine the width of the adhesive band, equal to 1.5 of the pipe diameter. The clamp is fixed on it so as to ensure its tight contact with the pipe. Provide glue drying within 24 hours from the moment of application, at a temperature of at least 22˚С.
Sewer pipe connection diagram.
A damaged cast iron or plastic pipe must be repaired using means that differ in their technical characteristics and structure.
If a crack is being repaired, the first step is to determine the material from which the pipeline is made.
Damaged plastic risers are repaired with a sealant, followed by fixing it with tape.
If the riser is cast iron, degrease the entire working surface.
For work, it is necessary to prepare a mixture of copper oxide and phosphoric acid (1.5: 1) and a spatula. The composition is applied to the damaged area, spreading it quickly over the entire surface of the crack.
For emergency elimination of the defect, a metal clamp, equipped with rubber gaskets, is applied to the cast-iron pipe.
It is advisable to stamp out small slots using a chisel with a blunt end.
It is recommended to place a gasket at the joints and fill it with a thick cement solution. To eliminate defects in pipes, materials such as:
silicone sealing compounds;
epoxy resin;
technical sulfur;
Portland cement.
Repair of equipment designed to remove sewage is a crucial moment, and the master should take into account the many nuances that arise at each stage of work.
Elimination of defects should be started only if the owner knows the simplest concepts of the functions and principle of operation of the sewer system, can independently determine the cause of the malfunction.
You should not start repairing sewer pipes until the material from which the sewer equipment is made is determined.
Calculation of the amount of funds spent on repairs and a detailed diagram of the technological process for troubleshooting the sewer network are essential for high-quality work.Defect elimination should not be performed without following a strict sequence of work.
It is necessary to study the certificates for materials and consult with specialists before starting the repair.
The elimination of defects in sewer pipes does not allow for savings, since ensuring life's comfort guarantees only the impeccable quality of the material.
Dismantling the old sewer system in an apartment is in many ways a more responsible procedure than in a private house. Indeed, in case of mistakes, not only your home, but also the apartments of your neighbors can suffer. For this reason, many owners hire a professional team to work with the sewage system, the services of which are not the cheapest. But if you want to save money and are the happy owner of skillful hands, you can replace the apartment sewage system yourself.
Sewerage in the apartment with your own hands
Contents of step-by-step instructions:
The first thing you should do on the way to a new indoor sewerage system is to draw the future network. It is important to do this even if you plan to replace pipes and some plumbing equipment, and not redo the sewer scheme, changing the position of sanitary fixtures and the place of passage of pipes.
It is not necessary to draw up a drawing, as is done in design organizations, but the diagram should be as detailed as possible.
On the plan you need to display:
the lengths of all pipes to scale;
be sure to indicate the diameters of the pipelines, their number, as well as the number and locations of all connecting elements and hydraulic seals;
sketch the sanitary equipment and its location;
the location of the riser;
the number of pipes and the distance from them to the walls;
location of inspection hatches;
slope of pipelines.
In order to correctly draw up a plan for arranging a drainage system, as well as implement it, it is necessary to take into account the nuances of installing an internal sewer network.
Since the replacement of the sewage system will take place in an apartment building, in which the apartments located one above the other have a common riser, do not forget to notify the neighbors about the upcoming work. After all, you will cause them a number of inconveniences, which is better to warn about.
Sewer pipe connection
In addition, you will have to negotiate with the house maintenance organization to turn off the water supply. So, you will at least protect yourself from the activities of forgetful neighbors associated with the bathroom.
Sewerage scheme in the apartment
From a purely technical point of view, the following nuances must be taken into account.
Many experts do not recommend replacing a cast-iron riser without special need, since this material is really durable, and dismantling a cast-iron pipe is a difficult process, which, if necessary, is best left to professionals.
Plastic pipes and fittings
Plastic pipes and fittings
Sewer trap
Sewer check valve
After all the measurements have been made, a diagram has been drawn up, taking into account all the nuances, and the necessary materials have been selected and purchased, you can proceed to the dismantling process if we are talking about replacing the old network.
It is possible to remove used pipes only when the water supply is turned off.
Bathroom after dismantling the toilet
Start by dismantling the riser. It is easier if the replacement of this vertical pipe occurs simultaneously for all neighbors. However, this option is rare.
It is much more common to change the system in only one apartment. Let's consider this particular option.
The work associated with dismantling the riser is dangerous and requires a certain skill, therefore it is better to invite a specialist to carry it out. In any case, you can't do without a partner.
Step 1. Fix the riser from above using two half-braces, connected to each other with studs mounted in the wall. A rubber gasket must be placed between the half braces and the pipe itself.This measure will allow, when removing a part of the riser, not only to avoid the fall of its section coming from the higher living neighbors, but also compensate for the vibration that appears during the dismantling process.
Step 2. First, all plumbing fixtures are separated from the sewer network. The bathroom is freed to the maximum.
Step 3. Cut the pipe going to the tee, leaving a small section of the pipeline. This measure will facilitate further dismantling of the tee.
Note! Cutting old pipes must be done carefully, not only if you plan to keep the riser or at least a tee. The reason for caution is the fragility of cast iron. During dismantling, vibration is created, from which the riser itself can suffer, and a fragment of the pipe can clog.
Step 4. In the center of the riser, 2 oblique cuts are made so that the maximum distance between them is 12 cm.
Step 5. By inserting the wedges first into the lower and then into the upper cut, carefully remove the pipe section between the cuts with a chisel and a hammer.
Step 6. While one person is holding the old pipe on top, another cleans the top joint of the old pipes. If the sealing is done with sulfur, then the connection can be heated with a burner. The sulfur will melt and can be removed with a knife.
Step 7. Swing the pipe together with the cross, then pull them out of the socket of the pipe going to the neighbors below. This joint can also be reinforced with gray.
Step 8. Clean the socket of the pipe going to the neighbors from the old sealant.
The worn-out riser has been removed, you can proceed with the installation of a new one.
Methods for connecting sewer pipes
If you removed not only part of the riser, but also the tee, the installation of the vertical pipe can be done as follows.
Step 1. In the socket of the lower pipe, freed from the old sealant, insert a rubber seal, lubricated with sealant.
In the socket of the lower pipe freed from the old sealant, insert a rubber seal, lubricated with sealant
Step 2. Now a tee is installed in the socket.
Note! In some cases, the spider-flare connection may not seem strong enough. This is corrected by using official silicone or sanitary tow.
Step 3. Mark the axis of the riser on the wall with a pencil.
Step 4. Assemble the riser without rubber seals and install it in place for the purpose of checking. At this point, you can mark the mounting locations of the fasteners on the wall. In standard apartments, 3-4 clamps are enough. If there are any errors in the assembly of the riser, then they are corrected.
Note! Don't forget the riser inspection hatches. They will help in inspecting the riser pipe for blockages and cleaning it.
Step 5. Mount the brackets into the wall.
Note! It is advisable to use brackets, since it is not recommended to install the pipe close to the wall.
Step 6. Collect the riser for finishing, this time using rubber seals and a sealed lubricant. At the top, it is connected to a cast-iron pipe with a cuff, and the lower part is inserted into a tee. Fix the riser to the wall with clamps.
There are 2 types of fixation.
A rigid fastening is used near the sockets, carried out using tightly tightened clamps with rubber gaskets.
Additional fixation can be carried out with a floating connection, which is produced with the same clamps. In this case, a rubber gasket is not used, and the fasteners are not tightened too much.
The installation of the riser is completed. You can start wiring.
VIDEO
It makes no sense to dwell in detail on the dismantling of old horizontal sewer pipes. The main thing is to free the pipes from the concrete and carefully disconnect them from the tee. Since the pipeline is old and it is not necessary to maintain its integrity, it is much easier to dismantle it.
How to install sewer wiring
The principle of installing a new wiring is not much different from installing a riser.
Step 1. First, draw on the wall with a pencil the axis of passage of future pipes, observing the slope.Often a strobe is made in the wall, in which the wiring fixed with clamps is laid.
Note! The width of the groove should be slightly larger than the diameter of the pipeline laid in it.
Step 2. Make a rough assembly of the pipeline without gaskets and attach it to the wall.
Note! The sockets must face the movement of the water.
Step 3. Collect the pipeline from the point where it enters the tee to the plumbing fixtures. All connections are made using a rubber seal and sealant. The ends of the pipes must be chamfered and free from irregularities.
Hidden wiring of water supply and sewerage
Step 4. Fix the pipe to the wall using clamps, which should be spaced from each other at a distance of no more than half a meter.
Pipes need to be leveled
Installation of sewer pipes
Note! Some of the clamps must rigidly fix the pipe, while in others the pipeline must have a floating course in order to compensate for the oscillation of the pipes during the movement of water.
Step 5. The toilet is connected to the riser using a corrugated pipe with a minimum diameter of 10 cm.
Step 6. Connect the rest of the sanitary equipment to the wiring.
After installation, a visual inspection is carried out first for tightness. Then you can turn on the water and use it to accurately check the strength of the joints.
VIDEO
To make sure that the pipes are tightly connected to each other in the distribution and the riser, you must proceed as follows.
Type the bathroom by closing the overflow hole.
Empty the drains and at the same time open the hot and cold water valves to full capacity.
At the toilet, plug the drain hole. For this, it is convenient to use a plunger.
Pour water into the toilet with a bucket to the brim and open the drain.
Ask the neighbors from above to drain the water to check the tightness of the riser.
If the work is carried out efficiently, then there should be no water at the joints at all.
Such a difficult work has to be done to replace the sewer network inside the apartment. If you doubt that you can do it efficiently and in a short time, then contact the specialists. After all, the neighbors also do not come in to wait while you are on the spot to deal with the nuances of dismantling the old and installing a new network.
Video (click to play).
VIDEO

