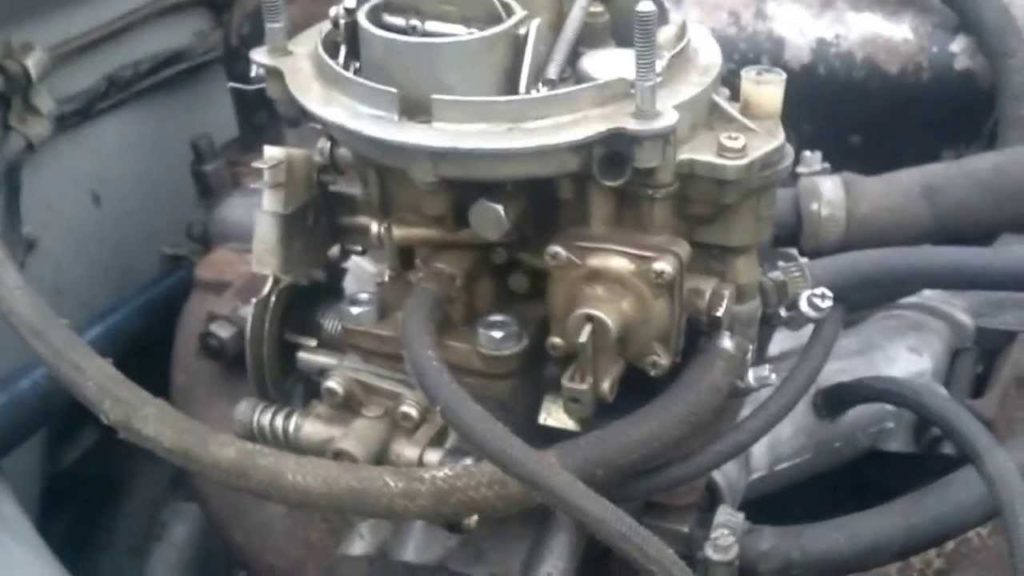
In detail: DIY carburetor k151d repair from a real master for the site my.housecope.com.
Fuel consumption directly depends on the state of the fuel system, and if there are malfunctions in it, the dynamics of the car also deteriorates, the engine starts to work unstable.
This article will consider the K151 carburetor: device, repair, adjustment, tuning features, as well as basic problems and their symptoms.
In the fuel system, the K-151 model carburetor performs the function of preparing a fuel-air mixture in the composition necessary for the operation of an automobile engine under various loads - at idle speed, at medium or maximum speeds. This unit is used on light cars "Volga", IZH, on commercial vehicles "Gazelle", "Sobol", off-road vehicles UAZ. There are various modifications of "one hundred and fifty-first", and depending on its model, a letter is added to the name at the end, for example, the GAZ-3102/31029 and GAZ-3302 Gazelle cars are equipped with the K-151S carburetor. Also, depending on the K-151 model, the jets can be installed in different sections - much depends on the characteristics and volume of the engine.
The 151 series carburetor consists of the following systems and elements:
The K-151 carburetor consists of two chambers, the throttle valves in it open sequentially, a filter is installed at the inlet in the fitting - a protective mesh. The unit is also equipped with a return fuel line, through which excess gasoline is discharged back into the gas tank, and the “return” does not allow creating excessive fuel pressure. The device of the K-151 carburetor itself is quite complicated, and in order to repair and adjust the unit, experience is needed, strict adherence to the repair instructions.
| Video (click to play). |
Several hoses of two diameters are connected to the K-151 carburetor - if they are mixed up, the engine will not work properly. Connect the hoses in the following order:
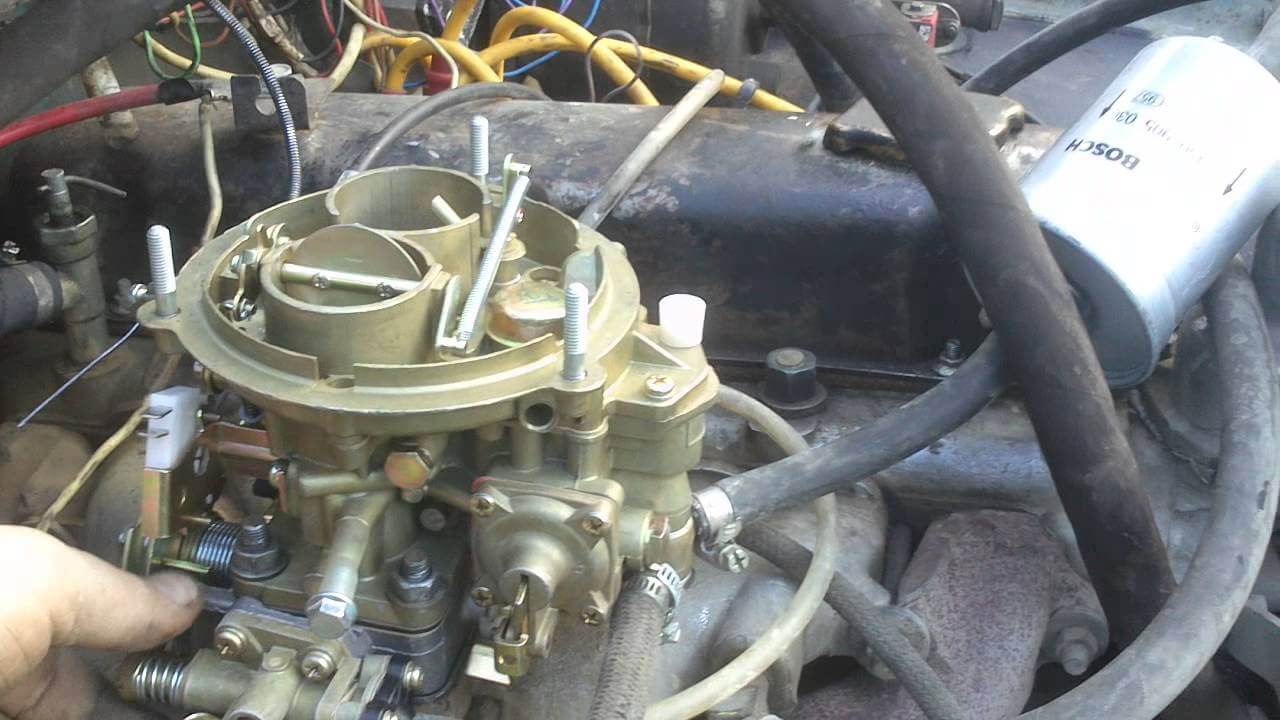
- the main fuel pipe - to the union, which is located under the float chamber closer to the engine (in the figure, it is clamped in the hand);
- "Return" - to the lower outlet (it is directed from the opposite side of the engine, and is located below the main choke);
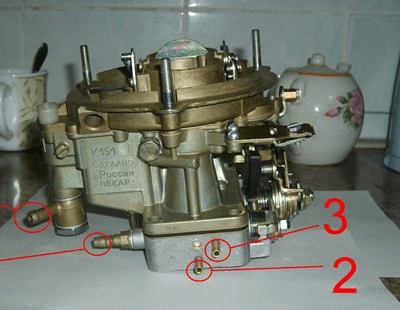
- the second - to the lower fitting on the other side of the throttle body (below in the picture under number 2)
- output number 3 - with a hose of the vacuum ignition advance on the distributor;
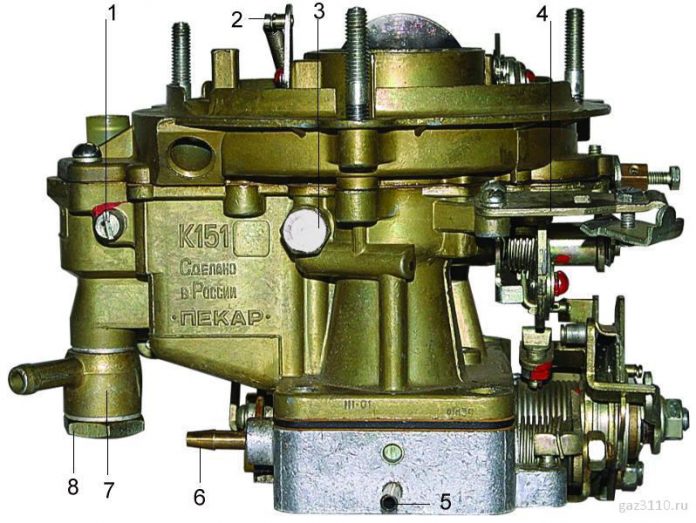
- nozzle on the carburetor at number 5 (picture below) - with a forced crankcase ventilation hose, which on many engines is located on the top of the valve cover;
- tap 1 (figure below) - to a thermal vacuum switch, which is not installed on engines without an exhaust gas recirculation system. In the absence of a sensor, output # 1 is often muffled, but it is not at all necessary to do this - no air is sucked through the fitting;
If, without experience, it is quite difficult for car owners to repair the K-151 unit with their own hands, then it is easier to master the adjustment, the main thing is to understand the principle of operation of the device and follow the instructions. In total, there are several types of adjustments "one hundred and fifty-first":
- idle move;
- air damper position;
- the level of gasoline in the float chamber;
- throttle position.
You should trust experienced carburetors to change the fuel level in the float chamber, but any driver can adjust the idle speed independently. We carry out the procedure as follows:
- we warm up the engine to working condition;
- we leave the engine running at idle speed, the air damper must be fully open (the suction is recessed);
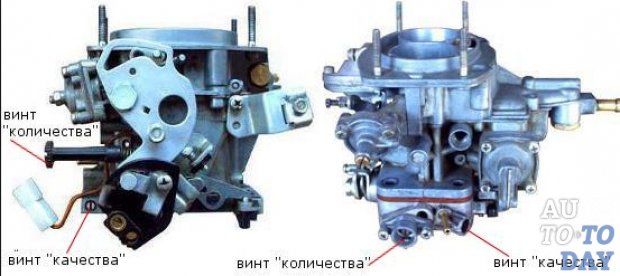
- we unscrew the screws of quantity (with a spring) and quality, let the motor gain maximum speed;
- gradually tighten both screws until the internal combustion engine starts to work intermittently;
- with the amount screw, we slightly increase the speed, while adjusting the quality, we "catch" the stable operation of the motor, but this screw, if possible, should be tightened as much as possible. It should be borne in mind that the position of the quality screw significantly affects the fuel consumption, therefore, it is wrapped as much as possible;
- slightly tighten the amount screw, achieve stable engine operation at 700-800 rpm. If the "quantitative" screw is screwed in a lot, dips begin at the moment of a sharp press on the accelerator pedal. You also need to remember that the stability of the internal combustion engine to a large extent depends on the ignition control.
If the engine speed is increased, it should be reduced using the screw that adjusts the position of the throttle valves. This screw often boils tightly, and it is impossible to turn it in any direction (in the figure below under the number 4, under white paint).
There is one "tricky" way that makes the adjusting element turn - you need to install a flat screwdriver in its slot and gently hit it several times with a hammer (you need to feel the effort, otherwise you can break parts of the carburetor). The screw will "come off" and begin to rotate on the thread. If the "trick" is not successful the first time, it should be repeated. It is important not to rush and be patient, then everything will work out.
During the operation of the car, various malfunctions may occur in the carburetor, the main signs of failures in this device:
- increased fuel consumption;
- black smoke from the muffler pipe, it is especially noticeable if you press the gas pedal sharply;
- unstable operation at idle, the engine may also stall on deceleration;
- poor vehicle dynamics;
- dips when picking up speed.
With a faulty carburetor, the engine may not develop speed, and pops and shots in the muffler are often heard in the intake manifold. K-151 is a fairly complex unit, and almost any element of it can fail.
There are reasons why the carburetor most often fails:
- jets, fuel and air channels are clogged;
- from heating, deformation of the case occurs;
- the stop valve of the float chamber stops working;
- over time, the jets wear out.
Many repairmen, restoring the working capacity of the carburetor, first of all strive to replace the jets, believing that because of them fuel consumption increases, the engine is unstable. One rather important note is that the jets are very rarely worn, and most often wear occurs when the carburetor is often operated in dusty conditions. The most common reason for poor carburetor performance is clogging, but to clean the unit well, it must be completely disassembled. Repair of the K-151 carburetor is carried out with the removal of the device, complete flushing and purging of all its parts.
Often, cars with carburetor engines are converted by car owners to gas, for example, it is advantageous to put LPG on a working Gazelle. But with the constant use of gas in the carburetor, various kinds of problems appear, and one of them is a malfunction of the cold start system on the carburetor.
On many machines in LPG, a spacer for gas is used for the K-151 carburetor, it is located between the main body and the throttle body. Due to the additional insert, the distance between the lower and upper parts of the carburetor increases, so the cold engine starting system begins to work with violations - you have to constantly keep your foot on the gas pedal, while holding the suction.On gas, not fully working suction does not affect the operation of the engine, but the point is that the cold start of the engine, and especially in winter, is carried out on gasoline. Therefore, starting the internal combustion engine with an incompletely closing air damper is quite problematic, even from the vibrations that arise, the fastening of the damper axis is often unscrewed. How to get rid of such an unpleasant problem?
One of the options for resolving the issue is to weld on an additional strap on the air damper rod, which makes it possible to compensate for the difference in the thickness of the standard gasket between the bodies and the gas spacer.
The bar can be made from an electrode with a diameter of 2 mm.
With severe wear of parts, the carburetor needs to be replaced, most often it changes if the body wears out:
- the lower surface of the middle part is strongly deformed;
- the lid is warped (upper part of the case);
- the seat for the throttle valves in the lower part wears out.
The price of the new K-151 carburetor is quite high (on average 5.5-6.5 thousand rubles), but it is impossible to drive with a faulty device, especially since with high fuel consumption even more money is lost. Changing the K-151 is quite simple, consider the process of replacing it with a Gazelle car:
- we turn off the engine, unscrew the clamp of the air pipe, dismantle the "corrugation";
- dismantle the air filter housing - first the cover, then the main body (fastened with three 10 nuts);
- we loosen the two fasteners of the suction cable, pull out the cable;
- disconnect the throttle cable;
- we release the carburetor from all hoses;
- unscrew the 4 nuts that hold the device body;
- dismantle the assembly - it can sit very tightly, so you can slightly pry it from below with a screwdriver, but you need to work with the tool carefully so as not to damage the gasket under the carburetor;
- put a new carburetor in place, start and warm up the internal combustion engine, adjust the idle speed.
If there are malfunctions of the accelerator pump of the carburetor, the engine begins to "choke", with a sharp increase in engine speed, a failure occurs. Quite often, the reason for this operation of the internal combustion engine is a clogged "nose" of the fuel atomizer, and the diaphragm of the accelerating pump may also fail.
Diaphragm defects are determined by its external inspection; you can easily get to it without removing the carburetor from the engine. To do this, you need to unscrew the four screws of the cover (in the picture below - at number 11), but you need to remove it carefully - it is important not to lose the spring that is inside the assembly.
To determine the serviceability of the pump accelerator sprayer, it is necessary to remove the air filter housing, turn the throttle valve by hand and see if fuel flows through the accelerator "nose". If the spray is clogged, you can try to blow it out, but this will require removing the carburetor cap. If the spout is not blown out, it should be replaced; work on replacing it is also performed without removing the entire assembly. We replace the sprayer of the accelerating pump as follows:
- remove the air filter;
- disconnect the suction cable;
- unscrew the seven screws of the carburetor top cover;
- we take out the cotter pin of the trigger rod, release the rod, dismantle the cover;
- we unscrew the screw of the sprayer, blow through or change the part;
If the engine consumes a lot of fuel, one of the reasons for this phenomenon may be a faulty needle valve in the float chamber - it is not tight, and too much gasoline enters the chamber. In some cases, the valve completely ceases to hold fuel, then the carburetor is completely filled with gasoline, and the car will not start. Replacing the needle valve is very simple:
- remove the top cover of the carburetor;
- we unscrew the screw that holds the axis of the float;
- dismantle the axis, remove the float to the side along with the needle itself;
- Using a pipe wrench for 10, we unscrew the valve seat, then put new parts in place, assemble the carburetor.
- How to set up the K-151 carburetor and what is the risk of an incorrectly performed adjustment
- Why adjust the carburetor and what is the risk of misadjusting your car
- Adjusting idle speed of the K-151 carburetor
- How to adjust the fuel level in the float chamber
- How to correctly adjust the position of the carburetor floats
- Is everything adjusted correctly?
- Adjustment of the starting device of the K-151 carburetor
- With the carburetor removed
- Without removing the carburetor from the car
- optimal, where fuel and air have a ratio of 1:15;
- highly efficient, with a fuel mixture ratio of 1: 12.5 / 13;
- economical, with a ratio of 1: 16 / 16.5.
Accordingly, each car owner adjusts the carburetor in accordance with his own wishes. However, the adjustment of the K-151 carburetor may also be mandatory - when the device becomes dirty or its individual elements are out of order. In such cases, it is impossible to do without repairs, after which the carburetor will require additional adjustment.
On the PECAR carburetor, the idle speed setting is of paramount importance. Correctly adjusted XX ensures stable engine operation; in addition, a minimum amount of carbon monoxide will be present in the exhaust gases, that is, the car will practically not pollute the environment. Due to long-term operation and clogged filters, idling the engine can burn much more fuel than necessary.
It is quite simple to adjust the idle speed of the K-151 carburetor, and the whole procedure comes down to a few simple tasks:
- Warm up the engine to operating temperature.
- Find a quality screw on the spin shank and remove the spin stop from it.
- Adjust the quality screw on the K-151 carburetor. To do this, you need to find such a position of it, in which the main engine units will carry out the maximum number of rotations when the mechanism is idling.
- There is also a quantity screw on the idle speed unit, with the help of which it is necessary to increase the rotational speed by 100-120 rpm. When, after completing these tasks, you tighten the quality screw on the carburetor, the rotational speed will drop and will thus be equal to 100-120 rpm.
For adjusting the fuel level in the carburetor K-151 need to prepare in advance only a ruler and a drill, the thickness of which should not exceed 2 mm. To complete this task, follow these steps:
- Find a level area that is comfortable for you to work with the vehicle and its carburetor.
- Dismantle the engine air filter housing.
- Start the engine to idle for at least 5 minutes.
- Remove the cover from the carburetor (this is the upper part of its body).
- Use a ruler to measure the fuel level in the float chamber.
- turn over the carburetor cover and install it on a flat surface so that the position of the floats is measured correctly;
- we measure at what distance from the bottom of the floats is the carburetor cover, or rather, its cardboard gasket.
Normally, this distance does not exceed 2 mm. If, in spite of this, the fuel level in the float chamber is not correct, you need to slightly bend the tongue on the float levers. After that, all measurements should be repeated, which will allow you to make sure of the effectiveness of the action you performed.
When adjusting the carburetor, the car owner himself can often set malfunctions, therefore, the correctness of the settings should definitely be checked so as not to aggravate the situation. To do this, move the carburetor cover to a vertical position and observe the tongue located on the float lever. If the adjustment has been done correctly, the float tongue will slightly drown the damping ball, which is located on the needle valve. In addition, it should be substantially parallel to the needle valve, while the punching axis on the floats should be aligned with the carburetor cover surface.
In the absence of all these nuances, the adjustment of the fuel level in the carburetor must be repeated, otherwise you will not achieve the correct functioning of the fuel system and the car engine.
The carburetor start system is actually the main center from which the start signal is given to the engine. If its elements fail for one reason or another, the car will turn into a useless heap of metal. But it is worthwhile to understand that even if all the elements are in good working order, the starting device may not function properly and for this reason requires a special adjustment, which can be carried out both with a dismantled carburetor and directly on the car.
Adjusting the starting device of the K-151 carburetor when it is dismantled from the car includes the following list of actions:
- Open the throttle on the carburetor and locate the lever that controls the starting device. It must be turned all the way and fixed in this position with a wire.
- When the throttle valve is released, the gap that forms between its edge and the wall of the mixing chamber should be 1.5 +/- 0.3 mm.
- Unscrew the lock nut on the carburetor,
which will allow you to take advantage of the stop screw located on the throttle lever. To do this, you just need to turn it, each time doing only half a turn. This is necessary because, in the end, when tightening the locknut, the screw must become perpendicular to the plane of the cam, otherwise the operation of the entire system will be disrupted.
- Check the rod length and adjust if necessary. We are talking about the thrust, with which the cam of the carburetor's starting system is connected to the levers located on the axis of the choke valve. If the choke valve is fully closed and the trigger lever is turned all the way, the gap between the levers will be 0.2-0.8 mm.
- If there is no gap - slightly unscrew the threaded rod head. If the gap is too large, tighten the knob to reduce the active link length.
With the K-151 carburetor, the starting device can be adjusted without dismantling the fuel unit. In this case, the result obtained will be no less good:
remove the air filter from the engine and start idling;
- press the gas pedal to open the throttle and pull out the lever, which is responsible for controlling the air damper;
- using a screwdriver, open the choke and estimate the crankshaft speed (it should be in the range of 2500-2700 rpm);
- if the crankshaft rotates much faster, on the adjusting screw of the lever responsible for the throttle valve of the primary chamber, unscrew the lock nut, wrap the crankshaft; if it rotates slowly, turn it out;
- tighten the lock nut back.
After the completion of all work, the adjusted carburetor is run-in. To evaluate its performance, it is important to record the current fuel consumption before tuning, the indicators of which you can compare with those that will be characteristic of the improved carburetor.
The K-151 series carburetor is produced by the domestic enterprise Pekar. It meets all modern standards, ensuring the reliability of the operation of vehicles of any kind. However, like any other part of the car, the carburetor periodically needs maintenance and repair.
Most domestic cars are equipped with a carburetor:
- cars "Volga" and IZH;
- UAZ off-road vehicles;
- light trucks "Gazelle" and "Sobol".
Its main purpose is to prepare and adjust the composition of the fuel-air mixture for an internal combustion engine.
The device of the K-151 carburetor is rather complicated. It consists of the following elements:
main body with float chamber;
a second body or body of throttle valves, which are rotated by the actuator from the accelerator pedal;
the upper cover of the float chamber, in which there is a locking mechanism that does not allow the chamber to overflow with gasoline, and an air damper for starting a cold engine;
main dosing system (GDS), consisting of jets and fuel lines for preparing a fuel-air mixture;
idle system, necessary for stable operation of the engine at idle, consisting of a bypass channel, nozzles and adjusting screws, as well as an economizer valve with a diaphragm mechanism;
an accelerating pumping mechanism that allows the car to move without failures with sharp acceleration and consists of additional channels in the main body, a ball valve, a membrane mechanism and a fuel atomizer;
econostat - a system designed to enrich the engine with a fuel-air mixture with a sharp increase in speed;
a transitional system consisting of fuel and air jets and providing a smooth increase in speed at the moment the throttle valve starts to open in the secondary chamber.
K-151 has two chambers. The throttle valves open alternately during operation. This guarantees an uninterrupted fuel supply. When it enters the carburetor, the fuel passes through the fitting, into which a mesh filter element is mounted. This mesh removes impurities and dirt from gasoline. Surplus fuel flows back through the fuel hose to the gas tank. All this allows maintaining the required pressure in the fuel system.
I got acquainted with the Pekar K151 carburetor after buying a Volga car (Gaz 2410). What can I say? The carburetor is manufactured by Pekar JSC (Petersburg carburetors) and is designed for installation on Volga and Gazelle vehicles (modification K-151). Volga, I'll tell you, of course, a prestigious car of domestic production, but not economical, about fuel ... And the carburetor plays an important role in this. Of course, the K151 is more economical than the K-126, which was produced earlier, the power has increased, but of course there are drawbacks, in my opinion they are present in all domestic products. Jets tend to get clogged and therefore have to be cleaned (at least once every two months). And so for a domestic car, a completely normal carburetor.
l
A serious advantage of the K-151 is the presence of a suction. The control system for the cold start of the engine on vehicles with K-151 operates separately. Therefore, sometimes a cold start can be difficult. To avoid such problems, a wire has been drawn between the starter crescent and the throttle heel. This wire creates a bond between the two separate gears and ensures a quick engine start.
In this case, the suction can be adjusted by setting the desired values depending on the weather conditions.
Within the framework of the K-151 series, several modifications of carburetors are produced. They all have the same principle of operation, but differ in technical characteristics.






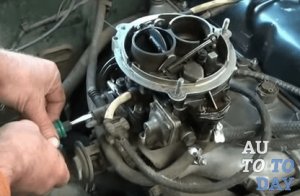 which will allow you to take advantage of the stop screw located on the throttle lever. To do this, you just need to turn it, each time doing only half a turn. This is necessary because, in the end, when tightening the locknut, the screw must become perpendicular to the plane of the cam, otherwise the operation of the entire system will be disrupted.
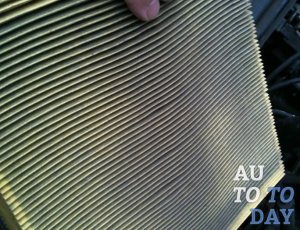 remove the air filter from the engine and start idling;