In detail: do-it-yourself repair of frame pools from a real master for the site my.housecope.com.
Having your own indoor or other pool is a great idea and will cost you a lot. Not everyone can afford this luxury. But there is also another option that is available to more people and which can be mounted in any convenient place - this is an inflatable or frame pool, which is assembled in a matter of minutes. Their only drawback is the possibility of a puncture. In such cases, repair work will be required. This article will tell you how to identify a leak, as well as how to seal a pool of the brand "Intex" or another manufacturer.
You can always manage to beat the alarm. But if it comes to the fact that water is decreasing from the pool, then you should not rush. Extremely hot weather can be one of the reasons for the decrease in the water level in the pool. Since the pool surface is open, it provides a large area for evaporation. With air temperatures above 30 ° Celsius, the water level in the pool can drop significantly during the day. To make sure whether there is a puncture in the pool, you can use the comparative observation method.
To conduct the experiment, you will need a permanent marker and a bucket. The permanent marker does not wash off with water, so it is great for these tasks. Instead of a bucket, you can use any container. The pool is filled to the maximum level. The container for the experiment is also filled with water, but not to the very edge, but so that a mark can be set. It is placed on a flat surface. When the water calms down, a dash is made above the water level. It is worth doing the same for the pool. After that, you need to leave a bucket or basin next to the pool. Everything is kept in this position for at least a day. After the time has elapsed, you need to look into the pool and bucket. If the water level has dropped proportionally in both the pool and the bucket, then the issue is evaporation.
| Video (click to play). |
If the puncture site is in the wall of the pool, it is usually easy to spot it by the constant leakage of water. But there are not so obvious cases. Also, the leak may not be in the pool at all. Usually, a filtration unit or a pump is used in conjunction with a pool, which drives water through a solar collector for heating. Leaks can be at the puncture site of the hoses or at the places of threaded connections. If a visual inspection does not show anything, then it is worth disconnecting all devices from the pool for a day and see what happens to the water level. If it remains unchanged, then the problem is in one of the modules. After that, for a day, they must be turned on one by one and it is analyzed whether there will be a drop in the water level in the pool. In this way, it will be possible to identify in which particular module the leak is and work with it separately.
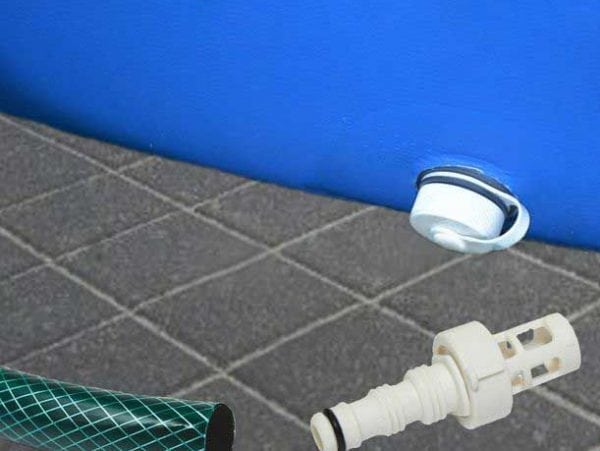
Usually the filter is connected to Intex pools by a difficult lowering of the hose into the water column. For this, holes are used that are made at the factory in the material of the container. It is on this node that you need to pay close attention. The most common problem is the gasket between the plastic fittings. During assembly, it could be skewed and not create an airtight abutment. She can also leak from seasonal use. Another problematic point is the connection of the hose to the pump itself or the slag separator. It must be carefully inspected and, if necessary, the threaded connection must be sealed with FUM tape or tow.
It is a little more problematic to identify a puncture in the "Intex" bowl itself, but it is possible using the following methods:
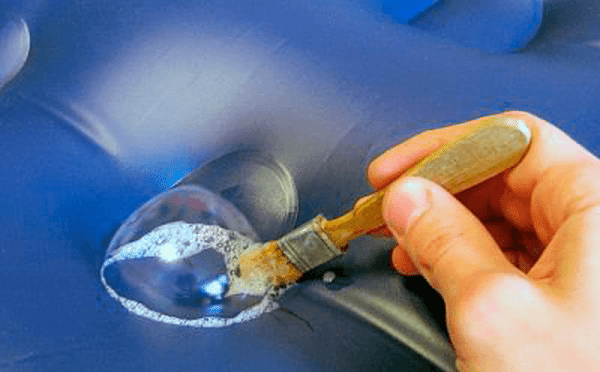
The foam method should be known to everyone who has changed the gas hoses to the stove at least once. For him, you need to take a container with a lid, it can be a jar or a bottle. It is necessary to pour water and detergent, shampoos or liquid soap into it, shake well until a thick foam. After that, with a brush or washcloth, the mixture is applied to the intended place. If bubbles appear, then the problem is found. When it comes to the inflatable part, then it can be lowered into the water and watched for bubbling. The use of pigment is the most effective method. It must be added to the water near the site of the alleged leak. It will enhance its color where there is an increased outflow of water. Also, the pigment can be easily seen on the outside wall of the Intex container.
When the bathing process is in full swing, you do not want to interrupt and distract children. In such cases, you can use the tools at hand to solve the problem with water. There is always an opportunity to use a ready-made repair kit from the manufacturer. These kits are usually supplied with the pool itself. If it has already been used, then other methods can be applied in order to patch the leak.
In emergencies, various types of adhesive tape can be used to temporarily fix a water leak. For this role, ordinary scotch tape, bitumen tape or aluminum tape is perfect. It is worth remembering that such a solution as a repair kit for the pool will be relevant if the breakdown is closer to the top and very small. Such tapes will not be able to withstand significant water pressure. The water can be kept completely dry. It will be enough to temporarily close the leak from the pool side. From the outside, processing is carried out with fine sandpaper and a degreaser. As the latter, acetone, alcohol or "Kalosha" gasoline are suitable. After that, several layers of tape are fixed with a perpendicular overlap.
This method will require more extensive intervention and time to ensure the elimination of the leak. For work you will need:
- superglue or glue for pvc;
- cut pvc film;
- degreaser;
- brush;
- sandpaper.
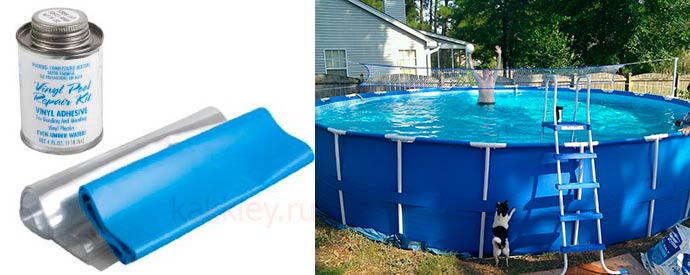
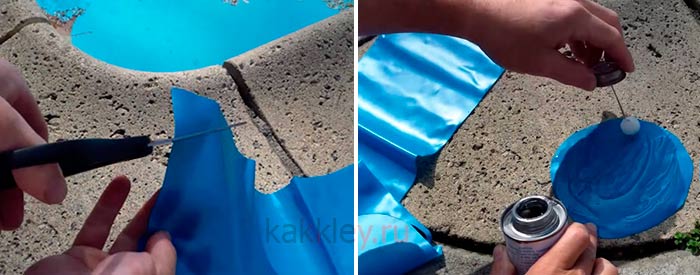
A piece of PVC film can be purchased separately or you can find a scrap of an old banner, which is often found near the road. Before starting the process, you will have to empty the pool container. It is better to leave the pool structure assembled so that it can dry well in the sun. After that, the place of the leak in the pool is treated with sandpaper and a degreaser, as in the previous case. After that, two patches are cut out several times larger than the hole in the pool. The adhesive is applied to the damaged area in the pool, both from the outside and from the inside. It can also be applied to patches. If this is a special compound for PVC, then the glue must be given a few minutes for it to react with the surface. After that, the patches can be fixed on the pool and kept in accordance with the manufacturer's recommendations. This pool repair kit is always easy to have on hand.
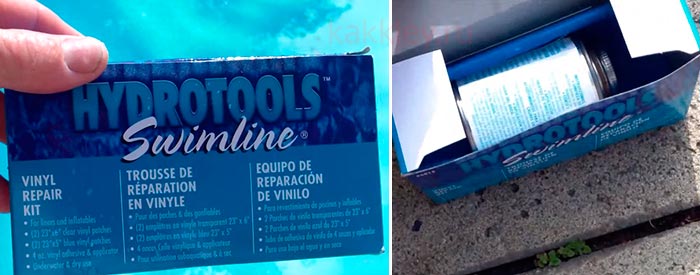
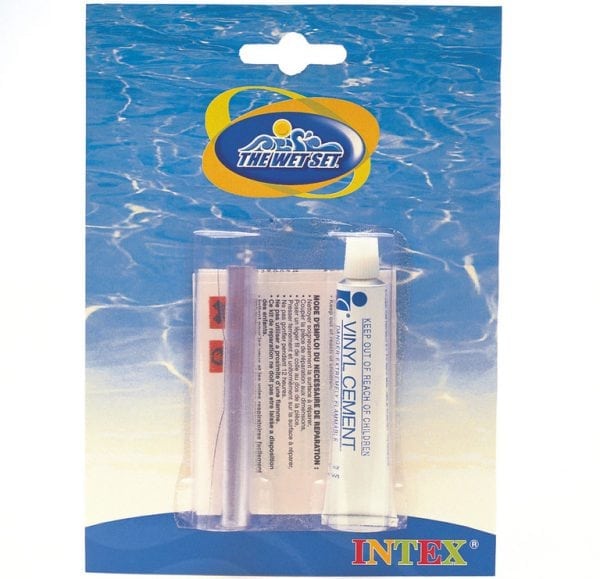
The most effective and durable is the Intex pool repair kit. If you own it, then the question should not arise, what else can be used to seal the pool. A pool kit usually includes a PVC patch and a special compound that has been specially designed and tested in the laboratory. It is with such a repair kit that the restoration will be the easiest. The step-by-step instructions for its use are the same as described for the previous case. The process of eliminating leaks in the pool can be visually assessed by the video:
With the knowledge provided in this article, you will now not be worried or nervous that the rest in the pool can be disrupted. You can easily and quickly correct the situation with the help of improvised or specialized means.
The masters argue that it is not so much the process of eliminating the hole itself that is difficult, but rather finding it. We will analyze what is needed for the repair, and what is the algorithm of actions.
To eliminate leaks in frame pools, ready-made repair kits are sold. They can be purchased in the markets in the fishing department or in the pool shops.
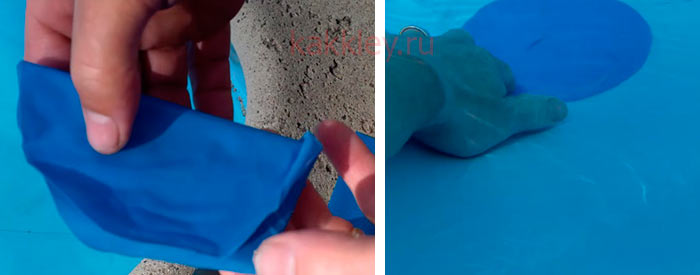
- Self-adhesive underwater repair patches. Allows you to carry out repairs right in the water. The patch needs to be cut to the correct size. It will cover the hole.
- If there is no patch, a piece of pvc material from which inflatable boats are sewn will do. For example, you can buy a pillow for a pvc boat.
- Glue. Vinyl Cement cold welding superglue is presented in the sets of Intex. It contains ethyl acetate, methyl ethyl ketone, acetone and polyurethane rubber.
Other adhesives can also be used.
Craftsmen who have already had a chance to repair a frame pool recommend the following tools:
- Rubber glue "Moment": designed to work with hard and foamed rubber, gives a strong, elastic and, which is especially important for swimming pools, a waterproof seam. Convenient for home renovation and cheap.
- Plumbing sealant - fills holes and cracks, does not turn yellow, does not crumble, is not afraid of water and ultraviolet radiation.
- Roofing bituminous aluminum tape - designed to work with the roof, but according to reviews, it can keep the pool from leaking for a while. It is an adhesive coated foil. Scotch tape is resistant to moisture, has good sealing against environmental influences.
Also in the work, depending on the selected technology, you may need a hair dryer (preferably industrial), brick or any other press.
The first thing to do is find the leak. Water does not always decrease due to defects in the bowl or bottom.
It can evaporate or leak due to a defective gasket in the filtration system.
If such options are excluded, then it is recommended to drain the water and carefully inspect the pool surface.
There are other, faster ways to find damage:
- Purchase a special color pigment. This substance is used to check the health of artificial reservoirs. It will help you quickly find a place with a defect.
- It is better to start searching for damage to the bowl with the valve in the drain part. Also, water often appears outside the pool, getting there through small cracks.
- At the bottom, the accumulation of dirt (silt) around the defect will help to find a leak.
When the damage is found, we proceed to its elimination.
- Degrease the surface at the leak.
- We apply glue to two patches - one will be on the outside and the other on the inside. We apply them to the place of damage.
We repair the bottom of the frame pool in the same way as the bowl.
- We roll the surface and heat the patches applied to the place of the defect with a hairdryer. From above, if we are repairing the bottom, we press down with a heavy object, for example, bricks. Leave to dry for a day.
If you do not want to drain the water, you can try to renovate the pool directly with water.
To do this, we buy Intex self-adhesive underwater repair patches and press them to the defective spot on the inside. We hold the patch for a minute.
Next, we glue another patch dry from the back side.
Unfortunately, this technique will only provide a temporary result, and the pool may leak again.
- In practice, Intex ready-made repair kits have proven the most effective - this option is more preferable for high-quality repairs.
- If the cracks are very small and you don't feel like messing around, try sealing them with a sealant. With impressive holes, a patch is still indispensable.
- Be careful when operating the pool.
If you cannot solve the problem yourself, contact a specialized company for help.
When it’s summer outside and the thermometer shows maximum values, almost everyone dreams of freshening up in cool water, but not everyone can afford the arrangement and maintenance of a stationary reservoir in their area.
An excellent alternative would be an inflatable or frame pool, which is easy to install, operate and repair yourself. However, such a device is not as durable as it seems at first glance. It can be accidentally pierced with something sharp, cut on a sharp stone, or otherwise damaged. How to glue up an inflatable pool and fix a frame one?
The inflatable pool consists of two- or three-layer rubberized fabric in the form of volumetric rings, which retain their shape thanks to air chambers. Its advantages are maneuverability, simple operation and easy assembly. PVC is a durable material, but it can be easily damaged, for example, by placing the tank on a sharp stone, spike, or broken glass.
How to seal a hole in an inflatable structure at home? Consider the following options:
- scotch tape and plaster (emergency repairs when nothing else is at hand);
- repair kit (you need to buy with the pool);
- waterproof glue for inflatable pools (you should always have it on the farm);
- vulcanization in a car service;
- repair in specialized workshops.
When a puncture is found, and a special repair kit is not at hand, use an adhesive tape or plaster as a patch on an adhesive basis. In this way, you can glue a children's circle or a rubber mattress.
In case of damage to the tank air chamber:
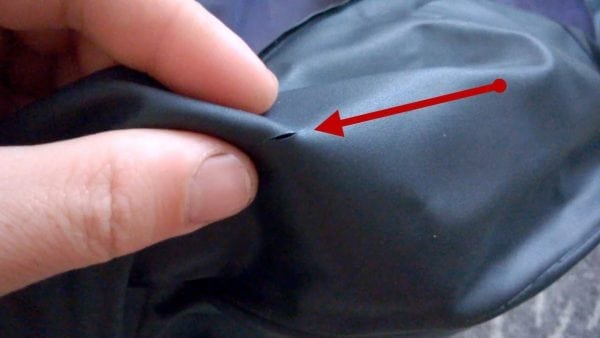
- Determine the exact puncture site. For this, the inflated pool is completely or partially submerged under water. Soap solution will also help determine the location of the rupture (bubbles will come out of the hole).
- Mark the damage with a marker or ballpoint pen.
- Sand off the rubberized material. This can be done with sandpaper.
- Degrease the pool counter with an alcohol-based substance.
- Use a suitable size tape or tape.
Attention! Bonding in this way is short-lived and is used if you need a quick result.
The repair kit consists of a tube of special glue and a transparent vinyl patch that can be glued to a product of any color without fear of ruining the design. Start the repair by degreasing the surface with an alcohol-based substance. Then:
- Cut the patch to a suitable size.
- Apply the adhesive evenly to the damaged item and to the vinyl piece.
- Place the patch to the surface and press down (preferably using a press).
- Leave the product inflated for 4–5 hours.
Important! If the pool is deflated and does not hold its shape or is flowing, it is necessary to find another hole and eliminate it in the same way.
Inflatable manufacturers Intex and Bestway supply their products with a repair kit, which eliminates the need to choose the right adhesive when a puncture or leak is detected. Often the final result of the repair depends on what kind of glue it was carried out.
When choosing an adhesive on your own, you need to pay attention to the method of using it, which is usually indicated on the packaging. The glue must be waterproof, as the pool is in constant contact with water. Most often, they use a universal tool that can also glue rubber and rubber products, plastic, wood.
You can repair a leaking pool in a car workshop using cold vulcanization. The specialist will degrease the surface, glue the patch to the rubberized fabric of the pool and press it firmly with a vice.
If a factory defect or holes left by the teeth of animals are found on the pool, then it is difficult to make a high-quality gluing at home. In this case, you must contact the repair and service center. Experts in working with PVC will make diagnostics using a professional leak detector or glycerin solution, as well as individually select a repair method and eliminate the leak qualitatively.
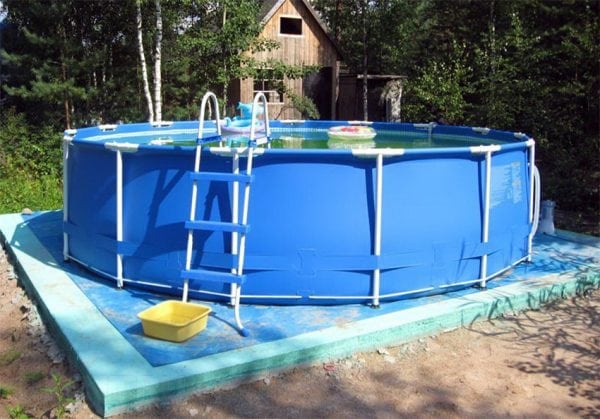
The pool frame is a rigid metal structure that gives it stability, strength and perfectly keeps its shape. The material of the bowl can be different: often they use PVC film for the pool and three-layer vinyl in combination with polyester. The main difference between frame pools is the absence of inflatable elements.
It is allowed to make home repairs of frame pools, but it is better to turn to professionals. A medium-sized frame pool has a volume of approximately 6 tons. If the location of the damage is determined inaccurately, then the drainage of water will be unjustified.
Before gluing the surfaces, you need to find the location of the hole. Sometimes evaporation rather than leakage is the cause of a decrease in pool water level. You can check this as follows:
- Secure the water container to the frame tank, leaving a small gap up to the edge.
- Record the liquid level (inside and outside) with a marker.
- After 24 hours, compare the markings in the pool and tank.
- Draw conclusions about the reasons for the decrease in water.
On a note! If the mark in the pool is lower than in the bucket, the fault is a leak. If the levels match, then the water decreases due to evaporation.
To determine the location of the puncture, it is necessary to record the water level indicators for 24 hours with the pumping unit turned on and off. Then compare the results. The puncture site is located in the pipeline system if the water quickly decreases with the filter in operation. If the values are the same, the source of the leak is damage to the pool shell.
Also, the reason for the decrease in the water level in the tank can be:
- leakage of the gasket in the filtration system;
- puncture of the part of the pipeline working for water suction;
- malfunction of the valve located in the drain part.
Damage located at the bottom of the pool is accompanied by the accumulation of debris and dirt around the leak. To accurately diagnose and repair the tank bowl, it must be drained.
In order to repair damage using a repair kit, you need to:
- Mark the hole with a marker.
- Degrease the surface with an alcohol-based substance.
- Sand the edge of the damage with minimum abrasive paper (for rubber surfaces).
- Apply a thin layer of waterproof adhesive to the vinyl patch and glue it to the surface of the damaged product. For a stronger adhesion of materials, you need to apply force when gluing.
- Place the repair site under a press or press down with a heavy object.
- Dry for at least 24 hours.
On a note! After removing the flaws, the reservoir should not leak.

