The coil works in contact with a distributor breaker, or distributor. When the distributor is functioning, the amount of current in the primary winding on the coil changes all the time. The current becomes less when the contacts open, and more when they close. The magnitude of the current in the primary winding depends on the closing time of the distributor contacts.
When the engine is running at a high crankshaft speed, the contacts close for a short time. The magnitude of the current in the primary winding, the voltage of the secondary winding becomes less. Such conditions for a multi-cylinder motor lead to interruptions. To reduce the negative effect, a resistor or variator is sequentially soldered into the primary winding.
The resistance value in the primary winding becomes variable. It is greater at low crankshaft speed and decreases with increasing speed. The magnitude of the current increases in this case. When the starter motor, which draws a large mass of current, starts the engine, the voltage across the battery poles decreases. A similar process takes place in the primary winding.
With a faulty ignition coil, the car either does not start, or a running engine troit, stalls, and brings a lot of inconvenience.
Part check: turn off the ignition, disconnect the battery terminals, remove all wires from the coil. An ohmmeter measures the resistance value between 1 and 4, 2 and 3 pins. If the resistance on these pairs is not 5–6 ohms, the part under test is faulty.
In the absence of an ohmmeter, it is necessary to remove the coil from a known working car.If after that the car starts up with a quarter of a turn, therefore, there is a breakdown of this part, it must be replaced. Another way to identify a dead coil and high voltage wire tip. With the engine running, the wires are alternately removed from the candles, short-circuited to ground.
If there is no spark on one of the wires, or it is much smaller than the others, there is a problem with the coil or high-voltage wire. It is necessary to try with another, working cable. It turned out - good, the cable is to blame. If the same happens, the ignition coil must be changed.
After washing the engine, driving under a heavy rainstorm, after winter parking, ignition breakdowns appear, the engine undermines. Motorists have to carry out preventive cleaning of the ignition coil, tip, conductive cables with their own hands.
After cleaning the ignition coil and tip with your own hands, the engine will delight the owner of the car with proper operation. In general, such a procedure will not cause much difficulty, and self-cleaning will help save money on repairs.
This part is one of the main ignition systems for gasoline engines. Great importance is attached to the coil because the air-fuel mixture compressed with high pressure can only be ignited by a spark plug. A high voltage must be applied to break the spark gap. Its value is more than 30 thousand volts. This voltage is generated by the ignition coil.
As the design of the car improved, there were changes in the ignition systems of vehicles. Several types of coils have been developed and are successfully used to obtain high voltage, but they cannot be called interchangeable.
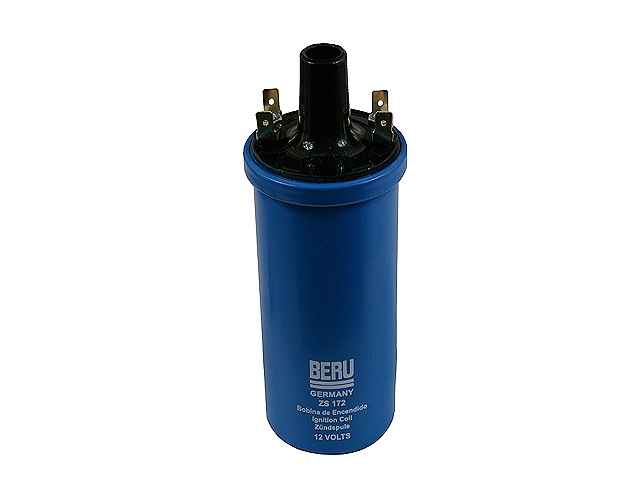
The photo shows the coil of "Moskvich" cars. A feature of the product is the presence of an additional resistance connected in parallel with the primary winding. It is used in contact ignition systems.
An increase in the power of the power unit required an increase in the compression ratio of the engine, and this entails an increase in high voltage. Therefore, the sparking system has changed, including the coil. Further modernization of the product led to the appearance of products with four high-voltage wire leads, double, individual samples.
The appearance of the device of the VAZ 2108 family of cars shows the difference from the previous design.
It happens that this part creates problems for the driver and the car. There are two main signs of failure, misfiring, inability to start the engine. Experienced drivers determine the signs with their "ears", they say, the motor "troit". Modern cars with an on-board computer signal a malfunction to the driver.
VIDEO
A misfire makes it difficult to get to the nearest service, but in the event of a complete failure, this is possible only in tow or a tow truck. True, in cases where the motor serves several coils, if one of them fails, it is possible to continue driving, but you will have to forget about fuel economy and high speeds.
The simplest thing is to replace the defective part. There are drivers who carry such a part in the trunk; it is quite simple to replace it with your own hands. In some cases, the ignition coil is repaired, but only if there is no turn-to-turn circuit, breakage of the windings. Check the ignition coil before replacing or repairing.
It is performed with a multimeter, a car tester, and a control lamp.A break in the windings, an additional resistor or a short circuit of turns are detected by measuring the resistance. Insulation breakdown or high voltage leakage to vehicle ground can be seen. Let us dwell on the elimination of such problems in more detail.
When checking the health of the high voltage source of the contact ignition system, the ignition system must not be left on. This can lead to the failure of the coil, since a significant current is supplied to it.
Old models have a problem when the additional resistance burns out. Such "grief" can be repaired with your own hands. For repair, it must be dismantled, before this, the location of the suitable wires must be remembered. The burned out additional resistor is rewound. Use a wire made of St0 steel with a diameter of 0.4 mm and a length of about 140 cm.
It should be wound on a core with a diameter of 0.5 mm. The finished spiral is riveted to the contact plates with rivets, placed in the groove of the ceramic plate, filled with liquid glass or epoxy resin. A current flows through it, heating the coil, so it is poured with a compound. The resistance of the winding is checked with a multimeter, it should have a value of 1.25 - 1.4 ohms.
You can use NP 2 nickel wire. The diameter is chosen approximately 0.3 mm, winding is carried out on a mandrel with a diameter of 3.5 - 4 mm. This is done with your own hands, using a winding device, a drill or other devices.
More modern products do not have additional resistance, but they are pursued by other types of malfunctions that are easy to detect by external inspection. These include mechanical damage to the case, chips of the carbolite cover, wear of the thread on the contact screws, breakdown of a high-voltage pulse to ground.
The defective cover, which is punctured, is replaced with a new product. It is necessary to carefully flare the edges of the metal case, remove the defective part, install a new cover. After that, wrap the edges of the case again. Usually, it can be restored to work.
Important! The coil is cooled with transformer oil, so be careful not to spill it. If this suddenly happens, you need to add the required amount of liquid.
Some drivers try to repair cracks or chips in the cover with epoxy. To do this, they make "ingenious formwork", which is filled with a mixture of epoxy resin and filler. In some cases, DIY repair works, but in most cases it is not for long.
Modern products also fail and are being restored. Symptoms of breakdowns are the same, they are determined visually or with a multimeter. Most often, high voltage breaks through. This problem is easy to fix with your own hands. You need to buy a piece of heat-shrinkable tube with a diameter of 23 - 25 mm in a radio parts store. A defective device should be degreased and put on a tube. Then, in an accessible way, heat it to shrink, then repeat the same with the second layer.
Many drivers wonder why sometimes a new part, for which a decent sum is given, quickly fails. It is difficult to give a definite answer, but it happens. As soon as symptoms of malfunctions appear, you have to take a multimeter and check the functionality. You want to measure the resistance between the shield (ground) and the lead for the wire or the tip of the candle. The resistance at this point should be within 1.2 Mohm.
If it is less than or significantly greater than the specified limit, the high voltage pulse current will not flow. This problem is especially often encountered on individual coils. You can try to fix the malfunction with your own hands. The location of the contact for the wire or candle is deep, but you need to get to it. With a hacksaw for metal, they carefully cut off the plastic tip near the influx itself.
Next, with a file, you need to remove the plastic in the contact area until a layer of epoxy resin appears, usually yellow.After that, the resin is again removed with a file until a nickle and a contact wire appear. Signs of breakage are visible to the naked eye, this is the lack of contact between the winding wire and the contact penny. It should be carefully soldered, then collected back.
Again, you need epoxy resin, a sawn-off tip, in which the traces left by the high voltage current are first removed. Its traces are clearly visible on the inside of the tip. The tip is installed, the joint is poured with resin. Its location should be as close to the base as possible.
VIDEO
Message Untermensch »28 Sep 2010 05:42
Even if relatively inexpensive coils appeared on sale, in the region of 4tr, they are made by the same plant with the same jambs, so having bought a new one, you can again get a replacement after a few tkm 🙁
In my case, it all started with jerks when picking up speed, especially on a cold one, and ended with a P030x error with the engine running on 3 cylinders.
After starting, the engine began to work smoothly, without failures, traction appeared on the bottom, power returned, the error was dropped from the 5th start of the engine, but at the same time I traveled about 50 km, I don't know which is more important. Then I rolled to another city (which I was going to do during the holidays). The rebuilt coil has covered 500 km, while there are no issues. Boom to watch.
p.s. I forgot to say, if there is damage from a spark that hit the screen, this place must be completely ground off so that there are no traces left, if a lot is ground off, restore with epoxy. The trouble is that the scratch conducts electricity 😯 i.e. she calls with a tester in the region of 2-3 MOM, apparently the lightning is spraying pieces of metal from the screen along its path. 💡
Here is a photo of the damage from a spark past:
p.p.s I drove 16tkm, everything is fine with this coil, however, after 14tkm, the coil of the 4th cylinder pierced, began to triple when starting off, and now it also pierced the coil of the 1st cylinder, even with the error P0301. Both the 4th and 1st were immediately modified in a similar way, and instability was also found in measuring the resistance of the last unfinished coil (2nd cylinder). Apparently I will do it in the near future. Now it takes 1.5 hours to rework with one coil together with glue filling. And it follows from this that if you plan to drive more than 15-20 tkm on the machine, you should immediately redo all the coils so as not to drive and listen when the next one is covered. As for the candles, I will also say, the candles for the first time were 4tkm right now, 20tkm, the condition is excellent, the original is GM.
Yes, symptoms who need:
It seems to be a small transformer that supplies high voltage to the candles, igniting the mixture in the cylinders in time. However, the trivial role of this device sometimes makes it inevitable to replace or repair the ignition coil.
The principle of the coil is traditional here - the low voltage current of the primary winding creates a magnetic field that induces a high voltage into the secondary. This is what is served on the candles.
Engines in operation today use 3 types of bobbins:
General - used in all systems, including electronic with an ignition distributor.
Individual - supplying current directly to the candle, excluding the armored wire. It differs from the general one by the location of the secondary winding over the primary.
Two-pin / twin - for electronic systems, synchronously supplying a spark to a pair of cylinders, but in opposite cycles of the compression stroke.
Whichever option is used, none is immune to breakdowns.
The normal running of a motor is a continuous cycle of well-coordinated interaction of its components. The slightest malfunction or asynchronous spark supply violates this order. Even a beginner will notice that one or several cylinders do not ignite the fuel in time, but in all at once, they will force anyone to leave the comfortable salon in order to solve the problem.
At an early stage, bobbin outages can be identified:
by the uncharacteristic sound, "triple" of the motor, the increase in frequency of these signs over time;
the same, with a sharp increase in revolutions - the failure of gas flow;
strengthening of such signs in the rain;
loss of traction when accelerating;
the check engine indication on the instrument panel is triggered.
This device is designed for continuous use, but operating conditions and technical features dictate their own rules. Having omitted a factory defect or mechanical damage, the reasons for which a repair / replacement becomes necessary are:
long-term operation, especially in unfavorable climatic conditions, increased loads;
use in extreme temperature conditions exceeding 150 ° C for a long time, which indicates a faulty motor control system;
inadequate power supply caused by insufficient battery charging. The minimum voltage supplied to the reel for its normal operation must be 11.5 V;
a malfunction of the main cable, which can be damaged, is eliminated by an elementary wire change;
breakdown of insulation due to the ingress of oil, moisture through worn seals, causing negative resistance of the windings, which will lead to damage to the entire device.
Errors in the work of such an important part, on the contrary, can negatively affect other components, for example, the engine control unit (PCM).
In order to avoid the rather costly, both in time and in terms of finance, the procedure for diagnosing the service station, you can confirm the validity of suspicions yourself:
the candle is unscrewed, the armored wire is removed;
a candle inserted into a high voltage wire is pressed against the body (for example, against the cylinder block), and the engine starts.
A weak, yellowish and uneven glow or lack thereof is a sign of a faulty spark plug, the replacement of which is a proven working one, will cast doubt on the serviceability of the following two components responsible for the spark:
a high-voltage wire, which can also be easily tested by others;
the bobbin itself.
It is worth noting that foreign cars of the last years of production are unaccustomed to such familiarity, and can respond with the failure of a hitherto serviceable bobbin.
The visual inspection method involves the detection of visible damage to the case, externally and internally. Identification of burnt spots, black dots will mean an indispensable repair or change.
The affirmative can be answered here in rather rare cases, more often related to preventive measures. To avoid increased resistance, poor contact or breakage, electrical connections must be protected from corrosion. Dielectric candle grease will come in handy here.
Do-it-yourself repairs are possible in case of damage:
combustion of additional resistance - is eliminated by rewinding the faulty resistor (for old models);
the damaged case is replaced with a new one;
the lid chip is restored with epoxy;
breakdown to mass - with a heat-shrink tube.
The expediency of repairing the coils has recently been questioned. Many models of modern cars (like some Skodas) are equipped with non-separable coils filled with polymer for tightness. It will be difficult to maintain this parameter, even after repairing the coil, after assembly.
Some parts still need to be replaced, for example - rubber tips, however, experts advise changing the floundering part with a new one, and preferably with a set of appropriate candles. The main thing is to pick up a copy of the same parameters, if the question is not about improving the entire ignition system.
VIDEO
The symptoms of malfunction of individual ignition coils (IKZ) can be different. For example, the engine is troit, the "Check Engine" indicator comes on, and the on-board computer shows a "misfire in the cylinders" error. There is an opinion among motorists that in order to extend the period of the IKZ, as well as to reduce the number of breakdowns, heat shrinkage should be put on the ignition coil. Is it worth doing?
You will need: a heat-shrinkable tube with a diameter of 25-30 mm, a hair dryer, scissors.
VIDEO
Put heat shrink on the ignition coil;
Trim shrink to length;
Heat it with a construction hairdryer so that the heat shrinkage fits tightly on the coil.
Some motorists repeat the operation, putting on 2-3 layers of heat shrinkage.
Reviews about such a repair of ignition coils can be divided into two groups:
The ignition coil no longer pierces. The error was dropped and it no longer lights up. The engine stopped troit, there was agility. Can be considered as a temporary repair in the field.
should be. Putting heat shrink on the ignition coil is pointless.
Would need : heat shrink tubing (25-30 mm in diameter), building hair dryer.
Installation order:
Hello everyone! My name is Mikhail, now I'll tell you a story about how I managed to exchange a dvenashka for a 2010 Camry. It all started with the fact that I was wildly annoyed by the breakdowns of the two, like nothing serious broke down, but the little things, damn it, so many things that really started to enrage. Here the idea was born that it was time to change the car to a foreign car. The choice fell on the tayet Camry of the tenths.
Put heat shrink on the ignition coil;
Cut it to length;
Heat with a construction hair dryer until the tube is firmly seated on the coil.
Some motorists repeat the operation, putting on a 2-layer heat shrink.
According to the reviews of car owners, such a refinement of the ignition coils has a positive effect. The "Check Engine" indicator no longer lights up, the misfire error has disappeared, and the engine began to run smoothly, without interruptions. Many consider this to be a temporary solution (repairing ignition coils) before buying a new part, because it costs a lot.
Another part of motorists argue that it is pointless to put heat shrink on the ignition coil. What do you think?
We will remind, earlier we considered another revision of individual ignition coils (IKZ), which will help to cope with unstable sparking. Read also how you can check the ignition coil yourself.
In order to get rid of constant fines from cameras, many of our readers successfully use Special Nano Film for numbers. Legal and 100% reliable way to protect yourself from fines. Having familiarized ourselves and carefully studying this method, we decided to offer it to you as well.
In order to get rid of constant fines from cameras, many of our readers successfully use Special Nano Film for numbers. Legal and 100% reliable way to protect yourself from fines. Having familiarized ourselves and carefully studying this method, we decided to offer it to you as well.
Often, if the ignition module breaks down, the car owner immediately runs to the store and buys a new one. But, for the VAZ-2112 there is an alternative way - repair. Of course, without proper knowledge in auto electrics, it will be difficult to understand all the circuits and communications.This article will tell you as far as possible how to repair the ignition module with your own hands.
Before proceeding with the repair of the ignition module, it is worth figuring out what it consists of. So, let's consider the construction of this element:
Two ignition coils that generate a high voltage pulse.
Two-channel switch.
If there are problems with the operation of the ignition module, there are reasons for this. It is worth warning that during this malfunction the "Check Engine" warning lamp will not light up: engine shutdown, loss of spark, interruptions in the operation of the power unit, and more.
For diagnostics and repairs, basic knowledge is required not only in conventional electrics, but also in the principles of car electrics. Also, a successful process will require skills in using a digital multimeter.
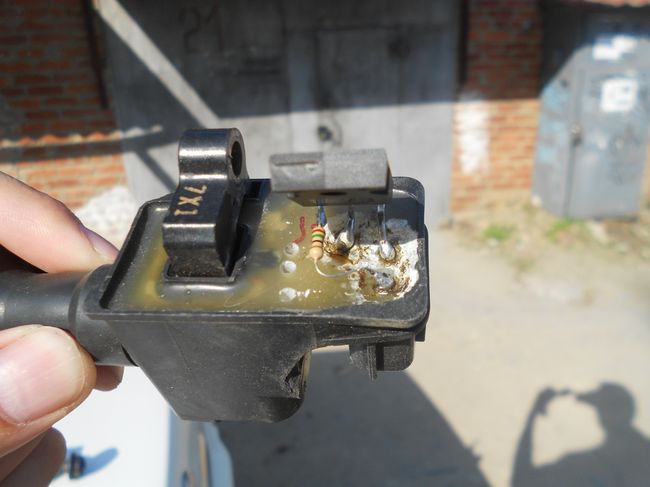
Often, the high-voltage impulse disappears in 2 and 3 cylinders ... So, to start repairing the ignition module, of course, you will need to dismantle it. To do this, turn off the high-voltage wires and unscrew the node itself from the mounts. When the preparatory operations are completed, you can proceed directly to the repair process:
We tear off the aluminum plate.
Open the aluminum plate with a screwdriver
Wire soldering diagram and arrangement of elements on boards
Diagram of the assembled ignition module
Completely assembled ignition module
VIDEO
The video material will tell you about the repair of the ignition module, as well as how to remove it from the car.
As it turned out, it is not so difficult to repair the ignition module on a VAZ-2112 with your own hands, it is enough to have basic knowledge in electronics and be able to hold a soldering iron in your hands, the rest is a matter of technology.
Thu 6 Sep 2012
If you have an incredible amount of dead ignition modules in the corner of your workshop and you have a free evening, you can try to restore several copies at least so as not to spend money on a "replacement fund". For this, the "corpses" must be sorted. That is, put the modules in one pile, presumably with interturn short circuits, they will be "donors" of control boards, in another - respectively, presumably with faulty boards, you can take coils from them. If there are few modules, then the electronics board can be restored.
This is followed by a stage of preliminary thorough preparation. We will need:
1. Flat screwdriver - break the module.
If, as a result of the research, a working switch board remains without a suitable pair of coils, do not despair, on its basis you can make an excellent ignition coil tester. You just need to make a small variable frequency generator and arrange the product in a beautiful box. Now you can check the coils from GAZ and VAZ (as you know, all "new" models VAZ 21114, 21124, 11183, 11193 are equipped with coils or individual coils on a candle.)
Let me remind you once again that everything that is described above concerns the "old" model, manufactured before 2003. from 09.2003 they were replaced by another circuitry module (see the photo on the left. You can enlarge it by double-clicking the mouse.). In this modification, only one L497 microcircuit is used, working on both channels at once. To control the channel selection, the HCC4001B microcircuit is used, which is 4 elements 2 AND NOT. This module has inherited all the childhood diseases of its predecessor - low reliability and a wide range of parameters.
Video (click to play).
The MV coil (there are two of them in the module) is a conventional step-up transformer. Below in the photo you can see its design.

