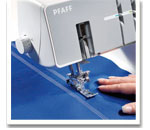
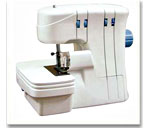
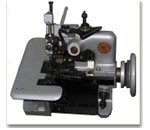
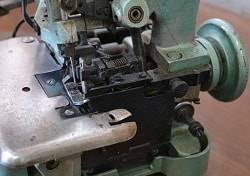
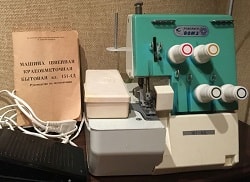
In detail: do-it-yourself repair of a Chinese overlock from a real master for the site my.housecope.com.
Any overlock is much more complicated than a sewing machine. It is only a master with special knowledge, skills and experience that can set up many parameters of the overlock units, moreover, only a master with special knowledge, skills and experience can repair mechanisms. It is almost impossible to make adjustments with your own hands, for example, the interaction of the overlock loopers. However, it is not always necessary to repair or adjust its knots, sometimes it is enough to correctly adjust the thread tension and the overlock will again overcast the fabric with high quality.
Almost all overlocks, except for the old model 51 class industrial overlock, are very sensitive to thread tension, and when switching to other thread thickness and quality, the tensioners have to be adjusted. This is precisely the most common reason for poor overlock performance. But there are other reasons too, let's look at them.
First, let's figure out how the overlock seam is formed.
The overlocker uses two loopers and a needle (three-thread stitch) to form a stitch. In modern models of knitted overlockers, two needles are installed, due to this, the overlocker performs a higher quality four-thread overlock stitch.
When adjusting the thread tension in a stitch, it is important to understand which one belongs to the needle (s) and which belongs to the loopers.
This diagram clearly shows that the needle thread (I) does not overcast, but grinds, but overcast the cut edge of the looper thread (P). The green thread (bottom) belongs to the left looper, and the beige thread (top) belongs to the right looper.
| Video (click to play). |
Be sure to figure out which looper is setting the bobbin thread and which is the upper thread. And remember which tensioner adjusts each one. Then, just by looking at the line, you will immediately understand which thread needs to be tightened and which one to loosen.
Most often, when a bad stitching appears, random rotation of all the handles in a row begins, completely knocking down the tensioner setting. As a result, the overlock begins to skip and sometimes break the thread.
And yet, having studied how the overlock seam is formed, you will get rid of the illusion that the sewing machine can sew an overlock seam. The sewing machine can only imitate the overlock stitch because it has a completely different stitching principle.
Some instructions provide for adjustment of the loopers, and give parameters for their setting in relation to the needles in case of failure of these gaps or when replacing the loopers. As a rule, these parameters are indicative, so to speak, ideal. A master who repairs overlocks has to experimentally bring them to the desired value, so this type of repair is recommended for a professional.
All our recommendations in the overlock repair section are generalized, universal and will fit any overlock model, but do not forget to carefully read the instructions for your model, where you can find information on setting up, lubricating, choosing the type of needle and more.
If you experience gaps or thuds, the needle is most likely dull or bent. A dull needle can cause many problems. The overlock needle is a very important detail, many parameters depend on its condition, in particular, the gap of the needle with the looper is the main parameter for the overlock stitching without gaps.
A blunt needle can be identified by running your thumbnail along the tip of the needle on all sides. The nail will definitely find a bent place on the tip. You can use a magnifying glass to inspect the needle point.
If the needle is bent, do not try to straighten it, the overlock setting is very accurate and such needles are not allowed.
Whether the needle is bent or not can be determined by placing it on a flat surface. Examine the needle from above and from the side: 1 - parallel lumen; 2 - flat surface (glass, etc.)
Pay particular attention to which type of needle is installed in the overlock. It is imperative to comply with the requirements of the manufacturer's instructions - use the types and brands of needles recommended by the factory.
In addition to the fact that the needles can be with a round or sawn flask, they can still differ in the length and thickness of the flask, the length of the needle itself and other parameters.
If the overlocker uses needles with a round flask (overlock class 51), you need to replace the needle with the same thickness and length of the flask when replacing.
See Sewing Machine Needles.
The sizes and types of needles used are indicated in the instructions, sometimes their brands are indicated on a sticker located on the inner surface of the hinged cover. If not, then write down the type of needle on a small piece of paper and glue it with transparent tape on the body.
In any household overlock, the needle is installed with a long groove towards itself, or with the sawn-off part of the flask away from itself.
It is imperative to install the needle as far as it will go, and if you have two needles, they are often offset (one higher than the other).
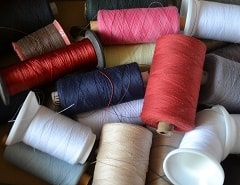
Overlock sewing threads play a vital role in the overlock process. If you use threads of different quality or thickness, this will immediately affect the tension and, therefore, the stitch pattern will change. The overlocker is very sensitive to thread tension, and the slightest change in one of them can affect all the others.
Try not to use cotton or thick threads. The thinner and more elastic the thread, the easier it will pass through the sewing fabric, needles, loopers, and the better the stitching will be.
Threads on tapered bobbins (35) are considered the most optimal for high-quality overlock operation. They are thin, strong and resilient and can be easily removed from the tapered bobbin.
It is ideal to use threads of the same brand, changing only the color. But in practice this happens rarely, therefore, when replacing threads with a different type or thickness, their degree of tightening may change. In the event that the stitch turns out to be very ugly and not "correct", we recommend to loosen all the tensioners and at the slowest speed, gradually increase the tension of each thread, periodically checking which thread, and how much you need to tighten.
In “hard” cases, when adjusting the overlock stitch, it is better to use threads of different colors in order to clearly see the tension of each of them, and replace them after adjustment.
The fabric does not move - the presser foot pressure is too weak.
If the fabric is too thin, the pressure of the foot must be reduced, otherwise the fabric will pucker. Increase the foot pressure when sewing thick fabrics. In general, the presser foot should not be changed unless clearly necessary.
Broken thread - the threads are not threaded correctly.
Thread the threads carefully, especially those going through the loopers. In some models of overlockers, threading into the loopers is a rather complicated procedure, and you cannot do without specially curved tweezers. It is imperative to insert the thread into all the attachment points indicated in the diagram. It is enough to skip one fastening and the stitching will be uneven.
The thread is tangled. Check the spool, maybe the thread came off the spool and caught on the body part. Check the thread guides and the entire thread path.
Too much thread tension is one of the reasons for thread breakage. Thread breakage, skips occur when using a different type of needles (see above).
Skip stitches: the needle is bent or blunt; the needle is installed incorrectly; a needle is used that is not recommended for use by the manufacturer; the thread is not threaded correctly or one of the thread attachments is missing; the pressure of the presser foot is too weak.
Uneven stitches - the thread tension is incorrectly adjusted.
The fabric wrinkles - too much pressure on the fabric; the thread is not threaded correctly or is tangled; the thread tension is too tight. When sewing thin and light fabrics, loosen the thread tension in the overlock stitch.
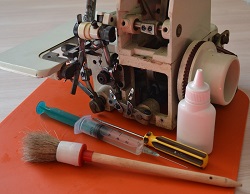
After prolonged operation of the overlock, clean the looper compartment and other accessible areas from trimmings, fleece and other contamination (oil stains). Cleaning is preferably done with a stiff hair brush (for glue).
By the way, excess oil in the area of the needle can ruin the fabric being processed. Be careful to lubricate the parts that come into contact with the fabric.
Overlocks should be lubricated at least once every six months, and with intensive use once a month. It is convenient to use a medical syringe instead of a grease can. With a long needle, you can always crawl into hard-to-reach places, and less oil is consumed.
The instructions provide a lubrication scheme, but you can follow a simple rule - lubricate any accessible places where there is friction of metal parts, even if they are not specified by the factory in the instructions.
In order to “thoroughly” lubricate all the overlock assemblies, it is sometimes necessary to remove the protective covers of the case, but if they are difficult to remove, you can get by with the factory labels for lubrication.
Overlock lubrication should be given more attention than a sewing machine, as the overlock operates at higher speeds and the lack of lubrication in some units leads to overheating and even seizure.
An overlocker is practically no different from a carpetlock. It can also sew overlock seams. But thanks to the special design, in addition to the overcasting seam, the carpetlock can also perform a flat seam and even a stitching one. Since a carpetlock is much more complicated than an overlock, it can be repaired only in a specialized service center.
If you do not use an overlocker often, you do not need to purchase an expensive model overlock. Any overlock for 7-8 thousand rubles will perfectly overcast various fabrics and, most importantly, in the event of a breakdown, repairing the overlock will be cheaper.
For many who are going to learn how to sew, the question often arises "What to buy a sewing machine", preferably inexpensive and good. In this article, we will figure out whether such a combination is possible - "an inexpensive and good machine" and how an inexpensive sewing machine that costs 3-4 thousand rubles differs from a machine that costs 30 thousand.
Many who tried to sew knitwear on an ordinary sewing machine noticed that the machine often refuses to make a beautiful and even stitch. There are gaps in the knitted stitching, the lower thread loops and sometimes breaks. Why is this happening and how can you fix it?
Overlock class 51 is perhaps the most common brand of industrial sewing machine used in everyday life, in small ateliers. Although morally this technique has long been outdated and many modern fabrics simply cannot be processed with high quality, nevertheless, its use is sometimes justified, especially for processing coarse and thick fabrics.
To save money, many are trying to sew curtains with their own hands, and you have to learn how to sew the curtain tape yourself. However, the result is often unimportant, because there is not enough experience or a completely unsuitable sewing machine.
Processing an organza curtain of a simple model for a window in the kitchen is indeed available to many who have little experience and a sewing machine. But to sew curtains in a living room or a hall with a lambrequin is the lot of professionals who have not only knowledge, but also experience.
How to cut jeans that are too long and use a household sewing machine to finish a hem stitch consisting of several layers of coarse denim.
Any overlock, including a household overlock, is not much more complicated than a sewing machine. However, adjusting the parameters of its operation, setting the correct clearances of the loopers and overlock needles is very difficult.Therefore, it is almost impossible to repair the overlock with your own hands, without special knowledge and skills. But, it is not always required to perform exactly overlock repair... That is, to set the position of the loopers relative to the needles, adjust the interaction of each looper and the needle, adjust the operation of the main shaft, etc. Basically, it is enough to check the correct threading of the overlock threads, adjust their tension, lubricate and clean the overlock in time, and it will again overcast the fabric with high quality.
The correct threading of the overlock needles and loopers, the correct adjustment of the thread tension is the main condition for the high-quality operation of any model overlock. Compared to lockstitch sewing machines, overlocks, household rugs and industrial coverings are very sensitive to thread tension and thread quality. The slightest inconsistency with the norm leads to the appearance of various defects in the line. Therefore, when changing threads, start by adjusting their tension.
Some instructions for overlocks provide for their repair, and provide various parameters for adjusting the loopers, their interaction with the needle. As a rule, these parameters are only indicative ("ideal") and only serve as a guideline for setting. An overlock repair technician, on the basis of these recommendations, has to experimentally bring them to the optimum value.
Never try to adjust the loopers and change the knives, much less sharpen them, yourself. This type of overlock repair is recommended only to a professional.
All the recommendations in this article “Repair and adjustment of the overlock” are generalized and are suitable, as a theoretical material, for any model of 3, 4-thread overlock. Many of them, perhaps, will help you find the cause of the “breakdown” of your overlock and set up the overlock yourself.
Remember to carefully read the instructions for your overlock model. You can always find the necessary and useful information in the instructions. How to properly thread the overlock, adjust the thread tension, where and how to lubricate the overlock, what type of needles to use. And sometimes, even the manufacturer's recommendations on how to replace the loopers and overlock knife.
If skipping stitches appear in the overlock stitching and the overlock makes a dull knock during operation, then this is a sure sign that the needle is dull or bent. Change the needle immediately as a dull needle can cause many problems.
The overlock needle is the most important part. Many other parameters depend on its condition. In particular, the gap between the needle blade and the looper. This is the most important parameter for a gap-free overlock stitch.
A blunt needle can be easily identified by running your right thumbnail along the tip of the needle. The nail will definitely find a bent place. You can use a magnifying glass for inspection, which is much more convenient and effective. You need to check not only the point, but also the needle itself, because when processing rough areas of fabric, it can bend. By the way, a good quality needle does not bend, but breaks.
To check if the needle is bent or not, place it on a perfectly flat surface. Inspect it from above and from the sides: 1 - parallel lumen; 2 - flat surface (glass, etc.). Replace if the slightest curvature is found. Do not try to straighten a bent needle. The overlock setting is very precise and does not allow the use of such needles.
Often the reason for overlock repair is the installation of a different type of needle, not intended for this model of overlock. Pay particular attention to which type of needle is installed in the overlock. A prerequisite for the high-quality formation of the overlock seam is the use of needles recommended by the manufacturer. In addition to the fact that the needles can be with a round or sawn-off flask, they can also differ in the thickness of the flask.The needles can be of different lengths, have a different shape of the tip and have a number of other features.
If needles with a round flask are used in the overlock, then when replacing it, you need to put in exactly the same needle having the same thickness and length of the flask. The sizes and types of needles used are indicated in the instructions. Sometimes, needle markings are indicated on a sticker on the inside of one of the overlock caps. You, too, can write this marking on a small piece of paper and stick it on the body with transparent tape.
In any household overlock, needles are used, intended for household use, with a sawed-off flask. Such a needle is installed with a long groove towards itself, or with a sawn-off part of the flask away from itself. Please note that some household overlocks (very rarely) may use needles with a round bulb.
Be sure to install the needle as far as it will go. If the overlocker uses two needles, they are offset (one higher than the other).
Sewing threads are not only of different thicknesses, some of them are used only for sewing leather, others for silk fabrics, cotton fabrics, etc. For overlocks, threads are essential. The appearance of skipping stitches in the line depends on their incorrect selection.
If you use threads of different quality or thickness on the needles and loopers, this will immediately affect their tension. Consequently, the formation of the overlock stitch will change and the “pattern” of the stitching will be disturbed.
The overlocker is very sensitive to changes in the tension of any thread. The slightest release or increase in the tension of one of them can affect all the others. Ideally, use threads of the same brand, of the same thickness, changing only colors. But, in practice, this is rarely possible, therefore, when replacing threads with a different type or thickness, we recommend that you loosen all the tensioners almost to “zero” and at the slowest speed, gradually increase their tension. Check at the same time which thread, and how much, you need to tighten.
When setting up an overlock stitch for the first time, you can use different thread colors. This will allow you to "visually" adjust the tension of each of them. And after setting the correct stitch formation, replace them.
Try not to use cotton or thick threads. The thinner and more elastic the thread, the easier it passes through the sewing fabric, needles, loopers, tensioners, and the more reliably loops are formed to catch them with loopers or needles.
Sewing machines and overlocks should be lubricated at least once every six months, and with intensive use of the overlock, at least once a month. A medical syringe can be used for lubrication. It is much more convenient and economical than a standard oiler. A long needle can always “crawl” into hard-to-reach places, and oil consumption is significantly reduced.
Excess oil in the area of the needle can damage the fabric being treated. Be careful to lubricate the parts that come into contact with the product. The instructions for the overlock provide a lubrication scheme, but a simple rule can be used - lubricate any accessible places where there is friction of metal parts, even if they are not specified by the factory in the instructions.
In order to thoroughly lubricate all overlock assemblies, it is sometimes necessary to remove the protective covers of the case. Removing them, however, is not always easy, so you can get by with the factory labels for lubrication.
More attention should be paid to lubricating the overlocker than lubricating the sewing machine. The overlocker operates at high speeds of rotation of the shaft and the lack of sufficient lubrication in some units and mechanisms can lead to overheating of parts and even their seizure.
After prolonged work, the looper compartment and other accessible places should be cleaned from trimmings, thread strips, and other mechanical contamination. It is very convenient to clean with a stiff hair brush for office glue.
It is important to be able to properly fill the overlock.Correct threading is essential for proper overlock operation. Tweezers are used to refuel the overlock.
It is impossible to give a general, universal scheme for refueling an overlock of different models. Each of them has its own little peculiarities. But the principle of refueling overlocks is the same, so we give a refueling scheme for an industrial overlock of class 51, a rather popular overlock used at home and in small ateliers.
Threading a 51 class overlock.
First, thread the right (upper R) looper (fig. P) into two holes 1, between the tensioner washers 6 into the thread feeder 8, under the bracket of the wire thread guide 9 and into the eyes of the looper away from you.
From the stand, from the bobbin for the lower looper L (left), thread the thread (fig. L) into hole 1. Next, into the eye of the thread take-up 3 and into the hole of the thread guide 8 fixed on the machine cover. It is carried out through holes 9 and 10 in the side cover, then through the tensioner 12, through the thread guide 13, under the thread take-up 14 and into the eyes of the left looper (away from you).
The needle thread is removed from the stand from the bobbin and passed through the holes 1 in the thread guide plate 2, between the washers 3 of the tension regulator. Further, into the holes 4 on the left side of the plate 2 in front of the shaped thread take-up 5, into the eye 6 of the thread feeder, fixed on the leash of the needle mechanism, between the tension washers 7 and into the eye of the needle 8 away from you.
Industrial overlock 51 class
Setting up an overlock is, first of all, in adjusting the thread tension. Check the correct threading of the overlock, the condition of the needle. She may have become dull or bent. Try changing your thread to thin, stretchy threads that are wound on large, tapered bobbins. You may not need to make other overlock settings.
How to properly lubricate the overlock
Sometimes, you need to remove the overlock covers and lubricate all rubbing parts inside the case. What you need to pay attention to and how to do it yourself.
Which overlock to buy
Modern 3, 4-thread overlocks, even the most inexpensive models, sew fabrics with sufficient quality. Many of them have many additional features that allow you to sew a 2-thread overlock, simulate a flat seam, disable one needle, etc. Repair of an overlock of similar models is not required if you follow the instructions for use.
Sewing threads, which is better?
Refueling of the overlock should be done exactly according to the scheme attached in the instructions. Occasionally, an overlock refueling diagram can be printed on a sticker on one of the overlock lids. If you find it inconvenient to constantly look at the instructions, draw a small diagram yourself and fix it on one of the walls. It is very important, when refueling the overlock, to start the thread in all the thread holders provided for by the design.
Overlock VOMZ 151-4D
For this overlock model, there is a scheme for installing the loopers and parameters for setting their gaps when interacting with the needles. You can use this diagram as a rough diagram of the position of the loopers and the dimensions of the gaps. However, this scheme cannot be used to fine tune other overlock models.
Do you have a sewing machine and love to sew? Then this site is for you. Professional craftsmen will tell you how to make minor repairs to a sewing, knitting machine. Experienced technologists will share the secrets of tailoring. Review articles will tell you which sewing or knitting machine to buy, a mannequin iron and many other useful tips you will find on our website.
Thank you for viewing the entire page.
Here is a brief description of the most common malfunctions and ways to eliminate them in the Overlock machine -51 class. (industrial).
The principle of operation of the machine "Overlock" -51 class:
- Lower left looper (rice. 172) catches the thread at the needle.
Rice. 172. Left looper of the Overlock machine -51 cl. PMZ:
Rice. 173. Right looper of the Overlock machine -51 cl. PMZ:
1. Skipped stitches (no stitching). Thread break in right looper
1. Thread the right looper (see fig. 173).
2. Skipped stitches (no stitching): No thread in the needle in the left looper
2. Thread the needle or left looper
3. The left looper does not catch the loop-overflow from the needle: the looper has deviated from the needle by more than 0.1 mm clearance due to a bent or loosened screw 2 (see fig. 172) securing the looper leg. If the looper is displaced to the left, when adjusting it must be moved to the right and tighten the screw2... The left looper cannot be folded in at any adjustment.
3. Turn the handwheel to lower the needle bar to its lowest position. Use a medium screwdriver to loosen the screw 2 and turn the left loop slightly towards the needle, i.e. forward. Tighten the screw 2 and gently turn the flywheel along the way. If the left looper catches the needle during this, loosen the screw 2 and take it away from the needle at a distance of 0.05 mm. The operation is very time consuming, since it is impossible to visually check the size of the gap. But in a few steps it is possible to achieve the desired clearance
4. Skip stitches
4. Lower the needle bar 0.5-1.0 mm
5. Put the needle in the same size to which the Overlock was previously adjusted. Otherwise, readjustment of the relationship between the left looper and the needle is required to the conditions specified in paragraph 4
5. Skipped stitches (no stitching). The needle is of a different size (length). Round shank needles come in different sizes - for example 42.38, 33mm, etc.
6. Skip stitches in a line. The needle is strongly twisted
6. Replace the needle thread with good quality thread
7. Skipped stitches (no stitching). The right looper is so close to the needle that it bends back as it passes through
7. Right looper (see fig. 173) is fastened in such a way that it is impossible to move it from its attachment point: landing using the SLOT 4. Therefore, its relative position is ensured only by bending the looper itself back and forth, providing a gap with the left looper equal to approximately 0.05-0.1 mm.
In practice, this is done as follows: bend the right looper forward; if it hits the left looper when it hits it, bend the right looper slightly. Here it is necessary to bear in mind the difficulties of adjustment in that the mutual position of the loopers on the right side is closely coordinated with the mutual position of the left looper with the needle. Debug the right side (the relationship of the loopers to each other), on the left side, the left looper may touch the needle or the right looper may touch the needle. But there is only one correct alignment of the needle with both loopers and the loopers between each other. This is the only option and must be found by adjusting the cam, which is located on the left of the main shaft.
When the cam is turned by a small angle of 2-3 °, both loopers change their position at the same time. Adjustment of the loopers should be preceded by removing them from the machine and checking their condition thoroughly. Remove all burrs on the loopers, bluntness of the working end and other damage and grind them on a felt wheel impregnated with GOI paste. This operation is required
8. Skipped stitches (no stitching). The needle does not catch the right looper thread. This looper interacts with the needle above the left looper and is clearly visible. In this case, the needle is not at the normal level. This may be due to a different needle size (in length, see p. 5)
8. Place a needle of the same size (length) to which the Overlock was previously adjusted. When debugging the relative position of the left looper with the needle, the operation is always the most difficult one. With this replacement operation, you can place a spacer under the base of the right looper, this will change its inclination and may speed up the adjustment of the looper needle. Can be adjusted by moving the needle bar vertically
9. Any thread break.Strong thread clamping in the adjuster
9. Loosen the thread clamp in the corresponding adjuster
10. Any thread break. Thread chafing when the looper hits the looper or the needle, or other parts of the mechanism. Touched loopers or needles can be detected visually or by ear (squeaking, grinding, etc. sounds can be heard)
10. Eliminate the contact of the needle with the loopers, as well as between the loopers (see. p. 7 ). Make the stitch wider (paragraphs 1-3 )
1. Loosen the bedknife block retaining screw.
2. Move the block to the right by 0.5-0.8 mm.
3. Tighten the block retaining screw.
Adjust the seam cleanliness by moving the foot to the right or left. The same can be achieved by shifting the toe to the right or left on the foot. The quality of the stitch depends on the thickness, tension and quality of the thread.
11. The material is not trimmed. A gap has formed between the knives. It can form due to the backlash of the bracket. 1 ( fig. 174 ) on its axis. This play is easy to detect if you shake the hold-down device. 2 right left
11. Loosen the screw 5, lightly pressing the bracket 1 to the right, remove the backlash, at the same time remove the movable knife 6 to the left, close to the fixed knife, and tighten the screw 5... When turning by the flywheel, see if there is a gap between the movable and fixed knives. CLEARANCE SHOULD NOT BE!
Rice. 174. Clamping device of a movable knife "Overlock" -51 cl. PMZ:
An overlock, even a household model, is much more complicated than sewing machines and it is almost impossible to set it up, moreover, to repair an overlock without special knowledge and skills. However, overlock repair or adjustment is not always required, sometimes it is enough to simply adjust the thread tension and it will again overcast the fabric with high quality. Some overlocks are very sensitive to thread setting, and when switching to other quality threads, you have to readjust their tension.
Some instructions provide for the repair of overlocks, their adjustment and the parameters for setting the loopers and needles in case of failure of these gaps or replacement of the loopers. As a rule, they are indicative, ideal. A master who repairs overlocks has to experimentally bring them to the desired value, so this type of repair is recommended to be done by a professional.
All our recommendations are generalized and will fit any model of overlock, but do not forget to carefully read the instructions for your model, where you can find information on setting, lubrication, needle type and more.
If you have gaps or thuds, it is most likely that the needle is blunt or bent. A dull needle can cause many problems. The overlock needle is a very important detail, many parameters depend on its condition. In particular, looper needle clearance is the main parameter for overcasting without skipping.
A blunt needle can be identified by running your right thumbnail along the needle from the bulb to the end. The nail will definitely find a bent place on the tip. You can use a magnifying glass for inspection. If the needle is bent, do not try to straighten it. The overlock setting is very precise and does not allow the use of such needles. Place the flat side of the needle on a flat surface to check the condition of the needle. Inspect the needle from above and from the sides: 1 - parallel lumen, 2 - flat surface (glass, etc.).
Pay particular attention to what type of needle is installed in your overlock. A prerequisite is the use of only factory-recommended needles. In addition to the fact that the needles can be with a round or sawn flask, they can still differ in the length and thickness of the flask, the length of the needle itself and other parameters. If your overlock uses round shank needles, you should replace with a needle with the same shank thickness and length when replacing. The sizes and types of needles used are indicated in the instructions, sometimes they are on a sticker inside the overlock. It is best to write down the type of needle on a small piece of paper and stick it on the body with transparent tape.
In any household overlock, the needle is installed with a long groove - towards itself, or with the sawn-off part of the flask - from itself. It is imperative to install the needles all the way to the stop, and if you have two needles, they are offset (one above the other).
After prolonged work, the looper compartment and other accessible areas should be cleaned from trimmings, fleece, etc. Preferably with a stiff hair brush (for glue).
Overlock threads play a vital role in the overcasting process. If you use threads of different quality or thickness, this will immediately affect the tension and, therefore, the stitch pattern will change. The overlocker is very sensitive to tension and the slightest change in one thread can affect all others. It is ideal to use the same brand of thread, changing only the colors. But in practice this rarely happens, therefore, when replacing threads with a different type or thickness, we recommend loosen all the tensioners and at the slowest speed, gradually increase the tension of each thread, periodically checking which thread, and by how much, tighten. Sometimes, when setting up an overlock stitch, you can use a different color of thread, for clarity, adjust the tension of each, and then set the necessary ones.
Try not to use cotton or thick threads. The thinner and more elastic the thread, the easier it will pass through the sewing fabric, needles, loopers, and the better the stitching will be.
Overlocks should be lubricated at least once every six months, and with intensive use - once a month. It is advisable to use a medical syringe for this instead of an oil can. With a long needle, you can always crawl into hard-to-reach places, and consume less oil.
Excess oil in the area of the needle can damage the fabric being processed. Be careful to lubricate the parts that come into contact with the fabric. The instructions provide a lubrication scheme, but you can take it as a rule to lubricate any accessible places where there is friction of metal parts, even if they are not specified by the factory.
In order to thoroughly lubricate all the overlock units, it is sometimes necessary to remove the protective covers of the case, but if they are difficult to remove, you can get by with the factory labels for lubrication. Overlock lubrication should be given more attention than a sewing machine, as the overlock operates at higher speeds and the lack of lubrication in some units leads to overheating and even seizure.
List of major overlock malfunctions:
The fabric does not move: The pressure of the presser foot is too weak. If the fabric is too thin, then the pressure must be reduced, otherwise the fabric will gather. Increase the foot pressure when sewing thick fabrics. In general, the presser foot should not be changed unless clearly necessary.
Needle breaks: the needle is bent or blunt; the needle is incorrectly installed; pull the fabric strongly with your hand when working.
Thread breakage - the threads are not threaded correctly. Refuel carefully. In some models of oaerlocks, filling into the loopers is a rather complicated procedure, and you cannot do without specially curved tweezers. It is imperative to insert the thread into all the points of its attachment indicated in the diagram;
The thread is tangled. Check the spool, maybe the thread came off the spool and caught on the body part. Check the thread guides and the entire thread path;
Too tight thread tension is one of the reasons for breakage;
Using a different type of needles (see above).
Skipped stitches: the needle is bent or dull; the needle is incorrectly installed; a needle is used that is not recommended for use by the manufacturer; the thread is not threaded correctly or one of the thread attachments is missing; the pressure of the presser foot is too weak.
The stitches are uneven: the thread tension is not adjusted correctly.
The fabric is wrinkling: the thread tension is too tight. When sewing thin and light fabrics, the thread tension should be loosened; the thread is not threaded correctly or is tangled.
What to buy a sewing machine
Modern sewing machines can be divided into 2 types: electronic and electromechanical. There are many design differences between these types of sewing machines, but the main thing that is clear to everyone is that electronic models of sewing machines perform an unlimited number of operations.
Which overlock to buy
Many modern overlocks use differential feed of the processed fabric. It is indispensable when sewing knitted fabrics, especially connecting seams.
Reasons for skipped stitches
The main reason for skipped stitches is that the nose of the hook does not catch the loop formed by the needle. The gap between the needle blade and the hook nose should not be more than 0.3 mm, sometimes it reaches dimensions in millimeters. The spout passes next to the loop and a pass appears.
Overlock class 51 is perhaps the most common brand of industrial sewing machine used in everyday life, in small ateliers.
| Video (click to play). |
Overlock VOMZ 151-4D
Household 4-thread overlock VOMZ 151-4D (Vologda) can perform 3 types of stitches: overcasting overlock stitch formed by two needles and four threads; three-thread overlock, 6 mm wide.

