In detail: do-it-yourself repair of a computer chair cross from a real master for the site my.housecope.com.
Office, it is also a computer chair, is now not only in the office, but in every home. This furniture is very comfortable and you have to pay for the comfort with problems. The chair has a rather complex mechanism, which is subjected to considerable loads and often fails, it often requires adjustment or repair. This article will discuss how to repair an office chair with your own hands, without going to a workshop.
- Defective rollers
- Repairing the chair cross
- Eliminating gas lift malfunction
- Repair video
Most often they break: rollers, a crosspiece and a gas lift. In the case of rollers, there are no big problems. The easiest way out is to replace the broken roller with a new one or, if possible, glue it with super glue. Often the cause of a malfunction is debris: threads, hair, etc. Then it is enough to remove the rollers and clean the places of their attachment from clogging. If the wheel axle mount is broken, you may have to replace the crosspiece.
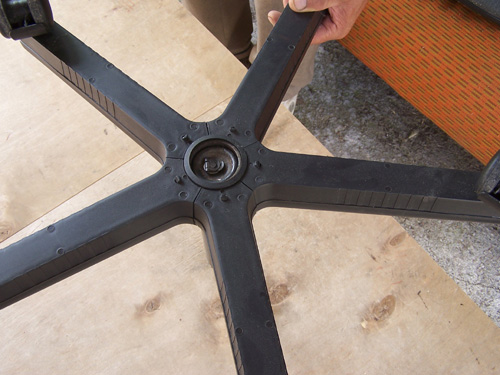
Do-it-yourself repair of an office chair cross is quite possible with some skills in mechanics. To do this, you need simple tools and care.
The material of the cross is important - if it is made of plastic, then it is better to put a new one. After repair, plastic serves even worse than new and restoring such a fragile part makes little sense. Pay attention to the type of plastic, it is better to change the polyethylene cross for glass filled with polyamide, since this material is stronger and lasts longer than conventional plastics.
To fix the crosspiece, you need to remove it and this process is not as simple as it seems. This often damages the part itself and the gas lift, especially if you use a hammer or sledgehammer. It is imperative to do this with rollers, since they are often damaged during disassembly and repair. You will need a tool:
| Video (click to play). |
It is better to cover the floor with rags or newspapers to protect it from grease. For disassembling tight connections, especially a gas cartridge with a cross, it is convenient to use WD-40 liquid, gasoline or just soapy water. Attention! You can knock down the cross with a hammer only if it is metal; for a plastic one you need to use a mallet. We recommend watching a video of an office chair repair.
- We remove the wheels. Usually they are not rigidly fixed and can be easily removed from the mountings.
- We turn the chair over; for stability, it must be placed as a seat on a chair so that the back rests on the floor.
- It is necessary to disconnect the rocking and adjustment mechanism - piastre. Unscrew the 4 screws securing it to the seat. Then you need to knock it off the gas lift with a light tap, since usually this is a connection without a thread, a tapered one. It is advisable to use a wooden or rubber mallet and not hit the edges of the parts, they are easily deformed. If the connection is "stuck", you can use a special liquid or gently tap it with a hammer.
- Remove the gas cartridge stopper. The retaining clip is located in the center of the recess for the cartridge, you need to carefully pry it off with a screwdriver and remove it. Then you need to remove the washer and put it aside along with the clip. Now we disconnect the rod of the gas lift. Careful! Inside the glass, gas lift parts can stick to the lubricant: 2 washers and an oil seal with a bearing. Set them aside and do not confuse with the stopper washer when reassembling.
- We knock down the crosspiece. You need to be especially careful with plastic. It is better to hit with a mallet or an ordinary hammer through a piece of wood, with light blows from all sides.
This work must be done very carefully and carefully, with the careless work of a non-professional, the piastre and gas cartridge often break.
To assemble, you need to do everything in the reverse order.
- Repairing the crosspiece of an office chair does not always make sense if it is plastic. Glue and soldering with a special soldering iron for plastics do not provide strength, they can only be used to seal small cracks.
- You can attach the broken-off foot of the cross using a lining made of metal or plastic. Sometimes they use a plastic tube of a suitable diameter for this and fix it with glue or screws.
- For broken or cracked metal crosses, welding is the best option.
Do-it-yourself gas lift repair of an office chair will help to save a considerable amount on the services of a master or buying a new thing. In this case, it is necessary to clearly determine the cause and severity of the malfunction; in many cases, the easiest way is to replace the entire cartridge. The part is not cheap, but new furniture is much more expensive.
When the chair starts to fall arbitrarily and the lift lever does not work, these are clear signs of a breakdown of the gas cartridge. We check it like this:
- You need to unscrew the seat and see if the lever presses the cartridge gas valve. In a working mechanism, under pressure, the valve goes down, the gas cartridge extends.
- The problem is sometimes a bent lift arm. Then you can gently straighten it to its original state.
To repair or replace the gas lift, you need to disassemble the chair completely. The process is described in the first part of the article (repair of the office chair cross). Installing a new part is much easier than removing a broken one, most importantly, without having to hammer.
- It is necessary to determine the optimal seat height for you. Measure and record the result.
- It is necessary to remove the crosspiece and disconnect the cartridge from the piastre, after unscrewing the seat.
- Then the glass is removed and the parts are sequentially removed: washers, bearings, etc. It is important not to lose them and remember the installation order.
- Then you need to pick up a tube or a rigid hose made of plastic with an inner diameter suitable for the axis of the lift. You will have to cut the tube at a comfortable seat height (this was done in the first step). For this purpose, you can use a plated plastic water pipe.
- The resulting part is put on the stem and all parts of the chuck are installed in the reverse order.
Once assembled, the chair should behave normally. This method will help to restore the minimum efficiency of the chair and prevent "failures", but the gas lift will no longer work like new. In general, its complete replacement is the best option, for cheap and medium-priced seats, the cost of this spare part will not be high.
Gaslift replacement video:
Rocking mechanism replacement video:
What means can you remove stains and scratches from polished furniture if there are no special means? We will describe all the methods in detail in our article.
Means, methods and advice for cleaning upholstered furniture. Your chairs, sofas and beds at home and in the office can always be clean.
The chair cross is made of three materials:
It takes practice to replace the D-pad on a computer chair. A plastic crosspiece breaks on average 20 times more often than a steel one, and five times more often than an aluminum one. Why then buy chairs with a plastic cross? The reason is simple: they are several times cheaper than products with a steel cross. It is such a false economy that later turns out rather sadly: you have to repair the chair and replace the crosspiece with a new one.
So, a plastic cross for a computer chair breaks much more often than parts made of other materials. The most durable of all, the steel crosspiece, can also be damaged, but this is extremely rare.But if you have already purchased furniture with a plastic crosspiece, then remember that this piece of furniture can break down due to careless use. Simply put, if you sit down in a chair abruptly, almost fall into it, the crosspiece begins to collapse. Special stiffening ribs of the plastic part suffer, giving it the required strength.

Attention! The gas lift has a cylindrical shape in the lower and conical upper parts. When assembling (assembly diagram) of the chair, the gas-lift is inserted into the crosspiece and into the mechanism of the chair on the seat and pressed under the weight of a person. The cross is dismantled with a hammer.
We start from simple to complex. Before disconnecting the gas lift from the crosspiece, you must first remove the piastre support by unscrewing the four screws. Piastra connects the gas lift with the seat of the chair.
Piastra is designed to adjust the height of an office chair or chair, and is the simplest adjustment device.
The sequence of work when removing the piastre support or the rocking mechanism on the leader's chair:
- in order to remove the piastre support from the gas lift, you must first remove the seat. To do this, turn the chair upside down with a cross and unscrew the 4 screws with a Phillips screwdriver that secure the seat to the piastre;
- after that, by lightly tapping the hammer on the piastre, knock the piastra off the gas-lift (the connection of the piastre support and the gas-lift is conical and does not contain threaded connections);
- We use a rubber hammer (mallet) in our work, but you can also work with an ordinary steel hammer;
- with long-term operation or high humidity, the connection may stick to it and then considerable efforts may be required. In this case, tap around the gas cartridge. Do not bend the piastre support when tapping.
In order to dislodge the gas lift from the crosspiece:
- flip the cross at the bottom of the gas chuck has a lock washer that holds the chuck stem. Remove the lock washer and remove the stem of the gas cartridge from the glass (casing). Attention! Inside there is a bearing, an oil seal and two washers;
- knock out the glass of the gas cartridge from the cross with a hammer;
- reassemble the gas cartridge in the reverse order.
To remove the cross or piastre support, we recommend that you carefully watch the video on our website. Otherwise, not only will the gas lift be damaged, but also the mechanism for raising and lowering the chair.
The video will help you to qualitatively and carefully replace the cross-piece of the chair.
Skillful hands get the job done in 10 minutes or less.
Apply fluids that will penetrate the joint and help separate the parts.
Lubricate the compound with kerosene, VD40, vinegar essence, maybe even soapy water and let the solution penetrate into the joint for 5-10 minutes. You can shake the gas lift to better penetrate the fluid into the joint.
How to remove the piastre support mechanism from the gas lift (pneumatic cartridge, gas cartridge)
Dismantling an office chair. We remove the piastre mechanism from the gas lift.
You can buy spare parts for the seats at https://my.housecope.com/wp-content/uploads/ext/1500
How to dislodge the gas lift from the cross in a chair or armchair
The gas lift does not have any fasteners to the cross - the connection of the gas lift and the cross is conical.
A modern office chair is a functional and comfortable piece of furniture equipped with a rather complex mechanism that sooner or later fails. In such a situation, there are three options for the development of events: buy a new one, give it to a specialized workshop, or make an office chair repair with your own hands.
As practice has shown, it is quite possible to perform such work on your own.The only thing that is required of the wizard is to strictly follow the sequence of actions and follow the instructions that will be given in this publication.
Today, there are three types of chairs on the office furniture market:
- For the leader
Such a piece of furniture usually has the maximum possibilities: a five-beam steel crosspiece; synchromechanism (a device that makes the seat and backrest repeat the movements of the owner); mechanisms for adjusting the backrest resistance, seat depth, negative tilt, etc. - For staff
Furniture of this type has more modest characteristics and functionality. Most of the varieties are lightweight (providing high mobility), equipped with mechanisms for adjusting the height of the seat, armrests, backrest angle. - For visitors
Office chairs of this modification are simply beautiful, stable and comfortable furniture, devoid of any functionality. Often they do not even have a rotation mechanism and are produced on four legs, instead of one supporting leg with a crosspiece on wheels.
Despite the variability of designs and functional content, almost all chairs consist of one set of elements:
- Five-beam cross (base). This part is made of metal or plastic. The first option is of higher quality and more expensive
- Rollers... Just like the cross, the castors can be made of metal or plastic. However, the mount and internal hinge of any roller is metal.
- Pneumatic cartridge (gas lift). The part serves as a chair leg and is responsible for its "elasticity"
- Swing mechanism contributes to the axial deflection of the chair and its fixation in one position. On expensive models, a mechanism with an offset axis is installed, which provides the most smooth swing
- Piastra... This element is a metal platform with a lever. Serves to change the height of the seat relative to the cross
- Permanent contact - an element that connects the back with the seat and is responsible for changing its position
Most office chair models have armrests. In cheap models, these elements are made of plastic; in more expensive ones - from anodized or stainless steel.
As noted above, an office chair is a rather complex device and any of its structural elements may fail.
The problem of this element may be destruction at the junction of the rays. Here the material from which the cross is made is important.
As a rule, the base is a hollow structure, inside which you can insert a polypropylene pipe of a suitable size and cross-section. It, in turn, must be rigidly fixed to the base and the damaged beam.
Plastic parts cannot be spliced with glue or a soldering iron. due to heavy loads on the legs. There is no point in restoring the integrity of this element. The best option would be to completely replace the damaged structure with a glass-filled polyamide base.
In order to dismantle the cross-piece of an office chair, you need:
- Remove rollers... As a rule, they do not have a rigid fixation and can be easily removed from the mountings. For clarity of the process, it is recommended to watch a video:
Note! In case of critical damage or destruction, it is impossible to knock the gas lift out of the base. In this case, pull the slave cylinder with a seal and bearing out of the "glass".
The process technology and the dismantling device are shown in the video:
If the chair does not hold the "horizon", then the problem is most likely in the destruction of the swing mechanism.
Attachment to the seat is made with four screws for a figured screwdriver. The element is dismantled as follows:
- The bolts that secure the swing mechanism from the seat are unscrewed
- The gas lift is knocked out of the device mount.
This element is made of metal.
You can independently solve the problem of a collapsed device by completely replacing it (recommended) or using a welding machine.
It should be noted that domestic spare parts are not suitable for most of the armchairs from the Middle Kingdom. This applies, first of all, to the swing mechanisms (discrepancy in size).
- Chinese movements: 200 x 200 mm.
- Domestic: 200 x 150 mm.
In order not to over-drill holes when replacing an element, we suggest using adapter plates. How it looks assembled can be seen in the picture below.
The pneumatic cartridge of the chair is a two-chamber structure filled with air. When you press the adjusting lever, the valve blocks the flow of air between the chambers.
If, when pressing on the valve, the gas lift rod does not extend, then the integrity of the piston, seal, etc.
It's important to know! Gas lift cannot be disassembled... If damaged, a complete replacement of the element is required.
The dismantling process is described above. For clarity of the process, check out the video on replacing the gas cartridge on office chairs:
A fairly common reason for gas lift failure is the bending of the adjusting lever, which does not allow pressing the cartridge valve. In this case, the repair can be easily carried out on your own: it is necessary to bend the lever to its original state.
If the contact is loose and the back does not "hold", you will need to tighten the connection. How to do this, see the video:
As can be seen from the above, almost all work to restore the working capacity of an office chair consists in replacing the failed elements. In most cases, any "handy" man can do such work. Finding the parts you need to replace is quite simple: all components can be purchased in specialized stores or companies that sell office furniture. To complete the picture, we recommend watching a video about repairing office chairs with your own hands:
The other day my home computer chair broke down.
Although this chair is already a little old (it is already about six years old), nevertheless, until now, it has served me and my family members quite well. Moreover, about once every six months, I carried out prophylaxis, which consisted of tightening all threaded elements, as well as lubricating the rubbing parts (first of all, the bearing at the end of the gas lift rod).
However, some time ago, I felt that the chair began to dangle and sway from side to side, and the further, the stronger.
Having disassembled it, I saw that the plastic sleeve, which stands in the upper part of the outer gas lift pipe and serves to center and fix the gas lift cylinder, is badly cracked, and several pieces have even fallen off from it.
When I began to pull it out, the part of the bushing, which was directly inserted into the outer pipe of the gas lift, fell apart into pieces, so that only the rim remained intact, that is, the uppermost part of this bushing.
Naturally, I immediately began to look on the Internet to see if such bushings are on sale among spare parts for computer chairs. However, it turned out that such small parts as bushings are not sold separately (at least I have not found such anywhere).
Nevertheless, I did not want to buy the whole gas lift, because, on my chair, the gas lift still works quite well and without any complaints.
Therefore, I decided to make such a sleeve myself.
To begin with, of course, I wanted to find some similar plastic sleeve, but not finding one, I decided to make the sleeve out of wood. For this, birch wood is best suited, it is strong enough and well processed.
However, the problem here was that such a bushing is a pronounced body of rotation, so it is best to make it on a lathe.
I don't have a lathe, but using a drill for this would also be problematic, since the part is quite complex - you need to process not only the outer surface of the workpiece, but also the inner one (the hole in the sleeve).
As a result, I decided to go the other way and make almost the entire bushing using hole saws (or crowns) for wood.
And here I must say that I was very lucky, because having measured the inner diameter of the tube into which the bushing is inserted (it is 48 mm.), As well as the outer diameter of the gas lift cylinder, which will be inserted into this bushing (it is 28 mm.), I was able to find hole saws that are almost perfect for cutting the diameters listed!
So, in order to make the mentioned bushing, I needed the following accessories:
Materials and fasteners:
- A piece of a thick, well-dried birch branch, 6-7 cm in diameter, and about 50 cm long.
- Four small screws 3.5x10 mm.
- Drawing and measuring tools (pencil, square and vernier caliper).
- Shiloh.
- Hand saw for wood.
- Electric drill-screwdriver (preferably two electric drills).
- Drill bit for metal with a diameter of 4 mm.
- Hole saw for wood with a diameter of 29 mm.
- Hole saw for wood with a diameter of 51 mm.
- Perforated drill bit for wood with a diameter of 25 mm.
- Clamp.
- Sandpaper.
I must say that above I mentioned only the most basic tools, but in the process of work, I periodically had to use many other tools (for example, chisels, knife, file, etc.), but I did not mention them, otherwise it will turn out to be huge list of tools.
So, first, if necessary, we update the end of the birch blank by sawing off a small part of it with a saw. By the way, this can be done with a jigsaw, but I specially took a hand saw to warm up once again, because it's freezing outside! : e113:
Then we set aside from the end of the workpiece, about 35 mm, (this is just the depth of the hole saw and the length of the lower part of our future sleeve) and cut in this place in a circle, about 5-6 mm deep, with a hand saw with a fine tooth.
After that, we mark the center at the end of the workpiece, clamp it with a clamp and make it along the longitudinal axis of the workpiece, cut it all the way, using a hole saw with a diameter of 51 mm installed in a drill.
Next, we chop off excess wood with a semicircular chisel.
Now we also make a cut to the stop, but with a hole saw with a diameter of 29 mm.
After that, insert a 25 mm diameter perforated drill into the drill, and use it to drill out excess wood from the internal cut.
When the wood has been selected to a depth of two to three centimeters, you can again cut the hole with the hole saw to the stop in order to deepen the inner hole.
Then again remove the excess wood with a feather drill. And we do this several times alternately, until the depth of the inner hole reaches 4.5-5 cm. By the way, for these operations it is better to use two drills (if possible) so as not to rearrange the drills every time.
After the bushing is formed with us, you can remove the clamp and finish the surface of the bushing, first with a knife and then with sandpaper.
Now you can saw off the bushing blank.
To give it a neater look, you can chop off excess wood from the top ledge of the bushing with a chisel.
Then we carry out the final finishing with a knife and sandpaper.
And now our sleeve is finally ready!
Now it is necessary to make a slight revision of the tube of the computer chair, into which our sleeve will be inserted, namely, drill holes in it for the screws.
Therefore, with a drill with a diameter of 4 mm, we drill four holes in the tube for screws.
Then we remove the chamfers, and at the same time the burrs from these holes with a drill of a larger diameter (8-9 mm.).
Inside the tube, remove the burrs using a round metal file with a fine notch.
Now you need to thoroughly clean the tube from small metal shavings and you can install our sleeve into it.
We carefully hammer the sleeve with light hammer blows.
And then we wrap the screws in the prepared holes for additional fastening of the sleeve.
Now you can assemble the computer chair.
But first, it is necessary to lubricate the thrust bearing well with grease.
And, of course, the inner surface of our sleeve.
Well, now, we finally assemble the chair, that is, we put the bearing on the gas lift rod, then we put the crosspiece with the tube and the sleeve on the gas lift cylinder, we install the outer washer and the fixing washer-latch.
And this is what our chair looks like with a new wooden bushing.
After testing the chair, it turned out that everything is functioning normally, the chair rotates, the height of the chair's rise is adjustable without problems, there are no special backlashes.
In general, I don’t know what will happen next, but so far everything is working fine!
Although I must say that theoretically, a wooden sleeve should not be inferior in strength to a plastic one. Therefore, I hope that it will work long enough.
In my opinion, the only thing that can happen to this sleeve is that it can crack. But I think that in this case, too, it will not lose its performance, and to strengthen it, you can simply fasten its upper part with a clamp or even just wrap it tightly with electrical tape.
Well, however, it will be seen further!
Well, that's all for me!
Everyone, so far, and reliable and durable homemade products!
Information
To leave your comment - register or enter the site under your name.
A computer chair is an essential attribute of a modern person's workplace, without which it is difficult to imagine an office or office.
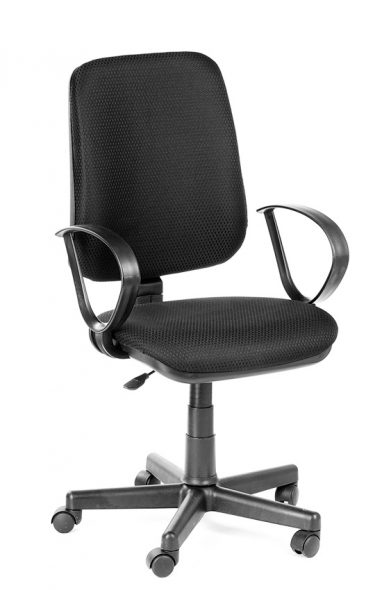
Office chairs are designed to be lightweight, maneuverable and comfortable for extended work in the office or at home
The convenience of a computer chair is expressed in its ergonomic and functional form, it is suitable for people of any shape, height or weight. All this is possible thanks to the unique ability to adjust the height or level of the backrest to the needs of a particular user, for which the gas lift, built into the structure of each chair, is responsible.
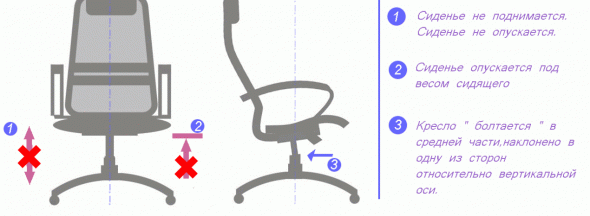
The main symptoms of a gas lift malfunction
However, the same part is also a vulnerable spot, the breakdown of which renders the entire functionality of the seat unusable.
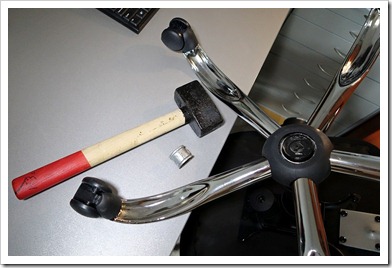
Office chairs are comfortable and functional furniture, but sometimes they require repair
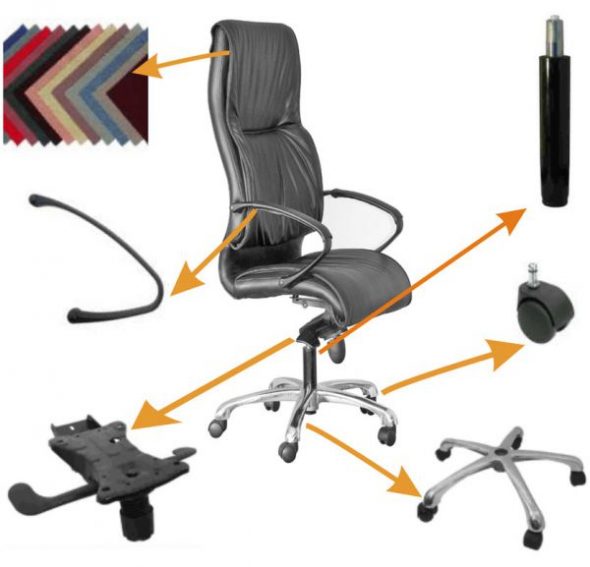
Parts of the computer chair that may need to be replaced or repaired
Office chair layout
If you are faced with a malfunction of the computer chair, you need to find out which part needs repair. One of the most common causes of breakage is the gas lift, which is the part that is most susceptible to wear and tear.
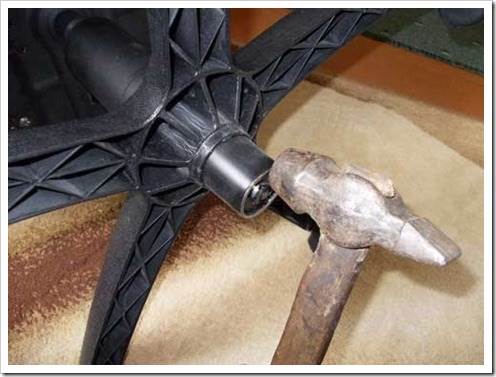
Homemade repairs will not restore the full functionality of the office chair
There are two ways to fix a broken gas lift breakage. The first option is to replace the defective part with a new one, no matter which one, from a whole chair or bought in a store.
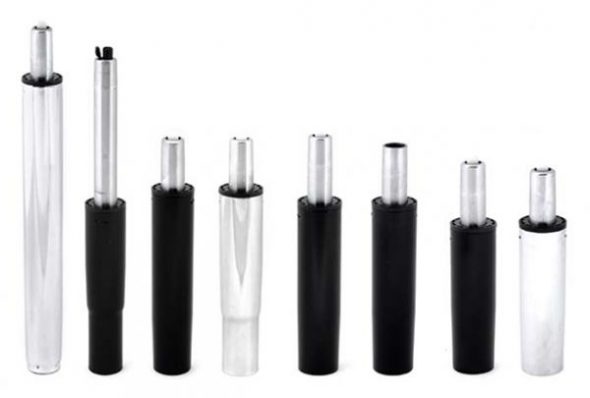
Chair gas lift or lifting mechanism is designed to adjust the height of the office chair
This method can be considered expensive, since the purchase of a whole gas lift will be required. To make a replacement, you need the following set of tools:
- carpentry hammer;
- pliers;
- a bolt with a diameter of at least 10 mm;
- screwdriver or screwdriver;
- technical lubrication.
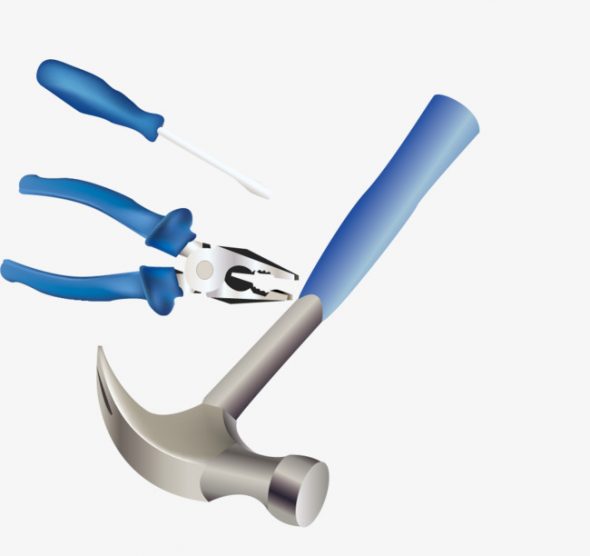
Repair tool kit
- We remove the wheels and dismantle the back of the seat, for which we turn the chair over and unscrew the necessary screws from the bottom of the chair. This is necessary for the subsequent convenience of dismantling, you also need to remove the armrests, if any.
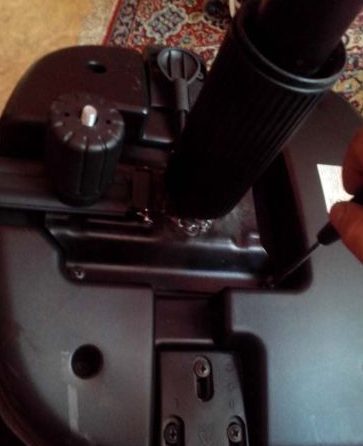
Use a Phillips screwdriver to unscrew the 4 bolts
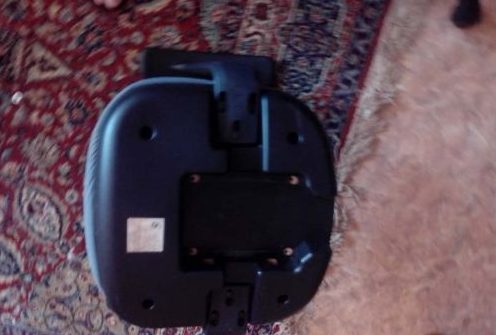
Remove the seat from the chair mechanism
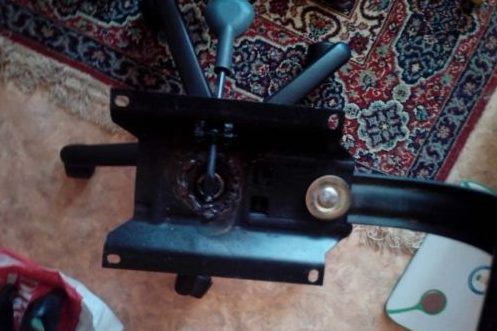
Detached chair mechanism
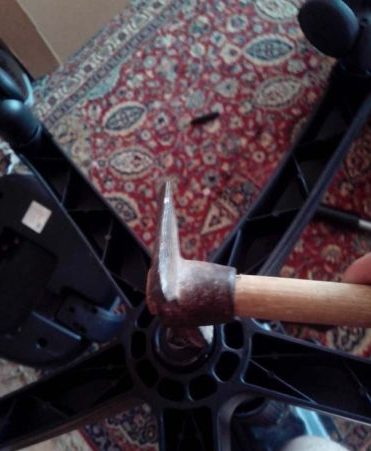
We proceed to dismantle the gas lift
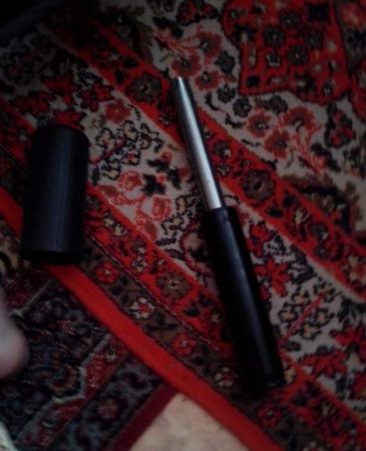
New gas lift to replace the broken one
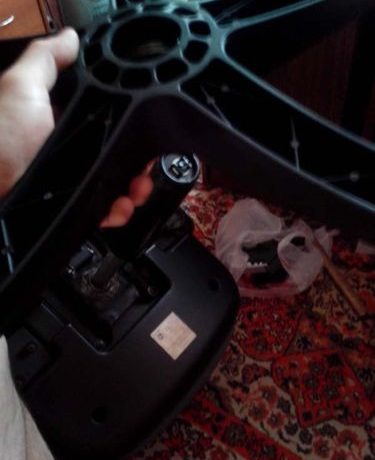
Putting the cross in place
Assembled chair after renovation
The second method is cheaper, it consists in fixing the gas lift in one position. However, this method eliminates the possibility of adjusting the height of the chair, but if you need the same height, it is quite suitable. You will need:
- screwdriver;
- pipe, rubber hose, or a set of washers, depending on what you have at hand;
- a rag to remove traces of oil.
Before starting the repair, it is important to make sure that there is no gas in the gas lift and that the gas chamber has free movement up and down, that is, if the height adjustment lever dangles freely. Only then follow the instructions.
According to the instructions presented earlier, we remove the chair along with the rocking mechanism, leaving the crosspiece.
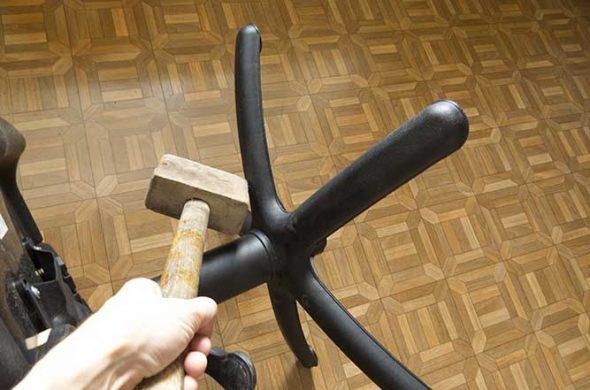
We knock the crosspiece off the chair with a mallet, you need to hit as close to the middle as possible, alternately from different sides of the pneumatic cartridge
We turn it up and in the center we see the latch, remove it, and then take out the washers covered with oil. Having done this, you can pull out the outer casing, from which the lifting rod sticks out, on which the rubber damper, thrust washer, bearing and second thrust washer are attached.
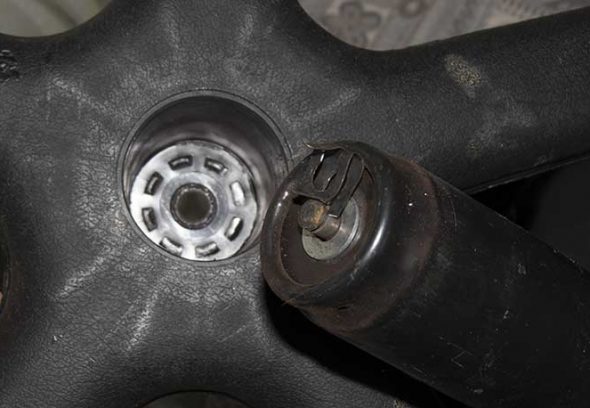
Remove the steel latch washer
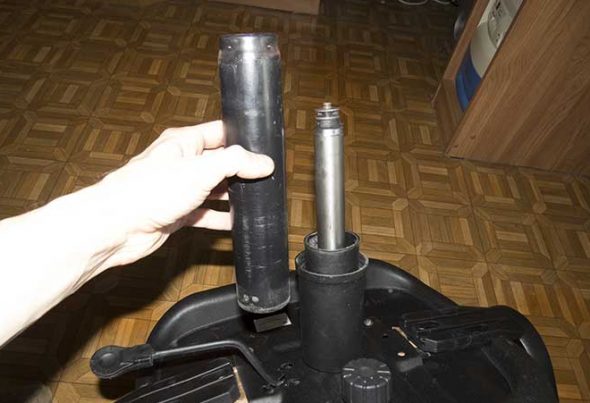
We remove the glass, and then everything else from the axis - an elastic band, washers and a bearing
Next, we select the supply, which we will fix on the lifting rod, thereby fixing the height of the chair at a certain level. You can use any material from PVC pipes to a hose and washers with nuts, the main thing is that it fits freely on the stem.
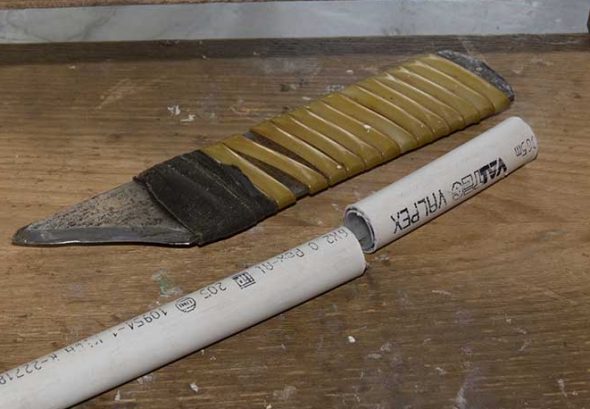
We make a tube of the required length, with an inner diameter not less than the diameter of the axis
Measure the required length of the hose and secure it with a damper, then screw on the thrust washer, bearing, second washer and insert the structure back into the gas lift housing.
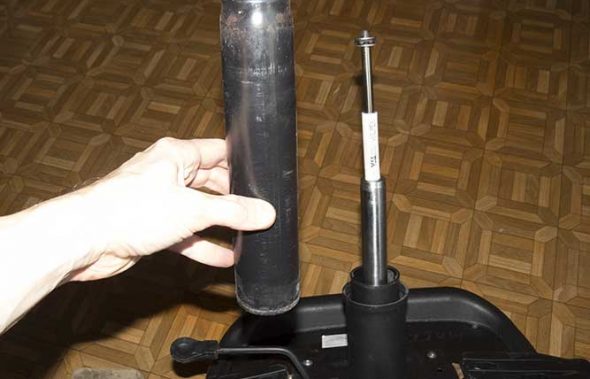
We put the resulting tube on the axle, and then an elastic band (if it is still alive) and washers with a bearing
Reassemble the gas lift by installing the outer washers and latch. The chair is ready.
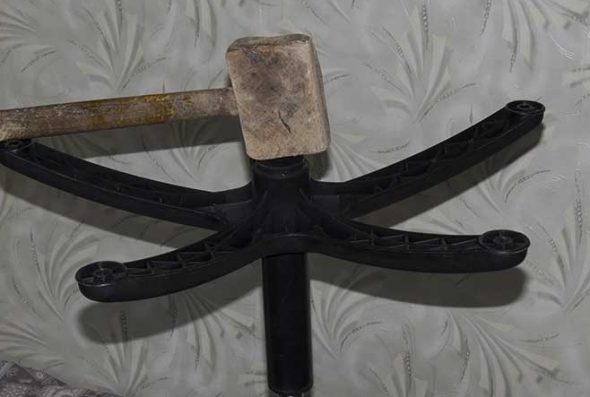
We put the cross in place, and complete the assembly by installing the wheels
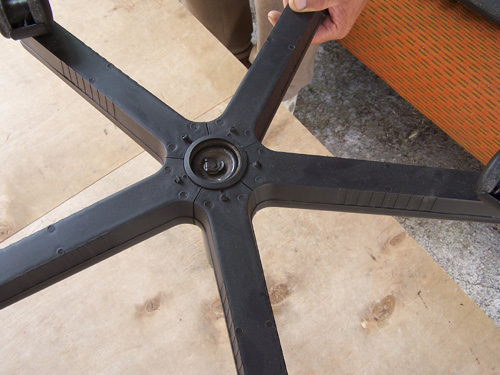
This is what a metal crosspiece looks like with plastic covers on the bottom.
A separate case is the breakage of the crosspiece. Although this part is made of particularly durable materials, it cannot be damaged, especially if it is made of plastic.

Types of crosspieces: plastic, aluminum, metal with wooden pads
Fortunately, replacing this part with a new one is quite simple. You will need:
To replace, follow the instructions: turn the computer chair upside down, pull the wheels out of the mountings. Take a pair of pliers and use a circular motion to knock out the gas lift, applying pinpoint blows along its edges.
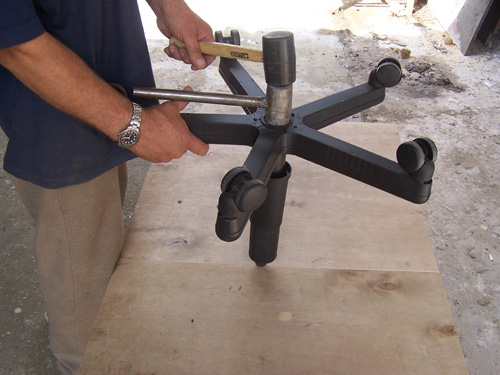
To remove the plastic crosspiece from the gas lift, you need to hold on to the gas lift and tap the crosspiece from above around the connection point with light hammer blows
After detaching the spider, fit the casters onto the new one and insert the second part of the chair into the hole. You don't have to worry about incompatibilities, as all office chairs have a standardized gas lift mount.
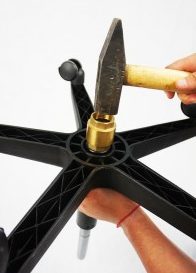
To knock out the gas lift from the cross, it is better to use a spacer of the appropriate size. to prevent blows to the central part of the gas lift
Thus, you can fix any office chair with your own efforts, without the costly purchase of a new chair.
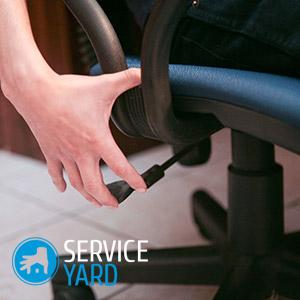
Unlike all cabinet furniture, a computer chair is subject to extremely increased wear and tear, because, in addition to daily use, it has mechanical, and most importantly, hydraulic elements. For example, repairing a gas lift of an office chair with your own hands can be done, but first you need to understand the reasons for the breakdown. So for what reason, for one user, the chair broke down after a few months, while for another, it serves for years without the slightest breakdown? We will deal with this in this article.
Much to surprise, this circumstance does not always depend on the reliability of a particular model.First of all, you need to pay attention to the weight of the owner, as well as to care during operation.
Important! Modern armchairs, as a rule, are designed for a weight of no more than 120 kilograms, and the manufacturers themselves, in turn, provide a guarantee for any malfunction from 12 to 18 months.
From this it can be concluded that the reasons for the breakdown can be:
- careless handling;
- non-observance of weight restrictions;
- the warranty period has expired.
But in the event that your chair has broken down, and the warranty period has already expired, then, having sufficient knowledge and dexterity, you can easily repair a computer chair at home.
Important! Since you have taken up the repair of the chair, it makes sense to put things in order at the entire workplace. And since a computer desk is, as a rule, a bunch of wires of papers and little order, let's start with the main thing - remove the wires from the computer under the table. The next step is the countertop:
If your computer chair lowers itself when you sit down and rises during lifting from it, while the period of lifting or lowering can vary from a couple of seconds to a day, this is a sign that gas has escaped from the gas cartridge.
Important! Gas lifts cannot be repaired in any way, because their disassembly is quite dangerous for human life.
In this situation, you can fix the chair with the help of available tools in the required position, or change the gas cartridge for a new one.
Important! The price of a gas cartridge is not so high, and it can be purchased at absolutely any specialized store.
So, you have made the decision to replace the gas cartridge with your own hands. For this case you will need:
- Armchair;
- Curly screwdriver;
- Rubber hammer;
- Metal drift;
- New gas cartridge that will match the length and diameter;
- Vise for more comfort.
back to content ↑
In the event that you carry out repairs in a cool time of the day, the liquid in the gas lift may well freeze - it is strictly forbidden to use it. Wait until the new gas cartridge is at room temperature. To achieve this, you will need to leave it on for about 24 hours.
- First of all, use a curly screwdriver to unscrew the seat directly from the piastre or the rocking mechanism.
- Flip the chair over, mark the front of your rocking unit.
- Remove the 4 screws that secure the chair seat directly to the rocking mechanism, then set the chair body aside.
- Dismantle the protective casing, take your gas cartridge in a comfortable hand, the swinging block down.
- Use medium blows to tap the rocking mechanism at the very base of the cartridge.
Important! Carefully monitor the degree of flexion of the swing mechanism, do not allow it to bend. If you did not succeed in knocking down the block, try to fix the base of the gas cartridge in the clamp and turn it.
- After removing the rocking mechanism, knock out the gas cartridge from the crosspiece.
- Turn the crosspiece over with the rollers upward and, using a metal drift, knock out the gas cartridge from the tapered base of the crosspiece with precise and accurate blows.
Important! Be sure to watch out for damage to the front side of the chrome crosspiece, as well as the stiffeners of the plastic crosspiece.
Thus, you have disconnected the crosspiece. This means that the difficult task is over, now assemble the chair:
- Screw the rocking mechanism onto the backrest seat itself and pay attention to the correspondence of the front sides of the seat and this block.
- Next, put the crosspiece on the floor with the wheels, dismantle the transport cap from the new gas cartridge.
Important! You should see the button, but under no circumstances press the gas cartridge button in your hands, because it is dangerous.
- Install a new gas cartridge and make sure that the diameter of the gas cartridge fully matches the crosspiece.
- Slide the protective cover and then the chair body directly onto the rocking mechanism.
- In the event that everything is in order, press the body of the chair with your hands, re-check all the elements.
Important! If your chair is not a year or two, then in addition to the constructive repair of the gas lift, it also needs aesthetic, replacement of the upholstery. How to do this, learn from our master class - "How to pull a computer chair with your own hands."
- Now you can sit on the chair, thereby checking the performance of the new gas lift.
back to content ↑
- If you have problems with the gas cartridge immediately after assembling a new seat, it is likely that you have come across a defective gas cartridge. But before you go and complain about the trading organization and demand replacement of the element, check if the button of the gas lift is fixed by a lever from the swing mechanism.
- When the gas lift does not respond when the lever is pressed, check if you have properly secured the piastres or the swing system, if the lever for pressing the gas lift button is not damaged.
In all other cases, it will be necessary to replace the gas cartridge.
Important! If, after reading everything about the repair, you come to the conclusion that, for you personally, it is easier and cheaper to buy a new chair, then do not forget to read the article on how to choose a computer chair.
| Video (click to play). |
Now you have an idea of when you need to repair the gas lift of an office chair with your own hands, how exactly it happens. Whether you are ready to do this work or it is better to turn to a specialized master - decide for yourself, taking into account your technical skills, knowledge and dexterity in fixing various items.

