In detail: do-it-yourself baby repair from a real master for the site my.housecope.com.
In small-sized washing machines of the CM type, laundry is washed under the action of intensive circulation of a soap solution, which penetrates between the layers and pores of matter without mechanical effect on it. The circulation of the soap solution is created by a vortex motion, which is excited by the activator. Washing machines of the CM type are divided into machines with a vertical arrangement of the activator ("Baby", "Desna", "Samara"), horizontal and bottom arrangement of the activator ("Feya", "Mini-Vyatka"). Machines of this type do not have a squeezing device and are designed for a wash of 0.75. 1.5 kg. During operation, the machine is placed on a chair or stool. If you know the structure of a washing machine of this type, then you can repair it yourself and there will be no need to call a master and waste money.
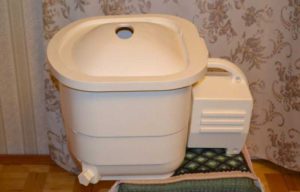
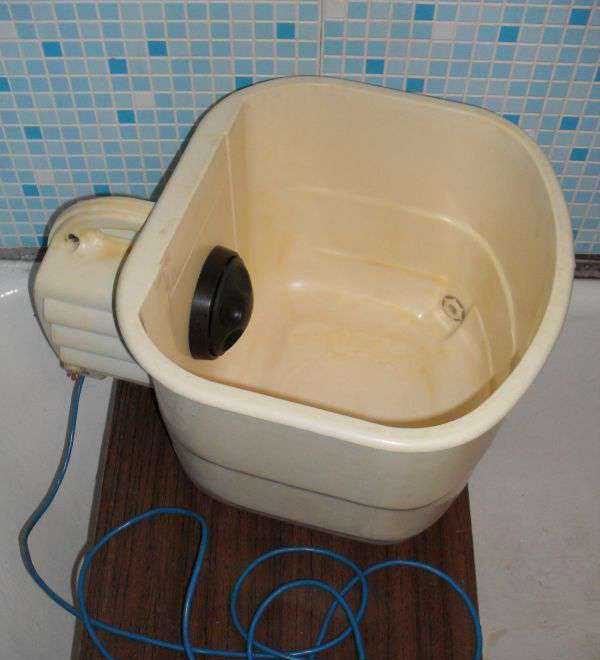
Let's consider the device of one of the most widespread washing machines of the type SM "Malyutka-2". The Malyutka-2 machine consists of a tank, a tank lid with a seal and two halves of a casing with rubber gaskets (Fig. 1)
Rice. one The device of the washing machine SM "Malyutka-2"
The halves of the casing are fastened together with screws with bushings. To prevent the heads from corroding, their heads are closed with rubber stoppers. The housing contains an electric motor, relay, capacitor and switch. The switch is attached to the casing with a nut with a washer and a rubber nut.
The connecting cord is routed to the inside of the housing through a rubber protective tube. The casing has a threaded flange onto which the activator body is screwed. The flange has a collar to prevent water leakage. An activator is screwed onto the motor shaft. Before 1985, an activator with a left-hand thread was installed in machines, and since 1986 - with a right-hand thread. The flange is fastened to the engine with screws. The plug of the drain hole can be closed with a plastic plug or, if necessary, a drain tube with a nozzle can be put on it to attach it to the tank of the machine. A sealing gasket is installed on this sleeve prior to assembly.
| Video (click to play). |
Rice. 2 Schematic diagram of the electric washing machine "Baby-2"
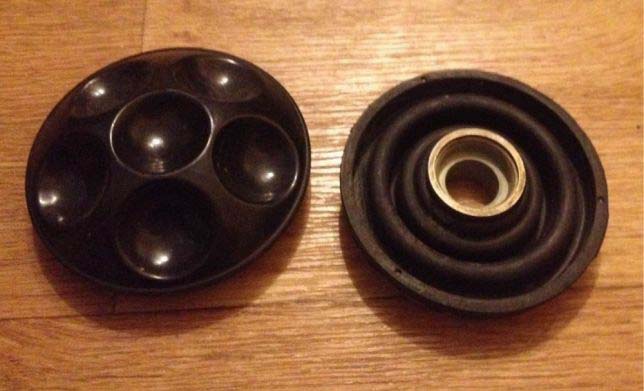
As for the activator assembly, its support consists of a plastic body, a steel sleeve, a rubber sleeve, a steel spring and a rubber gasket (Fig. 3)
Rice. 2 Device activator unit for washing machine "Malyutka-2"
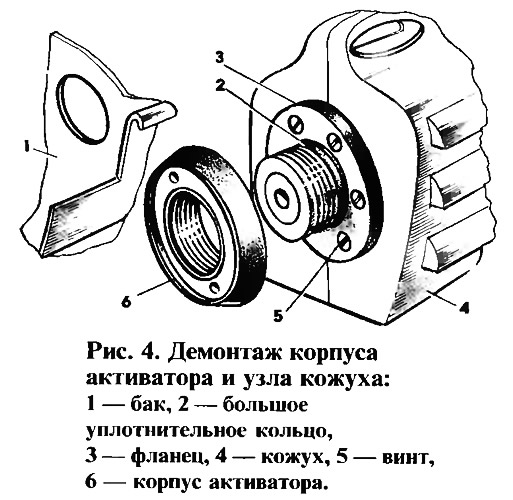
A ring is installed between the activator body and the flange. The washing machine is supplied with a tubing and tongs. During the operation of the machine, its plastic parts must be protected from damage. Do not allow the surface to come into contact with active solvents (acetone, dichloroethane, etc.), as well as hot objects at temperatures above 80C.
- Remove the plug from the hole at the back of the motor cover. By turning the activator, align the oblong hole of the plastic impeller with the hole in the casing.
- Insert a screwdriver through the hole in the casing and the impeller until it stops into the rotor of the electric motor, locking it.
- Unscrew the activator. Insert a special key into the opening of the activator body (the description of the key is given below) and unscrew the activator body.
- Disconnect the tank.
- Unscrew six screws and remove flange with parts.
- Unscrew the lock nut and rubber nut securing the switch and remove the washer.
- Unscrew the screws holding the casing halves together and remove them. In addition to the electric motor, other equipment elements are located under the casing. All of them are indicated in the wiring diagram.
The assembly of the machine is carried out in the reverse order, but the following features must be taken into account. When installing electrical equipment in the machine body, pay particular attention to the location of the installation wires. There should not be a short circuit between conductive moments, in addition, electrical wires should not be pulled and pinched.
- Carefully tuck in the casing rubber profiles around the entire perimeter of the casing connection.
- Install the oil seal into the flange seat. Loose, skewed seating of the cuff will cause fluid to flow out of the tank of the machine.
- Fit the flange and secure by evenly tightening the screws. The drain hole of the flange should be at the bottom. The activator body must be screwed onto the flange until the O-ring is firmly pressed against the tank wall.
- Install a washer, nut and locknut on the switch.
A special wrench for removing and installing the activator body can be made from a piece of water pipe. Its length should be 100.150 mm larger than the diameter of the activator body. Drill two holes with a diameter of 6 mm through the pipe body, symmetrically with respect to the center of the pipe. The distance between the holes should be 95 mm. Insert screws in these holes so long that they protrude from the pipe by 10.15 mm. Securely fasten the screws to the pipe with nuts - and the wrench is ready. The quality of the repair performed must meet the requirements of the standard.
All the best, write
Rice. one The design of the washing machine Malyutka 2
Washing machine "Malyutka-2" consists of a tank 9 (Fig. 1), a tank lid 8 and a casing consisting of two halves 25 and 31 with rubber gaskets 30 and 20, fastened together by screws 26 and 29 with bushings 28. Screw heads closed with rubber plugs 27. The casing contains: an electric motor 32, a relay 17, a capacitor 22 and a switch 33, which is attached to the casing by a nut 35 with a washer 34 and a rubber nut 36. The connecting cord 47 passes into the casing through a rubber safety tube 48.
The casing has a threaded flange 12, onto which the body b of the activator 2 is screwed. A collar 5 is installed in the flange to prevent the liquid from escaping. An activator is screwed onto the motor shaft. The flange 12 is attached to the electric motor with screws 11. The bushing 37 of the tank drain hole is either closed with a plastic plug 41, or, as required, a drain tube 44 with a nozzle 43 is put on it to attach it to the tank of the machine. At the other end of the drain tube, a tip 45 is fixed. The threaded sleeve is attached to the tank with a plastic nut 40 with a rubber ring 39. A gasket 38 is installed on the threaded sleeve.
The machine is supplied with a tubing 46 and pliers 42. The tank lid has a -1 seal. The activator support consists of a plastic body 6, a steel sleeve 7, a rubber cuff 5, a steel spring 4 and a rubber gasket 3. A rubber ring is installed between the activator body b and the flange 12 10. A rubber sleeve 14, a plastic nut 13 and a steel washer are put on the motor shaft. 15. The thermal relay 17 is secured with a clamp 16. The capacitor 22 is attached to the platform 23 with clamps 21 and 24 with screws 18 and nuts 19.
Note: on machines manufactured before 1985, an activator with a left-hand thread is installed, since 1986 - with a right-hand thread.
The electrical diagram of the washing machine is shown in Baby 2 in Fig. 1 on the right.
Remove the plug from the hole at the back of the motor cover. By turning the activator 1 (Fig. 2), align the oblong hole of the plastic impeller with the hole in the casing. Insert a screwdriver through the hole in the casing and the impeller until it stops into the rotor of the electric motor, locking it. Unscrew the activator. Insert a special key into hole A of the activator body 8 (the description of the key is given below) and unscrew the activator body. Disconnect the tank. Unscrew six screws 3 and remove flange 2 with parts 10, 9, 4, b, 7.
Unscrew the lock nut 35 (Fig. 1) and the rubber nut 36 securing the switch 33 and remove the washer 34. Unscrew the screws 29 holding the casing halves 25 and 31 and remove them. Under the casing, in addition to the electric motor 32, other items of equipment are located. All of them are indicated on the wiring diagram (see Fig. 1 on the right).
The assembly of the machine is carried out in the reverse order, but the following features must be taken into account. When installing electrical equipment in the machine body, pay particular attention to the location of the installation wires. There should not be a short circuit between conductive elements, in addition, electrical wires should not be stretched and pinched.
It is necessary to carefully tuck the rubber profiles of the casing around the entire perimeter of the connection with the casing.
Rice. 2... Unit of activator of the washing machine Baby 2:
1 - activator; 2, 6 - flanges; 3 - screw; 4 - a sealing ring; 5 - activator shaft; 7 - bushing; 8 - activator body; 9 - cuff; 10 - a sealing ring; 11 - bushing
Next, install the collar 9 (Fig. 2) into the socket of the flange 2. A loose, skewed seating of the cuff will cause fluid to flow out of the tank of the machine. Flange 2 is installed pre-assembled with parts 10, 9, 11, 6, 7, 5 and secured by evenly tightening the screws 3. Drain hole B of the flange should be located at the bottom. The activator body 8 must be screwed onto the flange 2 until the O-ring 4 is firmly pressed against the tank wall. Install a washer, nut and locknut on the switch.
A special wrench for removing and installing the activator body can be made from a piece of water pipe. Its length should be 100.150 mm larger than the diameter of the activator body.
Drill two holes with a diameter of 6 mm through the pipe body, symmetrically with respect to the center of the pipe. The distance between the holes should be 95 mm. Insert screws in these holes so long that they protrude from the pipe by 10.15 mm. Securely fasten the screws to the pipe with nuts - and the wrench is ready.
"Baby" refers to devices with an activator, due to which its design is characterized by maximum simplicity. The principle of its operation is that the rotation of the rotor of the electric motor is transmitted to an activator - a disc, of a special shape, which mixes water and linen in the tank.
This machine cannot boast of an abundance of washing programs, as well as the presence of at least some kind of automation. Actually, the only thing that can be configured in the operation of the device is to set the washing time. The built-in timer will turn on itself and turn off the engine at the right time.
Since the machine is simple, the list of possible malfunctions is not very wide. Among the most common breakdowns:
- the engine hums for a long time and only after a while the activator starts to rotate;
- the activator disk turns slowly, often stops;
- during operation, the device makes a loud noise, tears the laundry during washing;
- water leaves the body or drain hose;
- the car does not turn on and does not react to the owner's actions;
- the hum of the engine is heard, but the activator does not spin;
- the machine turns on, the engine starts to run, but stops soon, there is a smell of burnt wiring.
The reasons that led to the occurrence of malfunctions are also not very diverse. Actually, all breakdowns can be divided into problems with the activator, with the electrical part and body parts.
In most cases, the repair of the Malyutka washing machine requires its complete or partial disassembly. A homemade key will help to significantly simplify the work. It doesn't take much time to make it.
To make the key, a piece of pipe with a length of about 20 cm is used. Two holes with a diameter of 6 mm are drilled in the pipe, symmetrically relative to its center, the distance between them is 95 mm. Bolts are screwed into the holes, they are fixed with nuts. Free thread will play the role of the working part of the key.
Structurally, the machine itself consists of two separate parts: an electric drive casing and a tank with a lid. To disassemble it, you need to follow a series of simple steps.
- Remove the plug at the back of the casing. Turning the activator, align the hole in the casing with the hole in the impeller.
- Stop the motor using a thin screwdriver.
- Unscrew the activator with a homemade key.
- Remove the six bolts that secure the shroud to the tank.
- Remove the switch.
- Unscrew the screws that tighten the cover.
The disassembly process is not particularly difficult, but it will not be superfluous to film every stage of the work on the phone's camera, this will help in the subsequent assembly.
There is no drum in the "Baby" type washing machines, its functions are performed by an activator. It rotates and mixes the laundry while performing the wash. Any malfunction, as a result of which the activator stops rotating or its rotation is difficult, leads to an interruption of the washing process. By the way, in the case of a slow rotation of the activator, the machine can be automatically turned off; due to engine overheating, a thermal relay is triggered.
There are three main faults associated with the operation of the activator. Below is a list of them with an indication of how to solve the problem.
- There is more laundry in the tub than is allowed. The motor of an overloaded machine cannot turn the activator at normal speed, it overheats, the machine shuts down.
To solve the problem, unload the machine, leave it for 15 minutes, let the engine cool down, repeat the wash, but with less laundry.
- The machine is not overloaded, but threads are wound around the activator shaft, preventing the normal operation of the machine.
In this case, disassembly is indispensable. You will have to remove the laundry, drain the water, disassemble the machine and remove threads and flaps that interfere with rotation.
- Misalignment of the activator. Symptoms of this problem are that the machine tears things, or during operation, you can hear the sounds of friction of the activator against the body.
Complete disassembly required. Water is removed, the activator is removed. If the problem arose after a recent repair, during which the activator was incorrectly installed, you just need to tighten it again, if the problem appeared unexpectedly, you may have to change the activator itself.
Many owners of "Baby", having noticed a leak, do not attach much importance to it, they say, this is normal. Like, there is no need to worry, you just need to put the car in the bathroom, let it flow. This is the wrong approach. We must not forget that the washing machine is powered by electricity, a leak can cause a short circuit, in addition, the person who does the washing can be injured.
- Damage to O-rings or flange seals.
Elimination of this breakdown requires partial disassembly of the machine. To do this, it is necessary to dismantle the activator, remove the drive housing. Inspect the large ring carefully for damage. In case of loss of elasticity by rubber or violation of the integrity of the ring, it is changed.
Having unscrewed six bolts, disassemble the casing. Pull out the flange. It needs to be disassembled. The most common problems are caused by the loss of elasticity of the rubber seal. If so, you need to replace it. Also pay attention to the snap ring. Over time, it can weaken, which will lead to a loss of tightness of the assembly.
- Damage to the drain hose or fitting.
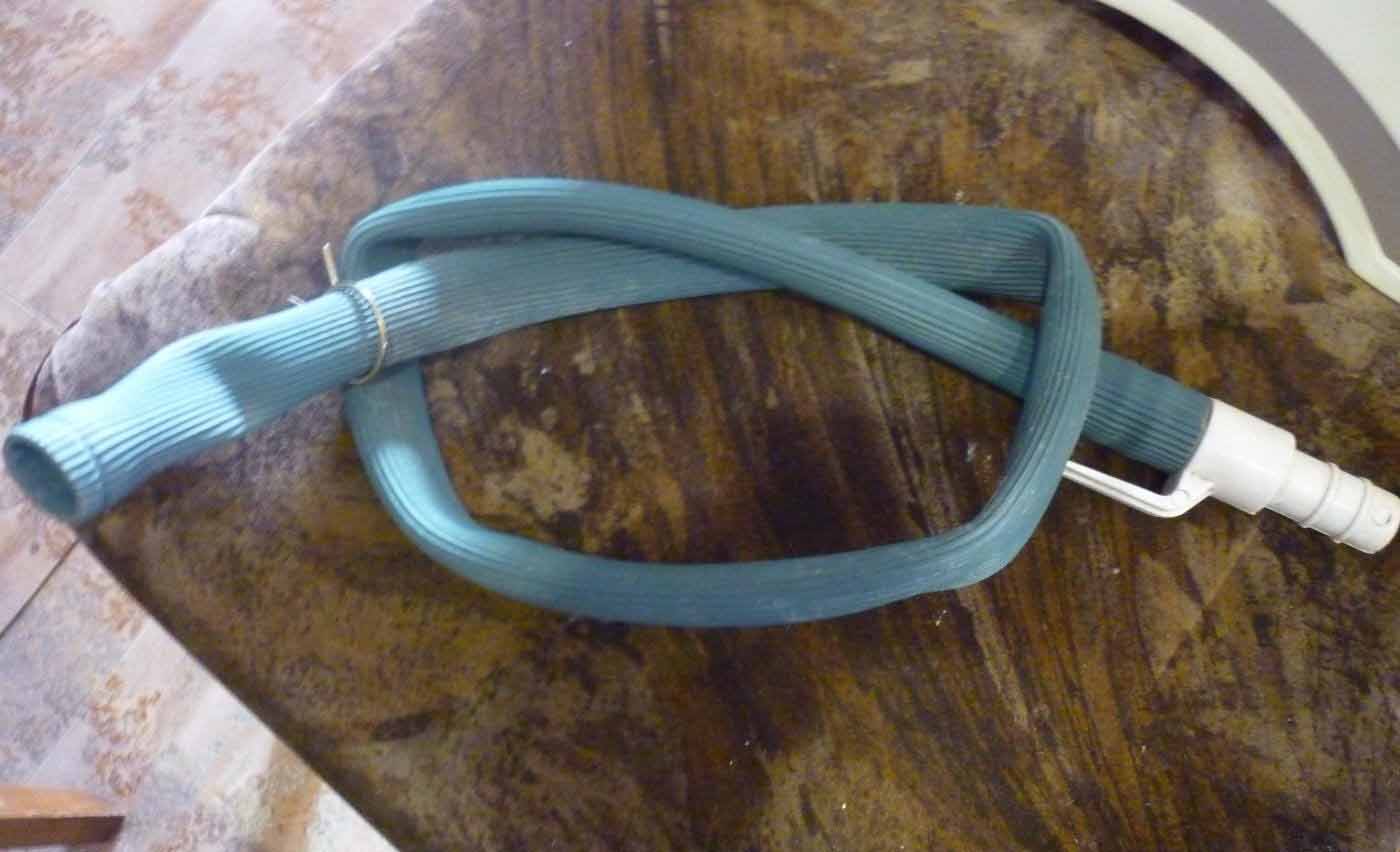
The service life of the rubber hose is limited. Over time, the rubber cracks, water begins to pass through. It is not difficult to determine if the hose is damaged, as well as to replace it. Occasionally, there is a violation of the tightness at the place of its attachment. This problem is solved by replacing the clamp, you must first remember to clean the fitting from accumulated dirt and scale.
Washing machine "Baby" is made of plastic. Due to this, it has a small mass, but the plastic is not particularly durable. The slightest shock load is enough for a crack to form in the housing. Glue will help to get out of this situation, but you need to work extremely carefully. The inner surface of the machine must remain smooth, otherwise the wash will result in torn linen, and possibly a new depressurization of the tank.
Any of the components of the electrical circuit of the "Malyutka" washing machine may fail over time or its operation may be disrupted. The list of possible problems is not too wide, but you must be prepared for the fact that in order to solve them, you will have to completely disassemble the car.
Oddly enough, but this is not the worst car breakdown. The fact is that in most cases the cause of the malfunction is outside the device case.
First of all, it is worth checking the voltage at the outlet. To do this, you can use a simple probe or multimeter in voltage measurement mode. It is important not to forget to rearrange the switch to AC voltage mode, selecting the scale limit of 500V or more.
If there is no measuring device at home, you can use any electrical appliance to check that the outlet is working, temporarily turning it on.
Next, you need to make sure the integrity of the power cord. As a result of regular use, it frays, conductive conductors break. Most often, breakdowns occur near the plug and in the place where the wire enters the machine body.
It is better to replace the damaged cable immediately. Use any punched wire, even if it is carefully insulated, is life-threatening, especially if it is a wire from a washing machine that is operated in high humidity conditions.
If the socket and wire are checked, and the device still does not work, it is necessary to proceed to disassembly, followed by checking the engine and details of the connection diagram.
It's worth starting by checking the integrity of the connecting conductors. You can't do without a multimeter. With a switch, it is transferred to the resistance measurement mode, each conductor is called. Along the way, it is worth examining the places of their connections. The constant humidity in which the machine is operated contributes to oxidation of the contacts, which can cause engine failure.
Suspicious conductors (with blackened insulation, covered with a thick layer of oxide), terminals, as well as visible damage to circuit elements must be replaced immediately. To connect new wires, it is better to use connecting pads, connect the parts by soldering, not forgetting to use heat shrink insulation.
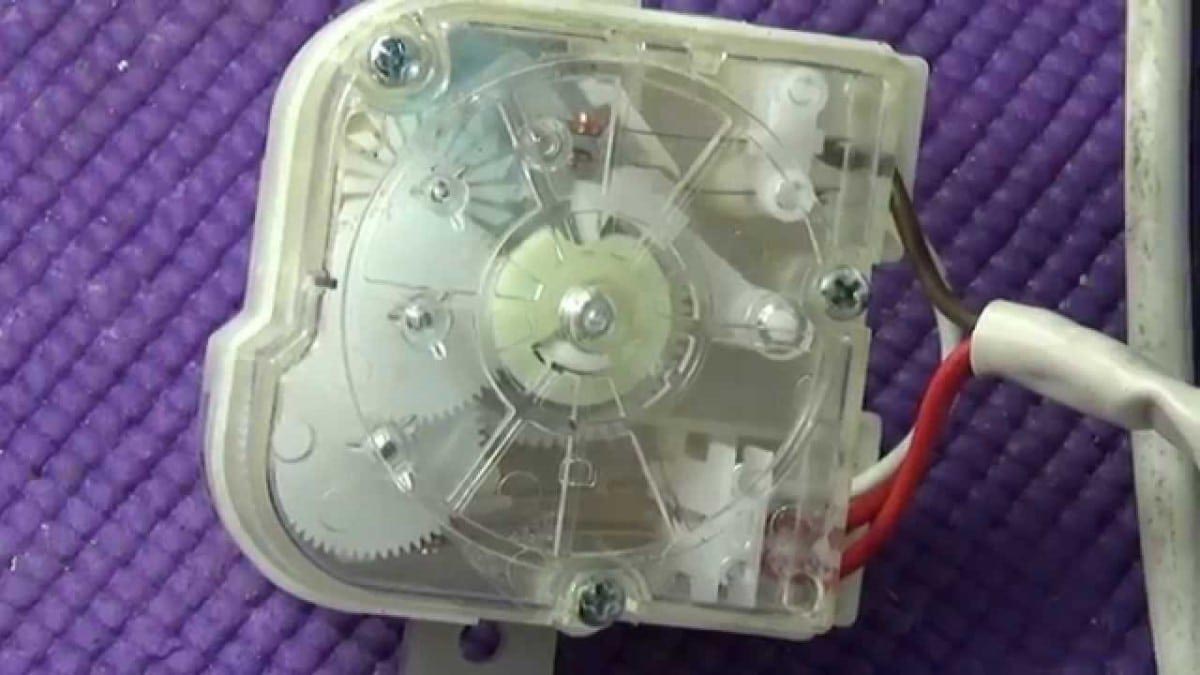
Often the time relay is the cause of a machine failure. It is unlikely that you will be able to repair it yourself, it is easier and more logical to buy a new one. The same applies to the switch.
The thermal relay can also cause the engine to reluctance to turn on. They test him cold. Connect a multimeter to the terminals in ohmmeter mode, if it shows a break, the relay is changed.
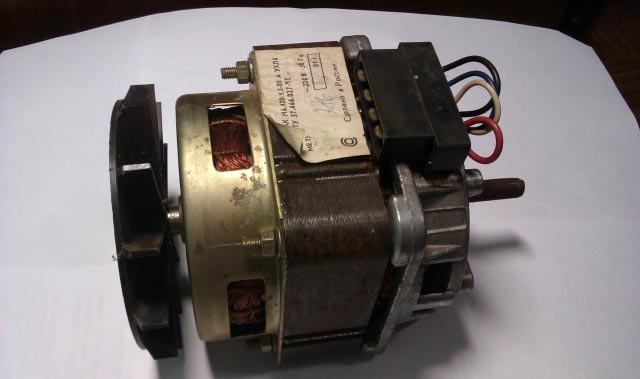
If the machine does not turn on and there is a distinctive smell near the drive housing, the cause may be in the engine. The list of its possible malfunctions is extensive, this is a winding break, its short circuit, breakdown. It will definitely not be possible to repair the engine at home. You can consider rewinding it, but it is economically impractical.
There is only one reasonable way out of this situation - to buy a new one.It should be noted that the price of a new engine is commensurate with the price of the car itself, there is something to think about.
Repairing a washing machine, even something as simple as "Baby", is far from the most pleasant thing. It is also worth noting that malfunctions occur at the most inopportune moment - you need to erase, but instead you have to look for the cause of the breakdown, fix it. To avoid premature failure of the "Baby", you should adhere to a number of simple rules:
- do not heat water with a boiler directly in the machine;
- install it only on a flat surface, do not use it in the bath;
- monitor the machine during washing, in case of appearance of third-party odors or tingling when touching the case, immediately turn it off, find the cause of the malfunction and repair it.
Let the washing machine "Malyutka" have become outdated for a long time, with good care and timely repair it can still serve. She has no place in a modern house, but in the country, or in a rented apartment, in conditions of frequent moves, she is still one of the best options.
The Malyutka washing machine is an activator-type technique. This means that the drum is an integral attribute of any modern automatic washing machine; it is absent here, but an activator replaces it. However, if the Baby were an automatic washing machine, there might have been a drum in it, but since this is a semiautomatic machine, we will not find anything in it except a washing tank and an activator.
Since the Baby does not have a drum, she does not make such a noise during operation as automatic washing machines.
- instead of washing, the machine hums and then turns off;
- the activator turns slowly or gets stuck;
- the machine tears and strongly creases the laundry, a loud noise is heard;
- the body of the Malyutka washing machine is leaking;
- the hose of the Baby washing machine is leaking;
- the machine does not turn on;
- the machine turns on, hums, but the activator does not turn;
- washing starts, but stops within a few minutes, heating of the case is noticeable;
- the machine does not turn on, and there is a smell of burnt wiring.
Symptoms of breakdowns are clear and obvious, but what kind of malfunctions caused them. Here, too, everything is pretty simple. Some of the symptoms are caused by a faulty activator, some by an electrician of the washing machine, and some are due to a faulty electric motor. Leaks of various nature can occur both due to improper connection of the machine by the user, and due to wear of the O-rings and various rubber bands, but let's not get ahead of ourselves.
An activator is a movable element of the Malyutka washing machine, due to the rotation of which things are washed in the washing tub. Violation of the mobility of the activator leads to an interruption of the washing process. Moreover, in some cases, a thermal relay is triggered and the machine shuts down. Let's list the problems associated with the activator and, at the same time, figure out how to fix these problems.
- The washing machine tank is significantly overloaded. When the washing machine is overloaded with linen, the activator does not turn normally or does not turn at all.At the same time, the washing machine begins to hum desperately, and then turns off completely. Solution to the problem: unload the washer, wait at least 15 minutes, restart it.
- Threads, pieces of fabric and so on were wound around the activator and its shaft. The symptoms are the same, the activator does not spin normally, the car hums and then turns off. The repair will consist in cleaning the shaft and activator from threads, rags and other foreign bodies that interfere with the operation of the moving part.
- The activator is skewed. The activator twists, but the linen after washing is partially torn and badly wrinkled, or the activator touches the walls of the washing tub. These actions are accompanied by a strong hum, and sometimes the Malyutka washing machine turns off for no apparent reason. Solution to the problem: unfold the washing machine, take out the plug, unscrew the activator, clean the threads and screw the activator back on until it stops.
If you find a leak in the housing of the Baby washing machine, you need to check it for two potential breakdowns: damage to the large O-ring and damage to the flange assembly. To understand exactly where it is, it is necessary to partially disassemble the washing machine. We do the following:
- dismantle the activator, and then turn off its body;
- we inspect a large rubber band, called a large o-ring;
- in the presence of any damage, we replace the part with a similar one;
- if the large elastic band is intact, disconnect the casing itself and the electric drive from the tank;
- unscrewing six screws, disassemble the casing by pulling out the flange assembly;
- disassembling the flange assembly, take a picture of the location of the parts, remove the rubber grommet and inspect it for damage;
- also inspect the small O-ring, if any damage is found on one of the parts, replace them.
Sometimes the leak is caused by the small snap ring of the flange assembly. If the ring weakly compresses the cuff, it must be replaced with a tighter one or simply bend, but in this case the leak may recur.
The easiest way to find and repair leaks in hoses or fittings. We unscrew the nut holding the fitting, take out the bushing, pull out the gasket. If the slightest damage is found, we replace the part. The hose itself can also get damaged, although over time, low-quality hoses that come with Malyutka washing machines dry out, crack and fail, starting to leak water. The solution, in this case, is one - to replace the hose.
If you turn on your Baby washing machine as usual, and it does not show any signs of operation, the electrical circuit is most likely broken somewhere. To search for and fix a breakdown in the electrical of the washing machine, you will have to completely disassemble it.
- We dismantle the activator.
- We pull off his body.
- We remove the engine cover.
- Remove the flange assembly.
- We dismantle the washers from the engine shaft.
- We take out the protective elements from the casing - decorative plugs.
- We turn out the screws.
- Disconnect the rubber seal while disassembling the half-body elements.
Now you can check the electrics of the washing machine. We arm ourselves with a multimeter, reconfigure it to ohmmeter mode and check the wiring and semiconductor parts one by one. Poor contact may be caused by oxidized terminals, screws, or nuts. We clean all suspicious elements with sandpaper and check the contact again.
If wire breaks are detected, the break point must be securely connected. It is better not to twist the wires, but to use a small connector block. Inspect all wiring as repairs progress. If there are suspicious wires, terminals, semiconductor elements, they must either be replaced or insulated.
When installing or dismantling the semiconductor elements of the Malyutka washing machine with your own hands, do not forget to check its electrical circuit.
Quite often, the time relay fails at the Malyutka washing machine, as well as the switch. We do not recommend repairing them, it is better to replace them. First, remove the old switch along with the time relay.
- there is a small cap next to the switch, you need to turn it out;
- then unscrew the metal nut;
- remove the washer;
- push the switch into the case;
- disconnect from the wiring switch.
You can try cleaning the switch contacts and then wiping them with gasoline. In some cases it helps, but it is better to replace both the switch and the time relay. These parts cost a penny, but then there will be no problems with their performance.
The thermal relay can also fail. In working condition, the contacts of the thermal relay open "hot" and close "cold". Only the cold element is checked with an ohmmeter. A broken, faulty relay cannot be repaired; it is replaced with a new one with exactly the same technical characteristics.
It is much easier to change the electric motor to a similar new one, or, even better, to buy a new Malyutka washing machine. By the way, a new motor costs almost the same as a new machine, but just in case, let's say that a single-phase asynchronous engine with two windings is used in the Baby washer.
In order for the Malyutka washing machine to serve for a long time, and most importantly, it is safe for others, observe a number of simple rules that, in a certain scenario, will save the washing machine, and, which is very important, your life. These rules are simple and do not differ in anything remarkable, nevertheless, every second user neglects them.
- Do not try to heat water with a boiler directly in the washing tub of the machine.
- Do not place the washer on the ground, the bottom of an iron bathtub, or in general on any metal surface.
- If you disassemble the body of the washing machine, check that the gasket is properly filled and that the fasteners are evenly tightened.
By the way, if the seal has any damage, you need to change it and you don’t need to skimp in this case - this is your safety.
- If during washing you notice that there are suspicious odors, such as the smell of burning electrical wiring, immediately unplug the washing machine.
- If, after touching the body of the washing machine, you feel a strong or light tingling sensation, also turn off the machine, it needs repair.
The socket to which you connect the Malyutka washing machine must have protection in the form of a grounding and an automatic machine. You can read about how to correctly make a socket for a washing machine in the bathroom in the article of the same name posted on our website.
In conclusion, we note that the Malyutka washing machine was outdated already 20 years ago, nevertheless, it is still in demand. This car is cheap, so it is not profitable to call a foreman to fix it, and the foremen often do not undertake such repairs. There is only one way out - to carry out repairs with your own hands.How? We talked about this in detail in this article. Happy renovation!

