Quite often you have to remove the polish: this is not the most fashionable finish. Modern furniture is most often painted with opaque or tinted paints, and the surface is matte. In any case, the polish must be removed. There are several ways. Since varnishes are different in composition, they have to be selected empirically. But one of the methods should work.
Do-it-yourself furniture restoration often requires harsh measures: some types of polishing can only be scraped off with glass
If the old furniture was prepared for painting, it must be cleaned of dust, wiped with a damp cloth and allowed to dry. After that, level everything with putty, smooth out all irregularities, wait until it dries. Take sandpaper and sand again, first with medium, then fine grain. Next, apply a layer of primer and wait for it to dry.
Buy a primer for the paint you are going to use, or you can dilute the paint with a compatible solvent and cover it instead of a primer. After drying, you can paint.
You can paint with a roller or brush.Usually several coats are necessary: do not try to apply a lot of paint at once, as drips may appear. Better to apply several thin coats. This will make the surface even and uniform in color. Another trick: for uniform coloring, the layers are applied in different directions - along, then across. This also applies to the application of the varnish.
Some varnishes are easier to work with when they are warm. They are heated a little and then applied with a spray gun or brush. When warming up, you need to be careful: vapors may flare up.
In the order of staining: first, paint the inner surfaces, edges and joints, then move on to the outer ones. With this sequence, there is less chance of getting dirty or touching the already painted surface, ruining it.
If the varnish coating is even, without defects, and it needs to be painted over, you can do without removing this layer. There are special primers for difficult surfaces. Coat the surface with them, and paint after drying. They have components that even penetrate the varnish layer. Therefore, the paint will be well applied and hold for a long time. But such soils have a drawback: they are expensive. But they significantly save time.
Some secrets of wood coloring (including brushing and painting in two colors) are in the article "How to paint the lining". For a few secrets of even application of acrylic paint, see the video.
VIDEO
If the restoration did not bring the expected result, maybe you need to change the appearance? How to remake furniture in a new way is described here.
Veneered furniture requires a special approach. The means are basically the same, the methods are different. For example, if the veneer is swollen after being hit, you put PVA glue into a disposable syringe, pierce the bubble, and inject glue into the cavity. Put a piece of thick fabric on top and place the load. If the surface is uneven (convex or concave), use a bag of dense fabric with heated sand as a load.
Such damage to the veneer is restored in two stages. First, the swelling is eliminated, then the scratch is painted over and the coating is restored
If the veneer is glued with alcohol glue, you can return the swollen part to its place by ironing it through a rag with a hot iron. But do not overheat the iron: the veneer can stretch. The degree of heating is medium.
If ironing through a dry cloth does not work, try repeating the operation with a damp cloth (wet it and wring it out well). There is a chance that the wood will swell and become more elastic. For reliable fixation of the bulge, you can insert PVA there, and then heat it with an iron.
If the bulge is cracked, you can also try to seal it with heating (through a rag). If it doesn't work, tear off the peeled piece. Do not cut, but break off: on the veneer, the fractures after restoration are less noticeable than cuts. Therefore, you break off the lagging piece. From the place of damage and a piece of veneer, clean off the old glue (with sandpaper or a nail file - depending on the size). Further, the repair of veneer on furniture is standard: they smeared it with PVA glue, laid it down, aligning the fracture lines, laid a thick cloth on top and put the load to dry.
Such veneer flaking can most likely be eliminated simply by ironing it with an iron.
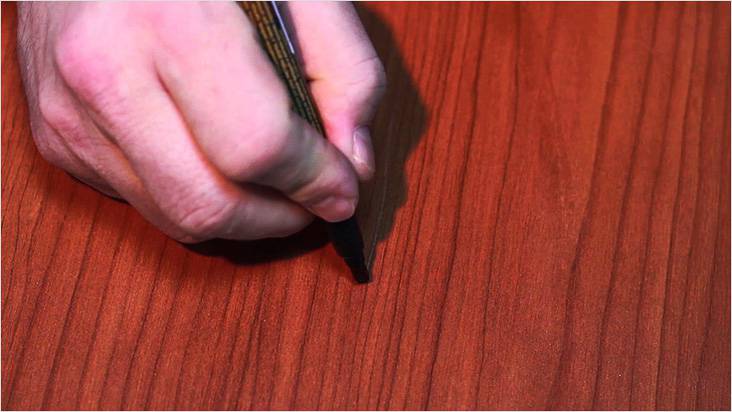
Scratches and traces of restoration on veneer are removed in the same way as on wood: they are painted over with a furniture marker of a suitable shade. If the scratch is deep, a little melted furniture wax is applied to it (with a spatula). After drying, the wax is ground, if necessary, using fine-grain sandpaper, but after such processing, the restored piece is covered with a layer of varnish.
Do-it-yourself furniture restoration requires patience and accuracy. We have to act gradually and methodically: smeared, wait for drying, leveled, smeared again, etc.Sometimes you have to try several methods: the damage is different, as are the materials used in the manufacture (glue, varnishes, etc.). But the furniture will look much better as a result.
No matter how carefully people handle the furnishings in their home, sooner or later the furniture will need to be repaired. This will help restore damaged parts and worn upholstery to its former beauty. To carry out the restoration yourself, you will have to try a little and do everything beautifully and efficiently.
Everyone understands that the repair and manufacture of furniture are complex processes, it is unlikely that it will be possible to fix large areas on your own, you will have to turn to professionals. But at the same time, small, but unpleasant defects can be tried to be corrected at home. Chips, minor scratches, scuffs and other misunderstandings that spoil the look of seemingly recently purchased things can really be corrected on your own.
Smooth paintwork is easily scratched. None of the household members usually can remember where they came from. People have come up with many ways to deal with furniture defects. Many of them are based on the use of scrap materials. The availability of renovation products makes it easy to keep the furniture in its original condition, and the choice of restoration method allows you to use the most convenient method. You can get rid of scratches on furniture using one of them.
Linseed oil and alcohol are mixed in equal proportions;
The mixture is impregnated with a tissue swab. They need to wipe the damaged part of the coating;
You will have to wait for the mixture to dry completely;
The final step is to polish the surface with a clean cloth.
There is an alternative method for removing small scratches from the surface of tables and chairs. To do this, you need to prepare a walnut and a jar of iodine:
The walnut must be cut into halves and wipe the damaged area of the furniture with them;
Iodine works the same way. It paints over minor damage and makes them less visible. A weak iodine solution is used. It is applied to the inside of the scratch with a toothpick or needle;
After processing, this place can be varnished.
Manufacturers of tools for repairing wooden furniture have long begun to produce special pencils that work similarly to walnuts or iodine. Using the tool, you can paint over the damaged part of the furniture. This method has one significant drawback: it will take a long time to select the desired shade of the pencil. After purchasing the right scratch repair tool, you no longer have to worry about new minor damage, it will take a couple of minutes to fix them.
If you need an expensive repair of Italian furniture, correction of significant damage to the surface or complex breakdowns of mechanisms, you will have to contact a special company that repairs furniture at home.
The repair process in this case should be carried out by professionals with extensive experience. They will repair the walls of the cabinets or change them to similar ones if repair is impossible, replace worn parts.
Some serious defects affecting the operational properties of furniture can be corrected on their own; local repairs will not cause difficulties for a neat person. Constant changes in temperature and air humidity inherent in every working kitchen cause cracks, table legs eventually deteriorate. The repair should be done as soon as possible, before the deformation becomes very noticeable:
Ordinary PVA glue is taken into a medical syringe, for better penetration of the substance, the needle is removed;
Putting the needle on a full syringe, carefully fill the crack with glue;
The part is tightly pressed with a clamp, the glue residues protruding from the crack are removed;
After a day, the clamp is removed and the repaired part of the furniture is varnished.This will extend the life of the furniture and protect it from further damage.
For kitchen facades, it is advisable to use furniture repair wax. The substance will help fix chips and cracks on the surface. For easy application, use wax crayons. Repair instructions with wax:
Selection of the required color. To repair chipboard furniture, purchase a wax crayon of a suitable shade in specialized stores. If the store does not have the desired color, then mix adjacent shades. To do this, you will have to take shavings from two pencils, mix and melt in a metal bowl. By choosing proportions, achieve the desired shade. After that, minor furniture repairs will not be difficult;
To repair chipboard furniture with your own hands, you need to clean the surface. This is done using sandpaper and a blade to gently cut away loose pieces;
When applying a pencil to furniture, you will have to melt it, but not with an open flame. The beeswax, which is part of the composition, is to blame, the pencil will simply light up. A heated metal object is used for melting. A knife is perfect for this. It is heated over a flame and the pencil is melted, after which they continue to repair the veneer on the furniture;
A chip or crack with a slight excess is filled with molten wax;
After the composition has dried, its excess is removed with a blade;
Wait until the mixture is completely dry and polish the surface;
The polished surfaces are varnished to secure repairs and extend the life of the furniture.
Repairs are easy enough, but repaired chipboard furniture must still be protected from further damage. To prevent them, cover the furniture during repairs with plastic foil and secure it with tape. This prevents stains and dust from penetrating the furniture surface.
Moving elements are more prone to breakage than other parts. The metal part of the mechanism may become unusable and require replacement. Missing repair parts can be purchased at the furniture store. To repair furniture with your own hands, you need to understand what has become unusable, decide whether the mechanism can be repaired or whether it will have to be completely replaced. On your own, you can perform small repairs and replacement of some elements:
Each type of mechanism has its own repair algorithm; before starting work, it is necessary to determine it, carry out diagnostics and repairs according to the instructions. Video master classes are available on the Internet. In any case, you need:
Dismantle the mechanism;
Disassemble into constituent elements;
Identify the broken part;
Replace;
Assemble the mechanism back and install.
To prevent minor repairs to furniture or windows, simply grease the moving parts. Lubricating the hinges will reduce friction and hence wear on the mechanisms. In addition to eliminating the unpleasant squeak, this preventive measure will significantly increase the life of the metal part. Thanks to the film on the surface of the part, the risk of rusting is reduced.
If you look at the chairs in concert halls, you will notice their perfect condition: the upholstery looks like new, despite the constant stress. Upholstery of upholstered furniture is its most important part. It is the upholstery that has an incredible load that makes it unusable. Over time, scuffs appear, torn parts of the fabric, soft filler crumples.
To restore the upholstery, you will need a modest set of items. Furniture repair supplies include a furniture stapler and new fabric.
The easiest way to update the chair cover is:
First of all, you will have to disassemble the chair and separate the old fabric from the seat;
After making accurate measurements of the seat, you can go to the store for fabric. The size of the canvas should be approximately 20 cm larger than the size of the seat in all dimensions.If you change the upholstery on all chairs, you can choose a completely new color that matches the interior of the room. Choose a strong and durable fabric. In addition to upholstery, you will have to buy a soft filler, for example, a synthetic winterizer;
The soft part is cut along the contour of the seat with a margin of a couple of centimeters;
The synthetic winterizer is placed on the seat and covered with a cloth; it is attached with a stapler to the back of the seat;
After fastening, close the wrong part of the upholstery with another piece of the same fabric. And collect the chair.
Furniture stains are the most common defect. They can appear on soft surfaces or MDF panels. Most modern furniture is made from this material, so every owner should know how to clean stains. Stains can be of different origins, each stain has its own method of removal:
Fresh greasy stains can be easily washed off with a cotton pad soaked in a solution of water and liquid soap. Remaining moisture should be wiped off with a dry cloth. Do not use a large amount of water, the particle board is afraid of moisture and may swell;
If the stain is already ingrained, then remove it with alcohol or acetone. A napkin soaked in it is briefly applied to the dirt after applying the soap solution. Immediately after this, wipe the damaged area with a dry cloth;
Remove stains from varnish and paint from furniture by applying a cotton pad with acetone. It should not be left on the surface for a long time to avoid major damage;
Stains left on the surface by hot objects are removed with vodka and sunflower oil. The mixture is applied to the stain, after which it is removed, and the surface is wiped off with a cloth. When the folk method does not help, you can resort to pencils for the laminated surface.
Removal of stains from textile surfaces is carried out immediately after they appear, until they are ingrained and can be easily removed.
The furniture should be vacuumed;
Before starting work, all cleaning agents must be tested on an inconspicuous part of the upholstery. Wipe the dirt with a napkin moistened with vinegar;
The stain must be wiped off with a napkin or cotton pad soaked in soap solution. You can wait until it is absorbed and starts working on removing the stain. It is not allowed to use a large amount of water, it is better to wet only the surface layer;
It is necessary to dry the upholstery without the use of special devices; to speed up the process, windows are opened and a draft is created.
In many homes, furniture is covered with bedspreads to prevent stains. It really helps when solid contaminants get on the surface, but when it comes to stains left by liquid substances, then only removing the stains already formed can help. To make it easier, they begin to fight pollution as soon as possible.
For an experienced master, restoration of kitchen facades will not take a lot of effort and money, and a non-professional will be able to do such a job if he gets acquainted with useful tips.
The facade is called the front part of the kitchen set, in particular, the front side of its doors, drawer lids. For its manufacture is used:
natural wood;
chipboard (chipboard);
medium density fibreboard (MDF);
plastic.
As a finishing of the front surface, special dyes, glass, metal, and self-adhesive films are used. Sometimes these materials are combined with each other, for example, when creating stained glass windows.
In most cases, the restoration of the facades of kitchen furniture becomes necessary after its long-term use. Drops of fat, particles of food residues, vegetable dyes leave traces that cannot be removed with household products.
In order not to buy other furniture, since the existing one remains in a technically sound condition, many owners prefer to update the facade.This repair work can be done even by an amateur, since it does not require special skills and special qualifications.
If the elements of the front part are intact, have no damage and large holes, adhere well to the mountings, you can perform simple operations:
cover the surface with self-adhesive films;
paint in a different color;
to glue the facade using decoupage technique.
These options can be applied to furniture made from any material. Everything you need is sold in hardware stores.
The easiest way to update the front side of a kitchen set is to cover the facades with self-adhesive foil. It is better to choose a material with a glossy surface. It is easier to wash, grease and dust will not adhere to the surface.
With the help of the film, we restore as follows:
the removed parts of the facade are washed with a product and dried;
the film is cut into pieces 1-2 cm larger than the plane of each part.
having glued its edge, we fix it, gradually unwinding along the length.
To make it easier to disperse the bubbles, the surface of the facade is lightly sprayed with cold water. The excess film is cut off with a clerical knife.
VIDEO
Another option for the restoration of facades is staining. Anyone can do this work with their own hands in the following sequence:
remove handles, hinges and fittings;
wash, dry and degrease removed parts;
primed the surface of the facade depending on the type of paint, pre-cleaning especially damaged areas with fine emery;
dry and apply the paint with a roller on a flat surface, with a brush on an embossed surface.
The paint is allowed to dry, after which the furniture is assembled.
VIDEO
The restoration of the kitchen facade using decoupage technique has become popular. To do this, use wrapping paper, patterned napkins, waterproof glue. Doors and drawers are removed, cleaned, dried. A layer of glue is applied to the old coating, paper cut into parts, cut patterns, flowers, drawings or parts thereof are applied on top.
VIDEO
Old postcards, wall calendars can be used to cover. To give the facade surface an aged look, the application is dried with a hairdryer. This creates fine wrinkles. To protect against moisture, decoupage is covered with transparent varnish in several layers.
If the surface of the film for facades made of MDF requires replacement, this task can be dealt with without resorting to the services of hired specialists.
Problems can be as follows:
the coating begins to peel off the edge;
there is a swelling of the film;
the surface is damaged.
If the film comes off, what is being done: by removing the door and unscrewing the handles, hinges and locking fittings, the facade is placed on a flat surface. If a corner or a small strip comes off, it is recommended to heat the coating and glue the film with strong smoothing movements. To fix it, a flat plate and a weight are placed on top.
For heating, use a household hair dryer or iron (when using it, put a cloth or Teflon film). If the furniture is not old, you can level it with your hands, heating the adhesive composition during friction.
If the factory glue does not hold the surfaces, quick-drying "Super-Moment" or universal polymer glue is used for fixing. The work is guided by the instructions for use of the product.
To repair the film facade, which has a swollen coating, you will have to cut the bubble with a clerical knife into 4 parts crosswise. Sometimes the reason is dust or debris trapped under the film during the manufacture of furniture. It is necessary to thoroughly clean everything inside from foreign objects, apply glue and press. Depending on the type of glue, MDF doors are kept under load from several hours to several days.
If damage occurs (holes, cracks, traces of fire), you need to completely renew the coating. Handles, hinges and other accessories are removed from the part, cleaned and dried, after which the film is glued.The desired color and texture will help you choose in a furniture company or a specialized store, the main thing is to show a sample.
Good to know! Most often, the film peels off near heat sources (stove, oven, radiators) and water (sink).
The monolithic elements of the furniture sets, made of solid natural wood, are restored by repainting the facades.
For the kitchen, it is better to choose enamel rather than paint. The first has a higher degree of abrasion resistance, less fading.
Acrylic enamels are water-based. Having chosen to paint kitchen wooden facades with this material, it is recommended to apply a protective layer of transparent varnish on top. Alkyd enamels do not need such protection.
Painting facades in the kitchen is a popular method because it is not expensive and takes little time. Most often, a different color is simply applied over the old, washed and degreased layer.
VIDEO
In case of large damage (deep scratches, holes, traces of fire), it is necessary to prepare the surface from natural wood. Old paint is removed using chemicals (washes) or heating with a hair dryer. After that, the wood is cleaned with fine emery cloth. Deep damage must be putty with a special putty for wood. To make the composition better adhere, cracks and cracks are cleaned of dust and debris.
The putty is applied with a plastic spatula, pressing it so that it fills the entire space. Otherwise, it will sag, depressions will appear.
The next step in recoating is the application of a primer. It will create better adhesion of the base to the paint, play the role of a protective layer, and extend the service life of the product.
The last step is staining. It is made with a paint roller or brushes of different widths. Thin embossed details are processed with narrow ones (they are painted first of all), with wide ones - panels and other planes. For best results, it is recommended to apply several coats of paint.
Another way to restore the kitchen facade with your own hands is varnishing. This method allows you to show the beauty of the texture of different breeds, gives the furniture an expensive and representative look.
In order for the surface to sparkle with gloss, it is pre-prepared. All fittings are removed, after which the paint from the facade or the old varnish is removed. The tree is cleaned with emery, first coarse, then fine.
The existing cracks in the kitchen facades are sealed with putty, which is matched to the color of the wood. For more similarity, colored pigments are sometimes added to it. The putty must be dried before varnishing the facade.
levels the surface;
creates a protective layer;
enhances the texture of the original material.
The peculiarity of working with varnishes is that it is applied in several layers. The first layer is made basic, allowed to dry, and then the next one is applied. The last layer is made the thinnest, most transparent. It gives the façade a glossy sheen and enhances the depth of the design.
The varnish must be allowed to dry before hanging the doors in place. Drying it with a hair dryer is not recommended. Characteristic ripples may appear. It will ruin the look.
Well, who among us would refuse to have completely wooden furniture at home? It is elegant, reliable, but expensive, and it is because of this that we are forced to purchase furniture made of chipboard, which is more susceptible to damage. But even these defects can be eliminated, even if repairing chipboard furniture with your own hands seems to be a difficult process. Now we will prove to you that you can cope with such work on your own.
Let's describe the accidental damage to furniture made of chipboard, which may well be successfully eliminated with minimal effort:
The most commonly used soft and hard wax, special retouching, as well as tint felt-tip pens or markers, PVA glue, furniture stroke, laminating edge:
Soft wax differs from hard wax in that in its original form it is immediately ready for use, that is, it does not need to be melted. But at the same time, it can be used exclusively on surfaces that have not been subject to mechanical stress.
It is much more convenient to use soft wax, but hard wax is safer.
The stroke is used to putty small damages, such as scratches, small chips, abrasions. It must be applied to the surface, wait until it dries slightly, and then sanded with a felt cloth.
The laminating edges must be glued to the already worn end surface, having previously removed and sanded the old edge.
The edge is placed on the end and passed over it with a pre-heated iron, due to which it is glued.
back to content ↑
Chips, as a rule, appear in the corners and are small depressions of a light color.Therefore, it is necessary to repair chips on chipboard furniture with your own hands.
In order to repair such defects, you will need:
retouching felt-tip pen or ordinary, suitable color;
hard wax;
lighter or wax melter;
spatula or chisel;
fixing spray varnish;
felt fabric.
The liquidation process consists of several successive stages.
Work the chip with a chisel so that the edges are straight.
Melt hard wax of a suitable color with a wax melter or a lighter and apply it directly to the chip with a certain margin.
When the wax is dry, use a chisel to work through each plane, carefully cutting off any excess wax. Form a clear right angle of the chipboard surface, sand lightly with a felt cloth.
Enough with a thin retouching felt-tip pen to apply lines along the chip, in accordance with the general texture, wiping with a paper napkin each time, in order to smear the clear boundaries of the lines quite a bit and for greater believability.
In order to fix the seal and give the restored surface a characteristic shine, it is necessary to apply a varnish-spray treatment.
Especially often, such damage is found during the repair of children's rooms. In order to eliminate scratches, you will need all the same tools for repairing chipboard furniture that are used for sealing chips. Only now it will be more convenient to use soft wax instead of hard wax.
How to eliminate scratches - work sequence:
Using a spatula, apply the wax crosswise to the scratch while leveling and compacting it.
Use a thin retouching felt-tip pen to paint in the missing texture.
Apply a fixing varnish to fix the embedments and even out the gloss level of the surface.
Important! If wax is not available, you can use special furniture strokes to seal cracks.
Scuffs, like scratches, quite often occur on laminated chipboards due to frequent contact of foreign objects with the surface. For example, you can find them during renovations in the hallway or kitchen.
As a result, the top layer of protection and partially or completely the layer of paint are erased. In order to eliminate the abrasion that has already appeared, you must do a few simple and uncomplicated manipulations:
Pull a microfiber cloth over your finger and moisten it with a suitable colored felt tip pen.
Touch up the scuff with a napkin by rubbing along the surface structure.
Apply the fixing varnish in several small coats.
back to content ↑
Cracks on furniture made of chipboard are often formed under the influence of moisture, heat, or improper operation in the place where the cabinet doors are attached.
To repair cabinet furniture, you will need:
clamps, they are also adjustable clamps;
PVA glue;
syringe with a needle.
The procedure for repairing chipboard furniture with your own hands in this case will be as follows:
In a syringe without a needle for the easiest and most rapid penetration, take PVA glue and put on the needle.
Use a syringe to fill the entire interior of the crack with glue.
Place a clamp on the stove on both sides of the crack, and then pull it off.
Remove excess glue with a napkin, leave in this position for about a day.
After the drying time of the glue has expired, the part will be ready for use again.
back to content ↑
VIDEO
VIDEO
VIDEO
VIDEO
VIDEO
VIDEO
VIDEO
As you can see, in order to repair chipboard furniture with your own hands, in some situations you don't even need special carpentry tools and skills to work with them. Even a housewife can cope with such a task, if desired. Therefore, do not rush to get rid of practical and comfortable interior items, if they are still subject to restoration, because they are expensive today!

