In detail: do-it-yourself mechanical watch repair guide for a beginner from a real master for the site my.housecope.com.
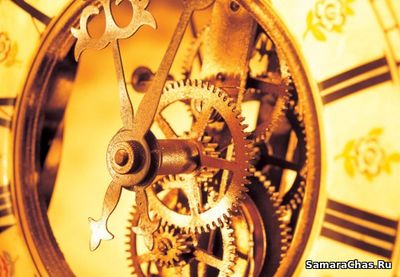
Let's say you have a watch in your hands. It could be the watch of your grandfather, friend, acquaintance, or even your own watch that you forgot a long time ago. They once stopped and stopped showing the time. In search of the necessary tools, you turned the apartment upside down and, with the help of available tools, managed to open them.
But is it worth the rush? Perhaps this watch can still be repaired.
If you are a beginner and have never dealt with the repair of a watch movement before, then you should familiarize yourself with a few rules that any watchmaker adheres to. 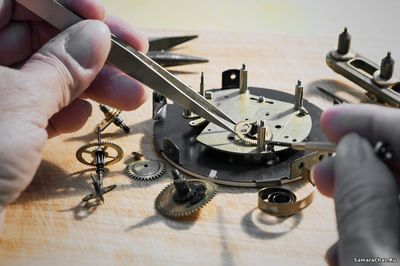
1. The clockwork is the most complex "organism" in which all its elements work as a single whole. Therefore, watch repair must be careful and careful. You must understand how they work, because some parts of the watch mechanism are so small that it will not be difficult to damage them.
2. Remember that proper specialized tools are required to gently remove the machine components. Otherwise, your repair will lead to an inversely proportional result.
It is also worth noting that even if in some miraculous way these tools are at your fingertips, but you do not have the slightest idea about the mechanism of the watch, they will not help you. If you are not confident in your abilities and do not have sufficient experience, it is better to give your watch to the workshop. They will be properly repaired by professionals in their field.
3. Watch mechanisms of the times of the Soviet Union in terms of the complexity of repair are not inferior to their more eminent and expensive counterparts from Switzerland.
4. Like most other movements, the watch needs lubrication. They won't work without it. Remember that by the word lubricant we mean a specialized substance designed specifically for watch movements, and not petroleum jelly or, even better, sunflower oil. The last two options are not even suitable as a temporary solution to the problem. The lubricant should be applied to the parts of the mechanism that require it, with exact observance of the quantitative proportions of the substance. If you think that the watchmaker, when carrying out repairs, abundantly waters the entire mechanism from a huge oiler, then you are greatly mistaken. 
| Video (click to play). |
5. If for some reason you still do not want to give your watch to a professional workshop and cannot get rid of the desire to carry out the appropriate repairs yourself by purchasing specialized tools, know that a watch set for 600 rubles, which can be bought on most Internet stores won't be enough. This is a waste of money. A high-quality watch tool is expensive, and purchasing it for a one-time repair is not the most rational act.
6. Before starting work, read the relevant literature. For a beginner, we recommend the book "Construction and assembly technology of mechanical watches" by S.М. Tagirova. It is distinguished by the clarity and utmost brevity of the material presented in it. After reading it, most of your questions will be answered. Agree, there is nothing worse than a beginner who does not even understand the basics of the business that he decided to take on, and even showered you with constant questions: "what, but how?".
7. Remember - do not touch the components of the clockwork with your hands.For these purposes, you must use tweezers, gloves, fingertips or, at worst, a toothpick.
8. Are you going to make watch repair your hobby? Be prepared for high financial costs.
Entry-level watch tools, designed primarily for assembling watches, cost about ten thousand rubles, for minimal repairs - from one hundred thousand. In any case, you won't be able to buy everything at once. Assembling a complete set of tools can take a lifetime. The same rule applies to repair training. 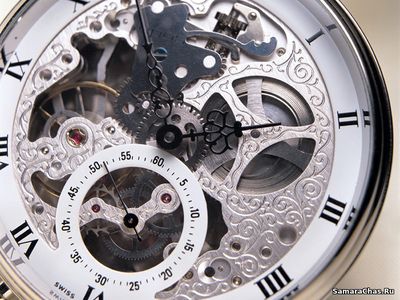
Patience is an essential character trait of any watchmaker. Without him, in this case, nowhere. First of all, you should honestly answer to yourself one simple question: "Do you need all this?"
Let's assume that you have nevertheless acquired the necessary tools and equipped your workspace. Where to begin? Do not know? We will give you a hint.
Determine the breakdown or malfunction of the clock mechanism, which led to its malfunctioning or stopping. In 80% of cases, this is dirt and dried grease on the parts of the mechanism. This kind of malfunction of the mechanism can be determined by eye. Their main features are black tribes and dried oilers. The solution to this problem is to disassemble the clockwork, clean all its parts from dirt and lubricate.
Remember the patience we described above? Well, it is at such moments that you need it. Haste is your greatest enemy.
The most important part of this craft that you will need to learn is the disassembly and assembly of the watch mechanism. Old, irreparable watches are suitable for training - this is the best option. You are not immune from mistakes, like any other person, and with such training, they cannot be avoided. We consider the Slava alarm clock to be the most optimal option for learning. Its movement is similar to most mechanical wristwatches, and the details are not so small.
Let's look at it using the example of the above-mentioned alarm clock. 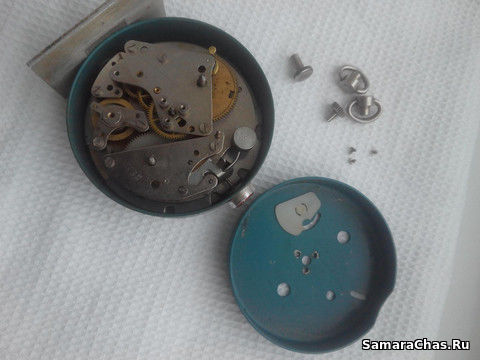
The first is to remove the back cover. Unscrew the factory keys, remove the buttons for shifting the hour hands, and then unscrew the fastening screws. In wristwatches, the back cover of the watch can be attached to their case, either with screws or with the help of special latches.
The second is to remove the mechanism. Look carefully and study the method by which the fastener was carried out. Unscrew the fixing screws. If you have a wristwatch in your hands, before removing the mechanism, take out the winding shaft, putting it in the eyeliner mode, and slightly press down on the suppressor, then take it out. At the end of the procedure for removing the mechanism, the winding shaft must be reinstalled.
The third is to remove the hands and dial. The first ones are removed quite easily - you just need to pry them slightly. To do this, use corners (tweezers, nippers). Thanks to this tool, you can avoid the appearance of mechanical damage (scratches, microcracks), both on the hands and on the dial. In cases where the watch model that you are repairing is not equipped with a calendar or chiming, it is possible to remove the dial, hour wheel and hands as a whole. Loosen all fixing screws carefully. In most cases, they are located on the front side of the mechanism opposite each other. All actions related to disassembly and assembly must be performed on a specialized stand that prevents dust from entering your workspace from the rest of the surface on which the stand is installed.
The fourth is the release of the spring. We apologize for the professional slang. Descent is a weakening of the spring winding. Take tweezers in your hand, the other - wind the spring by half a turn and in this state, use tweezers to move the dog. After that, slowly, without sudden movements, begin to release the winding shaft and wait for the moment when the spring is fully unwound.
Fifth - removing the balance bridge. Unscrew the fixing screws.Next, pry the bridge with tweezers and carefully, lifting it together with the balance, remove it from the clockwork. Be careful. Do not allow the balance spring to cling to the wheels. Remember that if you put the bridge down with a balance, you can damage the axle. Don't let this happen.
Sixth - removal of the anchor fork bridge. Unscrew the fixing screws. Next, remove the bridge, and then remove the plug itself.
Seventh - removing the spring bridge. This operation is performed in a similar way to the sixth stage.
Eighth - removal of the axle of the wheel system. First, remove the minute tribe located on the center wheel. If you practice with the alarm clock, which we talked about a little above, then you do not need to shoot the minute tribbe. In addition, it should be noted that in the mechanism of this alarm clock, the axles of the wheel system and the springs are one whole. After you unscrew the mounting screws and remove the axle, take out the wheels. Take your time and take out the wheels one at a time - this will allow you to avoid damaging adjacent wheels.
That's all. You have disassembled your first movement. However, it still needs to be collected. To do this, follow all the same steps in reverse order.
The first time is the most difficult. Therefore, we advise you not to try to piece everything together from memory. This will come later - with experience. It is best to run your eyes along the sequence described by us, only in reverse order and, only after that, perform the appropriate action. This way you can quickly and efficiently assemble your first movement, which has just been safely disassembled.
Good luck in your endeavors!
After writing this article, we have a new one, we invite you to get acquainted:
How to repair a mechanical wristwatch yourself. Instructions for beginners. 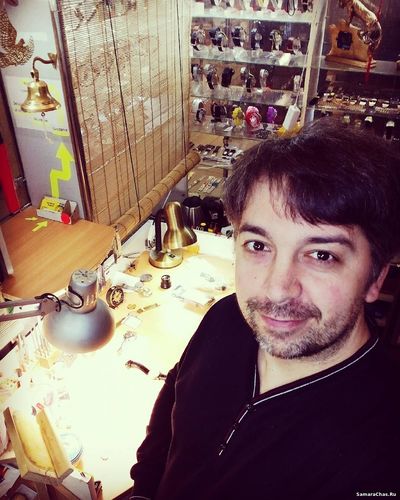
Friends, if you have any questions, as far as possible, I will try to answer everyone. Write, call and come by contact information,
posted here (link CONTACTS AIRCRAFT shopping center)
We kindly ask you to pay attention that our workshop is located in Samara.
We hope that after reading this article, you have discovered something new and interesting for yourself.
And remember, if you are the owner of one of the watches that we talk about on our website and feel that they need repairs or maintenance, or you just want to get professional advice from highly qualified watchmakers in the city of Samara, feel free to contact us.
Our experts will help you
to repair the following types of watches for you:
- old mechanical (the possibility of repair is determined by the master at the time of inspection);
- wall-mounted (the possibility of repair is determined by the master at the time of inspection);
- floor;
- desktop;
- Pocket;
- wrist;
- and even electronic-mechanical and quartz.
We will be sincerely glad for all your thoughts that you leave in the comments under this article.

99 Please wait for your turn, we are preparing your download link.
The download starts. If the download does not start automatically, please click on this link.
Description and summary of “Do-it-yourself watch repair. A beginner's guide ”read for free online.
"OWN HAND REPAIR OF WATCHES"
A beginner's guide
Watchmaking devices can be classified in different ways: according to the principle of operation, according to the structure of the oscillatory system, and finally, according to their purpose.
According to the principle of operation, watch movements can be mechanical, electronic-mechanical or electronic. The oscillatory systems used in the watch device (balance, pendulum, quartz generator, tuning fork, etc.) depend on the way of use and purpose of the watch. So, for example, a pendulum clock can only work if the pendulum is suspended vertically, that is, the clock must be stationary.This is a floor clock, wall clock or (in rare cases) table clock. The balance oscillatory system, in contrast to the pendulum one, is not afraid of movement of the mechanism, therefore it is used mainly in wrist or pocket watches.
Mechanical watches, in addition, can be subdivided according to the type of motor used: kettlebell or spring. The simplest in design is a wall pendulum clock with a kettlebell motor, such as a cuckoo clock.
Mechanical watches, in addition to the main mechanism, can also have various additional devices. For example, in an oversized watch, it can be a battle, a calendar or signaling device; in wristwatches - automatic spring winding, stopwatch, signaling or calendar device, etc.
Electromechanical clocks can be either wrist or stationary (table or wall). Electronic and electronic-mechanical watches can also be equipped with additional devices.
The book is mainly devoted to the repair of the most common watches - wristwatches and alarm clocks.
The main components of the clockwork
In mechanical watches, these are: the engine, the main wheel system, the oscillating system or regulator, the escapement or stroke, the pointer mechanism, the mechanism for winding the spring and shifting the hands.
The watch is powered by the engine.
It can be spring or kettlebell. A running engine stores energy, and then transfers it to the regulator and the switch mechanism through the wheel system. The main wheel system consists of toothed wheels (second, intermediate, central) that transmit energy from the engine through the escapement to the regulator and switch mechanism. The regulator controls the unwinding of the spring (or the opening of the weight). The escapement, which is an intermediate unit, periodically releases the gear train in the wheel system and transfers the spring energy to the regulator. The pointer mechanism consists of a system of toothed wheels (transfer, bill, watch) and transfers movement to the arrows from the main wheel system.
The mechanism for winding the spring and shifting the hands consists of a winding shaft, a drum and winding wheel and a system of levers. The base of the movement is platinum, one of the sides of which is called the pavement, and the other - the dial. On the bridge side there are: the engine, the main wheel system (or angrenage), the escape wheel, the escapement fork, the balance-spring, the automatic winding mechanism for watches with such a system, and on the dial - the arrow mechanism, the mechanism for winding the spring and shifting the hands and the calendar mechanism if provided.
The principle of the clockwork
The crown is screwed onto the winding shaft.
When the crown rotates, that is, when the watch is wound, the shaft also rotates, transmitting the movement to the winding wheel and then to the drum wheel put on the drum shaft. The inner coil of the mainspring is attached to it, and when the wheel rotates, the spring is wound onto the shaft. When the wound spring begins to unwind, the rotation of the drum is transmitted to the central wheel. The central wheel, in turn, rotates the intermediate wheel, and it is the second wheel, which drives the second hand. Then, from the second wheel, the movement is transmitted to the escape wheel, which maintains the balance oscillations. Finally, through the bill wheel, the movement is transmitted to the hour wheel with an hour hand.
To repair watches at home, you will need: a magnifying glass, several screwdrivers with a blade diameter of 0.6 to 2 mm, 2-3 tweezers, a set of keys, pliers, wire cutters, files, a needle, a knife, a vernier caliper, cleaning and lubrication tools ( oiler, brushes, rubber bulb, etc.). Gasoline for lubrication can be poured into an ordinary teacup, only you need to tightly close it. You can use old toothbrushes as part brushes.
Chapter 1. Repair of mechanical watches
Since quite often the reason for stopping a watch is the movement of dirt, drying out of oil, penetration of moisture into the watch case, etc., sometimes it is enough to simply disassemble the watch, while washing or lubricating its mechanism. Before disassembling the watch, study the attached diagram (fig. 1).
Rice. one. Kinematic and schematic diagram of the watch mechanism:
5 and 6 — overhead and impulse galoshes;
8 - restrictive pins;
11 and 12 — entry and exit flights;
15 and 16 - pins of the adjusting thermometer;
19 - tribe of the escape wheel;
21 - tribe of the second wheel;
24 - intermediate wheel tribe;
26 - tribe of the central wheel;
39 - spring of the transfer lever (latch);
41 - spring of the winding lever;
42 and 43 - transfer wheels;
45 - tribe of the bill wheel;
49 - minute hand tribe (minute)
Disassembly is carried out in the following sequence:
- Remove the back cover of the case (the most convenient way is to pick it up with a knife; some covers can be unscrewed). As a rule, faults such as a broken spring, broken or bent wheels, loose screws are visible immediately.
- If at a cursory inspection everything looks whole, you should remove the mechanism from the case. To do this, you first need to lower the mainspring; This is done in the following way: the crown is pulled back to the extreme position (the moment of the winding) and is held by tweezers, while the crown at this time gently rotates with the fingers. Then the winding shaft is removed. To do this, it is necessary to set it to the position of transferring the arrows and loosen the screw of the transfer lever. Then the mechanism is removed from the case and the winding shaft is put back in place. In some models, the watch case is designed in such a way that the mechanism can be pulled out without removing the winding shaft.
- Check the rotation of the central wheel with tweezers (whether it moves freely and does not come into contact with surrounding parts). Also check the drum, spiral, balance for contact.
- Remove arrows, release and remove dial.
First remove the second hand, then the minute hand (most conveniently with tweezers). Then remove the dial with the hour wheel and hour hand. Check the condition of its legs. Inspect the switch mechanism, check the bill and clock wheels, check the adhesion of the switch mechanism wheels (for this, turning them in the forward and reverse directions). Check if the shifting and winding levers are correctly locked.
- Remove the balance bridge with the balance assembly from the plate. Unscrew the screw of the spiral column by 1.5–2 turns, separate the balance assembly from the bridge. Having removed the balance from the mechanism, you must not let it hang at the end of the spiral.
- Remove the anchor bridge and the anchor itself (the mainspring must be fully deflated).
- Remove the central, intermediate, second and escapement wheels. Check their position on the axle and the adhesion between each wheel and the corresponding gear, inspect the teeth.
- Remove the drum from the platinum, open it and check the condition of the mainspring.
Where to begin. Some notes from Bogdan J.
This is purely the experience of an amateur who has never been a professional watchmaker. Accordingly, all this is suitable for the amateur. A professional is dear to the school. They will teach everything there.
Start with Pinkin. Or from Troyanovsky. In general, there are books on the topic of clock repair. Download and print. Okay, there is no Internet - everyone will do it for you in any Internet cafe. You must have a book. It can get expensive, but it's worth it. This book is a guide for the layperson who should be able to understand at least something from this book. Almost our case. I have never done anything like that - and here it was.
Let's make some additions with the amendment for today for those who are pinned.
Screwdrivers. Start simple.
Chinese. I use it. I sharpen it. As for Chinese screwdrivers - look where on the streets watch batteries are changed and batteries and watch straps are sold.Or in the most ordinary households. A set of screwdrivers for small jobs.
You take a screwdriver. If it turns out to be too soft and bends when trying to unscrew something, put a candle next to the screwdriver. You heat the blade of a screwdriver and quickly into wax. This is hardening. Then you take a small stone and sharpen it along Pinkin.
More cool - in a machine on a diamond disc. But it will be later. When the tool and machines appear. Stones are well suited for finishing.
Tweezers (for starters - medical eye tweezers will do).
An alternative is to get acquainted with a radio bazaar (if Moscow - it seems Gorbushka - where they sell radio components, radio stations and computer gadgets) - see the boxes where the instrument is sold. You will be greatly surprised by the abundance. Good tools are surprisingly expensive. Tweezers shapes - see Pinkin. I'm not talking about big watch shops. They would rather be beaten than sold at a normal price. They do not want to breed competitors. And if they do, the prices are simply unrealistic. Doesn't fit into any gate.
There is also a radio bazaar - Galosha gasoline. Wash. It is much drier than kerosene and white spirit.
You take sticks (like Chinese) - finger length - to taste. You stick fishing steel 3-4 cm long into the end - it can be thicker and thinner. 0.1 - 0.15 mm. This is for the fishermen. One meter is enough for 10 years of work.
The very tip with one blow of a hammer (through a punch or a hard piece of iron) is splashed on a hard anvil. You get a little spatula. You make 3-4 of these with different blade sizes and different steel diameters. This will replace butter dosing. As anvils, I use either a roller made of a large bearing or carbide plates for a lathe - your way to the flea market or to friends in the workshop.
In approximately the same way - they will come in handy for a start - sticks with ordinary sewing needles - while the hands are frightened and there are no good tweezers - to expose the details (gears in stones, screws, etc.) is an auxiliary tool.
Surgical clamps. Different. Very handy as small and strong pliers. They are usually bought on occasion at a flea market.
Dental spatulas. It is convenient to use in all cases as an auxiliary tool.
Enema. Rubber. From the pharmacy. Big. Blow off dust. The tip must be rubber.
Butter. Or in the workshop (if they don't beat you, although they usually look like rams and pretend that they don't understand what you are talking about at all and are trying to get you off as quickly as possible). Or maybe at a radio store - in the same place where solder and acid are sold. Oil MN-30, MN-45 or watch oil. Although it is not aerobatics, it will go for a start.
It is better to keep it in a dark heavy box - and the sun will not burn and there is less chance that it will turn over.
To open the cases - a large, broken medical tweezers. It is clear that this is not kosher - but it is also possible. Likewise - an old caliper. You just need to correct the edges of the jaws - so that they are more rectangular.
Scalpel - opening of enclosures.
Binocular loupe. It is relatively inexpensive, but without it it is better not even to start. Or photographic goods (classic - where telescopes and binoculars are sold) or a radio bazaar. There are different strengths. If you have money, take two. One is 1.5 times, one is the strongest one sold - it seems up to 2.5 times. They can be sold with an elastic band - you will have to redo them to fit a hard bezel. You can go and talk to the optics workshop - glasses. Maybe they will offer something like pince-nez. Regarding ordinary magnifiers - to my taste - I rarely use them. It turned out to be extremely useful for cutting off the baby's nails - they were not visible at all for the first six months, but it was necessary to cut them off.
Binocular - microscope. Yes. Old. Look. The oldest is MBS-1. It is with a straight image - not upside down - which is what we see. It should cost within $ 50. A very useful thing. In every way. Up to the point that you rip the scrap out of your finger.But this is on occasion and over time. MBS-10 or OGMZ is steeper - the distance from the object to the eyepiece is greater, it is clear that it is more expensive. But all the same, an ordinary screwdriver does not fit under the MBS-10 - it must be shortened. Although on the Site of the Lytkarinsky plant - the manufacturer of MBS-10, there is a link that they sell lenses for MBS-10 with a distance to the object - about 19 cm.This can be a good solution if we got MBS-10. Everything between MBS-1 and MBS-9 is the same. Over time, the lens can be altered by yourself. You take what is cheaper. It's closer to the flea market. The only thing is that it is desirable that there is an illuminator (transformer + light bulb).
All that is further from the instrument - only after evisceration for 4-5 hours.
Where to get a watch - make yourself a fashion to be at a flea market - everything floats there. Often they simply sell mechanisms there. For instance:
When you warm up a little - after buying a binocular microscope - there is also a radio bazaar, shops with tools - they usually sell ultrasonic cleaners. But here is also the question - is it necessary. 50 years before that they did not use them - they took a bath and washed the parts with a brush in gasoline. You can do it, but the weight is not bad. Should cost in the range of $ 50-80. Denatured alcohol and Galosha gasoline were poured into an ultrasound of 30 watts. Working. Does not flash. Washes like a beast, but all the same, sometimes you have to rip something off with a toothpick. At the bazaar, they say that 30-watt sinks - indestructible - work without problems and there is no return due to marriage. If the model is the same as in the figure - what should be done after purchase - disassemble completely (there may be moisture inside, one of the indicators is stylish clicks when working against a background of uniform sound), squeeze the metal tank out of the case and put it back on the Auto Sealant (white , ours, not on transparent silicone). Plumbing does not work - it is highly corrosive. One of the indicators of plumbing is a strong vinegar smell.
Yes, I forgot, a flea market - look for Petri dishes - or maybe in a pharmacy or in a laboratory at a hospital. But you are not their client - there is an expensive flea market - this is the very thing. These are flat round glass or plastic low trays - for details. They are cheap. Take 5 pieces for the current dismantling works. I like glass more - they are heavier, fidget less on the table.
Then, for convenience, in the offices that make business cards, you can sometimes roll up and buy boxes for business cards. Wholesale will cost within $ 0.30 pcs. Transparent ones are also a very convenient thing - but this is for longer storage.
Silica gel. Small bags that are put into new fashionable shoes, equipment, computer components. Absorbs water. It must be dried either in the microwave or at a good temperature - in an electric oven. Gas does not pass - when the gas burns, water is released. After drying, the bag is placed in a box in which small tools and spare parts are stored for a long time so that they do not rust.
Radio bazaar. Snap-on pouches - they sell in the hundreds. Size 4 X 6 cm. Place watches and small items. They are usually packed with small pieces that are sold in the bazaar.
To begin with, the wristwatch can be laid down on the grinder mesh during disassembly. Then you yourself will determine what you need and how it is more convenient for you. The stand can be machined from brass. Should be heavy enough.
Take a coil from any old starter from electricians - try asking for 380 V. If not, by 220 V. You attach the wires - the demagnetizer is ready. Turn on only for a short time - it gets warm.
About a new instrument. It is not always worth the money. Think how to get out with what you have. It is needed if you make a living with this and the customer pays for everything. If this is a hobby, then not first of all. Calculate the costs like this: I quit smoking (and drinking) and all the savings are on the tool. In this case, it is really a hobby and a useful pastime.
Now the steepness has gone. Machine.
Option 2. High-speed car. 10,000 revolutions. We sharpen with a diamond file. It may well be.There are eagles who did something in this way. But as for me - this is not very correct. If sharpen then sharpen.
Considering the above - if you do not sharpen the axes how to fry pies - then for a non-professional watchmaker-turner, it would be more expedient to take a small-sized precision universal machine. I would say that 20% of the work is axle turning (or even less), 80% is the turning of screws and body parts, various secondary milling work.
Examples I would name the following:
Collet chuck, native collets. On top is a milling corner. A part of the caliper is attached to it and we get a "milling cutter".
- new - Proxxon PD-230 / E, including a milling attachment or FF-230 router. Search on There they even have a price list in the power tool section - that is, they really do it.
Regarding the old MD-65. Axes 0.1 sharpens. Doesn't hit. Any additional clarifications are superfluous.
Now for the next topic. Okay. We got a machine. Well kva. We have a type of computer in the form of a processor, monitor and keyboard. But all this locomotive also needs software. Windows-2000 or Windows-XP and for tough peppers Linux will do. So, the fun begins. Software often costs more than hardware. It's the same story with machine tools. We need fixtures and additional tools. I think that an approximate set of additional accessories for the machine will cost no less than the machine costs. We are now talking about turning + milling. I ended up with MD-65 with a milling angle plate - a milling cutter is clamped in the machine chuck, and the support is turned over like a milling table, only a vertical one + milling vise. The arrows on it are milled. Cut the slots in the screws too.
- incisors - at least a hundred. Fits well in old wooden school boxes.
For precise sharpened incisors, old boxes from under grandmother's silver spoons go very well - incisors are more expensive than spoons, they will not break.
- collets and collet chuck. I have 2 sets - one is native to MD-65 (3-13 mm), the second set is Lorsch (hour, 0-6 mm).
This is in the machine, Lorsch in the adapter.
- indicators. 0.01 and 0.001. It is clear that various attachments are needed for them. Often you have to do the fasteners yourself.
- center detectors - 0.01. Without it, there is simply nothing to do on the machine.
- binocular microscope. Without words. We have already talked about this above.
- 4-jaw chuck. With split jaw release.
- sharpener - sharpen the cutters roughly
- diamond wheels - sharpen cutters precisely
- rotary vise (horizontal rotary system) - drill holes in precisely specified places. Screw holes in the rim of the transparent case back. It is hand drilled. It can be seen that the screws are jumping.
- dividing head. Or with discs or vernier. Cutting gears. Or at least make a square.
- I'm not talking about cutters. And end and for gears. The thickness of the disc cutters - from 0.1-0.15 - is the thickness of the "Neva" blade.
- the measuring tool is for rough work
- and for precise ones - only optics
- then you need to look at what is needed already for the work being performed. You will have to do a lot yourself. To invent a lot. Very often, for the manufacture of one part, it takes more time to make a clamp in order to clamp this part into the machine.
Foil trimming - making a "disk" arrow. Materials at hand.
Now the conversation is where and how to organize all this. It should be dry. Dust free. Not on the head of the family - the family should know that it is yours - and no matter what you do there - they have no entrance there. And there is nothing to howl about the noise from the workshop. Their comments are inappropriate (oh, it's dirty, oh, it stinks with gasoline).
One type I saw a German machine - the type of our school. More precisely, only pre-war. He mounted it under the kitchen table. In the center of the table is a shelf with a machine on it. The top board of the table rises - like in old school desks. He lowered the board, put the tablecloth in place and crumble the onion with the sausage.All the same, there will be no big turning works at home - everything is some kind of small piece.
If we are talking about a large workshop or a more serious occupation in the restoration business for the soul, then in addition to the small machine, you need to look towards a larger machine - a school one (I don’t want to name the type - there are many different ones), a horizontal milling NGF-110 and a muffle furnace - this is for more rough work and the manufacture of devices. It is clear that all this also needs a trailer of devices and tools. Photo of the basement in the country.
If you can order or buy somewhere, look towards the rollers. They can be quite expensive. Sometimes they help out a lot. Especially in the manufacture of new parts, arrows and shims for lathe cutters.
As a conclusion, let's say this - this process is endless. In one sensible book on choosing a watch lathe, there was a good idea, completely applicable in our case - we are all mortal. All these tools are of interest only to us. Personally. There is no need to expect that someone after us will continue with fire in their eyes what we have begun. The whole instrument must be bought on the basis that after us, our grateful descendants die of all this rubbish and faster. They can also be thrown into the trash. They need a place for a geranium! We need to make sure that they can get more for it, slowly and confidently to all these numerous relatives and posterity, it is necessary to explain that all this is expensive and on this in distant times it will be possible to earn something. And accordingly, if you already buy, then buy a liquid instrument, which will have a price even in 50 years. This is on the one hand. On the other hand, we are all working now. We earn something. This is exactly the right time to prepare for yourself a range of activities for a time when our earnings will decrease, that is, retirement. Good luck.
Solntsev G.
DIY watch repair
"Phoenix*
Rostov-on-Don
Solntsev G.
С 60 DIY watch repair. A guide for a beginner master. Rostov
n / a .: "Phoenix", 2001.-96 p.
With this book, you will be able to master the basics of repairing all types of sentries.
mechanisms. An easy presentation style and clear illustrations will help
beginners, and the book as a whole will complement the knowledge of the master.
Let's say you have a watch in your hands. It could be the watch of your grandfather, friend, acquaintance, or even your own watch that you forgot a long time ago. They once stopped and stopped showing the time. In search of the necessary tools, you turned the apartment upside down and, with the help of available tools, managed to open them.
But is it worth the rush? Perhaps this watch can still be repaired.
If you are a beginner and have never dealt with the repair of a watch movement before, then you should familiarize yourself with a few rules that any watchmaker adheres to.
1. The clockwork is the most complex "organism" in which all its elements work as a single whole. Therefore, watch repair must be careful and careful. You must understand how they work, because some parts of the watch mechanism are so small that it will not be difficult to damage them.
2. Remember that proper specialized tools are required to gently remove the machine components. Otherwise, your repair will lead to an inversely proportional result.
It is also worth noting that even if in some miraculous way these tools are at your fingertips, but you do not have the slightest idea about the mechanism of the watch, they will not help you. If you are not confident in your abilities and do not have sufficient experience, it is better to give your watch to the workshop. They will be properly repaired by professionals in their field.
3. Watch mechanisms of the times of the Soviet Union in terms of the complexity of repair are not inferior to their more eminent and expensive counterparts from Switzerland.
4.Like most other movements, the watch needs lubrication. They won't work without it. Remember that by the word lubricant we mean a specialized substance designed specifically for watch movements, and not petroleum jelly or, even better, sunflower oil. The last two options are not even suitable as a temporary solution to the problem. The lubricant should be applied to the parts of the mechanism that require it, with exact observance of the quantitative proportions of the substance. If you think that the watchmaker, when carrying out repairs, abundantly waters the entire mechanism from a huge oiler, then you are greatly mistaken.
5. If for some reason you still do not want to give your watch to a professional workshop and cannot get rid of the desire to carry out the appropriate repairs yourself by purchasing specialized tools, know that a watch set for 600 rubles, which can be bought on most Internet stores won't be enough. This is a waste of money. A high-quality watch tool is expensive, and purchasing it for a one-time repair is not the most rational act.
6. Before starting work, read the relevant literature. For a beginner, we recommend the book "Construction and assembly technology of mechanical watches" by S.М. Tagirova. It is distinguished by the clarity and utmost brevity of the material presented in it. After reading it, most of your questions will be answered. Agree, there is nothing worse than a beginner who does not even understand the basics of the business that he decided to take on, and even showered you with constant questions: "what, but how?".
7. Remember - do not touch the components of the clockwork with your hands. For these purposes, you must use tweezers, gloves, fingertips or, at worst, a toothpick.
8. Are you going to make watch repair your hobby? Be prepared for high financial costs.
Entry-level watch tools, designed primarily for assembling watches, cost about ten thousand rubles, for minimal repairs - from one hundred thousand. In any case, you won't be able to buy everything at once. Assembling a complete set of tools can take a lifetime. The same rule applies to repair training.
Patience is an essential character trait of any watchmaker. Without him, in this case, nowhere. First of all, you should honestly answer to yourself one simple question: "Do you need all this?"
Let's assume that you have nevertheless acquired the necessary tools and equipped your workspace. Where to begin? Do not know? We will give you a hint.
Determine the breakdown or malfunction of the clock mechanism, which led to its malfunctioning or stopping. In 80% of cases, this is dirt and dried grease on the parts of the mechanism. This kind of malfunction of the mechanism can be determined by eye. Their main features are black tribes and dried oilers. The solution to this problem is to disassemble the clockwork, clean all its parts from dirt and lubricate.
Remember the patience we described above? Well, it is at such moments that you need it. Haste is your greatest enemy.
The most important part of this craft that you will need to learn is the disassembly and assembly of the watch mechanism. Old, irreparable watches are suitable for training - this is the best option. You are not immune from mistakes, like any other person, and with such training, they cannot be avoided. We consider the Slava alarm clock to be the most optimal option for learning. Its movement is similar to most mechanical wristwatches, and the details are not so small.
Let's look at it using the example of the above-mentioned alarm clock.
The first is to remove the back cover. Unscrew the factory keys, remove the buttons for shifting the hour hands, and then unscrew the fastening screws.In wristwatches, the back cover of the watch can be attached to their case, either with screws or with the help of special latches.
The second is to remove the mechanism. Look carefully and study the method by which the fastener was carried out. Unscrew the fixing screws. If you have a wristwatch in your hands, before removing the mechanism, take out the winding shaft, putting it in the eyeliner mode, and slightly press down on the suppressor, then take it out. At the end of the procedure for removing the mechanism, the winding shaft must be reinstalled.
The third is to remove the hands and dial. The first ones are removed quite easily - you just need to pry them slightly. To do this, use corners (tweezers, nippers). Thanks to this tool, you can avoid the appearance of mechanical damage (scratches, microcracks), both on the hands and on the dial. In cases where the watch model that you are repairing is not equipped with a calendar or chiming, it is possible to remove the dial, hour wheel and hands as a whole. Loosen all fixing screws carefully. In most cases, they are located on the front side of the mechanism opposite each other. All actions related to disassembly and assembly must be performed on a specialized stand that prevents dust from entering your workspace from the rest of the surface on which the stand is installed.
The fourth is the release of the spring. We apologize for the professional slang. Descent is a weakening of the spring winding. Take tweezers in your hand, the other - wind the spring by half a turn and in this state, use tweezers to move the dog. After that, slowly, without sudden movements, begin to release the winding shaft and wait for the moment when the spring is fully unwound.
Fifth - removing the balance bridge. Unscrew the fixing screws. Next, pry the bridge with tweezers and carefully, lifting it together with the balance, remove it from the clockwork. Be careful. Do not allow the balance spring to cling to the wheels. Remember that if you put the bridge down with a balance, you can damage the axle. Don't let this happen.
Sixth - removal of the anchor fork bridge. Unscrew the fixing screws. Next, remove the bridge, and then remove the plug itself.
Seventh - removing the spring bridge. This operation is performed in a similar way to the sixth stage.
Eighth - removal of the axle of the wheel system. First, remove the minute tribe located on the center wheel. If you practice with the alarm clock, which we talked about a little above, then you do not need to shoot the minute tribbe. In addition, it should be noted that in the mechanism of this alarm clock, the axles of the wheel system and the springs are one whole. After you unscrew the mounting screws and remove the axle, take out the wheels. Take your time and take out the wheels one at a time - this will allow you to avoid damaging adjacent wheels.
That's all. You have disassembled your first movement. However, it still needs to be collected. To do this, follow all the same steps in reverse order.
The first time is the most difficult. Therefore, we advise you not to try to piece everything together from memory. This will come later - with experience. It is best to run your eyes along the sequence described by us, only in reverse order and, only after that, perform the appropriate action. This way you can quickly and efficiently assemble your first movement, which has just been safely disassembled.
Good luck in your endeavors!
After writing this article, we have a new one, we invite you to get acquainted:
How to repair a mechanical wristwatch yourself. Instructions for beginners.
Friends, if you have any questions, as far as possible, I will try to answer everyone. Write, call and come by contact information,
posted here (link CONTACTS AIRCRAFT shopping center)
We kindly ask you to pay attention that our workshop is located in Samara.
We hope that after reading this article, you have discovered something new and interesting for yourself.
And remember, if you are the owner of one of the watches that we talk about on our website and feel that they need repairs or maintenance, or you just want to get professional advice from highly qualified watchmakers in the city of Samara, feel free to contact us.
Our experts will help you
to repair the following types of watches for you:
- old mechanical (the possibility of repair is determined by the master at the time of inspection);
- wall-mounted (the possibility of repair is determined by the master at the time of inspection);
- floor;
- desktop;
- Pocket;
- wrist;
- and even electronic-mechanical and quartz.
| Video (click to play). |
We will be sincerely glad for all your thoughts that you leave in the comments under this article.


