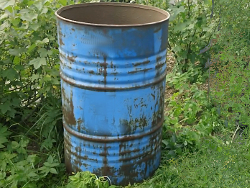
In detail: do-it-yourself repair of a metal barrel from a real master for the site my.housecope.com.
But the service life of metal in the open air is short: acid rain quickly corrodes the metal. One day you discover that the barrel has leaked: a crack or even a through hole has formed. Our people will not be in a hurry to throw out the leaky barrel and acquire a new one. Firstly, it requires an investment of money, and secondly, the hole can be easily repaired with your own hands.
Craftsmen use the following methods to seal a hole in a barrel or other metal container.
If a crack appears on the bottom or side wall of the barrel, you can repair it in the following ways:
- From the outside, the place of the crack is coated with molten resin or waterproof glue. Then a layer of rubberized fabric or dense fiberglass is applied. On top of this "patch" is covered with another layer of resin or glue. For reliability, glue or resin is also applied to the crack from the inside (after cleaning the rust).
- The leaky bottom of the barrel is sealed with clay diluted in water. To do this, in the place where the container will stand, they dig a small pit, which is filled with clay by 3/4 (you can knead it directly in the pit). An empty barrel is immersed in this mixture: for this you need to put a couple of bricks or stones on the bottom. After drying, the clay forms a dense layer through which water does not seep. The barrel installed in this way will serve for more than one year.
To seal a hole in a barrel, several methods are also used:
- The most common option is to use an appropriately sized bolt, nut and washer. Rubber gaskets are placed under the washers on both sides of the hole, and then tightened with a bolt and nut.
- If the hole is large, you can use an oversized bolt and cut the size washers out of sheet metal. In this case, it is better to use raw rubber as gaskets, which provides excellent sealing. You need to work with raw rubber in a warm room or warm it up before gluing to metal.
- For small holes, use a cold weld putty. This two-component composition is characterized by high adhesion to any cleaned surface and at the same time has high sealing properties. Cold welding is also suitable for repairing small cracks: they are processed on both sides for reliability.
| Video (click to play). |
In conclusion, we note that the use of an electric or gas welder for applying a metal patch is pointless. The walls of the barrel are very thin, so they will simply burn out, and even more holes will form.
You can seal it with cold welding, it costs from 50 to 120 rubles, buy any of them all the same, as it seemed to me there are two components that, in the form of a tube with a rod, as a rule, in a tube, you mix them according to consistency like plasticine and on a pre-degreased surface, the nanosh is glued to me, I was advised by one carrier who was so sealed hole in the gas tank. And voila literally in five minutes it becomes like a stone and at the same time moisture resistant. You can add an additional plate from the inside or from the outside and close the hole with it and stick it all over the sides with the same cold welding. Wait at least half an hour before using the barrel.
Try the next option.IT is inexpensive and will not take much time. The barrel will serve for many more years. Prepare a piece of stainless steel sheet or any metal plate. In addition, you will need bitumen mastic. Buy in such a way as to fill the entire bottom with a layer of 1 - 2 centimeters. Place the plate inside the barrel over the hole or crack. It is advisable to cut the plate larger, almost to the size of the bottom. And we begin to pour over the entire bottom area. The barrel is ready for use in half an hour. During operation, the barrel is not afraid of heat or cold. Water will not seep through the bitumen.
If the hole is very small, then you can use silicone sealant and chopik. We drive in the chopik missed with sealant to the maximum, break off or saw off the excess and coat on top on both sides. The barrel is ready for use in a day.
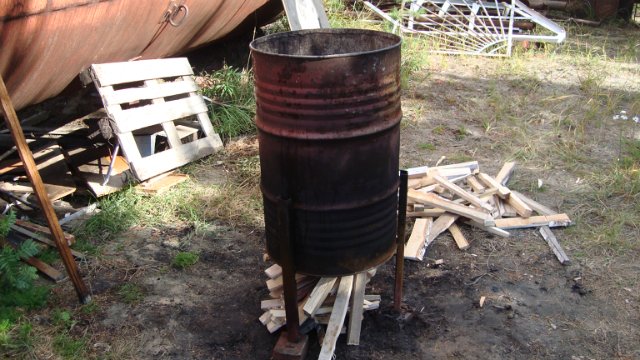
The metal barrel is one of the most useful items on our site. But time takes its toll, and gradually they fall into disrepair. Should I throw them away?
Our dacha experts say with confidence: no!
One of our readers decided to share some interesting ideas on how you can use an old metal barrel.
In 1982, I bought 10 200L steel drums (inner diameter 54 cm and height 88 cm) to store water for irrigation. They regularly served at the dacha for 20 years, since every two years I painted them with waterproof paint. But nothing, as they say, lasts forever. Gradually, small holes began to appear in the bottom and on the lateral cylindrical surface, sealed them with cold welding and tar. But from year to year, the holes increased in size, their number grew. By 2010, all the barrels were completely unusable, no repairs helped them - not the barrels, but the sieve! Suitable only for collection and incineration of waste, composting or disposal in landfills.
The idea was suggested to me by a summer resident Yuri Stepanov: "Holes are not at all a reason not to keep water in barrels." I decided to put it into practice and got a wonderful result. I had to bring the idea to mind myself.
In the store I bought plastic garbage bags - 60 microns, with a volume of 240 liters. It is very important that the volume of the package is significantly greater than the volume of the barrel, and its perimeter is equal to the perimeter of its outer cylindrical surface (if more, this is welcome; if less, then no more than 2-3 cm - polyethylene is elastic and stretches slightly). I think you guessed it: the water will be stored in a bag, and the barrel should only serve as a supporting frame for it.
At first I wanted to finish writing on this, but, on reflection, I decided: no, we need to convey some nuances, then you will save both time and nervous energy. The technology is simple.
We clean the inner surface of the barrel from sharp peels of paint and rust that can pierce a plastic bag.
We do this with a metal brush, or even better - a metal frame, which shaves off the weeds (just use the frame planted on the cutting). And don't overdo it! Carefully check the inside of the barrel with the palm of your hand: if there are no sharp spots, just clean it. Any non-sharp protrusions do not matter. There is no need to paint the barrel inside - don’t waste money, effort and time.
If you can't smooth out sharp protrusions, or you want to insure yourself against troubles in the future, there is such a move: cut out a circle from thick polyethylene (cardboard, plastic, etc.), the diameter of which is equal to the inner diameter of the barrel or even slightly larger than it. Place the circle on the bottom of the barrel. Cut out a rectangle, the width of which is equal to the distance from the bottom of the barrel to its top edge, and the length is slightly larger than its perimeter. We fold the rectangle into a cylinder, overlap the edges and fasten them along with threads. We put the cylinder in the barrel. The circle and cylinder will reliably protect the bags from punctures!
It is better to use two bags for strength. We put one into the other so that the corners at the bottom coincide.We put the bags on a flat surface (table, floor) and expel the air from them, stroking with our palms from the bottom to the upper edge. Of course, some air will still remain, but it doesn't matter. We align the upper edges and with narrow tape (8-15 mm) fasten the bags over the edge along the perimeter along their upper edge every 10-15 cm. The length of the fastening adhesive tape is 4 cm enough. we get a double package. Do not glue the edges of the bags along the entire length - this is very important, and you will appreciate this later, since the air remaining between the bags will have the opportunity to freely escape to the outside when pouring water into the inner bag.
We lower the double bag into the barrel. We bend its upper edge (5-15 cm) onto the outer surface of the barrel along its entire perimeter.
To prevent the bag from slipping to the bottom of the barrel when we start pouring water into it, it is necessary to attach the folded part of the bag to the outer surface of the barrel with wide tape (60-80 mm). This is a very important operation, it is better to do it together. For example, the husband puts the barrel obliquely on a bar, round or box and slowly turns it around its axis, while the wife, at this time, slowly glues the bag with tape: half the width of the adhesive tape to the bag, the other to the barrel. The operation requires accuracy, the adhesive tape should lie flat and tight, without swelling and distortions. Of course, you can perform this procedure alone, but it is difficult. In the photo next to me there is a barrel, which I wrapped with duct tape absolutely alone (before that, the operation was carried out together with my wife as I described above). Look how great I did it! And you, dear readers, I am sure, are incomparably more talented than me, you will succeed even better!
And here is one more serious nuance! There is a lot of air between the double pack and the barrel body. You will be tortured to delete it. And if not removed, the poured water, gradually pressing the bag to the barrel, will squeeze the air up: the bag will swell, and since there is no way out for air, as a result, it may break, or the bent edge of the bag together with the tape will pull the water inside the barrel, which it was with us at first. The bag falls to the bottom, water flows out through the holes. Goodbye idea.
Having suffered a fiasco on the first barrel, I found the next way out. Cut pieces 15-20 cm long from aluminum wire with a diameter of 4-5 mm and make hooks. To do this, press a piece of wire vertically to the outside of the barrel. The upper end of the wire should be 5-6 cm higher than the edge of the barrel. With one hand we hold the wire, with the other hand we bend it inside the barrel and also press it tightly against the wall. A short piece of hook, 4-5 cm long, is sufficient.
Before lowering the double bag into the barrel, I hung one hook on each barrel with the long side of the hook on the outside. If you have inserted a cylinder into the barrel, the short end of the hook must be on top of it. When wrapping with tape, you must not glue the outer end of the hook, the tape should be at least slightly above the tip. The hook will create two air vents.
Please note: with this method, water is perfectly stored throughout the season. It is clean, there is no rust in it. It can even be used for washing laundry and primary washing of vegetables.
Packages can be removed for the winter and kept warm, for example, in a city apartment, their weight and volume are insignificant. Polyethylene will retain its properties and last at least one more season. Saving! Barrels should be stored in a dry place after the end of the season and will last for many years without any repairs.
By the way, not only a leaky barrel is suitable for storing water in this way. It can be any container, as long as it serves as a reliable frame for the package. For example, you can put together a wooden box whose cross-sectional area and height are consistent with the dimensions of the package.
I already wanted to seal the letter in an envelope, but my wife said: “What if the summer resident does not have the opportunity to buy packages? How to be? " And here is her advice, instead of bags, you can use a film for greenhouses in the form of a sleeve - bend the sleeve lengthwise, bend it across, lower it into a barrel, cut off at the top with a margin. Further, I think it's clear.
If we fill all leaky barrels and other leaky containers with water, we will have something to water our gardens and vegetable gardens, and there will be good harvests even in dry years. I urge everyone to amicably follow my example. I wish everyone health and sufficient water - the basis of life on earth (of course, God forbid you from floods).
A 250 liter water barrel has leaked in the village. They patched the holes from rust earlier than they could: putty, bitumen - now it does not help.
Holes 1-3 mm at the bottom along the perimeter. How can you patch up, glue it up (we'll go to the village soon)? The barrel is old - rust inside. We cannot bring it from the city and buy it on the spot.
2Alwol I filled up small holes in the barrel with rubber-bitumen mastic. Seems to involve a patch from something. There was also a version with a PE bag.
2Alwol If the barrel for watering - as a temporary measure - take a piece of PE film (pipe), tie one end tighter to make a bag, and lower it into the barrel. All other methods, except for welding a new bottom - IMHO are unreliable and not budgetary.
Interestingly, 4 advice will also be about polyethylene, so to speak, to consolidate the passed?
The bachelor wrote:
Interestingly, 4 advice will also be about polyethylene, so to speak, to consolidate the passed?


The corrosion process cannot be stopped. It remains to either smear EVERYTHING from the inside with bituminous mastic (for example, automobile), or, as already mentioned here, polyethylene (for example, a garbage bag of the appropriate size).
Guessed

2 Bachelor
And the fifth tip will be the same, because it radically cures.
The bachelor wrote:
Guessed
“What an interesting one”! What were you waiting for? Really the magic words "treks, pex, fex", pronouncing which your barrel will turn into a new one.
Vik2140 wrote:
The corrosion process cannot be stopped.
And here you are wrong.
If you use anodic protection - why not? Well, in the sense that it will be protected that is closed with water filling the barrel. the device is simple to the point of disgrace - you clean the section of the barrel to pure metal, fasten a piece of aluminum wire with a bolt and washers and fill the bolt with Movil (you can cover it with grease). further - the main thing is that the wire is in the water filling the barrel.
Now that the corrosion process has stopped, you can seal the holes with anything, even with an automobile anti-corrosion agent, as was advised here.
Vik2140 wrote:
... What were you waiting for? Really the magic words "treks, pex, fex", pronouncing which your barrel will turn into a new one.
No, I was waiting for catch phrases from another cartoon


Vik2140 wrote:
“What an interesting one”! What were you waiting for? Really the magic words "treks, pex, fex", pronouncing which your barrel will turn into a new one.
word 250 rubles and no tex words. pex.
took barrels of juice
peach juice
brick red top, light gray inside.
Alwol wrote:
A 250 liter water barrel has leaked in the village. They patched the holes from rust earlier than they could: putty, bitumen - now it does not help.
Holes 1-3 mm at the bottom along the perimeter. How can you patch up, glue it up (we'll go to the village soon)? The barrel is old - rust inside. We cannot bring it from the city and buy it on the spot.
Load up with cement and mix with sand.
Hang down somewhere an iron mesh with a cell of 3.5 cm and insert it into the barrel, as well as line the bottom with it.
Coat the mesh inside the barrel with sand and cement mortar.
Soak the solution for 2.3 days, until it dies.
Use this barrel to your health.
In order to further extend the life of the resulting vessel - coat it with the same solution from the outside (preferably also on the grid).
And it will be for you.
I have on vegetable garden metal tank stands on a shed, height 2 m. From time to time it has long and hopelessly rotted away, but I continue to use it. How? Very simple! Everything did it yourself, knocked and beat off the rust inside, abundantly treated with urea (car preservative), laid out the inside with old linoleum and covered it with a film of 150 microns thick, brought the edges out through the top of the tank and secured it.
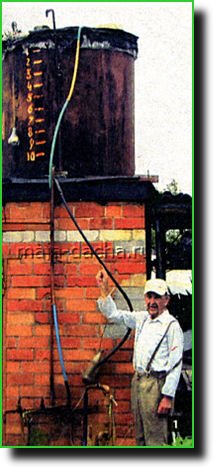
Inside the tank, in the place of the former drain, I do not make a hole in the film, but I take water from the tank using a hose lowered into it to the bottom (photo 1). At the end of the hose there is a tap at the bottom. For the initial flow of water through the hose, it must be filled with water. Then it comes out of the tank by itself.

Those who do not have a metal tank can knock the box out of any, even old, boards and cover it with foil. The film with a thickness of 150 microns will reliably serve for at least three years, even without removing it for the winter and with the remaining water in the tank with a layer of 15-20 cm. To change the film - 10 minutes. Everything is very simple and reliable.
But there are a number of other very important requirements for the tank. You need to know how much water is in the tank - it depends on whether it is possible to water the garden or whether it is necessary to fill the tank. You need to know how the pump pumps, what is the water pressure when the tank is filled with water when the pump is running, in order to prevent overflow - which, if forgetful, can last for hours and wash away the structure!
To do this, gardeners very often have to climb the stairs and observe all this. It is difficult and unsafe for the elderly. But all this can be avoided very easily!
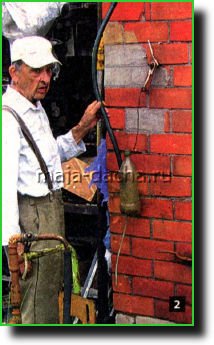
This is how it works for me. The water level is shown by a float made of an empty 0.5 liter bottle and a weight tied with a nylon thread along the height of the tank and thrown over its edge. To facilitate sliding, I have a thread slung over a plastic reel from a fishing line (photo 2). To balance the weight, water must be poured into the bottle so that when the water level drops, it lifts the weight. On the outside of the tank, I drew lines and numbers and I always know how much water is in the tank.
The pressure pipe from the pump is above the tank, its edge is bent with a "gander", the lower edge of which is 10 cm higher than the edge of the tank. I always see how the water flows when the pump is running. Turning off the water when filling the tank is automatic for me.
At the top of the tank, stepping back 5-7 cm from the edge, I made a drain pipe on which a hose goes down. Below, on the wall of the shed, a lever is made that passes through the wall inward. A 1 liter bottle is suspended from the outer end of the arm, into which a drain hose is lowered through a hole made on the side. The other end of the lever inside the shed, when filling the bottle with water, presses the "stop" button of the electric pump.
For self-draining of water after stopping the pump, a hole with a diameter of 2-3 mm is made in the bottom of the bottle. It does not interfere with filling the bottle.
Once upon a time we filled up holes in metal barrels, enamelled residues by cold welding. This is such a two-component composition. I wrote to you from memory - it was a long time ago. We bought "cold welding" in Kiev at the Yunost market. The fact of the matter is that I live in a real village. We need some kind of “old-fashioned” method. Or Very Clever. It's a pity that I can't help you yet! : pardon: As a last resort, you can, after all, be sent from Kiev. 😉: beer: It is strange that not a single man raised his voice. All this is good - liquid nails and cold welding. It works for a while, then it needs to be repaired again. Therefore, taking into account the parameters a) the time spent b) the cost, I just go to the place where the oil in the cars is changed, they have an empty 200l barrel worth (that year) as much as 30 UAH. 🙂 Voice! All this is just wonderful! But people DO NOT have near “where they change the oil in the cars”. I think that all these surface answers have already been worked out by people. Yura! Tell us how to properly use liquid nails and cold welding to make the barrel last longer? You are welcome! 🙂 SHOULD in auto parts or building materials ask for the same liquid nails or cold welding, or epoxy based glue, then follow the instructions. I myself think the bottom of the boil should be sealed with such a rank. Again, if there is an hour. And to pour into a barrel or can, you can use a piece of hose, as before, gasoline was poured into cans. You can also put the barrel under the roof drain, if there is one, so as not to travel far. Normal, galvanized, for 3 cans of four buckets. So maybe it's really better to go straight into the barrels, bypassing the “can” stage? Yes, the water issue is of course relevant. Maybe somehow you can buy an inexpensive pump + hose and put it there from time to time in order to pump water to the house? Well, I just don't like this idea for a woman to pull cans and glue holes in the iron: pardon :. So the well is through three yards. Get along with your neighbors: hose + submersible pump: "Kid" + extension cord = you need to draw water, turn on the pump and pump it into a barrel or can. The fact of the matter is that I live in a real village. We need some kind of “old-fashioned” method. Or Very Clever. Here's the most old-fashioned one for you. Look for a piece of aluminum wire and select a drill for its diameter. The leaky place is drilled and an ordinary aluminum rivet is placed.: Wink: Time has passed since the moment of the question, but better late. Well, if I already have three huge basins, with a capacity of three cans of water, in which I heat water in the sun all summer, corrosion has eaten the bottom, maybe someone will write a recipe for sealing the holes. I cover them with clay, but if the water dries up, the clay melts and holes are revealed when the water starts to flow. So much extra hard work is added. Please advise how they can be repaired. as an option: 2. Sealing holes: costs: scotch tape - 3 UAH, sealant - 30 UAH, gun for sealant - 20 UAH. (after using the sealant, plug the spout with a long stick-splinter = the length of the spout, with proper storage, you can use this sealant for a couple of years) Summer resident Registration: 19.4.2009 Summer resident Registration: 20.5.2009 Summer resident Registration: 23.7.2007 Summer cottage in Sergiev Posad region Summer resident Registration: 21.5.2009 Summer cottage in Leningrad region Passerby Registration: 13.7.2009 Passerby Registration: 18.9.2008 Dacha in Tver province, Vorgash tract Summer resident Registration: 27.2.2009 Summer resident Registration: 23.6.2006 We bring to your attention a simple way to repair a rusted and leaky barrel with your own hands. Take drying oil and cement, mix them to get a creamy mass. Clear the place of the barrel that you will be patching. Position the barrel so that the surface with the hole is horizontal and our solution does not flow down. Apply the compound to the damaged area and around it with a layer of 0.5-1 cm. Dry in a dry place in the usual way. The mixture dries slowly, but the resulting composition will set like a stone. Drying oil and cement are sold in any hardware store. In the same way, you can putty small damages on the tin roof of a house or other outbuildings. And at the same time, inexpensive plastic barrels are now sold in stores, which can replace your old one that is out of order. You do not have to throw away the old barrel, as it can still find a new use for itself as:
barbecue grill;
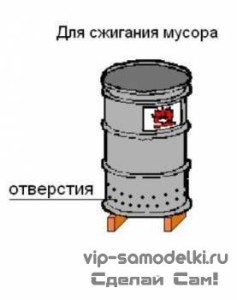
Everything for your farm (tools, equipment, household goods and much more you can purchase in our store And if you still have ways to fix or adapt a leaky barrel for some purpose, write comments. Your experience will certainly be useful to our readers! Home »Welding work in the country. The mentality of our compatriots does not allow throwing away old and unnecessary things. Skilled and zealous owners are able to give a second life to any item. A striking example of this is an old metal barrel, which is used in all areas for watering a vegetable garden or as a container for a summer shower. But the service life of metal in the open air is short: acid rain quickly corrodes the metal. One day you discover that the barrel has leaked: a crack or even a through hole has formed. Our people will not be in a hurry to throw out the leaky barrel and acquire a new one. Firstly, it requires an investment of money, and secondly, the hole can be easily repaired with your own hands. Craftsmen use the following methods to seal a hole in a barrel or other metal container. If a crack appears on the bottom or side wall of the barrel, you can repair it in the following ways: To seal a hole in a barrel, several methods are also used: In conclusion, we note that the use of an electric or gas welder for applying a metal patch is pointless. The walls of the barrel are very thin, so they will simply burn out, and even more holes will form. Since old worn-out containers are most often used for irrigation, they can leak very quickly. But they can still be made suitable for storing water for many years if the hole is repaired. To do this, a bucket or barrel that has leaked from rust can simply be sealed up - just like a car wheel. First, the leaking metal barrel is freed from water and dried in the sun. Then, from the outside, clean the rust with an emery cloth or a metal brush. This is done carefully so as not to widen the hole. Then a piece of rubber is cut out of an old car or bicycle camera and glued with Moment glue or other waterproof glue. And on the inside, for greater reliability, the hole is covered with garden pitch, which cannot damage the plants. But if the hole is large, then it is better to grind the barrel. To do this, the rust is cleaned with an emery cloth or a metal brush and a layer of resin is applied to this place. Then you need to put a piece of durable material on the hole that has just been tarred and apply another layer of resin. When heated, it becomes viscous and adheres well to the gland. It would be even better to grind such a barrel thoroughly on both sides. And a metal barrel with a very leaky bottom can also serve as a reliable reservoir for water in the garden for a long time. To do this, where it will stand, it is necessary to remove the sod and pour an even layer of oily clay 8-10 cm thick into the formed depression. Then pour water over the clay and forcefully press the barrel into this wet layer. Then you need to pour clay on the bottom of the barrel and also tamp it well. Now you can safely use the resulting reliable water storage tank. If a plastic container is leaking, then it can be repaired by gluing it with silicone glue-sealant. To do this, the outside surface is very well degreased with a conventional dishwashing detergent. Then it must be thoroughly washed off and a thick layer of silicone adhesive sealant is applied to the surface. After the acetic acid has evaporated from the silicone, the repair site will look like a "welded" piece of rubber. By the way, this patch is very, very durable. The body of an old metal barrel without a bottom and a lid can be successfully used as an oven for burning garbage in a garden area. In addition to this barrel, it is necessary to make a metal lattice from steel rods with a diameter of 8-10 mm, which are fastened with wire. Then, on the prepared site, you need to install brick posts 3-4 bricks high, put a grate on them, install a barrel on it and pour garbage into it from above. To "start" the stove on the ground, make a fire between the brick posts under the grate. It quickly ignites garbage in the barrel, which, due to the strong traction, burns so well that even green weed grass burns out. And when the bottom of the barrel looks like a sieve, then it can be turned over, and the garden "blast" furnace will work perfectly again. Valery Grigorievich Shafransky, Yekaterinburg Many summer residents in their gardens pour water for watering vegetables into iron barrels. The older the barrel, the thinner the metal becomes, this means that small holes appear, which make it impossible to operate the container. Of course, you can buy a plastic container - it will definitely never rust. But before spending money, you can try to repair the iron barrel, give it the opportunity to serve us for more than one season. We will tell you about one such method in this article. When the iron barrel rusts, do not rush to hand it over to scrap metal. First you need to try to repair it. If the holes are small, you can seal them with cold welding, window putty, or all-purpose sealant. Such repairs will be enough for the summer. But if there are many small holes all over the bottom, a different method must be applied. Everyone knows how cucumbers are salted in barrels - first, cellophane is placed inside, then vegetables are laid and poured with brine. We will do the same with the iron barrel. I need to buy cellophane film, which is sold in rolls. It is sealed on the sides, if you straighten it, it resembles a pipe. Let's cut the film to the height of the barrel, let's do it with a small margin. Bend the bottom edge of the cellophane, put a newspaper under it, cover it with newspaper on top, heat the iron and gently melt the edges. The surface temperature of the iron should not be too high - cellophane can be burned to a hole. An iron barrel in this form can last more than one season. The main thing is not to break through the cellophane with a bucket, taking water. For the winter, the film can be removed and dried. In this way, you can repair an iron barrel.
The area around the hole was cleaned of rust, degreased.
From the “sausage” of “cold welding” the desired piece was cut off. Warm up (like plasticine). In this case, the two components mixed well with each other.
The hole was covered with this composition.
It hardened and polymerized in about a day, but we used the dish (poured water) after a few more days.
I can't say that this is a panacea, but it was enough for the season.
We bought "cold welding" in Kiev at the Yunost market.
Try googling.
Or our men will catch up and give a more correct answer. During this time, new ways could appear.
🙂
Thank you, Julia.
Let's wait! Maybe someone else will advise that.
All this is good - liquid nails and cold welding. It works for a while, then it needs to be repaired again. Therefore, taking into account the parameters a) the time spent b) the cost, I just go to the place where the oil in the cars is changed, they have an empty 200l barrel worth (that year) as much as 30 UAH. 🙂
Or the car is such that you just can't load this hefty barrel into it.
Or. But you never know these “ors”?
For some reason, it doesn’t work that way, and that’s why the question was asked. : pardon:
Thank you, Julia.
1. Stop corrosion: sand the bottom of the basin well from the outside and paint with any paint up to the sides.
- sand the inside, degrease, dry.
- from the outside, close each hole with tape crosswise
- Fill the holes with plumbing sealant inside, smear over the edge of the hole. Dry for 3 days.
- remove the tape and repeat the same outside. Get something like a plastic double-sided cork.
Posts: 157
From: Novosibirsk
Posts: 411
From: Leningrad
Posts: 1291
From: Moscow
Messages: 3515
Posts: 8
Posts: 5
From: Moscow-business trips
Posts: 182
Messages: 4448
From: Moscow
![]()
Video (click to play).

