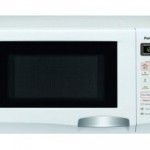
In detail: do-it-yourself Panasonic microwave repair from a real master for the site my.housecope.com.
Corroded bottom of the chamber.
After about three years of operation, through corrosion of the bottom of the chamber formed. The high humidity and friction of the turntable wheels are likely to be the cause of the corrosion. Immediately after the discovery of such a defect in the chamber, the furnace was checked for radiation leakage using a microwave detector. Everything turned out to be normal. The outer casing shields well despite the major destruction of the camera.
In the second year of operation, the camera illumination lamp burned out. The breakdown is not at all terrible and easily removable. You need to: open the oven (remove the cover), disconnect the wires on the lamp, remove the lamp and install a new one. However, the lamp there is used not ordinary, but a special one for microwave ovens (the base is not threaded, but in the form of two contacts). Buying a lamp is not particularly problematic. As a last resort, you can put an ordinary lamp, having come up with a way to fix it and connect the power wires.
Backlight lamp.
Shines through small through holes directly into the camera.
In the third year of operation, at one "fine" moment the furnace refused to work at all (the display did not light up, there were no signs of life). After opening the case, first of all, the thermostats were checked, and a malfunction was immediately found - one of the thermostats was in a permanently open state. There are two such thermostats in the Panasonic NN-G335 oven, both operate to open when their body is heated above the nominal response temperature (indicated on the thermostat body). In order to replace a failed thermostat in any microwave oven, you need to know the response temperature of the failed thermostat, its operating current, the type of switching (on or off) and the type of case (appearance). We could not find the same thermostat (by fixings). This is not scary, the main thing is to ensure reliable thermal contact of the thermostat body with the body of the investigated object (details of the furnace structure on which it is installed).
| Video (click to play). |

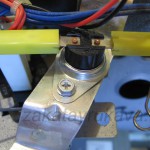
"Live" thermostat in the standard setting (photo on the left).
Replaced thermostat. Installed with an additional pressure plate and self-tapping screws (photo on the right).
It is difficult to say what was the reason for the failure of the thermostat. Most likely, the reason is simply in time, because everything has its own service life. If overheating took place, for example, due to the closing of the external ventilation slots by something, then after turning off the oven and cooling it down, a working thermostat should turn on again, which did not happen.
And the last thing I had to face was the blown of the power supply fuse as a result of the operation of the protective diode.

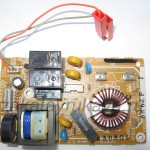
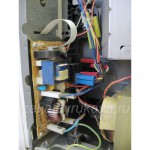
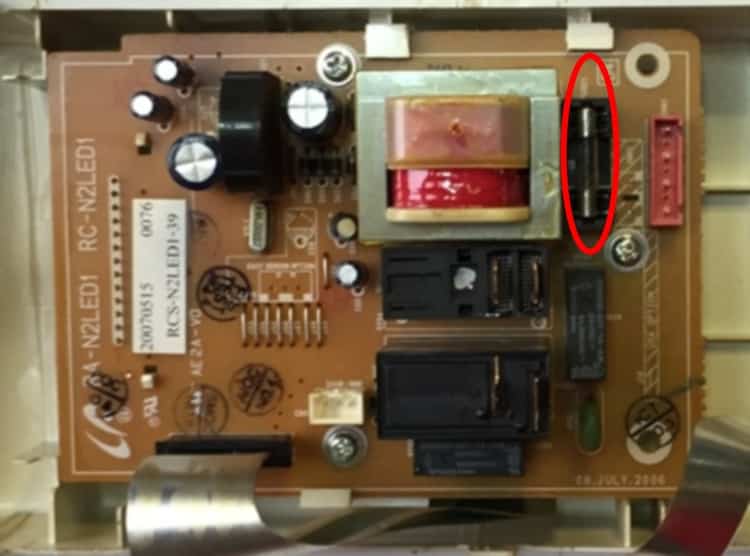
Power board with blown fuse F1 removed (photo on the left).
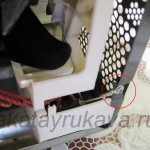
Power board, speaker view (buzzer). The hole marked with a red circle can be sealed, for example, with electrical tape, and the microwave will not beep loudly (photo on the right).

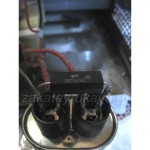
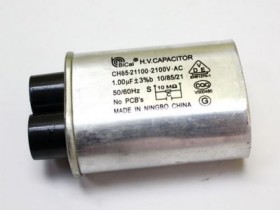
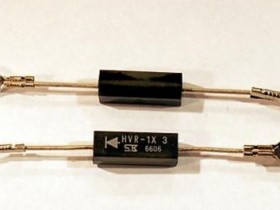
Protective diode 2X062H mounted on a high-voltage capacitor 1 μF x 2100 V (photo on the left).
The inscription on the high-voltage capacitor (photo on the right).
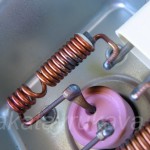
In order to find the reason for the operation of the protective diode 2X062H and, as a consequence, the blown out of the fuse, the resistance of the magnetron heating circuit was checked, it turned out to be extremely small (about 0.1 Ohm), it was not possible to accurately measure it with an ordinary multimeter. According to the found reference data for this magnetron, such a low resistance was normal for a working magnetron, or rather, should be 0.07 Ohm. The resistance between the magnetron body and its terminals was also checked, the resistance turned out to be "infinite", as it should be. From these measurements, it was concluded that the magnetron was in good condition (for lack of the possibility of a deeper test). However, when dismantling the magnetron and removing the protective metal cover, traces of excessive local heating of the coils were revealed (the enamel of the insulation had darkening), but the wire itself was not damaged. To ensure the conditional serviceability of the high-voltage transformer, the DC resistances of all its windings were checked. The resistances roughly coincided with the reference data. The measurement results were written with a pen on the transformer itself for the possibility, if necessary, to re-check the measurements in the future.

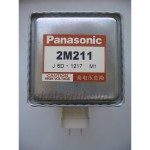
Magnetron Panasonic 2M211 (photo on the left).
View of the furnace with the removed magnetron (photo on the right).

Magnetron.A slightly burnt insulation of the coil is visible (photo on the left).
Magnetron. The cover is removed (photo on the right).
As a result, it was decided to replace the fuse with a higher current (10A), assemble and check the furnace in operation. As it turned out, this decision was correct. After the last repair, the microwave oven works perfectly, no extraneous noise or abnormal operation was observed. Of course, if repaired according to all the rules, then it was also necessary to replace the burnt out protective diode with a new one, but its far from the lowest price, the absence of radio supplies in the vicinity of the store and the extreme need for a kitchen in the oven outweighed the rest of the arguments. At the end of the article, you can see a few more photos of the repair process.
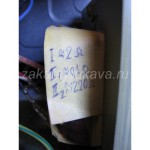
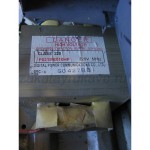
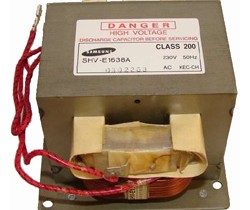
High voltage transformer. View of the nameplate (photo on the left).
The resistance of the high-voltage transformer windings was measured with a Mastech M-838 digital multimeter (photo on the right).
Contact to body one of the terminals of the transformer winding (during testing, it is necessary to check the presence of this contact with a multimeter).
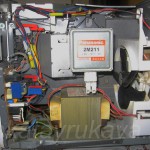
Everything is connected.
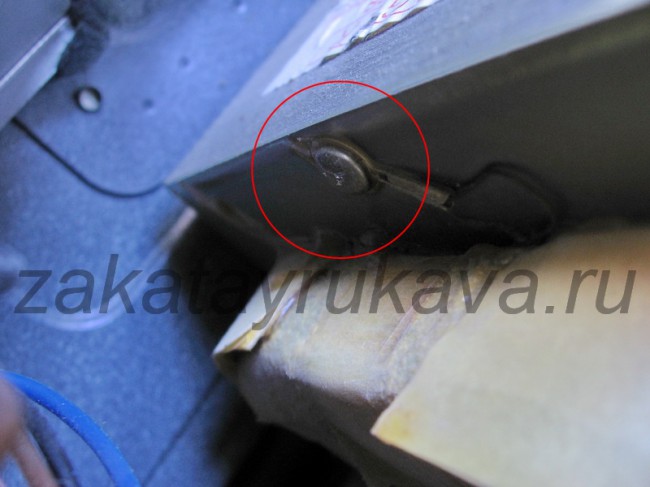
Rectifier diode. Body contact (in red circle).
We bring to your attention another article to help the home master. It will focus on the repair of microwave ovens from Samsung, LG, Panasonic and other popular brands. In the introductory part, we will briefly talk about the principle of operation and design features of microwaves. After that, we will give a list of typical malfunctions, an algorithm for diagnosing a breakdown and ways to solve the problem. As practice shows, in about 80% of cases of failure of a microwave oven, it can be restored by the efforts of a home craftsman.
We are so used to microwave ovens that the failure of this kitchen appliance creates a lot of inconvenience. With its repair in the workshop, difficulties also arise, primarily related to transportation. Naturally, this raises the question of the possibility of repair on their own. In our article, we will provide a list of typical malfunctions and tell you about how to fix them. Before you start repairing microwave ovens (Samsung, LG, Panasonic, etc.), we recommend that you familiarize yourself with their principle of operation and design features, this information will not be superfluous.
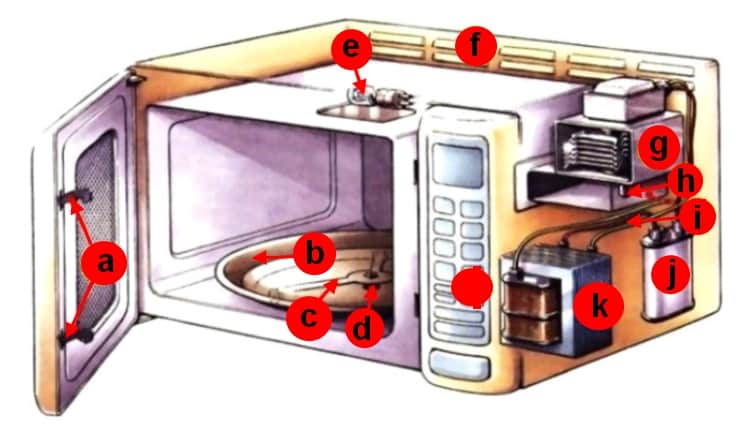
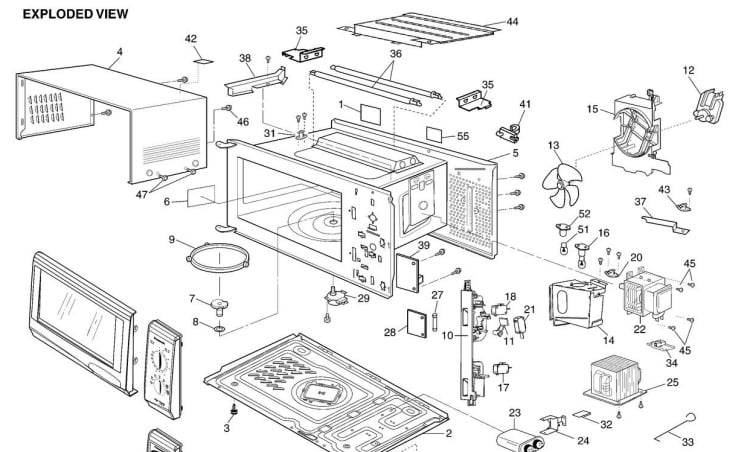
We will consider this issue superficially so as not to get away from the main topic. The information will be simplified as much as possible, since not all home craftsmen have a deep knowledge of electrical engineering.Let's start with a description and purpose of the main structural elements, they are presented below in the figure.
Legend:
- Door latches serve both for fixing the latter and for the system of blocking work in the open position.
- A rotating tray on which the dielectric cookware is placed.
- Separator equipped with rollers that drives the pallet.
- The drive that rotates the separator.
- Backlight lamp, turns on depending on the operating mode.
- Ventilation (usually forced).
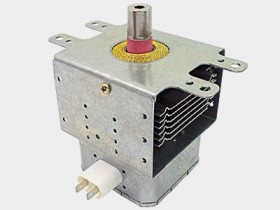
- Magnetron - a microwave generator, in fact, is the main structural element. You can find out how it works and how it works by reading an article on our website dedicated to this issue.
- Waveguide, provides the movement of microwave waves to the microwave chamber. It is a rectangular hollow metal tube.
- High voltage diode.
- Capacitor.
- Waveguide power supply transformer and control circuits.
- Control block.
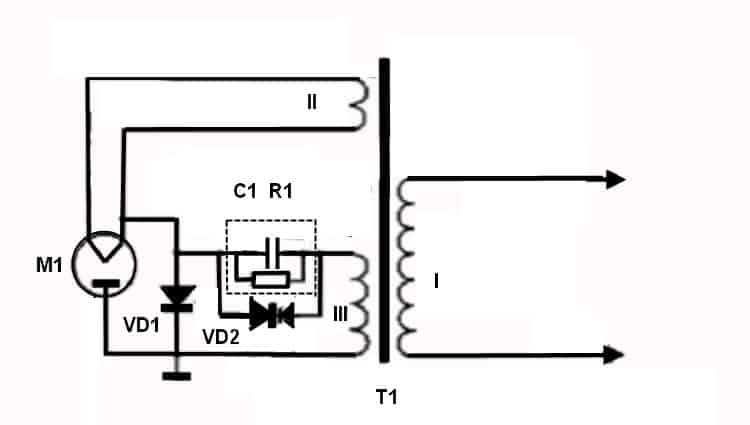
We will not give a complete schematic diagram of the device, since they can be very different in different models of microwave ovens. In our case, the supply circuit of the magnetron will suffice. As a rule, it has a typical structure.
Let us briefly describe the principle of operation of the above circuit. Power to the primary winding of the transformer (I) comes from an external control circuit that regulates the power and duration of microwave radiation. One of the secondary windings (II) supplies voltage to the magnetron filament. Winding II is made of 2-4 turns of a thick wire, since the current in the heating circuit can reach 10.0 A at a voltage of about 3 volts.
Another secondary winding (III), which supplies a high voltage level (up to 3.0 kV), is called anode winding. As can be seen from the figure, in this circuit, a rectifier and a voltage multiplier are built on the basis of a high-voltage diode (VD1) and a capacitor (C1). In this case, VD1 is turned on so that the opening occurs with a positive half-cycle, as a result, the capacitor begins to charge. When the negative half-cycle begins, the diode VD1 closes and the voltage is supplied to the magnetron M1 together with the charge accumulated on the capacitor. This leads to a doubling of the voltage and the formation of an electric field of the required intensity in the magnetron.
Resistance R1 in this case is necessary for C1 discharge. Typically, this resistor is located in the capacitor case. As for VD2, it provides protection in the event of an increase in voltage across the capacitor C1 or the occurrence of a short circuit in the magnetron M1.
Before proceeding with the repair, it is necessary to collect as much information as possible about the failed device. Ideally, this is a model-specific service manual. In this document, the manufacturer provides all the necessary data, starting from the assembly drawing (exploded view, literally from the English explosion-diagram) and ending with the troubleshooting algorithm.
Unfortunately, manufacturers are in no hurry to share this information, distributing it only among the networks of certified service centers. If you manage to find the technical documentation for the repair, prepare for it to be in English.
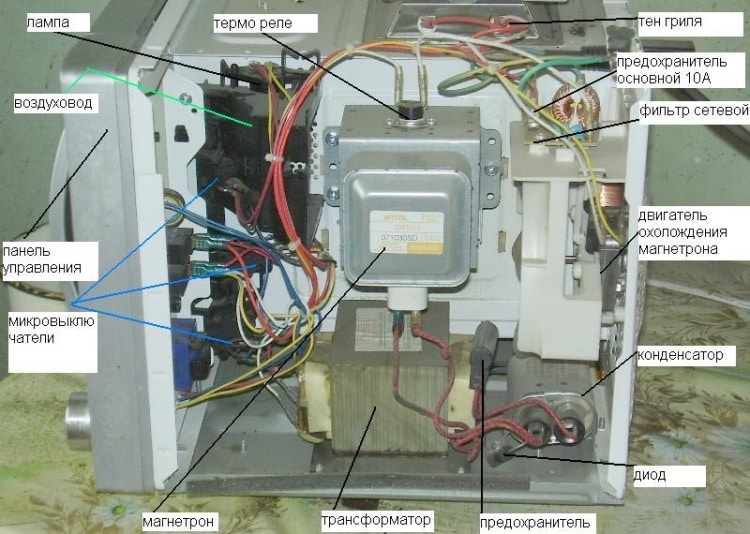
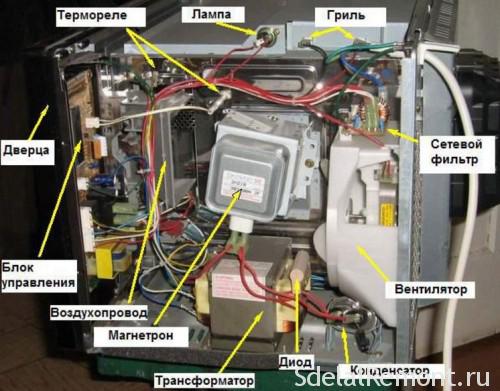
If the documentation could not be found, and this will happen in most cases, do not worry, typical microwave oven malfunctions can be determined without a schematic diagram. It is enough to know what the main elements look like and where they can be located. A photo of the microwave oven with the cover removed will help you with this.
The intuitiveness of the process in most cases allows you to remove the casing and get to the main structural elements without an assembly drawing.But in this case it is necessary to remember the sequence of actions and try not to leave “unnecessary” parts after the reassembly.
In most cases, you can get by with a Phillips screwdriver and a multimeter. In some cases, you may also need a soldering iron. Accordingly, spare parts will also be needed, which ones will be clear after diagnostics.
As we promised, here is a list of common faults:
- No response to the power button.
- The device does not turn off after working out the mode.
- Weak heating.
- No heating.
- Sparking is observed.
- The pallet does not rotate.
- No response to the control panel.
- When turned on, the scoreboard does not work.
- The fuse blows when the door is closed.
Before considering in detail the elimination of the listed malfunctions, we consider it necessary to warn that before diagnostics and repairs, it is necessary to physically disconnect the device from the power supply, that is, pull the plug from the outlet.
In this case, diagnostics and repairs should be subject to the following algorithm of actions:
- We check the presence of voltage in the power supply. If it is not there, we solve the problem with the power supply, otherwise go to the next step.
- We check the power supply unit of the control module. We start with the fuse. If it is burnt out, we will replace it. After that, we turn on the device and try to heat, for example, a glass of water. If everything works, the repair is complete. If the fuse blows, the problem is in the control module, it should be repaired or replaced.
In order to independently repair the control module, you must have certain skills in radio electronics; without them, it is not recommended to start self-repairing the control module.
In most cases, this problem indicates a faulty door position microswitch. To eliminate the problem, we find, check and, if necessary, replace the switch.
If the microswitches are OK, the problem may be with the relay supplying voltage to the power transformer in the magnetron supply circuit. We "call" the relay contacts with a multimeter, if they are "stuck", we change the electrical switch to a new one.
When no problems are found with the relay, it means that the malfunction is associated with the control unit, we change or repair it.
Most often, this malfunction is associated with a voltage drop in the household power supply. If it falls below 205.0-210.0 V, a sharp decrease in the intensity of the microwave flow occurs. This problem is typical for private houses in rural areas, where power grid overvoltage occurs regularly, and, as a result, voltage drops.
If the multimeter shows the permissible voltage level of the household network, then the power circuit of the magnetron should be checked, as we will describe how to do this in the next section.
When the diagnostics of the magnetron circuit did not give results, then everything indicates a problem with the control module.
Such a malfunction clearly indicates a malfunction in the magnetron power supply circuit. Diagnostics is performed as follows:
Important! The magnetron must be changed to the same type. This is due to the fact that the parameters of the high-voltage transformer and the control circuit are calculated based on the specific model of the microwave generator.
Such a malfunction can be caused by the following reasons:
- Burnout of the mica plate, which insulates the waveguide from splashes and food pieces... The plate is located inside the chamber on the side of the magnetron. The condition is determined visually. If the problem is with the plate, it is sufficient to replace it.
- During operation, the cover of the coupler burned out... This is a kind of plastic cap that rotates the pallet. In this case, only replacement will help. Naturally, it is necessary to install a coupler from the same type of model, since the design of such a cover may be different even from one manufacturer.
- The "wrong" dishes are installed in the chamber... We remind you that metal appliances, as well as those on which metallized dyes are applied, cannot be used in microwave ovens.
First of all, it is necessary to check that the pallet is not blocked by any foreign object, it is correctly installed or the separator. If everything is normal, then the reason lies in the drive. This may be due to the following reasons:
- Jammed engine (determined tactilely) or breaking one (dialing is carried out) of the windings. In these cases, a replacement of the drive is required.
- Gearbox problem... In this case, it all depends on the design. In some cases, the gearbox can be repaired. But, as practice shows, it will be easier and cheaper to replace it.
In modern electronic models, such a malfunction indicates a problem with the control module. In products with an electromechanical control system, it makes sense to check the mechanical relays and / or switches, if necessary, replace defective parts.
If, when turned on, the power indicator lights up, but the digital display does not work, then everything indicates problems with the control module. It needs to be repaired or replaced.
A characteristic indicator of faulty microswitches for door position. One of them is "stuck" and does not switch; as a result, a short circuit occurs in the control circuit. The repair consists in replacing or cleaning the microswitches.
Many of us have forgotten about various stoves, hobs and completely trust the process of cooking microwave ovens. And this is not surprising at all: microwave ovens take up little space, have a rich set of different functions and significantly save time. Naturally, we are very upset when our microwave breaks down. The reasons for the breakdown and malfunction can be different. Consider what breaks down most often in a microwave oven. Often, if a microwave oven breaks down, it is necessary to contact a specialized master. After all, this is not the simplest device, so the repair is rather complicated. But in fact, the design of a microwave oven is elementary and includes only a few basic elements. If you first familiarize yourself with frequent breakdowns, then repairing the microwave on your own will not be difficult.
Although the design of a microwave oven contains a lot of elements, most of them do not play a special functional role. To repair this device, you only need to know the basic elements of the circuit that ensure its operation. Among them:
- Magnetron.
- Transformer.
- High voltage fuse.
- Rectifier diode.
- Capacitor.
- Control block.
It is easy to distinguish them, because outwardly the design is not very complex. The magnetron is always installed in the middle, directed towards the food warming unit. The transformer is located under it, representing a massive box with a protruding coil. The capacitor, diode and fuse are located to the right of it, and the control unit is often located near the input panel.
When the device is turned on, a voltage of 220 V is supplied to the transformer. Passing through the primary and secondary windings, a current of 2 kV is already flowing out of the element. Further, the negative half-wave goes to the diode, and the positive one charges the capacitor, which again leads to a twofold increase in voltage. After that, the generation of microwaves by means of a magnetron begins. The power of the magnetron is regulated by the control unit.
Therefore, in the event of a breakdown, it is worth paying attention to these elements. They carry the greatest load, so they are often the problem.
When disassembling the microwave, be sure to disconnect it from the mains.
Search for breakage in a microwave oven is based on "symptoms". This allows you to gradually eliminate possible causes and find the real one. So, if the oven does not turn on at all, then it is worth checking the following points:
- The integrity of the power cord.
- Door position and closing system.
- Mains fuse and thermal relay status.
In the first case, the situation is elementary - there is no power supply due to damage to the power cord. A similar situation occurs when the outlet is damaged or overloaded. In this case, it is enough to replace this element, everything is in order with the microwave itself.
Next, it is worth checking the operation and position of the door. The fact is that the operation of a microwave oven when the door is open is dangerous for others. Therefore, the design provides for the possibility of operation only when it is completely closed. If a latch, a locking system or a checking element is broken on the door, the protection system will not allow the device to start.
The last points also concern the protective systems of the oven. The fuse prevents damage to the device due to power surges, and the thermal relay provides a complete shutdown of the system when the door is open. Both can fail, it is quite easy to replace them.
It is also worth checking the voltage in the network and the number of devices connected to the outlet. The microwave oven is very demanding on power supply, therefore its slight deviations can interfere with the operation of the appliance.
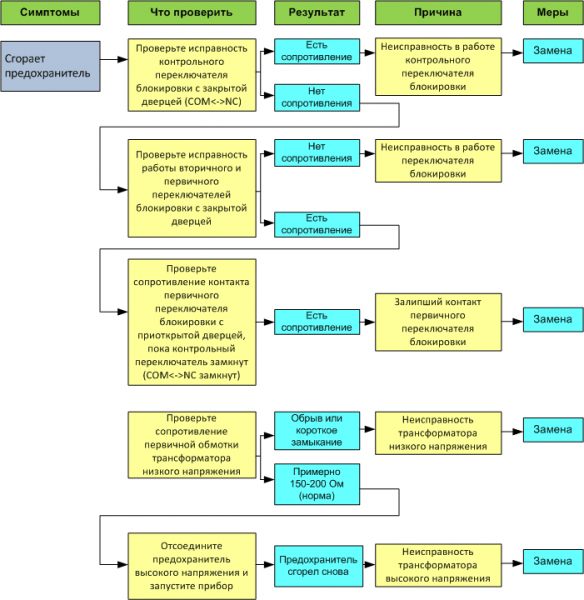 Fuse faults
Most models suffer from common problems and have similar, typical faults. For example, if the microwave works, but does not heat, then this indicates a malfunction of the capacitor, diode or magnetron. To repair a microwave oven yourself, you will need a simple set of tools: pliers, wire cutters, a screwdriver, an adjustable wrench and a five-spanner wrench, as well as a soldering iron with the necessary equipment.
When repairing a microwave microwave yourself, you should remember about safety measures. The two most important hazards in microwave repair are high voltage in the oven components and microwave radiation. Do not turn it on if the door is defectively locked or the mesh on the viewing window is damaged. Do not make independent holes in the case and introduce any conductive objects into the units and elements of the furnace. Never touch internal parts and assemblies while the microwave is in operation. Be sure to use a tester or other electrical meter to measure AC and DC current.
If the above reasons are not confirmed, then you need to disassemble the device for troubleshooting. Before that, be sure to turn off the oven from the network and wait a couple of minutes.
What should you look for when searching for breakdowns? There are several basic elements that often fail:
- Circuit breakers.
- Capacitor.
- Diode.
- Transformer.
- Magnetron.
These elements are directly involved in the operation of the device and were mentioned earlier. First you need to check the health of the fuses. Their breakage can be seen immediately, because during combustion, the conductor inside is destroyed. If this did not happen, then it is worth looking further.
For further verification, you need to take a multimeter, because outwardly it is extremely difficult to find a breakdown on the remaining parts. To check the capacitor, you need to switch the device to ohmmeter mode, and then connect it to the part. If there is no resistance, then the part must be replaced.
It is impossible to check the high-voltage diode with a tester. It is recommended to replace it in case of breakage of other parts, because often the blow falls on it. It can be checked in a slightly different way - by connecting it to the network on the way to the light bulb. If the light is weak or blinking, then the part is working properly. If it burns brightly or does not turn on at all, then the diode must be replaced.
Next, the transformer is checked.
It is important to observe safety precautions, because
this element is able to hold a charge for a long time. It will take several minutes to discharge a serviceable transformer, and if the discharge resistor breaks down, it will take much longer. It is worth discharging it on the case or not touching it at all if there is no experience with such a technique.
Next, the transformer windings are checked. It is necessary to remove the terminals and check the terminals of the device one by one with an ohmmeter. First, the primary winding is checked, for which the rate varies from 2 to 4.5 ohms. For the secondary winding, the limits are 140 and 350 ohms. It is also worth checking the filament winding by connecting the terminals leading to the magnetron to the multimeter. The norm here varies from 3.5 to 8 ohms.
All previous tests have failed, then the problem may lie in the magnetron.
To test the magnetron, just connect the tester to its power terminals. The tester switches to ohmmeter mode. If the resistance is 2-3 ohms, then this means a breakdown of the device. The situation is the same if the tester reads infinity. In both cases, the device must be replaced.
These items are the most common culprits in microwave oven breakdowns. However, the failure of the device is often associated with other malfunctions, such as problems with the electronic control unit, timer and other electronic parts. Here, simple checks with a multimeter will not help; the help of a qualified technician is needed. Although it is much easier to simply replace a part if you are sure that it is broken.
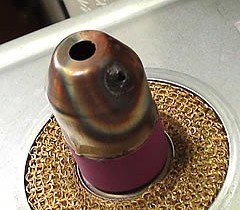
There are frequent cases of breakage associated with the destruction of the cap on the magnetron. The thin aluminum body simply cannot withstand stress and is destroyed by microwave waves. This problem often occurs in older devices that are more than a few years old. The obvious symptoms in this case are noise and sparks during the operation of the device.
To check, it is enough to remove the transformer, because the cap is located towards the food chamber. If the cap is destroyed, then there are 2 options:
- Cap replacement.
- Flip the cap.
The first option is a priority, it is enough to order a replacement or return the magnetron for repair. The second option is considered a temporary alternative that allows you to extend the life of the device indefinitely. It is enough just to rotate the cap 180 degrees around the axis, because the load falls on only one half.
Repairing a microwave oven is a feasible task for a novice electrician. If the problem lies in the breakdown of one of the constituent elements of the furnace, then the simplest and correct solution is to replace it. The bottom line is that most of the parts of this device cannot be repaired, but only completely replaced with a new one. This especially applies to fuses, diodes and capacitors - the main reasons for the failure of the device.
Parts replacement is carried out in several steps:
- The microwave is disconnected from the network.
- The transformer is discharged (5 minutes).
- The terminals are disconnected from the defective part, it is removed.
- A workable part is connected to the same place.
There are two important factors to consider when replacing a part. The first is schema compliance. It is important to remember that each part has its own characteristics, selected for the performance of the entire electrical circuit. If, after replacement, this nuance is not taken into account, then this leads to new breakdowns. This is especially true for the transformer and capacitor.
The second important factor is the connection of the part. It is necessary to connect the replacement correctly, keeping the previous arrangement of the terminals. Reconnecting the device in reverse order can damage it, as well as several other parts in the system.
This will restore your microwave in most cases. If the breakdown is related to the electronic part of the device, then you should contact the professionals. This will ensure quality repairs and prolong the operation of the device for a long time.
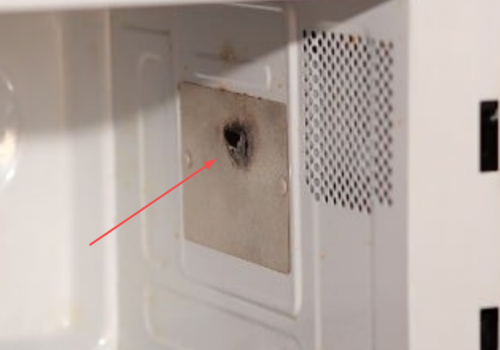
The most common malfunction is the failure of the waveguide cover in the microwave oven chamber. This is caused by splashes from cooking. This starts sparking between the magnetron antenna and the protective cover. Untimely removal of burnt products leads to local burnout of the lid and to complete destruction.
Local burnout of the lid mica plate can be removed with alcohol or solvent 646. It is enough to gently wipe the burnout area.
If the mica plate of the lid is clearly in poor condition, is greasy or begins to paint, then it should be replaced. Removing the diffuser plate is a snap. This can be done using an ordinary sharpened knife. Usually, the mica plate is attached with a self-tapping screw or rivets. Carefully place the old plate on the new template and cut out a new one. The best way to do this is with a knife - you can break the mica with scissors. We make holes in the new plate with a sharp screwdriver and process the edges of the fields of the plate with sandpaper. We install the new plate in place of the old one.
The question often arises, how to replace mica for microwave ovens? For these purposes, any dielectric with a similar dielectric constant is suitable. For example, PTFE or Teflon.
Common breakdowns in a microwave oven are also malfunctions associated with other elements of the oven. For example, such as the keyboard of the oven control unit, the microwave oven electronic control unit and the dissector. Less often, the high-voltage capacitor and transformer, the microwave waveguide plug and the rotating pan fail. The power supply and magnetron of the microwave oven are subject to wear and tear.
Knowing how to troubleshoot microwave ovens can save you significant repair costs. However, if you do not know how to repair the microwave yourself, then it is best to contact a specialist. Specialized service centers will help you to repair a microwave microwave oven. In addition, watch the video on microwave repair, perhaps there is exactly that breakdown that will help you fix your beloved household assistant.

