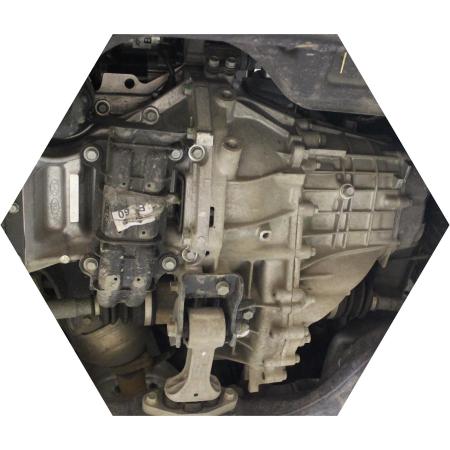
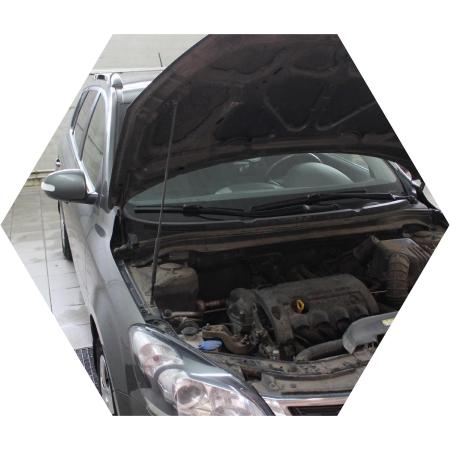
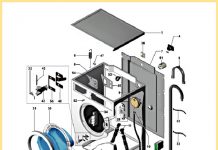
In detail: do-it-yourself repair of manual transmission kia seed from a real master for the site my.housecope.com.
The main malfunctions, for the elimination of which it is necessary to remove the manual transmission from the car;
- increased (compared to the usual) noise;
- Difficult gear shifting;
- spontaneous switching off or fuzzy switching on of gears;
- oil leakage through seals and gaskets.
In addition, the gearbox is removed to replace the clutch, flywheel and rear oil seal of the engine crankshaft.
An automatic transmission is removed for almost the same reasons as a manual transmission, with the exception of the need to replace the clutch and flywheel, which in this case are absent. The techniques for removing and installing a manual and automatic transmission are almost the same and are described using the example of a manual transmission. The difference lies in the design of the transmission control drive and the need to unscrew the torque converter mounting bolts.
The work on removing and installing the gearbox is very time consuming, therefore, be sure to first make sure that its malfunctions are not caused by other reasons (insufficient oil level, defects in the clutch release drive, loosening of the gearbox fastening, etc.). The gearbox is quite heavy and has a shape that is not comfortable to hold, so we recommend removing it with an assistant.
To remove manual transmission do the following.
You will need: socket wrenches "for 10", "for 12", "for 14", "for 17", a mounting blade, pliers.
1. Place the vehicle on a lift or inspection ditch.
2. Remove the engine mudguards
| Video (click to play). |
3. Drain the oil from the transmission,
4. Remove the battery
5. Remove the air filter
6. Remove the bracket mounting bolt.
7.. and move aside the wiring harness
8. Release the cotter pin retainer.
9. . remove the cotter pin securing the end of the cable from the hole in the shaft of the gear lever.
eleven. . and the tip of the cable from the shaft of the gear lever.
12. Remove the end of the cable sheath from the bracket slot on the transmission. Move the shift cable to the side.
13. Remove the cotter pin securing the end of the cable from the hole in the shaft of the lever a of the gear selection.
15. . and the tip of the cable from the shaft of the gear lever.
16. Remove the end of the cable sheath from the bracket slot on the gearbox. Move the gear selector cable to the side.
17. Disconnect the speed sensor harness connectors.
18. .. and a reversing light switch.
19. Remove the bolt securing the tip of the wire "weight".
twenty. . and take him aside.
21. Remove the bolt securing the clutch pipe bracket to the gearbox housing.
22. Unscrew the two bolts securing the slave cylinder to the clutch housing and move the cylinder to the side
23. Remove the front subframe
24. Disconnect the block of the control wire from the output of the traction relay.
25. Remove the protective cap of the power wire tip, unscrew the nut and disconnect the tip from the contact bolt
28. Support the engine securely or support it with a lifting device.
29. Install a similar support under the gearbox.
30. Remove the two bolts securing the power unit to the left support.
31. Remove the two upper transmission mounting bolts.
Engine coolant hoses removed for clarity.
32. Unscrew the four mounting bolts of the amplifier and remove it.
33. Remove one lower bolt securing the gearbox to the oil pan.
34. Remove two bolts from the right.
35.. and the left side of the gearbox to the engine block.
36.Move the gearbox back until the input shaft of the gearbox comes out of the hub of the clutch disc and carefully remove the gearbox from the car.
When removing the transmission, do not rest the end of the input shaft against the diaphragm spring petals, so as not to deform them.
37. Install the transmission and all removed parts and assemblies in the reverse order to removal.
- Before installing the gearbox, we recommend lubricating the splines of the input shaft with a thin layer of refractory grease.
- Check with a special mandrel how the clutch disc is centered
Repair of the gearbox (checkpoint) of the Kia Sid can be major or partial. Repair of the box (manual transmission) Kia Ceed must be done only after initial diagnostics in a car service. Very often, a third-party opinion that the box needs to be repaired turns out to be erroneous. It can also be caused by the clutch, flywheel, and gear selector.
We offer two options for repairing a transmission (manual transmission):
Partial (local) repair of the Kia Side gearbox - we remove the box, disassemble it, wash and defect. Troubleshooting the box is the determination of the cause of its failure, indicating a specific malfunction. A list of spare parts for this malfunction is also provided. After agreement, we make repairs to eliminate the specific malfunction that the client has contacted. We do not touch the rest of the components and spare parts in the gearbox.
Overhaul of the Kia Side checkpoint - as well as with partial repairs, the box is removed and completely disassembled, washed and defective. In this case, we are not looking for a specific cause of the breakdown, but we are doing a complete defect diagnosis. All units and spare parts with increased wear, all bearings, oil seals and gaskets are determined and changed.
The main malfunctions, for the elimination of which it is necessary to remove the manual transmission from the car;
- increased (compared to the usual) noise;
- Difficult gear shifting;
- spontaneous switching off or fuzzy switching on of gears;
- oil leakage through seals and gaskets.
In addition, the gearbox is removed to replace the clutch, flywheel and rear oil seal of the engine crankshaft.
An automatic transmission is removed for almost the same reasons as a manual transmission, with the exception of the need to replace the clutch and flywheel, which in this case are absent. The techniques for removing and installing a manual and automatic transmission are almost the same and are described using the example of a manual transmission. The difference lies in the design of the transmission control drive and the need to unscrew the torque converter mounting bolts.
The work on removing and installing the gearbox is very time consuming, therefore, be sure to first make sure that its malfunctions are not caused by other reasons (insufficient oil level, defects in the clutch release drive, loosening of the gearbox fastening, etc.). The gearbox is quite heavy and has a shape that is not comfortable to hold, so we recommend removing it with an assistant.
To remove manual transmission do the following.
You will need: socket wrenches "for 10", "for 12", "for 14", "for 17", a mounting blade, pliers.
1. Place the vehicle on a lift or inspection ditch.
2. Remove the engine mudguards
3. Drain the oil from the transmission,
4. Remove the battery
5. Remove the air filter
6. Remove the bracket mounting bolt.
7.. and move aside the wiring harness
8. Release the cotter pin retainer.
9. . remove the cotter pin securing the end of the cable from the hole in the shaft of the gear lever.
eleven. . and the tip of the cable from the shaft of the gear lever.
12. Remove the end of the cable sheath from the bracket slot on the transmission. Move the shift cable to the side.
13. Remove the cotter pin securing the end of the cable from the hole in the shaft of the lever a of the gear selection.
15.... and the tip of the cable from the shaft of the gear lever.
16. Remove the end of the cable sheath from the bracket slot on the gearbox. Move the gear selector cable to the side.
17. Disconnect the speed sensor harness connectors.
18. .. and a reversing light switch.
19. Remove the bolt securing the tip of the wire "weight".
twenty. . and take him aside.
21. Remove the bolt securing the clutch pipe bracket to the gearbox housing.
22. Unscrew the two bolts securing the slave cylinder to the clutch housing and move the cylinder to the side
23. Remove the front subframe
24. Disconnect the block of the control wire from the output of the traction relay.
25. Remove the protective cap of the power wire tip, unscrew the nut and disconnect the tip from the contact bolt
28. Support the engine securely or support it with a lifting device.
29. Install a similar support under the gearbox.
30. Remove the two bolts securing the power unit to the left support.
31. Remove the two upper transmission mounting bolts.
Engine coolant hoses removed for clarity.
32. Unscrew the four mounting bolts of the amplifier and remove it.
33. Remove one lower bolt securing the gearbox to the oil pan.
34. Remove two bolts from the right.
35.. and the left side of the gearbox to the engine block.
36. Move the gearbox back until the input shaft of the gearbox comes out of the hub of the clutch disc and carefully remove the gearbox from the car.
When removing the transmission, do not rest the end of the input shaft against the diaphragm spring petals, so as not to deform them.
37. Install the transmission and all removed parts and assemblies in the reverse order to removal.
- Before installing the gearbox, we recommend lubricating the splines of the input shaft with a thin layer of refractory grease.
- Check with a special mandrel how the clutch disc is centered
Kia Sid is a modern Korean car, it began to be supplied to the domestic car market relatively recently, and gained popularity in a short time. However, each car, sooner or later, needs to be repaired.
For example, to change the air filter, you need to slightly lift the top of the protective housing. Next, we lift the filter itself. At the bottom of the filter housing, as a rule, various debris accumulates. We collect all this in one pile and clean it with a rag, then install the filter in its regular place.
As for the air conditioner, its repair usually comes down to replacing the belt. Carefully unscrew the tensioner bolt and the adjusting bolt. We change the old belt to a new one and tighten all the bolts in place. It is recommended to mark in advance for yourself exactly how the old belt passed, otherwise it will simply be cut.
Let's say a lamp on your Kia Sid car has burned out, what should you do? It needs to be changed. We buy all the necessary materials in the store and get started. But this is not as easy as it seems at first glance. In the left headlight, only the high beam section is available. To get to the low beam department, we need to temporarily remove the battery. To change the lamp in the turn signal, you need to remove the headlight, gently bend the bumper, pull out the base of the turn signal and replace it. There are no such difficulties on the right side, the only thing is the expansion tank, it will need to be removed.
With taillight bulbs, everything is much easier. You can get to them through the hatches, which are located in the sidewalls of the luggage compartment. Brake light bulbs change without any problem.
Let's move on to replacing the PTF. First of all, we unscrew the core, which consists of three caps, then we take out the caps and bend the fender liner down to remove the lamp holder. The cartridges have a limited wire length, which brings additional complications. In this case, a jack can help.
Let's replace the coolant in the radiator. If you have a need to replace the coolant, then you need to find a small tap on the radiator. We open the tap and drain the used liquid, fill in a new one instead.
We change the brake pads. We purchase all the spare parts that are needed to replace the Kia Sid brake pads, then we unscrew the bolt of the lower guide, then pull out the pad by turning the calipers up. In order to replace the brake disc, unscrew the bolts that secure it to the hub. We detach the bracket and only after that we remove the brake disc. The rear disc drum is dismantled by uncoupling the suspension arm. Reverse fastening is done after removing from the jack.
Changing the engine oil. We start the power unit and wait five minutes for it to warm up. This is done so that the oil flows into the sump. Next, we take the dipstick, wipe it and look at the oil level. If it is below the “L” level, add oil.
Kia Ceed (2009+). REMOVING THE TRANSMISSION
Follow the steps below to remove the automatic transmission.
You will need: socket wrenches "for 10", "for 12", "for 14", "for 17", a mounting blade, pliers.
1. Remove the air filter and air intake (see "Removing and installing the air filter", page 97).
2. For convenience, remove the battery (see "Removing and installing the battery", page 190).
3. Place the vehicle on a lift or inspection ditch.
4. Remove the front suspension subframe (see "Removing and installing the front suspension subframe", page 152).
5. Remove the starter (see "Removing and installing the starter", page 196).
6. Remove the nut securing the transmission control cable end to the transmission range selector lever on the transmission control unit.
7. Remove the end of the transmission control cable sheath from the slot in the bracket on the transmission housing.
8. Remove the engine mudguard (see "Removing and installing engine mudguards", page 70) and the engine crankcase protection, if any.
9. Remove the four bolts securing the torque converter sunroof guard.
Depending on the configuration, both a five-speed and six-speed manual transmission can be installed on a Kia Ceed car. When operating a Kia Sid car, even with low mileage, minor damage to the manual transmission may occur. Only a timely diagnosis of manual transmission will help to avoid serious problems. Entrust your Kia Ceed to professionals, come to our auto technical center!
Many years of experience in the repair of manual transmissions allows us to quickly and efficiently perform any work with transmissions. Complete repair, tuning, partial replacement of spare parts in boxes. Our masters use only original spare parts when repairing manual transmissions. We have a used gearbox for Kia Ceed in stock, we are also ready to buy a used manual transmission from you. If your Kia Sid is not on the move, we offer you tow truck services to our auto technical center. We will repair the manual transmission as soon as possible (from several hours).
Free diagnostics! Call and come!
Even the most expensive cars are regularly faced with wear and tear. This applies to everything from engine parts, through the entire vehicle to the chassis. The clutch also did not pass by the side and requires regular maintenance.
Even an inexperienced car enthusiast will understand that it is time to change some clutch component, or change the clutch kit completely. The main symptoms of a worn clutch are:
- Jerks during clutch operation. Even if you raise the clutch pedal as carefully and slowly as possible, and the jerking still continues, it's time to do a detailed inspection of the clutch basket and clutch release.
- Increased noise when engaging / disengaging the clutch.As a rule, the clutch “hums” a little when the clutch pedal is not pressed, but if this sound is clearly audible and sometimes even interrupts the sound of the engine, it’s time to change the clutch release.
- Incomplete clutch engagement. That is, the clutch "slips" even though the clutch pedal is pressed to the floor.
- Incomplete disengagement of the clutch. That is, the clutch starts to "lead".
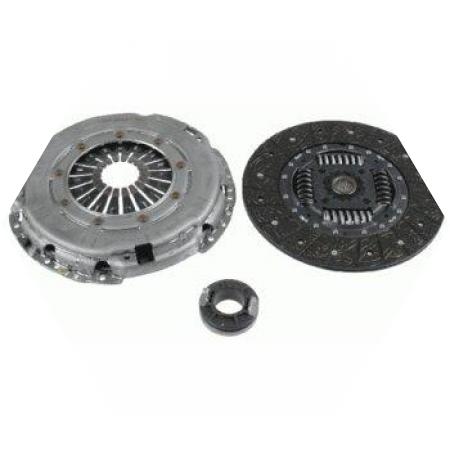
It is recommended that in the event of a malfunction of one of the clutch parts, even the least significant one, you still need to change the clutch with a set. When replacing one of the clutch elements, it should be understood that in the near future you will again have to climb into the box to replace the clutch components.
If the clutch breaks, it is recommended to immediately call the towing vehicle and go to the service station. But, if this is not possible, you can replace the clutch parts yourself. To carry out this operation on your own, you will need:
- Inspection pit.
- Key for 12.
- Keys for removing engine and transmission protection.
- Guide for centering the driven disc.
- Mounting blade.
Before changing the clutches, you need to disassemble the gearbox, since the clutch is located there. Detailed instructions for removing the gearbox:
When removing the box, it is not recommended to lean the end of the input shaft against the diaphragm spring. This can lead to deformation of the petals. Installation is carried out in the reverse order of removal. After installing the gearbox, it is strongly recommended to lubricate the input shaft splines with a refractory grease.
After successfully removing the transmission, you can start replacing the clutch parts. To begin with, the seized parts should be assessed for wear and quality, in general. Purchase all the parts you need.
Again, it is highly discouraged to change parts individually in order to avoid reopening the transmission in the future. Better to change the clutch kit right away.
If, nevertheless, it was decided to put the pressure plate back in place, then it must be marked, for example, with paint, so that it falls into the grooves and stands in the same way as it was before.
This procedure is recommended to be done in service centers. This will significantly save your time and improve the quality of the clutch parts installation.
Club service Kia Ceed "Koreets" provides post-warranty service and repair of manual transmission Kia Sid in Moscow. In case of severe internal damage, you can use the service - replacement of the Kia Sid manual transmission.
List of services provided during diagnostics and repair:
Kia Ceed clutch replacement
Kia Ceed crankshaft oil seal replacement
Kia Ceed crankshaft bearing replacement
replacement input shaft Kia Ceed
replacement of a secondary shaft Kia Ceed
replacement of oil seals drive Kia Ceed
replacement of oil seals of a primary shaft of Kia Ceed
replacement release bearing Kia Ceed
replacement of the slave cylinder Kia Ceed
replacement clutch cables Kia Ceed
backstage repair Kia Ceed
backstage adjustment Kia Ceed
Kia Ceed rear crankshaft oil seal replacement
Kia Ceed manual transmission housing repair
repair of a manual transmission Kia Ceed
repair of the fifth gear Kia Ceed
replacement of gear shift cables Kia Ceed
We have a master on our staff who deals only with manual transmission (we don't carry anywhere, etc.). If you have a problem with the mechanics on Ceed, then contact us - professional diagnostics of the Kia Sid checkpoint from a specialized technical center.
If you need it urgently, it is better to call. Ask
KIA SID 2009 MANUAL TRANSMISSION IS REMOVED IT IS NECESSARY TO REPLACE THE INPUT SHAFT OIL SEAL WITH DISASSEMBLY OF THE MANUAL TRANSMISSION HOW MUCH IT COST AND HOW MUCH TIME IT WILL TAKE AND HOW WILL THE MANUAL TRANSMISSION WILL WORK AFTER THE OIL SEAL REPLACEMENT
We have been working since 2008
More than 50 thousand clients trust us


Gear sticking, shifting difficulties, extraneous noise, oil drips - all these are signs that the oil in your Kia Sid gearbox needs to be changed.
For a manual transmission, it is recommended to do this every 90 thousand km of run, as well as for an automatic transmission (however, often car owners change the oil on the “automatic” every 60 thousand km).Otherwise, there is a high risk of failure of the entire unit, which will entail expensive repairs or replacement of the entire manual transmission. For greater confidence, check the condition of the oil every 30 thousand kilometers or once a year during maintenance.
Replacing the clutch on the Kia Side takes 5-6 hours and requires utmost attention and accuracy. If this unit is out of order, then it is necessary to replace all its elements - otherwise, there is a great risk of breakage of undamaged, but already weakened parts and a quick re-repair. This time-consuming and time-consuming procedure is best done in a car service, where qualified mechanics will carry out all the work in accordance with the manufacturer's recommendations.
Replacing the clutch is necessary if:
- Changes in ride or pedal effort
- the clutch is jerky;
- the clutch is not fully engaged or disengaged;
- extraneous noise is heard when the pedal is pressed.
It is recommended to replace the entire clutch completely, even if only one of its elements is faulty.
On the Kia Sid, 5 and 6-speed manual transmissions are installed - reliable units that have served faithfully for several years. However, they can also fail due to wear or damage to parts.
It is important to remember that most of the gearbox faults (wear or damage to gears and bearings and other parts, clutch and synchronizer faults) cannot be fixed without the help of specialists and special tools. The gearbox is too important a unit to repair it yourself, so at the slightest sign of a malfunction, you need to contact a service station.
The following "symptoms" can serve as a reason for repairing a manual transmission:
- Vibration and noise in the gearbox (can have a variety of reasons - from insufficient oil to damage to gears and bearings);
- Oil leakage (damaged oil seals or O-rings);
- Difficulty switching, grinding (it's all about a malfunction of the drive cables or synchronizer springs);
- Spontaneous gear shifting (wear of the gear shift forks or breakage of the retainer springs).
The car of the Korean automaker Kia Ceed is in high demand and popularity in our country. Users appreciated the high reliability, economy and practicality of the machine, excellent controllability and the ability to carry out many maintenance operations and minor repairs on their own.
Undoubtedly, complex types of work on the maintenance and repair of the machine, such as engine repair, adjustment of fuel equipment, etc., are recommended to be performed in specialized auto repair shops. Experienced auto mechanics will not only quickly identify the causes of Kia Ceed malfunctions, but will also carry out repairs with a quality guarantee.
Many types of Kiya Sid malfunctions can be performed independently. All that is needed for this is a little experience, a desire to learn how to repair and maintain a car in good working order yourself and, of course, our useful tips, recommendations and step-by-step instructions.
Do-it-yourself attempts to eliminate deviations in the car's operation are important and useful. A driver who knows how to fix minor (and not so) malfunctions is more confident in driving. He understands the rules of behavior on the road and knows all the features of his "iron horse". For example, a malfunction: on a Kia Ceed, a red airbag malfunction lamp came on. It seems to be unambiguous - problems with electronics, possibly an error, a software glitch. Are there many car owners who know how to diagnose electrical equipment, electronic filling of a modern car? In fact, everything is not so scary. Try to check all the contacts, feel the electrical wiring, and carefully inspect it. In the overwhelming majority of cases, the problem is in the weakened contact, it is worth fixing it properly, and the problem is no more!
The Kia Ceed can have a lot of problems associated with any breakdowns or malfunctions, like other cars. They can also appear in any units and systems of the car. As a rule, they are insignificant, therefore, most of the work to eliminate such malfunctions is carried out independently. Including such a simple and straightforward work as replacing the air filter. It is important to keep the system clean and in good working order, and for this you should change the filter installed under the hood of the car at least once a year (or after 10,000 km). The work is done in several steps:
- open the hood of the car and lock it with the latch
- disconnect the latches securing the cover of the air filter housing
- remove the old filter cartridge
- make sure that there is no dust, sand and dirt inside the case, if necessary, remove everything with a car vacuum cleaner and wipe with a slightly damp cloth
- install a new filter and close the cover, securing it securely with the latches.
Many other problems at Kiya Sid are solved in the same way, easily, quickly and consistently, step by step.
A catalyst is an important building block of a modern car. In the overwhelming majority of "Koreans" there are no problems. But sometimes the unit fails, breaks down prematurely, which leads to serious consequences if diagnostics are not carried out in a timely manner and the importance of high-quality repairs is not appreciated. If the problems on the Kia Ceed are in the catalyst, you can try to replace it yourself, but you will need a specially equipped box, a garage with a lift or a pit. Replacing the catalyst and repairing Kiya Sid with your own hands is carried out in the following sequence:
- we put the car in the garage and let the engine cool down (on average, 1.5 - 2 hours)
- raise it 1.5 - 1.8 meters up
- remove the crankcase protection
- unscrew the bolts securing the intake pipe to the exhaust manifold
- lower the car to ground level
- unfasten the upper heat shield, for which we unscrew 3 bolts
- remove the bottom splash guard, which is held by 4 M-10 bolts.
- disconnect the intake manifold
- then you can remove the catalyst, clean everything and install a new part instead of the faulty one.
We advise you to pay attention to the number of honeycombs clogged with slag. And what would have happened if a small fraction of all this soot got into the engine ?! Then, for the Kia Ceed, engine problems would have touched you for real.
Yes, the assembly of the exhaust system is carried out in the reverse order. We recommend that you pay attention to the tightening torque of all threaded connections. If possible, replace all bolts and nuts with new ones. It will not cost so much.
In fact, do-it-yourself repairs are not only an opportunity to save money, but, in many ways, are a guarantee of high-quality repairs. We will not reveal a secret if we say that an auto mechanic who carries out maintenance or repairs of your car at a service station is an uninterested person. And, it is unlikely that he will carefully and scrupulously woo every detail. Their work is paid according to standard hours, the time is strictly limited.
The repair manual on the Kia Ceed will provide essential assistance in maintaining the vehicle in excellent technical condition. The book tells in detail and professionally about the device of the car, the main technical parameters, maintenance rules and the main stages of car repair. The repair and maintenance manual for the Kia Ceed is not included with the sale of the car, but buying a book now is not a problem. A regularly updated edition can always be found on the shelves of specialized and ordinary bookstores in the appropriate sections.
When purchasing a repair manual for Kia Ceed Jd, make sure that the technical parameters and design features indicated here correspond to the make and model of your car.
There are not many of them, in general Ceed is a reliable modern car.The repair manual for the Kia Ceed 2010 can help you perform the following types of repair work with your own hands, without resorting to the services of a car service:
- replacement of brake pads
- oil and oil filter change
- replacement of burned-out headlight bulbs, side lights, fog lights, license plate lights, etc.
- replacement of spark plugs, if necessary - high-voltage wiring
- purging or replacing the fine fuel filter
- headlight adjustment
If you have special pullers and keys, you can change the suspension springs, shock absorbers and perform a number of other important types of work. Instructions for repair Kia Ceed at the initial stage, it will be a reliable assistant in mastering a difficult, but such an important profession - a personal auto mechanic for your Kiya Sid.
KIA Ceed gearbox broken? We will repair it!
The sale of KIA Ceed cars in the capital is constantly increasing, and this is only because one of the most important components (namely, the manual transmission) is thought out perfectly and has excellent performance characteristics. Every driver knows that traffic through congestion and traffic jams, which Moscow has long been famous for, requires more frequent gear changes, which makes the manual transmission fail faster.
One of the first signs that indicate a malfunction in the unit will be such external sounds as howling, crackling, hum or noise that occurs either when starting to move, or while driving, or at the moment when the driver is changing gear. Also, the increased backlash during the wings will eloquently notify about the presence of a breakdown. Whatever the problem in this unit, diagnostics are initially necessary, during which it will be precisely determined which part needs to be replaced.
Only after carrying out the diagnostic work can you say with certainty which parts should be purchased in order to restore the perfect operation of the gearbox. You may need both a shaft (primary, secondary) and a bearing. Do not forget that the overhaul of the assembly may be accompanied by the simultaneous replacement of the lubricating component, therefore it is also better to purchase oil together with spare parts. Often auto mechanics can offer the installation of used parts, this should not be feared, especially if the spare part is original, and the degree of its wear is minimal. If you need to repair the KIA Ceed gearbox, come to our auto repair shop, where a full service for this unit will be offered at a high professional level.
Whatever is required: disassembly of the gearbox, its partial or complete bulkhead, as well as the final assembly of the unit, any action is performed strictly according to the recommendations given by the manufacturer. The exchange of parts outgoing from their resource requires both special knowledge and devices, and therefore it will not work a priori to perform this operation in an ordinary garage. Replacing the oil and broken components of the KIA Ceed manual gearbox is the prerogative of highly qualified specialists, and it is these auto mechanics that make up the staff of our workshop. The cost of work on the restoration of gearboxes is minimal. However, you can say how much it costs to repair a unit on your car only after diagnostics, because the price of services depends on the complexity of the breakdown.


