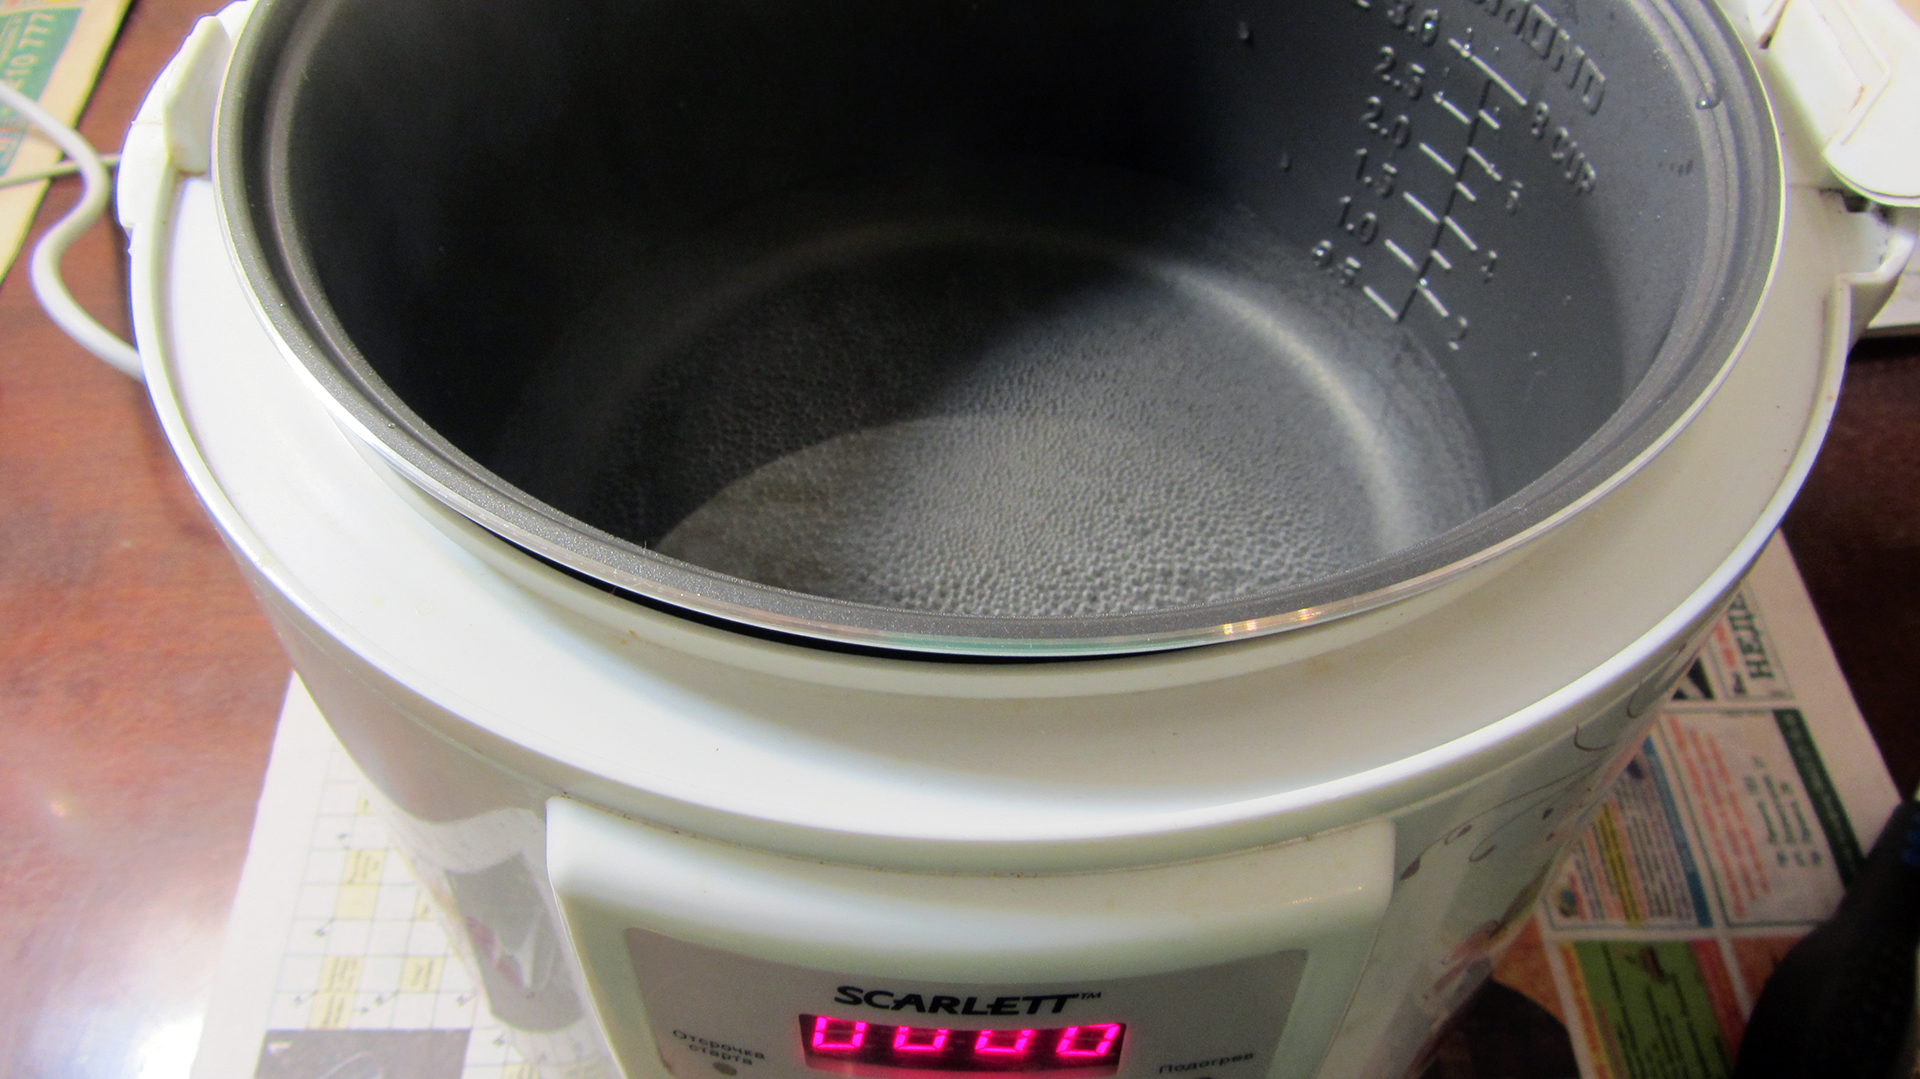
The fact is that in Scarlett multicooker (and the like), thermal fuses fly out every couple of years. This is due to the constant exposure to high temperatures. Over time, the effect accumulates and one day the fuse breaks the circuit without noise and dust and the multicooker is de-energized. This is fine.
So if your multicooker won't turn on, you can almost certainly fix it yourself. Even if you know nothing about electronics at all. To restore performance, you just need to replace one or two penny parts. But first you need to make sure that this is the case.
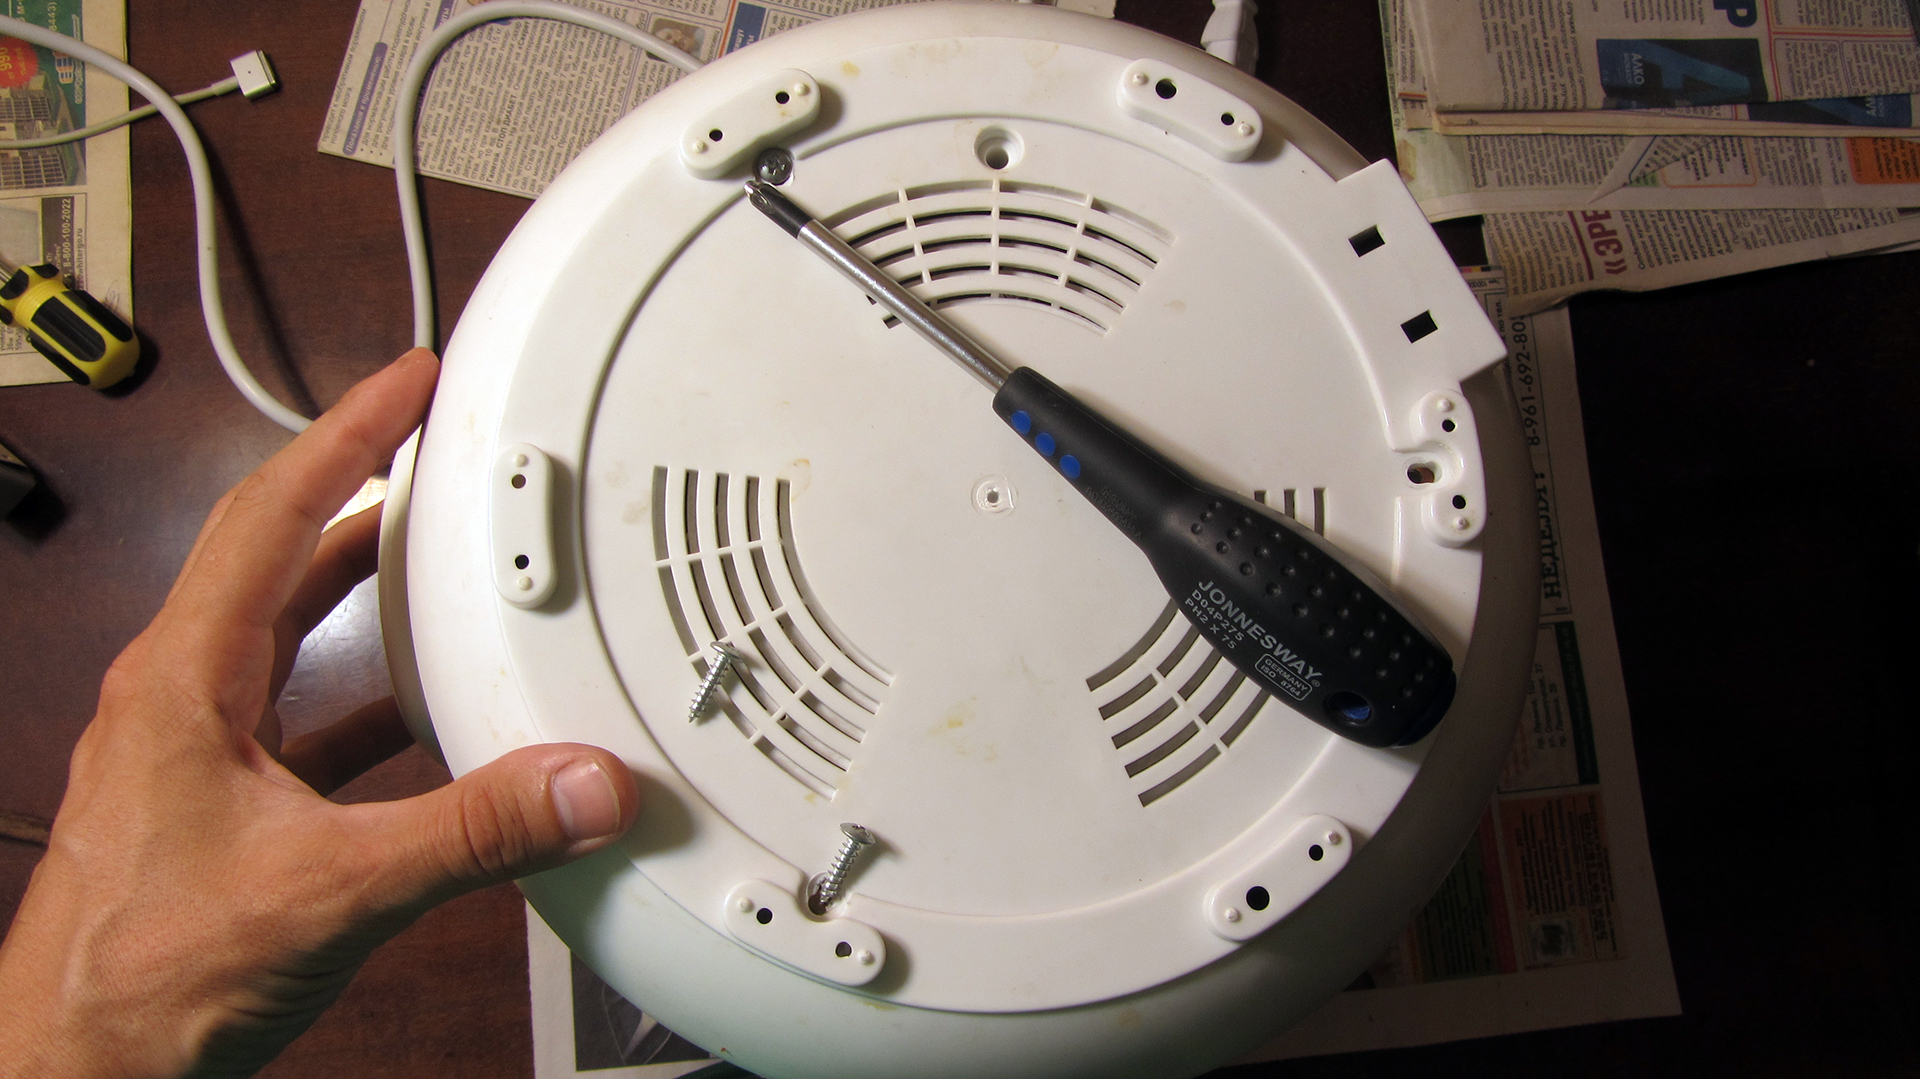
We unscrew the three screws and remove the bottom cover.
As you can see, you don't have to break any warranty seals.
By the way, it will not be possible to completely remove the cover, tk. the network connector and power board are fixed on it. And all this gimmick is connected by wires going deep. But we just need to slightly move the cover to gain access to the wires.
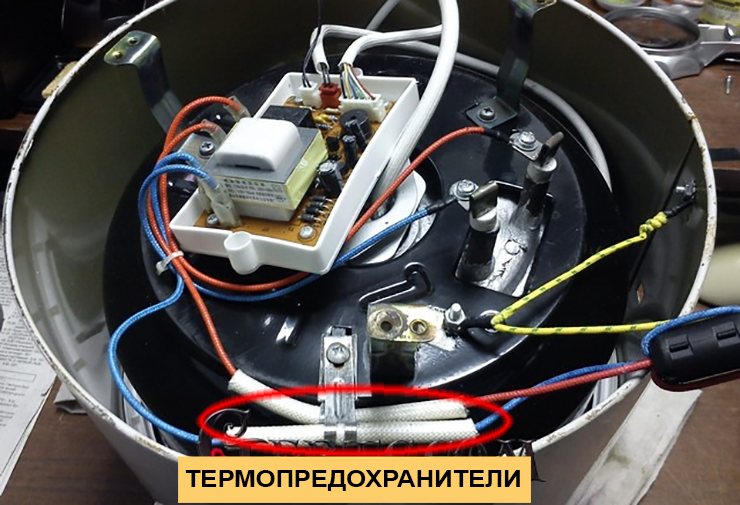
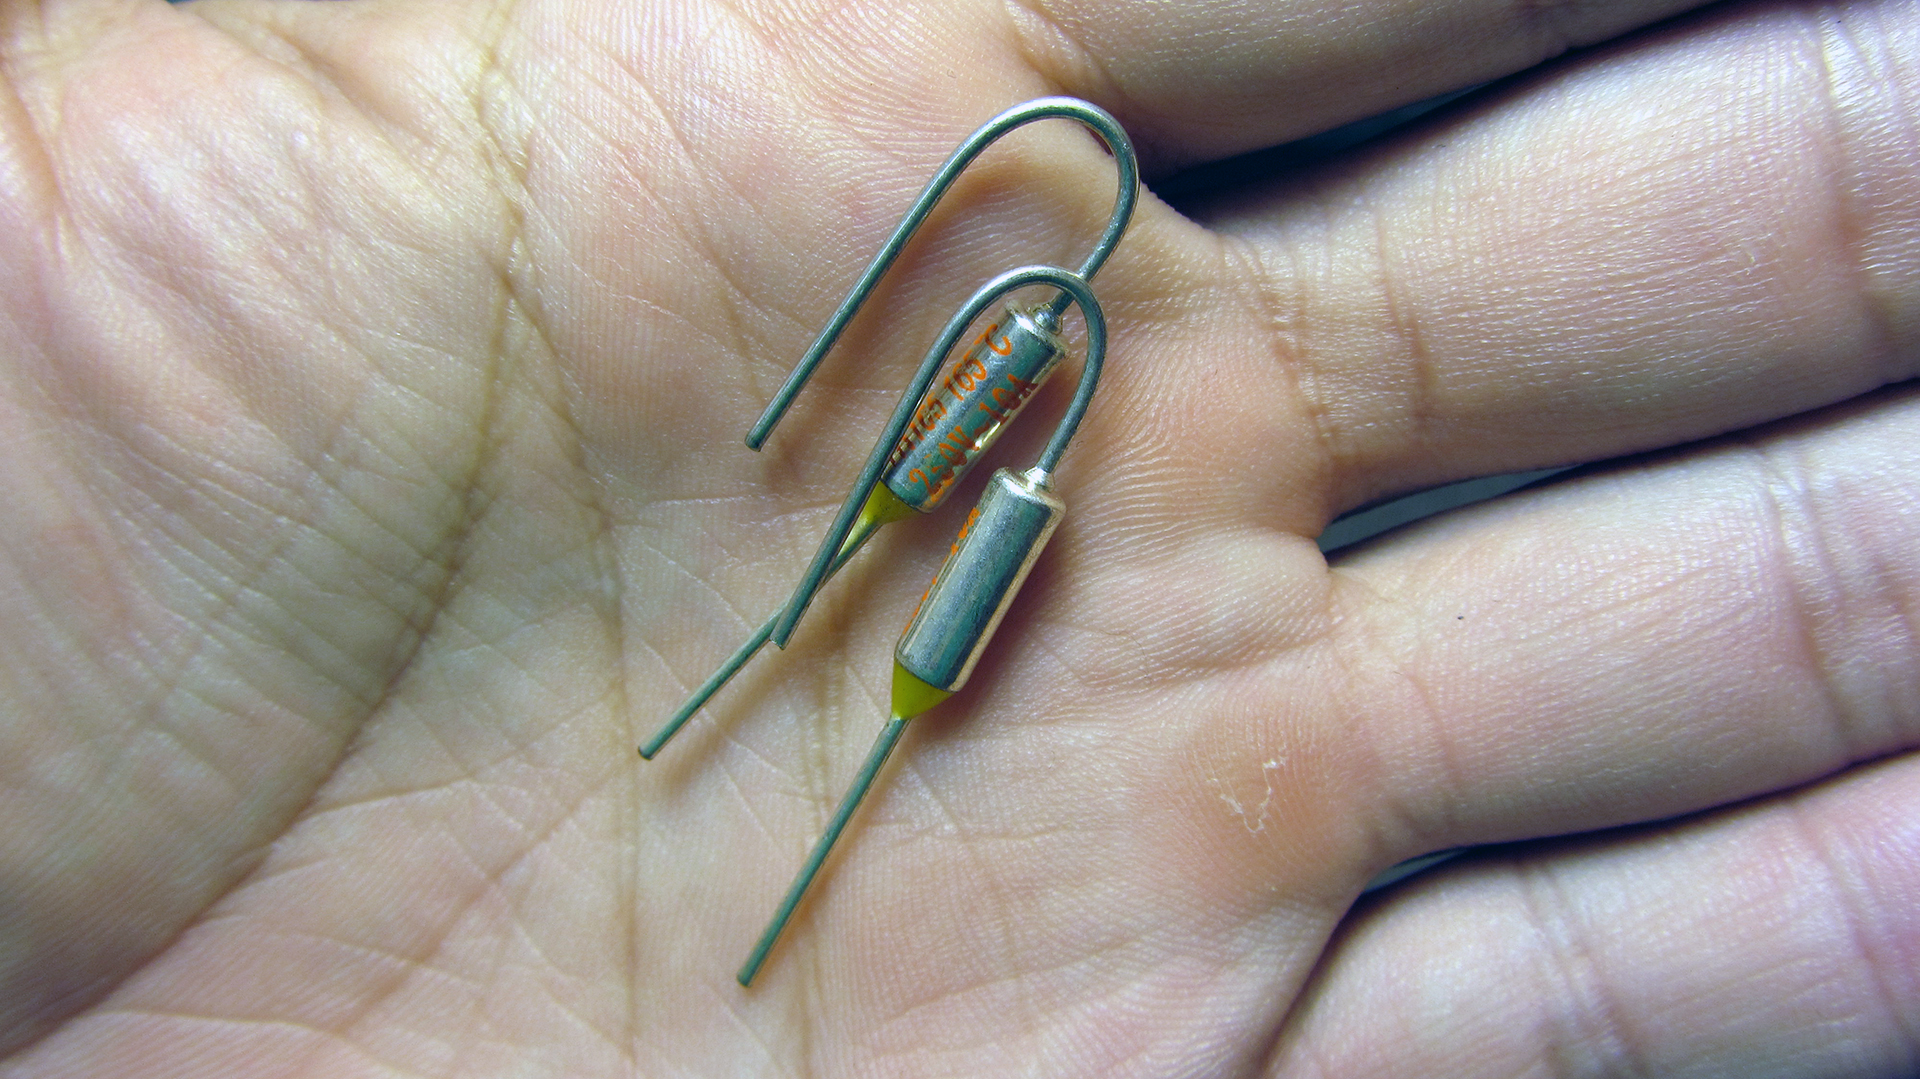
Thermal fuses are mounted directly on the power wires under the metal brackets, inside the tubes (under the heat-resistant cambric). Here they are:
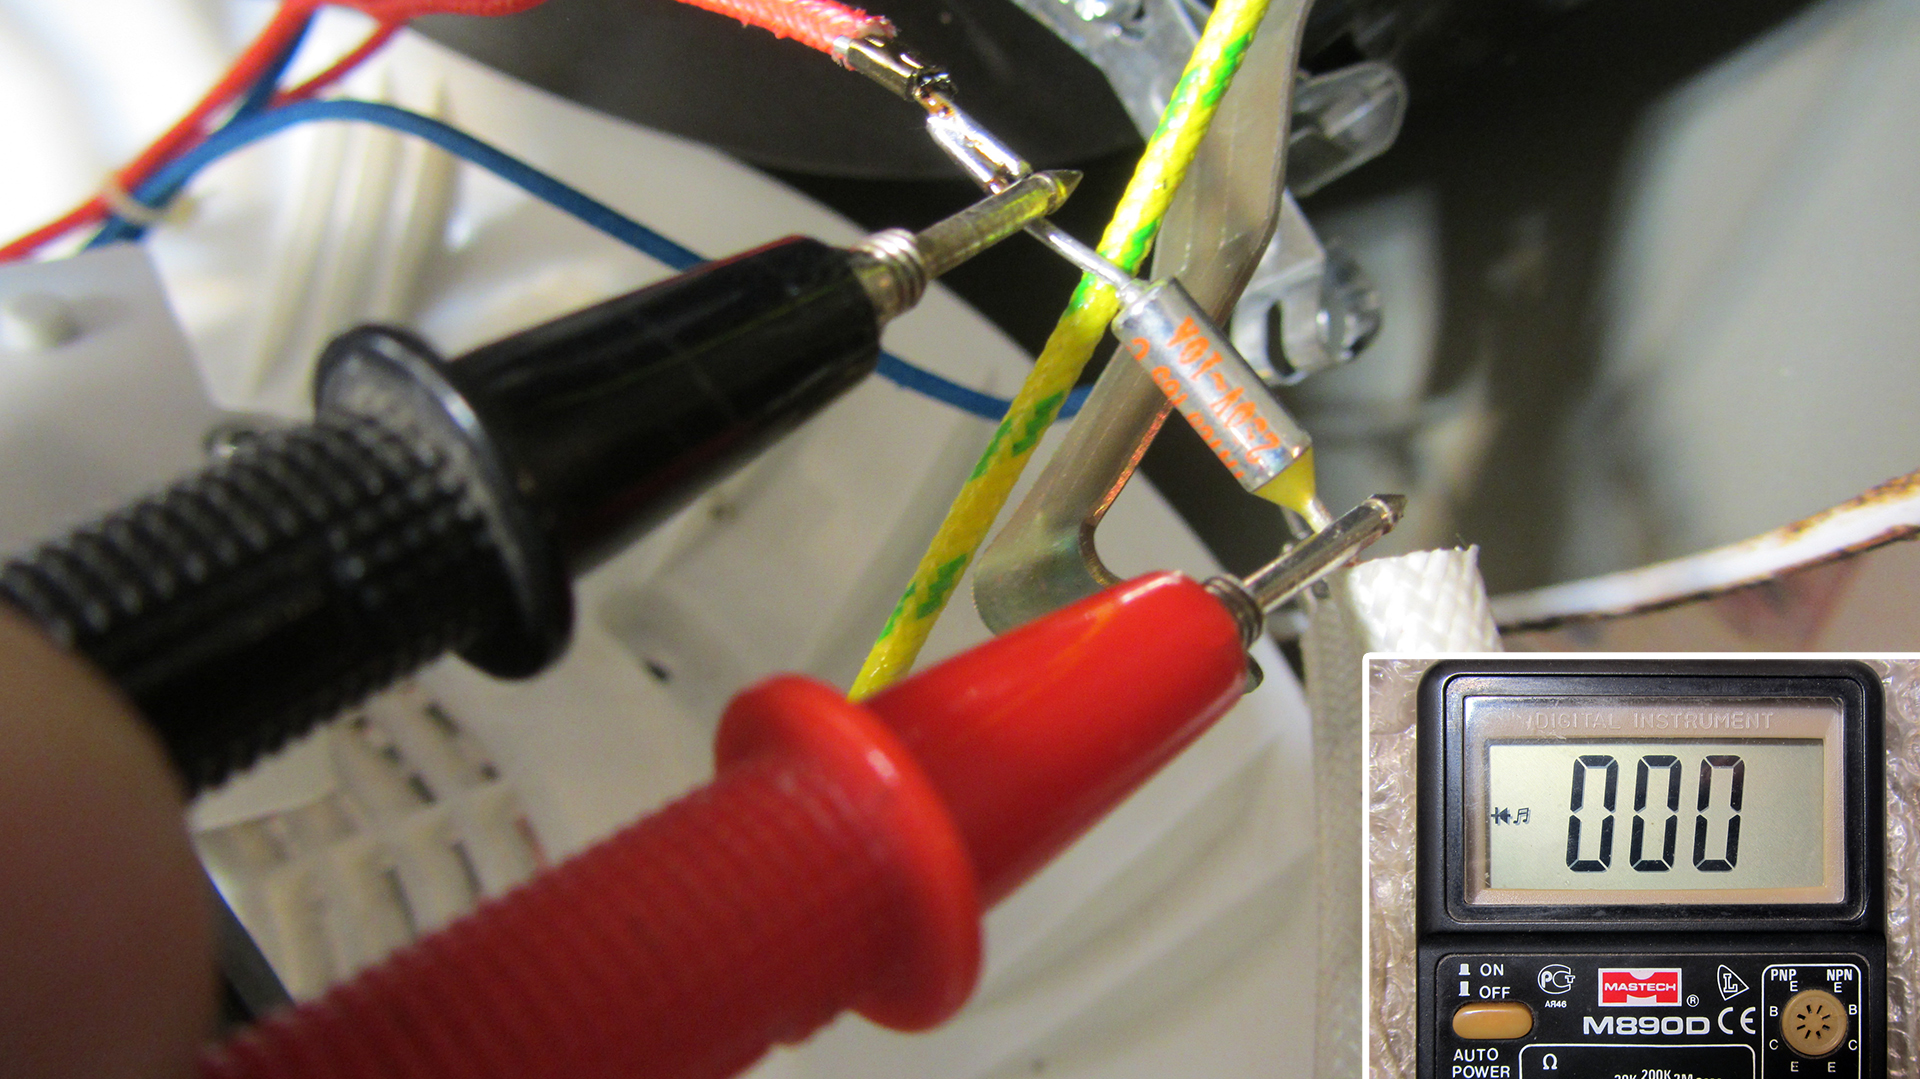
We expose them and call them with a multimeter. A working fuse should ring shortly, like a piece of wire. If this is not the case, then you are in luck and most likely the repair will take a couple of minutes.
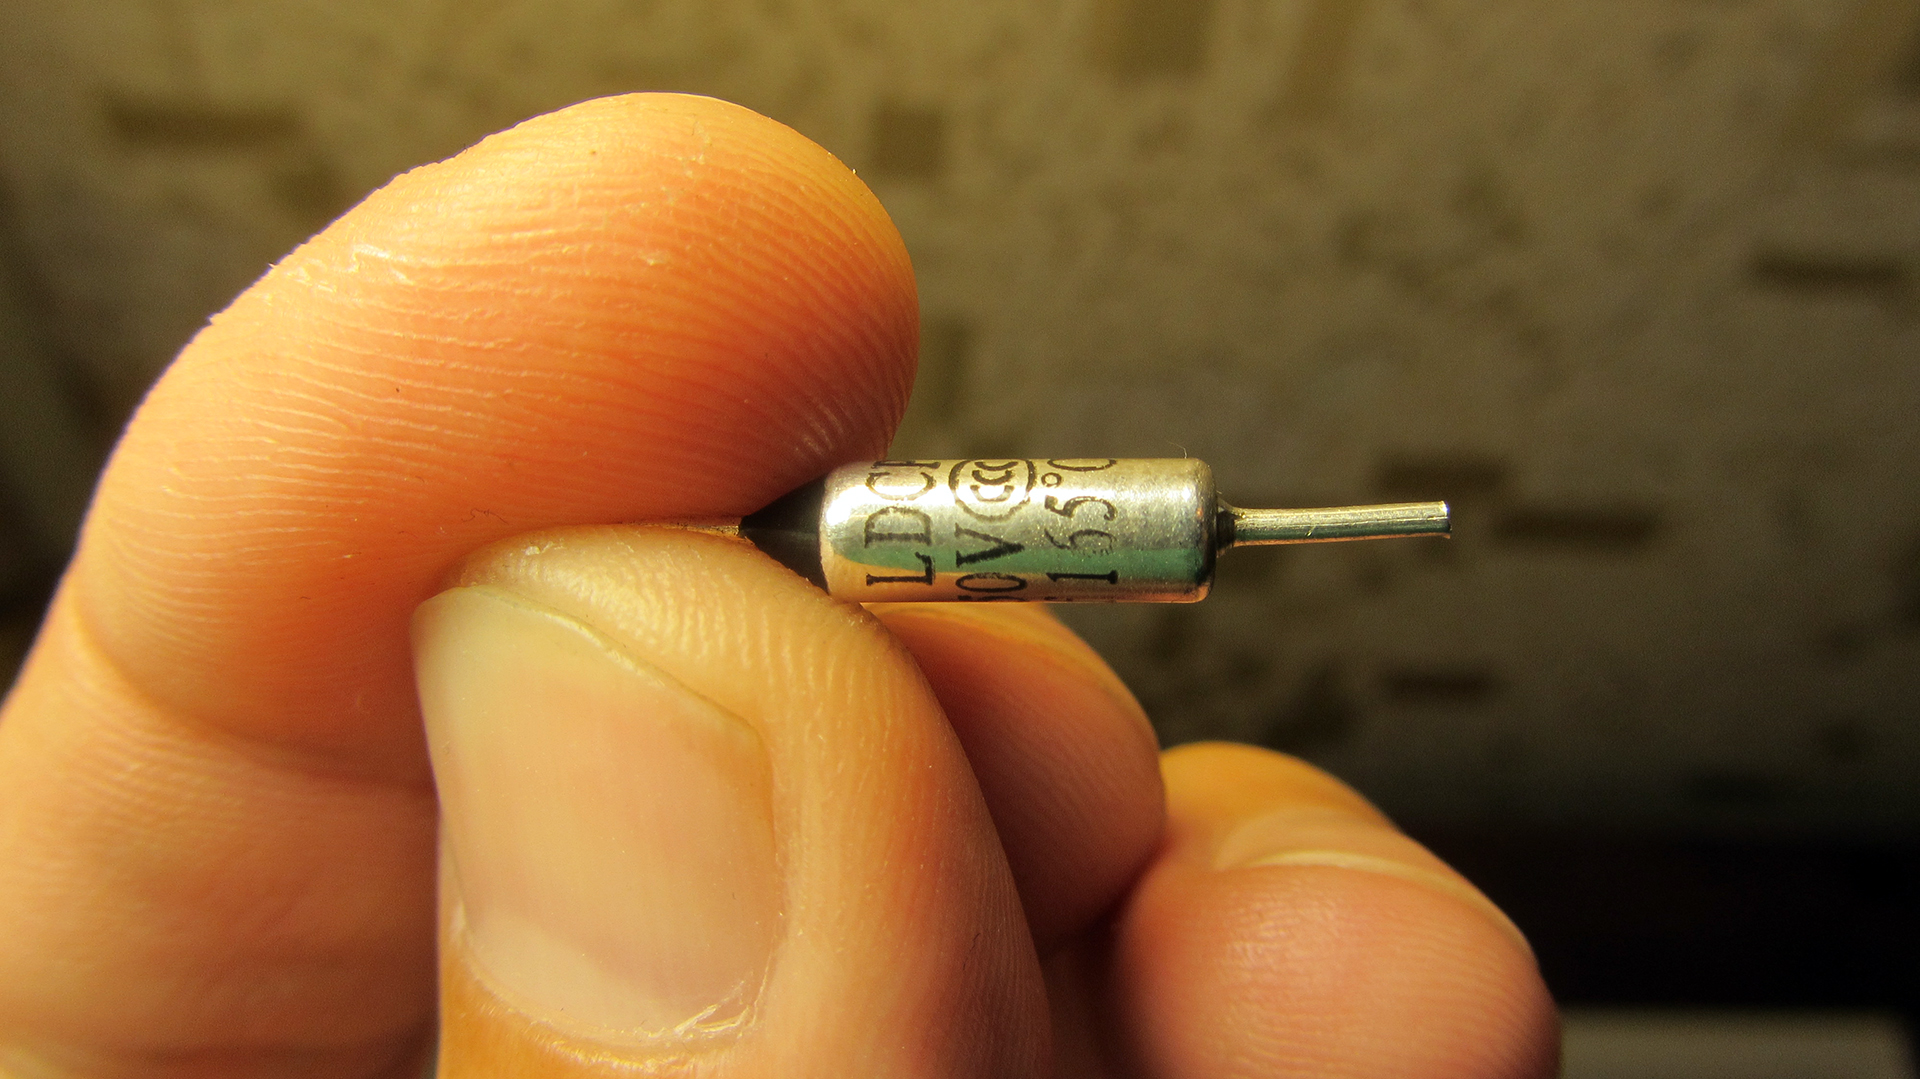
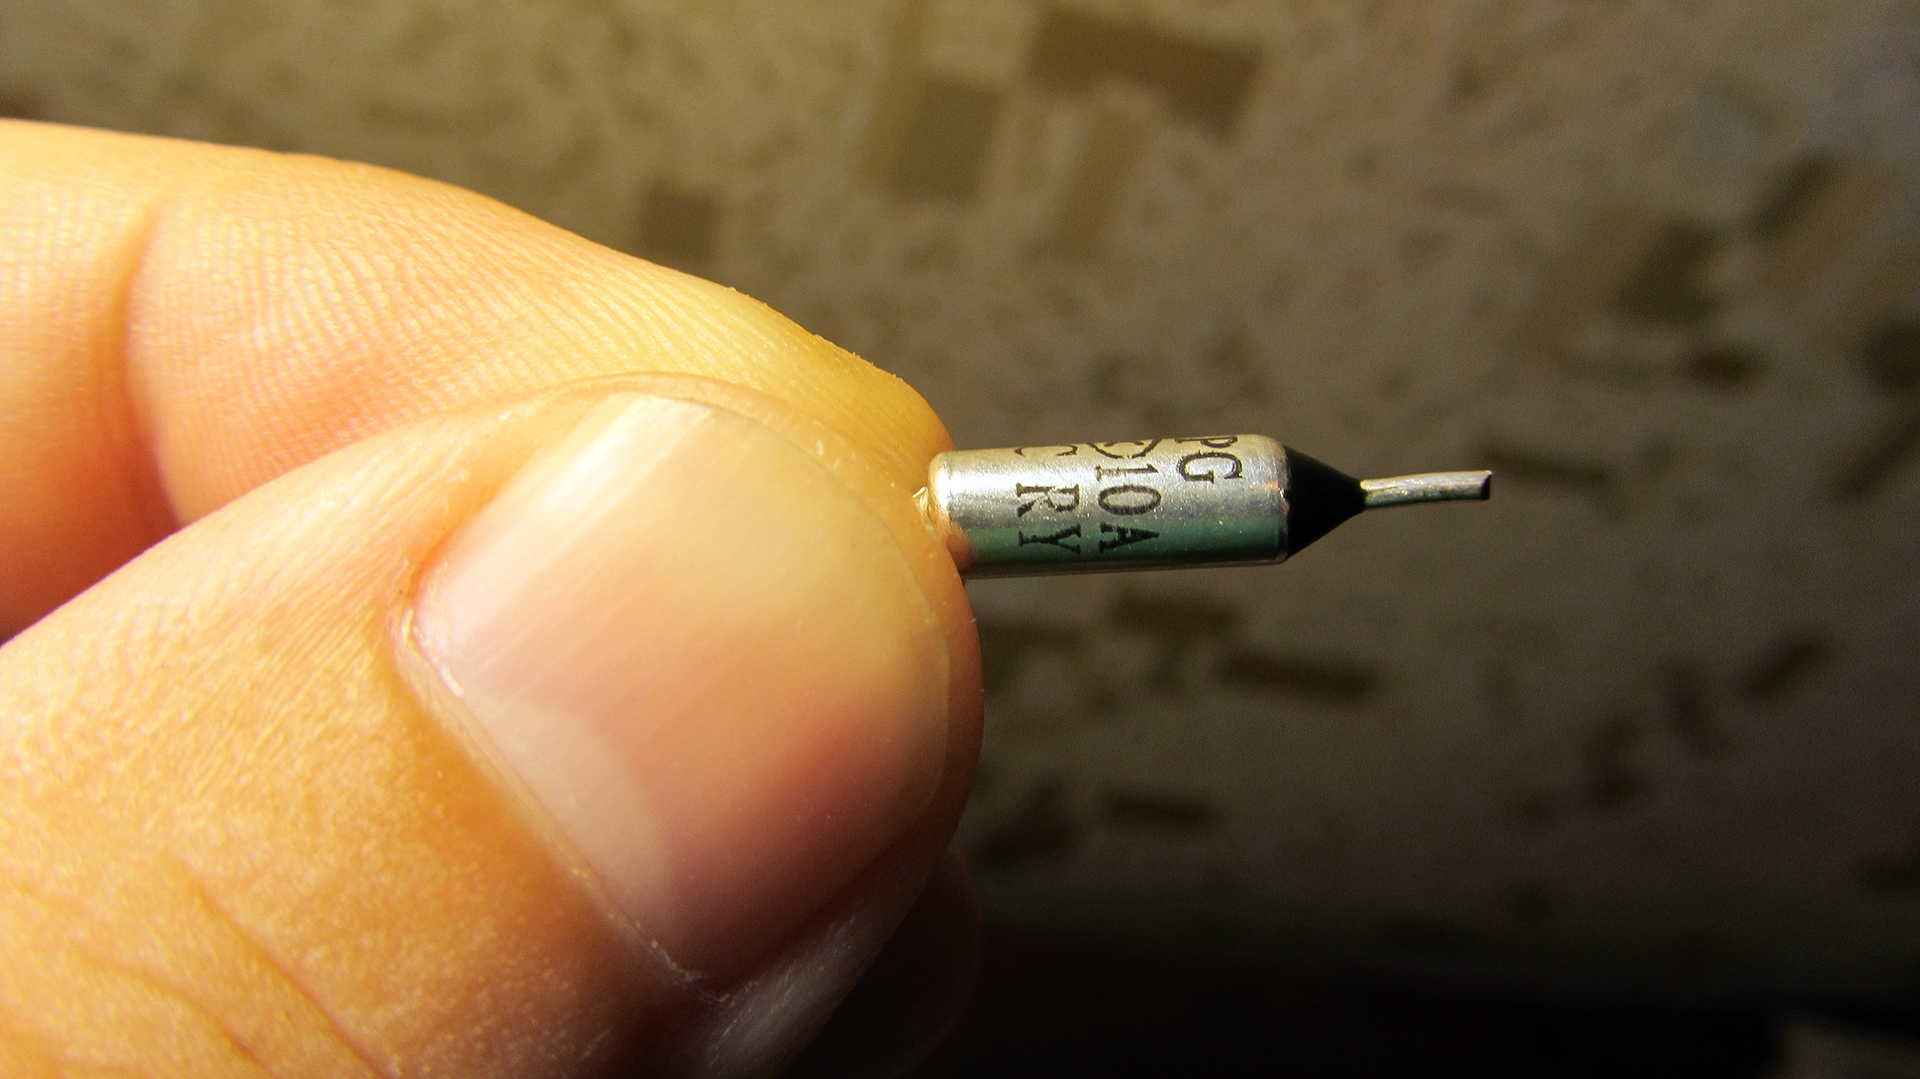
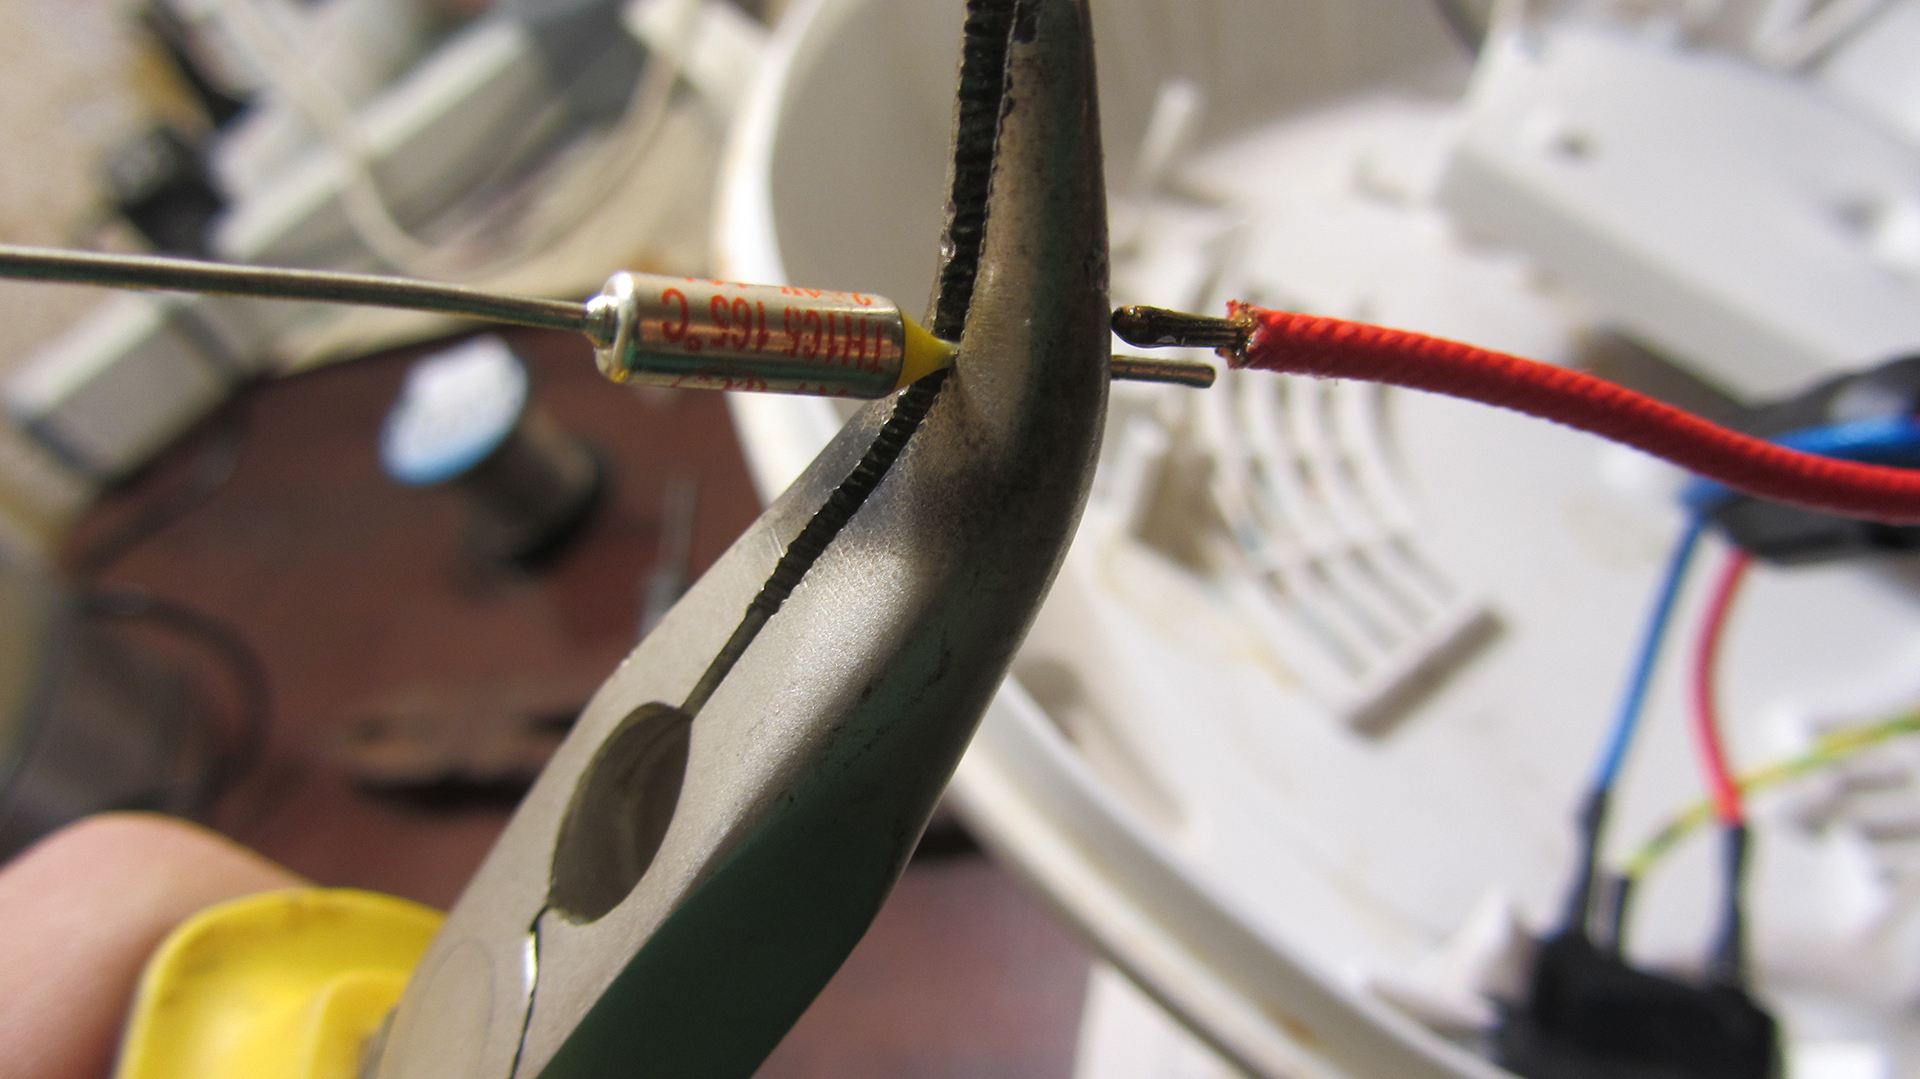
We bite out the faulty part and examine it properly. The fuse rating is always indicated. In our case, it is 10A, 165 ° C.
I was lucky, and in the nearest radio parts store there were fuses of exactly the same rating at a price of 30 rubles / piece. Better to take a couple at once just in case.
If everything is done according to science, then the connection of wires with fuses must be ensured by crimping with special brass or copper tubes. They are called crimp sleeves.
But of course, not in every village you can find such casings, so you have to somehow be perverted.
A good connection can be obtained if you wrap the contact point with a thick copper wire in several turns, and then squeeze this place strongly with pliers. In fact, it turns out the same thing, only instead of a copper tube there will be turns of wire.
Personally, I decided to just solder it stupidly and not steam.
190 ° C), then it turns out to be higher than the trigger temperature of the thermal fuse (165 ° C). Therefore, in case of strong heating, the fuse will blow faster than the soldering breaks.
The only thing that needs to be done is to protect the thermal fuse from the high soldering temperature (250-400 ° C), which clearly exceeds the threshold for its operation. This problem is solved by using a reliable heat sink, which can be done with ordinary platypuses or small pliers. That's exactly what I did.
We fix the fuses in their places, screw the cover back as it was and try to turn it on.
The whole process of repairing a multicooker using the example of the Scarlet SC-410 model (in the 411th everything is the same) is clearly shown in this video:
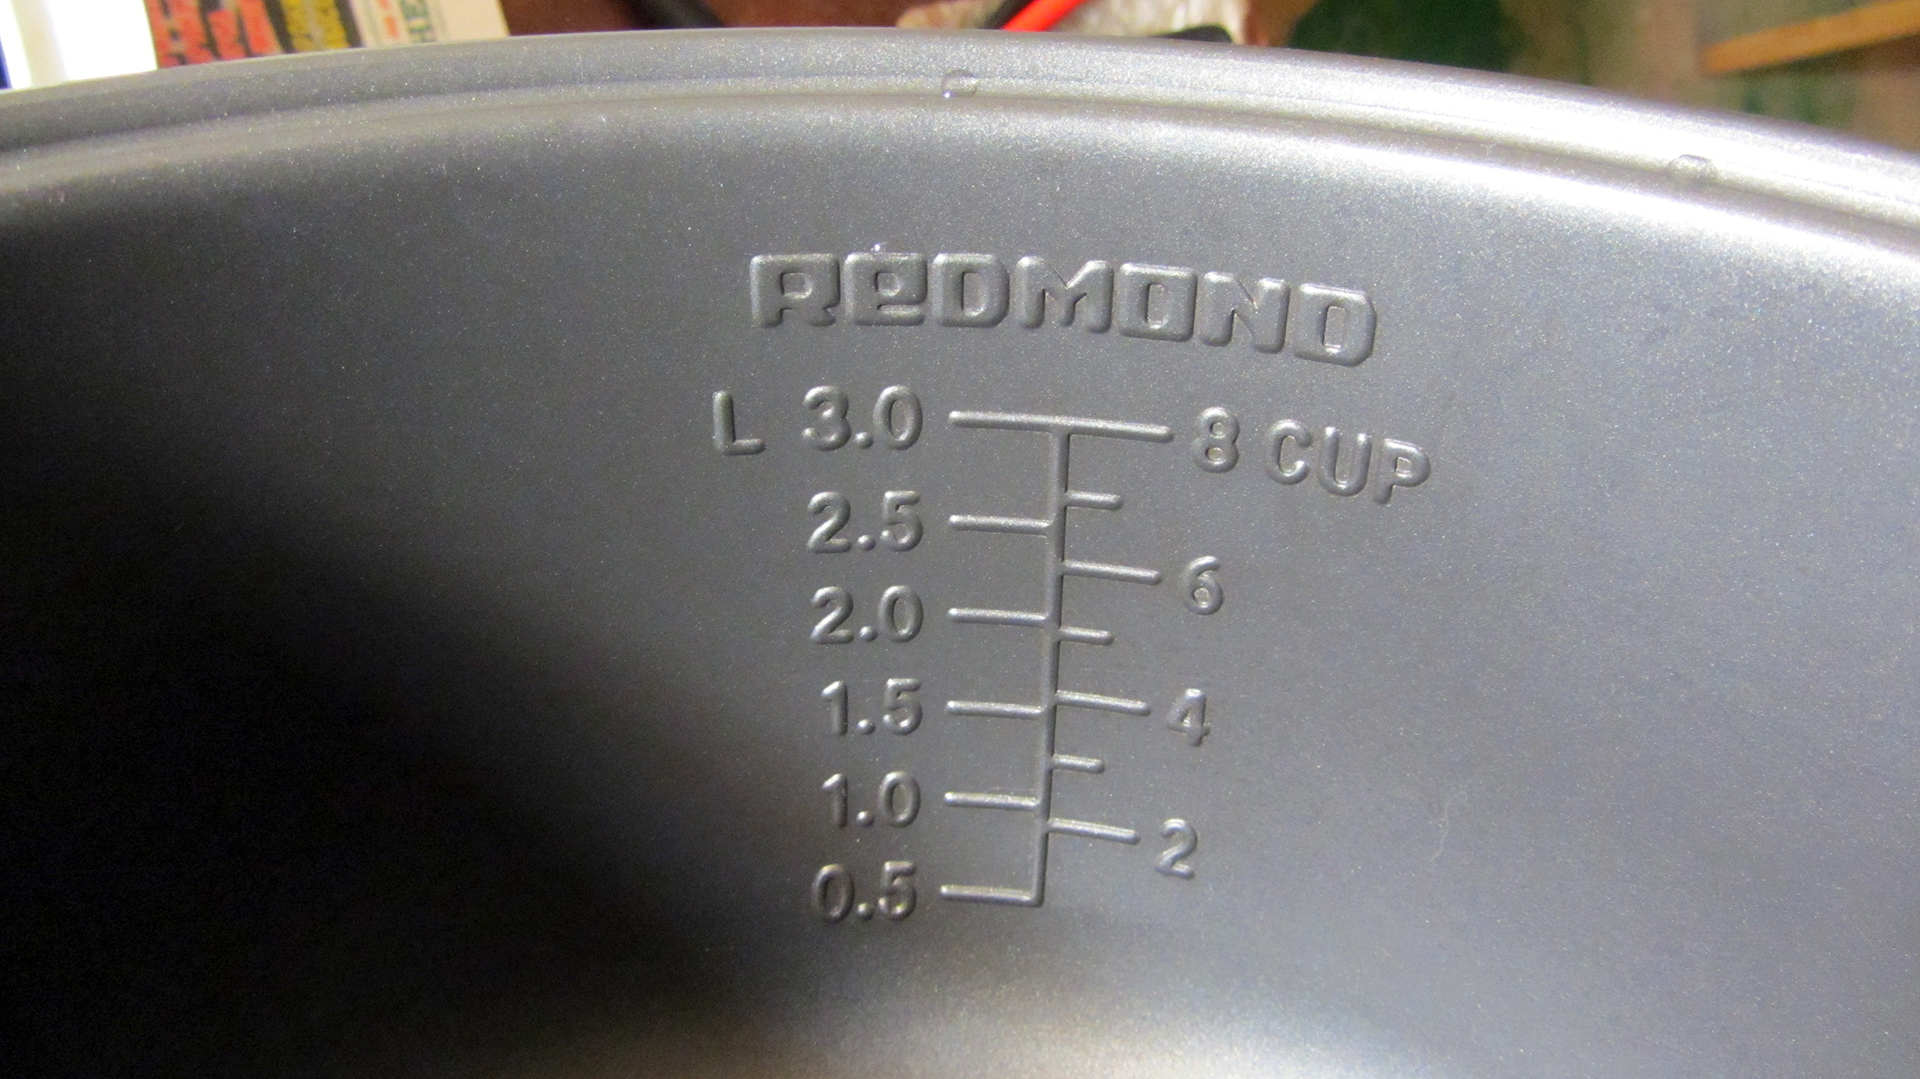
By the way, about the bowls. Bowls Redmond RB-A400, RB-S400 are great for Scarlett SC-411. The first is teflon-coated, the second is twice as expensive, made of stainless steel.
We took the one that is cheaper (pictured above) and for a year and a half no complaints. We cook often.
In this article, we will show you how to repair your SCARLETT multicooker with your own hands using a screwdriver and a tester.
Most of the SCARLETT SC-411 multicooker comes to us with a “does not turn on” fault. We take it, check it: insert the plug into the outlet, and indeed, there is no reaction to switching on. Cause of malfunction: failure of the thermal fuse. This happens as a rule due to the fact that the bowl is not completely inserted, and as a result of which an air gap appears between the bowl and the heating element. The most intensive heating mode for this multicooker model occurs in the "Fry" mode. If in this mode the bowl does not fit snugly against the heating element, then the temperature quickly exceeds the maximum fuse level and it burns out. It was theory, now to practice.
Disconnect the multicooker from the network, turn it over and see 3 bolts at the bottom of its body. Take a Phillips screwdriver and turn it off.
This will open the bottom cover. The wires will interfere with completely removing it, but we don't need it. It is enough to open it as much as possible.
Thermal fuses are highlighted in the figure with a blue circle; to get to them, you need to unscrew the screw highlighted in a red circle. We remove the insulation and take the tester in our hands. We transfer the tester to the “ring” mode and check the thermal fuse on the blue wire.
In my case, the fuse “ringing” means working. Checking on the red wire.
Problem found! This fuse has blown. We change or remove the fuse, assemble in the reverse order and check.
Most modern housewives know about the benefits and effectiveness of Redmond multicooker firsthand. This multifunctional kitchen fixture has provided thousands of homes with wholesome, nutritious, hot and delicious food. Everyone who has used this device at least once has become convinced of its effectiveness. However, like all electrical appliances, it is susceptible to various breakdowns. First of all, malfunctions of the device are attributed to a factory defect. Nevertheless, it sometimes happens that the device breaks down during operation. It is then that most people think about repairing a multicooker with their own hands. It is possible to perform it at home, but for this you have to take into account several nuances.
In order to protect the Redmond multicooker from breakdowns and not think about how to fix it with your own hands, you must comply with the requirements prescribed in the device manual.
The first step is to highlight the sequence of stacking products before cooking. Remove the food bowl from the Redmond multicooker before placing it. Otherwise:
Most malfunctions occur due to contamination of the device contacts. This can result from the ingress of liquids or bulk solids into the interior of the device, such as:
This type of breakdown is the most harmless and it will be easy to repair the multicooker with your own hands. At the same time, it is worth remembering that until the end of the cleaning and assembly process of the structure, the device should in no case be connected to the network.
To clean the device with your own hands, it is important to study and follow the sequence of actions.
Observing the rules of disassembly, cleaning the device will not cause much trouble.
In some cases, Redmond multicooker may stop working, displaying a specific alphanumeric error code. The ability to decipher the code will allow you to understand the cause of the breakdown and start fixing it. Information for decryption is known to manufacturers, as well as craftsmen specializing in the repair of household appliances.
Certain errors displayed on the screen indicate serious malfunctions. Nevertheless, there is a list of codes explored by ordinary users through trial and error.
VIDEO
Thus, craftsmen managed to find out that the message "e0-e4" displayed on the screen signals faults associated with short circuits, as well as breaks of temperature sensors located above or below. Also, the problem may be related to thermal fuses. Various manufacturers set their own codes, therefore, for repairs on their own, you will need to remove the device case and use the capabilities of the multimeter to detect an open by measuring the level of contact resistance.
Another common reason that a multicooker may need to be repaired is a clogged thermostat responsible for heating. In most cases, it is located at the bottom of the device, next to the power board. To get to and repair the thermostat, you need to remove the bottom of the structure. Before cleaning, the copper contacts must be slightly unclenched, and then wiped with zero emery cloth or thick paper. The reason for such a breakdown may be the accumulation of moisture that has penetrated into the mechanism due to the liquid spilled past the bowl. Condensation is also possible.
A thermal cutout for a multicooker is one of the most important parts of it. It is a small piece of wire that is indistinguishable from a resistor. The conductivity index is 10-15 A, based on the type of element. The highest temperature is 150-170 degrees. Exceeding the permissible limits will lead to a blown fuse and an open circuit, which can be determined using a multimeter.
The most important part of the Redmond multicooker is at the center of the device. Most modern models are equipped with several thermal fuses covered with protective plastic insulation. To detect a blown fuse, it is necessary to dismantle the bottom cover of the device.
After removing the bowl, you can see the button: outwardly, the assembly resembles a steel mushroom, the lower part of which is covered with a spring. The circumferential surface is the heating element of the Redmond multicooker. Thermal fuses are located near the main unit.
In this case, the plastic insulation is visible. Some manufacturers secure them with clamps screwed to a screw, but in most cases, the fuses are simply dangling in the air.
Since the factory fastening of the fuses is carried out by crimping, the use of soldering is strictly prohibited, since a red-hot soldering iron can burn out the heat-sensitive fuse. To determine which particular element is defective, as well as whether at least one of them is working, use a multimeter to measure the resistance without removing the fuse. After detecting a malfunction, the fuse must be replaced.
Modern multicooker is equipped with two electronic boards:
The main board, responsible for heating, is located at the bottom of the device, while the control board is located in the heart of the device - inside the working cylinder.
A close inspection of the microcircuits reveals several signs of problems:
delamination of tracks;
violation of solder seams;
blackening of resistors;
swelling of capacitors;
formation of carbon deposits.
If one of the items on the list is found, it is worth repairing or replacing parts, restoring the soldering or tracks of the board using a zero skin and tinning the damaged places.Jumpers can be made from burnt-out resistors using their legs. To secure the soldering and tracks, it is recommended to use a varnish that protects the circuit from leaks and oxidation.
Multicooker repair - errors and malfunctions, the multicooker is broken.
Multicooker perfectly complements the interior and functionality of modern kitchens, coping with dishes of any complexity. You no longer need to worry about whether your milk porridge will run away, or whether your patties will burn. But if you want you to need to repair the multicooker as late as possible, or not at all, you need to know the basic rules of its operation, and in no case violate them. Regardless of the brand of your multi, whether it be Redmond, Panasonic, Polaris, Moulinex, Vitesse, Phillips, Scarlet, Smiley, ARS, Cuco, Supra or some other company. Let's talk about this.
The first rule is the need to follow a certain sequence - first, the food is placed in the pan, after which the pan is placed in the device. Not the other way around! If you put the ingredients directly into the multicooker, then this can threaten two dangers. Firstly, the poured milk or water may spill out of the working bowl, onto the “insides” of the device. Even in small doses, it is dangerous. Secondly, you can simply forget that you washed the pan, but forgot to put it in the device, as a result of which you will pour the same milk or pour cereal directly onto the contacts and boards. As a result, the multicooker broke down, and in order to fix it, you need to completely disassemble the device and clean all the contacts. If the inside is already dirty, under no circumstances plug the device into the mains until the end of cleaning, otherwise the contacts may burn out.
How do I clean a dirty device?
E type multicooker malfunctions
Sometimes an error message appears on the screen of the device, in which the letter E appears with an index. Such errors are corrected depending on which index the technician is showing you. For example, the errors of the E1-E3 multicooker are, most likely, the ingress of moisture into the pressure cooker. The fix is followed by removing the bottom and leaving the device alone until it dries completely for several hours. If you don't want to wait, you can use a hairdryer. Correction of malfunction E4 - cleaning the pressure sensor with a centimeter strip of office paper. Alternatively, you can pass fine sandpaper between the sensor contacts several times. The multicooker error codes are described in more detail in the manual. If the error persists, you will have to contact the service center.
Sometimes the multicooker gives an error, and sometimes a malfunction can be noticed without any information on the display. For example, if you notice steam escaping from under the lid, this may indicate a problem with the O-ring. It is either worn out or outside of the specified seat. If reinstalling the ring did not help, then you will have to completely replace it. This procedure is recommended for at least once a year. If the overpressure valve allows steam to pass through even in the “Closed” position, this can only be corrected by service personnel.
Security measures
Remember that the outer bottom of the hob must be clean and dry. Moisture must not come into contact with the heating element or the protective cover. If you are cooking foods with a high liquid content, never open the pressure valve immediately after cooking. This can cause burns. If you want your pressure cooker to cool down faster, place a damp towel on top of it. The dropped internal pressure will allow the lid to open without difficulty.
For the correct operation of the multi, our articles will also help you:
It's great when the cooking process is mechanized, then the creation of culinary masterpieces brings sheer pleasure.Alas, not every manufacturer puts in detailed instructions for maintenance. Experts in the field of home appliance repair will offer several ways to disassemble a multicooker of different models. With these tips, it will be great to save your family budget.
Kitchen assistant from the "Moulinex" company
In most cases, it will not be difficult to disassemble the multicooker, because they are assembled according to approximately the same scheme. For a home craftsman who at least once faced the repair of electrical appliances, where the basis is a heating element, the principle of the device will be clear. Below are the main external parts of the enclosure:
Sealed lid with elastic band, on top of which there is a removable steam valve.
A cooking bowl (in older models it is built into the body, which is not very convenient).
Metallized case, with plastic elements (the appearance and finishing materials completely depend on the cost of the device: in the flagship models there are completely iron models).
Button that opens the lid.
Base (bottom).
Inside, under the bowl, there is a heating element disc (TEN).
Soft buttons, control panel screen (sometimes absent, in budget lines).
Handle for easy carrying. It can be located on top or on the body.
The device and equipment of the multicooker Polaris, middle class
The figure shows which wires are at the bottom of the multicooker. Power is supplied via red wires. A switch (which puts the device into operation) and a thermal fuse (protects against overheating) are installed in series. The voltage from the thermal fuse is supplied to one terminal of the heating element, to the power supply board. The white wire is directly connected to the power supply. Through it, voltage is applied to the second output of the heating element, closes the relay contacts.
Wires that supply voltage and ensure operation
Under the heating element there is a power supply unit with standard wiring. He is the most loaded part of the multicooker. Its tasks include converting the current into 220V to direct current 5V and 12V (the first saturates the control unit with power, and the second - the switching circuit, activates the relay). The home network supplies power to the three-pin connector located at the bottom. The yellow-green wire stands out: this is the ground.
A schematic diagram of the internal device of the Redmond RMC-M23 multicooker
Often, manufacturers mount a universal board in the device for the entire model line. Naturally, the technological nuances are kept secret, because firms do not expect to introduce self-taught masters into household appliances. When looking at the photo, an isolated metal round disc catches the eye. This is a battery that, when disconnected from the mains, stores the preset cooking programs in memory.
The figure shows the battery below (yellow)
Temperature sensors are located in the lid and bottom of the product - therefore, you need to disassemble the multicooker with extreme caution so as not to disturb these thin wiring. One wire is connected to the touch screen. A lot depends on these details - they are the “brain” of the device. Damage to the temperature sensors can lead to malfunctioning of programs and cooking modes. Moreover, the kitchen assistant may not turn on, because the required set of heat indicators will not occur.
The device is disconnected from the network, waiting for complete cooling.
The lid is wiped off grease with a soft cloth.
If the fat is not rubbed off, use mild dish detergents, without abrasives.
Wipe dry the lid.
The cover of the appliance is opened.
In the area of the lid, two plastic clips are found. They need to be pressed and pressed towards the center.
The upper sector is pulled towards itself, and then sharply downward.
All internal parts are thoroughly washed from food debris.
To put the part in place, do the opposite. If everything is in place correctly, the clips will make a click when they are seated correctly.
If the product breaks down and you need to see the internal details, and the master does not know how to carefully disassemble the multicooker, then:
First of all, wipe all soiled parts of the product with a rag.
The electrical appliance is turned over with the lid down.
The bottom cover holds the screw, unscrew it. Dismantle the bottom.
All removable wires going to the board are disconnected.
Unscrew the screws holding the heating element.
They remove the thermocouple, all the microcircuits.
Unscrew the screw holding the top cover (when the model does not provide for removal). Then, squeeze the cover with a screwdriver, remove the temperature sensors.
Remove the plastic snap rings (if present around the edges of the metal case).
The inner walls are removed from the outer ones.
When considering the Redmond model range, you can establish: the manufacturer takes care of the appearance of household appliances, reliably masks all the screws and bolts. If we take the multicooker of this company as an example of the middle class, then you can find that screws - trompe l'oeil are placed on the case for decoration. They only play an aesthetic role. The main ones are securely hidden under the plastic.
On some models (Mirta, Polaris, Redmond, Vitek, etc.), screws holding the upper part with a triangular hole. The most common mistake newbies make in repairs is to arm themselves with a cross, apply force, press on the hull.
From mechanical stress, dents are formed, which worsen the external condition of the device. Therefore, it is wiser to use in this case a triangular socket screwdriver, the length of which is from 100 to 120 mm.
The flagship device is manufactured by Moulinex. The build quality is solid. The main advantage is the ease of removal of the inner cover. The entire removable structure is supported by a silicone insert, which, thanks to its elasticity, tightly holds the parts. This design is more aesthetically pleasing than external screws.
Cutting edge model from Moulinex
In budget-class multicooker Delfa, Polaris, Rotex, Scarlet, Redmond, the button that closes the lid often breaks. Masters attribute this feature to birth defects. It happens that the button does not lead due to improper use, but due to exposure to high temperatures. If the device is under warranty, then it is better to contact the service. To cope with this nuisance, you will have to disassemble the case and break the seals.
When closing the lid, the hostess must first hold down the button, and after covering it completely, release it. Less stress on the part reduces the chance of breakage.
Broken open button
Two repair options that do not require complete disassembly:
The surface is degreased, glue is applied and magnets are applied so that after closing the lid they meet. You can take one large one, but it is better to take four small ones to connect them in pairs.
In the dropped button, two small holes are made for the stem. The same is done in the case, at the place where the latch is attached. Then, thread the stem through the removable part. Gently insert the structure into the body.
Parts are purchased in the store, the use of self-made inventions is not desirable. Using these can lead to fire! Moreover, the price does not bite on elements that can be replaced at home. If adequate operation of the device is disrupted, system errors appear on the screen. Reading them, it will become roughly clear which part needs repair and replacement.
E1, E2 - there have been changes in the operation of the power supply unit, the heating element, the lid is not tightly closed.
E3, E4, E5 - the device has overheated and the protective function has worked, the temperature sensor has broken. In some models, with this breakdown, a picture is not displayed on the screen. If we are talking about the "Redmond" company, then a damaged wire that goes through the body and the cover can become a possible ailment. We disassemble, remove the plastic in this gap (snap off with a screwdriver) and measure the resistance. The next step is to disassemble the bottom and ring the clamps under the heating element.
All devices are equipped with fuses that will blow in any situation that, in the opinion of the developers, could lead to a hazard. For example, if the hostess turns on the device, while forgetting to install the bowl inside.
When purchasing a multicooker, be sure to familiarize yourself with its characteristics: the presence of a removable cover, whether the rubber bands must be replaced at home, how reliable the latch is. To prolong the service life of the appliance, observe hygiene inside and out, avoid the ingress of cereals and food residues, operate as intended and follow the instructions.
Lid, with elastic fastening
In order to accurately disassemble into parts, it is important to know how the multicooker works. It seems that this ordinary-looking saucepan does not have a complex scheme, but it is not. There is a fragile electrical part inside. It can be easily damaged if it is roughly applied to the case.
A simple multicooker is under repair SCARLETT SC-411 - with error indication E4 ... For repair, we open the multicooker (the bottom is removed). The control unit is fixed in a small box at the bottom of the multicooker, on two stands. Among the connectors we find the one that comes from the top cover. We remove the connector plug and measure the resistance. The ohmmeter shows resistance close to zero. That is, the sensor is short-circuited. Everything becomes clear when we open the top cover, inside which this sensor is fixed. The sensor itself MF58-104 inserted inside the silicone tube, and the wires are tightly pressed together with it to the metal top cover using aluminum self-adhesive tape. From the high temperature, the insulation melted and the wires shorted. This is where the E4 error comes from.
But it was only necessary to disconnect the wires, and peel them off from the metal top cover, as an error already popped up E3 ... A second measurement on the disconnected plug of the connector at the control unit now showed an open circuit.
That is, the temperature sensor is now torn off inside. The picture is clear - during the cooking process at the maximum temperature (frying, stewing meat in oil), the upper temperature sensor failed (this is an error E4), and when they tried to remove it, it broke off (this is an error E3).
I must say that in the range of used MF58 sensors (datasheet for it here) there is a very wide variety of resistances - 10 kΩ, 20 kΩ, 50 kΩ, 100 kΩ, 500 kΩ. Most often, the MF58-104 (100 kOhm) is installed. Replacing this sensor completely restored the operation of the multicooker.
- the main culinary forum about multicooker, recipes, advice, exchange of experience
Phones in Moscow: 8- (495) -509-60-80
Tatiana54321 "24 Dec 2012, 12:48
so4iTolik »25 Dec 2012, 10:26
220 volts from the mains connector. Perhaps the heating element itself has burned out, or something with the relay that this heating element turns on and off.
Azimut »12 Jan 2013, 20:44
Tatyana, I hope you have already repaired the cartoon in the workshop.
This stuff is called a thermocouple and it serves as a temperature sensor.
It is also possible that a powerful relay (black box in the photo) or a control circuit that periodically turn on / off the heating element during the operation of programs has failed. The clicks during multi operation are the switching clicks of this relay.
In any case, if there is no person who is well versed in radio electronics nearby, you need to carry the cartoon to the service center for repair.
Celine »16 Mar 2013, 15:58
Azimut »16 Mar 2013, 16:18
Alina, is the multi lid closed?
The bowl in Scarlett-410 is too light and, with a small amount of products, does not fully press the bowl against the heating element, and therefore its overheating begins, and at the same time overheating of the compartment of the switching unit. In the touch mode, the upper sensor gives information to the microprocessor that no heating has occurred and the heating element heats up more.
My plastic cover of the switching unit melted and twisted, but this did not affect anything. Since then, I have not raised the lid for a long time on sensory programs.
Perhaps your overheating is much stronger, you should disassemble the cartoon and inspect its condition. If there is no one to do this, then it is better to take it to a service for inspection.
But the best thing is to look for documents on the cartoon.
Celine »16 Mar 2013, 17:48
Azimut »16 Mar 2013, 18:50
Yeah, it looks like the upper sensor does not work for you (it has deteriorated, the contact is broken or the control board does not process the signal from it). Since there is no signal from it, the cartoon thinks that heating is insufficient to reach the set temperature and the heating element works non-stop, overheating itself and overheating the switching board at the bottom of the multi.
Alina, then both Krupa and Milk porridge should also overheat, since they are also sensory and the heating in them depends on the signal from the upper sensor.
Repair can be both inexpensive (replace the sensor or simply restore contact), and serious, if the matter is in the control board.
Celine »16 Mar 2013, 19:11
Azimut »24 Mar 2013, 19:39
Peter, judging by the instructions E4 means “Open or short circuit in the upper sensor circuit”.
If the multicooker is no longer guaranteed and you feel the strength for self-repair, then you can check the integrity of the contacts and wires. But, unfortunately, there is no guarantee that you will be able to eliminate the cause of the malfunction.
The probability of a malfunction of the sensor itself is small, much more often it is just contact or soldering that is broken.
The upper sensor is not a fuse or even a thermocouple, but apparently a thermal diode. What type is used, I do not know. Alternatively, after biting out the sensor (it is apparently not soldered, but clamped with a special tool), show it in the radio parts store - maybe they will figure it out. Only, just in case, it should be noted on the wires and record the orientation of the sensor in case its connection polarity is important.
How to disassemble the multicooker SCARLET SC 410.
I hope it will be clear for those who understand at least a little in this. It should be understood that the entire risk from unsuccessful actions lies with you.
0. For disassembly, you need a middle Phillips screwdriver and a thin flat screwdriver.
By purchasing new equipment, everyone hopes that it will work for a long time and correctly. Practice shows that not a single household appliance is immune from breakdowns and malfunctions, and the multicooker is no exception. There may be several reasons why the multicooker stopped working or is not functioning correctly, but many problems can be easily eliminated.
What is the service life of the multicooker, you can find out from the instructions. For example, the well-known Redmond gives an extended warranty of 25 months, and the data from the technical passport says that the device will work for 5 years.
Russian legislation dictates that warranty service should be at least a year, if the manufacturer independently extends the period, it means that he is confident in the quality of his products.
The multicooker itself, from a technical point of view, is a simple device. Malfunctions in the early days may be the result of a factory defect, and if a breakdown occurs after a year or two, then the reason lies in the natural wear and tear of any parts, or it is the result of improper use.
The reliability of any household appliances is ensured by two factors: correct maintenance and adherence to the rules of operation. You should not neglect them, even if it is not initially clear why the manufacturer indicated certain requirements.
It is not easy to establish the cause of a breakdown remotely, because it is necessary to assess the situation as a whole, and not draw conclusions based on individual facts. But, you can somewhat systematize the frequently encountered problems in the operation of multicooker.
If we turn to the reviews of experienced users, the most common problem is when the multicooker stopped working, what to do in such a situation is not always clear.The malfunction may have specific features, for example, the multicooker does not turn on or it turned off on its own, for no apparent reason. In this case, there are no sound signals, the indicators do not light up.
Similar problems occur for simple reasons: lack of electricity, breakdown of the outlet, broken power cable, as well as clogged contacts or improper installation. All these reasons are easy to establish visually.
The problem may also be hidden in the internal parts of the multicooker, when the fuse, the power supply blows, or the temperature sensors do not work correctly. Accurate information can be obtained in the service, or after "dialing" with a multimeter.
If, shortly before the shutdown, there was a smell of burning and plastic, white or black smoke from the ventilation holes - there is a melting of the wires, a short circuit. Some parts may need to be replaced.
When the device does not work correctly, that is, it resets the settings, periodically does not respond to commands, emits sound signals and error codes or switches modes on its own, it cannot be used.
The reasons for this instability are different:
The device detects the presence of a breakdown and the protective functions are triggered.
Errors in operation: the bowl is installed incorrectly or does not fit at all, liquid or loose products get into the mechanism.
Failure in electronics, possibly resetting to factory settings will solve the problem.
If the temperature conditions are not observed (when switching from frying to cooking, the device needs to cool down or the overheating protection will work).
Some cooking modes imply the presence of steam (soup, stewing), if there is no water, the overheating protection is triggered again. If a recipe or food does not require the addition of water, it is still needed to create steam, even if only a small amount.
Other reasons may include: incorrect proportions of food, clogged pressure control valve, burnt food.
The conclusion suggests itself: if the buttons and the multicooker itself do not work, but the indicators are on, often the problem lies in improper operation. Here you can carry out a small diagnosis, eliminate possible causes. If all else fails, and the malfunction repeats, a visit to a specialist is inevitable.
The timer is designed to count down the cooking time or to delay the start.
Problems with the correct operation of the watch can be different:
The timer does not work in some modes during cooking.
The delayed start timer does not work in the multicooker.
To understand if there is actually a engagement, it is worth understanding how the timer works. By setting the delayed start time, different brands have their own characteristics. For example, if the user enters "5:20" - this may mean that in the morning at 5:20 the device should turn on or that the program will start in 5 hours and 20 minutes. You can check this nuance empirically.
The countdown timer usually starts only after the bowl has reached the set temperature. Frying food with the lid open may cause the bowl temperature to drop by one or two degrees. It is recommended to close the lid until the container has warmed up (this may take 15 - 20 minutes), only after that the minutes will start and food can be loaded.
Interesting fact! In some models, when cooking pasta or dumplings, a special principle of operation: the user sets the program and starts it when the water boils, the multicooker emits a sound signal, then you need to load the products and press the "start" button again, only after that the timer will start counting down.
Some breakdowns can also cause the watch to malfunction. For example, a thermal sensor may be defective or shifted due to a fall. In such a situation, it is not able to transmit real temperature readings to the control board, therefore, the bowl heats up or turns off, but the time is not counted.
If, during the cooking process, steam comes out not only through the valve, but through the slots in the lid, it means that the tightness is broken. This may be due to a broken lock or improper installation / wear of the silicone seal. At the same time, the multicooker can work in normal mode, but the multicooker-pressure cooker may not include any modes, except for "frying".
A replacement silicone seal can be purchased from a workshop or ordered from the manufacturer. Repair of the cover itself is much more difficult and is possible only in a service center.
If a system message appears on the display, you need to figure out what it means. A passport, a visit to a specialist or contacting the manufacturer's "hot line" will help with this.
E0 - open / short circuit of the upper temperature sensor circuit or its wire, the cover does not close (the silicone seal is damaged / missing / incorrectly laid).
E1 - ingress of moisture inside, the heating element / lower temperature sensor is out of order, clogging of the thermostat contacts.
E2 - open / short circuit of the upper temperature sensor circuit or its wire.
E3 - ingress of moisture inside, open / short circuit of the upper temperature sensor circuit or its wire, absence / inappropriate bowl.
E4 - the pressure sensor is clogged, the control board is malfunctioning.
E5 - automatic shutdown for overheating protection.
If it is precisely established why the multicooker does not work, you can try to fix the problems yourself. There are some tips for those who are at least a little familiar with the technique and are ready to repair the multicooker on their own. Such a problem as the ingress of moisture is "cured" by blowing a hair dryer. It is better to unscrew the bottom cover and dry all the parts well.
If, shortly before the E1 error, food was spilled or spilled into the device, it is likely that the thermostat is clogged. It can be cleaned with improvised means: cotton swabs, fine sandpaper.
Replacing the temperature sensor is quite simple, but first you need to establish that the problem really is in them. Perhaps there is not enough thermal paste or the sensor has come off. A common problem is the broken wires of the upper sensor at the fold of the cover.
A change in errors E1-E2 may indicate unsoldered sockets of the lower sensor on the control board. If you have experience with a soldering iron, the problem is easy to fix.
To clean the multicooker, you need to carefully remove the bottom cover. Pay attention to the splines of the bolts, if the warranty period is valid, keep them intact.
Breakdown of multicooker is always unpleasant, but it happens with equipment. To reduce the risk to a large extent is within the power of the user himself; it is enough to follow the simple rules for operating the multicooker.
The cooking bowl must be original, a slight difference in design can lead to incorrect operation, and in the best case, the device will not recognize the presence of a container.
Before laying food, the pan must be removed - this will protect the internal mechanisms from the ingress of liquid or bulk products. Many users who neglect this rule write reviews that, out of habit, they often pour broths or water into a multicooker without a bowl. Naturally, the result is various breakdowns.
It is important to observe all temperature conditions, keep the household appliance clean and protect it from mechanical shock.
Video (click to play).
Using a multicooker, you need to carefully monitor the stability of its operation: periodic errors on the display or a worn seal indicate that the device may fail or already breakdowns are already present.
