I propose to consider the option of how to renovate the kitchen with wall panels. It looks attractive, is reliable, easy to install. Does not require large material investments. Repairs can be done on your own without inviting specialists.
After you have decided on the choice of material, made measurements, it's time to think about the immediate process of finishing.
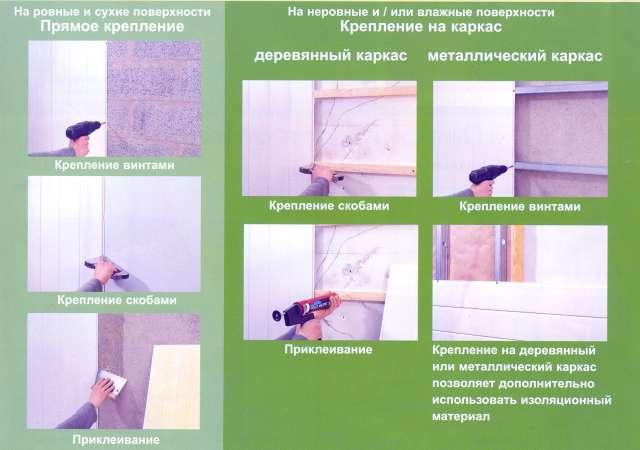
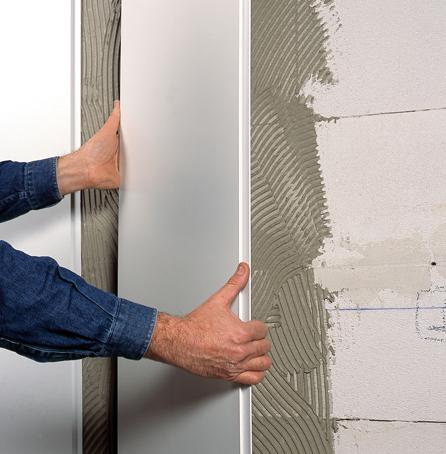
Provided that the walls of the room are even, almost perfect, do not have cracks, protrusions, the panels can be fixed with an adhesive or liquid nails. The easiest option, but it has pitfalls. When you consider updating your renovation, it will be difficult to peel off the old panels.
Wall panel repairs are a great solution when the walls are uneven. The material is attached to the frame, which will allow not only to decorate the walls or ceiling, but also to align them.
Preparation of the premises. We clean the walls from the old finish.
We check the availability of the necessary tools. You will need: a ruler, a plumb line, a level, nails, screws, a drill, a hammer.
Before starting work, it is recommended to open the packaging with the finishing material. Allow to lie down for about a day so that the panels gain the same level of humidity as the room.
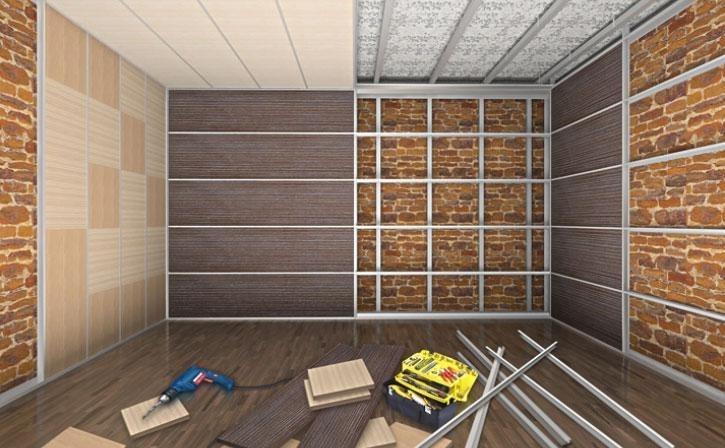
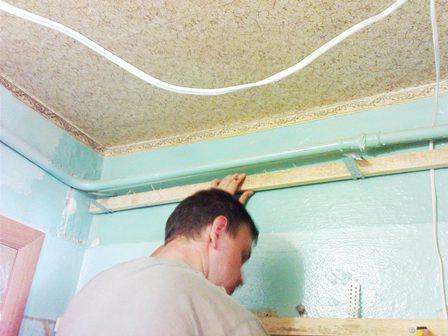
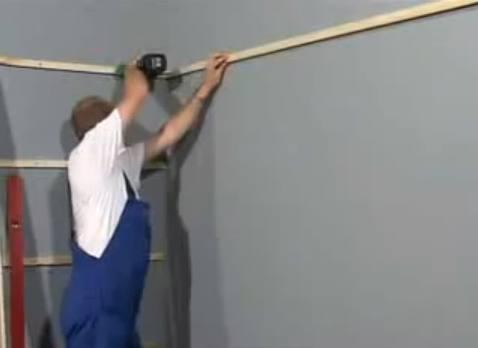
Installing the frame. The structure on which the panels will be mounted can be made of wooden beams, slats, plastic or metal profiles.
If you chose a wooden frame, do not forget to pre-coat the planks with a composition that protects against mold and mildew. The solution is usually toxic. Better to do this outdoors.
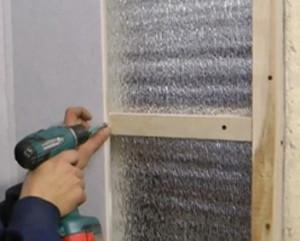
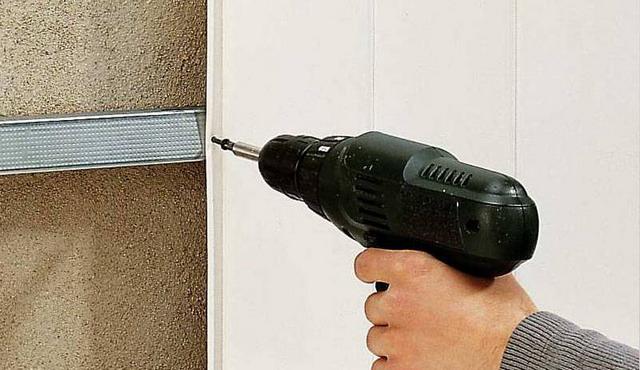
The profile of the batten is attached to the wall using self-tapping screws. Step from 30 to 50 cm so that the structure is strong. It is important to set the frame planks as evenly as possible. A plumb line, a level will help with this.
If you have a desire to insulate a room or improve sound insulation, then an insulating material is laid between the battens.
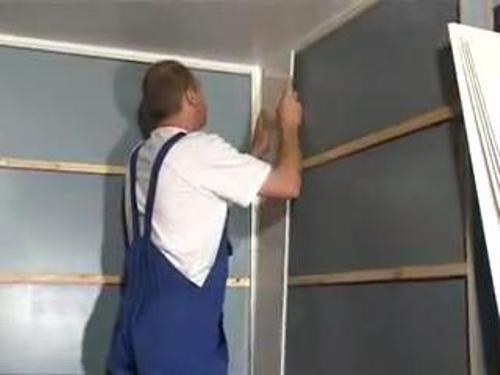
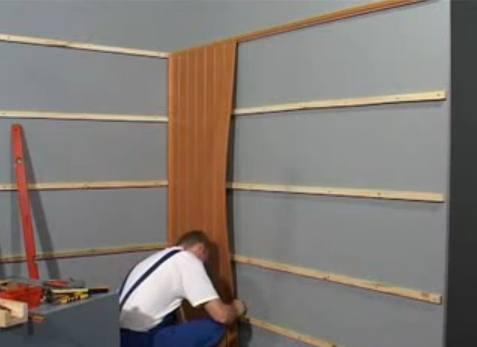
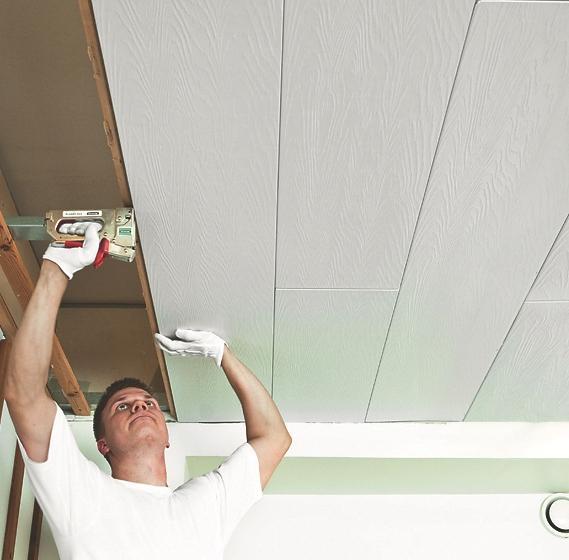
Starting from the left corner, farthest from the window, mount the panels. We set the first copy in a corner, fasten it to the frame bar with small nails. If you have a furniture stapler, you can use it.
For the required panel length, leave about 10mm to the floor and ceiling. Over time, the material tends to expand slightly. The trims are useful for installation in the area of a window, door, mezzanine. The next panel will be attached to the previous one using a special lock, already thought out by the manufacturer. We fix each panel to the frame with nails.
The last copy is not fastened with nails, but inserted into the lock between two adjacent panels
We install the necessary accessories. Corners, curbs, skirting boards. They can be fixed with liquid nails or with small regular nails.
The locations of the battens must be marked. It is on them that shelves, cabinets, hooks will then be attached.
Installation of panels can be done in any direction: vertically, horizontally, diagonally. It should be remembered that the frame strips must always be perpendicular to the panels. This installation pattern is suitable for walls and ceilings. The only difference is that it is better to choose thicker panels for walls, as they are subject to physical stress. The tighter the better. There is no such need for a ceiling.
After renovation with panels, the room is easy to clean. No cement dust, plaster, paint smell.Enjoy a beautiful new finish that is as easy to use as it is to install.
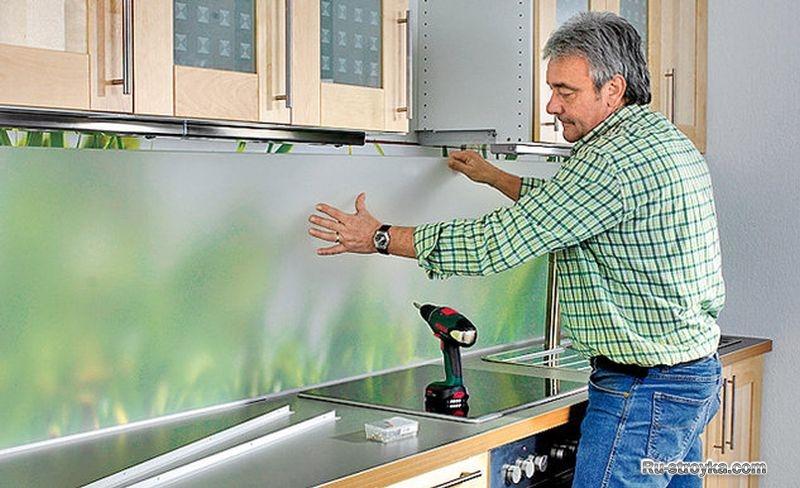
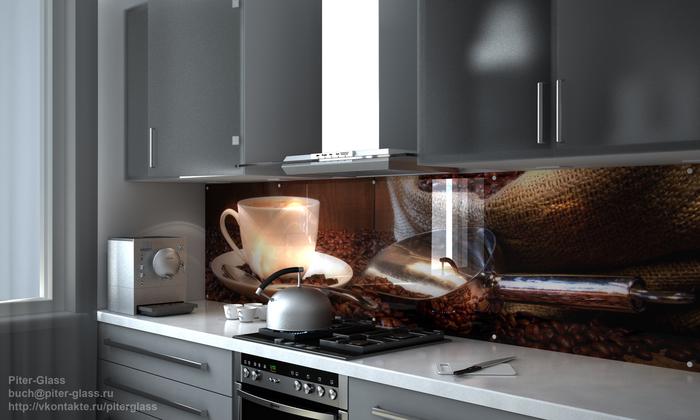
A great alternative to a kitchen backsplash from a tile can be a skinned or in other words a glass panel. Fastened with glue or by screwing. Doesn't require leveling walls. The screw-in installation method is considered the most reliable. The manufacturer provides holes in the panel through which screws are inserted, the material is attached to the wall. Then the screw is closed from above with a decorative plug. Looks organic, not striking.
VIDEO
If you have some free time and some money, and life has become too monotonous, you can do your own kitchen renovation. This will not only save money, but also acquire useful skills and even improve health, because physical activity has not harmed anyone yet.
The chances of getting a result in which you are not afraid to invite people to your kitchen after your own repair will increase significantly if you use the advice of a specialist.
When deciding how to make repairs in the kitchen, it is necessary first of all to consider the finishing materials, taking into account the costs of their acquisition and the possibility of self-assembly.
So that the kitchen does not stand out much from the rest of the rooms, it is advisable to do everything in the same style.
When determining where to start renovating a kitchen, first of all, they choose a style. There are more than a dozen of them for kitchen decoration, the most famous: classic, high-tech, modern, minimalism, baroque - the implementation of many requires a lot of money.
In the classics, expensive natural materials are used - a wooden kitchen set, parquet on the floor. High-tech and modern require the presence of expensive plastic and glass materials and are more suitable for modern young people, baroque with carved furniture looks better in living rooms and bedrooms.
For established people, one of the options that are simple and affordable is to decorate the kitchen in the Provence style on their own, which allows you to create a beautiful, cozy interior, characterized by comfort and grace.
Recently, Provence has been quite popular, it assumes the presence of light pastel colors in the decoration of the room and the furniture itself (finishing under natural light wood), the presence of plants and decorative elements. Provence excludes the presence of bulky interior items (heavy curtains, massive chandeliers), the kitchen should be light and a little romantic.
Provence will add coziness and warmth to your kitchen, as it looks organic
Making repairs in the kitchen with your own hands with a small budget in the Provence style is not difficult, it does not require a lot of construction experience and special expensive tools.
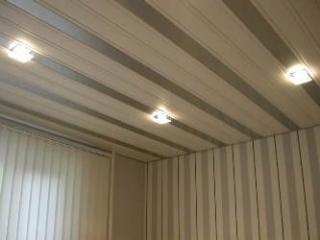
Most often in the kitchen, plasterboard ceilings are used, stretch, painted or pasted over with wallpaper. You can also use a ceiling finish made of expanded polystyrene or foam ceiling tiles or PVC panels - do-it-yourself repairs are easy, although in the latter case, you will need to arrange a wooden or metal frame to fix the PVC panels.
It is not difficult to paint the ceiling, it is enough to have a roller with a long handle
Usually the ceilings in the kitchen are painted with waterproof paints - acrylic latex, water-based. If the ceiling is flat enough and has been painted with waterproof paint, it will not be difficult to repaint it with a roller.
This must be done at least twice, the first time the staining occurs perpendicular to the direction of light from the window, the second time - along.
In some cases, it may be necessary to level the ceiling - for this it is necessary to rinse it very well and clean it up to the floor slab, prime and apply a putty, and after it dries, wipe it with sandpaper.
Wallpaper on the ceiling looks unusual, but it is advisable to buy a waterproof version
Gluing thick waterproof wallpapers to the ceiling will eliminate the need to level it and give it a more interesting aesthetic appearance than in the case of staining.
The choice of wallpaper for the ceiling is a budget option, besides, pasting the ceiling is a fairly simple job that even housewives can handle. It is advisable to prime the ceiling before wallpapering, the stripes should be glued in the direction of the light.
Do-it-yourself Provence-style decoration requires a light wooden floor. Naturally, in a kitchen with high humidity, natural wood is expensive and impractical, it can be replaced with such common flooring materials as ceramic tiles, laminate or linoleum - all of them come with a natural light wood finish.
Ceramic tiles are durable materials with water resistance properties, but require careful handling of heavy objects
Not the most suitable option for decorating the kitchen with your own hands; for laying tiles on the kitchen floor, you will need a special tool (tile cutter, grinder) and the skills of a qualified tiler.
In almost all kitchens, because the tile floor is rather cold, it is laid on an electric heating mat in the form of a wire about 5 mm thick. on the grid. This further complicates the task of laying tiles and requires the connection of the heater control unit with a knockout to install it, a hole in the wall and a strobe for the electric wire.
Considering that finishing a Provence style kitchen on your own will require the involvement of specialists for laying tiles, and the work will be quite expensive, this option can be abandoned.
It is advisable to choose a waterproof laminate, since the kitchen is quite humid and there is a high likelihood of frequent splashing of water on the floor.
Ordinary laminate is not a very suitable material for the kitchen due to its low water resistance, so you should use more expensive moisture resistant types with special surface treatment and locking joints. It is quite easy to repair the kitchen with your own hands, laying the laminate on a substrate, subject to a simple work technology.
Moisture-resistant types of laminate can withstand exposure to water for about 6 hours without consequences, while waterproof ones are not afraid of its effects. Waterproof laminate is also made in the form of panels of various thicknesses or glued to the floor, its only drawback is the very high price.
If linoleum breaks in one place, you will have to replace it throughout the room.
A budget option for laying on the kitchen floor, modern types have the widest range of colors and patterns, commercial brands are highly durable and durable.
The disadvantages of linoleum when laying in the kitchen include its small thickness, which leads to different levels of the floor if laminate is laid in the corridor. That is why many people prefer to lay out the floor in the kitchen from impractical ceramic tiles.
This problem has a simple solution - the floor in the kitchen is filled with a leveling self-leveling mixture to the required thickness (3 - 10 mm) - this allows not only to raise the level, but also to level the floor.
You can do the filling work yourself if you have a special toothed roller and a mixer for mixing the solution (self-leveling is sold in bags as a dry mixture).
Before laying linoleum, it is necessary to make a perfectly flat floor so that there are no differences in height.
A construction mixer can be replaced with a household drill by purchasing an inexpensive whisk for mixing the solution, a roller - with a metal comb with teeth (this option is very risky to use, liquid self-leveling may not spread well on the floor and it will be damaged).
You can repair the floor by laying linoleum on KS or PVA building glue yourself, this is not too difficult construction work.
Kitchen walls should also be practical and easy to clean.
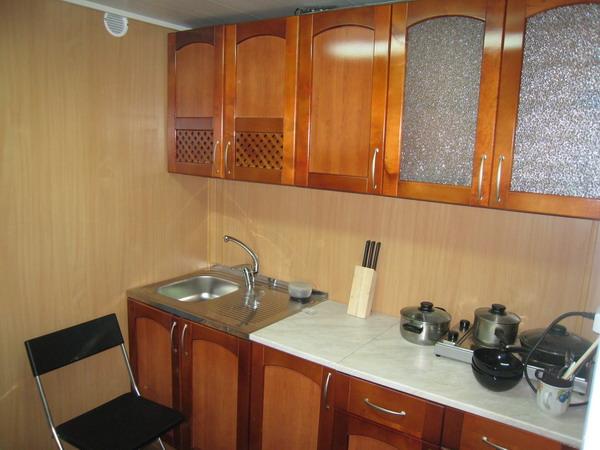
Renovation of a Provence style kitchen implies light colors; for wall decoration, MDF or PVC panels, ceramic tiles, painting, wallpapering are most often used, and the types of finishes are often combined.
Nowadays, rarely anyone decorates the entire kitchen with ceramic tiles, even to the middle of the walls, it is too expensive and out of fashion, the working area is mainly laid out with tiles.
There are 2 types of MDF, fiberboard or PVC panels: from a solid sheet (average size 1.2 m by 3 m) or type-setting, which are mounted on a wooden or metal frame.
In the latter case, the use of type-setting panels is impractical, since this significantly reduces the free space of the kitchen by the thickness of the frame and panel. In kitchens, it is better to use MDF panels covered with moisture-resistant PVC film or one of the types of fiberboard - laminated hardboard. The sheet panels have a thickness of about 3 mm. They are attached to the walls with glue.
Choose only waterproof paint that will not lose its appearance after washing
For painting the walls, preparation is necessary by leveling with puttying and rubbing, otherwise the light falling from the windows will highlight all the irregularities. The work is quite difficult for a layman and will require additional financial costs, and a monochromatic painting of the walls looks rather boring and is unlikely to become an interior decoration.
It is common knowledge that waterproof acrylic paints can be washed, but this statement is not entirely true. In the area of the working area, drops of food with fat often fall on the wall, which are absorbed into the porous surface of the paint and is practically not washed off.
3D wallpaper has an unusual texture that will help to hide irregularities
The most budgetary option is wallpapering the walls; the most practical way is to do it with paintable or vinyl glass wallpaper. The latter, due to their thickness, will hide irregularities on the walls, and all types of dirt, including grease, are perfectly removed from their smooth water-repellent surface.
For finishing the working area of the kitchen, you can use the same moisture-resistant materials as for finishing the walls. It is not difficult to install PVC panels or laminated MDF and fiberboard on the wall by gluing.
When decorating a work area, it is very important to apply the coating to a flat wall. In this case, the top of the countertop will fit snugly against the wall, and the thin panels will adhere well in all places.
The currently popular tempered glass panels with a bright pattern are not quite suitable for the Provence style, the use of frosted glass will fit more.
This is a rather expensive option, and although the glass can be installed independently, it makes no sense to save on this if the cost of the material itself is much more than the installation work that takes little time (1 - 2 hours).
Glass panels look sophisticated and suitable for expensive kitchen options
Laying tiles on flat walls is easy to do with your own hands if you have the simplest tool (hydraulic level, glass cutter), the only difficulty arises when cutting out holes for sockets - you need a grinder.
Conventional wall tiles, unlike floor tiles, have a rather soft base. Therefore, it is easy to cut it in a straight line using a conventional glass cutter, drawing a line on the glaze and breaking along the notch line at a hard corner.
In order to avoid misunderstandings, it is advisable to make repairs in the kitchen according to a design project - this will allow you to select and purchase materials suitable for the interior in advance, avoiding their shortage. The sequence of repairs in the kitchen is as follows:
Freeing the room from the kitchen set and all accessories (removing the chandelier, baguette).
Dismantling of old ceiling, wall and floor coverings.
Garbage removal.
Plaster or putty, followed by cleaning the ceiling and walls.
Work on leveling the floor in the kitchen (screed, self-leveling).
Shtroblenie walls and floors in the apartment, followed by the wiring and installation of boxes for sockets and switches, the output of lighting wires. Sometimes you may need grooves for plumbing pipes, followed by the output of plumbing fittings pipes to the walls.
Ceiling decoration.
Non-experts recommend doing kitchen repairs with your own hands from top to bottom: ceiling, walls, floor, which in practice is not entirely true. For example, painted walls and ceilings at the beginning of renovation work when installing screeds, self-leveling in the kitchen, laying tiles on the floor can be heavily soiled, so it is correct to do the most dirty work first (plastering walls, screed, laying tiles on the floor and walls).
Wall decoration.
Laying the floor covering.
If the flooring is linoleum or laminate, the installation of which does without dirt and dust, and the material itself is poorly wiped off the paint, paint work should be carried out first. In the case of wallpapering, it is more practical to put the floor at the beginning, and then proceed to decorate the ceiling and walls.
It is not very difficult to make repairs in the kitchen with your own hands using the cheapest materials (wallpaper, linoleum) in the Provence style if the work is carried out in stages. The working area can be independently decorated with laminated MDF, PVC, fiberboard or tiles, in many cases it is supplied with a custom-made kitchen set.
VIDEO
In recent years, plastic panels have become more and more popular. They have ceased to be a feature of exclusively public interiors and are actively moving into apartments. Why exactly pvc panels are becoming the new favorite finishing material? The thing is that they have a lot of advantages.
Material pluses:
absolutely waterproof and not damaged by contact with water;
resistant to chemicals and can be washed with any household cleaners;
hygienic, easy to clean and wash;
dielectric;
easy to install;
quick installation.
The disadvantages of the material include:
relative fire hazard - do not resist fire for a long time;
low wear resistance - they can be scratched.
There is a wide variety of pvc panels and this is also a big plus - you can create any interiors in any style, choosing the color of the walls to match the color of the furniture. You can order the printing of images on pvc or purchase ready-made photo panels for the kitchen. This allows you to make the interior completely unique. Photo panels are repaired in the same way as conventional ones.
Do-it-yourself panel repair is progressing very quickly, which cannot but impress those who do not like long work.
The process of installing a kitchen ceiling with PVC panels can be seen in this video:
VIDEO
The use of plastic panels allows you to completely abandon expensive tiles, since the panels are not inferior to them in their hygienic and waterproof qualities. The only place where pvc panels are undesirable is in the area near the slab. Here you can make an apron.
PVC panels are available in four widths - 10, 12.5, 20, 25 cm. The length of each panel is up to 6 m.They are panels of a plate, empty from the inside.
Important: The panels must be fixed to the frame - they cannot be installed immediately on the wall. The frame is made of metal or wood. It can also be easily done by hand. This does not prolong the repair for a long time.
In order for the entire assembled structure to be strong, the corners, joints and edges must be reinforced with a metal profile.
For this purpose, the following types of profile are used:
starting and finishing profile L-shaped and F-shaped;
docking profile H-shaped;
corner profile;
plinth.
Panels can be fixed:
horizontally;
vertically;
on a mixed type.
All this expands the possibilities of design. Repairs are done equally quickly for any type of panel placement.
First of all, you need to assemble the frame on which the pvc panels will be attached. It is easy to do it with your own hands: wooden slats are attached to the wall vertically or horizontally. The direction of fixing the rails is selected based on how the panel will be attached.
For vertical placement, horizontal markings are made on the wall. Marks are made at a distance of 60 cm and mounting brackets are attached to this place. Plastic dowels should be used as fasteners for strength and reliability. At the top and bottom of the walls, staples are placed in the form of the letter P.
Slats are inserted into the staples and fastened to them with self-tapping screws.
Important: work must be done according to the level. Otherwise, when cladding with your own hands, the panels will begin to deviate from the vertical and you will get an artisanal, low-quality repair.
Further, the actual repair begins with the fastening of pvc panels. The first panel is usually installed from the corner. The panel can be screwed to wooden pvc slats with self-tapping screws or nailed with a stapler. To a metal frame - screwed with screws. Each subsequent strip must be cut to the desired size and carefully inserted into the fold of the panel already supplied. In this way, all panels are mounted.
Only the placement of the last panel, which completes the renovation, requires special attention. It must be precisely tailored to the remaining size of the unsewn space on the wall. The width of the space is carefully measured. From this number, it is necessary to subtract 5 mm and trim the lining along this width.
Important: measurements must be made at several points - then there will be no gaps and inconsistencies.
The last panel is inserted into the profile and into the opening of the first panel. It is better to move the panels with wet hands - this makes them easier to slide.
In order for the renovation to be completed, it is required to install profiles and skirting boards.
All these works on installing panels with your own hands can be done in one day with proper skill.
To make the renovation unusual, you can combine horizontal and vertical placement of panels. Such an interior will look especially extraordinary if the panels, on top of everything else, have a different color or a pattern and plain panels are combined. In this case, the panel joint is made using the H-profile.
You can try to use both photo panels and color or white versions. Thus, you can make a drawing in the interior.
We recommend watching a video that will show all the nuances of installing plastic panels on walls:
VIDEO
With the help of pvc plastic panels, you can make repairs quickly, and the interior will turn out to be original and practical. And the best part is that after spending a little effort, you can also spend a little money, because this is a fairly economical option for the price of the material.
The most demanded and popular finishing material, suitable for cladding kitchens, bathrooms and bathrooms, and together with them, also hallways and storerooms, is a tile. However, the cost of such material may be prohibitive for some segments of the population, especially in times of crisis. Therefore, consumers are looking for other ways to equip their home as harmoniously and beautifully as possible. One of the best alternative solutions is to decorate the kitchen with plastic panels, the photo design of which can be seen on our website.
Photos from the site:>
Rooms in a house, where quite extreme conditions are constantly observed, such as high humidity and regular temperature fluctuations, have to be repaired quite often, and the kitchen is just that. It is here that you often have to use a variety of aggressive and caustic substances for cleaning, and splashing grease and moisture leave no other choice but to purchase such strong, wear-resistant and reliable finishing materials as plastic panels for the kitchen, the photos of which should be considered in more detail. However, before making the final choice, you need to thoroughly prepare and figure out what types and types of such panels can be found on the market today.
Before you start finishing the kitchen, you should choose the most suitable material, both in terms of performance and properties, and in appearance. Modern manufacturers offer hundreds and even thousands of positions of various design solutions that will allow everyone to choose exactly that kitchen finish with plastic panels that suits best, and the photos presented in our article fully illustrate this.
The most popular type of plastic panels for finishing walls and ceilings in residential buildings and other premises is the notorious lining. This is a plastic product that looks most like a regular board.
Decorating the walls in the kitchen with plastic panels, the photo of which is really impressive, can be done completely, that is, over the entire area, but this is not at all necessary. You can simply sew up an apron, a working corner or panels to the middle of the wall with this profitable and high-quality material.
Photos from the site:>
The width of a standard plastic lining board varies from 10 to 12.5 centimeters, but its length can reach a full six meters. Different sizes will allow you to choose such an option so that there are as few joints as possible that will have to be masked.
Most often, the texture and color of a material such as plastic lining resembles real wood. On the walls and ceiling, it will look no worse than natural oak, beech or walnut, provided that you select high-quality material.
Photos from the site: mutfaktadekorasyon.com
Kitchen cladding with plastic panels can be done not only "under the tree", which is clearly seen in the photo. A variety of textures can be similar to tiles, natural stone, metal or fabric.
Many consumers think that plastic lining does not give room for imagination, since it can only be placed and oriented vertically or horizontally, but this is not the case. In fact, modern designers offer many ideas for non-standard placement of strips of plastic panels, for example, diagonally.
If, for some reason, the lining is not very suitable for finishing your kitchen, you can consider the option with type-setting slatted panels, which look quite attractive in the interior, and the variety of designs will allow them to fit into almost any concept.
Photos from the site:>
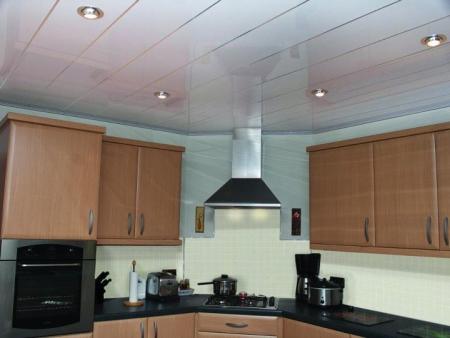
It is this material that will make a beautiful ceiling in the kitchen from plastic panels, as evidenced by the photo. Typesetting panels are easy to install in the same way as the lining, therefore, any home craftsman can install them without much experience.
Rack elements of type-setting panels are produced in various colors and sizes. Their width can be from 20 to 25 centimeters, which significantly reduces the installation time, and the length from 2.5 to 3 meters.
Since ceramic tiles have long been considered a classic cladding for the kitchen, bathroom, pantry or hallway, many consumers also prefer plastic panels to choose exactly this appearance.
Plastic panels for an apron in the kitchen will become a really budgetary, but at the same time luxurious choice, as you can see in the photo. The variety of designs is off the charts here, and installation is as easy as any other plastic finish.
Photo from the site: my.housecope.com/wp-content/uploads/ext/2356
Installation of plastic tiles can be carried out both on a special lathing made of wood or metal, or simply on a wall, using polymer glue or liquid nails. Patterned plastic kitchen panels will be the ideal solution for those who want an original and stylish life, as can be seen from the interiors in the photo.
Photo from the site: my.housecope.com/wp-content/uploads/ext/2595
The variety of colors and textures is simply amazing. Tiles can imitate wood, stone, tiles, metal, fabric and any other material, manufacturers have made sure that consumers have a wide choice.
When deciding to make a kitchen renovation with plastic panels, you need to think carefully about all the options and consider all kinds of photos presented by the best designers in the world. It doesn't hurt to learn more about the properties of materials.
For example, sheet plastic is much larger, which will make the surface of walls and ceilings monolithic, but its thickness is only 3-6 millimeters, so it can be called reliable with a stretch. Nevertheless, with correct laying and installation, as well as proper care afterwards, such a cladding will last long enough.
VIDEO
Decorating the ceiling and walls in the kitchen with plastic panels is a responsible and grateful business, which is perfectly illustrated by the photo. Therefore, it does not hurt at all to take into account the useful advice that professional designers give to beginners.
The issue of kitchen renovation and design is very important for the reason that very often all residents of the house, guests, friends and relatives will be in this room. For children, this room is also becoming one of the most important, and what can we say about adults. Decorating your kitchen with plastic panels is one good way to keep it clean and sleek. It is also a great option to create a unique design. For those who are going to argue about the mandatory presence of tiles in the kitchen - let's say right away that cladding with pvc panels is much cheaper than the tiled version. This is why it is worth considering plastic as a good finishing material.
I would like to say right away that such a panel is not very picky about installation. Therefore, there will be no big costs here either. And we will dispel the myth that it is not beautiful and cheap in appearance. There are tons of different panels, from very cheap to expensive (almost like tiles in cost). Their designs are also very different - from snow-white to pvc with a floral pattern or a water world. Therefore, if you choose well the floral range of plastic, the kitchen will turn into a real masterpiece.
The plastic panel can be from one meter to three meters long. And the width can vary from ten to 25 centimeters, depending on your wishes (there are also dimensional exceptions, about 30-40 centimeters). At the same time, if you want to find both a 20-centimeter strip with red flowers and a 15-centimeter one (to fit nicely), it will turn out very unlikely (unless you are looking for a pure white color).
It should be noted that plastic panels can be cut and adjusted to length.
In order to make the right choice, you should understand all the advantages of this material:
Water resistance. Decorating the kitchen with plastic panels is good for the reason that no amount of moisture, steam or water can damage the appearance of the panel.Even if neighbors fill you in, the plastic will not darken, fade and remain the same as on the first day. It is very easy to wash stains from it with soap.
Ease of care. The kitchen will be easy to wash and clean by any means - water, soda, chemicals.
Ease of installation. Paneling is very easy to do and does not take a lot of time. Even a novice specialist will be able to ideally place the plastic layer so that it looks like a custom-made one.
Low price. PVC panel has a low cost. And, accordingly, it will help to save money on other finishing elements. Moreover, not only the plastic layer is cheap, but also its installation. No special tools, mixes or large drills are needed.
The panel is not a conductor of electric current. This will help protect the kitchen and its visitors from unwanted moments.
In principle, there are enough positive qualities to opt for such material. But do not neglect the disadvantages, which are also important. It will not be a sin to conceal that, although there are not many disadvantages of plastic, they are very important:
Easily subject to mechanical damage. Any panel can break, choke and crack, if you press on it, put something weighty. This is a big disadvantage for the reason that it is necessary to approach transportation, installation and maintenance with the utmost care. If a champagne cork suddenly flies into the panel wall in the kitchen, then a dent will most likely remain clearly visible on the panel. When choosing pvc strips, you should pay attention to all the corners of the strips, to their surface. It happens that during transportation to the store, they are already damaged.
Fire hazard. The pvc panel is very easy to burn. If you lean a very hot frying pan against it, then the plastic can melt. This will be very damaging to the appearance of the kitchen. Although, if he treats every element of the interior very carefully, then this point is not so significant.
Only two disadvantages with so many positive aspects make plastic very popular for decorating kitchens and other premises. Therefore, choosing the material with which to decorate the walls in the kitchen, paneling is a very good option.
Each kitchen contains more than one decorative element. Plastic trim, for example, can only be done above the stove and above the sink. Alternatively, the plastic layer will be completely above the countertop. In any case, in addition to plastic, wallpaper, tiles, decorative stone, etc. can be used. You can make it so that one wall is wallpaper, the other is tiled, the third is made of stone, and on the fourth there will be shelves with dishes. Any option will do. But from what is already planned for the kitchen, the methods of mounting plastic strips will vary.
The first method is horizontal striping. This method can only be used if not the entire kitchen will be finished with plastic. For example, pvc will only fit over the countertop and up to the hanging shelves. In this case, 2 to 5 strips of plastic will be stacked and they can be installed horizontally.
The second way is vertical finishing. This method can be used to decorate any room. A full wall can be trimmed vertically with PVC strips and the result will be just great. The kitchen is no exception; this method can also be used here.
Installation of plastic should take place on the existing frame. As in other cases with the frame, it is necessary to prepare the wall, make a wooden frame (we beat the lower and upper strips first, and then adjust the vertical stripes around the perimeter and horizontal stripes inside the frame). When the base is ready, you can put insulation in its gaps in order to heat and sound insulate the room. Plastic finishing is carried out with minimal effort and loss from the corner of the room.If you start from the center of the wall, then you will have to cut the strip of plastic twice.
The wall version of pvc is laid with the help of guides. There are such types of them: F (for the beginning of laying, ends or corners), L (only for the beginning and end of walls), H (universal for connections, joints). There are also external profiles, corner and skirting boards. Guides are also selected depending on the plane to be machined.
No screws or nails are needed for mounting plastic. Each subsequent strip of plastic goes into the grooves of the previous one. For the tightness of the joints, some parts can be joined with liquid nails, but this option is resorted to in extreme cases. The wall type of processing is very simple, much more difficult is the processing of the plastic of the ceiling. But this only happens because several people need to be involved in the installation of panels on the ceiling.
I would also like to give some tips for those who nevertheless decided to make a room in plastic on their own:
when choosing a finish in a store, pay close attention to the quality of the strips themselves and their integrity;
if you are faced with the issue of plastic for the first time, then it is recommended to immediately purchase liquid nails, which will help to slightly improve the joining in difficult places;
transport material so as not to damage it. It is better to immediately cut the material into pieces in the store, about 1-1.5 meters long. This will make transportation much more convenient;
direct sunlight is undesirable for panels, so mount them in rooms where there is not a lot of sunlight;
do not place heaters, light bulbs or other items that heat up next to plastic panels;
do not try to smooth out dents in the plastic. This is almost impossible to do, but it can damage the strip even more.
As a result of the article, I would like to wish every master a lot of patience in working with such material. Make a detailed schedule and plan for what you will do and only then get to work. For the ideal look, the walls should be as flat as possible. If there are beveled corners in the room, then it is better to choose another option for finishing or initially align all the walls. Good luck in your endeavors!
The post shows how you can easily decorate the kitchen with PVC panels.
Video (click to play).
VIDEO 
