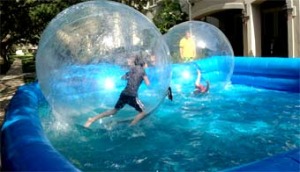
Inflatable pools are one of the most favorite attractions for children in the summer, while adults appreciate them for the convenience of transportation, assembly and, of course, for a low cost. With their help, you can organize fun children's leisure in the country, at the sea, by the river.
But the material from which the pools are made is easily damaged. Cuts and punctures appear, air begins to escape, as a result, the pool does not hold its shape and is quickly deflated.
The repair method is selected based on the material from which the pool is made. It can be rubberized fabric, PVC, rubber.
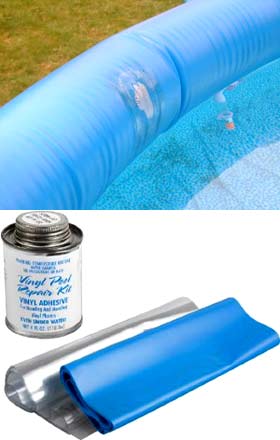
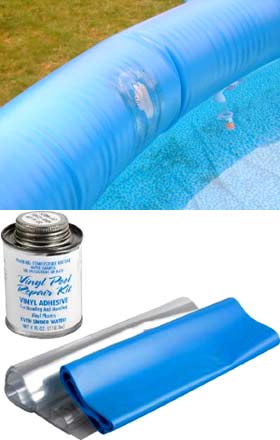
If you cannot fix the problem on your own, you should contact the company where this pool was purchased. Some manufacturers include a repair kit that may include patches, glue, and instructions.
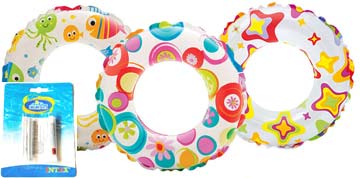
Inflatable rings are fun for children. They make bathing interesting, help the child to stay on the water. Today the choice of swimming rings is huge, there are both inexpensive options and more durable and high quality ones.
But no matter how expensive this toy is, sooner or later it begins to release air due to the cuts that appear. It is almost impossible to avoid them with small children, so it is important for parents to know how to glue the circle. In this case, you need to find the place of the cut and carefully remove it.
Unlike rubber, PVC is not required to sandpaper. It is not recommended to use "Superglue" as an adhesive for repairing PVC circles, as it will crack on this material.
The application of the adhesive must be carried out according to the manufacturer's instructions.Most often, it is applied to both the patch and the damaged area. For some formulations, one coat will be sufficient, for others, reapplication may be required.
Next, the patch is applied to the circle, holding it with your hands so that the material does not wrinkle. Use your thumbs to smooth it out, removing air.
For an hour, the toy is not inflated so that the glue seizes, then it can be inflated loosely and left in this position for a day until it dries completely.
It should be borne in mind that inflatable rings in the form of animals break the fastest, since they have a lot of connecting seams and parts.
There are inflatable beds in almost every home. It is convenient to use them when guests arrive and additional berths are required. But, like any other inflatable thing, the bed can fail. Their integrity is often violated by pets, children or misuse. As a result, the mattress begins to deflate. But you shouldn't throw it away, you can try to repair it.
VIDEO
We recommend the following glue options: Uranium, Intex.
First you need to find the place of damage and straighten it on a flat surface.
Then prepare a tape of transparent material and glue. In no case should it be an ionocrylate compound or super glue, which will not give the desired result. You can use the compositions intended for the repair of inflatable products.
The place of damage is treated with alcohol or acetone and the patch is “tried on”, marking the place of gluing with a pencil. Then the patch is trimmed to the desired size, preferably to an oval or round shape, with a margin of 3-5 cm compared to the cut area.
Glue is applied to the damage site and to the patch and spread with a brush. After the first layer has dried, the second is applied. Then, using an ordinary hair dryer, the glue on the surfaces is heated and applied to each other. To remove air, use a roller or improvised objects in the form of spoons, cans. After that, the bed can be folded without bending the glued place and left for a day.
Not everyone knows how to glue an Intex inflatable bed. Although this manufacturer usually applies a special repair kit to inflatable products, which includes instructions, glue and patches. By following the manufacturer's instructions, you can easily get rid of minor defects at home.
If the air bed is still allowing air to pass through, then there is still damage. In difficult cases, it is worth contacting the specialists from whom the bed was purchased so that they can help eliminate defects.
- material for making a patch;
- scissors;
- ball pen;
- glue suitable for PVC (for example, "Sekunda")
Animal circles break faster due to the large number of parts and joining seams.
It is not recommended to use "Superglue" type glue when repairing PVC circles - it will crack, not ensuring tightness at the place of repair.
PVC material, unlike rubber, is not recommended for sanding before gluing.
Traditional degreasing fluids such as solvents and acetone can degrade the material from which the wheel is made. Therefore, first try treating a small piece of the patch material with a degreasing liquid. If the disc material is damaged by acetone, use alcohol for degreasing.
On sale there are special kits for the repair of air mattresses and toys. Typically, this kit includes a patch, PVC adhesive (Vinyl Cement) and instructions for use.
The best patches are cut from the same material as the circle itself. You can use a toy that is no longer repairable and cut out patches from it. One such product will last for a long time.
In fact, there are no grammatical rules for the spelling of this word. You can pronounce and write as you like, that is, both "mattress" and "mattress" will be the correct answer.Such an answer will be received if we follow the new rules of the Russian language adopted in the twenty-first century.
For the first time this word is mentioned at the time of Peter the Great. It was he who brought the first feather mattresses from Europe. Since at that time the language was a little rougher, the word with the letter "t" at the end was common, that is, "mattress".
However, further research on this topic changed the situation a little. The fact is that the ancestor of the production of mattresses is Holland, and in their native language this word is spelled as matras. Accordingly, it would be more correct to write this word as “mattress”, but the population was already accustomed to speaking differently, and there was no point in changing the spelling.
There is also an assumption that the "c" at the end appeared as a result of the influence of the German language, which was also widespread in Russia at that time. In German this word is spelled as matratze and in Russian it is read as “mattress”.
The swimming season is in full swing. Parents dream of launching their little ones to catch a puddle at least in some puddle. What kind of bathing is complete without a rubber ring or bracelets? But the trouble is, very often these products are torn in the most inappropriate places and at the inopportune moment. In today's article I will tell you how to glue a circle along the seam using whatever items you have at your fingertips.
A children's PVC rubber ring can be glued with a regular patch, like we glued bicycle tires in childhood. The main thing is to degrease the surface well with a solvent and fix the patch under the press. It is also advisable to choose a similar material for the patch. For example, cut out a circle from an old unnecessary circle.
It's another matter if the hole is formed along the seam of the circle. And this happens very often. You can't put a patch in such a place, but there is a much better way. It is easy to apply it even while on vacation, somewhere in a hotel. And you can use the swimming circle in 1 minute. This is the ironing method.
circle with a hole at the seam;
wooden surface;
paper;
iron.
Lay the circle or whatever you are gluing on a wooden surface. The place where the hole is. Spread it out.
A hole along the seam cannot be sealed with a regular patch
Preheat the iron to the maximum temperature.
Attach the edge of the sheet of paper and press down with the hottest part of the soleplate of the iron - this is where the convex arc is. You need to try to cauterize with an edge. Let it sit for a while for the material to adhere well.
Try not to touch the circle with a hot iron - otherwise everything will be discarded.
Be sure to wait for the place to be glued to cool, otherwise, tearing off the paper, you will make new holes. When it cools down, carefully remove the paper. If there is a white mark left from it, do not worry, the paper will easily come off when it gets soaked in water. Check how the hole is sealed, if necessary, repeat the procedure again and be more careful.
Be sure to wait for the bonding site to cool down.
Now you know how easy it is to glue the rubber ring along the seam. A great way, accessible even to weak female hands. Be sure to share it with your friends. Enjoy your stay!
You also have problems with inflatable bed Intex ? Or with an inflatable mattress? I think yes. You have opened this page for a reason. At first I was also glad that such a successful contraption appeared in the house. But then she also began to let air through. Slowly at first. Then in the middle of the night I had to get up and pump up. Then during the night I had to do this twice already, otherwise you would wake up lying on the hard floor in the arms of a lowered inflatable bed. It all ended very badly: the bed was finally “blown away” and removed until better times. When the summer season began and repair kits for gluing Intex inflatable products appeared on sale, there was a real chance to repair our leaky bed. I bought a repair kit and.
The first place where I saw it on sale was the Sportmaster store.For only 199 rubles you can buy a repair kit consisting of a tube and a transparent patch. It's good that I never bought it. Indeed, in the Auchan store, the exact same set costs only 54 rubles:
No matter how much I tried to discern the differences in these products, I could not find it. The kits are identical. Probably, Sportmaster buys kits in Auchan and sells them at four roads.
Returning home, I pulled out the long-suffering inflatable bed from the mezzanine, laid it out on the floor and decided to immediately start repairing. First tore off all the previous patches. It's embarrassing to even admit, but earlier, trying to solve the problem with holes, I sealed them with tape. You understand that there was not much sense from this. Moreover, from the scotch tape on the surface of the bed, a sticky viscous glue remained, which was very difficult to remove.
But what was to be done? It was winter outside, repair kits are not for sale in winter. This is a seasonal item. Therefore, if you become the proud owner of an inflatable bed or mattress Intex , buy one or two at once repair kit ... Who knows when your product will leak, in a year or tomorrow.
Finding old holes in old parts of the bed, I lightly cleaned them with alcohol. If there is no alcohol, vodka will do.
After unpacking the repair kit and reading the instructions, I thought about it. At some point, there was even a desire to abandon this whole venture, since it was fraught with the most “rosy” consequences if something went wrong. Here's what it says about the glue:
Can you imagine? Accidentally inhale a couple of glue and that's it! Fatal outcome. Maybe, well, her, this bed. Then I'll try with regular rubber glue?
However, curiosity and a desire to solve the problem right now took over. As they say, fly so fly!
To begin with, let's give "praise" to the manufacturer for the fact that he so tightly wound the patch material into the tube.
No matter how long I tried to straighten the material, each time it regularly rolled into the same compact roll. Here, you bastards! Just bastards! No, to put two or three bookmarks in an unfolded state. After all, the size of the package allows you to do this. In a word, I got angry with the manufacturer and the second time I wanted to abandon my plan.
Then, when the surging rage subsided somewhat, I nevertheless cut out a patch of the required size and prepared for the most terrible thing: it's time to open the tube of killer glue.
Didn't even doubt it! The glue in the tube was naturally under pressure. As soon as the protective membrane was pierced, a part of the “magic liquid” immediately ended up partially on the fingers and partially on the floor. But, as the old joke says, “Chukchi are not a fool”! His hands were prudently wearing rubber gloves, and the floor was covered with old newspaper. If it weren't for the gloves, it remains to be seen what might have happened. Perhaps you would not read this article now and would not have been warned about the insidiousness of vinyl glue 🙂
Then the fun began. It was necessary to somehow manage to smear the patch with dangerous glue, which was striving to curl up into a roll. I tried on for a long time, but each time I realized that now it, already smeared, would again curl up into a tube and immediately stick together. This will end the game. And no pleasure other than breathing in the vapors of the vinyl glue! How not to be angry with the manufacturer!
Then a saving thought came. What if glue is not on the patch, but on the surface of the inflatable bed itself? Let's try it, anyway it won't work out otherwise:
Is it clear now. There was no explosion or other chain reactions. Now quickly apply a patch on top!
Aha! Somewhere already "grabbed"! Briskly grease the rest of the area with glue and press:
Then the incomprehensible began. The corners of the patch suddenly began to curl in the opposite direction - from the surface of the bed. I had to take action - grease the edges and press them into place.
More than once or twice during this time, I again wanted to drop everything and return to the good old rubber glue.The patch turned out to be terribly ugly. I didn't like it. Moreover, I somehow could not believe that it would hold on and not fall off the first time the bed was inflated.
In a similar way, I glued a couple more patches on the holes I knew in the inflatable bed. Then, according to the instructions, it was necessary to leave the product for 12 hours for complete setting.
The sight of the glued patches was disheartening. They looked too primitive. Most likely, all this is an empty idea. But when I tried to pick out the edge of one of them, it turned out to be stuck tightly.
Having inflated the inflatable bed, I first left it alone and did other things. Imagine my surprise when, after about a couple of hours, I came to the room where the experiment was being carried out and found that the Intex product did not even think to “let it go”. It looked exactly the same as right after pumping.
Deciding to conduct a more daring experiment (it was just about time for an afternoon rest), I lay down on the bed. When I woke up about an hour later, I noticed that the bed had lost some of its elasticity.
One of two things - either some patch is “gone” or there are one or two more “unaccounted for” holes.
This is the longest part of the job, but at the same time the most creative. Find a hole the size of a sewing needle in a huge double inflatable bed Is a whole ritual. I'm not afraid to say that this is an exciting quest for true adventurers!
First, it is worthwhile to pump up the product tightly enough and listen to if a suspicious hiss is heard from any part of it. Before that, you need to close all windows, doors, turn off all sounding household appliances and remove the headphones from the player from your ears.
Try to listen to the mattress alone. Otherwise, your focused look, which is an example of embodied attention, will certainly cause an unhealthy reaction in those present. With their laughter and barbs, they can threaten the failure of your mission.
Sometimes a simple listening is enough to find a puncture. However, very small holes cannot be found this way.
Alternatively, move your wet hand slowly over the surface of the inflatable product, hoping to catch the faint flow of air going out through the opening. Here you definitely need to be alone in the room. Indeed, from the outside it may seem that you are trying to heal the mattress with your suddenly awakened psychic abilities. Here you can not avoid jokes. Especially if you inadvertently tell someone that you are trying to repair a mattress or bed this way.
Alas, sometimes neither hearing, nor magical passes with hands over the surface of the product help to identify the problem area. Then you have to move on to plan "B."
Perhaps you recall looking for a puncture in a swimming ring or bicycle tube as a child? Right. They were simply lowered under the water and watched where the bulbs would come from. But try putting even the simplest single air mattress into the water, not to mention a huge bed.
Soap solution helps. Armed with a brush, first of all, it is worth "walking" with the solution in all corners, edges and seams. Look carefully for bubbles starting to inflate in the place where you just daubed. In this case, try to do without witnesses, because in your work you will resemble an outstanding artist working with concentration on the next greatest canvas of our time.
If you went through all the problem areas, and did not see bubbles, we begin a total check of the entire surface. You will need a wider brush. For example, painting. This work is quite painstaking and wet, but it is guaranteed to lead to results. The main thing is not to rush.
There is also the potential for air to pass through the pump valve. There is nothing you can do about it. As you know, you can't get far from fate.
There is another "ambush" that can lie in wait for the owner of an inflatable bed.This is a burst internal partition.
One night in the middle of the night I suddenly woke up from some strange and rather loud sound. First thought: the cat is pulling an inflatable bed with its claws. Very similar. However, turning on the light, I realized that the beast had nothing to do with it. It's just that the innermost partition burst near the bed.
As a result, there is a slight elevation on one side. It did not cause much inconvenience. Rather, on the contrary - now there was no fear of falling out of bed during sleep.
About a month later, another burst - the next one from the same edge. The inflatable bed has been transformed from a double bed into some kind of fancy single sofa:
What to do in such cases? I'm afraid to upset you, but the answer is the decadent word "nothing." Of course, you can do as befits real optimists: carefully cut the outer shell, five-neatly glue the inner bulkhead, and then just as neatly close up the outer cut. But at home, only a very decisive person can venture on such experiments.
Therefore, it remains only to watch with sadness how the partitions fail one after another. When the last of them orders to live long, the inflatable bed will stop into some strange object, resembling a huge hamburger in shape. I think I have all the prerequisites to follow this process to the end and show you all the stages.
Now I know I can find a small hole in the outer shell and glue the inflatable bed or Intex mattress quite possible at home without resorting to the services of specialists. I used a proprietary repair kit for this. Perhaps the same effect can be achieved with ordinary rubber glue and simple patches. Almost three weeks have passed since then and the bed is doing well. Of course, every two or three days it has to be pumped up using the built-in pump, but this is quite normal.
So, if your inflatable bed needs to be pumped up more often than once a day, you can try looking for a hole and glue it over instead of getting upset over trifles. We all know that nerve cells do not regenerate.
As for the destruction of internal partitions. hopefully you are more fortunate than me. After all, it will be either impossible or very expensive to fix such a defect.
An inflatable PVC mattress or an inflatable bed is a useful thing, both for outdoor recreation and as a spare sleeping place for guests, and sometimes for oneself. But besides convenience, there is a drawback in Intex or any other inflatable mattresses, they must be carefully handled in order to avoid punctures, cuts or tears, and this is true both for the velor top of the mattress and the base made of polyvinyl chloride. A puncture or rupture is sometimes noticed when you wake up prematurely from touching the floor of the room. Or if you unsuccessfully try to inflate the mattress tightly after storage. Such an unexpected event immediately causes confusion, what to do, how to repair, how to glue or how to fix an air mattress with your own hands? Where can I find the patch? What kind of glue to glue? You don't have to look for a workshop! You can glue the inflatable mattress with your own hands.
In the absence of patches, some inexpensive inflatable PVC toy for children can serve as material for replacing them. Cut out a patch in the shape of a circle from the toy. Sandpaper is purchased from a hardware store. Degreasing agent - alcohol or gasoline.
We are looking for a hole, hole, puncture, rupture or torn seam in the mattress. We need to be optimistic and patient. I offer the following simple instructions for finding a puncture and repairing an air mattress:
1. In a quiet room or room, inflate the mattress as tightly as possible.
2. We listen and try to localize the leakage area by the sound of the outgoing air.
3.We carefully study the area of the leak, for example, slowly moving the palm at a distance of 1-3 cm from the surface to localize the hole of the hole. A thin stream of air will "cool" the palm.
4. If the hole or holes are visible, mark them with a ballpoint pen or felt-tip pen.
5. Very small holes are sometimes difficult to see, then you will need to use soapy water, the place of bubbles is also marked.
6. In INTEX mattresses, the sore spot is the valve, therefore, the bleeding is not always the result of a puncture; the valve is also checked with soap and water. Attention! Do not check the valve of the built-in pump in this way or dry it thoroughly before switching on.
6. Prepare a patch of the required size, the edge of the patch should be no closer than 15 mm from the hole.
7. The place of repair is dried, cleaned with sandpaper, and the patch is also cleaned. You can try to clean the fleecy surface with a cotton swab dipped in acetone.
8. Put the patch on the place of gluing and trace its contours on the mattress, this will allow you to gently apply the glue.
9. Degrease the place of gluing and blow off the air from the mattress. For acceleration, you can rearrange the hose on the pump or use a vacuum cleaner.
10. Apply glue to the marked area on the mattress and to the patch.
11. After applying the "Crystal" glue, pause for 5-10 minutes and strongly squeeze the patch and the surface of the mattress. Of course, the surface of the mattress is not always even. Compression density during gluing can be ensured as follows: We try to lay the canvas in the place of gluing on a flat surface. Quickly without the formation of bubbles, roll the patch onto the gluing site, put a piece of polyethylene on the patch, then a piece of foam 3-5 mm thick, slightly larger than the size of the patch, and put a load on top. This sequence of actions is best done before gluing. After installing the load, it is necessary to forcefully press the gluing place for 5-15 seconds and leave the gluing alone for several hours.
12. If everything is glued well and there is no other damage, then we pump up the mattress in 24 hours and use it.
When using the mattress outdoors, inspect the mattress placement surface for piercing objects and cutting glass fragments. Do not pull the mattress on a hard surface with people lying on it; in this case, unacceptable stresses may occur on the seams and cells of the mattress with breaks in the fastening of the inner frame. Avoid playing with animals near the inflatable mattress, cats can easily break through the covering with their claws.
yes indeed the cats have untied a rubber three-section mattress with 18 holes to glue them I will not cut this section
From my:
Thanks for the detailed and helpful comment!
Thank you, I will try to glue it together today.
how to replace the patch if there is no spare pvc material for the mattress?
Strange, the answer is in the text “In the absence of patches, some cheap inflatable toy for children can serve as material for replacing them. Sandpaper is purchased from a hardware store. Degreasing agent - alcohol or gasoline. "
Hello . Thanks for this article. Need advice:
-It is desirable that he glue it together as quickly as possible (in order to lay the bedridden patient on the glued mattress as soon as possible). In most adhesives, the term is stipulated for a day. This is VERY long in our case.
What is the minimum gluing time to use the product? (if it is important, the patient's weight is 55 kg, but on the other hand, the compressor constantly, every 6 minutes, alternately inflates / deflates the cells of the mattress)
He burst the circle along the seam by 20 centimeters. They sealed it in a second and began to pump it up, and he again dispersed from the air. Is there really nothing you can do? It's a pity for the money, damn it (it burst through our fault. So you can not advise the change.
By the way, no one knows this site has an android version?
Mobile app"Happy Mama"
4,7 It is much more convenient to communicate in the application!
melt through the newspaper with an iron, but you need to be very careful and not at a high temperature
These are recommendations on how to quickly restore the tightness of an inflatable product without causing additional harm to it. You should not expect too much from a temporary repair, moreover, it will need to be redone in a workshop, but often this is the only opportunity.
Do not use super glue!
Repair of circles, vests and small pools.
How to find the air exit points?
inspect visually,
try with the back of your hand to hear a cold stream of air,
partially immerse in a container of water and turn, bubbles indicate a leak.
it is necessary to mark the places of damage, blow off, remove dirt, dry.
For self-repair, the easiest way is to use the Intex repair kit (59632)
There is little damage on a flat area.
Cut a patch with a diameter of 2 cm from the material of the repair kit. It is better to wipe the patch and the damaged area with alcohol, at least wipe it with a clean, dry cloth. The gluing area must be dry. Apply glue from a tube to the patch and spread it with a “greasy” layer. Immediately apply the patch with glue to the damaged area, smooth and press the patch until the glue dries. The glue should dry in 1-2 minutes. After 30 minutes, you can use it. If you use Dismakol as a glue, then the glue is applied in a thin layer, it is dried for 10 minutes, then the second layer is applied, it is dried to the state of "scotch tape", it remains to glue and smooth it. You can very gently warm up with a hair dryer, carefully, the material of circles and pools can easily melt.
There is little damage at the seam edge.
Inflate about halfway to see where the leak is. Fill this place with glue from a tube, let it dry, pour more until the bubbles disappear. After 2 hours, you can use it. It doesn't always work out.
There is damage more than 1 cm. - contact the workshop for the repair of inflatable products.
R Repair of inflatable mattresses, beds, sofas, Intex boats.
There are many tips on how to find punctures in air mattresses and beds on your own. I do not recommend pouring water into an inflatable mattress, let alone an inflatable bed. The method is, of course, effective for finding holes. But after that it is very difficult to dry an air mattress, and an air bed is impossible. White streaks will appear on the surface and the fabric will be damp. Sleeping on such an inflatable mattress will be very unpleasant.
To find air leaks, you need to:
visually inspect for scratches, scoring, etc.
try to hear the cold air flow with the back of your hand
Take a container for water and a sponge. Make a soapy solution and lather the inflated mattress from all sides, mark the places where air bubbles exit, dry and deflate the mattress.
There are small punctures or micro tears in the seams.
If the mattress is still deflating, repeat the entire procedure, starting with looking for damage, and so on until the mattress stops deflating.
There are large gaps on the flat surface.
L it is better to go straight to the workshop, but if it is not possible, glue in the same way as a puncture, but the patch should protrude 1 cm in all directions from the gap. In the workshop, I glue on both sides with a special adhesive.
There is a gap in the seam along the edge of the seam larger than 5 mm.
Contact the workshop. Self-repair of breaks is more difficult and often does not lead to the desired result. And repair in a workshop "after repair" is usually more complicated and expensive.
The valve is often thought to be causing the mattress to deflate. It's easy to check. This requires a soapy solution and a brush. Inflate the mattress, close the valve cap. Then you need to completely lather the valve from all sides with thick foam. If no air bubbles are observed, then the valve has nothing to do with it. If there are bubbles, go to the workshop or look for a valve. An attempt to smooth the plane of the valve surface with emery paper will not give any tangible result.
If you do not want to soap, dry, and so on yourself, contact a specialist.
Watch the video course Air Mattress Repair School.
VIDEO
Video (click to play).
The continuation can be viewed on the latka channel.

