In detail: do-it-yourself gdi pump repair from a real master for the site my.housecope.com.
Continuation:
We unscrew the “fuel pulsation damper” (not unscrewed it will slightly interfere), read the name of the MEK, twisted by 4 hexagon bolts, it is quite clean under it.
Then, unscrew the cover 2 of the hexagon bolts, hold it with your hand, under it there is a spring (elastic enough) and carefully so as not to damage the corrugation ..
We open it slightly, there we see this very spring, under it the corrugation is “hidden”, we remove the spring, we take out a small roller with a support plate from the removed case.
we see a nut with internal hooks in the amount of 6 pieces, we make a key for it (described above, in the first post)
So, the “cunning nut” is twisted, let's open it ..
I got a little worried about removing the corrugation, hooked up with just 2 screwdrivers, there is a small protrusion, it was removed. To remove the top plate, you need to remove the rubber ring (photo), and then the funniest thing in the photo can be seen in principle. Sandpaper was taken in 3 grit sizes (600, 1000, 2000) and in order.
total grinding and polishing time took 3.5 hours. after sandpaper, I walked with a felt roller with GOI paste (photo) everything glitters and sparkles ..
Putting them in the reverse order put 3 plates, by the way, do not mix them up there are pins there, put the top plate (we don’t forget to put the rubber band) put the corrugation and bait the nut on top. I tightened the nut, again in a vice and with an assistant, in 2 steps (tightened, allowed to stand for 5 minutes, tightened one more time).
We put the lid in place, with the rubber sealing ring of the lid more careful !! We fasten the damper, the body is assembled. We change the filters for new ones. Then I found at the outlet of the high-pressure fuel pump, in addition to the filter, a shiny ring from the old one, “carefully” left by the previous owner, removed it again with a self-tapping screw, but with a large diameter (photo).
Almost as good as new
| Video (click to play). |
And further. Floating rpm at idle does not always drop in pressure. Usually in conjunction with the tapping of wetsuits.
I solved this issue like this. And everything is quiet and does not float.
php? 22065.315
In the GDI, it is important to clean the throttle and injectors.
Be sure to flush the fuel with this
08 & like_name = 1
Pouring oil Liquid-Moli for Japanese machines ASIA 5-w30
And there will be no noise from the gidrik. And the revolutions will stop floating
Pouring oil Liquid-Moli for Japanese machines ASIA 5-w30
And there will be no noise from the gidrik. And the revolutions will stop floating
I advertised the liquor mills in full, my wetsuits did not knock and the revs did not float, the throttle valve was clean.
———- Added at 15:19 ———- Previous post was posted at 15:15 ———-
tt1488 nope (the pressure has risen a little, 39-40 MPa, the engine has become a little smoother, the diagnostician says that it is some kind of pressure regulator or pressure sensor that is most likely to blame, for the sake of interest I will change the maintenance station to another, whatever they say.
I will ask BAN for the title of the topic. ABOVE IT IS WRITTEN IN CAPITAL LETTERS HOW TO NAME THEMES!
———- Added at 14:54 ———- Previous post was posted at 14:53 ———-
You will never see your useful and high-quality material in FAK! Because for me this topic is already “in the fake”.
Colleagues, help me, my pressure on the injection pump dropped to 30 atmospheres and floats within 10 more. The old forum had a whole section on the pump and its repair with photos. If anyone has a photo report on the removal and repair of the pump, post a link or post it here.
Machine 1.8 GDI 1998 y / in mechanics
The old forum has never had a photo report on the repair of fuel injection pump. I feel the time has come. While I will deal with the pictures (insert them on the forum), prepare:
1) a bottle of gasoline "Galosha" (clean, unleaded, so as not to be poisoned).
2) 6 sheets of good skin (I take some kind of Swedish one) 1000,1500,2000, each with 2 sheets (better aluminum oxide, sometimes silicon carbide, it is softer, written on the back).
3) a piece (approximately 300x300) of thick glass, at least 8mm, I have 10mm. You can ask the manager of any large supermarket - there are always broken windows.
If possible, it is best to use a tared sanding plate. Work with glass anyway on a flat hard surface. I have a marble slab.
4) cotton swabs, clean rags.
5) the keys are different, incl. under the "asterisks". Special key for pressure regulator.
You are welcome Sign in or Register now to see hidden text
No key, don't even try to disassemble the regulator. No ersatz substitutes are suitable.
Colleagues, help me, my pressure on the injection pump dropped to 30 atmospheres and floats within 10 more. The old forum had a whole section on the pump and its repair with photos. If anyone has a photo report on the removal and repair of the pump, post a link or post it here.
Machine 1.8 GDI 1998 y / in mechanics
Change, for a start, the filter at the entrance to the injection pump.
Colleagues, help me, my pressure on the injection pump dropped to 30 atmospheres and floats within 10 more. The old forum had a whole section on the pump and its repair with photos. If anyone has a photo report on the removal and repair of the pump, post a link or post it here.
Machine 1.8 GDI 1998 y / in mechanics
You are welcome Sign in or Register now to see hidden text
On the image:
1) High pressure sensor
2) Discharge of a part of the high pressure into the return line
3) High pressure outlet to the fuel rail
4) Pressure regulator block
5) Block fur. drive
6) The fuel injection pump unit itself.
The fuel pump filter changed 2 times, before the winter-spring seasons. This is not a problem, I only started swimming for a week, I went to the Lipetsk Japanka for diagnostics - the verdict is pressure in the high-pressure fuel pump, accordingly, the officials only have the replacement of the high-pressure fuel pump at a price of 35t / rub. on the old forum I read about the ability to extend the life of the pump
Let's continue.
After separation from the engine, we have a separate section of the regulator (removed earlier) and two sections (mechanical drive and injection pump),
fastened together.
You are welcome Sign in or Register now to see hidden text
We unscrew the 4 long bolts holding the sections together and helping ourselves a little with a flat screwdriver, like a lever,
we separate them. It is better to flush the drive with gasoline and fill it with clean engine oil. Little oil, 3-4 tablespoons
spoons will still flow out through the oil channel hole. Rotate the eccentric shaft for lubrication.
Now, in fact, the injection pump.
You are welcome Sign in or Register now to see hidden text
Using the E8 head, unscrew the two bolts under the "asterisk". We unscrew evenly, 3-4 turns each, pressing firmly
unscrew the cover by hand, because there is a rather strong compressed spring under it. We remove the cover and see.
You are welcome Sign in or Register now to see hidden text
Well, to be precise, this is a photo of the 3rd generation injection pump, but they differ only in the fastening castellated nut.
In the second generation, there is no nut, and the inner bag is not compressed by anything.
Carefully remove and fold the rubber rings separately. Using a thin screwdriver and tweezers
we take out the ring located in the groove in the wall of the chamber well. Without removing the ring, we will not analyze it further.
You are welcome Sign in or Register now to see hidden text
Using two flat screwdrivers, using them as levers, we take out the corrugation. With corrugation in general, we handle it carefully!
After the corrugation, we take out the plunger itself.
You are welcome Sign in or Register now to see hidden text
It is better to put all the removed parts in a plastic container.
(ice cream bucket, small basin) filled with gasoline. I use a 1: 1 "Galosha" mixture for washing
with acetone. I carefully wash the glands with a stiff toothbrush. Especially the grooves of the corrugation.
You are welcome Sign in or Register now to see hidden text
Once the plunger pair (crimp and center plunger) has been cleaned, a small but much needed test should be performed. Its result will show
in general, the expediency of further actions. It is necessary to salivate the thumb of the right hand well, put the plunger on it, with the pad on the finger, so that the finger is guaranteed to cover the central hole and put the corrugation on the plunger from above. In a successful case, the corrugation will not fall on the plunger, the air cushion will interfere. The resulting knot must be squeezed several times between the thumb and forefinger. Three times he has to spring back.
This effect indicates a satisfactory condition of the plunger pair. If the corrugation freely descends on the plunger and is removed from it (remember the central hole closed with your finger), then further actions (grinding the plates, dancing with a tambourine, reading prayers) will be completely useless. High pressure fuel pump for discharge.
Let's continue.
Suppose that we have complete order with the plunger pair. This means that you need to disassemble the pump further.
We take out a spring with a plunger travel stop from the well
You are welcome Sign in or Register now to see hidden text
You are welcome Sign in or Register now to see hidden text
And, finally, “our charm-s-s-t” - three plates.
You are welcome Sign in or Register now to see hidden text
Well, I don't think there is much to tell about the state of these. And so everything is visible.
For those who are not visible and incomprehensible, for those there are they, only after grinding.
You are welcome Sign in or Register now to see hidden text
We take a thick glass, at least 8 mm, or better 10 mm, put it on something, also even and solid,
for example, on the desktop in the kitchen (hello to spouse!) and, applying successively, skins 1000, 1500 and 2000,
with circular and spiral movements, we remove all workings, saddles and cavities on two thick plates. Average,
thin plate, gently grind at once 2000th. AND NO PASTES. Grinding, polishing, lapping.
Here are the pluses of the new forum, excellent instructions. Thank you And at the same time the question: when warming up a cold car
in the area of the rear left wheel, away from the gas tank, some whistling is heard, this is normal or not.
Here are the pluses of the new forum, excellent instructions. Thank you And at the same time the question: when warming up a cold car
in the area of the rear left wheel, away from the gas tank, some whistling is heard, this is normal or not.
I can assume several situations - the neck of the gas tank is rotten and the intake air siphon quietly;
not a whistle, but a buzz - the pump engine dies, there is not enough gasoline in the tank, remove the back seat and listen to the flask
Thank you. I'm more inclined to think that the neck is rotten, the whistle is not even a whistle, but the hiss is like a wheel poisoning. Is it possible to inspect the neck without removing the tank?
Thank you. I'm more inclined to think that the neck is rotten, the whistle is not even a whistle, but the hiss is like a wheel poisoning. Is it possible to inspect the neck without removing the tank?
At a minimum, use a flashlight to shine through the filler hole.
I could be wrong, but from the lift, from below, removing the left wheel.
"Video stethoscope", there are many decent service stations, for examining the cylinder walls through the spark plug holes.
Oops. but how to determine what generation of injection pump is worth? ... on fault, can you? VIN: XMCLNDA2AWF049266
Oops. but how to determine what generation of injection pump is worth? ... on fault, can you? VIN: XMCLNDA2AWF049266
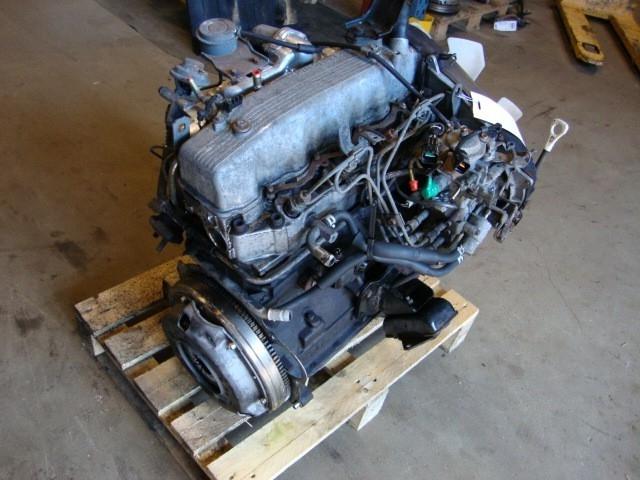
If the pump unit is located at the end of the engine, between the engine and the air filter box, then this is only
1st and 2nd generation.
Here's the first one.
You are welcome Sign in or Register now to see hidden text
You are welcome Sign in or Register now to see hidden text
And if the pump block is located on the side of the engine, between the flap,
then this is the third generation, "tablet".
By VIN you can, if there is a guarantee that no one has changed anything
Actually, you are in the second generation.
what is the acceptable minimum plate thickness after grinding? and is there an order of the plates? Is it worth turning the pressure regulator on the injection pump (there is a hexagon in my block under the number 4 in the figure) and if it costs how much and in which direction?
you can read here, for a general development, so to speak
You are welcome Sign in or Register now to see hidden text
what is the acceptable minimum plate thickness after grinding? and is there an order of the plates? Is it worth turning the pressure regulator on the injection pump (there is a hexagon in my block under the number 4 in the figure) and if it costs how much and in which direction?
You are unlikely to remove 0.1 from the entire package. There is no permissible (within reasonable limits), the production of the plates is removed by the clamp of the top cover. And that is why between the cover and the body
a gap of about 0.5-0.7 mm remains. In especially "suspicious" cases, I put a 0.1-0.2mm copper foil ring on top of a wide corrugation ring (massive body). Order
the succession of the plates, of course, is and it is very important. I will not speak in principle, everything is clear there after a moment's reflection (well, you can't chew everything like that). Though,
I recently read on Meka's website, and laughed and got angry at the same time, the person just managed to put (I have no other word) inside the parts, twist everything and put it on the car.
And I spent a week figuring out why there was no pressure! And all this with claims! Regarding the regulator, there will be a continuation of the report. In the meantime, I will say this, the factory position of the adjustment screw is
flush (under the cut) with the surface of the main plug, the one for which a special key is needed. And you can twist it only by connecting the tester to the pressure sensor. Necessary
set at 2000rpm 2.9-3.0v. When the pump starts to die, you can slightly raise the dropped pressure with this screw, again, only according to the tester. But, at the same time, it grows
pressure and high revs.
Of course, I am not a “deer”, but when I have never done it, I prefer to first learn about the intricacies and pitfalls, so as not to get into the situation later, in Lebedyan nobody wants to take my djidai, and since then I will have to do it myself and so as not to get paid.
Of course, I am not a “deer”, but when I have never done it, I prefer to first learn about the intricacies and pitfalls, so as not to get into the situation later, in Lebedyan nobody wants to take my djidai, and since then I will have to do it myself and so as not to get paid.
Will you wait until evening? There will be a continuation of the report. With assembly. No offense, if you do it carefully and think a little, you can't make a mistake. And friends are helpers with beer
close so as not to run.
High pressure fuel pump (three-piece)
1 - fuel tank
2 - fuel filter
3 - filtric
4 - compensator-limiting fuel pulsation (low pressure)
5 - ball-type bypass valve (low pressure)
6 - plates
7 - ball-type bypass valve (high pressure)
8 - plate valve on the line of dumping leaks from the supra-plunger space
9 - compensation chamber of high pressure
10 - fuel rail
11 - filter
12 - high pressure regulator
When the engine is started, the fuel priming pump, located in the fuel tank 1, starts to operate.
Under a pressure of about 0.3 MPa, the fuel passes through the fuel filter 2 and enters the injection pump through the filter 3, which is structurally located in the pulsation compensator-limiter
fuel 4.
This is where the separation of the fuel lines (highways) takes place.
Low pressure line:
1 - fuel tank
2 - fuel filter 3 - expansion joint-limiter 4 - ball-type bypass valve 8 - compensation chamber (located parallel to the fuel flow) 9 - fuel rail
This picture has already been published, but it is not superfluous to repeat it "in the subject".
Possible malfunctions when the filter is “clogged”: - poor engine start and not the first time
- unstable engine operation at XX
- uncertain acceleration
- no kick-down mode
- incorrect and unstable transition from the mode of operation with an ultra-lean fuel mixture to the mode of operation with a stoichiometric composition of fuel assemblies
As practice shows mek, it happened, and not so rarely, that when disassembling the high-pressure fuel pump, it turned out that there was no “filter” inside.
Nonsense, but true.
And there is no "filter" - that's it. soon an old woman with a scythe behind her shoulders will come to your pump and call him on a long journey.
She will come a little later and with the filter in such a state as in the above photo. See why?
"Little hole". Surely the reason was someone's "playful hands".
Note:Information provided by the workshop of Dmitry Yuryevich Kublitsky.
"The Moscow center of diagnostics and repair of systems GDI"
(Kublitsky Dmitry Jurjevich)
Note: this material will be further developed and expanded - there are already sketches of the following articles on the table, the basis of which is being prepared after 21-00, directly on the desktop mek and, most surprisingly, while talking about principles GDI it can take an hour or three hours - everything is imperceptible.
Because there is Passion and desire to become the Best.
More Better.
- = andry = - »Mon, 22 Jun 2009 13:53
2001 Aspire 4G94
The CHECK lights up, error P0190.
Starts up normally, turns on XX do not float.
The rpm does not rise above 4000 in neutral, it twitches during acceleration, barely eats.
The pressure shows in the region of 0.6V at XX.
When the pedal is pressed sharply to the floor, it sneezes, dips appear, and loud bangs are heard.
After cleaning the throttle valve and replacing the mesh in the tank, replacing the fuel filter, two filters for the inlet and outlet, no results.
Candles are normal.
After cleaning, the pressure was checked with a voltmeter on the pressure sensor, in the range from 0.8V - 0.9V at XX, at 3000 rev / s it rises to 1.2V - 1.3V.
And yet, while the CHECK is off, the car “does not go”, as soon as the CHECK light comes on, the car drives as usual, the revs rise briskly.
As soon as the light goes out, it does not gain momentum again, it twitches during acceleration, what can it be?
He took off the injection pump, the nut was unscrewed by hand.
The plates were unsatisfactory, they removed the plaque, cleaned, sanded.
Collected, put back, zero effect.
pressure as it was 0.8 - 1.0 Volts at idle, and remained.
I tried to tighten the pressure bolt on the injection pump, no changes.
Now the P0170 code comes on.
P0190 has not appeared yet, but it's strange why, because the pressure is 1.2 volts.
Please give advice on what else can be done?
There are specialists in Tyumen who have already restored the high-pressure fuel pump, please respond?
Jonnik »Mon, 22 Jun 2009 14:00
did it really help? when was it used? how much is the mileage after that?
The pressure was 2.83 volts according to the pressure sensor. When flushing up to 3 volts. Black smoke during start-up and venting, difficult start-up even at freezing temperatures.
After application, the pressure is 2.93-2.95 volts. When flushing up to 3.2 in. All troubles were gone. The mileage is not great, because operation is mainly warming up and dashing for a couple of kilometers. Several thousand but in time it is a year. The measurements were carried out with the same device at the same time of the year at the same temperature, with the same fuel filters.
This is after one tube per tank of gasoline. There are only 9 or 15 ml.
But the pressure does not seem to be higher on this type of injection pump. In the same article, the author was unable to achieve a higher pressure even after perfect grinding of plates and other parts.
Yes, but this is the equivalent of what rpm on X / X? 
And excluding warming up / heating up. How much will the motor be with the stock adjustment? I don't mind that the pump could potentially dispense more. But under what conditions? Taking into account that the injection pump is driven from a camshaft that rotates twice as slow as the crankshaft. I say that on the turns. about 3-4 sput, the pressure became 3.2 volts. This is the limit of the factory settings according to the correspondence table. Higher only gets worse.Nobody turned the injection pump, I know for sure. And besides, this is only from a one-time application of the drug.
The pressure was 2.83 volts according to the pressure sensor. When flushing up to 3 volts. Black smoke during start-up and venting, difficult start-up even at freezing temperatures.
After application, the pressure is 2.93-2.95 volts. When flushing up to 3.2 in. All troubles were gone. The mileage is not great, because operation is mainly warming up and dashing for a couple of kilometers. Several thousand but in time it is a year. The measurements were carried out with the same device at the same time of the year at the same temperature, with the same fuel filters.
This is after one tube per tank of gasoline. There are only 9 or 15 ml.
But the pressure does not seem to be higher on this type of injection pump.
Several questions arise:
1.How to measure pressure with a voltmeter? What chips or contacts to connect to?
2. Where can I find a table of correspondence between pressure and voltage?
3. What is the mileage of the car when using the XADO tube?
4. Is it difficult to remove the injection pump? if you can link with pictures
my car has a mileage of 167 thousand km. The injection pump is blowing weakly. I think it will help or not? The bulkhead costs $ 9,000.
Here is a table of correspondence between volts and pressure (the pressure there is indicated in megapascals 5 MPa, this is approximately 50 kg) With stock adjustment at idle (700-750 rpm), the pump should press 50 kg heating / heating does not matter as well as not it matters that the camshaft rotates slower than the crankshaft (the pump drive diameter is 4 times smaller than the camshaft gear drive diameter), and it does not rise above 3.2 volts, so the valve can discharge gasoline into the tank through a high return flow.
Well, does the car drive? does the motor work? That means it will help. What pressure and how much voltage did you not say? Dismantling the injection pump is such a thing. it's not that simple there. You can break something and it will no longer be whole from the factory + large hemorrhoids that will end with no one knows how. I would try. I also tried 
! And if it helps, then it will be + in the piggy bank of general experience. Self-repair actually does not take, as it says in the instructions, 100 hours of work or 3000 km. In fact, the difference has already appeared on the first second trip around the city.
there is still such shit. v-topliva #
But I used it cheaper, in an aerosol for 550 rubles.
Well, does the car drive? does the motor work? That means it will help. What pressure and how much voltage did you not say? Dismantling the injection pump is such a thing. it's not that simple there. You can break something and it will no longer be whole from the factory + large hemorrhoids that will end with no one knows how. I would try. I also tried
! And if it helps, then it will be + in the piggy bank of general experience. Self-repair actually does not take, as it says in the instructions, 100 hours of work or 3000 km. In fact, the difference has already appeared on the first second trip around the city.
there is still such shit. v-topliva #
But I used it cheaper, in an aerosol for 550 rubles.
and what to do with aerosol? where to pshYk it? 
Well, does the car drive? does the motor work? That means it will help. What pressure and how much voltage did you not say? Dismantling the injection pump is such a thing. it's not that simple there. You can break something and it will no longer be whole from the factory + large hemorrhoids that will end with no one knows how. I would try. I also tried
! And if it helps, then it will be + in the piggy bank of general experience. Self-repair actually does not take, as it says in the instructions, 100 hours of work or 3000 km. In fact, the difference has already appeared on the first second trip around the city.
there is still such shit. v-topliva #
But I used it cheaper, in an aerosol for 550 rubles.
and what to do with aerosol? where to pshYk it?
Well, as I understand it, the aerosol is typically for the fuel system, repairing the injector seats, etc. Those. written for the repair of fuel equipment. Generalized. And the syringe is in the description specifically for gasoline injection pumps, with an increased concentration of the drug and apparently a slightly different formula. Something like this. And pshikat according to the instructions should be in the tank and then pour 30-40 liters of benzene so that it washed and stirred. Better to have a full tank.Well, then the ceramic particles will seep through the filters of the fuel system and “weld” under load and temperature onto the loaded parts of the fuel, i.e. where is the plunger and valves in the injection pump. I even had extraneous noises in the injection pump during this process. But this thing is just some kind of spit on 80 liters of gasoline. The tank was almost full. Well, then the pressure rose and for a year now everything is ok.
well, it seems like this additive sticks only to the loaded places (valves and plungers of the injection pump), and the fuel lines and the tank do not apply to them.
Surprisingly, neither Vladivostok, nor Sakhalin Island, nor the cold city of Khabarovsk became the "homeland of repair" of direct fuel injection engines.
And what can we say about Penza, from where the pump (fuel pump) came to us GDI.
Fault "normal" - will not start.
But sometimes it can start, and then it works.
True, "troit" is a little bit, turnovers are "walking", but - it works.
It is necessary to repair, and for this it would be good to somehow check the sent parts for their performance, right?
Naturally, a "branded" or some similar stand for checking the injection pump GDI in Russia there is nowhere.
And in what way can you then check the sent injection pump and find a malfunction in it?
There is only one way, long and painstaking, but otherwise - how?
Only by installing the sent injection pump on the "donor" - an existing car with the same high-pressure fuel pump.
It is in this way - by substituting a high-pressure fuel pump on the "donor" engine, and all the parts sent for diagnostics and repair are repaired (for prices for such repairs - see the end of the article, a rather interesting note ...).
The injection pump, substituted for the "donor", began to work, but how - with the "swimming" of revolutions:
It is good that there was "some" experience, there were already certain "best practices" on this issue (why and why it can "pump" speed), therefore the type of this malfunction was determined quickly enough, having rechecked, of course, and according to the indications of a diagnostic scanner:
the notorious mistake got out P0190 , in the current characteristics it was clear that; the high pressure fuel pump has been "adjusted" to a pressure of approximately 8 Mpa.
Which means only one thing: the pump must be carefully sorted out, because it is not known what else could "adjust" those hands that are called "playful" in the environment of Diagnostics.
Well, "we take a brush and gasoline" ....
And only after a thorough bulkhead of the injection pump; 
Number 2 in the photo shows exactly the place under the "hexagon", which "someone and once" twisted.
And he “wound” it to a pressure of 8 Mpa, at which the pump could not work stably and “pumped” the speed all the time.
But if only that was the fault!
Alas, the most important thing was still unclear: why and for what reason the engine worked normally, but if it was “muffled”, it might not be started back.
Agree that repairing in this way - when only "spare parts" were sent in the parcel, it is both difficult and dreary.
With many unknowns.
And none of the most "expensive" equipment will help if there is no Experience and that substance in the head, which is called "gray".
Describe your troubleshooting experiments?
Long what to say.
And so let's go straight to what we "stumbled upon" after searching:
Yes, you thought correctly, this is the so-called driver injector, an electronic device that is responsible for the operation of injectors.
Outwardly, when examining it, either "simply" with the eyes, and with the help of a magnifying glass, nothing was found. Everything is normal and nothing aroused suspicion: "paths" of a workable type, nowhere are there traces of melting, "swellings", there is no characteristic smell of "something" burnt out.
Let's remember what is written in the "manuals".There are direct instructions on how to check: for heating, for twisting, for water ...
Do you remember?
The rest, as you correctly thought, is "a matter of technology."
After a very careful and very careful examination of the board, the reason was found.
There was "non-alcohol" and something else that was eliminated with the help of a soldering iron and our respected diagnostician Andrei Yuryevich, and of course, a certain baggage of knowledge.
At the beginning of the article, it was promised in a note to tell about the prices for such repairs.
We tell in the words of Dmitry Yuryevich: from Moscow
"With nonresident repairs, we, to be honest," fly over "a little, because if you take the Moscow prices for such repairs, then they are very different and - in a big way. We just take into account their financial situation and, despite the fact that there is more work (well, imagine what it means to "substitute" the injection pump on the "donor" car, and how many times you have to do it), and so, despite the greater volume of work, the prices for "Out-of-town repairs" - below.
Here is such a selfless statement.
Decide for yourself how to perceive it.
probably one of the first to repair his 1999 Mitsubishi Carisma. 4G93 engine. It was like this: I arrived at the station to Sergei on the advice of friends (having visited a dozen more stations before that), the problem was that the cutoff occurred earlier and earlier every month, at that time the turnover did not rise above 2000-2200. After talking with Sergei and talking about my misfortune, he offered to measure the fuel pressure in the system, connected a multimeter (namely a multimeter, not a pressure gauge), explaining that the pressure of the NVD is checked in this way. On the screen of the multimeter, numbers ran up (HZ what they mean), Sergei said that it was necessary to flush the entire NVD and grind some plates there, I left the car after discussing the time of my appearance on the call. The next day they called me and said DONE, without specifying the details, I went to the station. My swallow stood near the box and hummed with its motor (as they explained to me later, the process of adaptation of the throttle was taking place). I received an offer to ride, leaving a secondary road, I gave it to a sneaker, I was extremely surprised by the dynamics of the car, it did not tumble so much even at the time of its purchase.
To summarize: The cutoff has returned to its rightful place, the car has become more high-torque, the consumption of 12-14 liters has dropped significantly. city 10 highway, the pleasure of driving is back.
P.S. For the work, I paid 3000 + 300 for the filter (I did not specify what they did there, and I had no time for that) almost a year has passed since the repair - the flight is normal.
You must be logged in to post a comment.
Pumps from the second generation are more reliable than the first generation high pressure fuel pumps. This is a very high-tech unit, and quite capricious in terms of fuel cleanliness. The main malfunctions of the high-pressure fuel pump arise due to untimely scheduled maintenance to replace the fuel filter and the intake grid in the tank, in addition, as an additional filtering of the fuel, it is recommended to install an additional fuel filter before entering the high-pressure fuel pump. During normal operation, the average resource of this type of injection pump is about 250,000 km, without its repair. In this case, as a rule, the plunger pair in the pump is in good condition, mainly plate valves are worn out. sometimes there are cases of self-loosening of the fastening nut (pill-type pumps) tightening the entire structure (plates, plunger, corrugation), and if measures are not taken in time, the restoration of the plates will be very laborious. as the plates lose their shape and become uneven due to the constant shock load.
So, what should you pay attention to on the operation of the motor in order to prevent critical wear of the injection pump, and take action in time.
The very first sign if the revolutions began to float with the load on (position R or D) in the range from 600 to about 1200 rpm, with a frequency of 5-10 seconds
The engine does not develop rpm before cutoff, or develops them sluggishly
When the load is on (D or R), the check lamp is on.
With all these signs, it makes sense to check the fuel pressure. If no diagnostic scanner is available, the pressure can be checked using a conventional voltmeter. The pressure rating is for 4G93 non-turbo 3.0V (4.8MPA) 3.2V (5.0) MPA for Turbo motors. 2.9 in (4.7 for 4G15, when the pressure drops less than 2.6 in the ECU, it gives a command to increase the speed to stabilize the pressure, and so every time it drops less than 2.6 in). Having caught the normal value, the ECU gives a command to decrease the speed, and if it falls to xx, it repeats the command to increase them.
The signal can be read with a voltmeter from the middle contact of the fuel pressure sensor located on the fuel rail. In this case, the measurement must be carried out on a warm engine and on D or R, since under load, the speed begins to drop to 500-550 and the injection pump loses pressure if it is defective.
The ECU, on these cars, even in the worst case, a complete loss of high pressure (work only at the pressure created by the submersible pump), switches to the emergency program, and increases the opening time of the nozzle, by an interval of up to 3.2 milliseconds, instead of 0.51 milliseconds. (Mode work of the lean mixture) at idle, and does not allow the engine to develop revolutions over 2000 rpm. min, this allows you to get to the car service.
Typical trouble codes for a drop in pressure or instability under the OBD 2 protocol, 0190 is an abnormal fuel pressure in the system and 0170 is a malfunction of the fuel supply system.
Pressure instability can also be associated with injector failure. If the nozzle needle hangs in the open position, there will be no pressure in the system, while, as a rule, gasoline enters the oil through the piston. When starting, the engine wedges a little, there is a risk of getting a water hammer. It is recommended to clean the injectors with Vince without removing them from the car every 30,000 km, before changing the engine oil.
Before you panic and get upset, you can try to do the following: unscrew the low-pressure fuel supply pipe before entering the high-pressure fuel pump, and clean the microfilter, check the condition of the fuel inlet mesh in the tank, if the fuel immersion filter has not been replaced for a long time (over 35,000-40,000 km) analyze the state of cleanliness of the fuel tank. The nominal pressure created by the low-pressure pump is 3.8-4.0 kg. If these measures did not lead to the desired result and the pressure did not return to normal, then the injection pump must be repaired or replaced.
Regarding the increased planting, through the EGR valve, the least costly and effective way to get rid of this problem is to install a solid partition between the EGR valve and the intake manifold, which prevents soot from entering the intake manifold. At the same time, the ECU does not see such alterations and the motor operates normally.
[Message modified by user 12/15/2009 11:07 am]
The high pressure fuel pump, in short - high pressure fuel pump is an integral part of modern diesel engines. The high-pressure fuel pump is designed to supply fuel to the cylinders in strictly defined quantities in certain cycles of the diesel engine.
Fuel pumps differ in the type of fuel injection:
- direct injection of a diesel engine (the supply of a diesel engine and its injection into the cylinders take place simultaneously);
- battery injection (pressurized fuel is accumulated in a special "accumulator" and then supplied to the injectors).
ATTENTION! Tired of paying fines from cameras? A simple and reliable, and most importantly 100% legal, way has been found not to receive more “letters of happiness”. Read more"
Also, high pressure fuel pumps may differ among themselves in types, pumps can be of the following designs:
- in-line;
- multi-section;
- distribution.
If you do not go into the "jungle" of design differences between pumps of different types, then you can simply identify certain differences between them. In in-line and multi-section pumps, each section supplies diesel to its "own" cylinder. In distribution pumps, one "block" is capable of supplying several cylinders with diesel.
Also, another difference between the injection pump is their "power" - how many cylinders the pump is designed for and its pressure. In general, these are all obvious differences between the pumps. In general, these are the main differences between the pumps.Now we will no longer torment our readers with theories about the operation of injection pumps and their primitive characteristics, which have long been described on the Internet in large quantities. Let's move on to the immediate specifics.
The engine manufacturer Mitsubishi is deliberately omitted here. This is due to the fact that at the moment there are several derivatives of this engine. Accordingly, they have a minimum of design differences, and the injection pump is suitable for both motors.
To be more specific, this is the same engine as the Hyundai D4BH, the pump for it has full compatibility with the 4D56T internal combustion engine (the differences between the 4D56 and 4D56T internal combustion engines are insignificant, the "T" index indicates a turbocharged engine).
The pump itself for the above engines, there is only one, produced by Zexel (aka Diezel Kiki), and now BOSCH. Yes, final suppliers and packaging may vary, but in the end, injection pumps for these motors can only be obtained from Zexel or BOSCH.
Basically, the accelerated output of the injection pump on these engines is caused by low quality fuel, as well as by the ingress of foreign elements into the system, which often occurs when loose connections and driving over rough terrain, fords, etc.
The main problems with the injection pump on these engines are as follows:
- Damage (due to accelerated wear) of the internal parts of the pump - the plunger pair, bearings and other parts.
- Contamination of the filter (protective mesh and element) due to the ingress of foreign elements into the system.
- Increased or floating revolutions due to the so-called. "Airing" of the system - the ingress of air into the system due to loose connections and worn out gaskets and seals.
- Poor engine start in cold weather, caused by a jammed or broken thermostat (located on the left side of the pump, injection advance mechanism).
- Other breakdowns associated with the rest of the elements - spark plugs, automatic heating, fuel supply, diesel injection advance angle settings.
Until now, the debate about which injection pump for 4D56 / 4M40 / D4BH engines is better, electronic or mechanical, does not subside. How big are the differences in the injection pump themselves and the attachment electronics for the pumps. Is it relevant to replace an electronic fuel pump with a mechanical one? Let's take a closer look.
So, the main difference in this moment is not the pump itself, but the equipment (electronics or mechanics) that activates the fuel supply system, depending on one or another mode of engine operation. In a mechanical injection pump, activation occurs due to the direct mechanical control of the injection pump. A cable runs from the gas pedal to the pump, which controls the system. In an electronic injection pump (EFI), the gas pedal is already electronic and the system is activated through the accompanying electronic units and sensors.
There is also a version about the existence of a cable drive for controlling an electronic injection pump (there is a control rheostat on the pump itself), but our editorial staff could not verify the reliability of this particular information.
Structural diagram of a mechanical pump: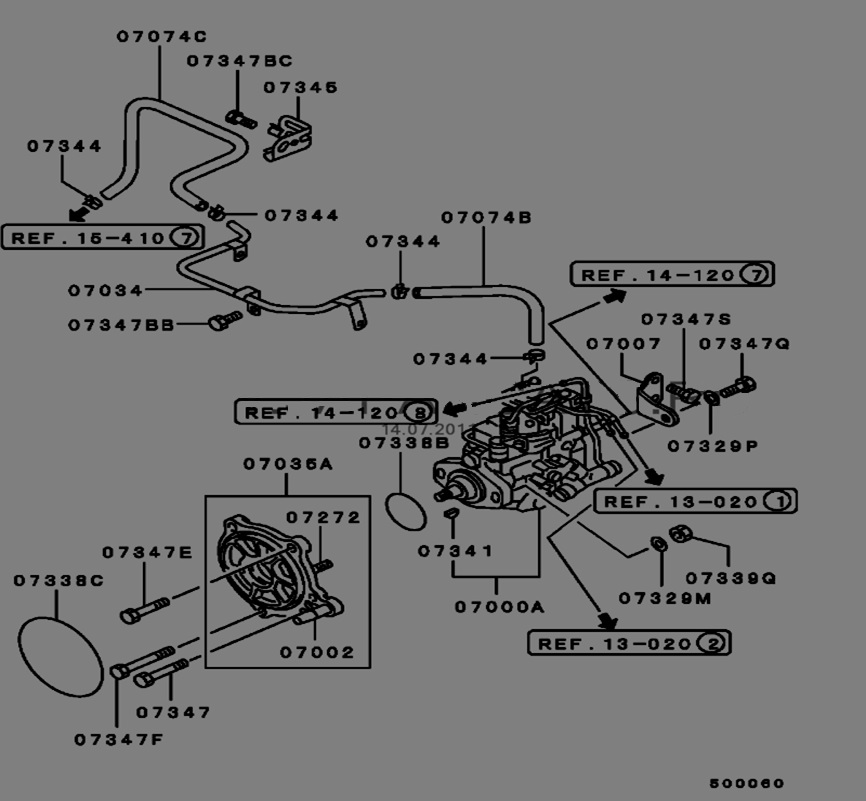
The advantages of a mechanical injection pump:
- ease of maintenance;
- reliability (due to fewer electronic components and sensors, which often "love" fail);
- cost, as a rule, mechanical pumps are cheaper than their electronic "counterparts".
Disadvantages of a mechanical injection pump:
- the absence of any indication systems and the quality of the units;
- the need to fine-tune the parameters and monitor the state of all related elements of the system (spark plugs, fuel pump, diesel injection timing device);
- increased consumption compared to an electronic pump.
- slightly worse traction performance at high rpm compared to an electronic pump.
Structural diagram of an electronic pump:
The advantages of an electronic injection pump:
- more stable operation of the engine, the absence of "floating" revolutions with serviceable accompanying elements (candles, injection advance mechanism, etc.), including electronic components and sensors;
- reduced fuel consumption compared to a mechanical pump;
- traction performance at high rpm is slightly better than that of vehicles equipped with mechanical pumps;
- the ability to read errors through electronic control units.
Disadvantages of electronic injection pump:
- a large number of sensors and other electronics, and this complicates vehicle repairs and increases the cost of maintenance;
- difficulties in finding some electronic components;
- difficulties in the selection of the pump itself and its components, since there are a large number of different variations with hinged electronics and they are different depending on the make and model of the car;
- the reliability of electronic pump units is lower than that of mechanical ones, since electronic components and sensors can often fail.
Before proceeding with the description of the process of removing the pump from the car, it should be mentioned that this article is not a guide to work on a specific car!
Zexel injection pump (aka Diezel Kiki or BOSCH) is equipped with a large number of cars with 4D56, 4M40, D4BH engines. Moreover, this family of engines is installed on completely different cars in terms of their characteristics and arrangement of units, such as Pajero Sport and Hyundai Oldax, so the attachments will be different in most cases. We will just talk about the pump removal process in general terms, without delving into the design differences between cars of different brands equipped with these engines and pumps.
To remove the pump, you will need to do the following:
- remove all electrical wiring from the pump itself;
- remove the cooling pipes from the intercooler;
- unscrew the high-pressure lines, for this use the key for "14";
- after which it is necessary to remove the nozzles, this is done with a long head on "22";
- then remove the washers (2 pcs.) from the wells for the nozzles;
- after which it is necessary to clean the wells from dirt, etc. and close the nozzle seats with a clean rag or glue it tightly;
- after the above steps, it is necessary to remove the timing mechanism (for more information about removing the timing mechanism, see the book on repairing a specific car);
- as soon as the timing is removed, it is necessary to remove the fuel injection pump sprocket and be sure to set marks on the injection pump and the engine block, this is done so that later it would be easier to install the pump and perform its adjustment;
- as soon as all the above steps are completed, you can unscrew the fastening bolts of the injection pump.
The pump is removed, now, depending on the problems, it can be sent to the service to the master. Well, or do it yourself if the breakdown is not very serious.
The installation of the injection pump is carried out in the reverse order: installation of bolts, connection of vacuum hoses and electricity, etc. However, it should be noted that when installing the pump, be sure to set the marks in the correct position! In addition, it should be remembered that the elements of the high pressure system must be installed using a torque wrench. We attach the tightening forces of each element during installation:
- nozzles - 55-60Nm;
- high pressure pipes - 30Nm;
- return pipes - 25-30 Nm.


