In detail: do-it-yourself headphone repair from a phone with a microphone from a real master for the site my.housecope.com.
From frequent bends, strong jerks and other mechanical loads, thin wires break or break. In this case, as a rule, one ear stops working, or, as in my case, both at once.
Sometimes the common wire breaks, in this case the sound is distorted beyond recognition: the high and middle frequencies disappear almost completely. This is due to the fact that the right and left amplifiers of the phone / player are switched on in antiphase and their output signals almost completely cancel each other out.
It also happens that the stereo effect simply disappears.
Often there is no sound in the ears, but the microphone works as if nothing had happened. However, if the microphone wire breaks, the control buttons on the headset cord stop working together with the microphone.
The most common cause of any described malfunction is in a broken wire in the immediate vicinity of the plug.
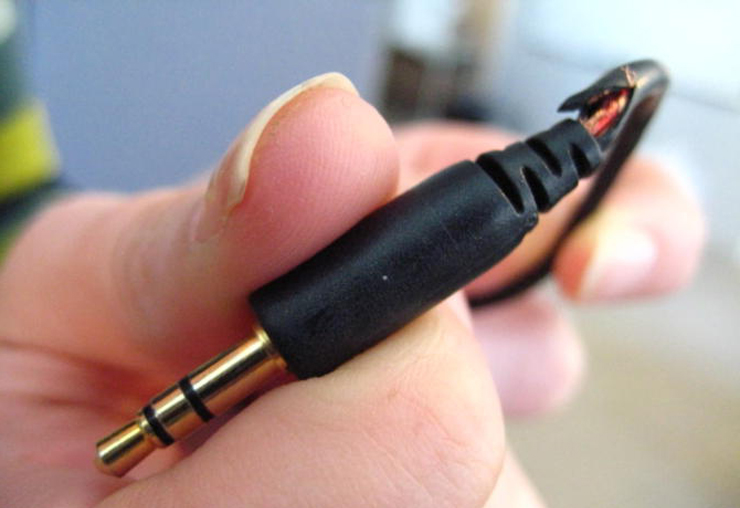
Sometimes wire damage is visible to the naked eye, but most often it is hidden under the insulation.
Now I will tell you how to fix vacuum earbuds with your own hands if the wire comes off the plug.
I will show the repair process using the example of the Monster Beats by dr Dre headphones, which I got along with the HTC Sensation XE phone. They served faithfully for almost 4 years, until, in the end, the plug broke.
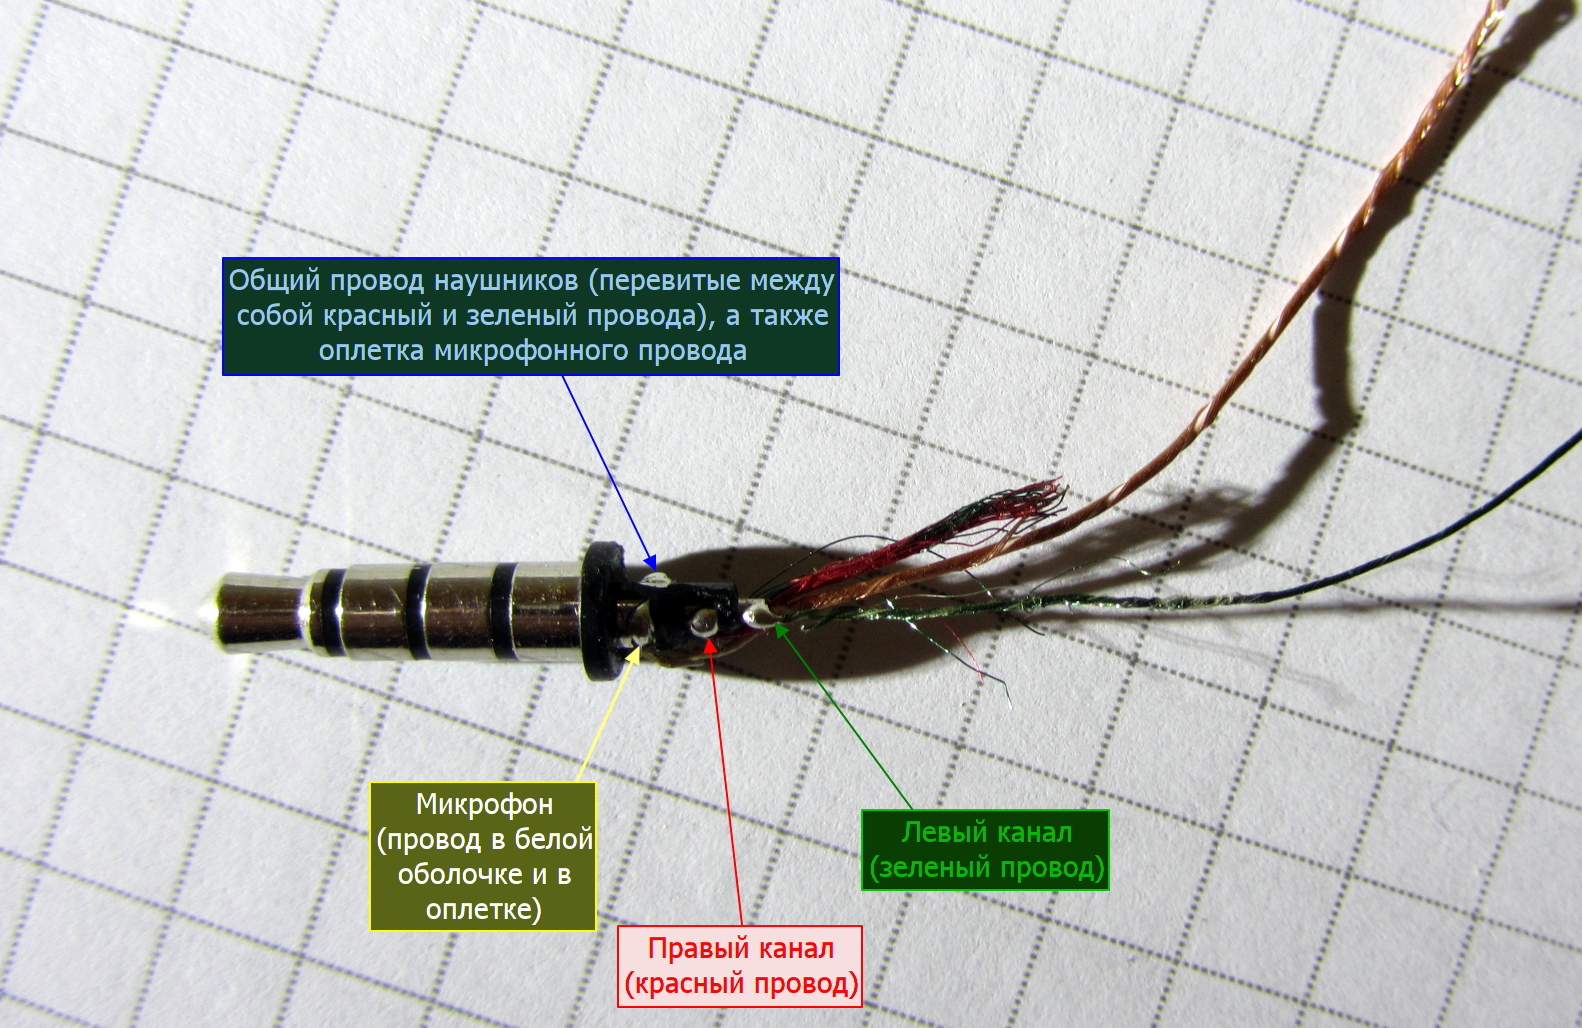
The plug in these headphones is a regular mini-jack (3.5 mm) with four contacts - right ear, left ear, microphone and general. By the way, interestingly, this headset has buttons so that you can rewind songs back and forth, but there are no special contacts on the connector for them. All buttons use the same mic contact in some miraculous way.
| Video (click to play). |
In short, now I will try to repair these headphones at home, and if something goes wrong - and fix it with it! - I'll go buy new ones. Moreover, the choice today is simply huge. Moreover, I am far from being an audiophile and anybody will suit me as long as they are comfortable.
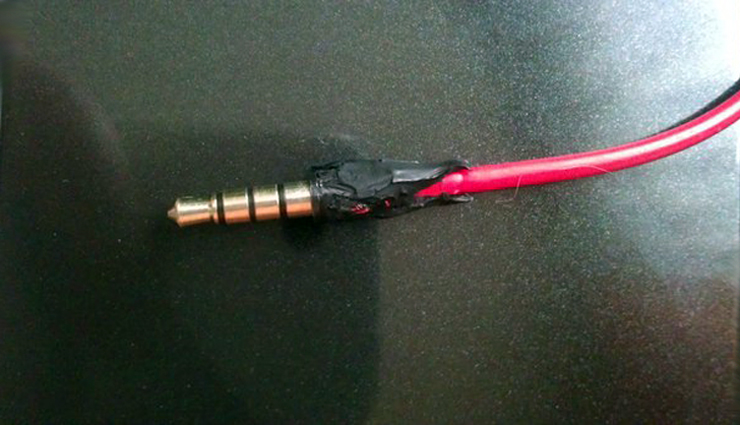
Initially, the headphones looked like this:
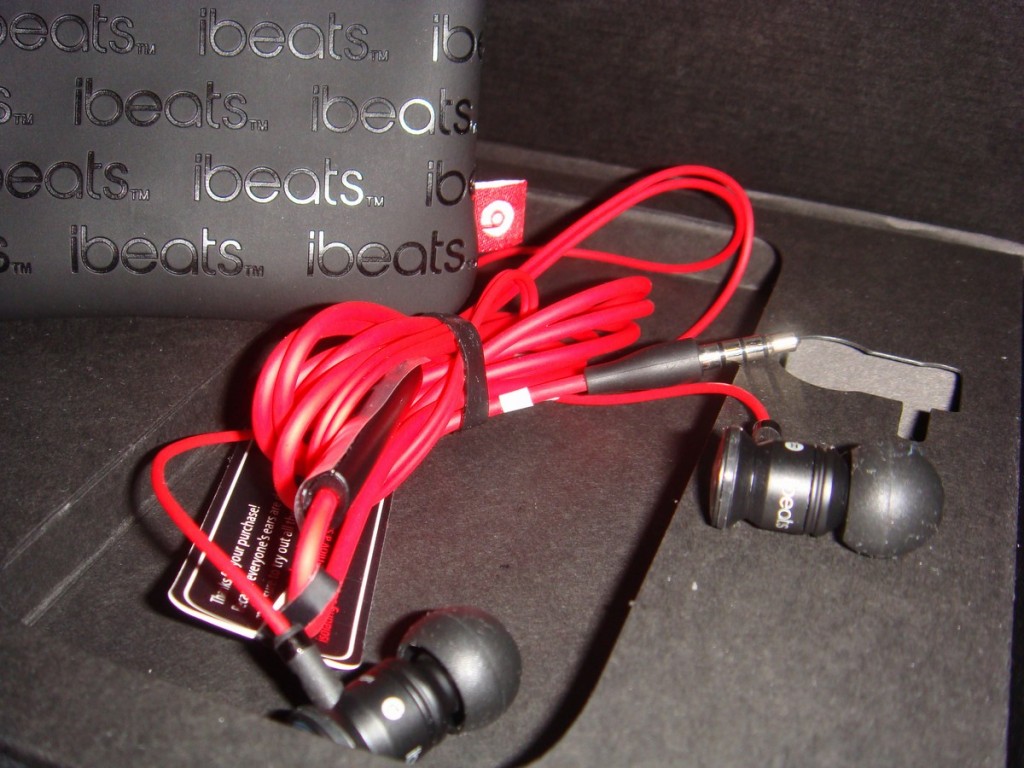
Headphones with a microphone and control buttons, so the plug has 4 contacts, and inside there are 5 wires. The headset connector is, of course, non-separable.
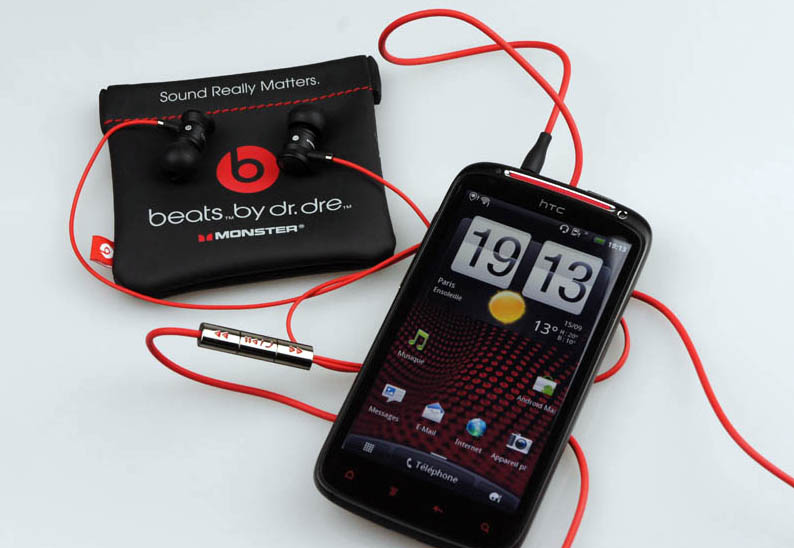
As I said, this repair method is suitable only if the problem is precisely in the connector - one earpiece, the right or left ear, a microphone does not work, the buttons are not pressed, the sound disappears if you move the wire at the plug, etc. etc.
So, if you are firmly convinced that the headphone plug really needs to be replaced - let's move on.
In order for us to get the highest quality and super-creative plug that no one else has, we will need:
- Two 38-caliber shells. Suitable from a Makarov pistol or the like. For example, I took brass sleeves from trauma (AKBS 9mm P.A.)
- Drill with drills (3, 3.5, 7 and 9.5mm)
- Hacksaw for metal
- Epoxy adhesive
- 5 dice syringe
- Small vice
- Awl
- Sandpaper
- Soldering iron with a sharp tip (solder, flux and aspirin tablet are welcome)
- A small plank, about 30x30 mm and about 20 mm thick
We will make an L-shaped plug, because it is better than straight line (more reliable and more compact). So let's go.
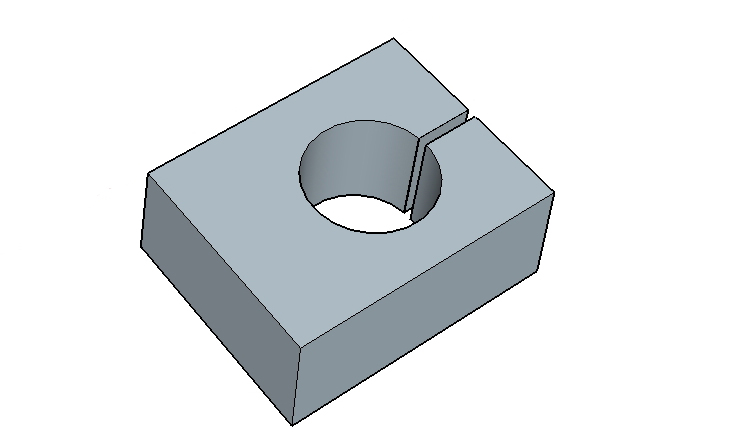
To begin with, we will make a small rig for the convenience of working with the sleeves, so that you can safely clamp them in a vice and at the same time not wrinkle or scratch.We take our piece of wood and drill a hole in it with a 9.5 mm drill, then we cut it with a hacksaw.
It is necessary to get something like this:
Now we can process our sleeves without fear of ruining their chic appearance:
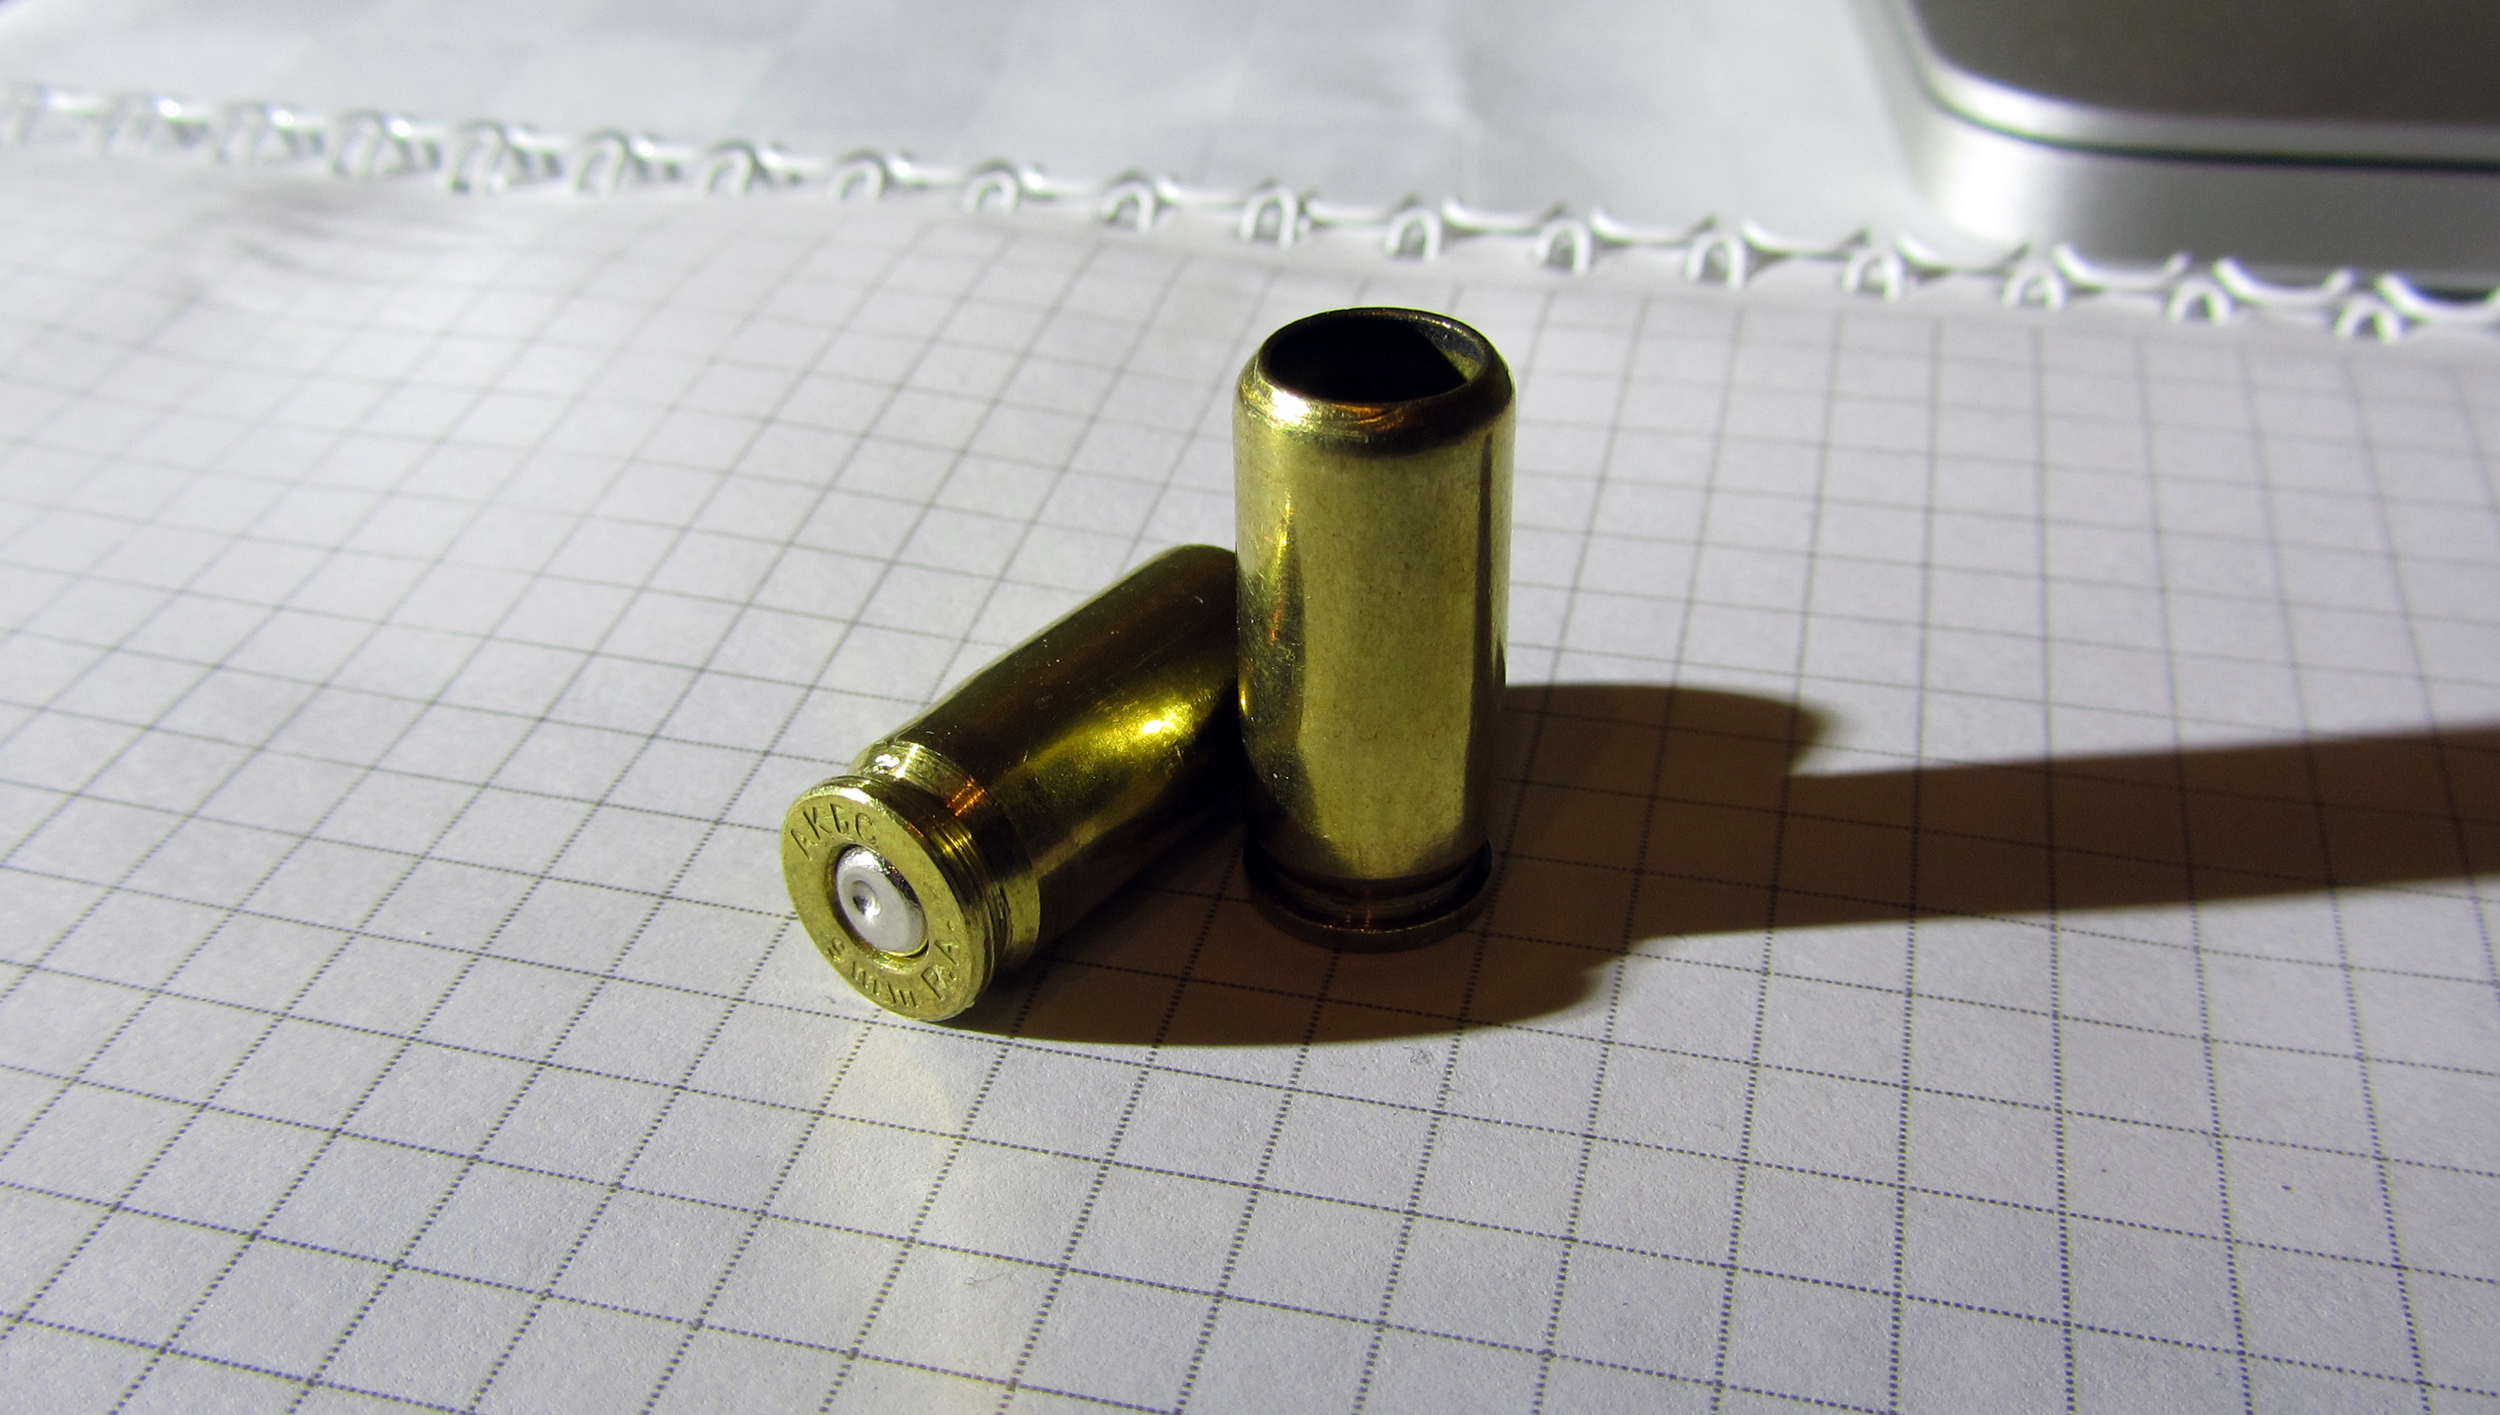
Since I had spent cartridges, there were dents on the primers from the striker. But we need everything to be beautiful, so we knock out both primers with an awl, hammer and straight hands:
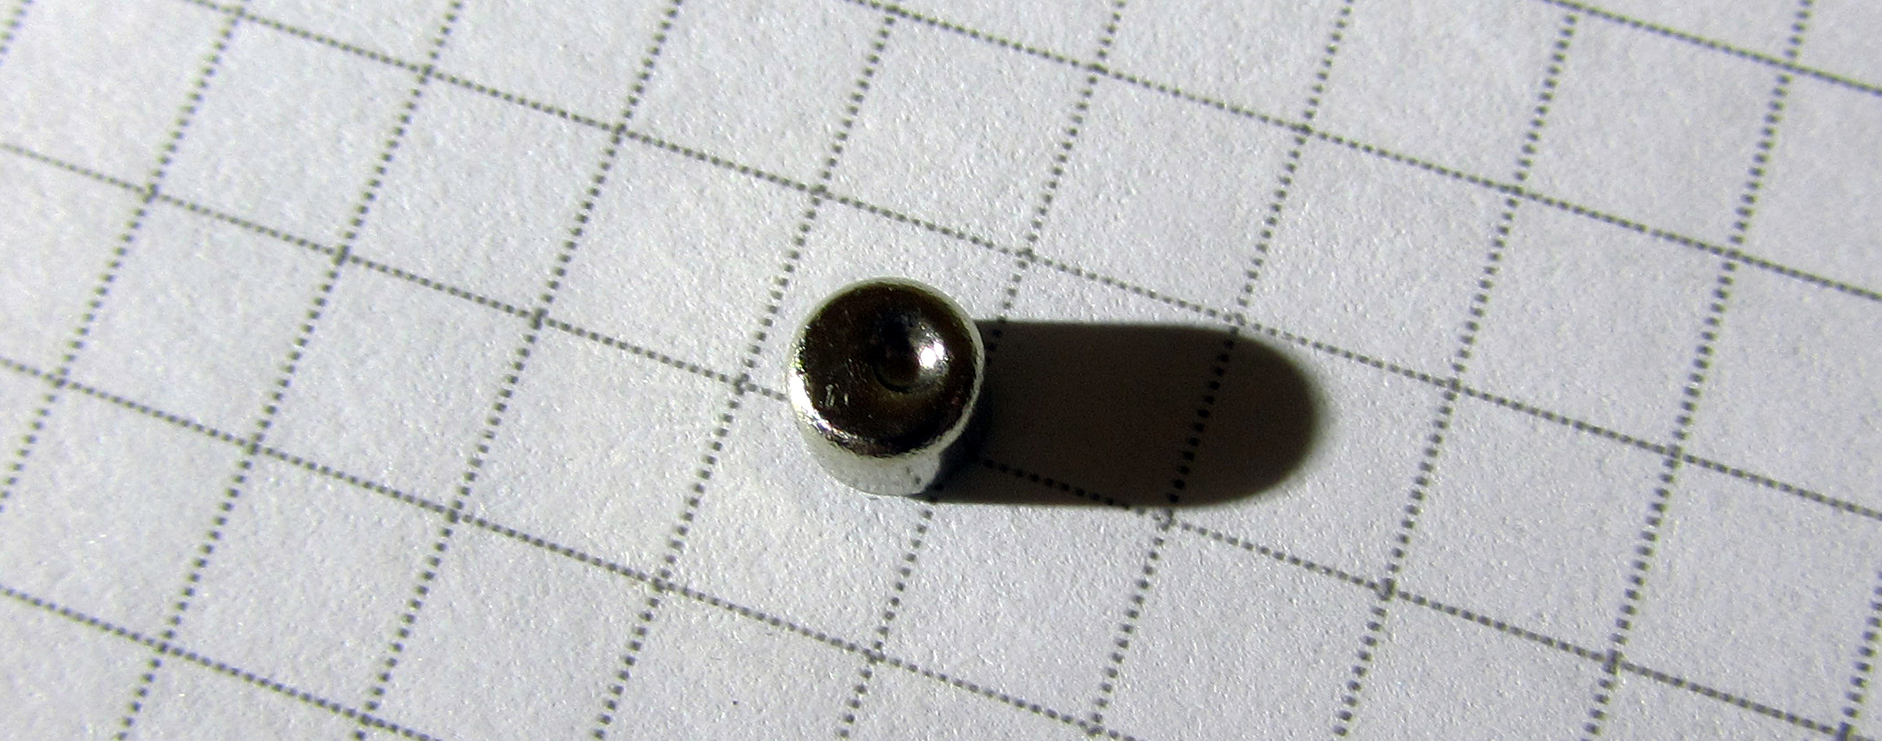
Then we straighten one of them with light blows from the inside with something suitable (I took the shank from a broken drill of a suitable diameter).
For greater beauty, you can grind a little more with sandpaper:
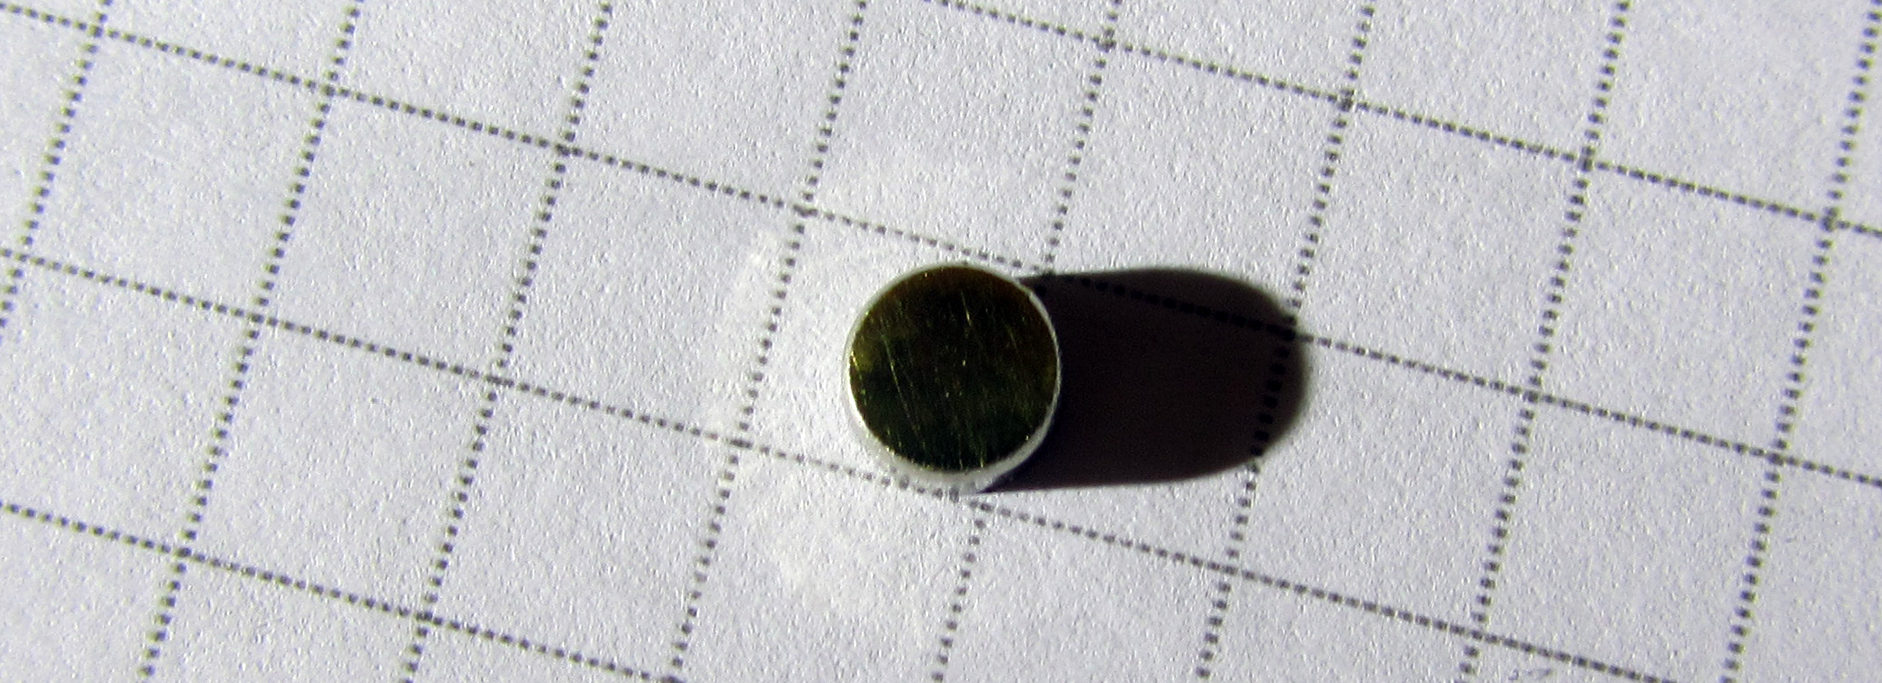
After that we press the beautiful and even capsule into place:
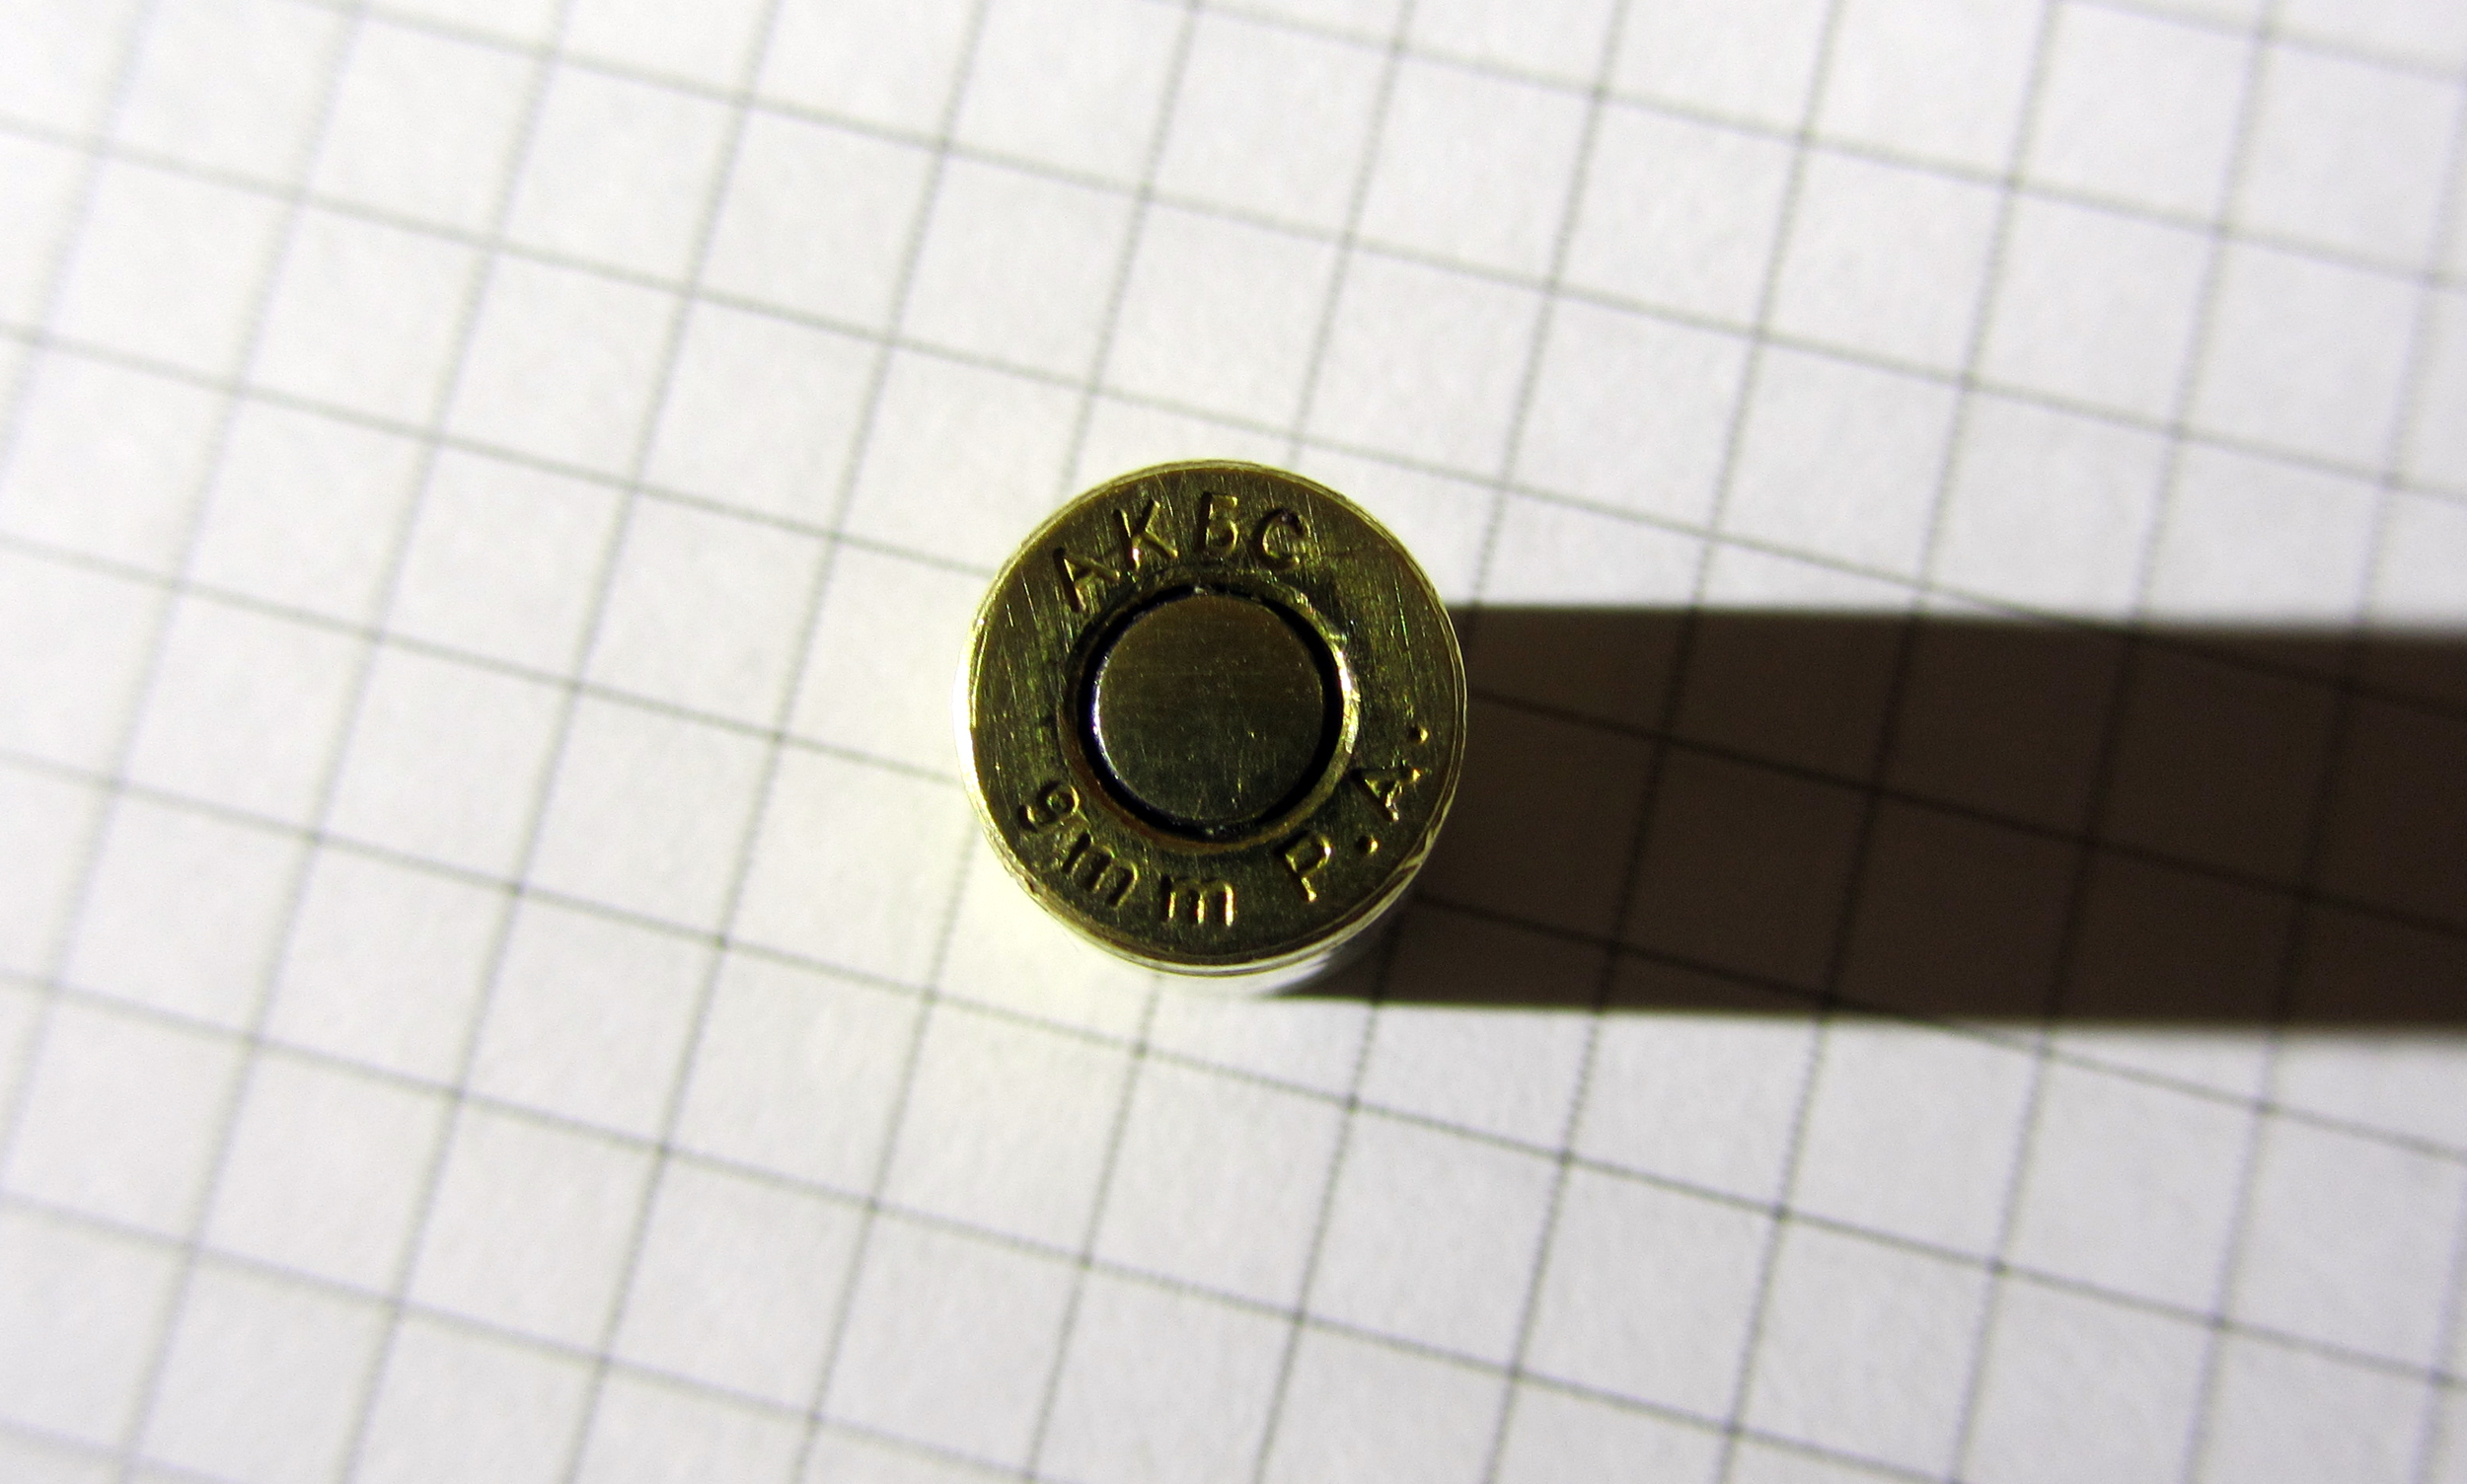
If your shells are brand new, not fired, then we knock out only the primer from one of them (you can throw it away right away, it will not be needed). Do not touch the second sleeve yet.
Then we clamp the sleeve without a primer in a vice and drill the bottom from the inside with a 7 mm drill. You need to drill so as to make the bottom of the sleeve as thin as possible. Those. the drill should be close to the primer hole (I've left about 0.5mm of headroom).
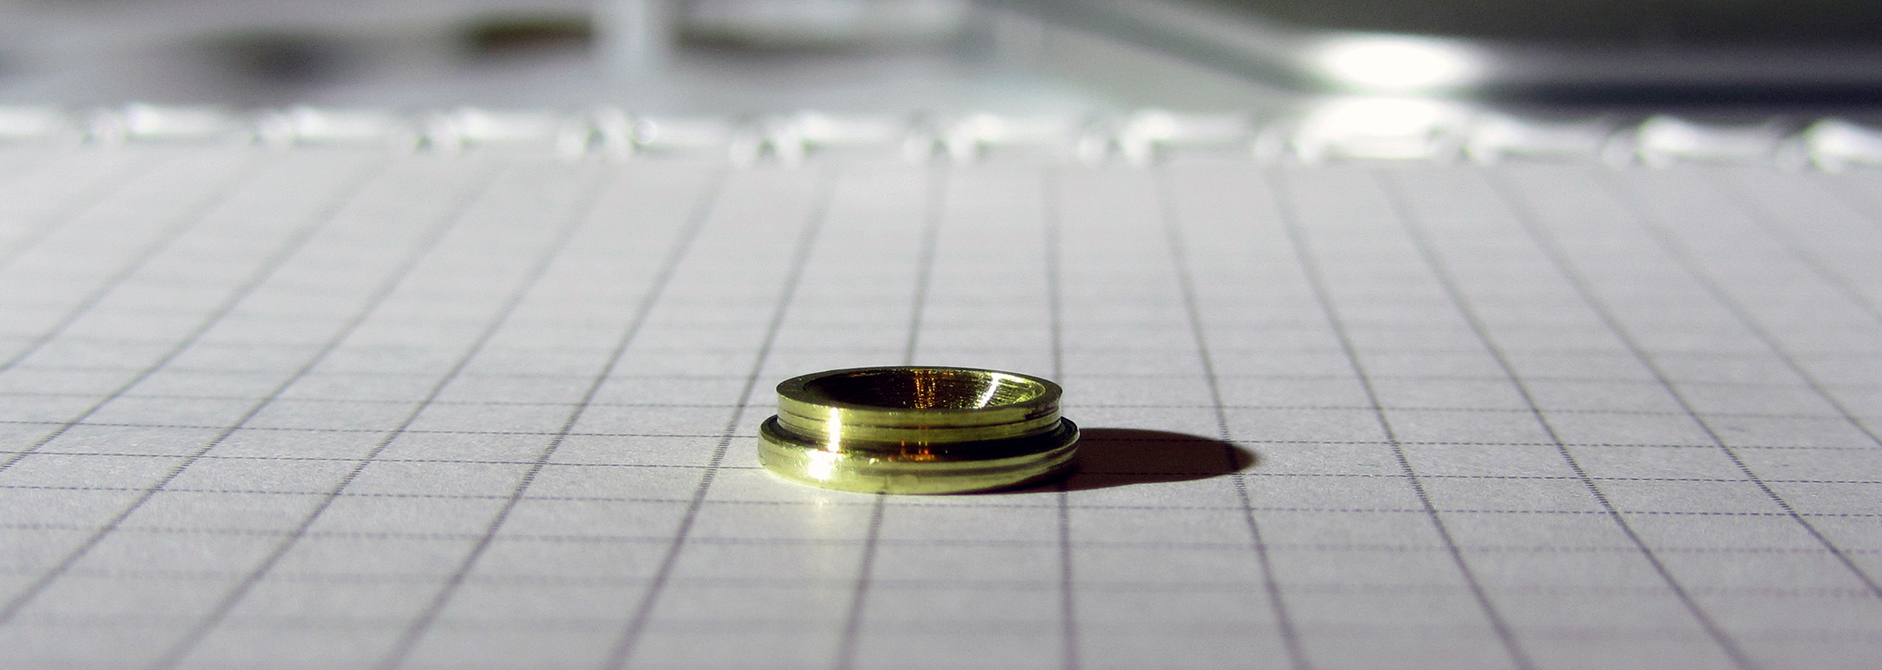
Then we carefully cut off the bottom to get such a washer:
Now we take our sleeve with a primer and shorten it to 13 mm:
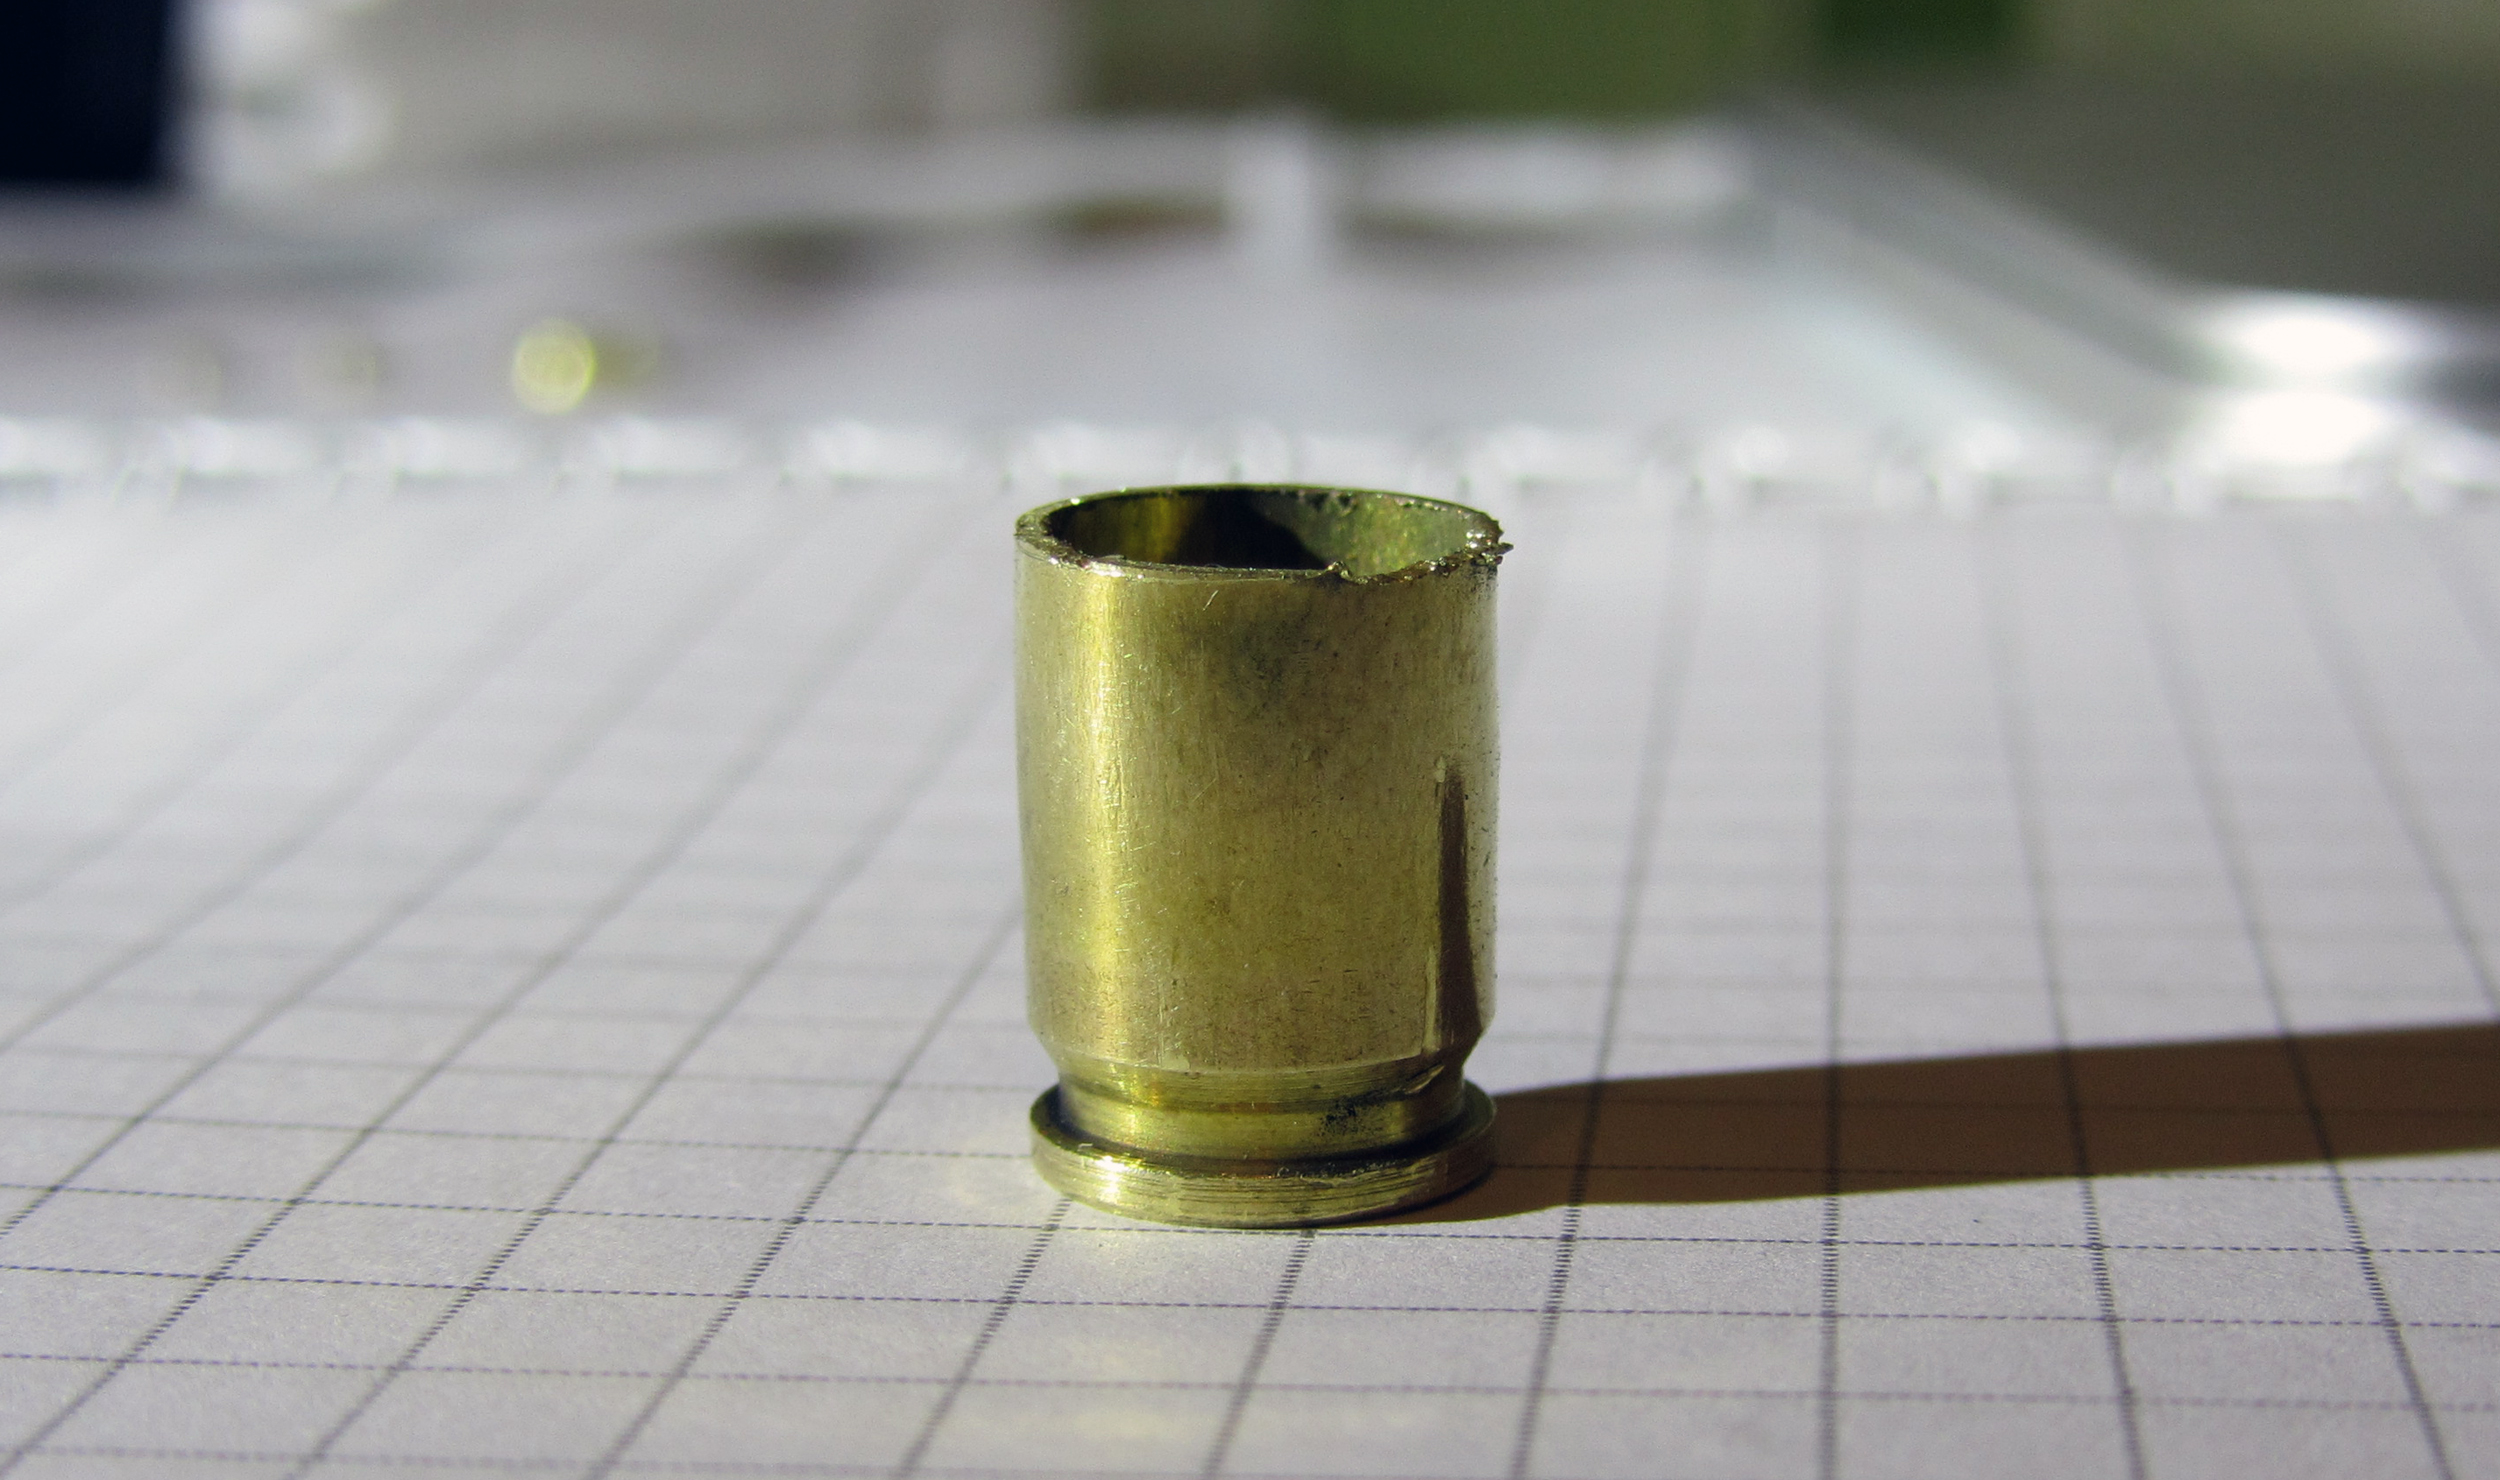
We carefully process the edges with sandpaper to get an even and strictly perpendicular cut to the axis of the sleeve.
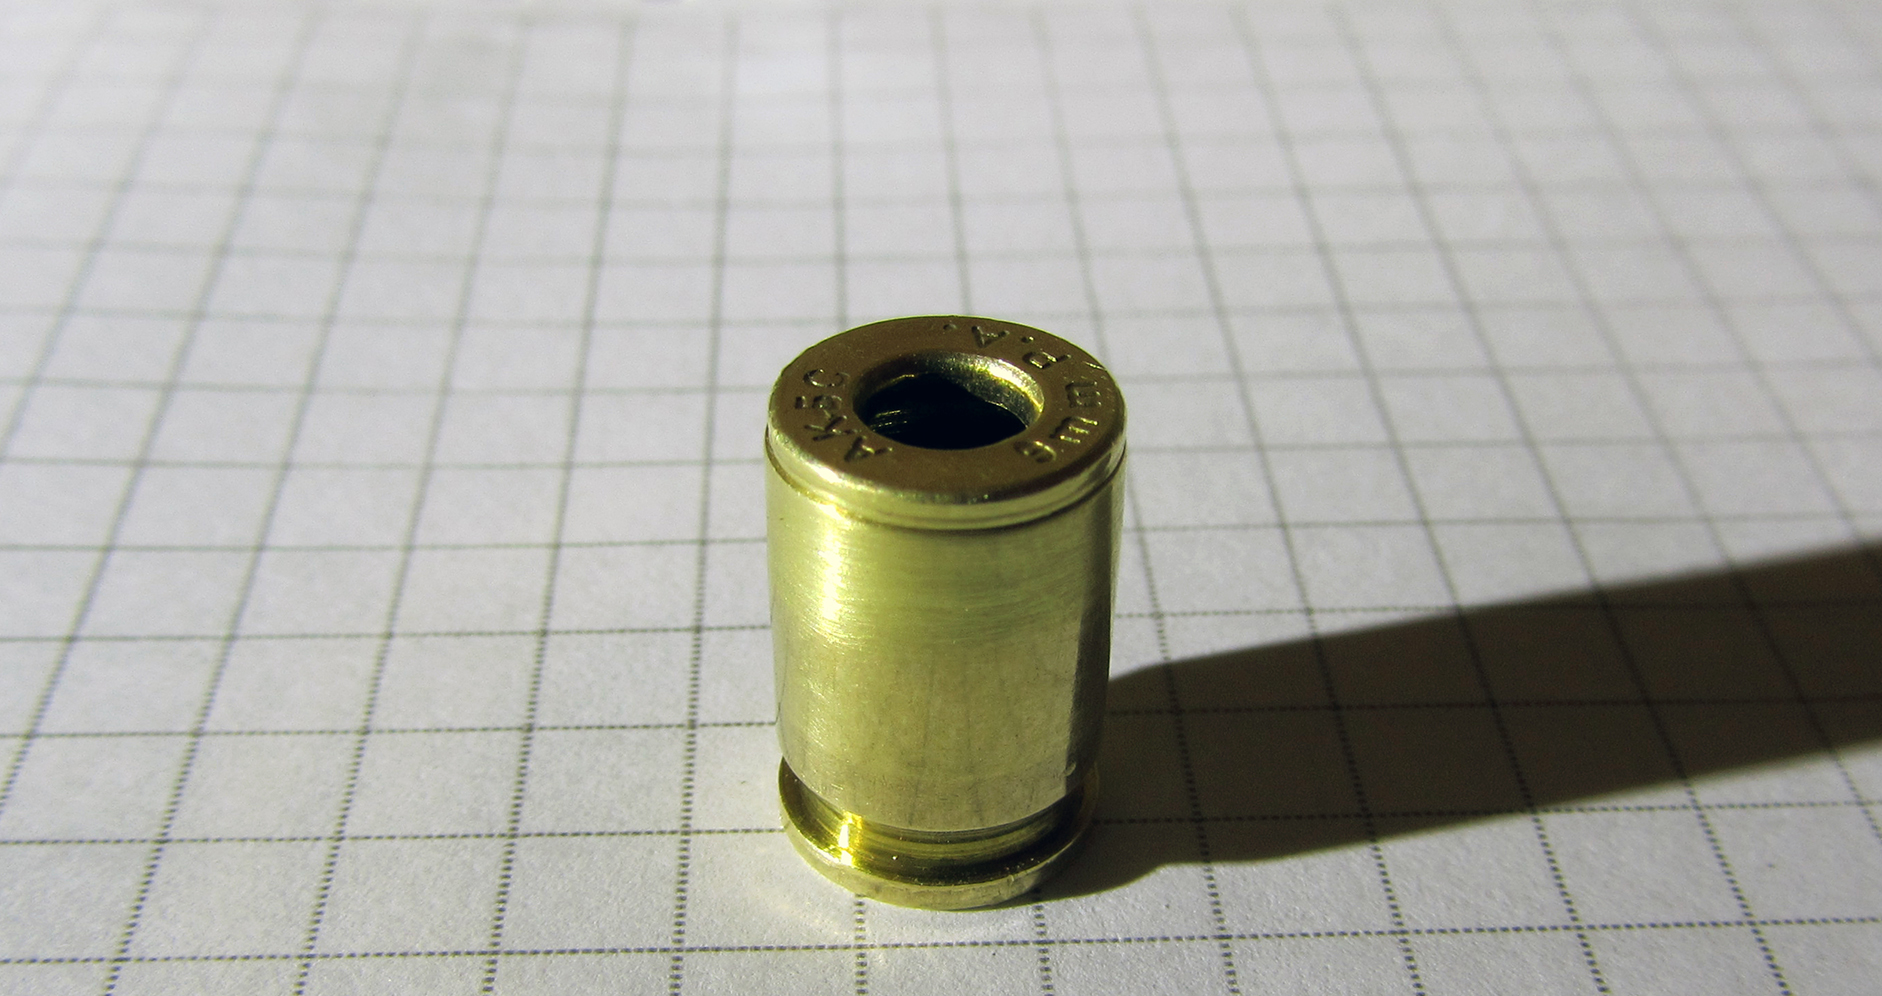
As a result, the two halves should fit perfectly into each other:
It's time to get busy with the old plug and wires.
To begin with, very carefully, using a sharp knife, we open the old connector to remove all unnecessary and leave only the plug itself with four contacts and soldered wires:
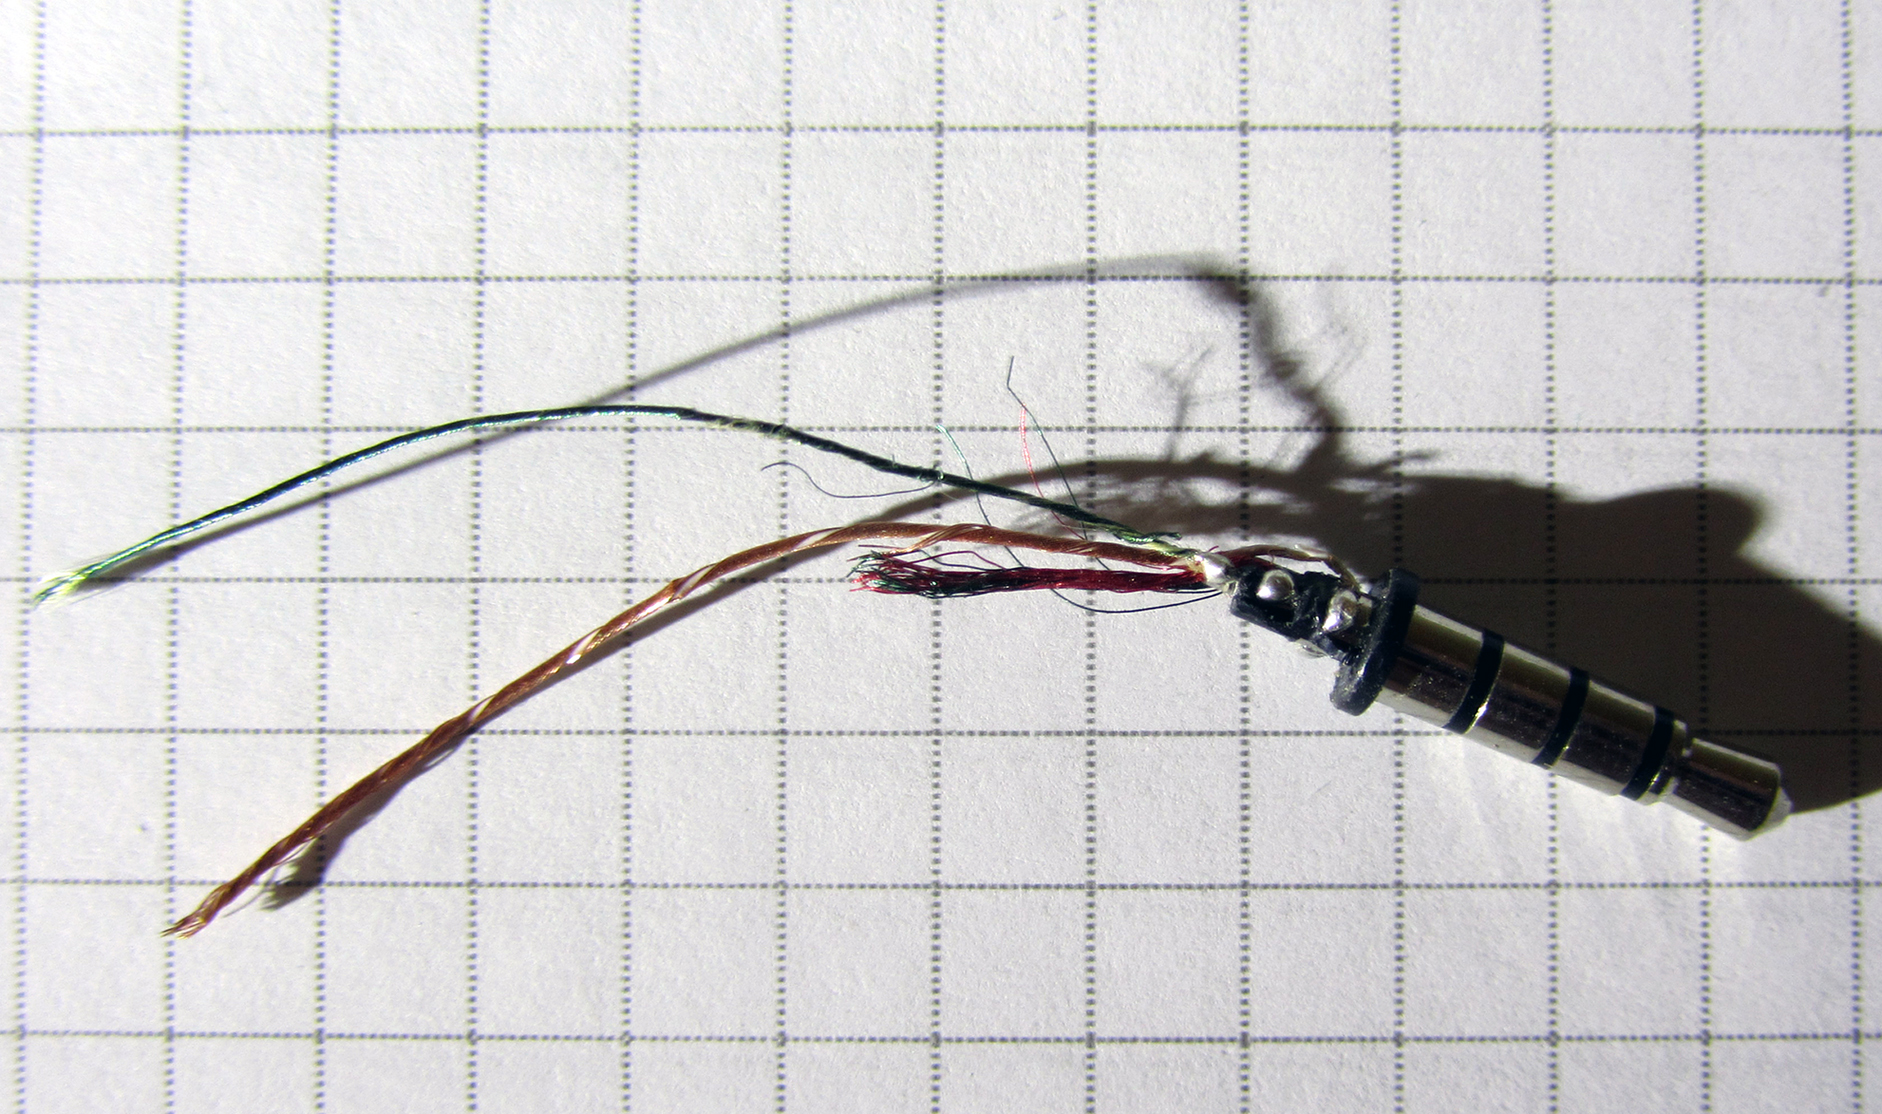

We remember, or better write down, where which wire was soldered. My HTC headphones (with microphone) had the following pinout:
We unsolder the old wires from the connector, strip the cable, tin the ends and shrink a piece of heat shrinkage (diameter 2.5 mm, length 21 mm).
It would be nice to take an aspirin tablet to service the wires in lacquered insulation, but I didn't have one, so I got by with ordinary rosin. If you work with aspirin, then you should know - the fumes of this muck are terribly poisonous. You have been warned.
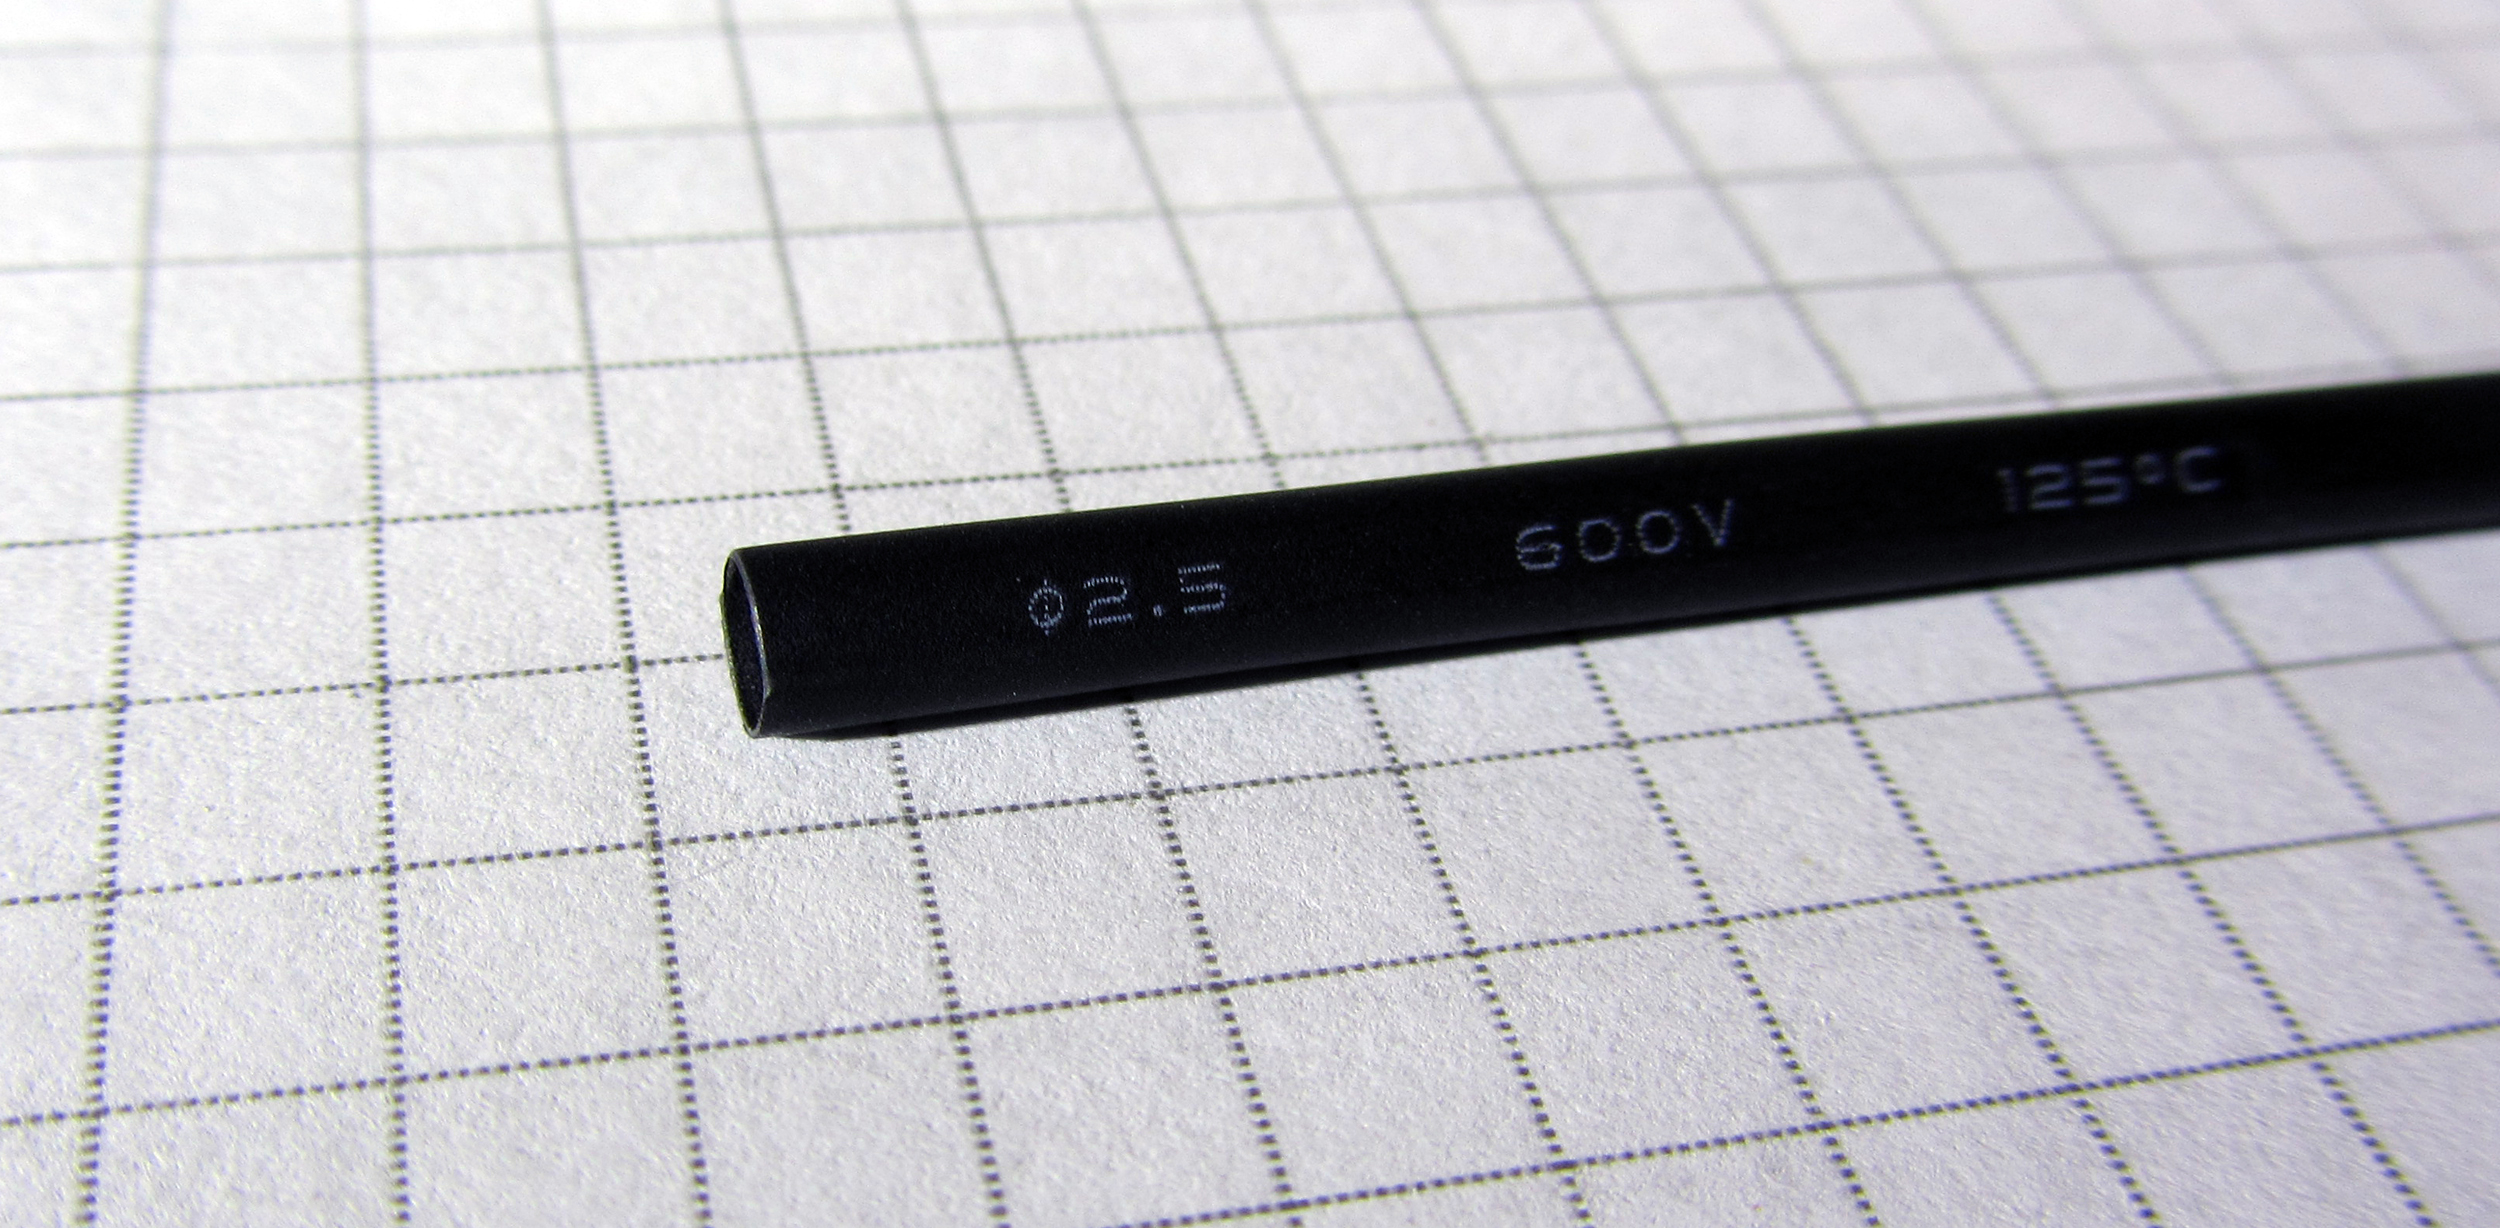
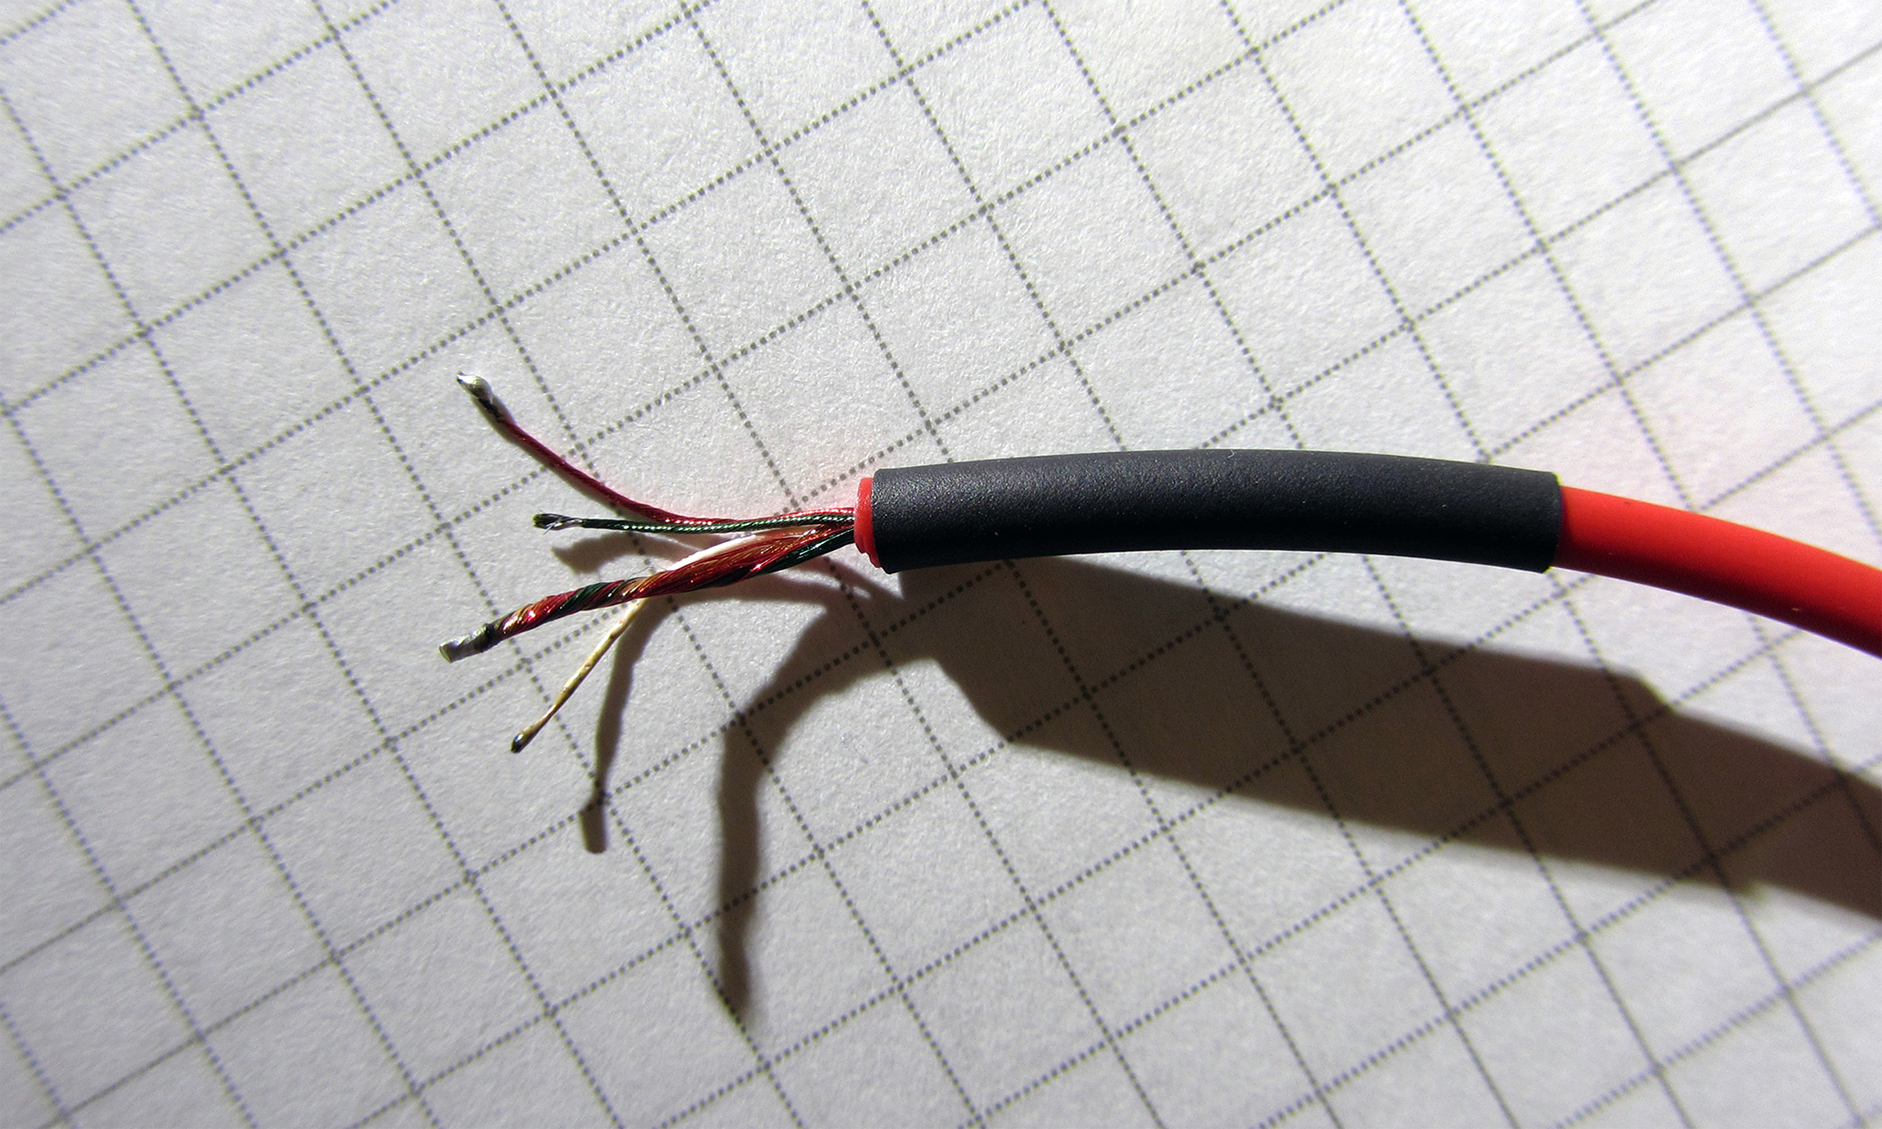

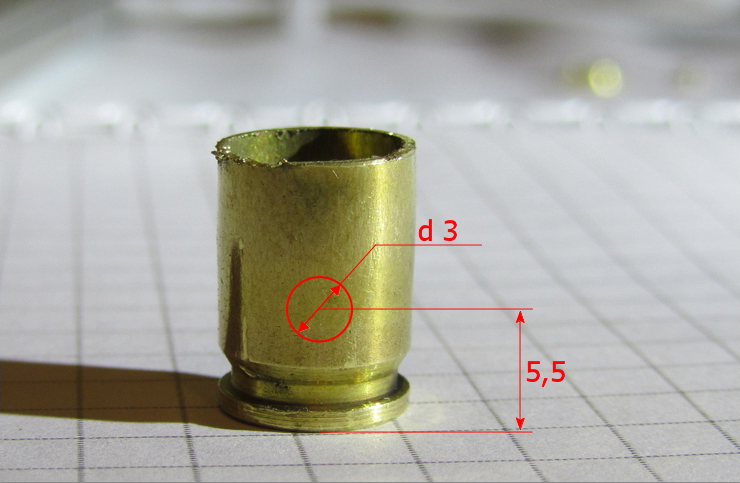
We drill a hole of a suitable diameter in the wall of the sleeve. In my case, a 3 mm hole turned out to be ideal:
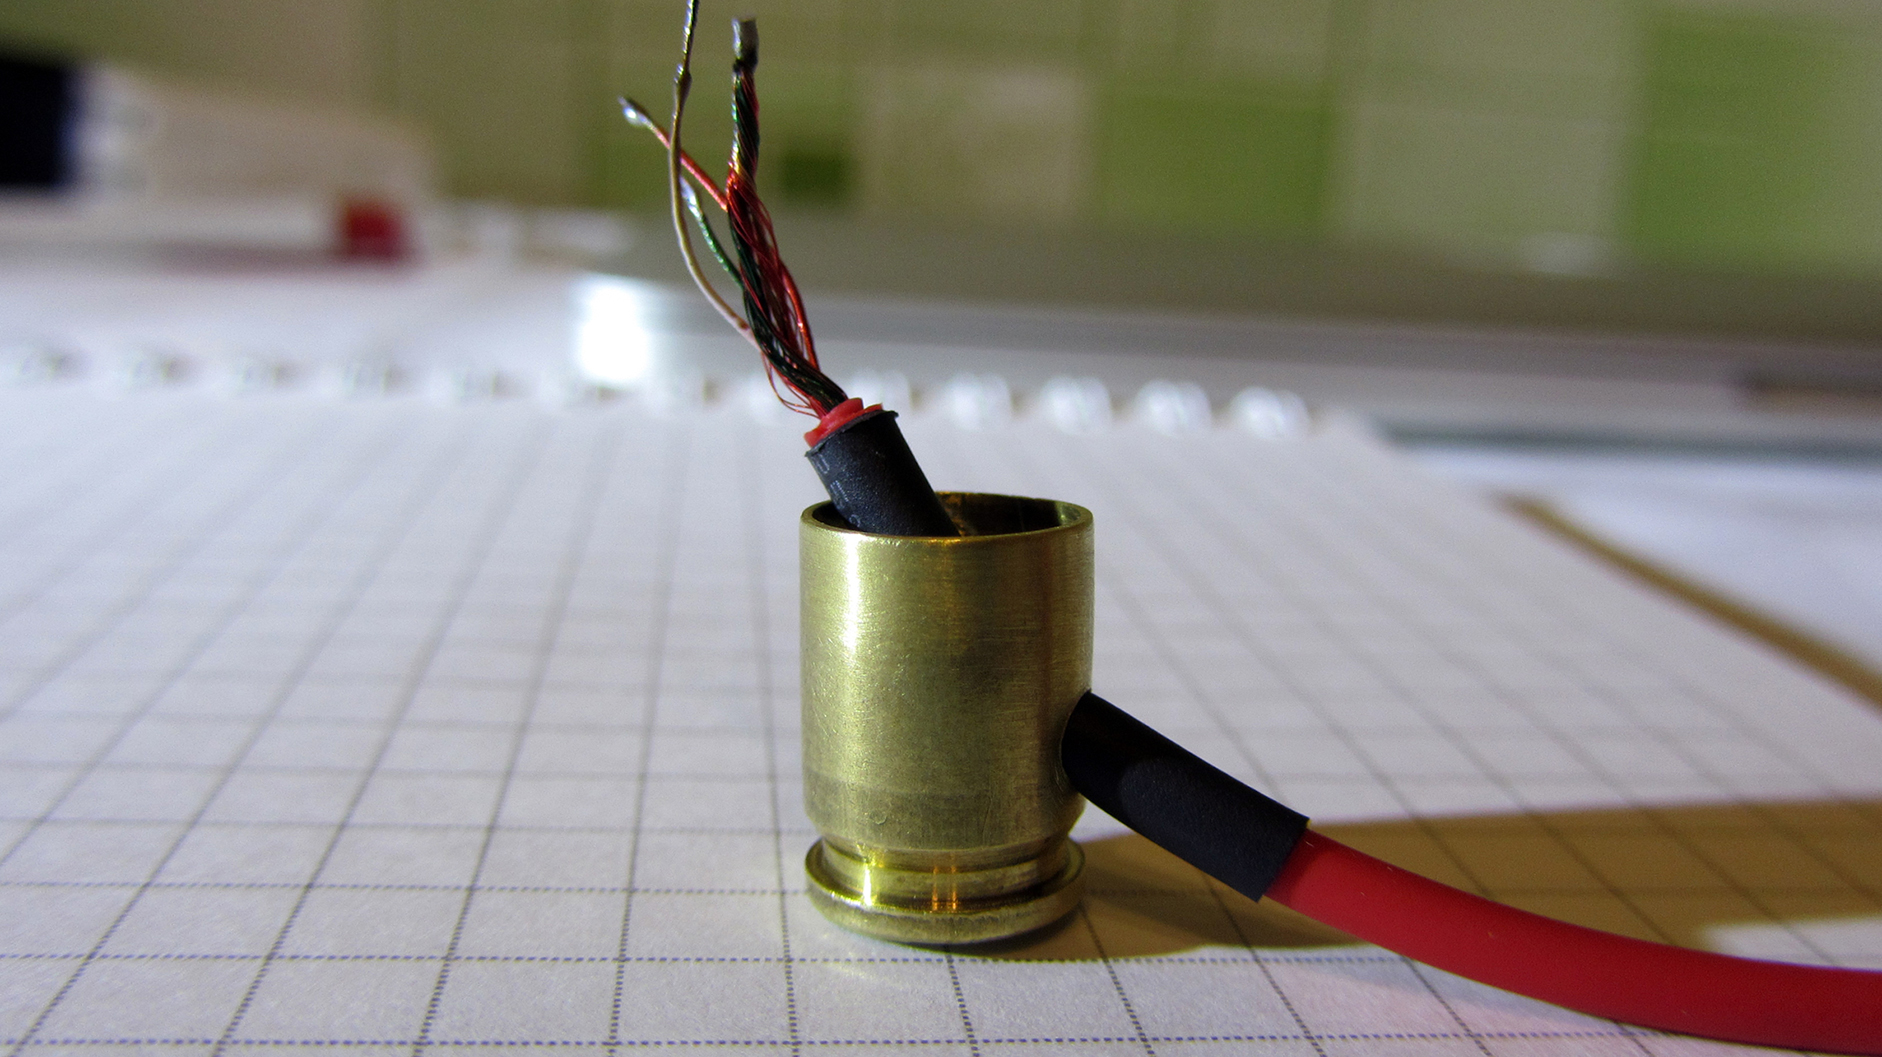
We pass the cable through the hole and solder the headphone and microphone wires (in strict accordance with the pinout!):
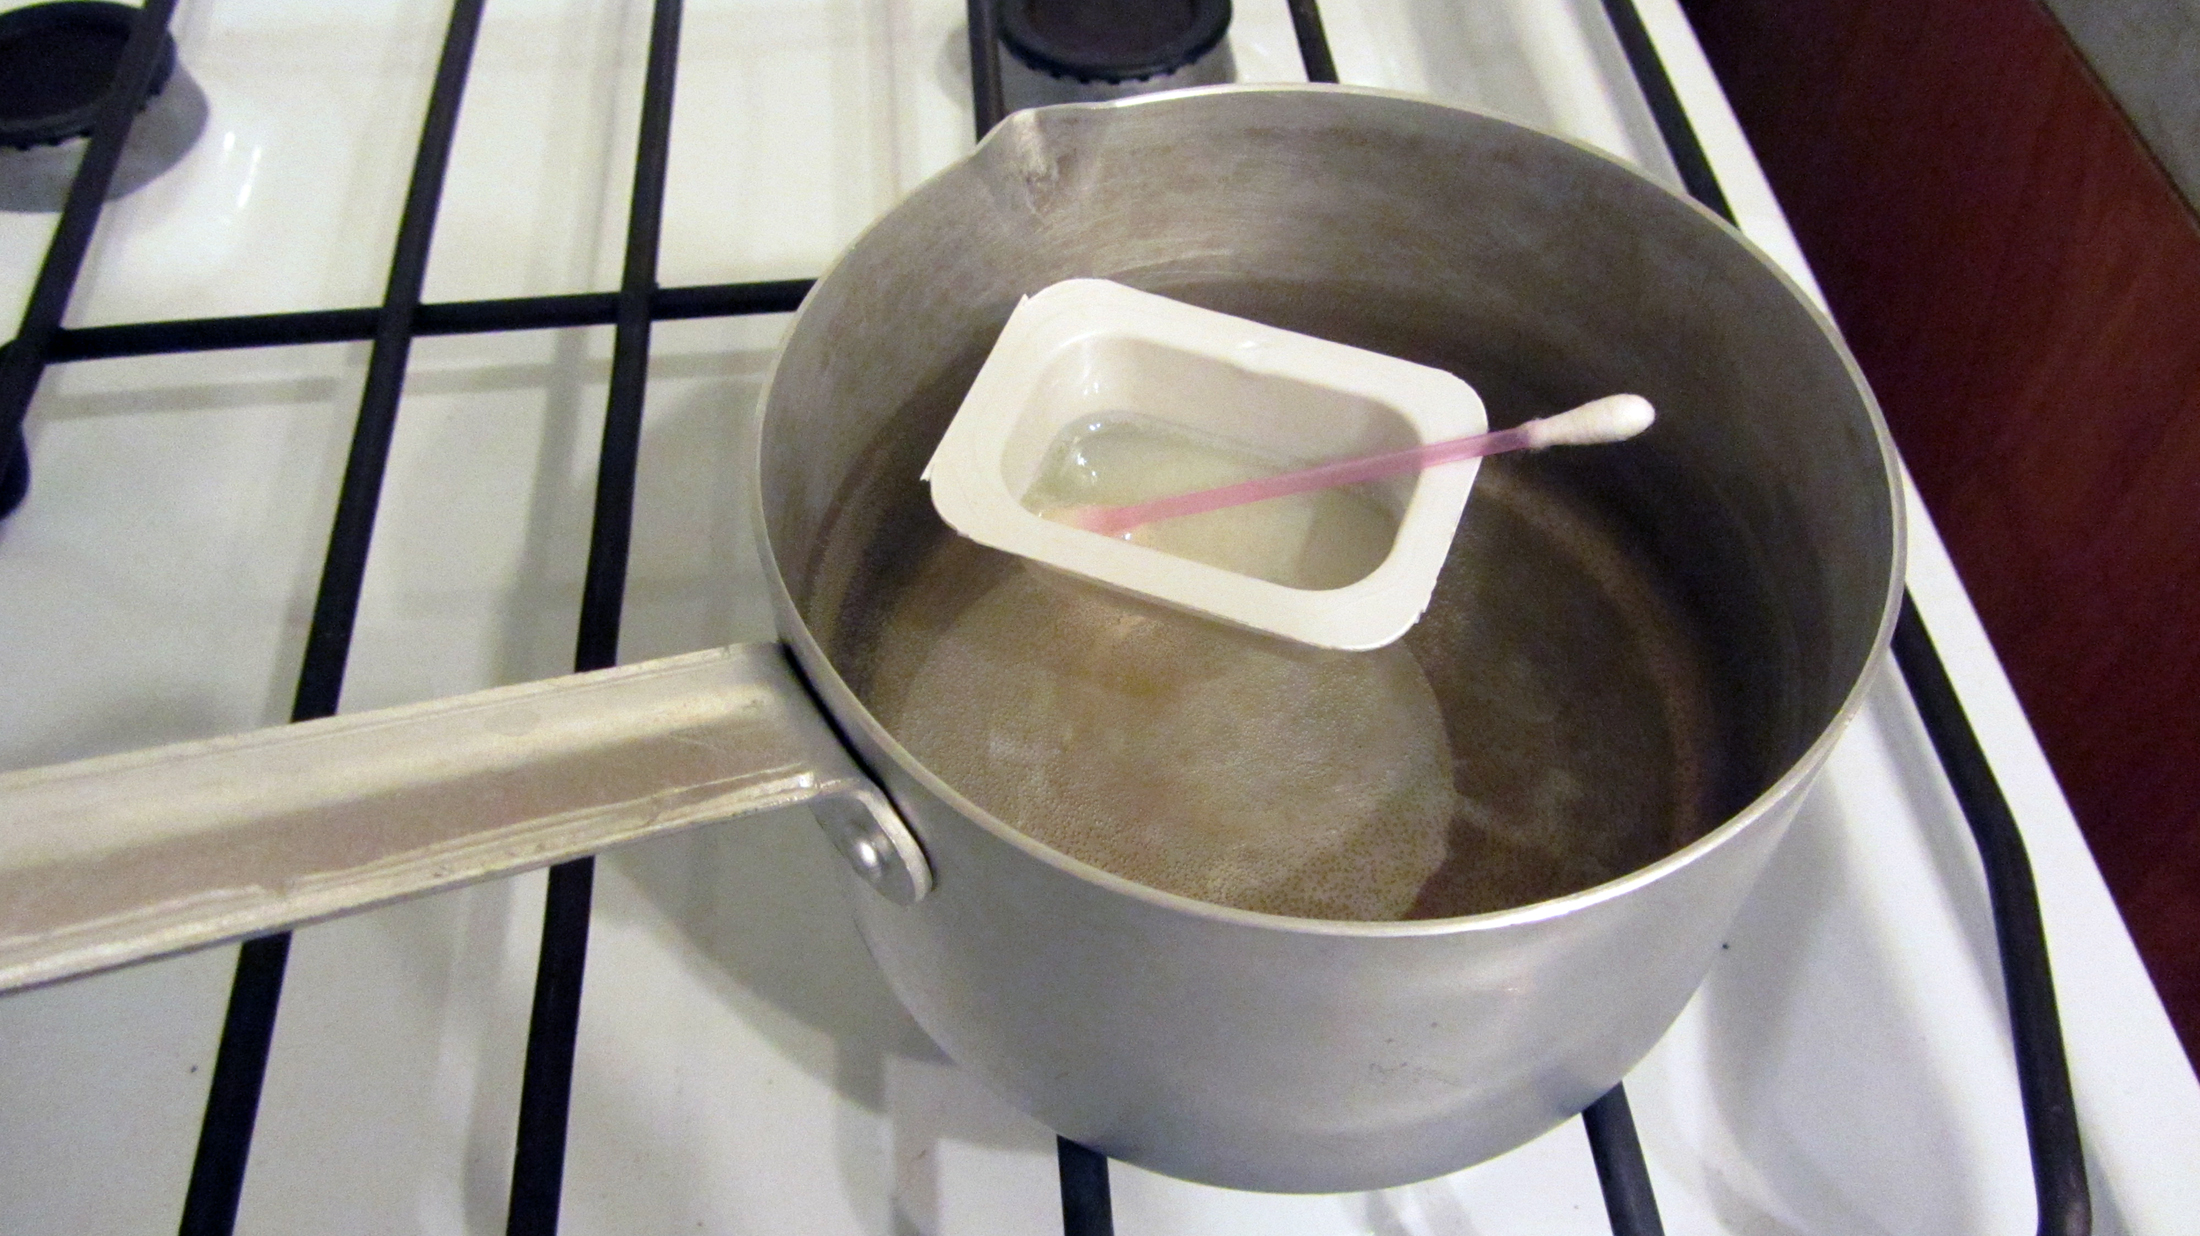
Then, to drive out all air bubbles, heat the mixture in a water bath to 80 degrees.
We fill our sleeve with the resulting composition to the brim, put everything in its place and, with the help of ingenuity and improvised devices, fix it all for at least 12 hours (or better for a day):
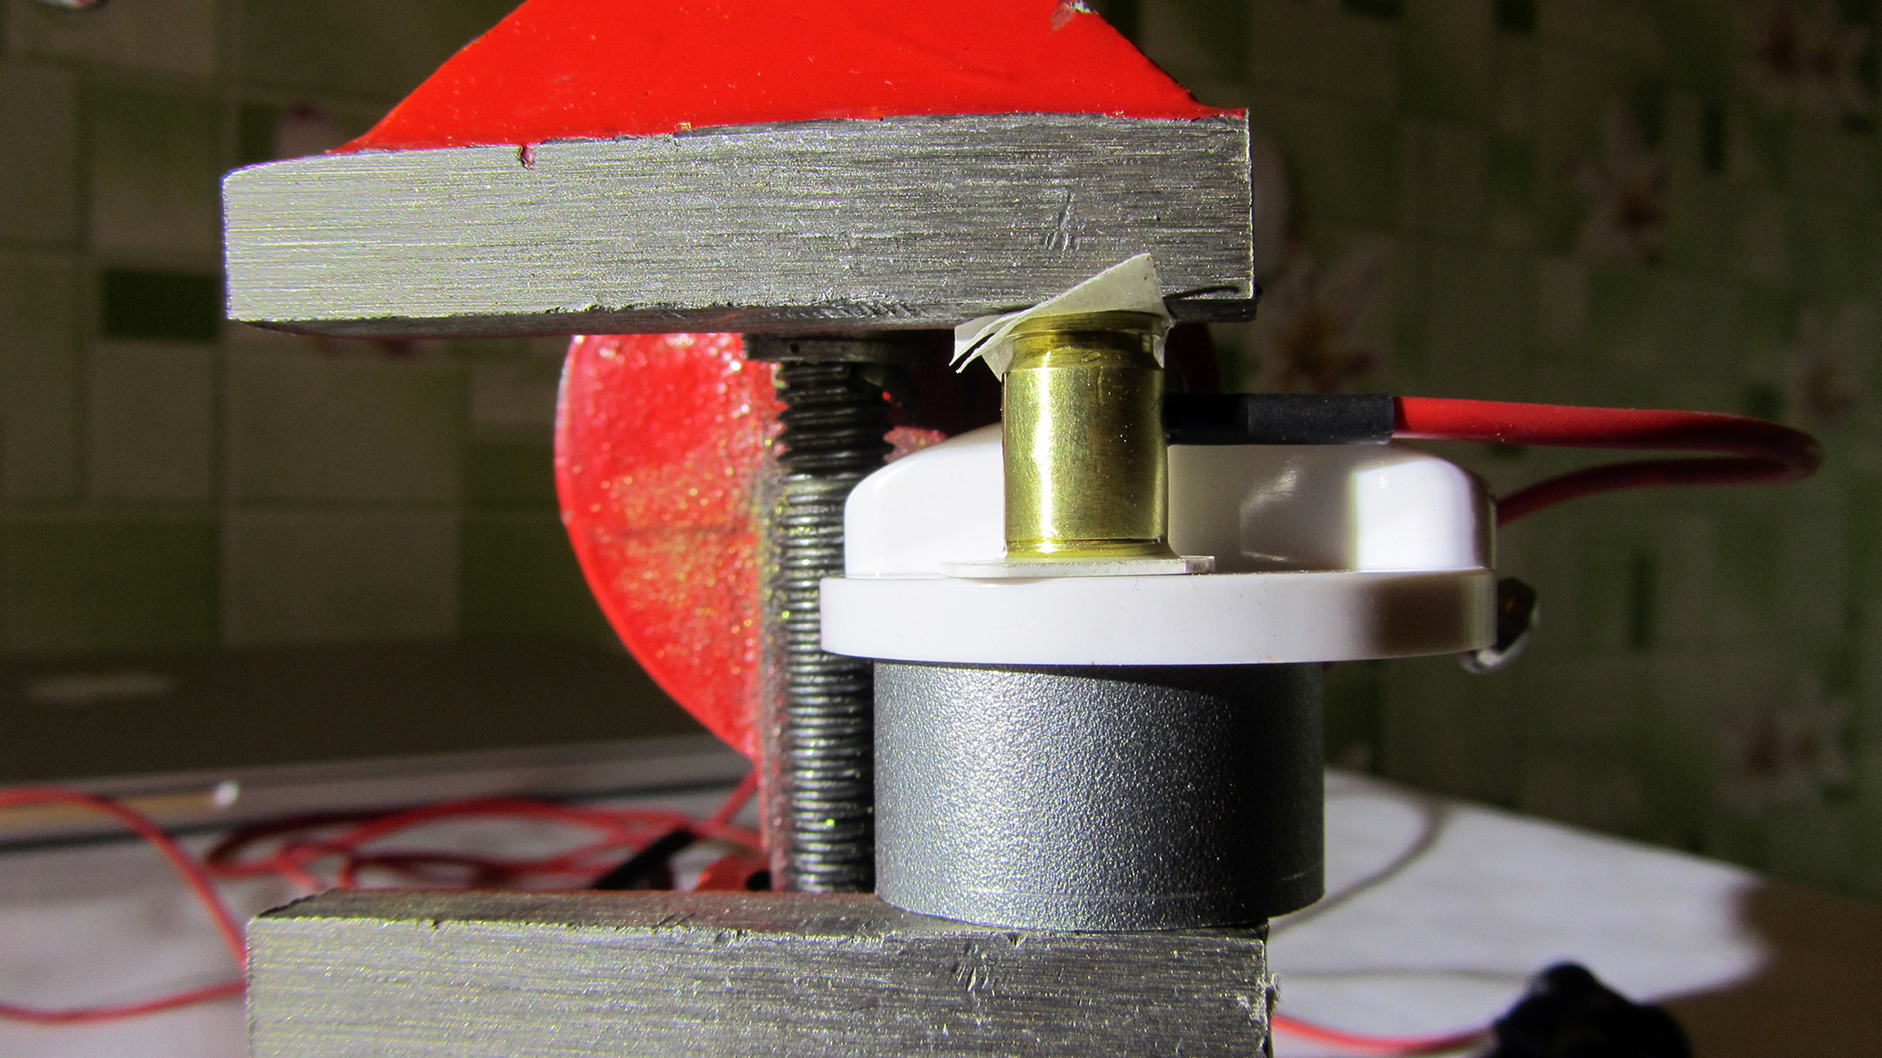
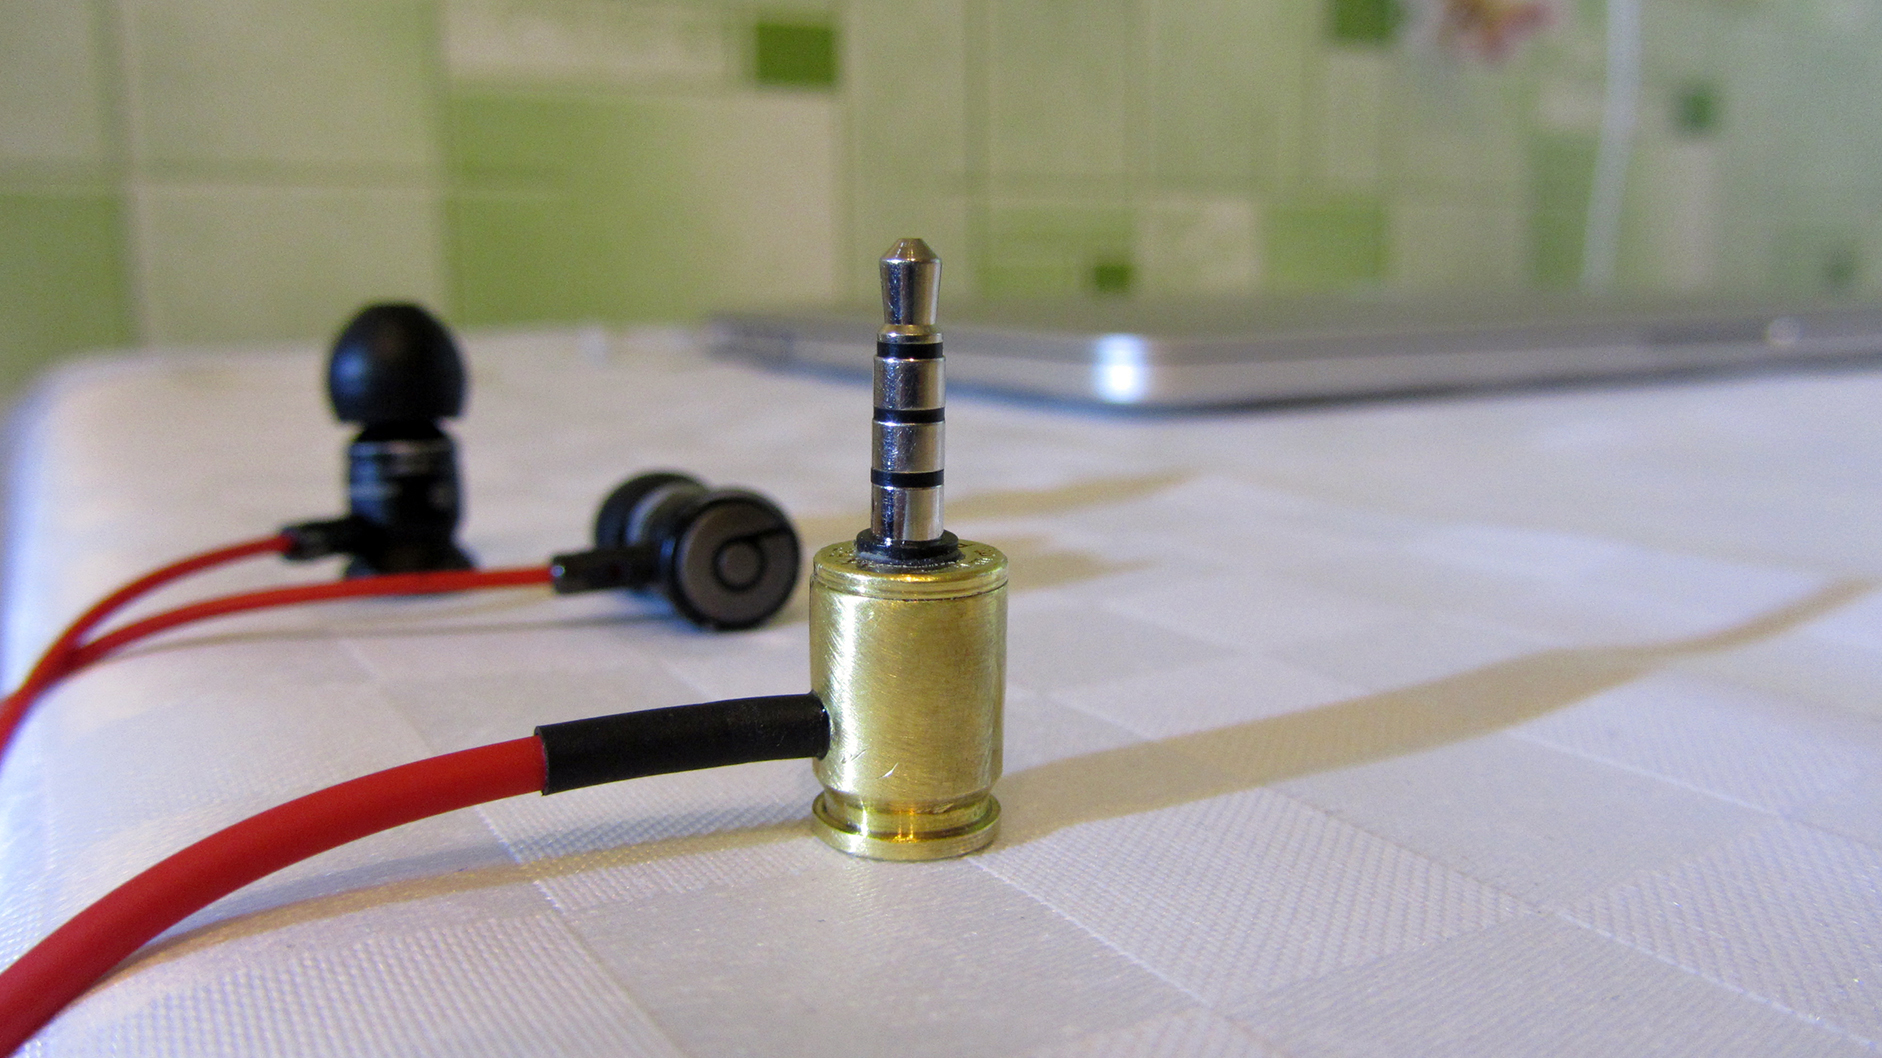
When everything hardens, we take the structure into the light of day and get aesthetic pleasure from the work done.
What could be nicer than fixing broken headphones from your phone yourself?
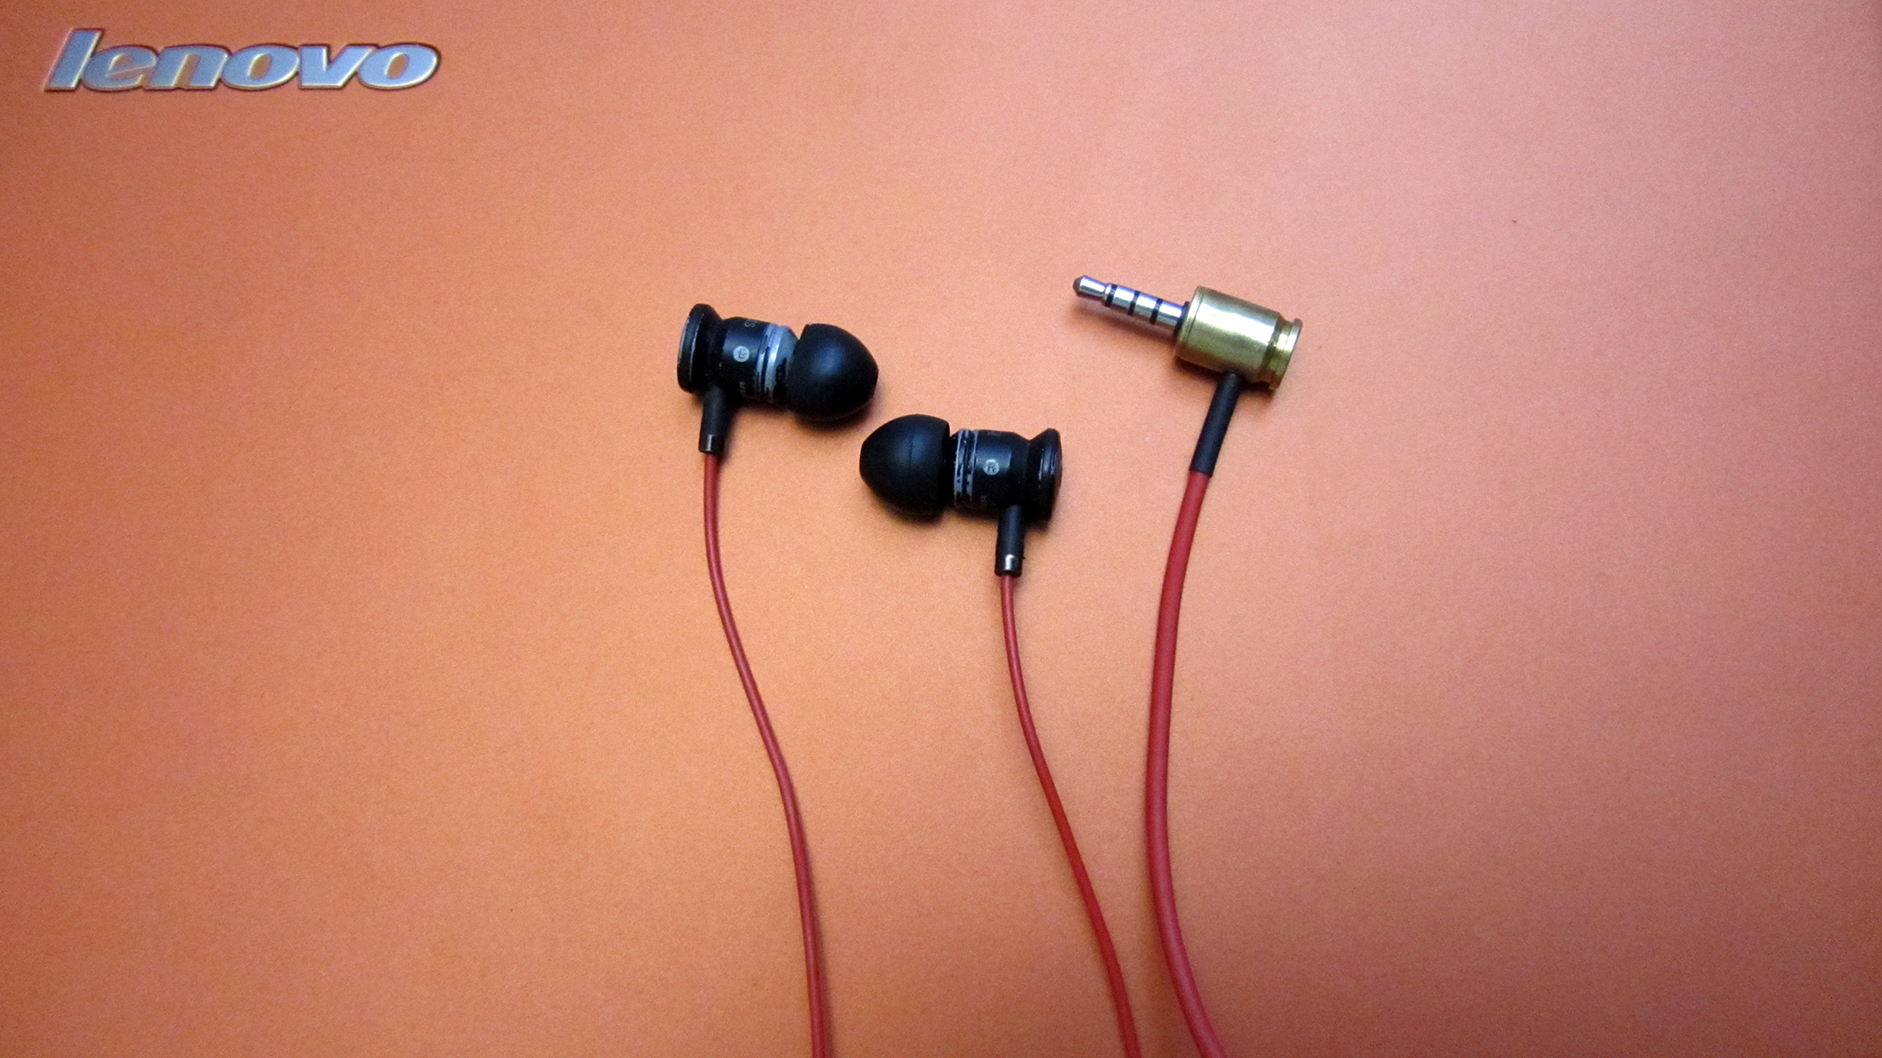
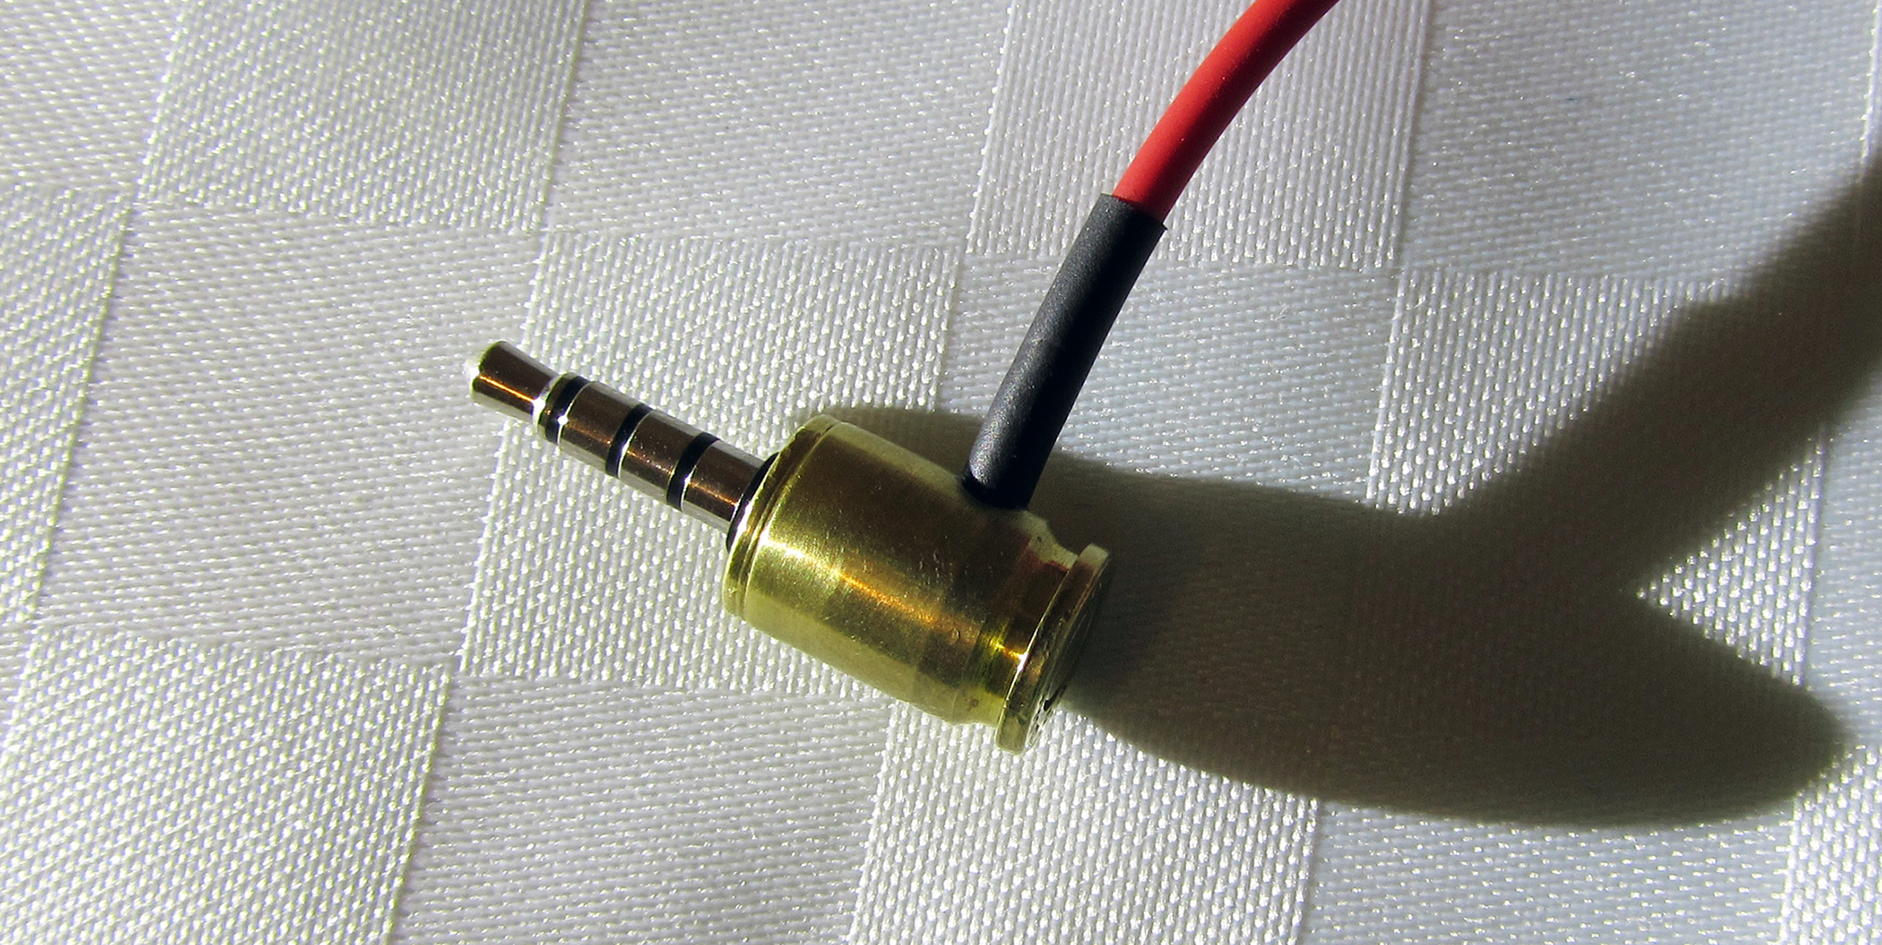

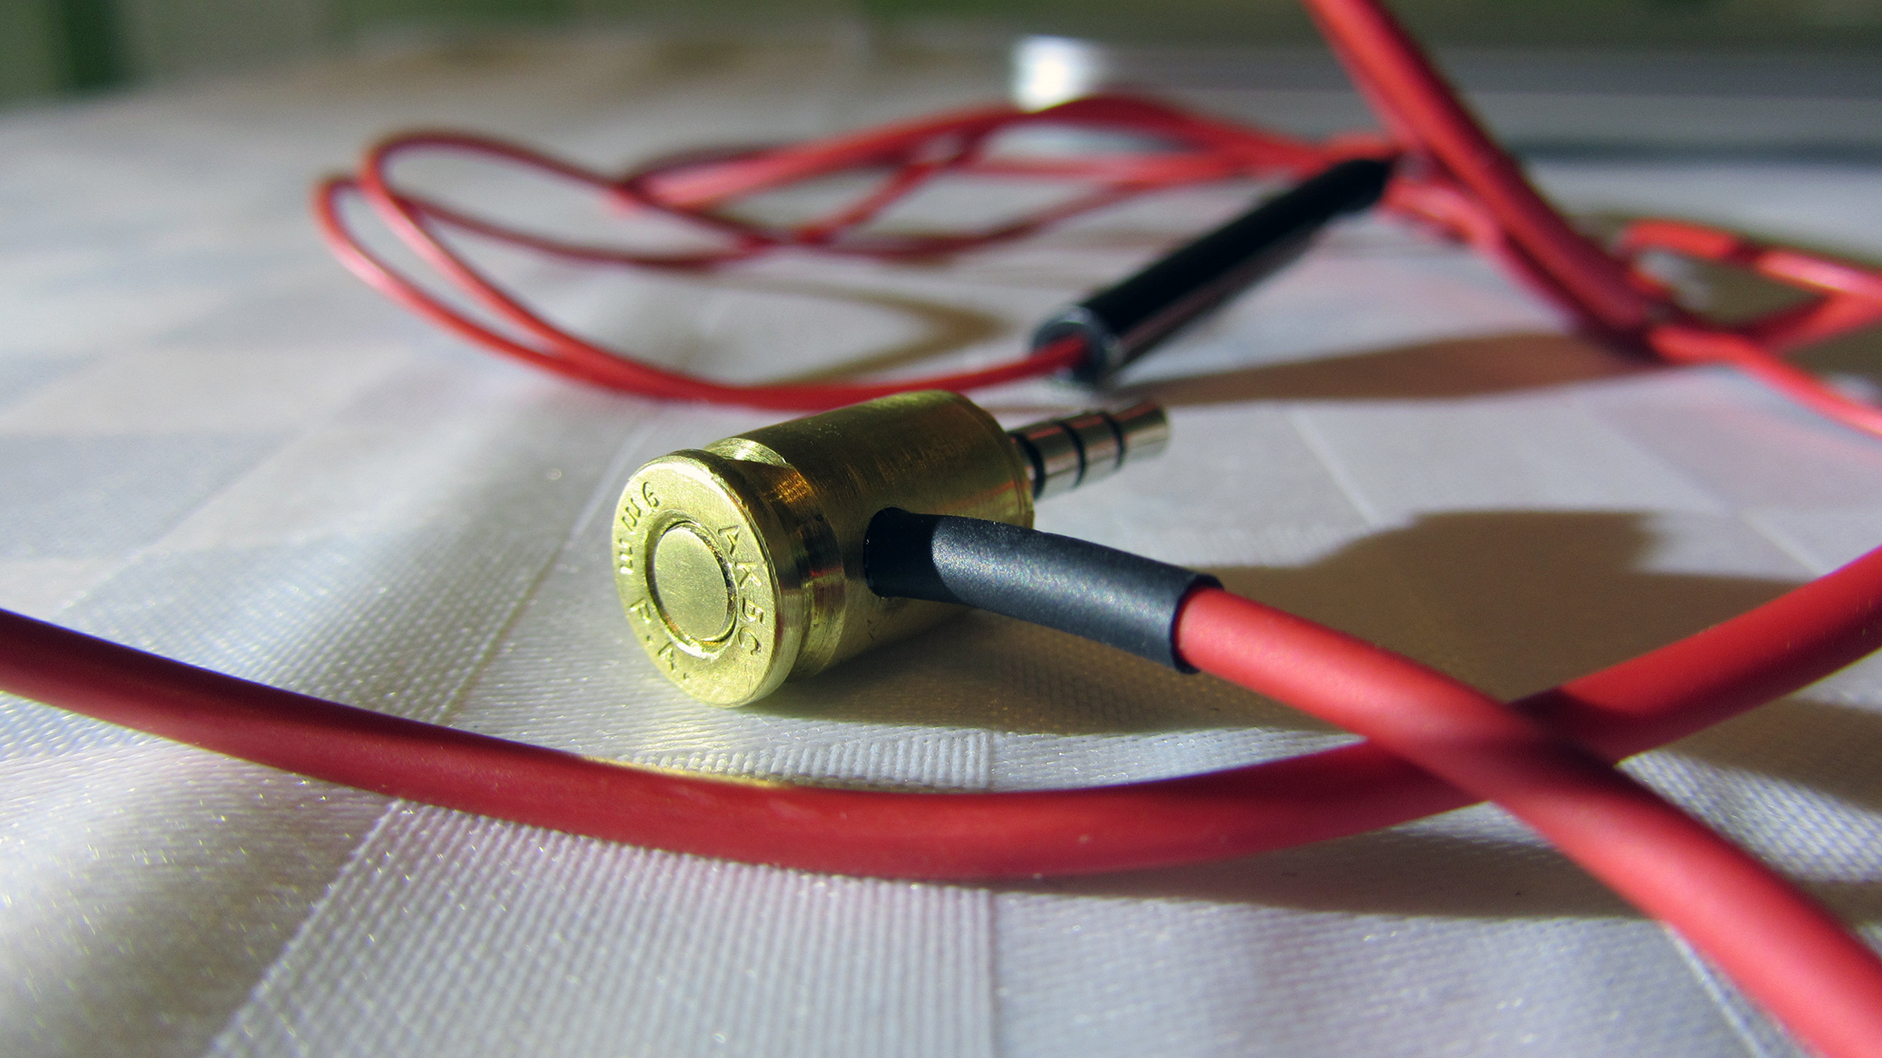

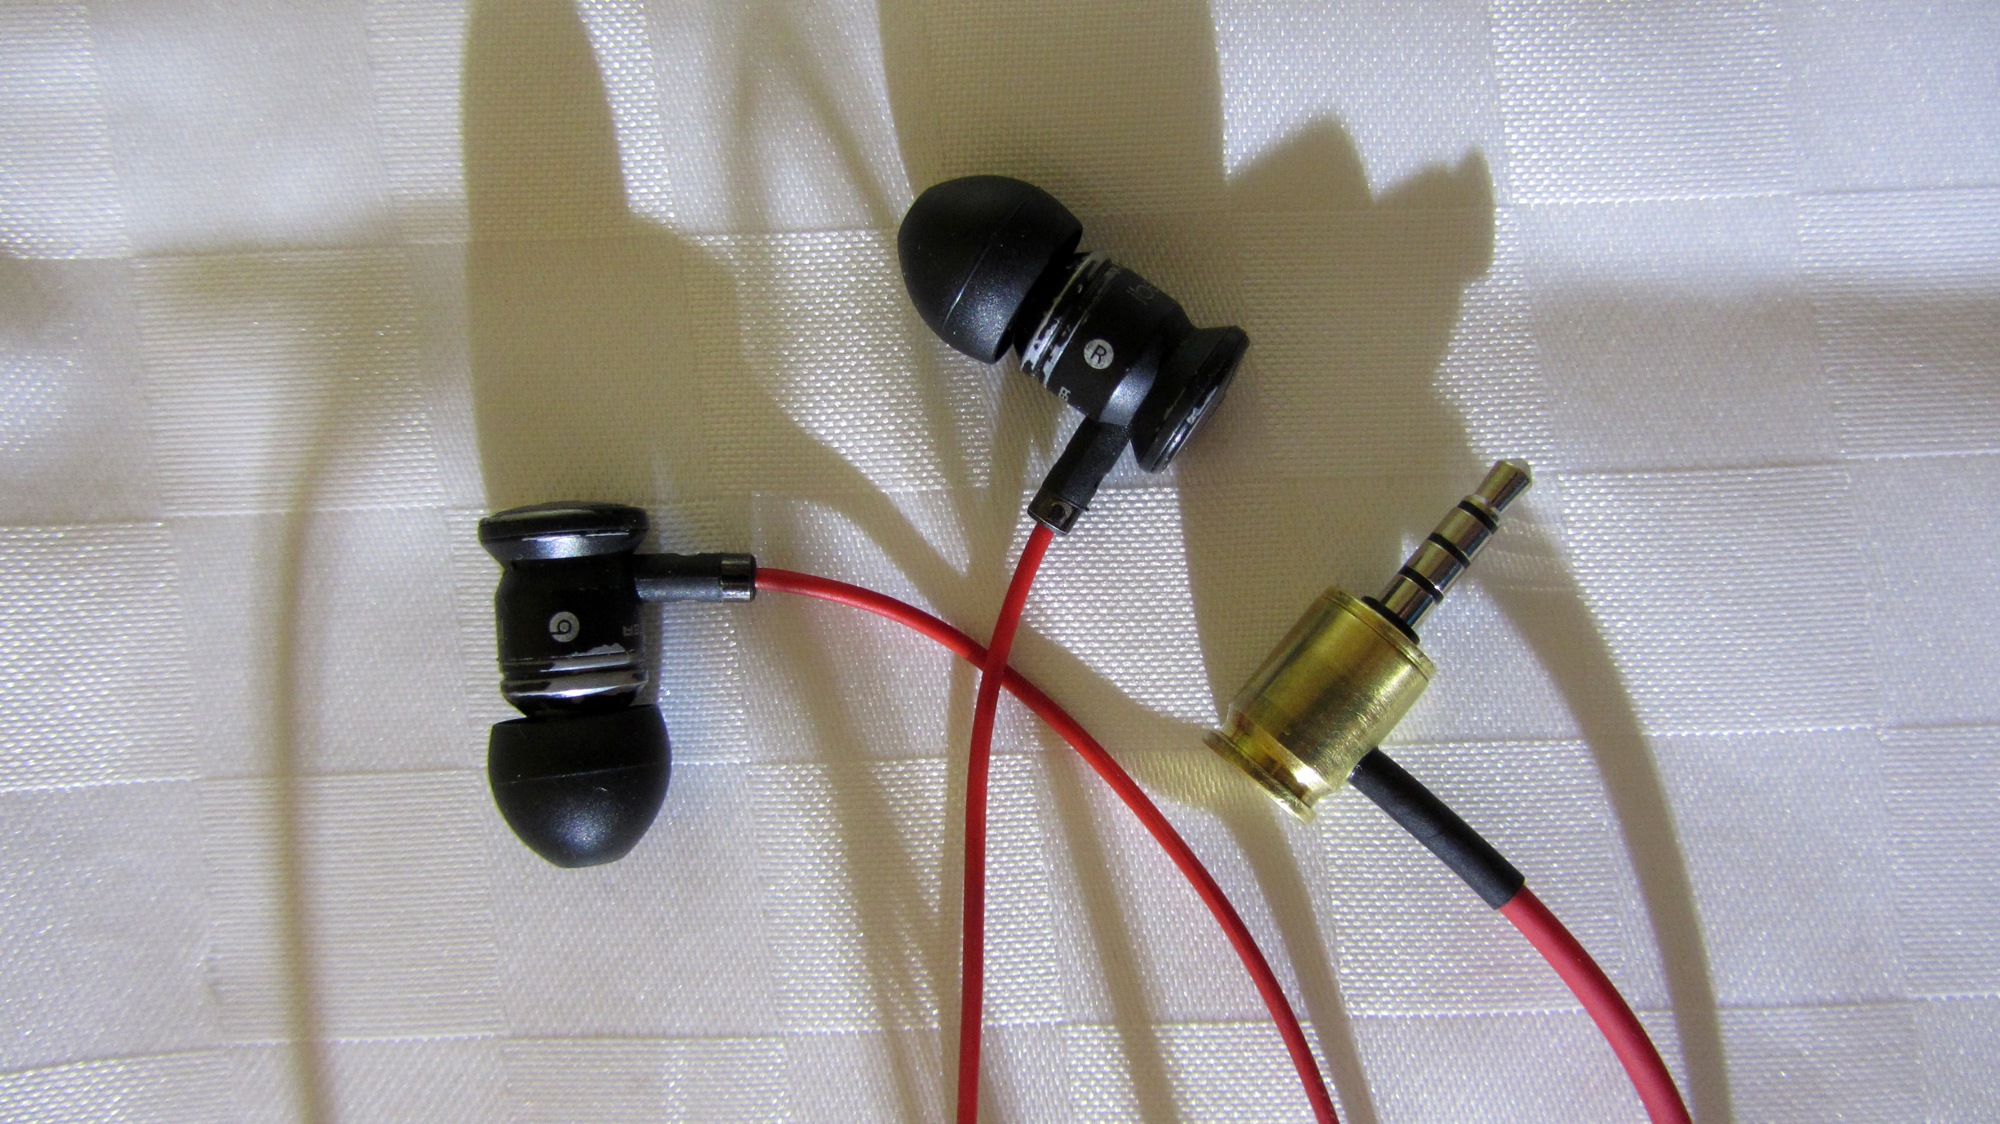

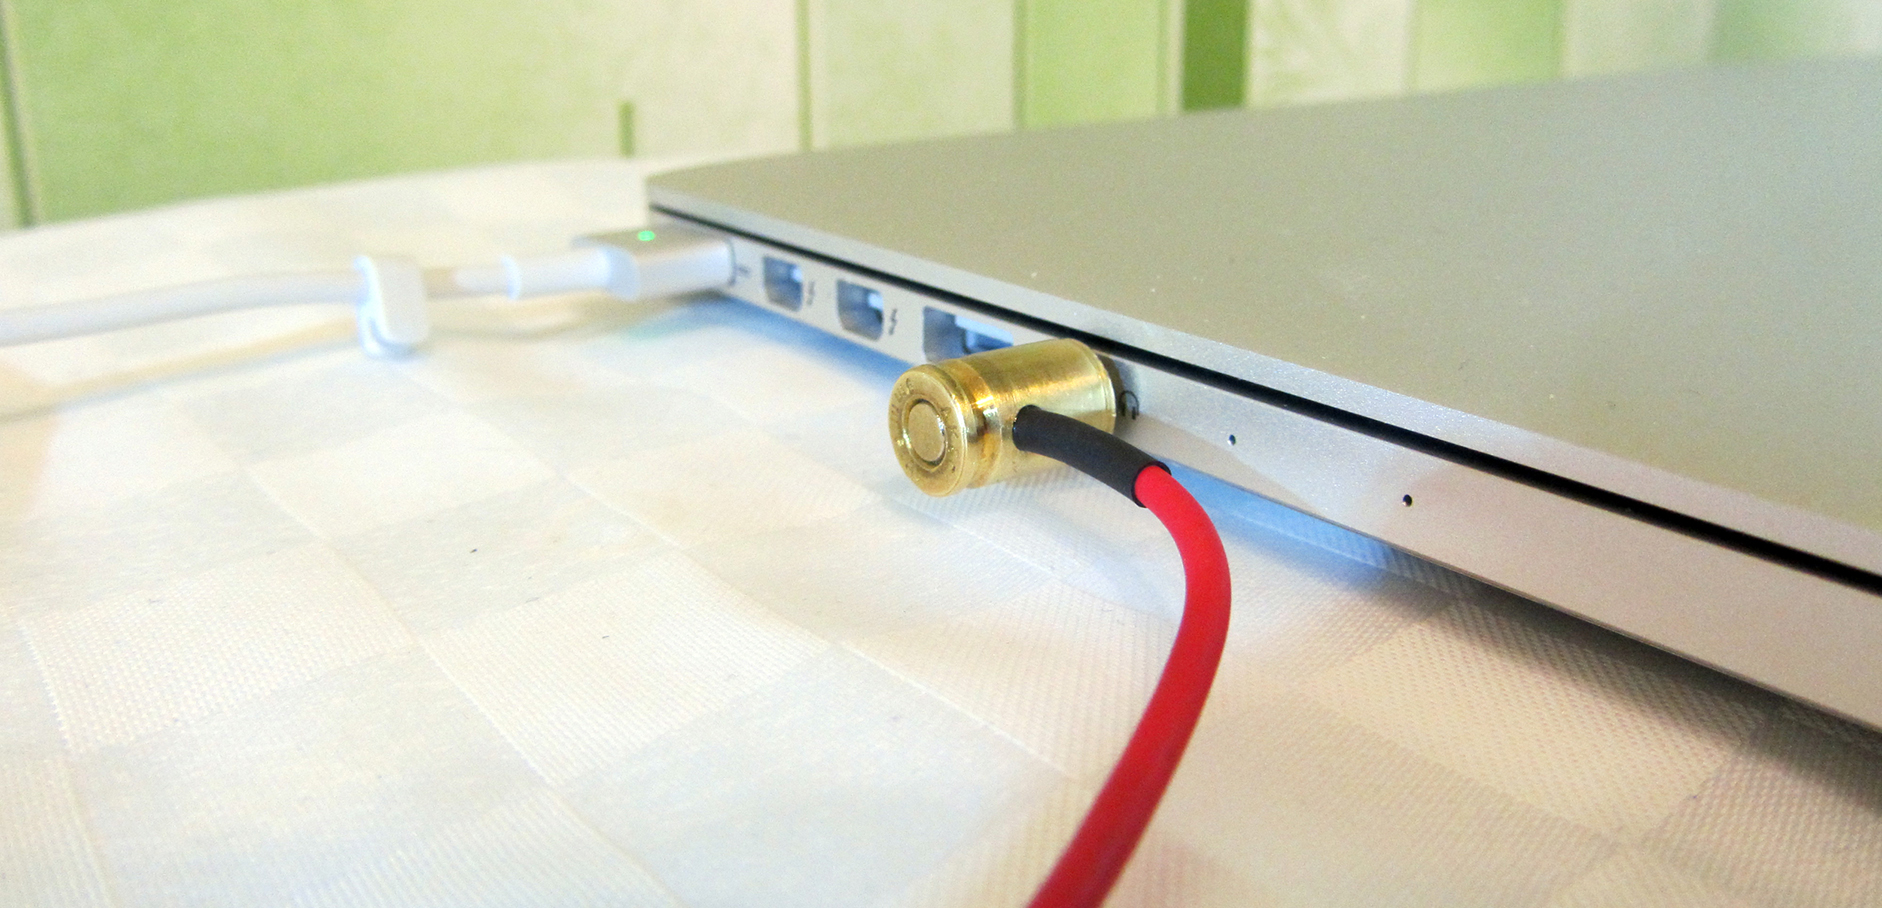

Eh, I would also have headphones in the form of cartridges - in general, a fairy tale would be 🙂
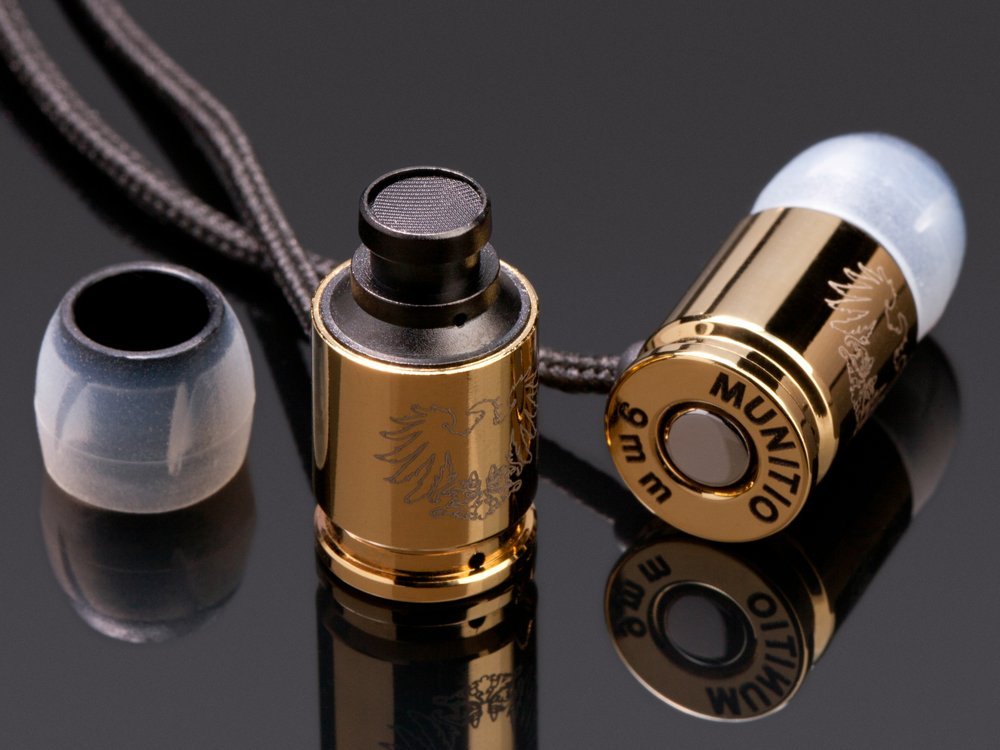
Well, now you know exactly what to do if the headphones in the jack are broken. And if your arms and legs grow from different places, then everything will work out. much better, than me!

Not everyone has a soldering iron these days. But almost everyone has headphones, or even more than one. And as everyone knows, any headphones tend to die ... And, as always, at the wrong time. So today we will get out and you will learn how to fix headphones without a soldering iron. Of the tools you need just a knife, lighter and scotch tape 🙂
The main difficulty lies in the fact that you will need a knowingly working AUX - a cable or connector from other working headphones with a piece of wire. This is also the main sadness of this method.An AUX cable is cheaper to buy than headphones, but it does not have a microphone, so if you have a headset, you will have to accept the fact that it will be cut in powers and lose the microphone and buttons.
But how nice it is when non-working headphones start singing, and you can even survive the absence of buttons.
AUX cable now sold in any stall for absolutely ridiculous money. You need it to connect your audio device (phone, player ...) to an amplifier or car radio. Thanks to the Chinese brothers, now there are quite bearable laces starting from 0.5 $... The wire used in the article cost about a dollar. Well, a paper knife, a lighter and scotch tape, I think, are lying around in closets at every house.
So they scratched the bottom of the barrel, well, in the sense of the cabinets, found all the tools, drove to the stall for (beer) lace, what's next?

We cut it 5-7 centimeters from the connector or further. In short, not worth it. if you screw it up, then there will be no way to fix it later. And it is better when the connection point is located farther from the connector.

Especially for this article, the dumbest knife was found in order to try everything on yourself). So, the most convenient way is to cut the braid just like in the photo. You don't need to press down on the blade too much. Bending will cause the braid to separate itself. We turn the wire, making cuts and, when we have passed the circle, remove the braid. If it does not go, we cut it further.
I bare about 2 centimeters of wires, it will be easier this way, and the contact area is larger. Which will increase reliability.
The wires are covered with varnish, which must be cleaned off. First there was an attempt to clean the varnish with a knife.

Not the best way. The wires are very thin and with such rough mechanical stress they come off together with the varnish. Which is well facilitated by the dullness of the knife.
Tovarischi! We'll go the other way! You will need a lighter. Well, or at least matches.

To strengthen thin copper wires, manufacturers intertwine them with nylon thread. And nylon, as you know, burns well. It is possible, by the way, that the varnish also burns. Therefore, for a split second, we bring the end of the wire into the fire. It flashes quickly and lights up slightly. When 1-1.5 centimeters burns out, you need to blow on it, if it does not go out.
Varnish and nylon leave a small deposit that can be easily removed with a fingernail. As a result, we have undamaged wires cleaned from varnish.

The main thing is not to keep the wiring on fire for too long, because they can just burn out and fall off ((

We cut the wire with them. Usually, the headphone wires break right at the output of the connector, and in order to be sure to cut off the broken part, we cut it off 2-3 cm above the connector. It is possible and even higher - as you like.

There are obviously more than three wires in the headset - there are five of them. Two wires are responsible for the microphone, and three for the headphones. A loose gold wire (ground) was wound over a thin white microphone wire.

Now we are faced with an unbearable task - to twist the necessary wires together. Actually everything is simple! Three AUX - wiring to three headphone wires. In this case, it turned out that the colors of the internal wiring matched and, twisting the same colors, the headphones worked.

You can also use this simplest way: we plug our connector into any audio device that is at hand. The cassette player lay closest:

earth - golden (yellow)
left - blue (green)
right - red
But like any other rule, this one also has exceptions, especially when it comes to typefaces. For example, it happens that the right is green, the left is blue, and the red is a microphone, or there are also mixtures of colors. But GOLD is always EARTH. Mixes of flowers with gold, in most cases also earth.
Gold goes to both headphones, so it is common, through it the current seems to flow from each speaker to the common ground, and through the other two the current flows into the speaker. Well, that's if ooooo rude 🙂
Therefore, first of all, we twist all the gold ones. Now we twist the wires of the repaired headphones one by one with the wires of the AUX cable. The bottom line is that the red wire of the AUX-cable connector must be twisted with the red wire of the headphones and then the right earphone will sing. In your case, the colors may differ and it may be that red needs to be twisted with blue or somehow differently.
Have you identified? Fine! Now we cut off the unclaimed wiring or twist it with a common wire. I preferred to cut it off.

In order to ensure maximum contact, it is better to first loosen the two twisted wires, and then twist them tightly. This option is preferable to twisting each separately and then together.
So the wires are twisted, the headphones are singing - there is a smile on my face).

First, we insulate each twist separately. In addition to the insulation itself, this will also strengthen the connections. For some reason I did it with masking tape, probably lying closer than XD. It does not matter.
Now we will wrap everything together with wide tape, layers of 3 - 4. Or 5 - your business)

Usually in such cases, I prefer to spread the places of the twists so that they do not touch each other.

This is the long-awaited result of all our efforts 🙂 Perhaps it looked like something long, but this is not at all the case, 15 minutes will be enough for the whole process.
Well, as promised, no soldering iron was needed and everything was realized from scrap materials. And the headphones that didn't work have been fixed and are now singing again.
I propose to improve the technology a little, again without a soldering iron. You will have to buy a heat-shrink tube or thermocambric in an electronics store (also found in households). The bottom line is that this is a tube that, when heated, is able to shrink at least twice in diameter. Such a tube costs about $ 0.1 - $ 0.2 per meter.
We need two diameters, the first one - about 1 mm and the second 4-5 mm.
We put pieces of a thin thermal tube on our twists. Cut off the pieces with a margin.

Now you need to heat the thermocambric. I usually did it with a soldering iron, but since We agreed that I did not have it, and the story about how to fix headphones without a soldering iron, I had to get out.

Without hesitation, I just kissed the lamp of the table lamp. The method proved to be quite effective and the thermotubes shrank. Usually, while they are still hot, I additionally flatten them with my fingers. there is not always a tube of the required diameter at hand, and then they will stick out less.
Before twisting the wires, remember to put a 4mm thermotube on one of the wires. This thermotube must then be put on the joint and also squeezed with the heat of the lamp. In general, you can squeeze lighters on fire, but you can accidentally melt or set fire to excess.

I used a piece with a length of about 8 or even 10 cm. To strengthen the end of the thermotube was put directly on the rubber band of the connector.
The view has clearly changed for the better 🙂!
As you can see, this is not as difficult as it seems, and now you know how to fix headphones without a soldering iron. Good luck!
In the everyday life of a modern person, headphones are an indispensable attribute that allows you to enjoy listening to your favorite music and audiobooks anywhere and anytime. Unfortunately, this gadget does not last forever and is prone to breakage. In such a situation, you have to think about whether it is possible to repair the headphones with your own hands, or whether it is better to buy new ones. It is recommended not to rush to throw away the old ones, since broken ones, in most cases, can be repaired at home. How to fix the headphones yourself, and will be discussed in this article.
Headphones are a fairly simple device, so all faults can be listed literally on the fingers.Frequent reasons why the headphones stopped working are the following:
- breakage of the plug;
- defective headphone cord;
- the volume control is out of order.
If the headphones are broken, the first thing to do is to pay attention to junction of the plug with the cable... Often the cause of the breakdown lies in this very place. Due to frequent bends, cable cores break, so the signal does not pass to one "ear" of the gadget or to both at once... Also, the microphone may not work.
It is quite easy to detect a breakdown. It is necessary, with the gadget turned on, to try to bend the cable in the place of the alleged breakdown in different directions. If at the same time a sound appears or a crackle is heard, it means that one of the wires of the wire is interrupted. What to do if a problematic spot is found on the cable?
To repair your headphones, do the following.
- Cut off the plug from the cable.
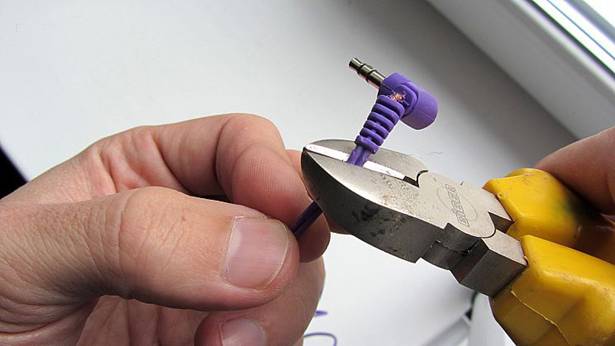
- To repair the plug will be used the inside of the old with a slight modification. To remove this part, you need to cut the plastic shell using a clerical knife, as shown in the figure below.
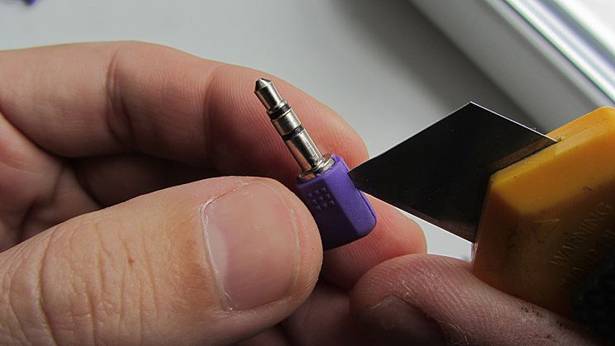
After cutting the plastic, pull out the insides of the plug. You will see contacts to which several thin wires of different colors are soldered. In the same way, you can disassemble headphones from an iPhone.
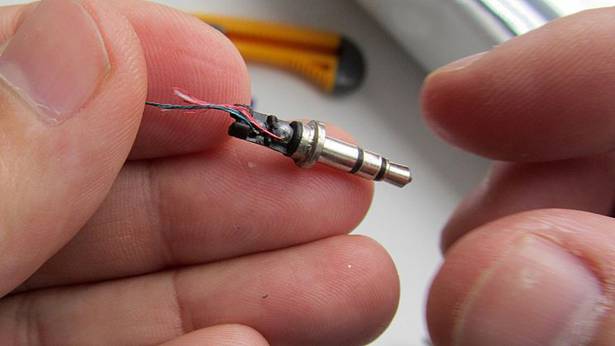
| Video (click to play). |
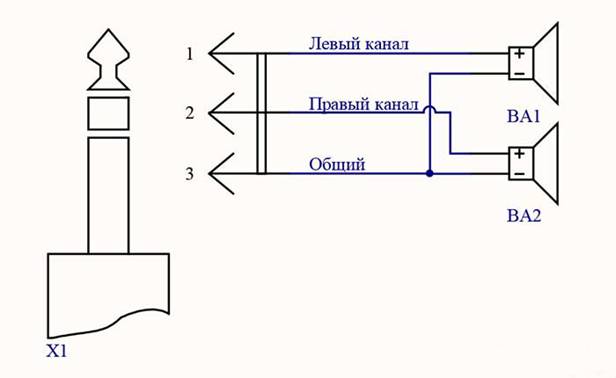

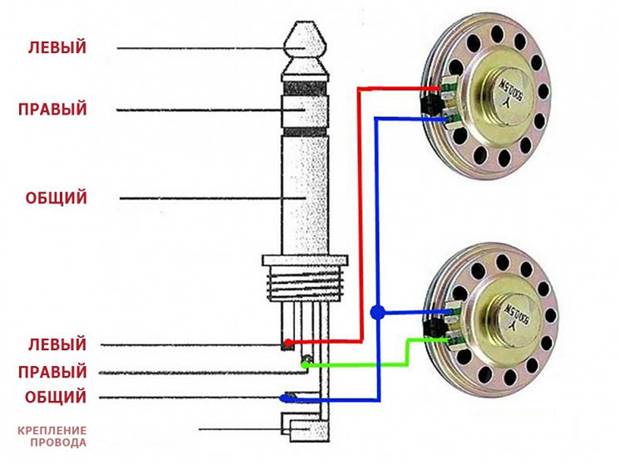

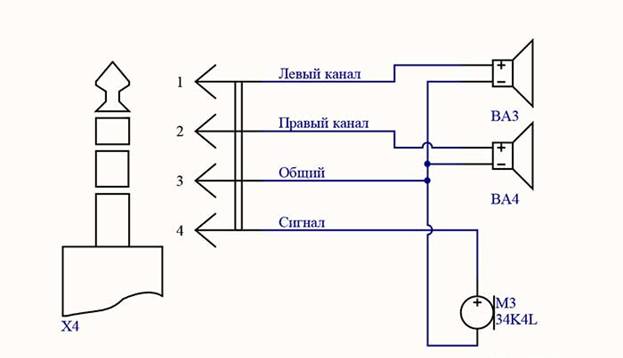

Next, you need to free the inner cores of the cable from the outer (general) insulation.
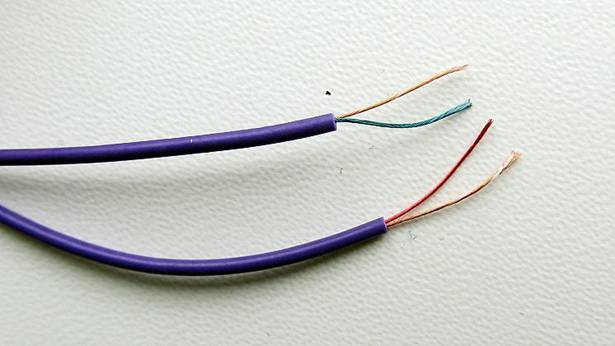
The procedure for replacing the plug is the same for all types of headsets, for example, such as: headphones Beats By Dr, Sennheiser (Senheiser) HD 215, Razer Kraken (Kraken) Pro, as well as, for headphones Steelseries Siberia v2, Audio-technica ATH-ES7 and headphones Defender.
How do I repair my headphones if the headset cord is faulty? You can try to find fracture site internal cable veins, probing and bending all its sections while the gadget is running. If you hear a crack or sound during the test, mark this place with a marker. Further, in the place of the break, the cable is cut and stripped. After that, the ends of thin conductors must be soldered, observing the color, and insulated.
If the break point is not found, then the entire cord will need to be replaced.... In the following example, the repair of vacuum headphones will be shown.
- Before disassembling broken vacuum headphones, you need to purchase a new cable - you can order it online.
- Using a utility knife, carefully disassemble (separate) the glued phone gadget into 2 parts.
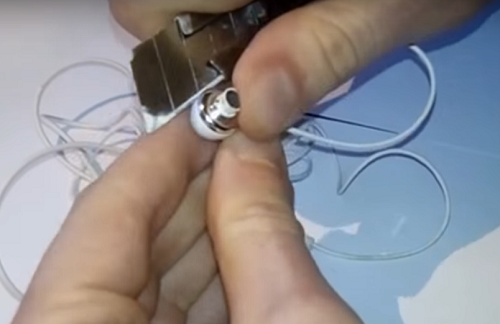
- After opening, you will see the soldering points to which you need to solder the new cable. Thus, you can repair the headsets Beats (Bits) by Dr. Dre, Sony, Audio Technica Ath-CKR10.
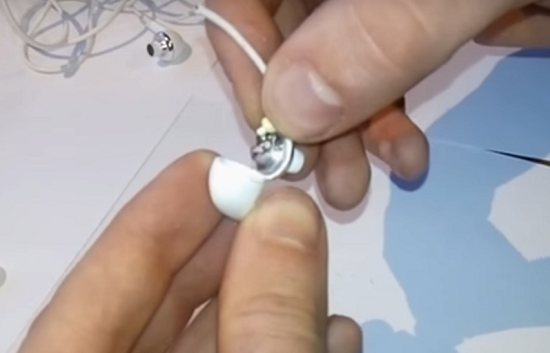
- In the same way, Iphone headphones are repaired. But when disassembling apple headphones, you should be careful and write down or sketch the location of the wires. They can be multi-colored.
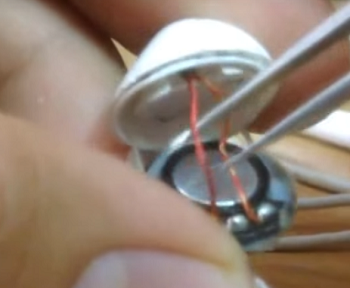
Large gadgets, such as, for example, Philips headphones or Sven headphones for a computer, differ from plug-in ones only in the size of the speaker (membrane in small gadgets). Difficulties can arise when trying to get to the speaker in order to solder the wires.
Different manufacturers of headsets have different methods of opening them. These can be latches that are difficult to find or hidden screws hidden under soft “cushions” - ear pads. For example, the question often arises, how to disassemble the Sennheiser HD203 headphones?
- Use a credit card or other flat object to pry out the ear cups securing clips.

- After removing the soft pads, you will see 4 screws that need to be removed.

- On the disassembled device, you will see contacts with wires soldered to them, which must be unsoldered and replaced with new ones.

When repairing Steelseries Siberia headphones, the ear cushions stay glue-based... You can remove them by gently prying with a screwdriver, after which you can find the fasteners. Some models use latches instead of screws, which can break with strong pressure. If they break, you will have to glue the gadget cups, after which they will become non-separable.
On the Razer Kraken headphones, the ear cushions are not glued and are easy to remove.
After detaching them, the fasteners can be found under the glued paper.
In the Audio-Technica M30 or ES7 headset, they are also worn on the rim of the gadget's cup. Phillips headphones are no exception.
By the way, the Audio-Technica ES7 headphones have hinges for rotating the ear cups. Therefore, if you, while repairing a gadget, disassemble it, then you need to be careful.
The Philips SHD 8600 headset is free from all the drawbacks associated with replacing the plug and cable, since it is a representative wireless devices.
How do I fix my headphones if I have problems with the volume control in the form of loss of sound or crackling? In this case, you can use graphite greaseto apply it to the resistive layer to re-establish contact. The headset should then function without issue.
If the headset continues to work poorly after lubrication, then the regulator must be replaced with a new one.
Thus, in most cases, before you run and buy a new headset, you can do it yourself. This requires a thin tip soldering iron and skills in handling it.
In this article I will tell you how to repair headphones or a headset for a computer or a mobile phone myself.We will look at the main breakdowns and how to fix them.
Broken wires are the most common cause of headphone failure. To repair the wire we need:
First, it is necessary to determine the place where the break occurred, since the outer rubber braid may not have externally visible deformations. You can find the place where the wire breaks by connecting the headphones to the sound source and bending the wire from the connector to the speakers, we find a place at the bend of which the sound appears in the headphones. Having determined the place of the break, we cut out a section of the wire, taking several centimeters before and after the break. Next, we strip the wire from external insulation and tin the wires. How to tin the headphone wire is a very relevant question. Now I will tell you how to do it efficiently and quickly. To do this, we need: a wooden plank, a flux (for example, an organic flux f-99), solder and a soldering iron.
We apply the flux to the wire, put the wire on the plate and press it down for a few seconds with a soldering iron, making it move as if you were cleaning the varnish from the wire.
Having tinned all the wires, we put on a thin heat-shrinkable tube on each wire, solder the wires, observing the color scheme and using a lighter or a soldering iron, we shrink the heat-shrinkable tube.
The heat-shrinkable tube acts as an insulator and does not allow the wires to be shorted together. Now we need to ensure the strength of our connection. To do this, we fold the wires with the letter Z and with the help of a thread we make a bandage of our connection.
The last stage of repairing the headset wire is of practical and aesthetic importance. Using a soldering iron, carefully apply hot melt glue to our bandage, on one side the hot melt glue will not allow the thread to unwind, on the other hand it will give a normal appearance to the wire connection. If you cannot get the black hot melt glue, you can put a heat-shrink tube of the appropriate diameter over the bandage.
A few more words about artistic molding from hot melt glue, if you warm up the hot melt glue and moisten your fingers with water, you can give it any shape with your fingers until it hardens completely. Irregularities can be made glossy with a lighter.
Before repairing the plug, we need to carefully disassemble it, for this we carefully cut the body lengthwise with a scalpel. Breakage of the plug (connector) of the headphones can be divided into breakdowns associated with mechanical deformation:
- breakage of the last link, as a rule, this link remains in the counterpart of the device and it can be removed only with an awl and tweezers for smd mounting. Such a breakdown is eliminated only by replacing the plug.
- the rotation of the first link (general) around its axis is characterized by a change in sound to "metallic under water" and a decrease in volume. In this case, the repair consists in soldering the contact between the link and the contact tab.
And not related to mechanical deformation of the plug is a wire break at the base. It is treated by shortening the wire a couple of centimeters above the break point and soldering it into place in compliance with the color scheme.
If you cut a wire and do not know which one was soldered where, do not despair! With the help of a multimeter, you can easily determine this. We put the multimeter in the resistance measurement mode and alternately find 2 pairs of wires between which you will see an equal value (depends on the resistance of the winding of your speakers and is usually within the range of 16-100 Ohms. We take one wire from each pair, weave them together, this will be a common wire we solder it to the first (most massive) link. The remaining wires are soldered to links 2 and 3. You will probably have a question how to determine where the right channel is soldered and where the left one. left and right columns.There is a second option: we launch an audio player for example winamp and adjust the balance, comparing it with what we hear, we conclude that the channels are connected correctly.
Capsule electret microphones are installed in the headsets. There is an amplifier inside the microphone, which makes it necessary to observe the polarity when connecting the microphone. Microphones are sensitive to diaphragm deformation, so do not try to clean the microphone opening. Also, microphones are very sensitive to high temperatures, so you need to re-solder the microphone quickly and accurately. Before starting to solder, it is advisable to apply an organic flux to the microphone contacts, this will improve the heat transfer and the contact time with the soldering iron required for reliable soldering. You can check the performance of the microphone only by replacing it with another one, or by connecting it to another known working device. And yet you can check a working microphone or not, if you have an oscilloscope (or an active speaker system) and an operational amplifier microcircuit (any) at your disposal, you can assemble a simple circuit (for example, an inverting amplifier with a single polarity supply.
Do not forget that the microphone must be powered through a resistor, and the signal must be removed through a 0.1 μF blocking capacitor. This scheme will allow you to clearly see whether the microphone is working or not, the amplified signal from the microphone will change the picture on the screen in time with your voice. If there is no oscilloscope, you can connect the output of the circuit to an active speaker system, if the microphone is live, you will get a megophone.
If the input power is exceeded, the speaker may fail - it burns out the winding wire. The integrity of the speaker winding is checked using a multimeter.
For a working speaker, the winding resistance will be equal to the winding resistance of the second speaker + - 10%. As a rule, this value is 16-100 ohms.If there is sound in the speaker, but it is wheezing, this means that the winding is intact, but it either peeled off from the membrane or clings to the magnet. This may be the result of a shock (displacement of the magnet), or a consequence of exceeding the power (boiling of the varnish in the winding and "snagging" it on the magnet, as well as peeling off a part of the coil from the membrane). Such repairs require care. The coil can be glued to the membrane using super glue, it can be applied with a toothpick or a sharpened match. To avoid jamming the diffuser, do not connect the speaker cabinet and membrane until the glue is completely dry. You can speed up drying by placing the speaker under a table lamp.
One of the weakest points of headphones is the volume control, provided that you use it frequently. The volume control is a double variable resistor consisting of 2 resistive sputtering strips and 2 sliders moving along the surface of the resistive layer when you turn the control wheel.


Send us your articles about homemade products, or register and publish them yourself.


